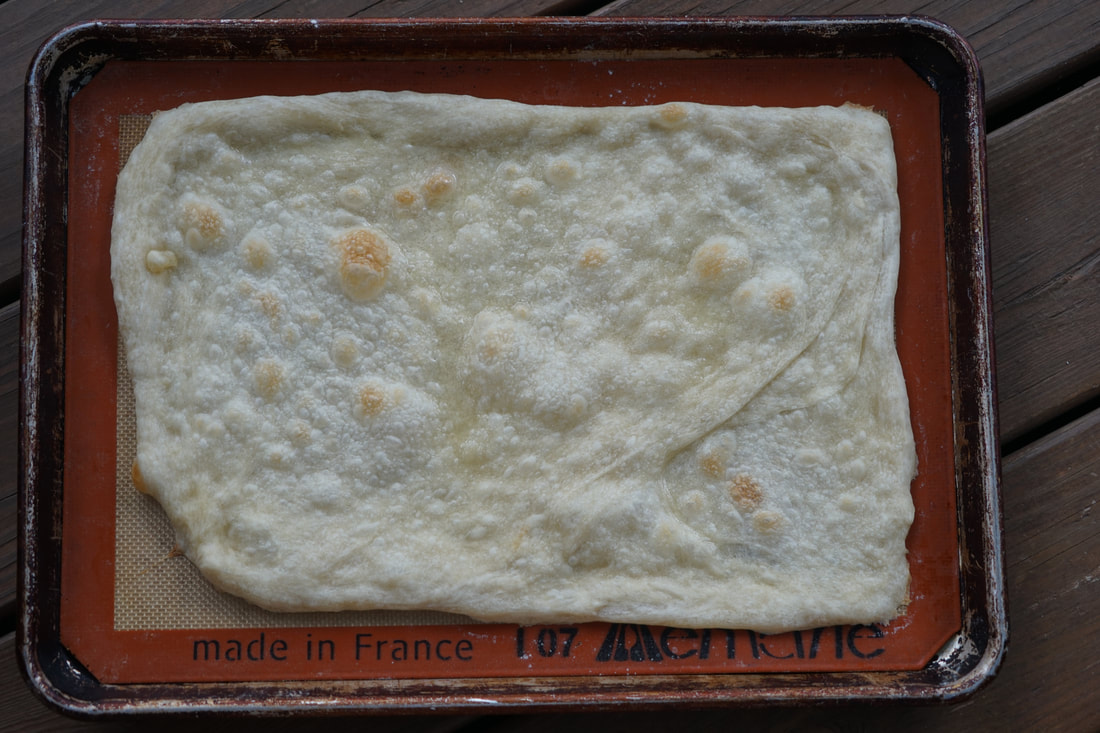
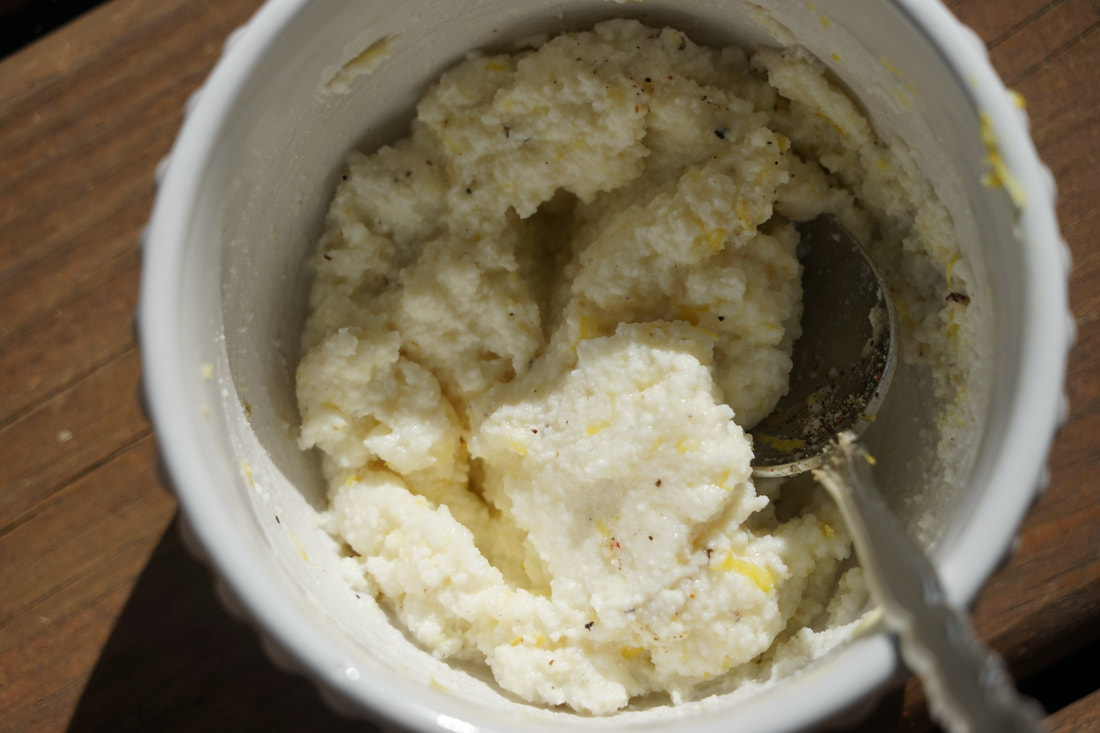
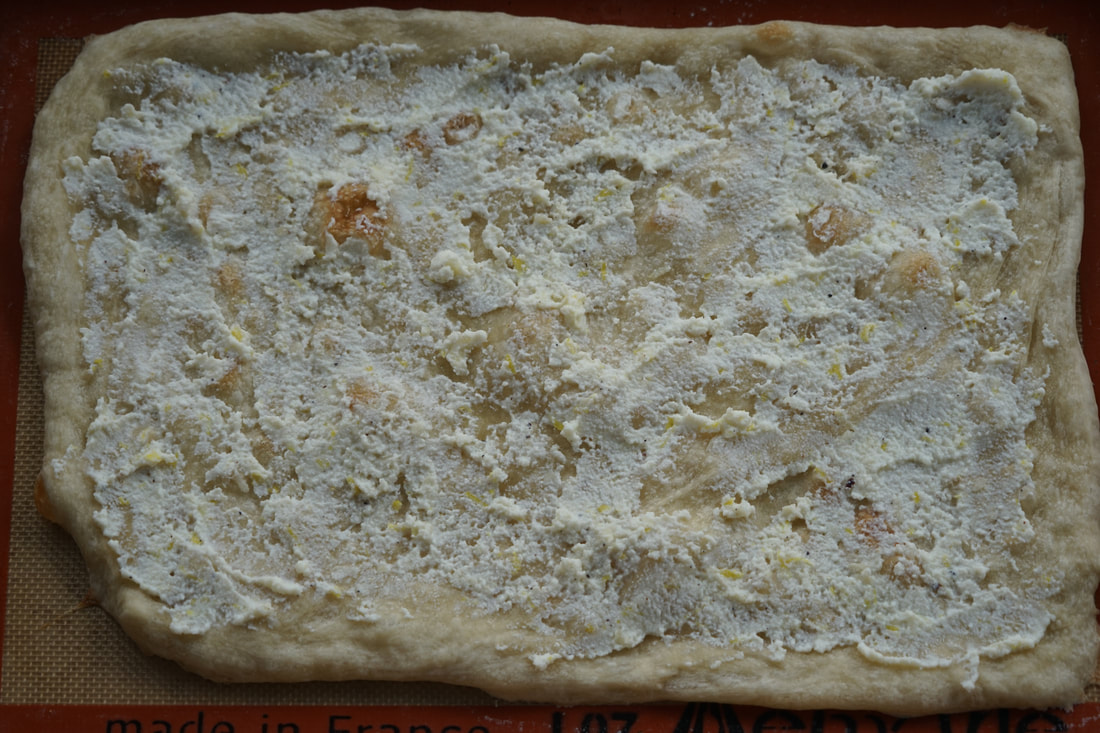
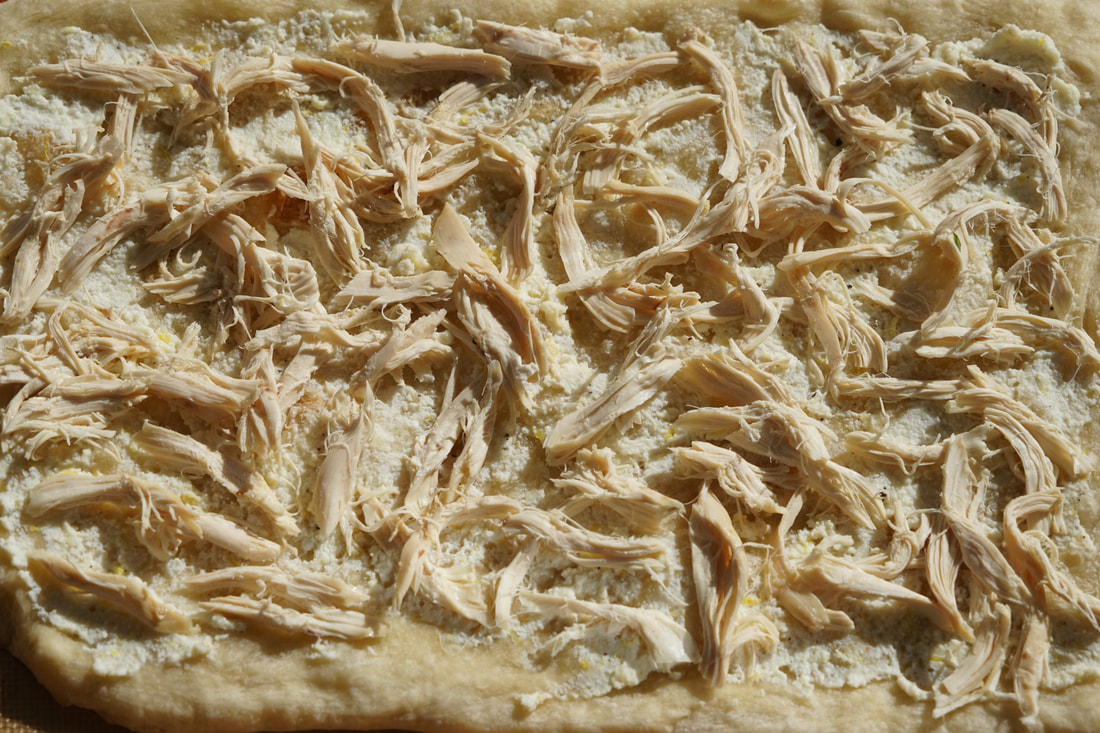
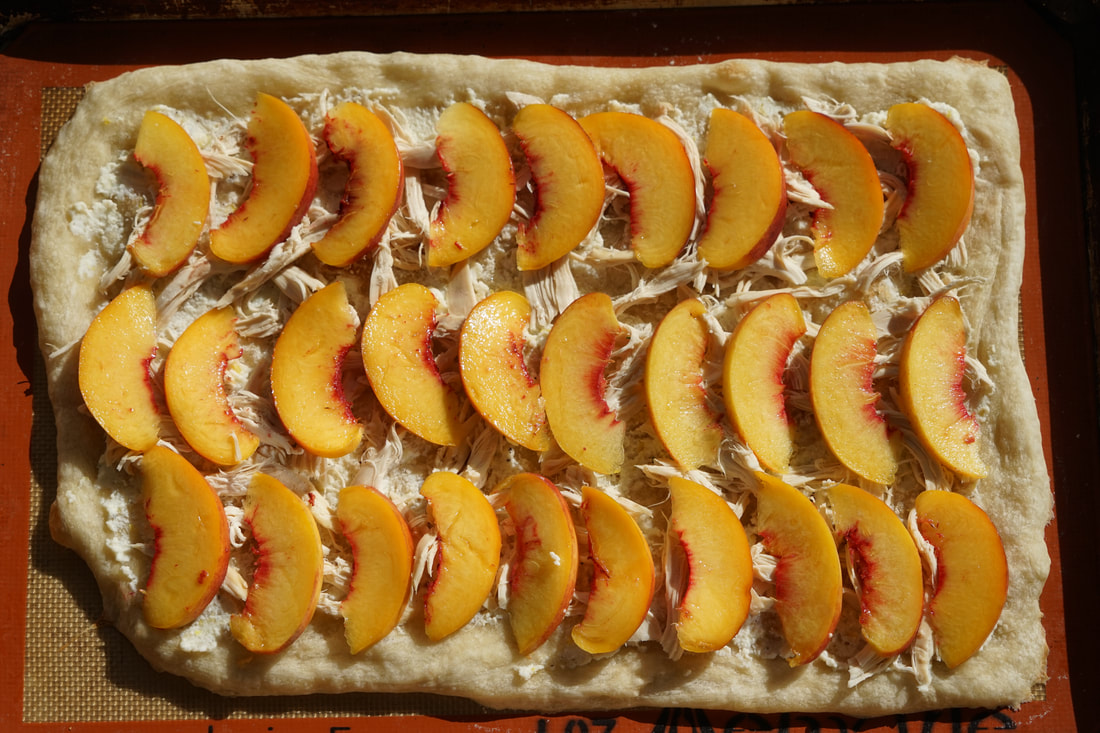
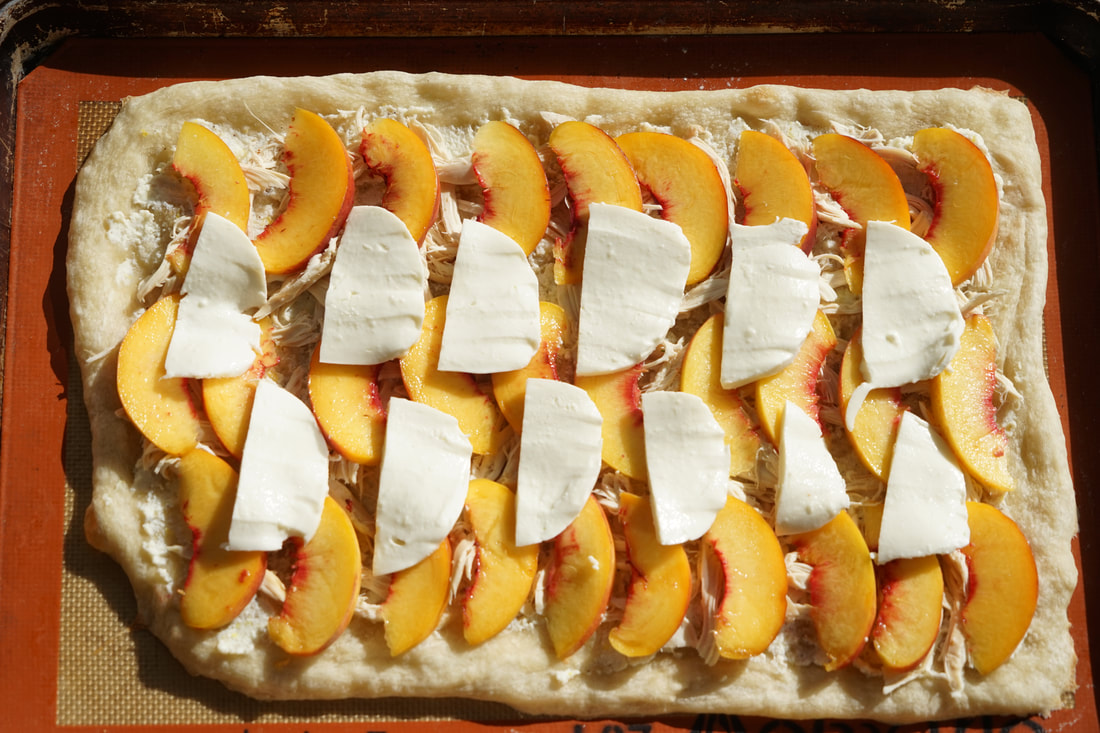
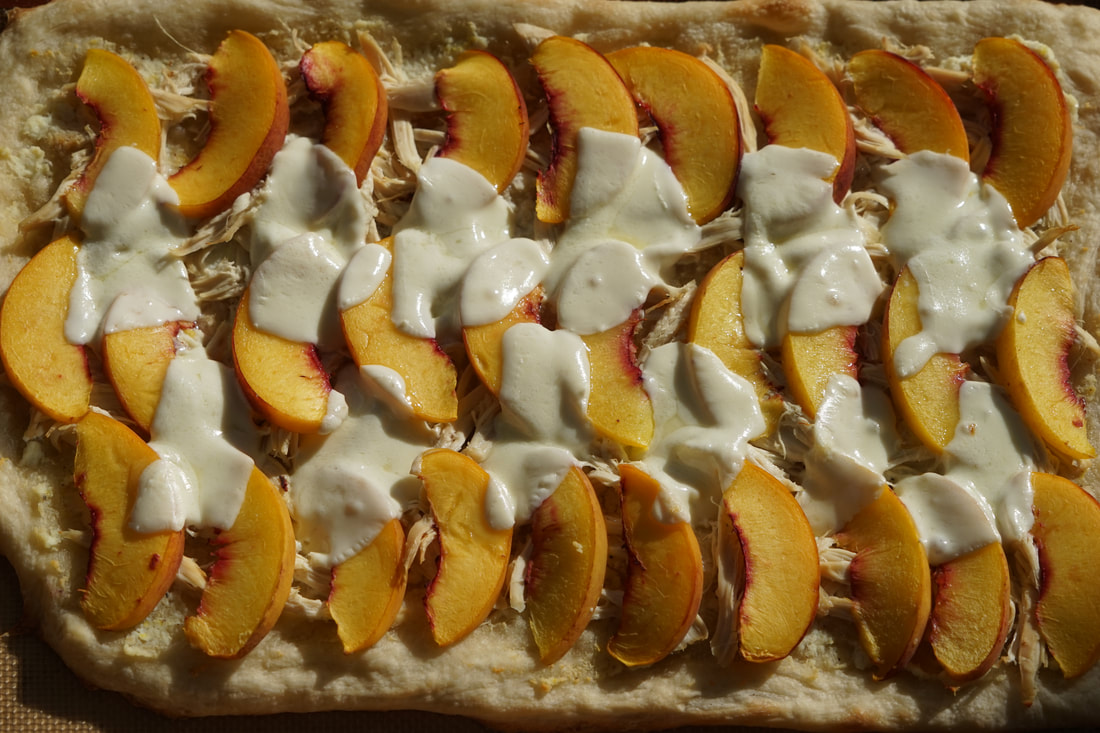
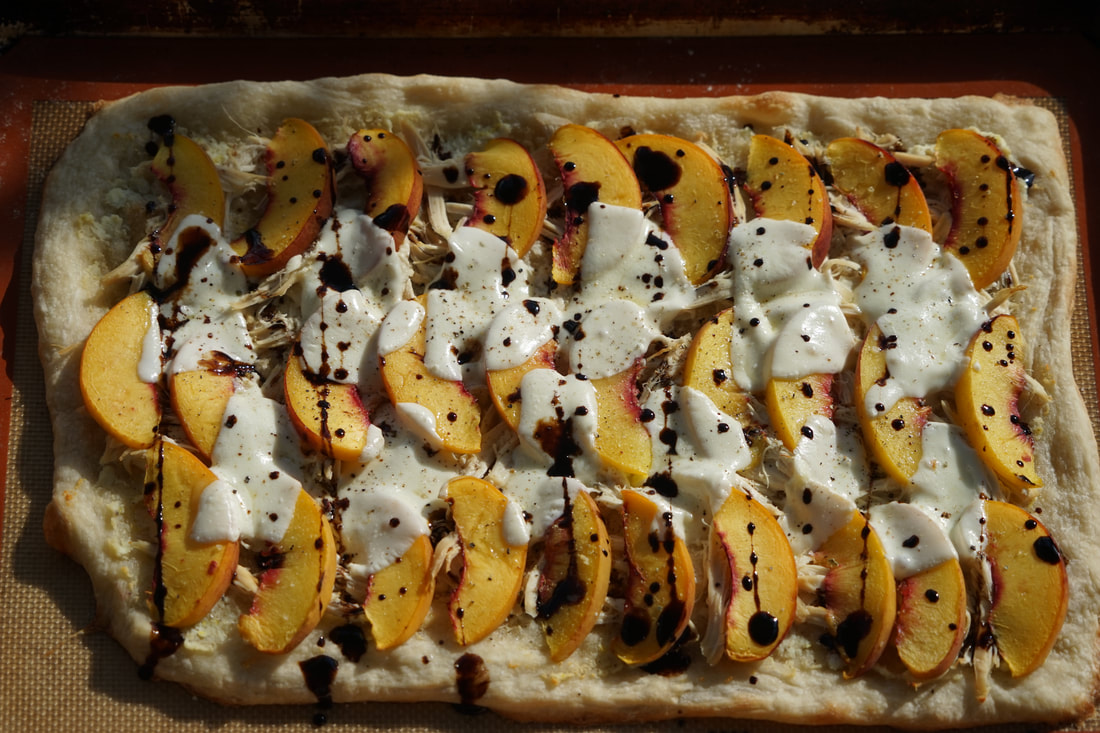
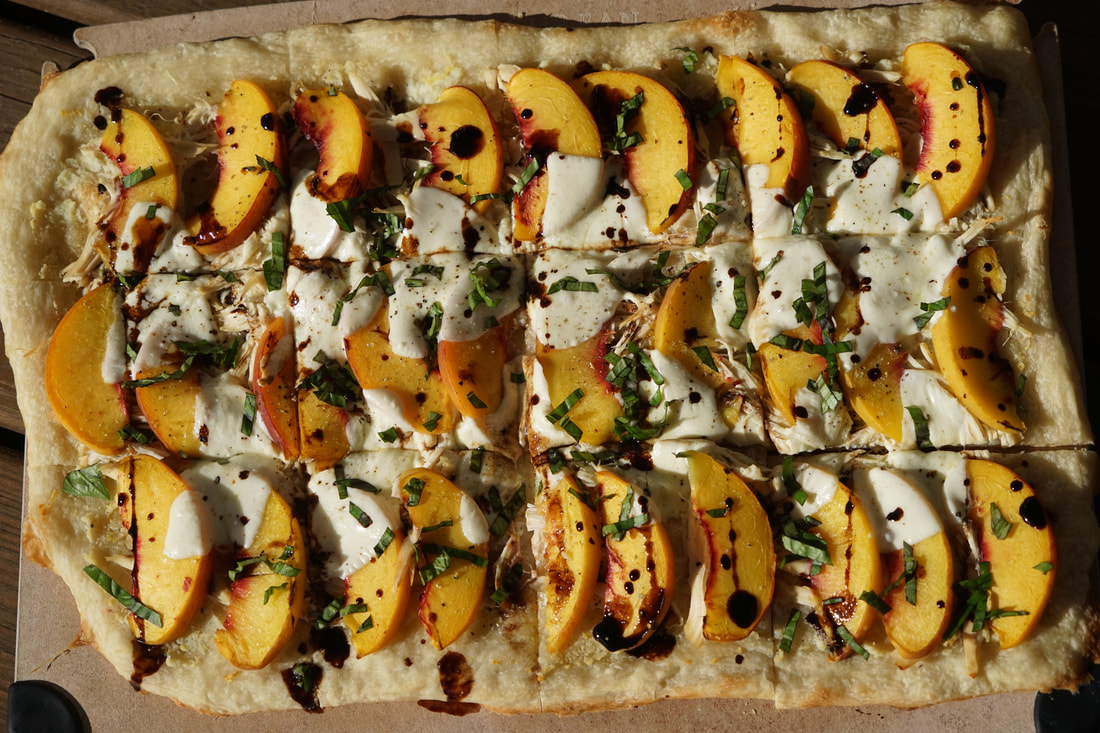
 I'll be the first to admit that I struggle with learning how to relax. It sounds really silly when I say it out loud but because everyone can relax - right? After all, I've got lots of things that I like to do simply for fun, the problem is that I wouldn't necessarily describe them as relaxing. Hiking, kayaking, paddle boarding, exercising, baking, cooking, gardening, and taking pictures are all things that I enjoy but none of them are inherently relaxing. Believe it or not, I do enjoy some activities that require me to sit down like sewing and playing the piano but those would definitely fall into a more arduous category because I'm not very proficient at either. You've probably figured out by now, based on my list of activities that I enjoy, that I'm not a very good movie watcher or reader either. If I start a good book, I feel compelled to put aside all of my daily tasks and sequester myself in a room on a reading marathon until I finish it. I wish that I was the kind of girl who could pick up a book every evening and read one chapter before bed but ... I'm not. 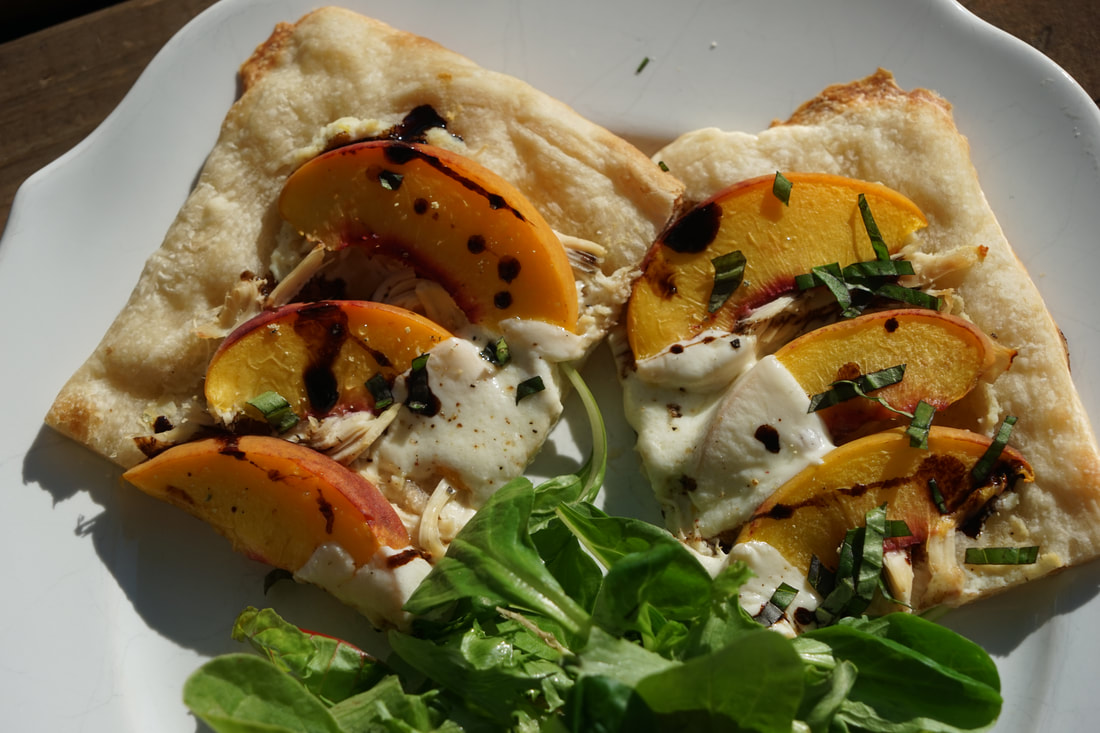 I have a tendency to spend my day moving from one activity to another so quickly that I have to remind myself to breathe, relax and enjoy each moment. Why is it that the older I get, the faster time seems to pass? Dinner is really the perfect time for me to practice my relaxation skills. I spend a lot of time on my feet and there are days when dinner is the very first chance that I get to sit in a chair all day long. Learning how to slow down and relax and enjoy my dinner is a process and quite honestly, some nights I do better than others. These Chicken and Peach Flatbreads are definitely one of those meals that are meant to be savored and appreciated. The complex blend of flavors is unique and best enjoyed with a glass of chilled white wine. 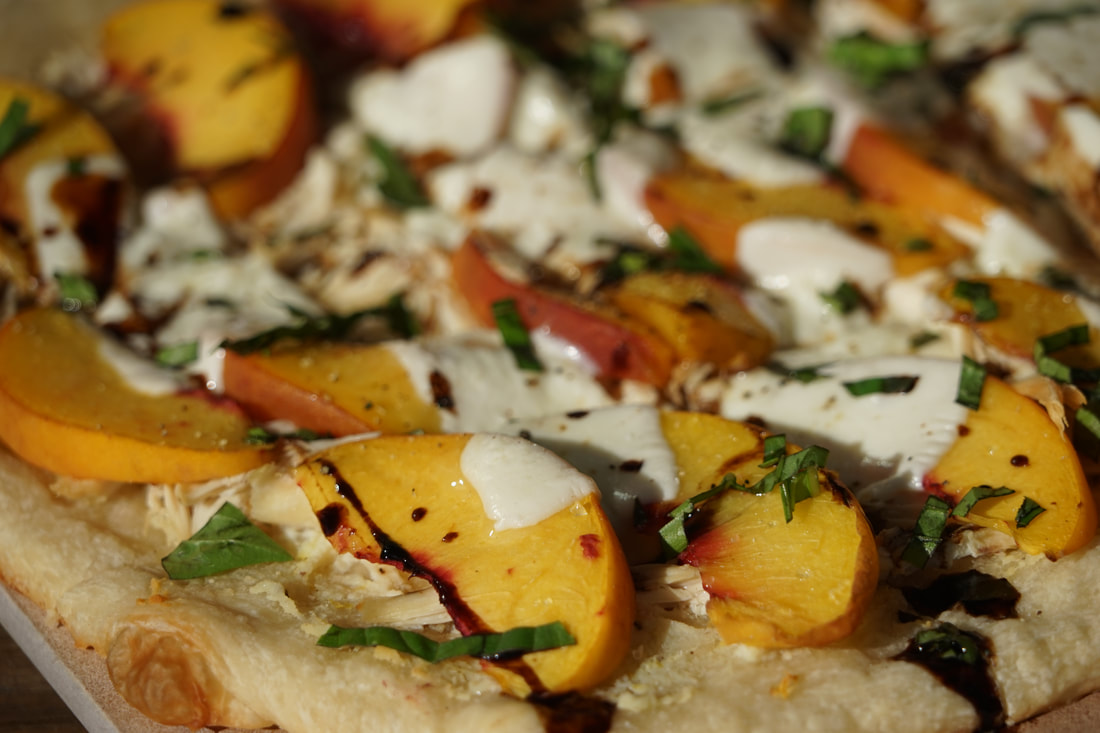 Chicken and Peach Flatbreads 3 prebaked pizza crusts 2 Tablespoons olive oil 3 Tablespoons ricotta cheese 2 garlic clove, minces 1/2 teaspoon lemon zest 1/4 teaspoon pepper 2 cups shredded rotisserie chicken 1 cup sliced peaches 1 1/2 ounces fresh mozzarella, sliced thin 1/4 teaspoon salt 1/8 teaspoon red pepper flakes 1 Tablespoon balsamic glaze Fresh basil leaves, torn
Sprinkle with torn basil leaves. 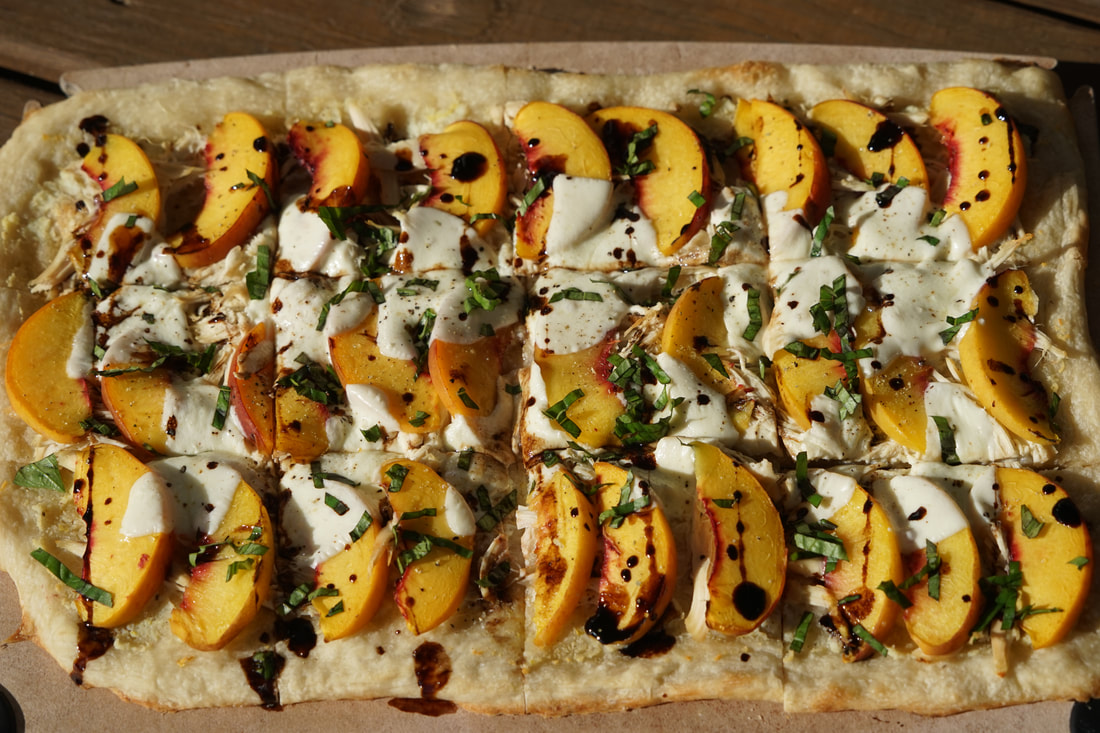 Slice and serve with a green salad. 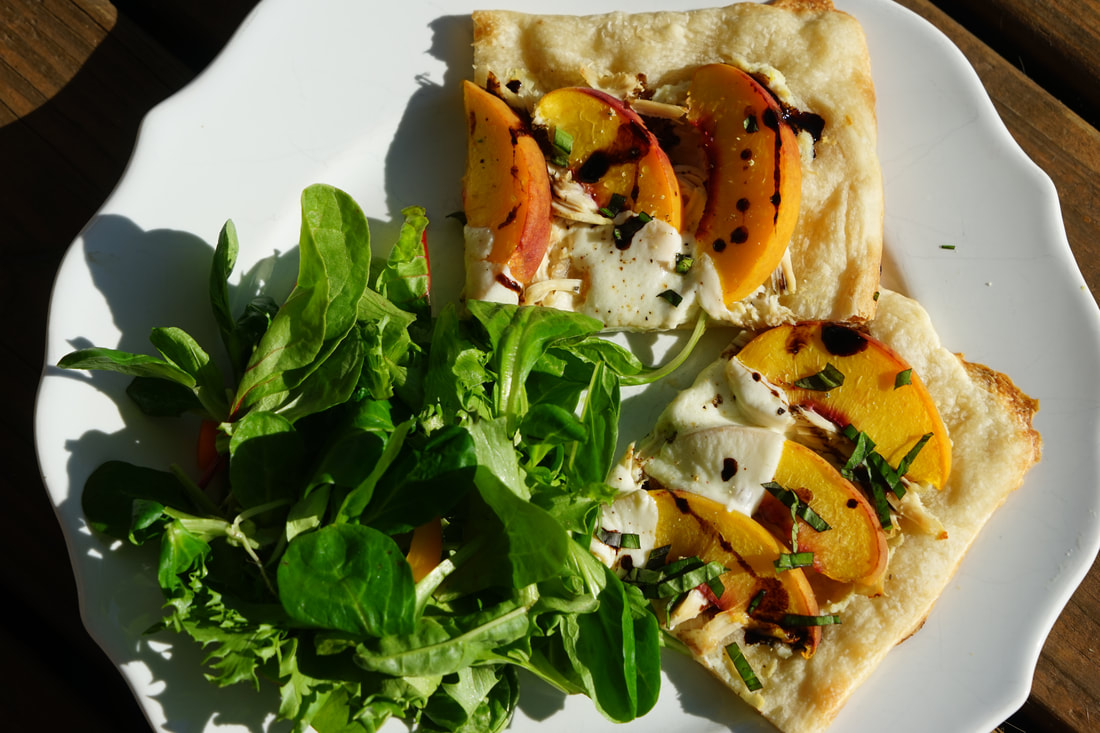 I don't know why I've been on a flatbread kick lately but I just can't get enough of these thin crispy pizzas. I've been experimenting with all kinds of different flatbread toppings. I love the traditional margherita flatbread with basil and mozzarella but I also like trying new and unique toppings. This peach and ricotta topped flatbread may not be your cup of tea but I hope that it inspires you to find your own unique flatbread style. If you come up with an original creation - send me your idea - I'd love to try it.
Ciao!
1 Comment
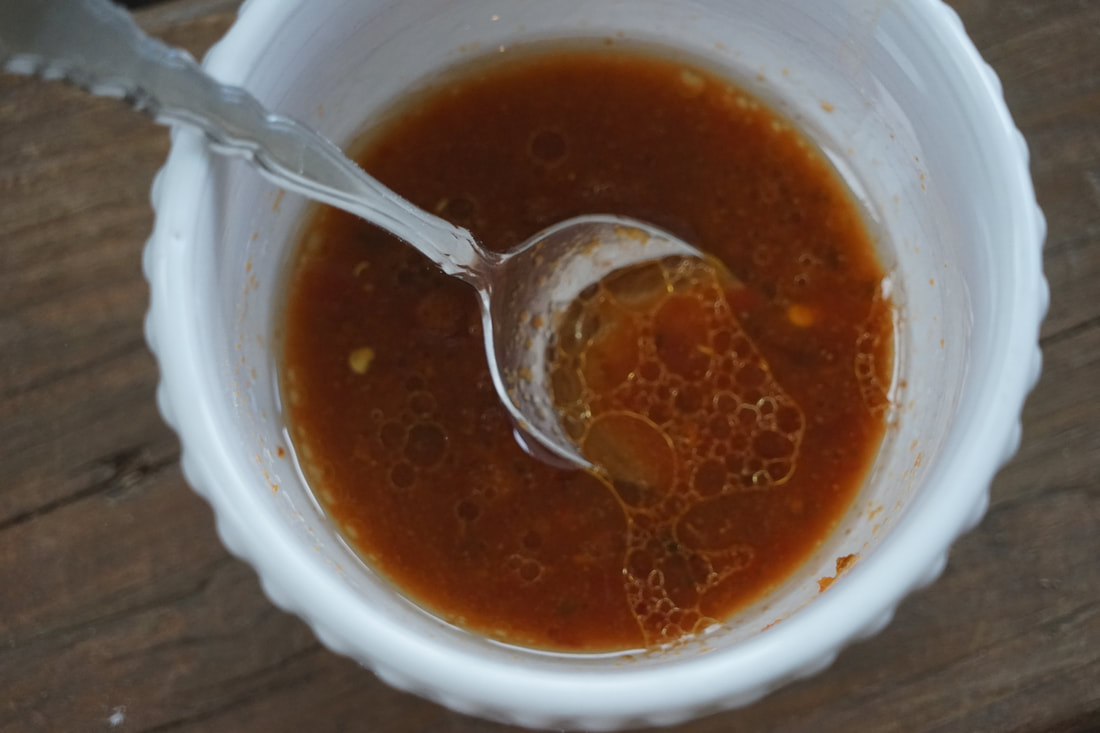
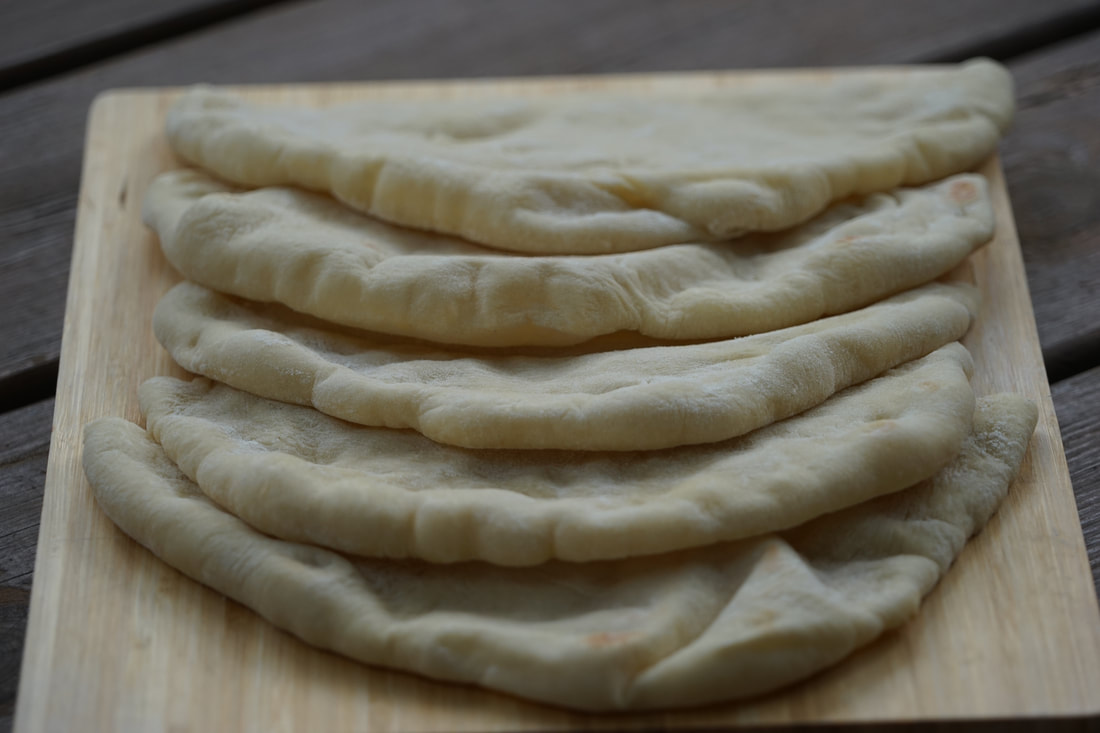
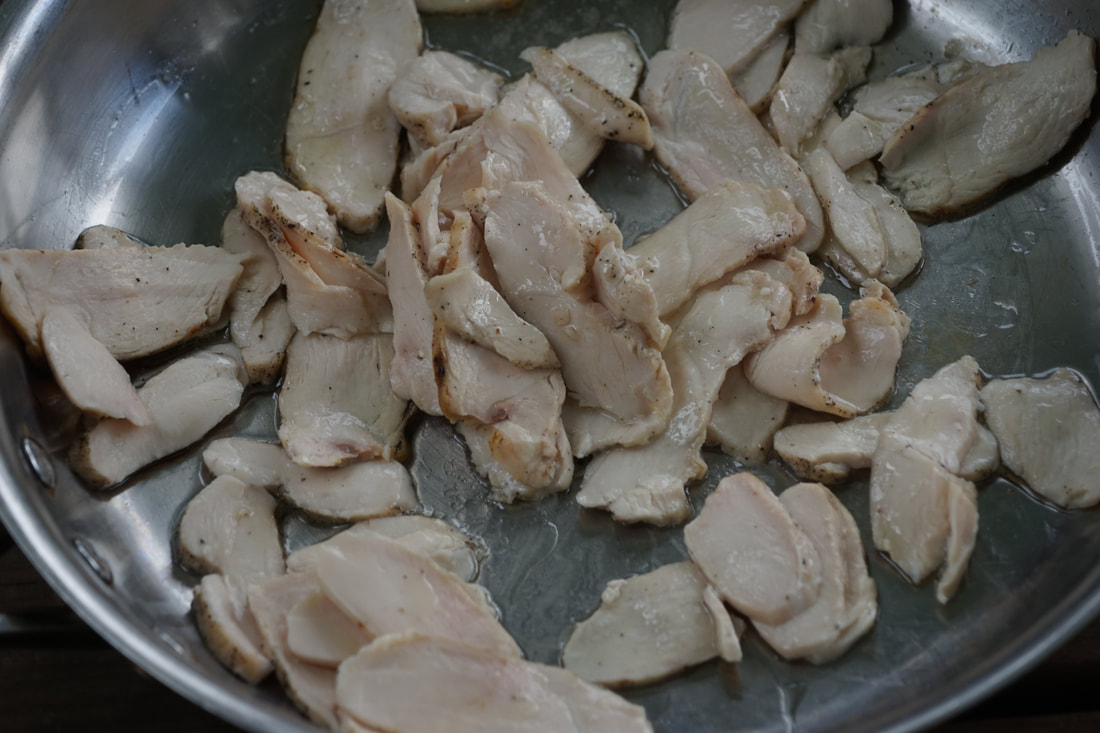
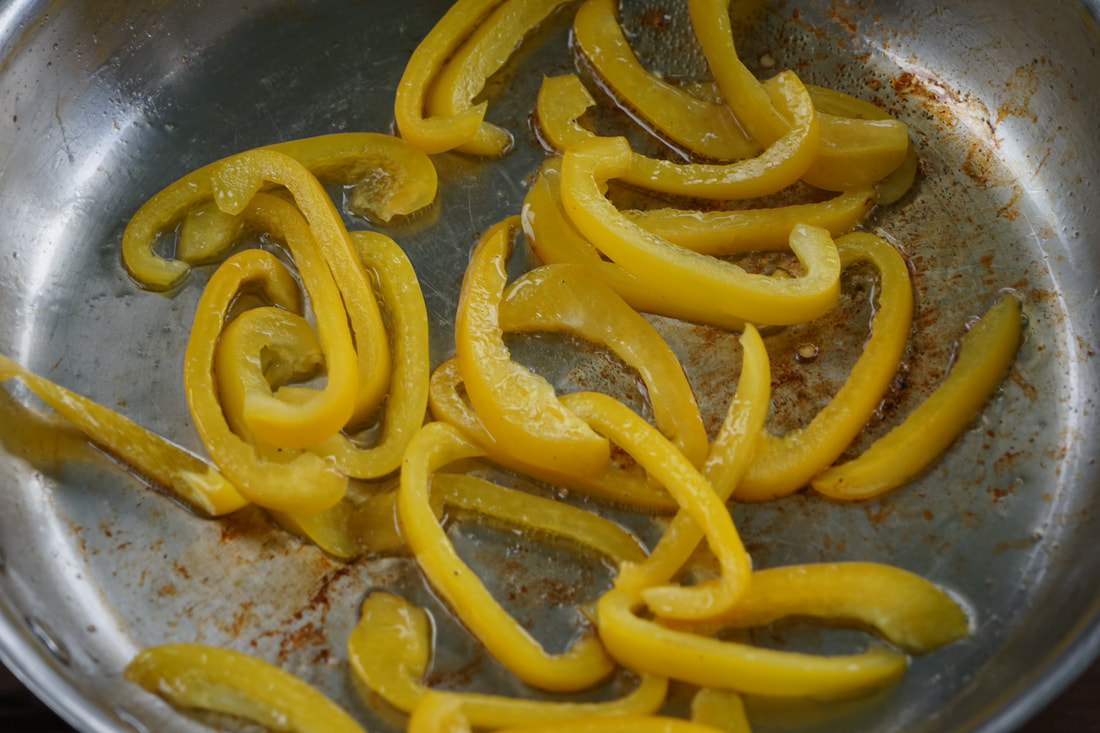
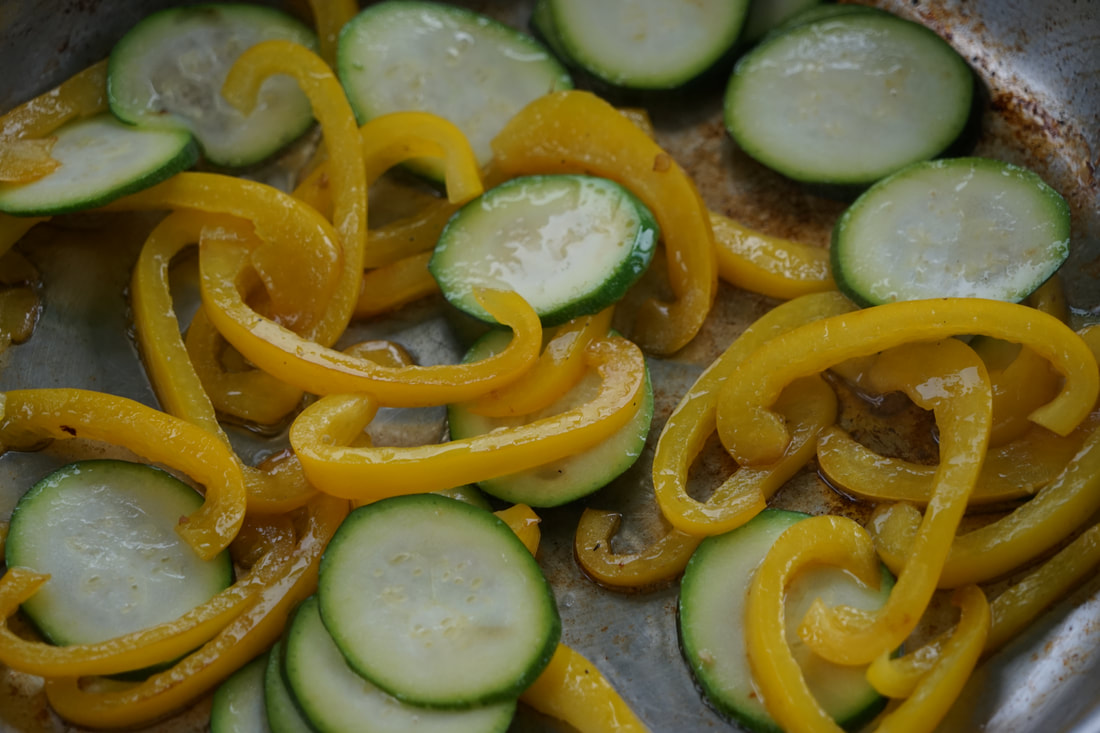
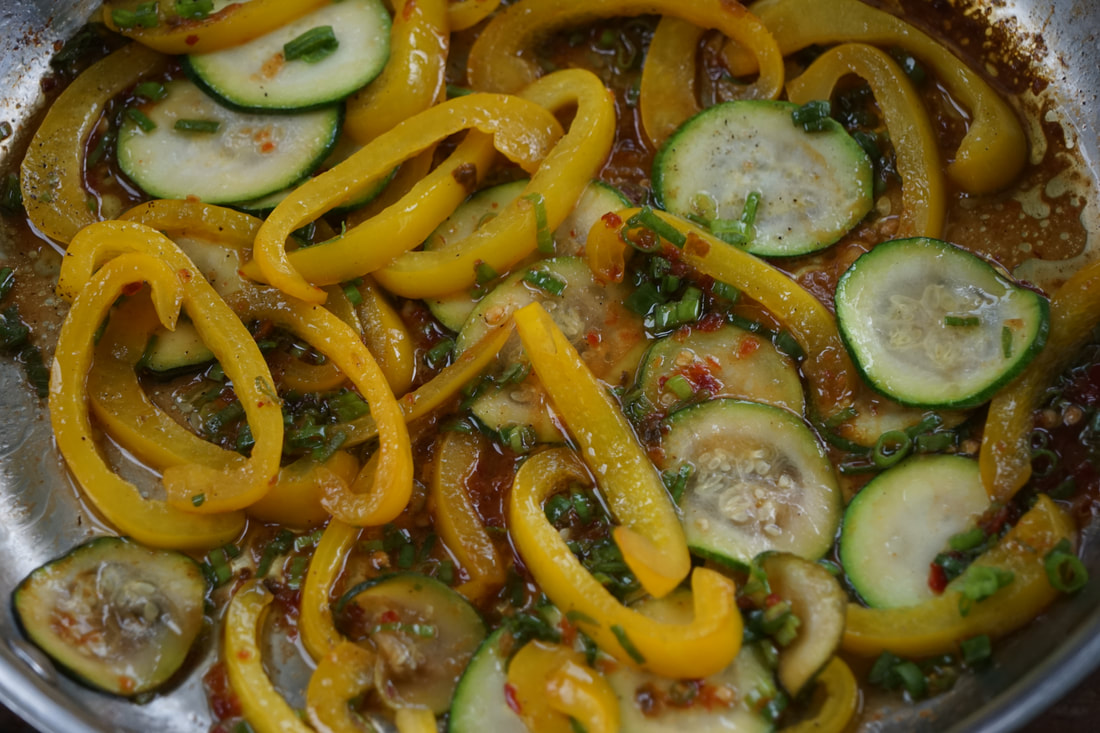
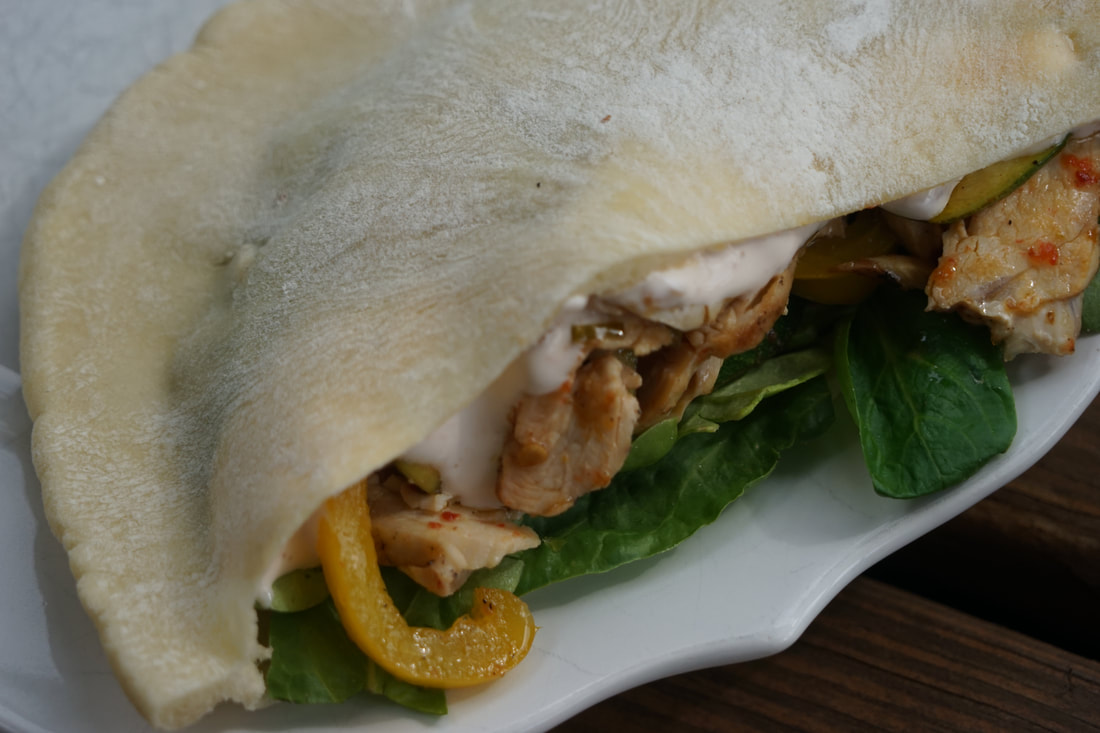
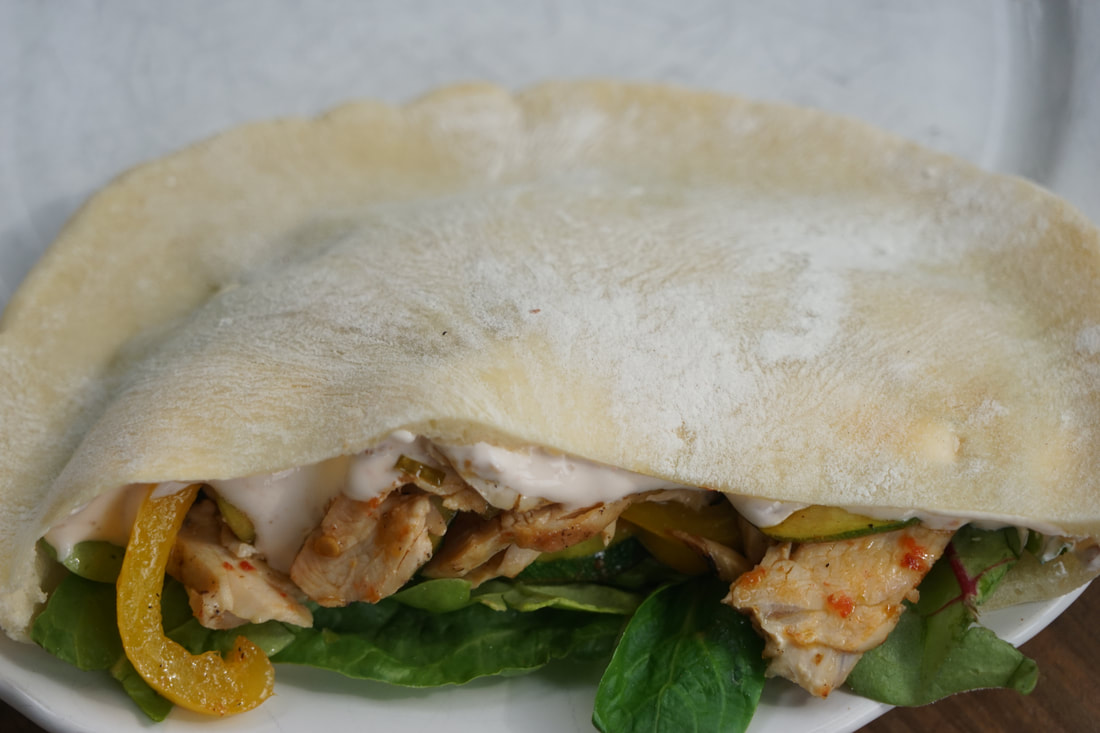
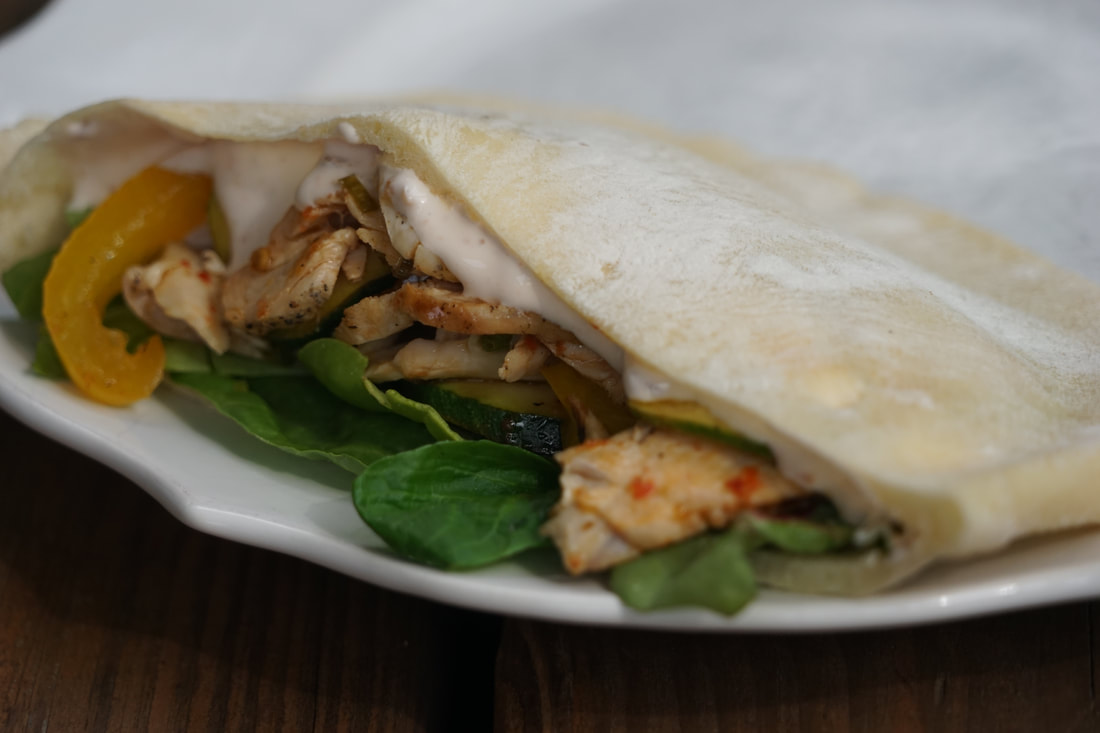 Living the food blogging life is so weird. First of all, I take my camera EVERYWHERE. Just think about the person who brings a giant SLR camera with a freakishly large lens to the most awkward and uncomfortable places that you can imagine - that's me. I've been known to shoot pictures at the most elegant restaurants, formal dinner receptions and grocery stores. (Do you remember when I got kicked out of a grocery for photographing the displays? LOL) Oh, and if you are a person who just happens to be preparing, serving or delivering me a meal - you're really not safe from my camera. I WILL be snapping photos of you making my pizza, serving my salad, pouring my wine, telling me the specials or putting my groceries in my car. I don't do it to make people feel uncomfortable, I simply feel the need to document every moment of my shopping and dining experience. Secondly, everything that I make for the blog gets photographed - on my back porch - on the ground. This probably completely grosses some of you out but I have good reason. The lighting on my back deck is almost always perfect for pictures and when I'm really lucking, my pots are overflowing with ivy and Euprorbia to add even more interest to my pictures. My family is accustomed to me putting their dinner plates on the ground to photograph the meal before we eat but it does take first time guests by surprise. I guess I forget that it's not a normal experience to place dinner plates on the ground, for most people. Haha - blogging life. 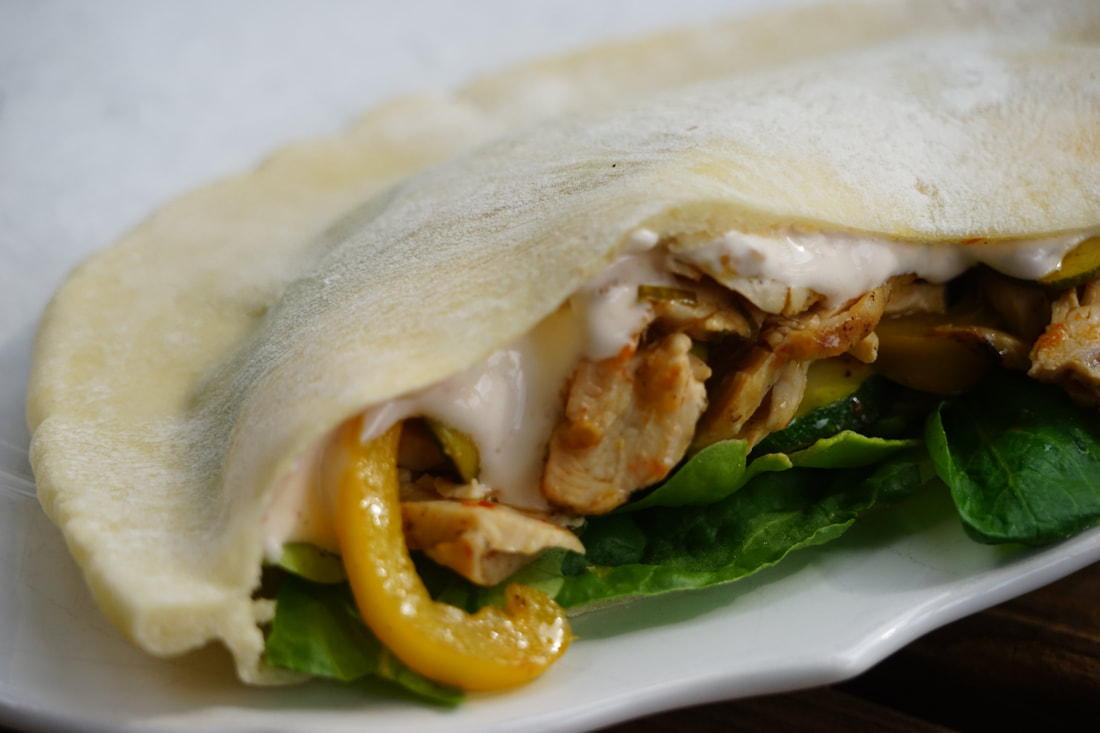 After 10 years of food blogging, I've gotten over the awkwardness of carrying my camera into weird situations and putting our food on the ground to take pictures of it. I really must love blogging because I've been doing it for more than 10 years now - without pay. I either really love it or I'm just crazy. (Or possibly a little bit of both.) One of the things that I love about blogging is when I hear from followers that they're recreating my recipes for their own families. People trying out new recipes and discovering new flavors and dishes that they really love. That's what it's all about. If you love my recipes, make sure that you "like" my website on Facebook and sign up to get new recipes delivered to your email. It's a great way to get notified when I post a new recipe and to keep track of recipes that you want to try. I'm sure that this Skillet Fajita Pita is one that you will want to keep track of. This one is a keeper for sure. 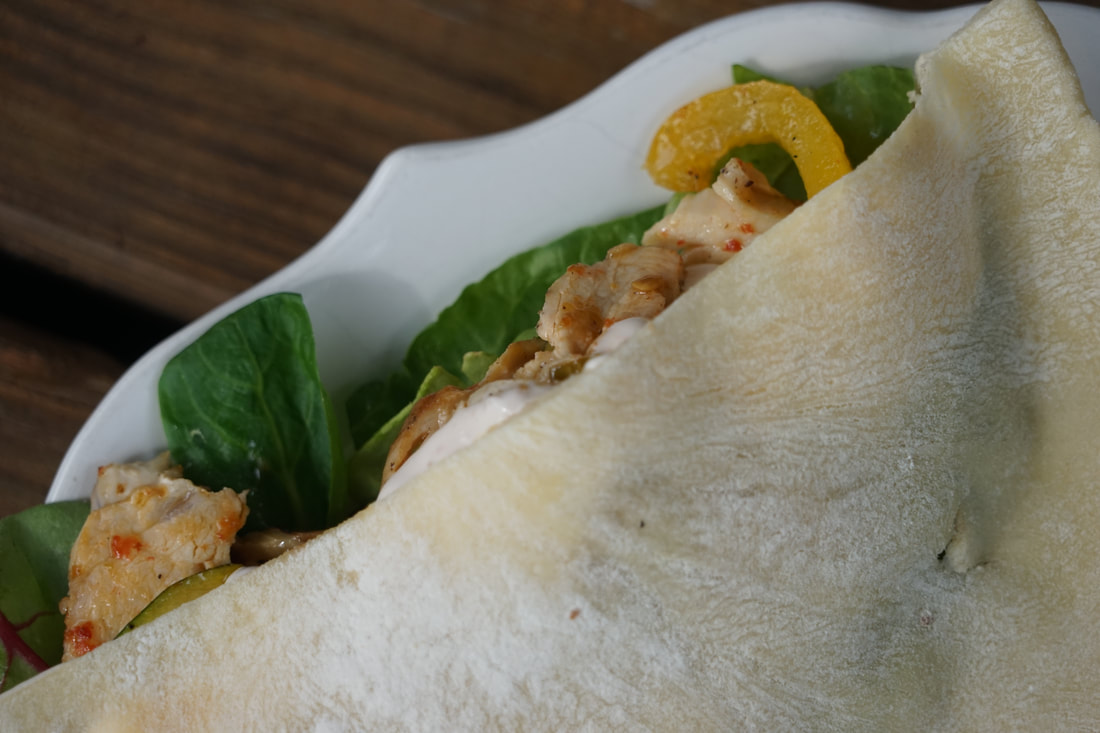 Skillet Fajita Pitas 2 Tablespoons fresh lime juice 2 Tablespoons olive oil 1 1/2 Tablespoons chili garlic sauce 4 whole wheat pitas 1 pound boneless, skinless chicken breasts, sliced 1 yellow pepper, thinly sliced 1 medium zucchini, sliced diagonally 1/4 cup thinly sliced scallions 1/2 teaspoon salt 1/4 teaspoon pepper 1/4 cup sour cream 2 cups chopped bibb lettuce
Fill each pita with 1/4 c. lettuce and 1/2 c. chicken/vegetable mixture. Drizzle with sour cream sauce and serve.
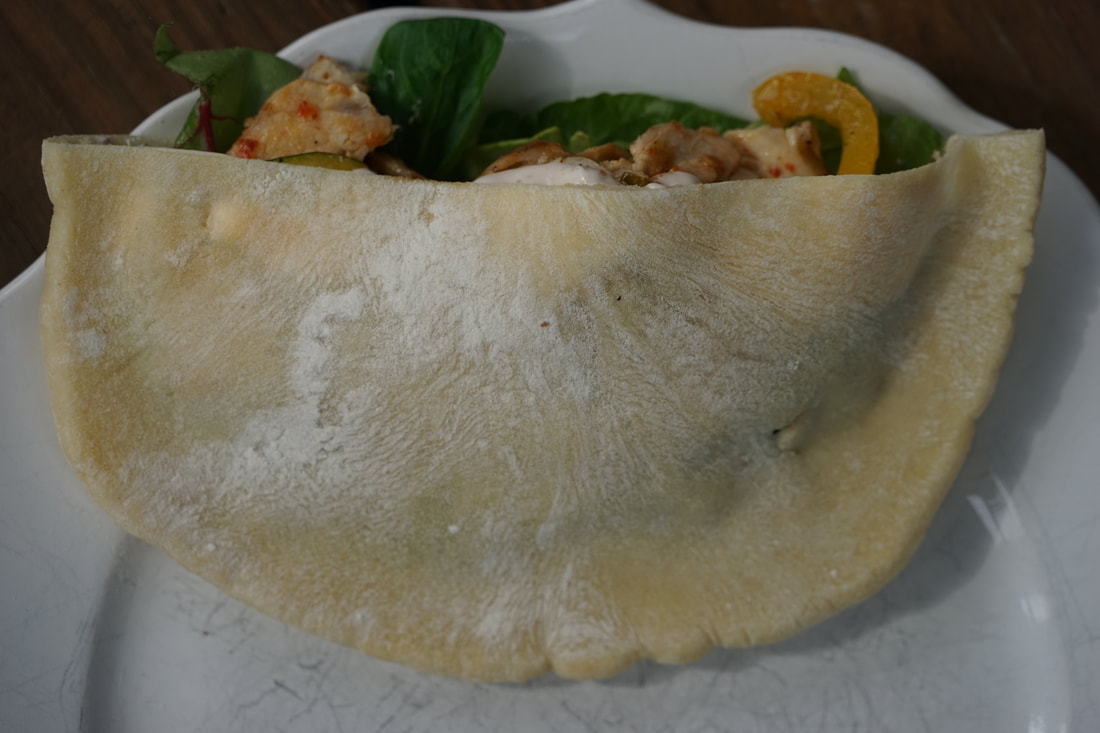 I made my pitas from scratch and I will be posting that recipe soon. (Make sure that you're on the email list to get notified when that post goes live.) If you want to skip that added step of pita making, just pick up some pita bread from the grocery store.
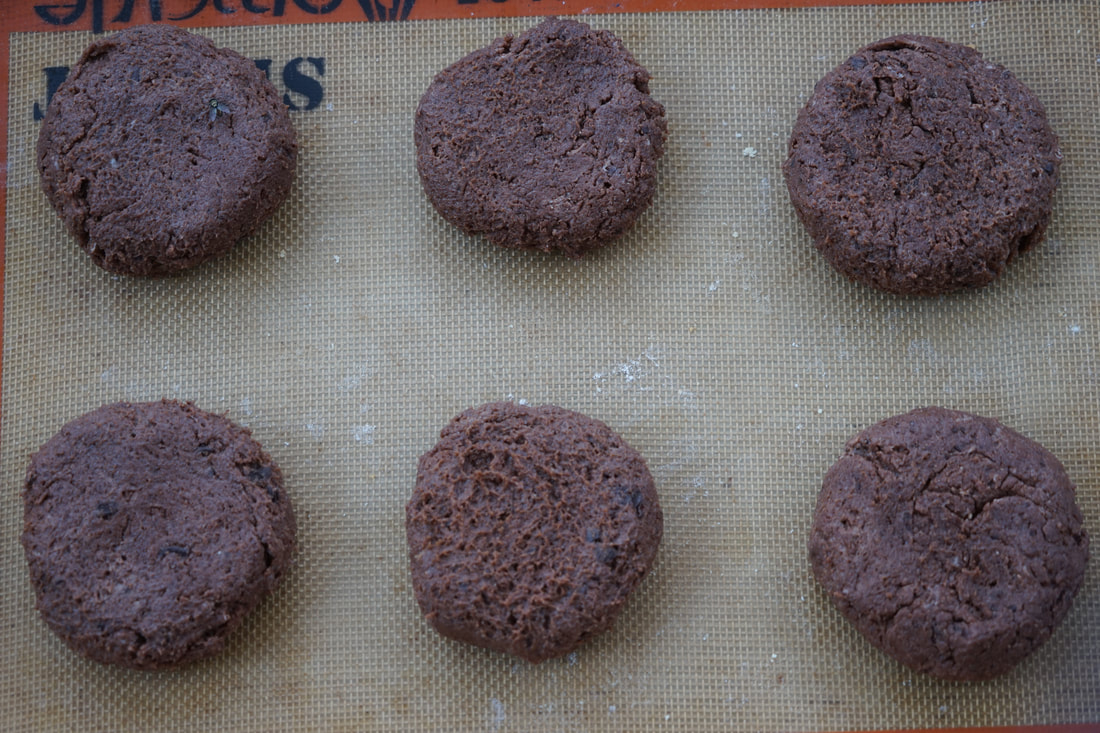
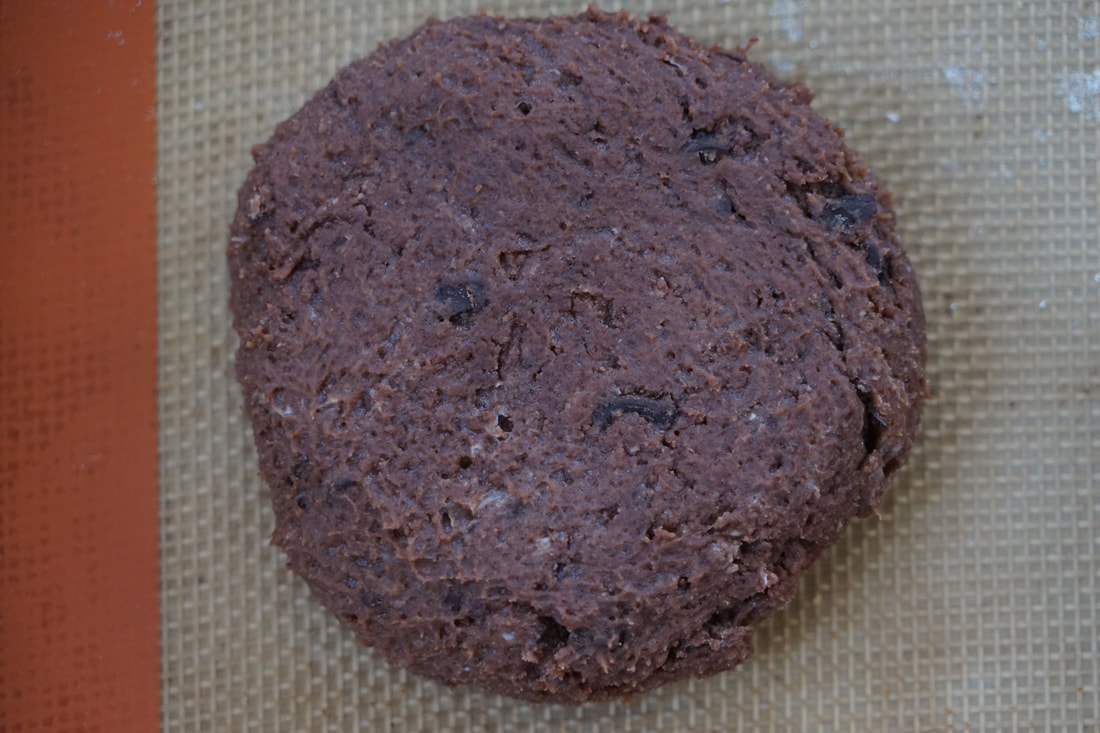
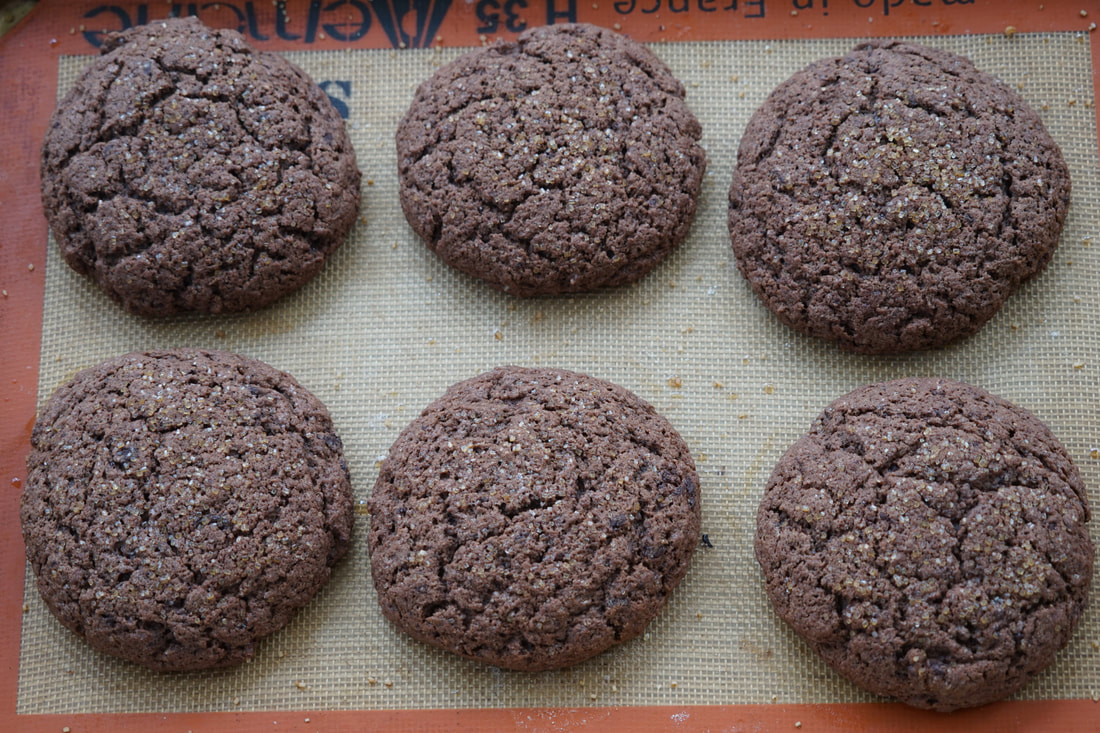
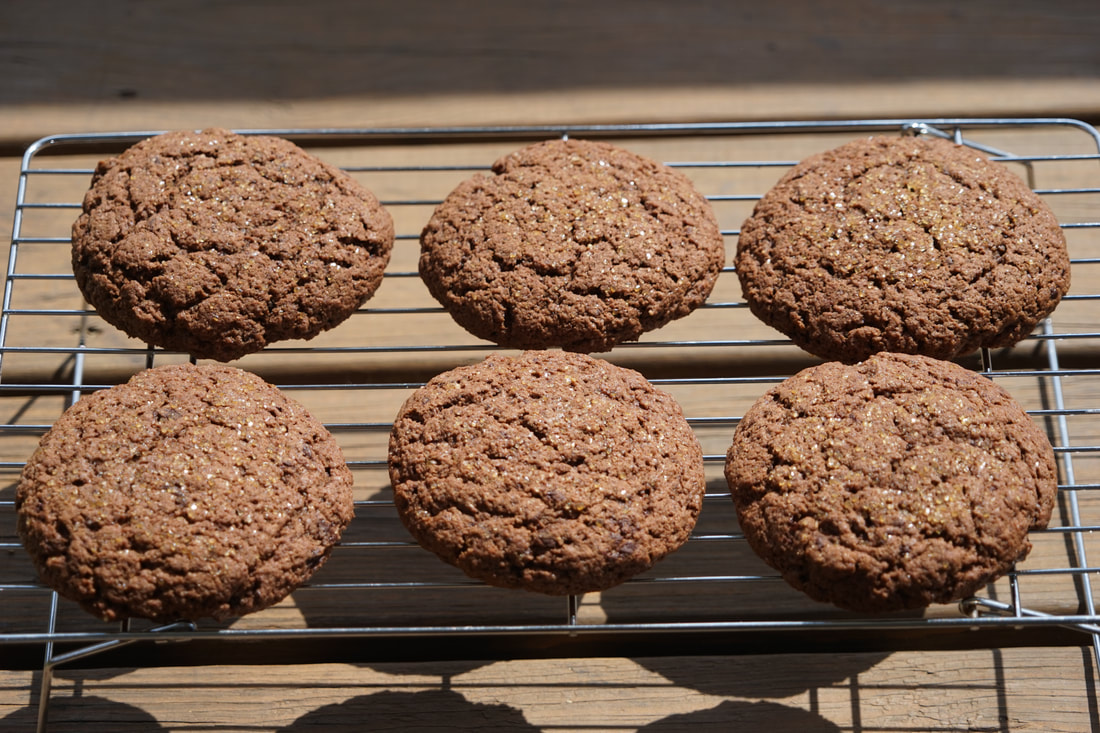
Ciao! 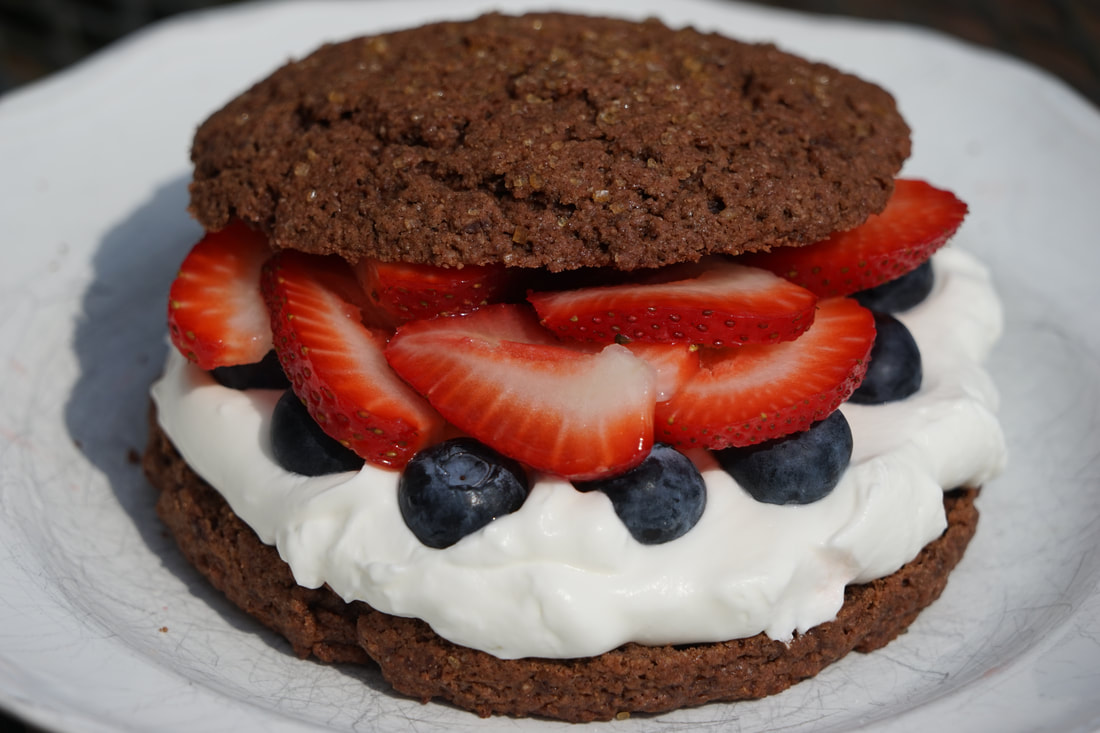 I feel like there is an unspoken rule when it comes to preparing food for guests: never try a new recipe when serving guests. I guess the theory is that if the recipe doesn't live up to your expectations, you won't embarrass yourself in front of other people. I can say that in most cases, I ignore this rule completely. I like to take advantage of the opportunity and create menus that are completely new and original when we have company at our house for dinner and when I prepare food to take to a friends house. I find myself paying much closer attention to the recipe when I make it for the first time and especially when I have to photograph each step and blog it. Maybe it's just me but I think my inaugural attempt at any recipes usually produces the best results. 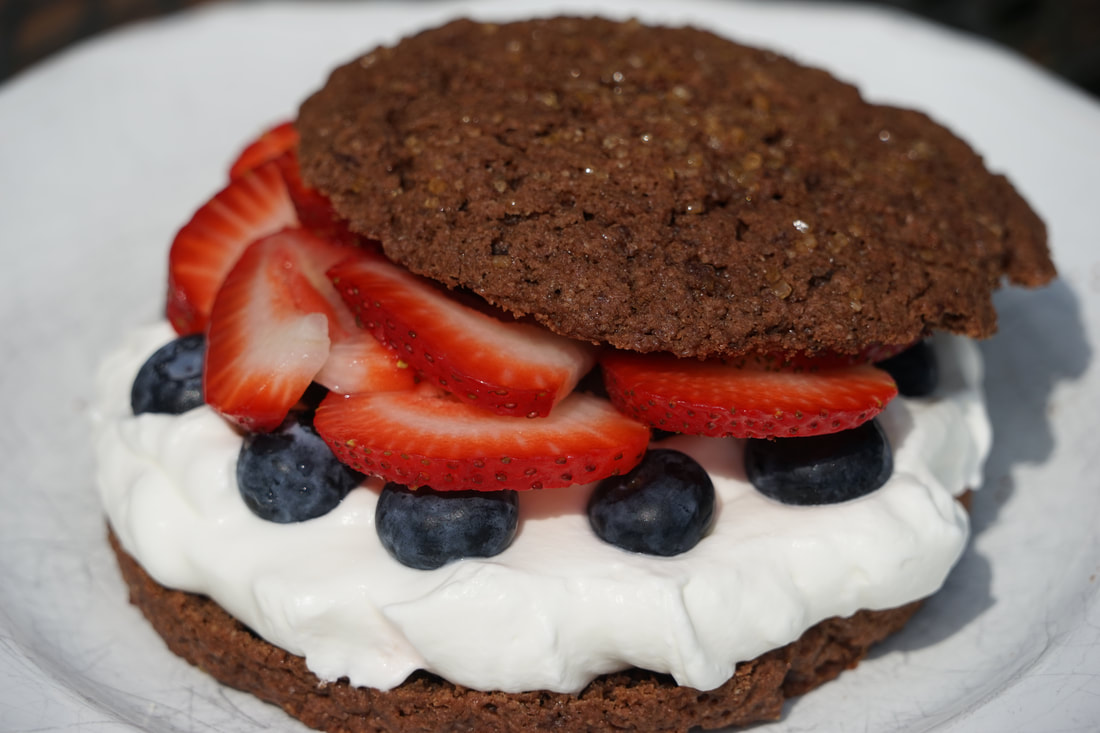 Anyone else like to use their friends as guinea pigs? I guess my friends have come to expect the unexpected when they get an invitation to dinner and my house. I always serve new foods and in most cases, I also photographing the entire evening from preparation through dessert. (The struggles of going to the home of a food blogger for dinner.) These chocolate shortcakes were a last minute dessert that I pulled together to take to a friends house on the 4th of July. I chose this particular recipe because of it's colorful nod to patriotism. The red and blue berries with the white cream just seemed to scream 4TH OF JULY! 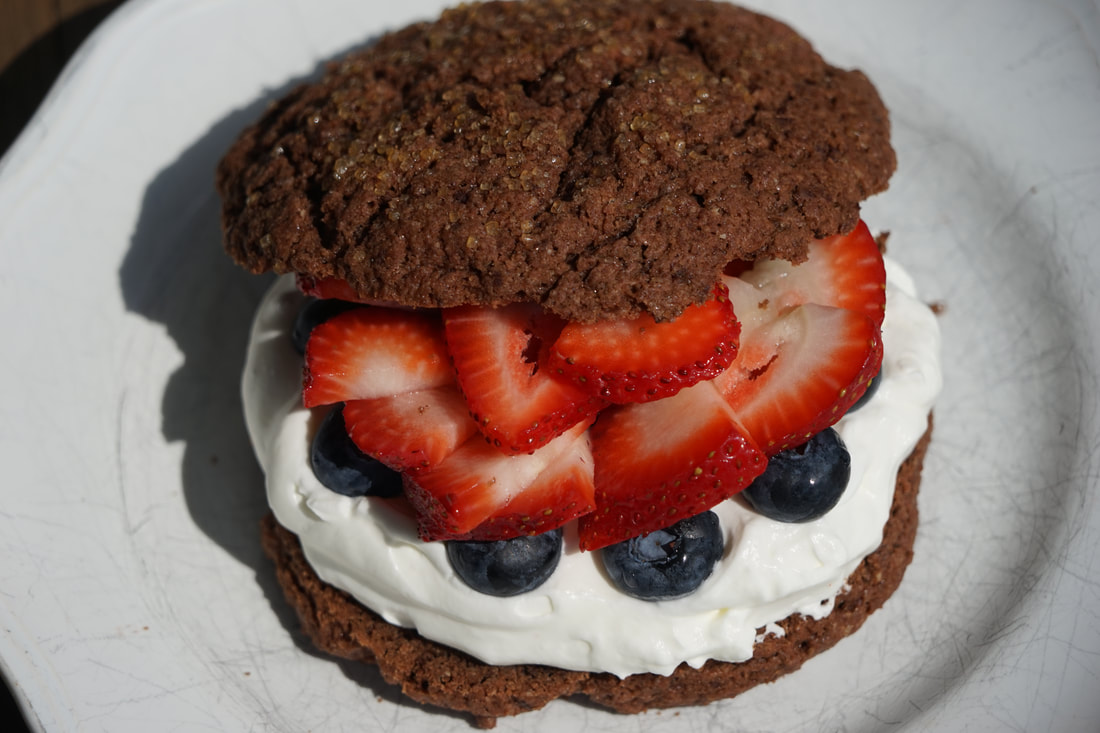 Chocolate Shortcakes 1 1/2 cups flour 1/3 cup almond flour 1/4 cup cocoa powder 1/2 cup sugar 1 Tablespoon baking powder 1/2 teaspoon salt 6 Tablespoons butter, cold 2 ounces semisweet chocolate 3/4 cup heavy cream 1 egg
Split in half. 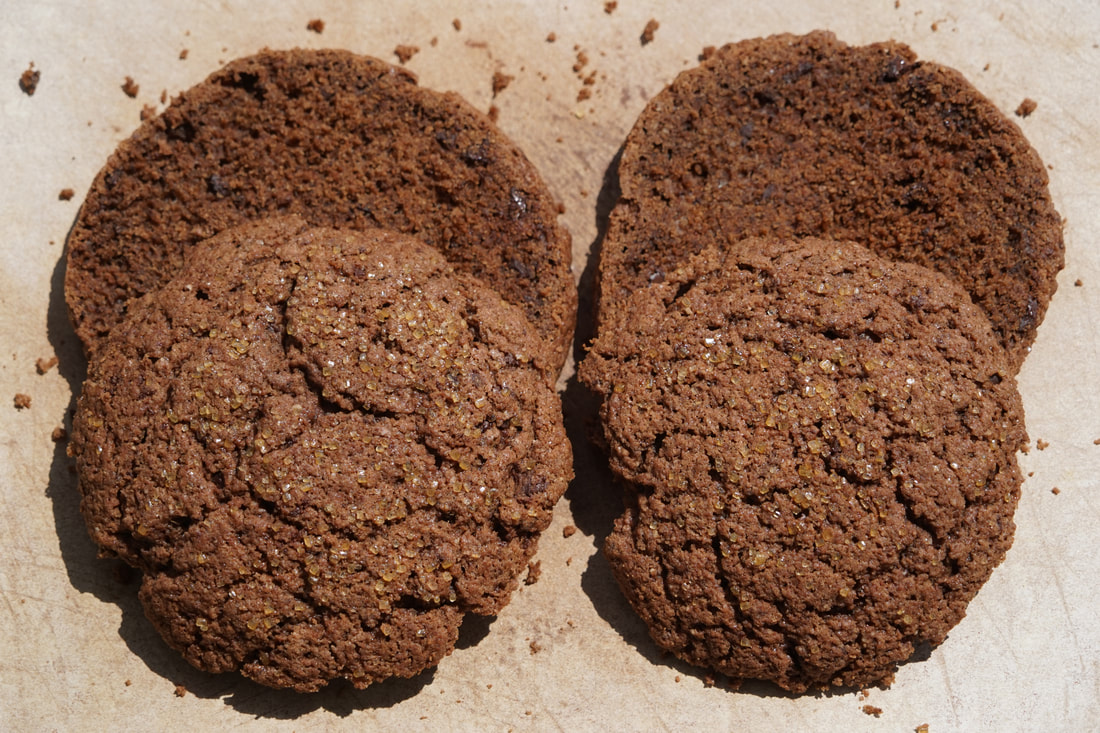 Fill with whipped cream and your favorite fruit. 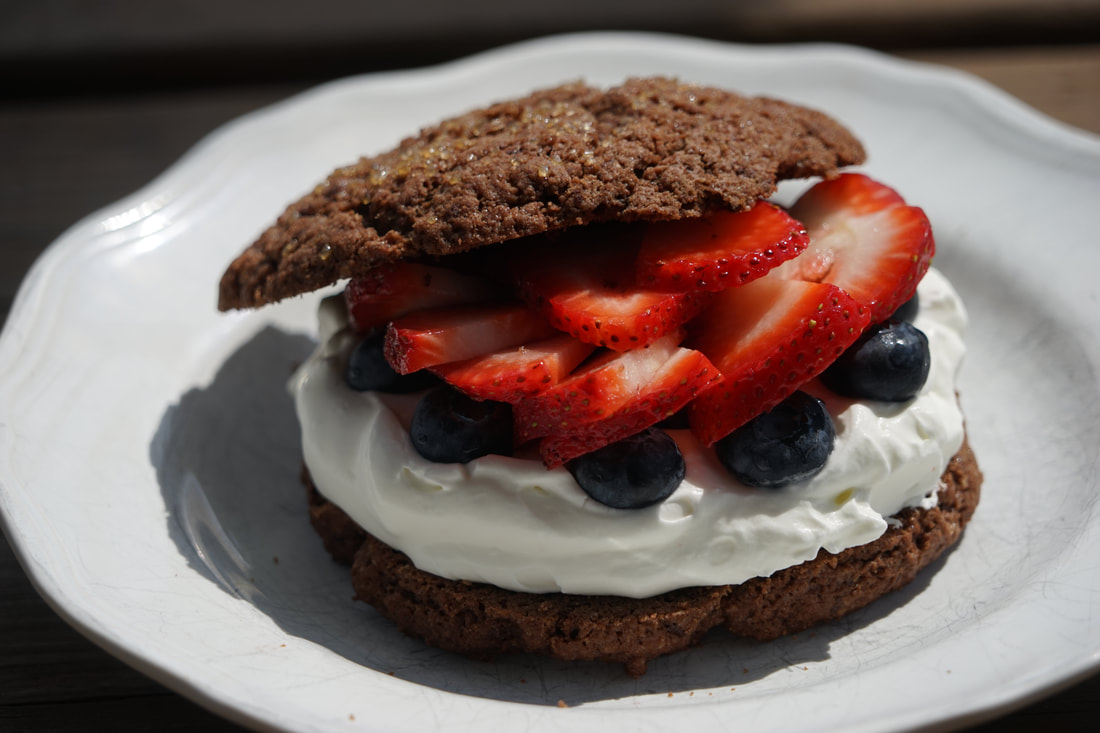  Changing the rules of cooking as we know them. Forget only fixing known recipes when it comes to serving guests - be adventurous and try something that you've never made before. With any luck, your guests will give you their honest opinion about your food. (Just remember to take it with a grain of salt.)
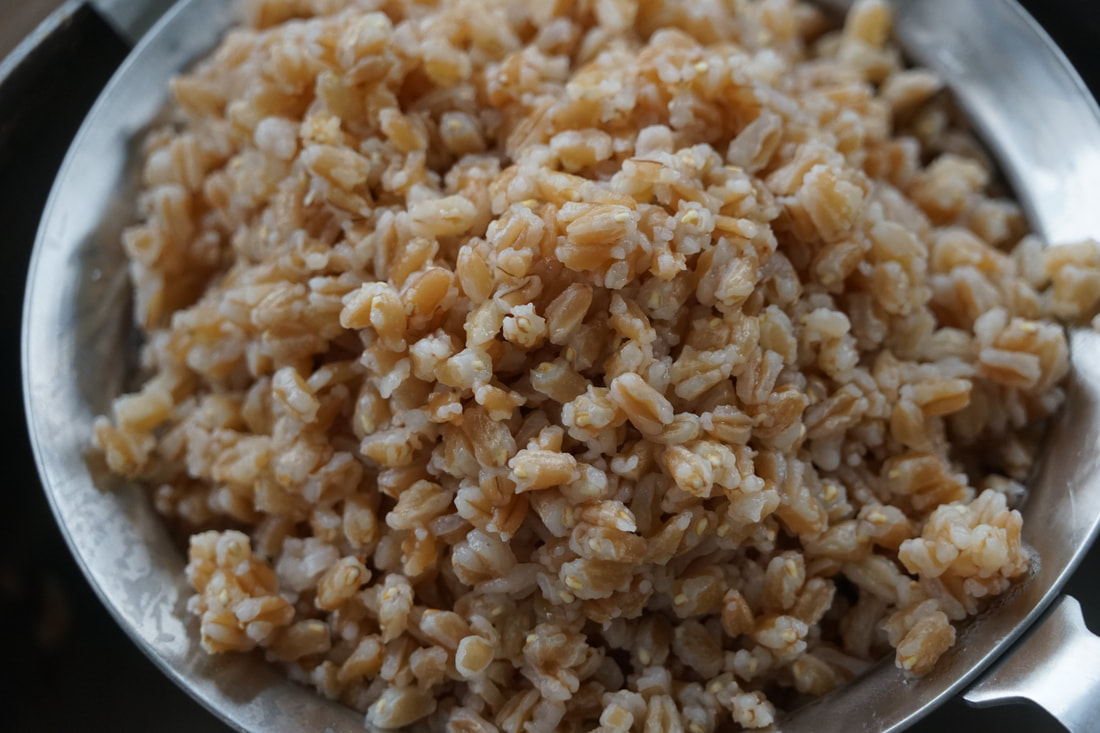
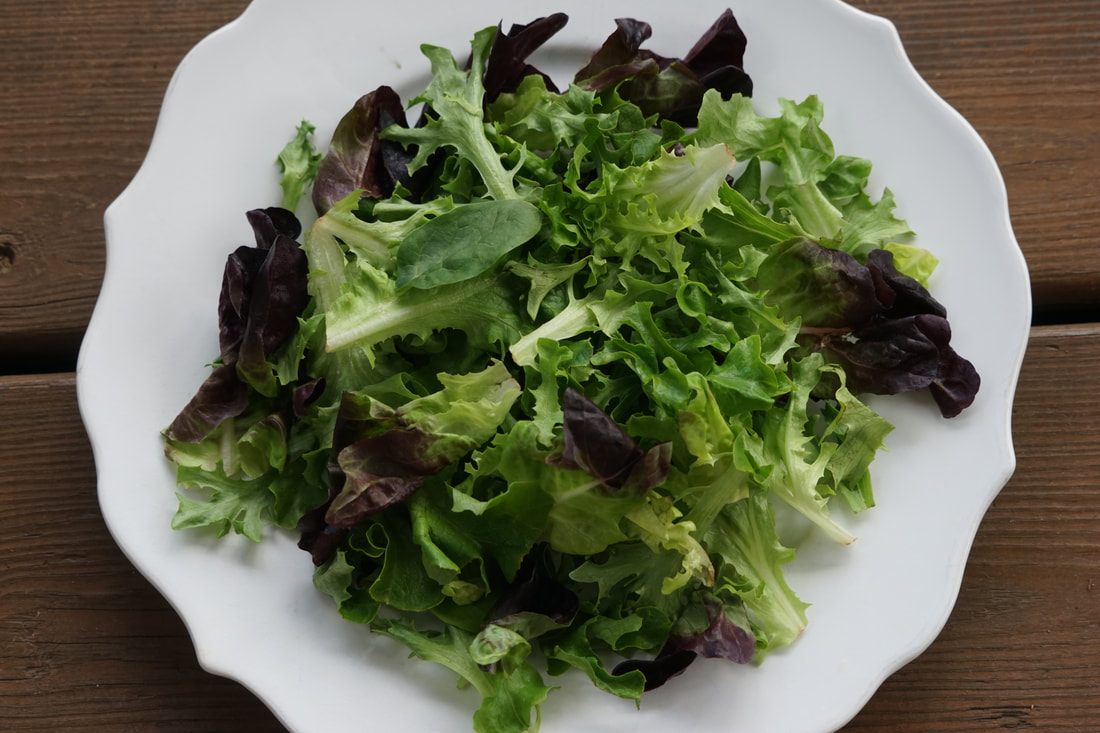
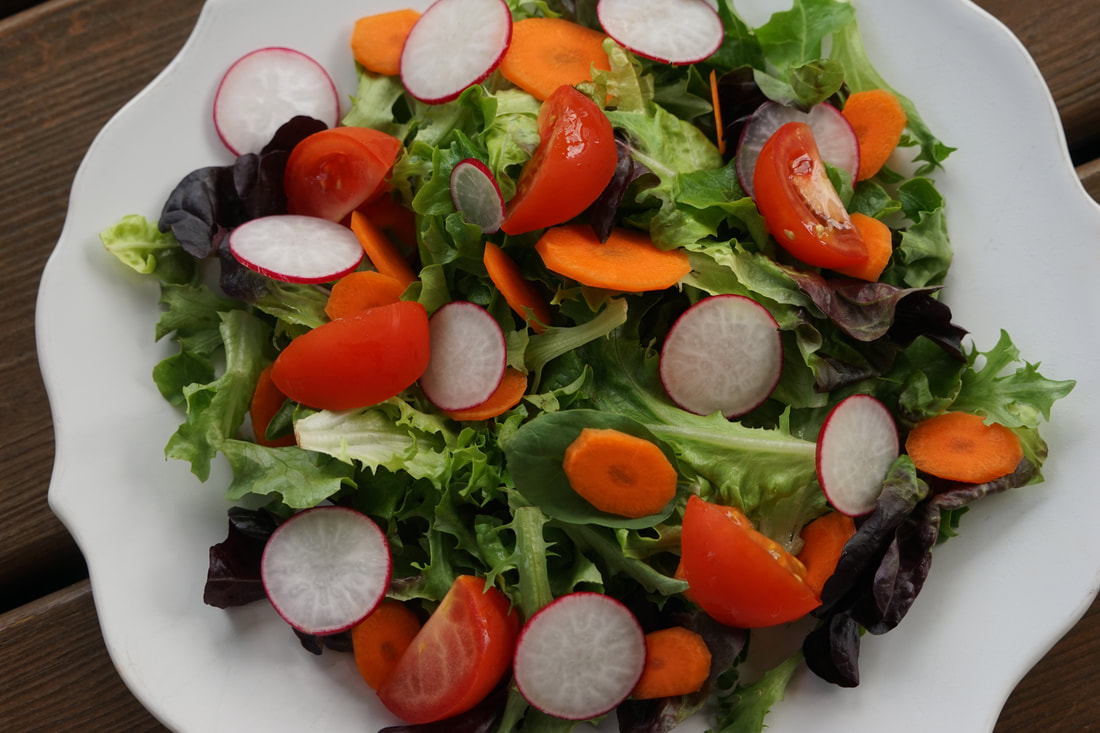
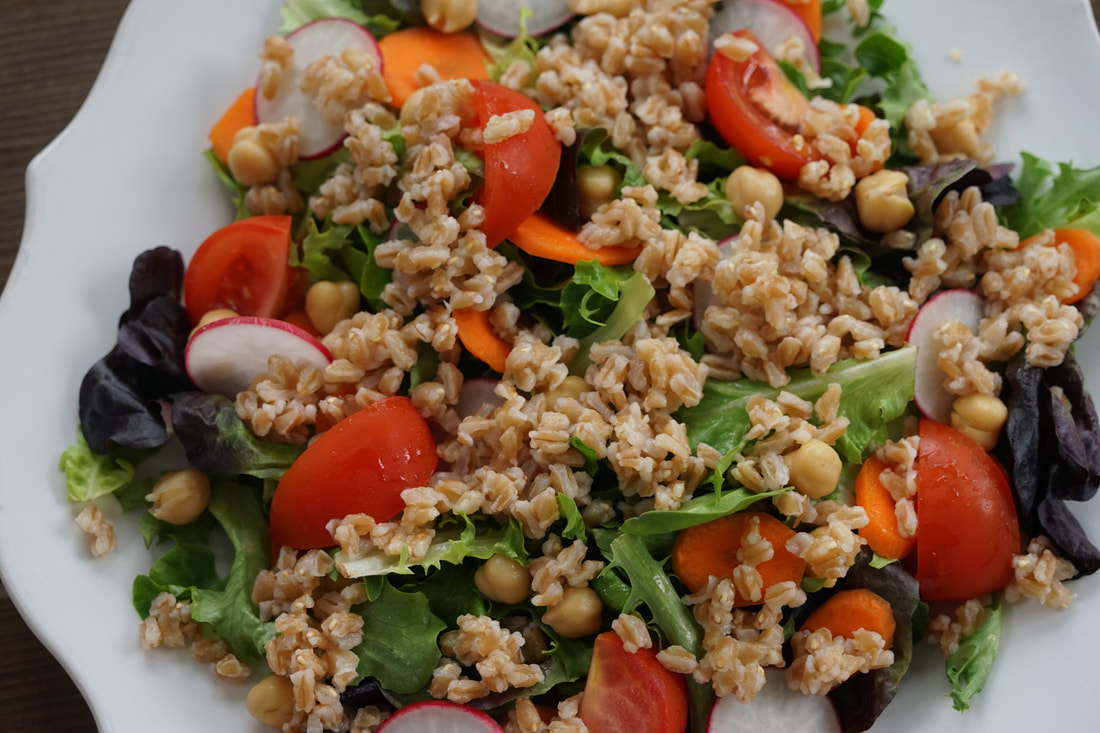
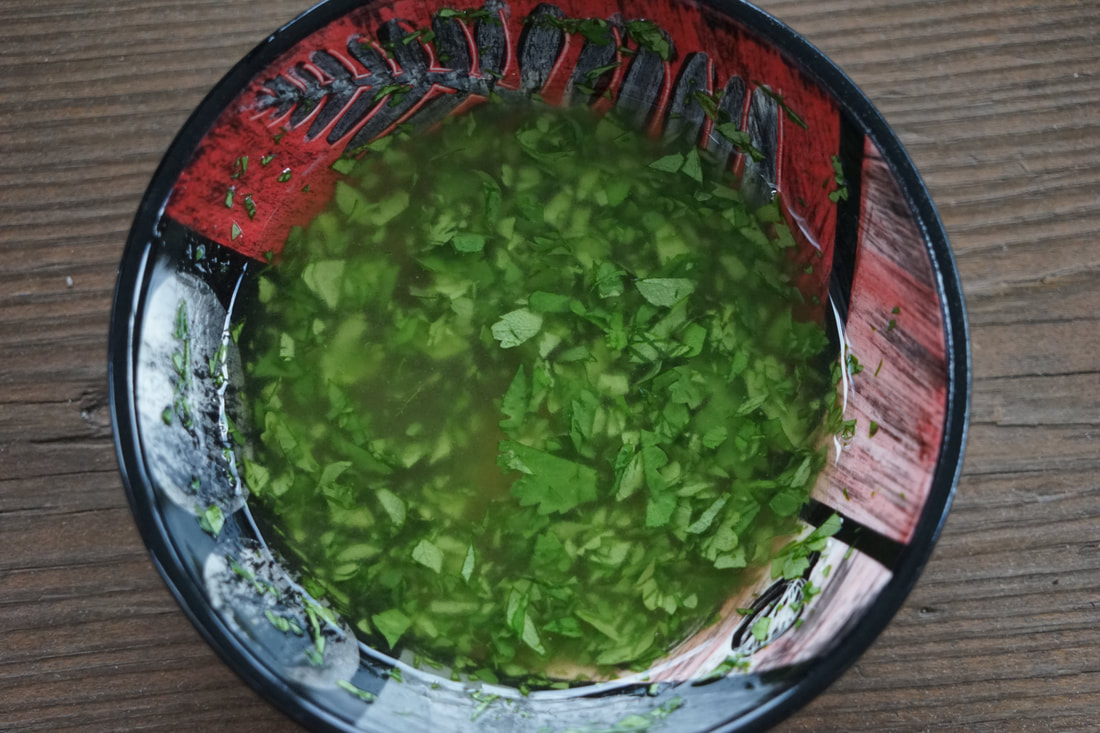
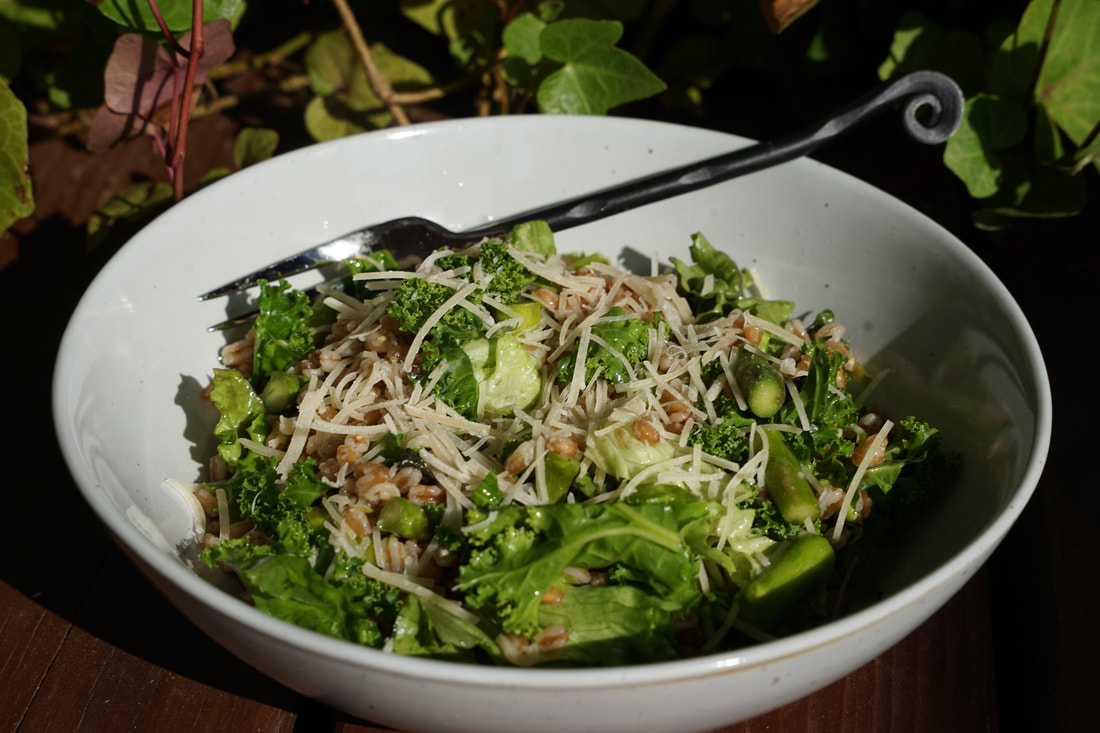
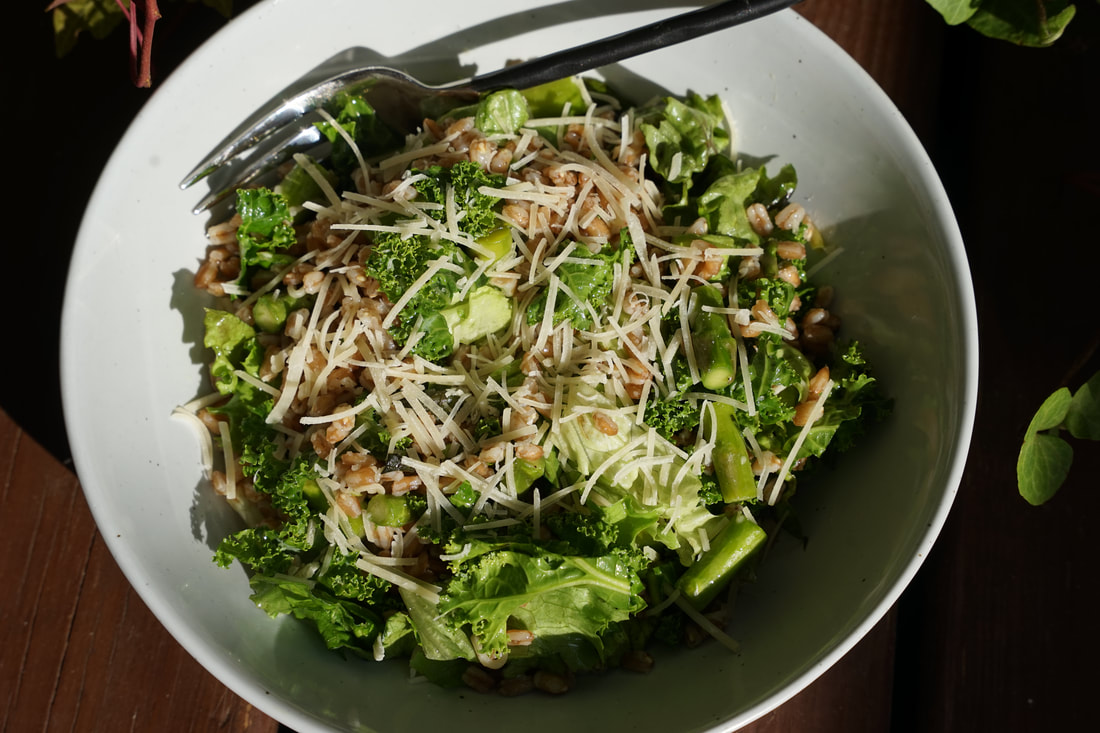
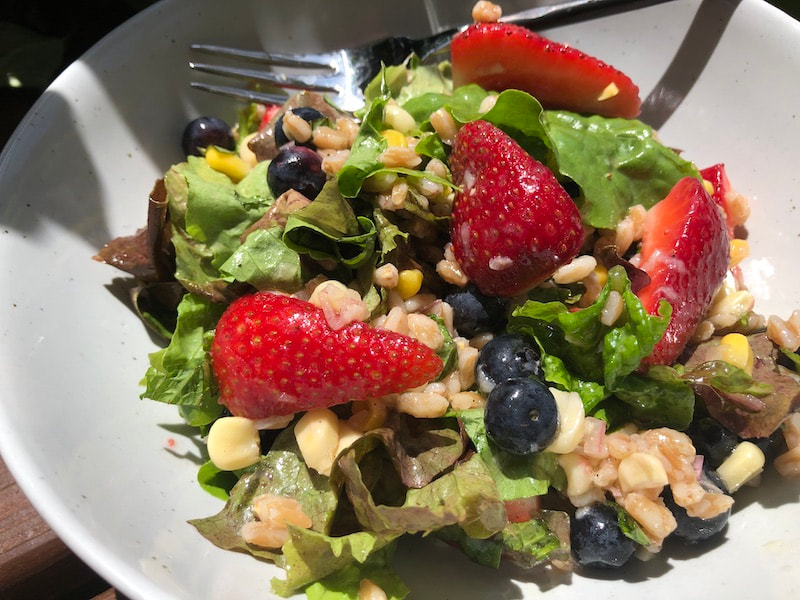
Ciao! 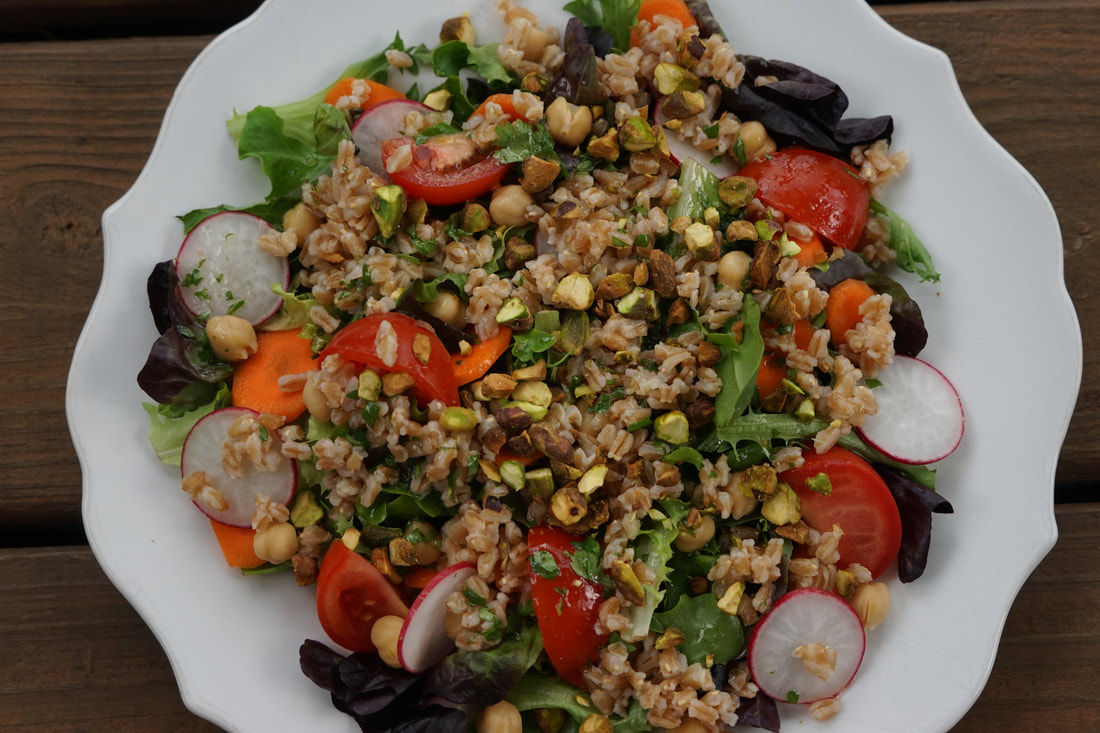 I can't even begin to count the number of times I've ordered a salad at a restaurant with the dressing on the side. I'm weird about my salad dressings and I like to be able to control the amount of dressing on my salad and I also like having the option of changing my dressing choice before it's applied to the entire salad. Dressing on the side is a pretty normal request. You know what's not normal? Ordering LETTUCE on the side. Anyone out there ever gotten a salad with lettuce on the side? I have. Not on purpose. I ordered an entree salad at an Italian restaurant and when the server repeated my order back to me she said "salad with lettuce on the side." I lightheartedly corrected her by saying that I wanted the DRESSING on the side, not the lettuce. Her befuddled smile led me to believe that she didn't fully understand my request and again she said "Salad with lettuce on the side." After she left the table, I joked about the ridiculousness of getting lettuce on the side with my fellow diners. Sure enough, within 20 minutes I was confidently served a bowl of carrots, cucumbers, croutons and cheese, all swimming in a sweet, dark balsamic dressing. Alongside my bowl of balsamic toppings, the waitress placed another giant bowl of lettuce. Lettuce on the side. It's just like you might have imagined. Turns out - it wasn't a terrible way to eat a salad - just a little unconventional. 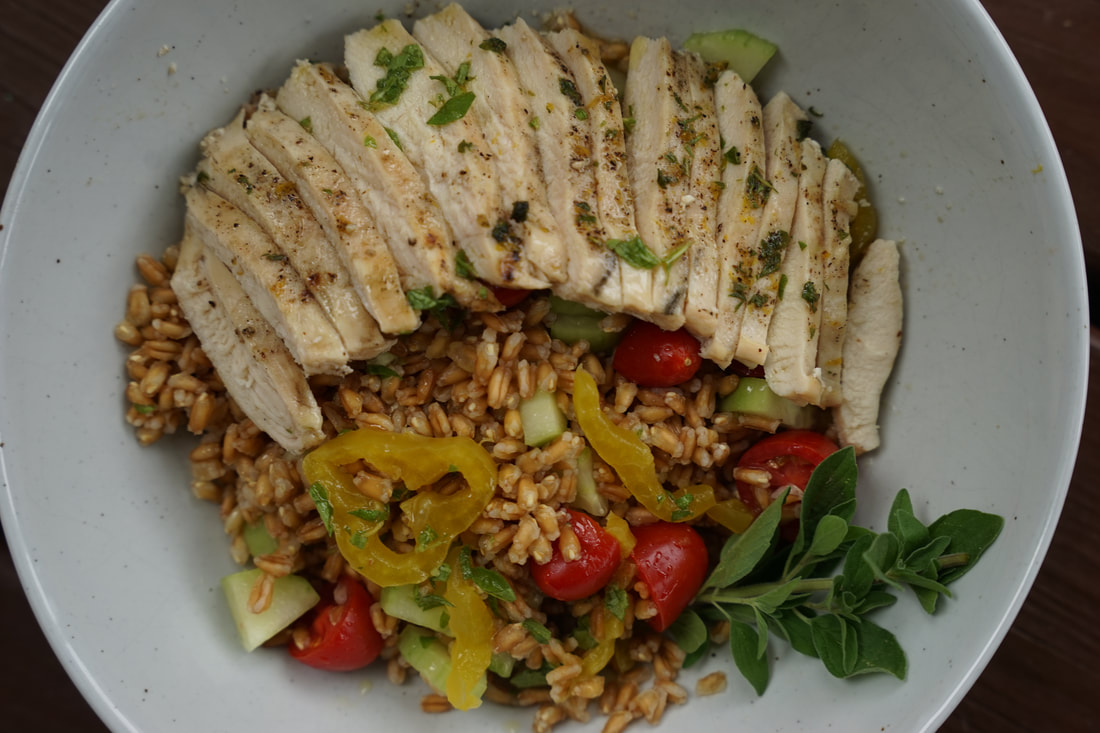 If you're looking for a great summer salad - look no further. This simple salad is really delicious and thanks to the addition of some whole grain wheat, it's actually very filling. You will want to make this salad over and over again this summer.  Farro and Chickpea Salad 2 carrots, sliced 2 radishes, sliced 1 small tomato, cut into wedges 6 cups salad greens 1 cup farro 1 cup chickpeas, drained and rinsed 1/2 cup fresh cilantro, chopped 2 Tablespoons olive oil 1 1/2 T. lime juice 1 garlic clove, minced 1 teaspoon honey 1/4 cup pistachios, chopped roughly
Drizzle over salad. Sprinkle with pistachios.
 I just did a big clean out of my refrigerator and discovered all sorts of half full bags of grains and flours. My goal is to use up as many of these as I can in the next couple of months so get ready for more quinoa, millet, farro and barley recipes. I'd love to see some of your recipes too so send them to me in a comment.
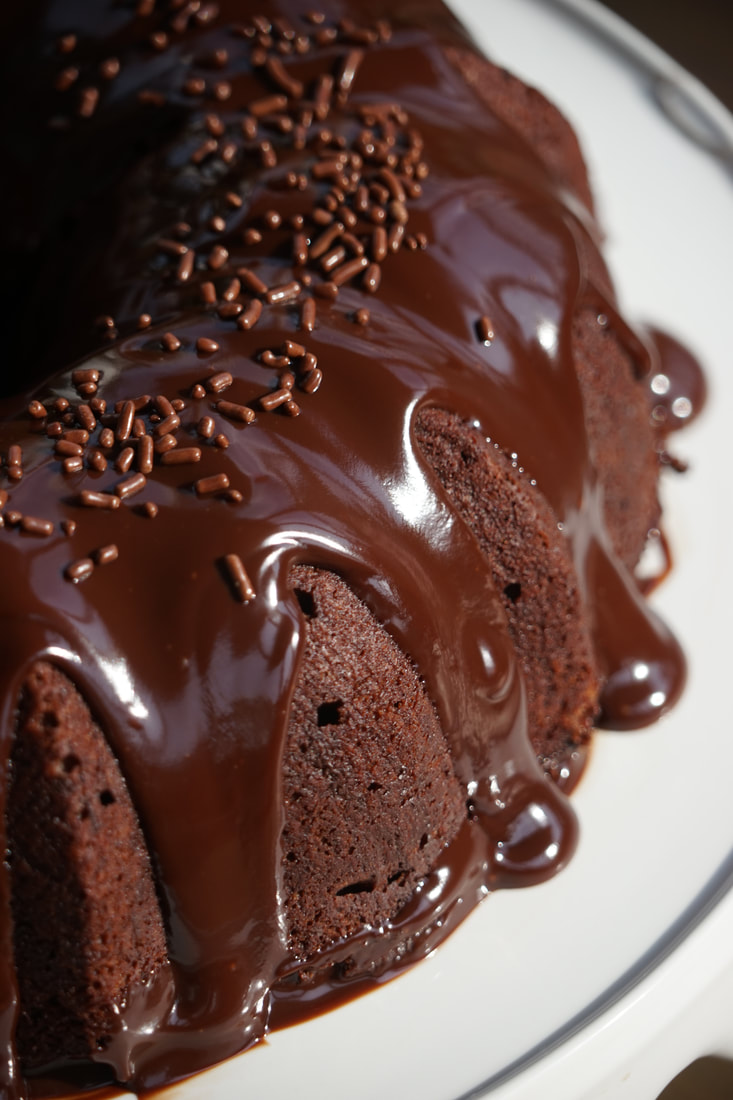
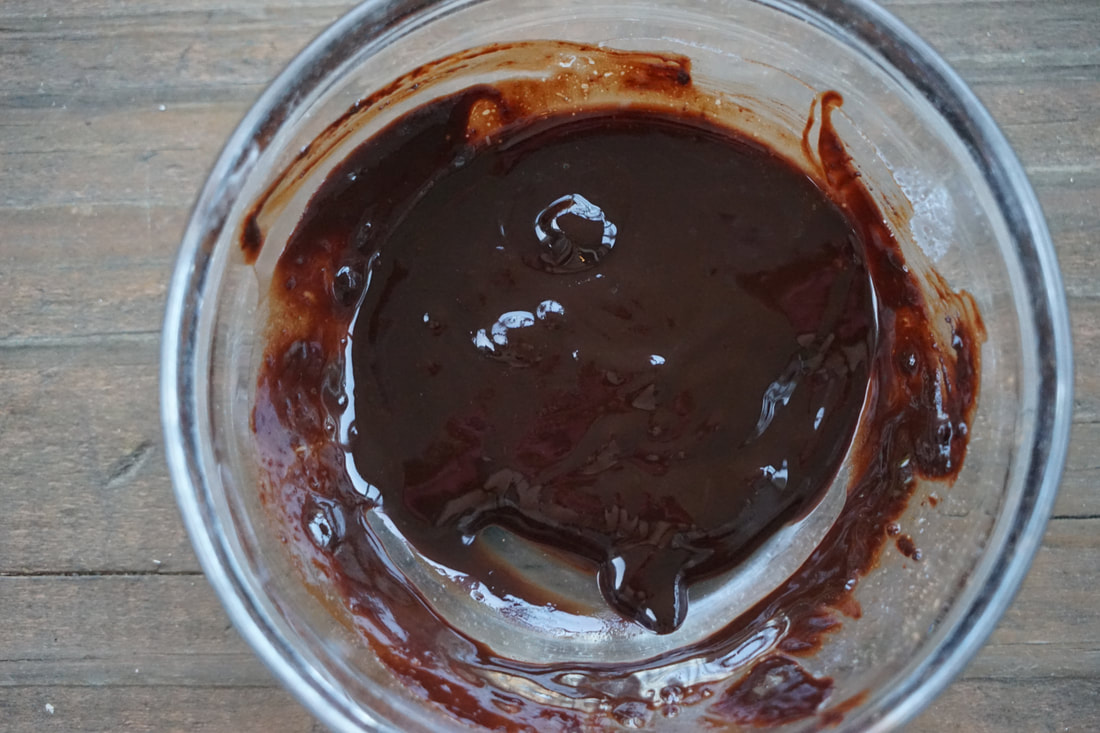
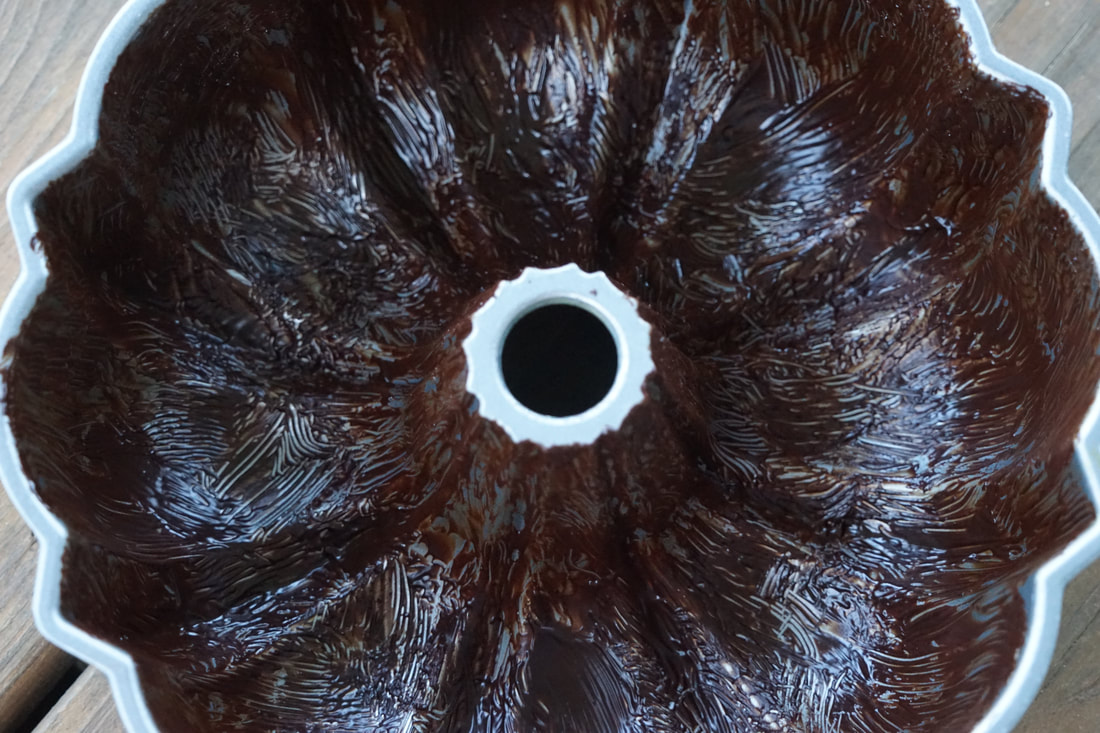
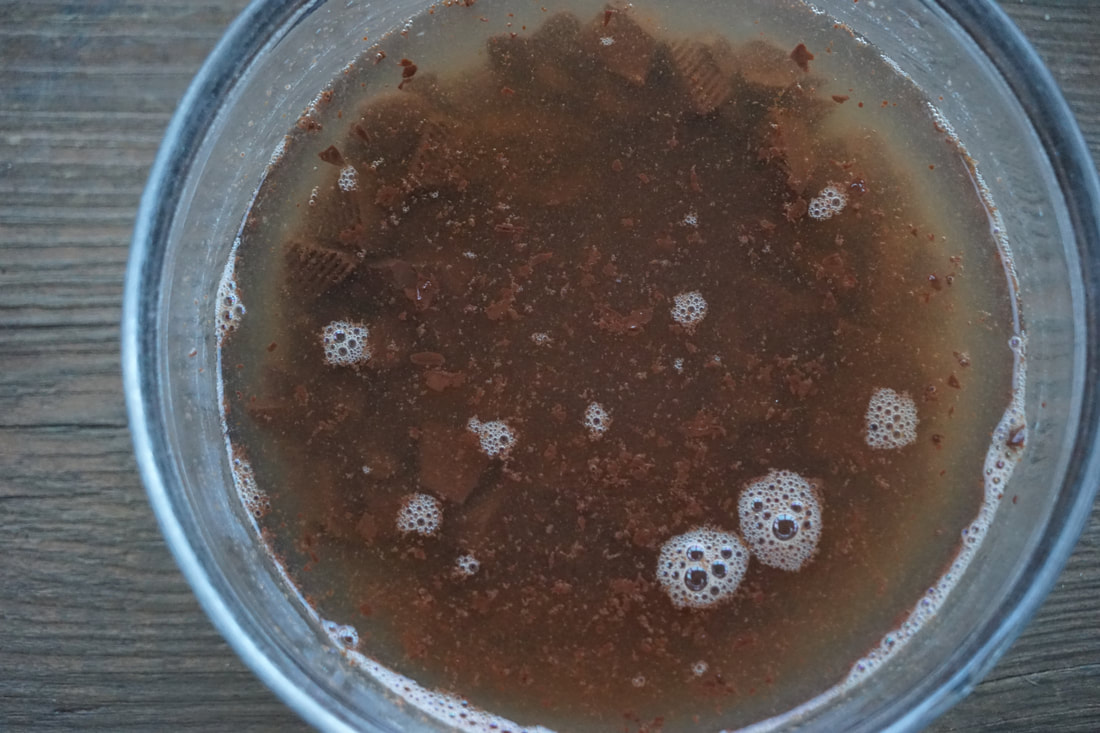
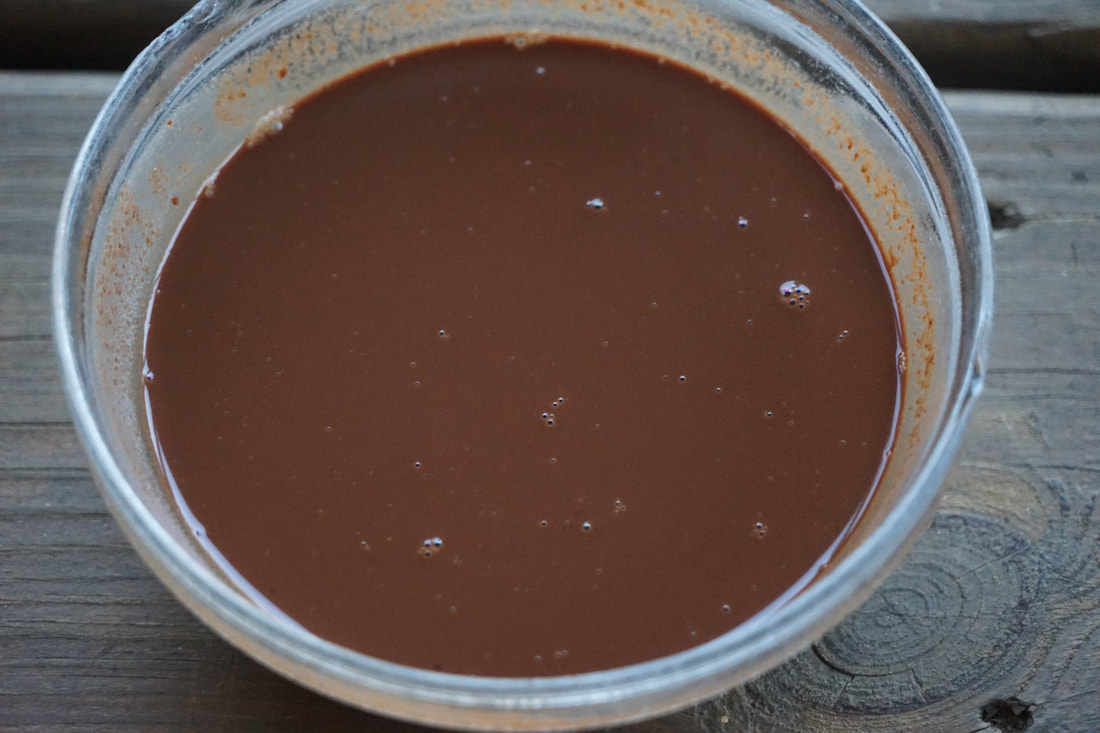
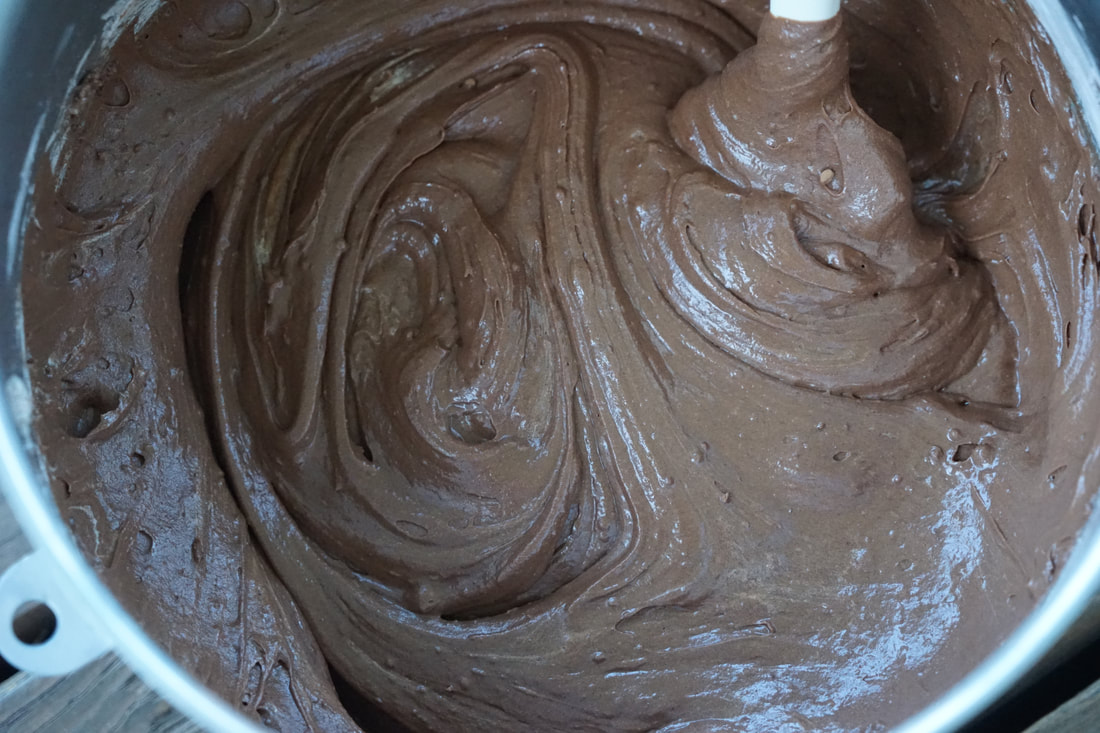
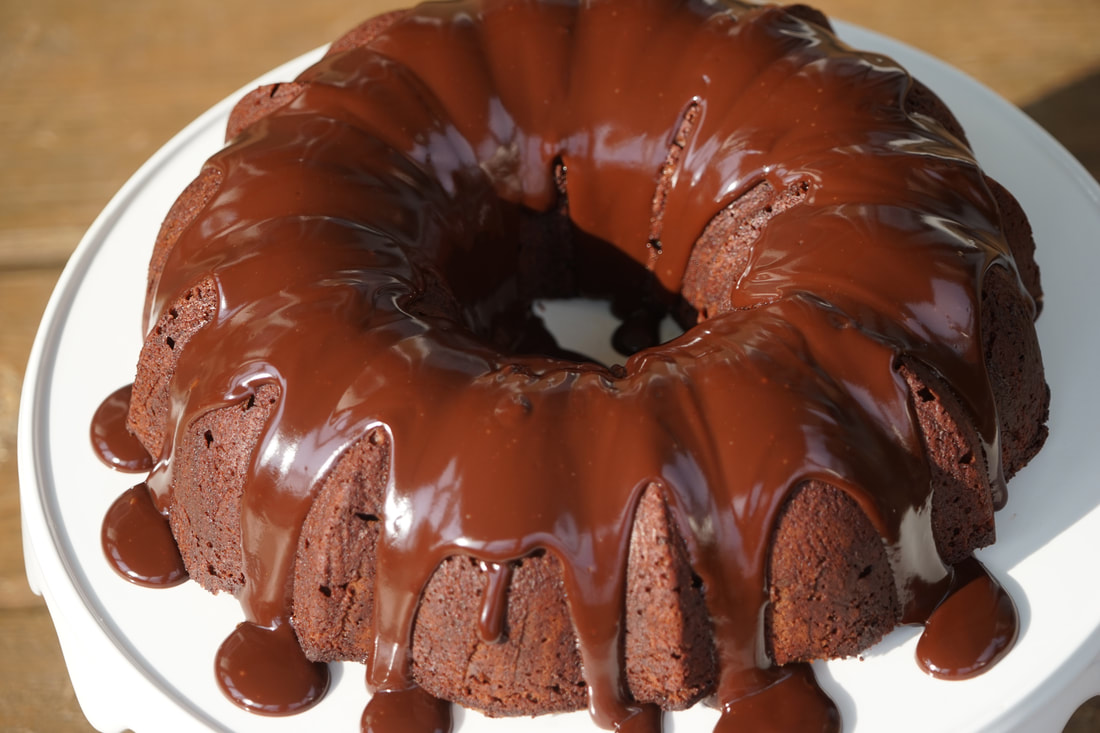
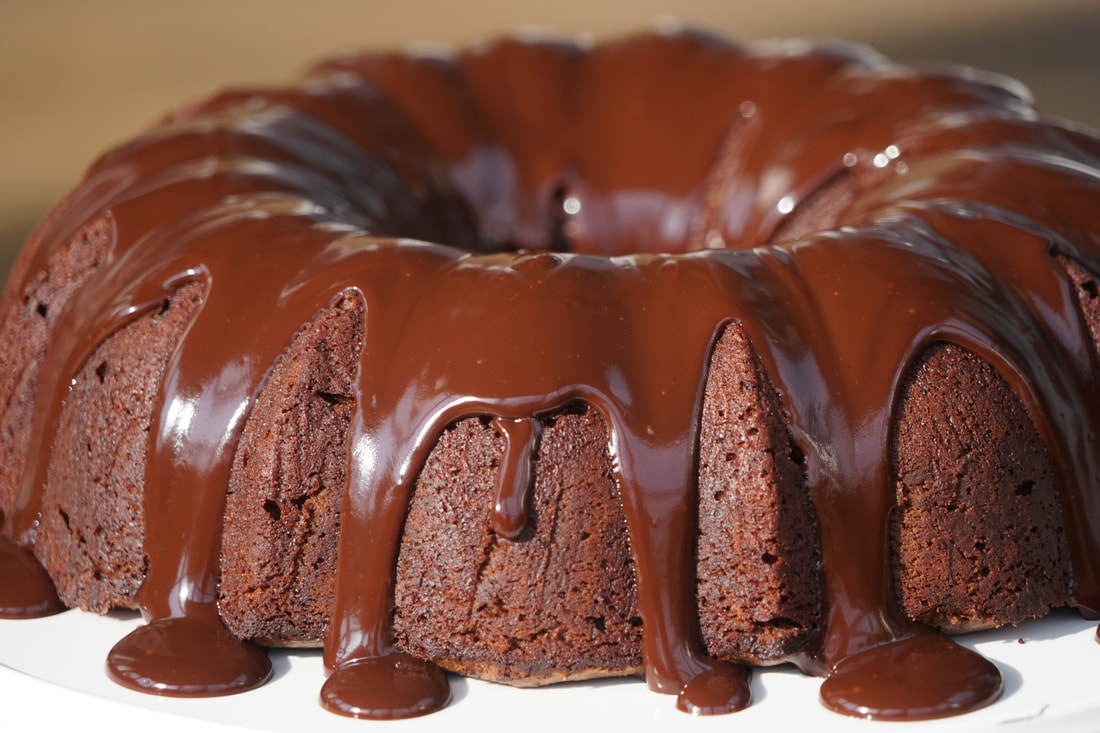
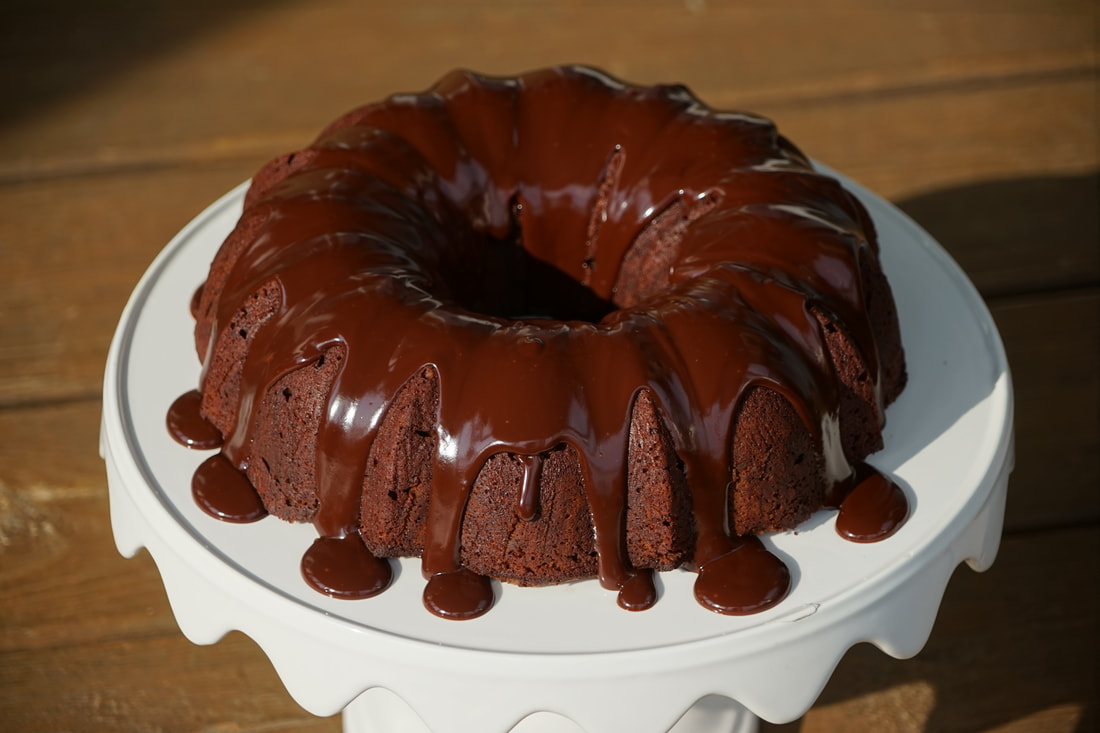
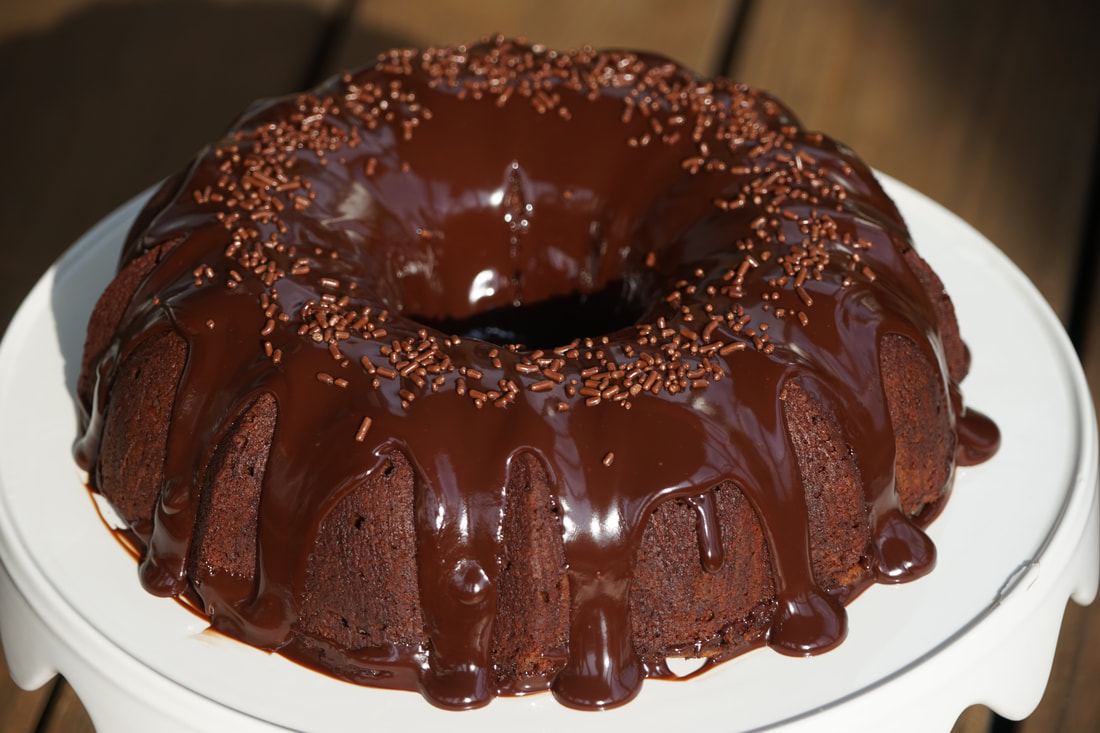
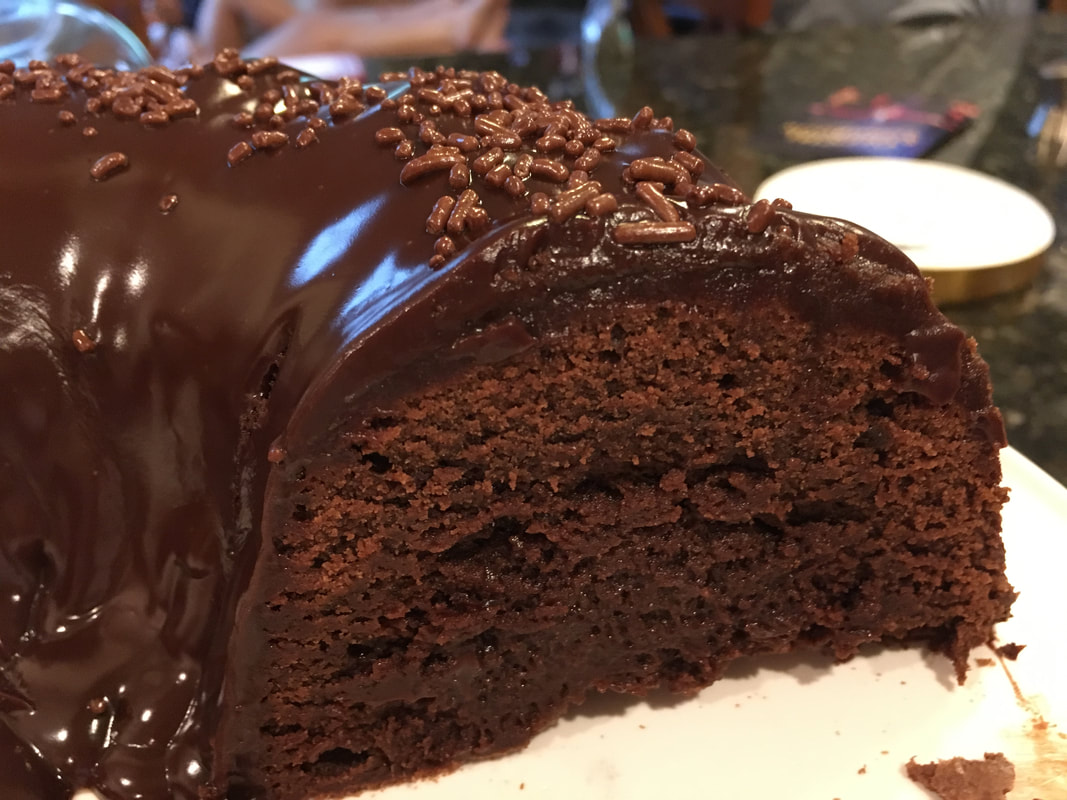
Ciao! 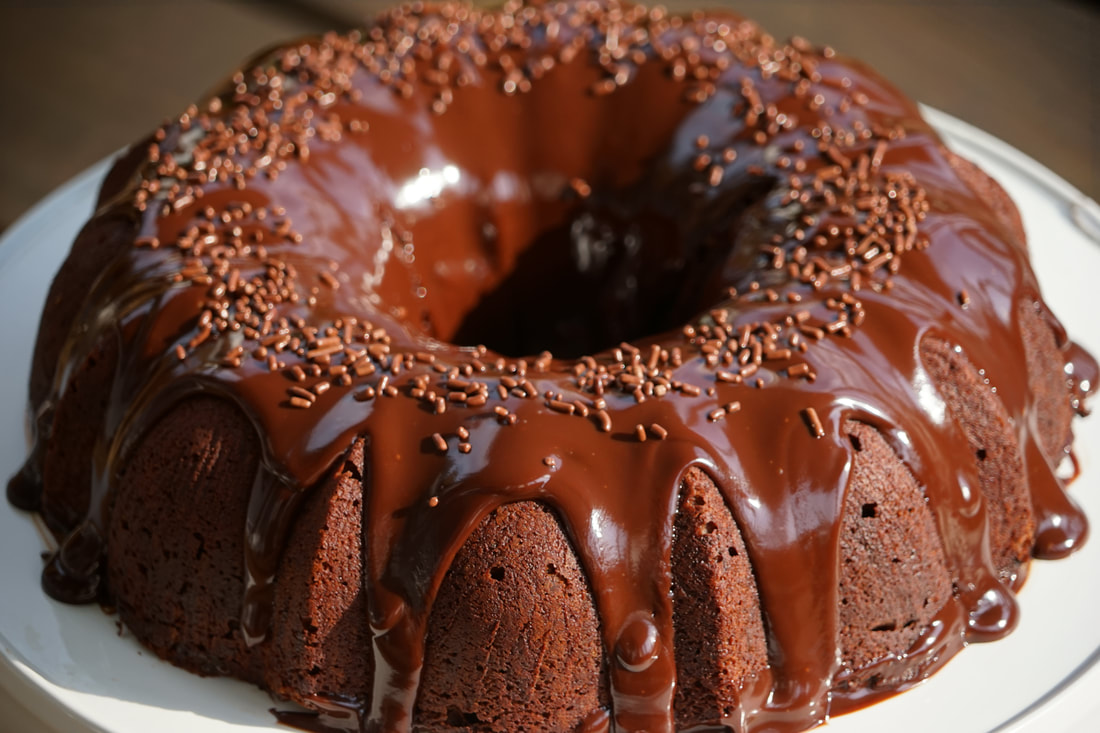 How I am just now discovering that there is such a thing as a TUNNEL OF FUDGE cake??? Seriously, where has this chocolatey, fudgey fabulousness been all my life? From the moment that I read the words "tunnel of fudge", I was in love. I actually stumbled upon this cake quite by accident. I was innocently searching molten lava cake recipes when this dreamy circle of glazed chocolate goodness popped up. How could I not go to my kitchen and make this cake immediately? Tunnel of fudge, people - TUNNEL OF FUDGE!!!
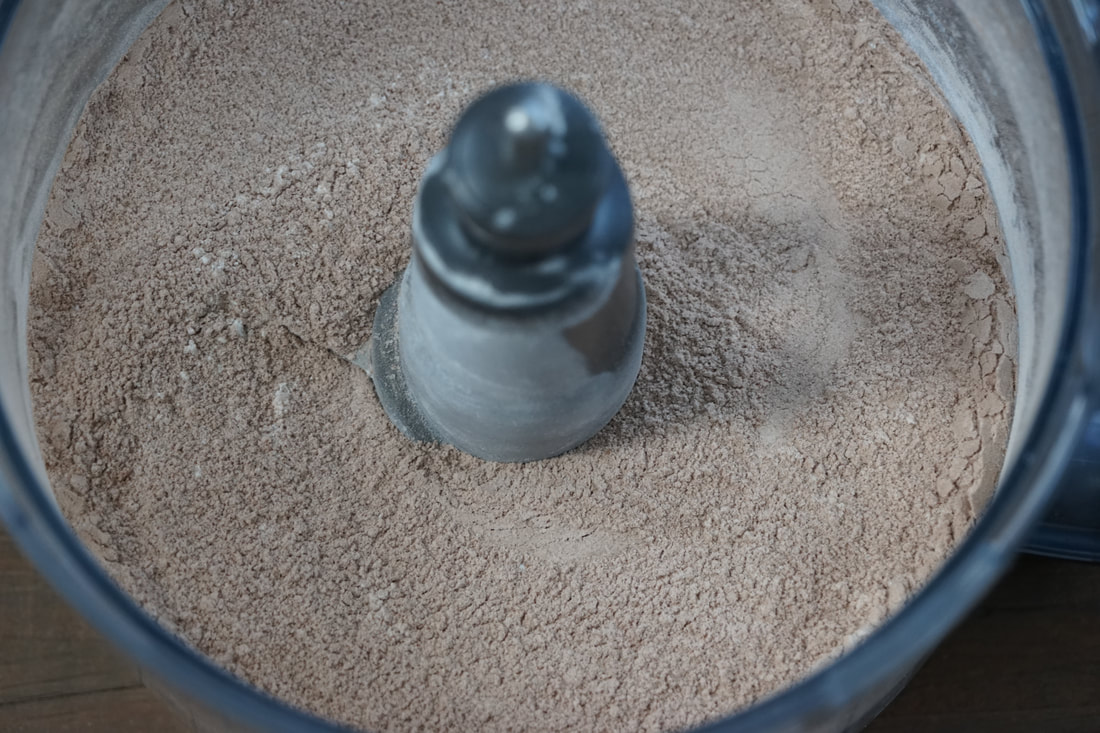
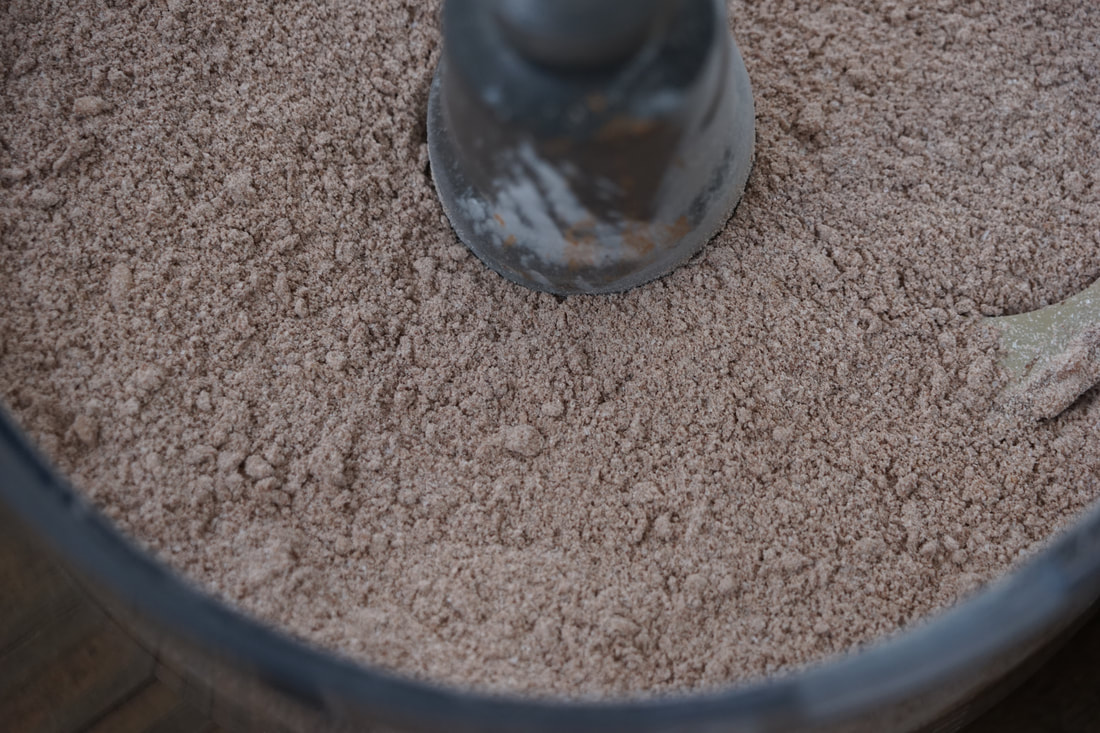
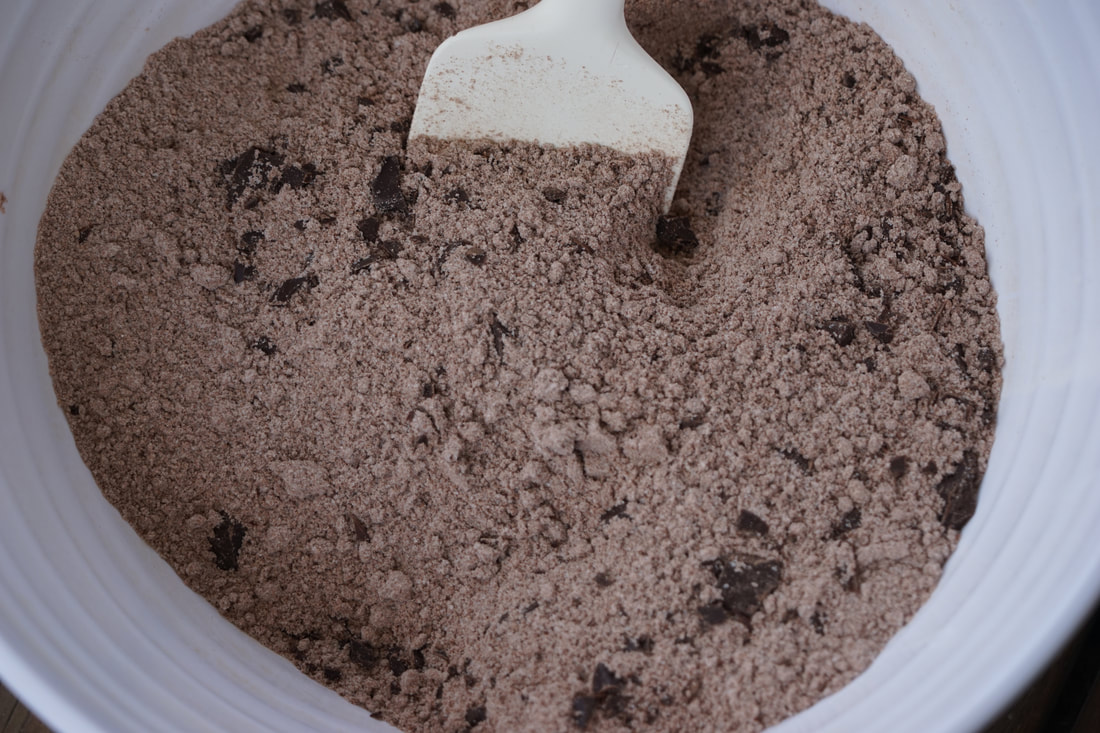
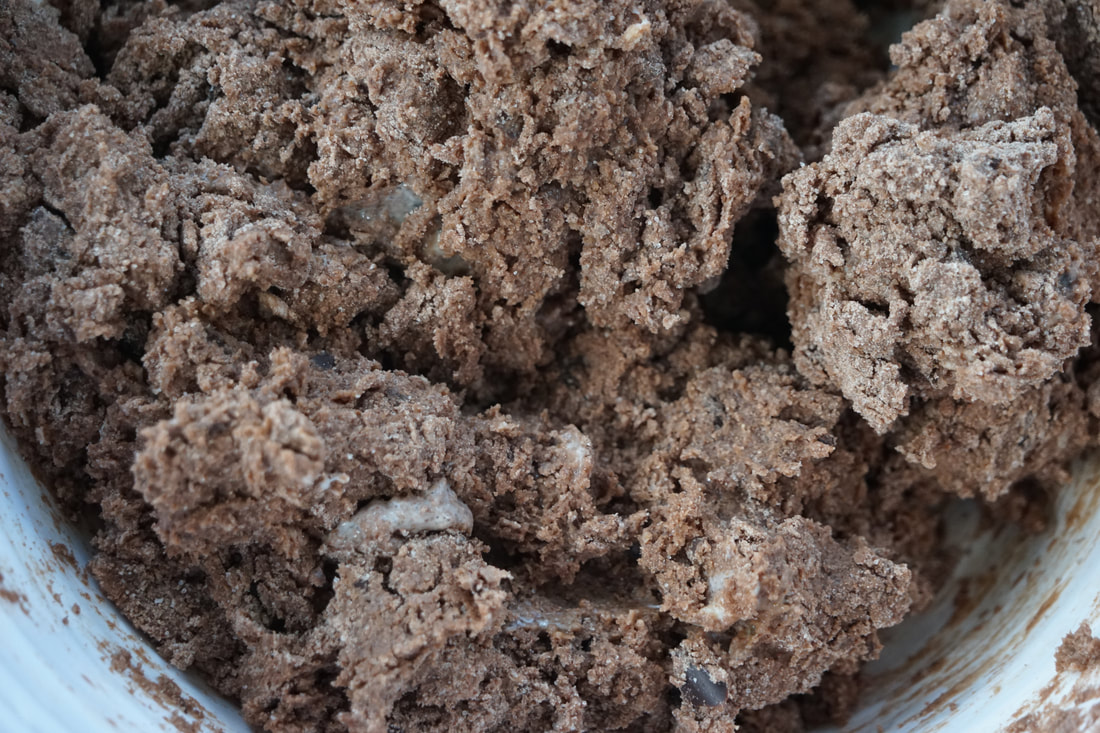
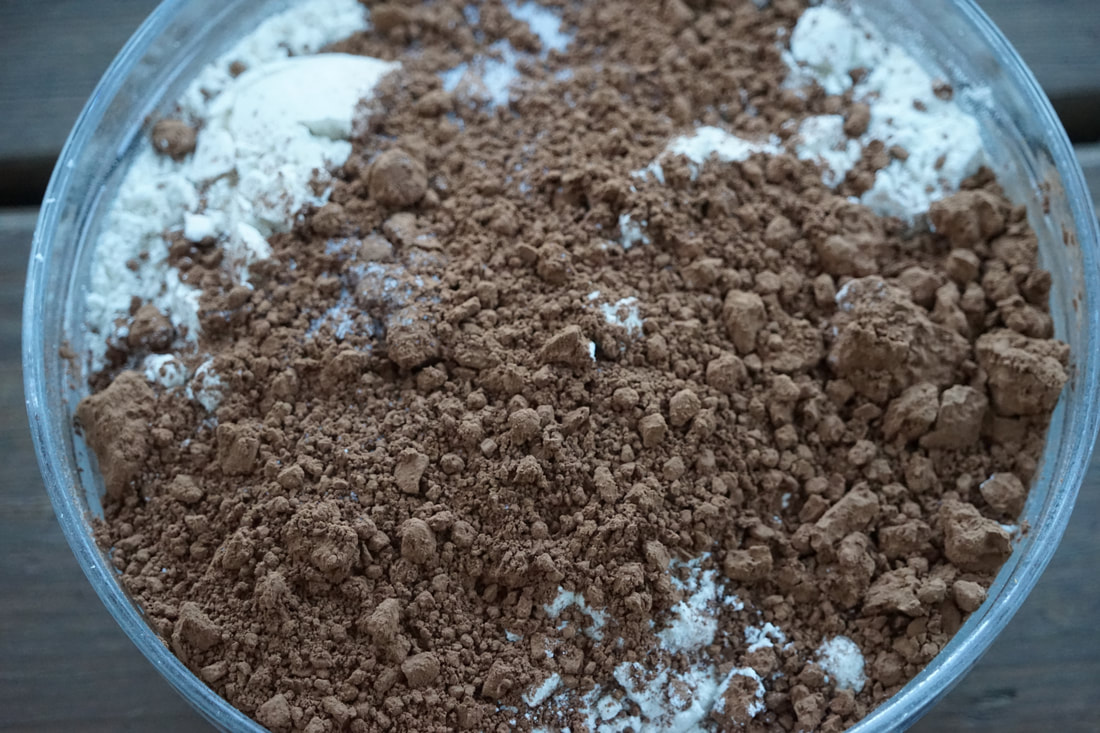
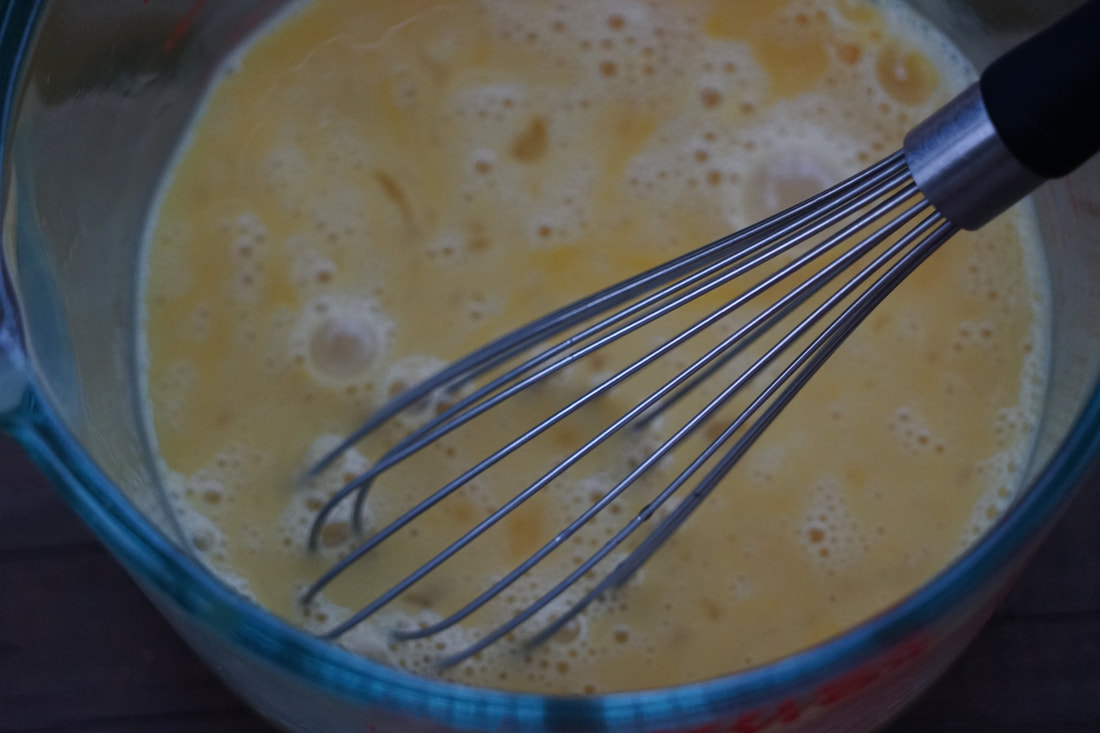
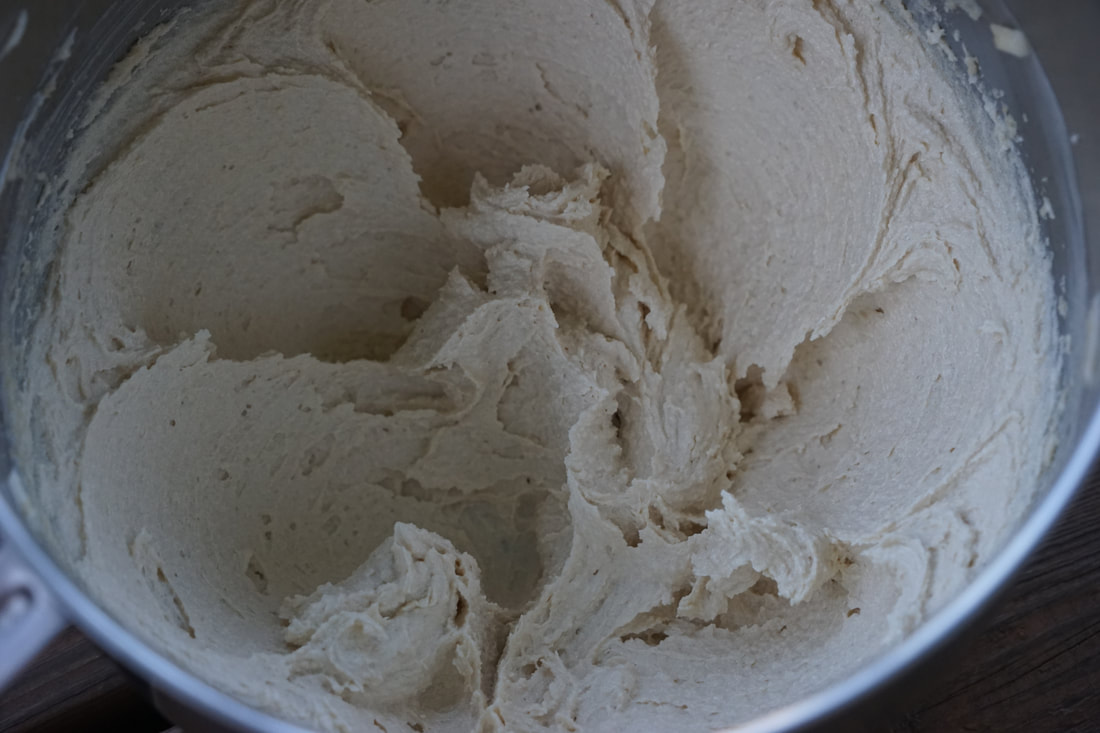
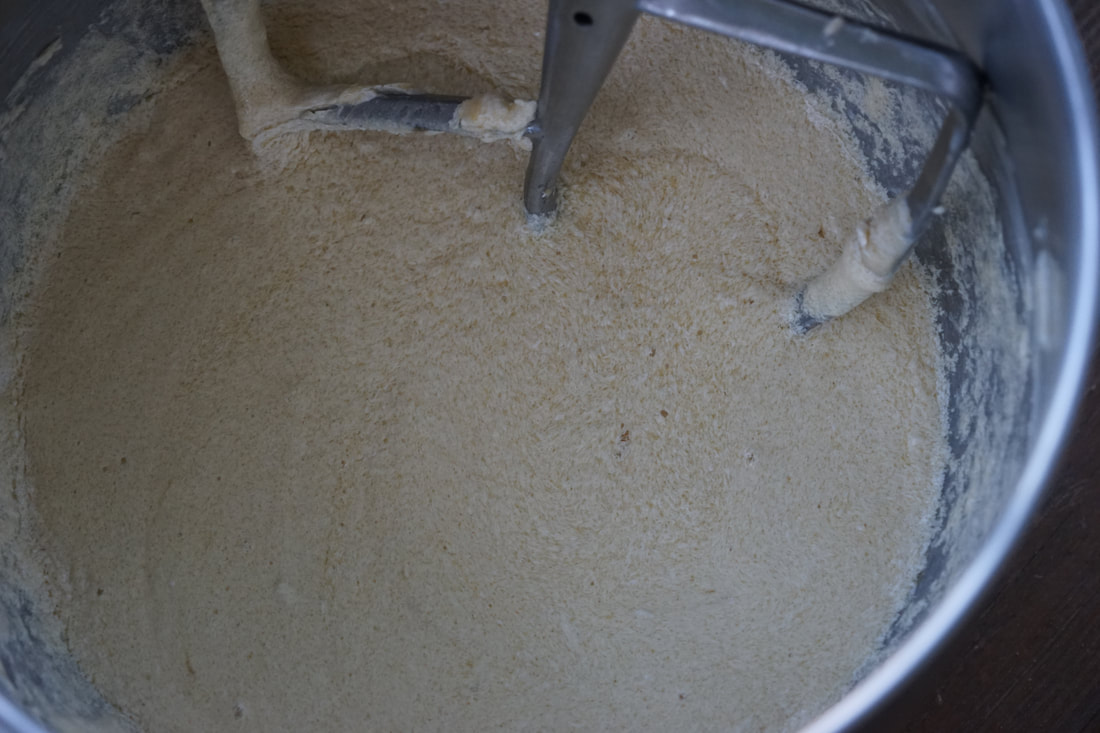
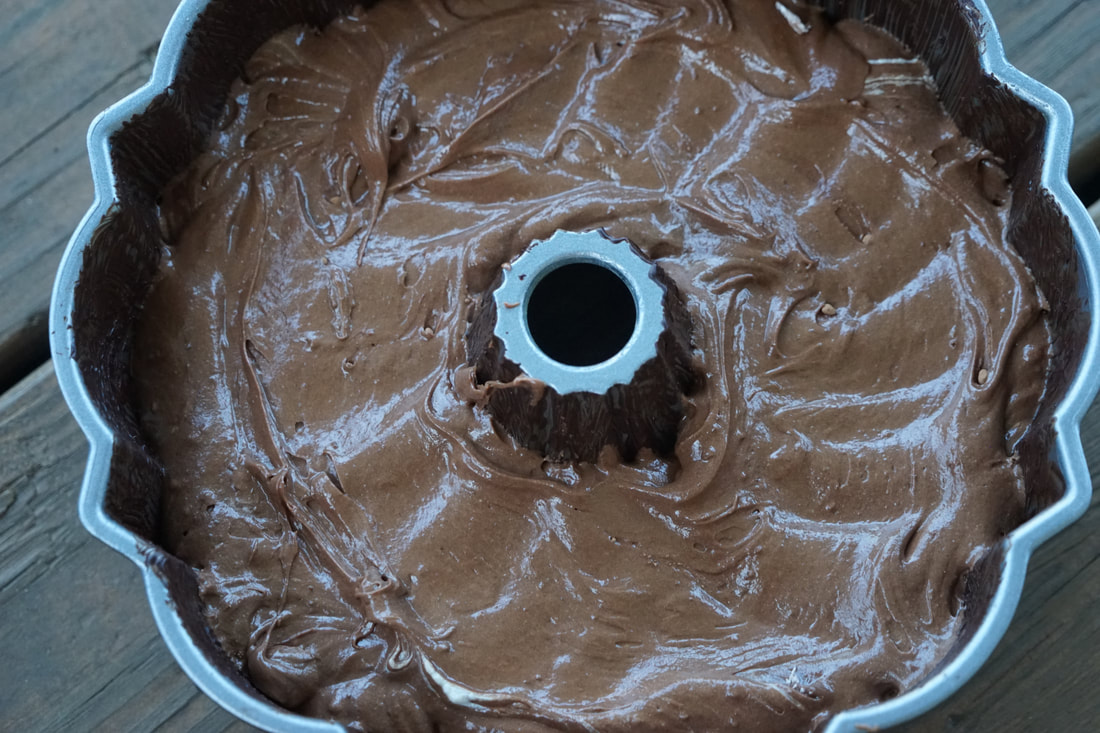
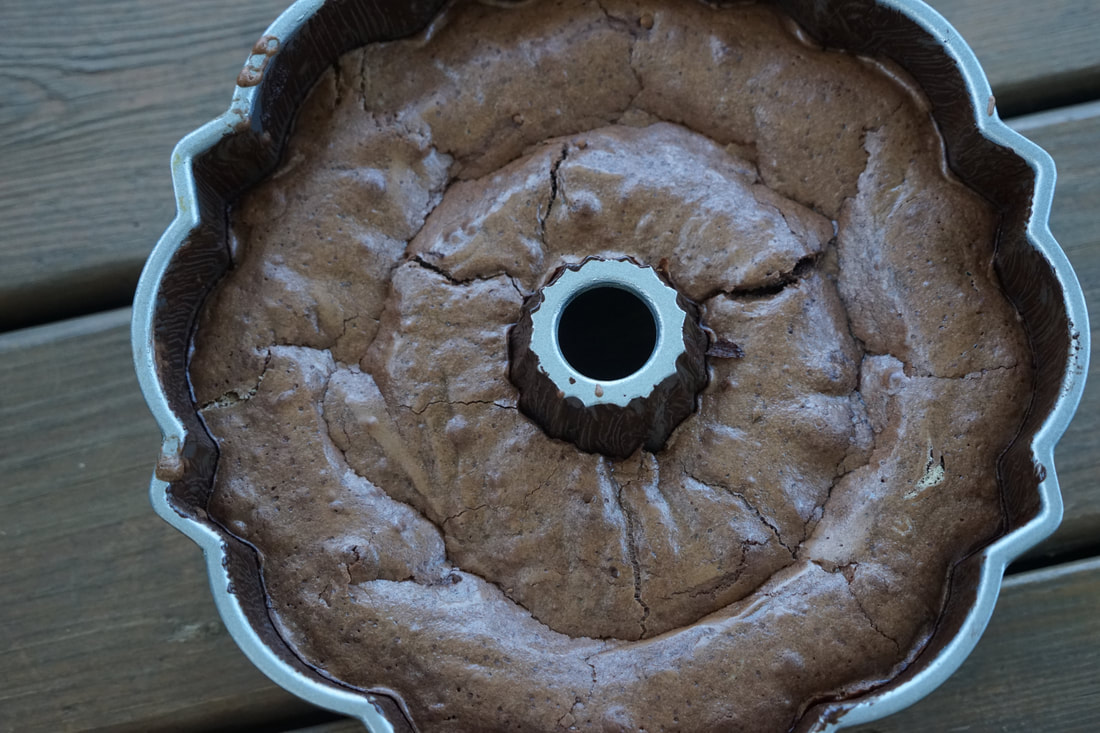
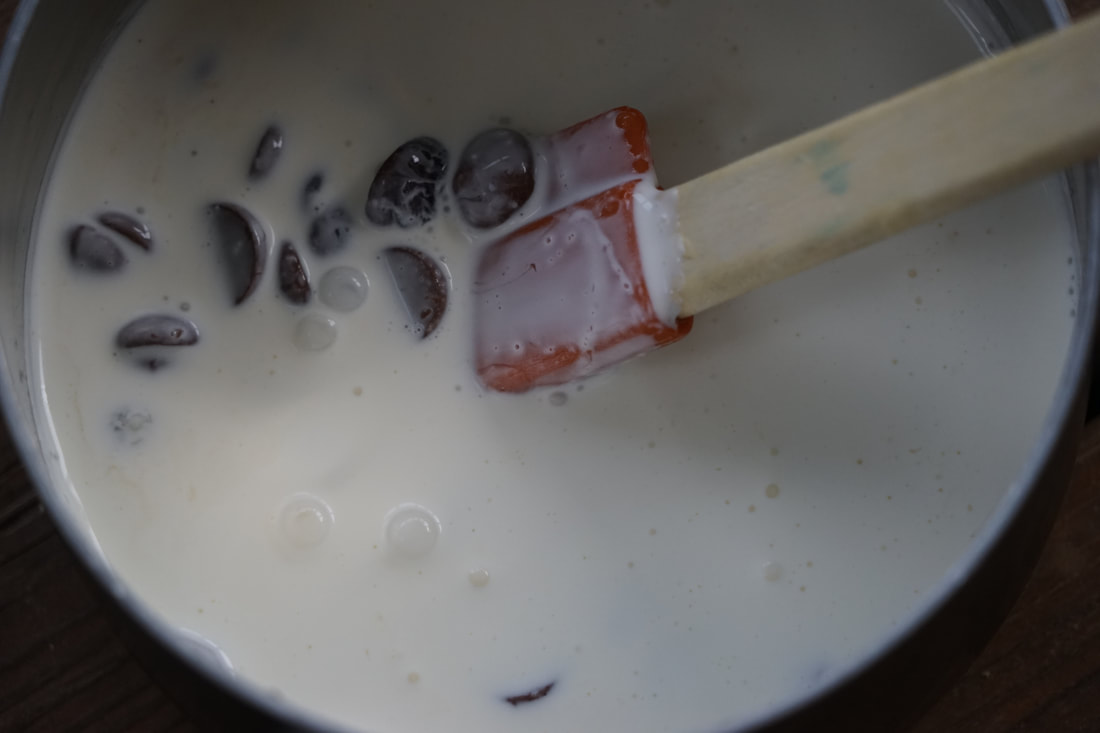
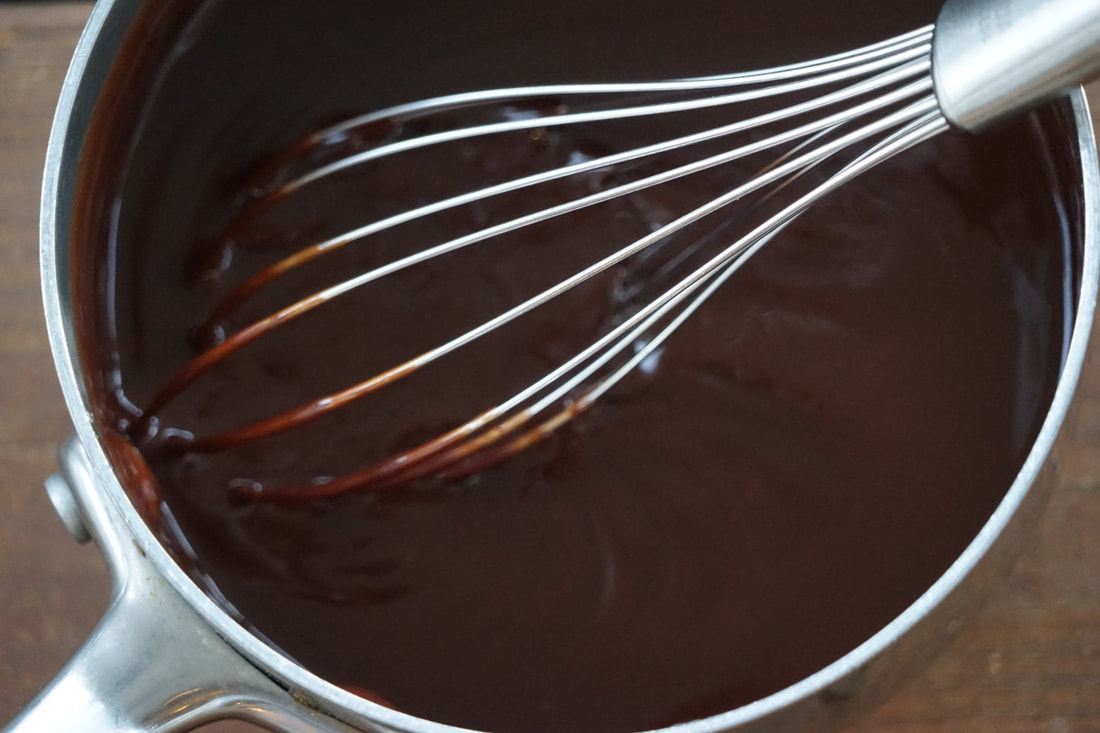
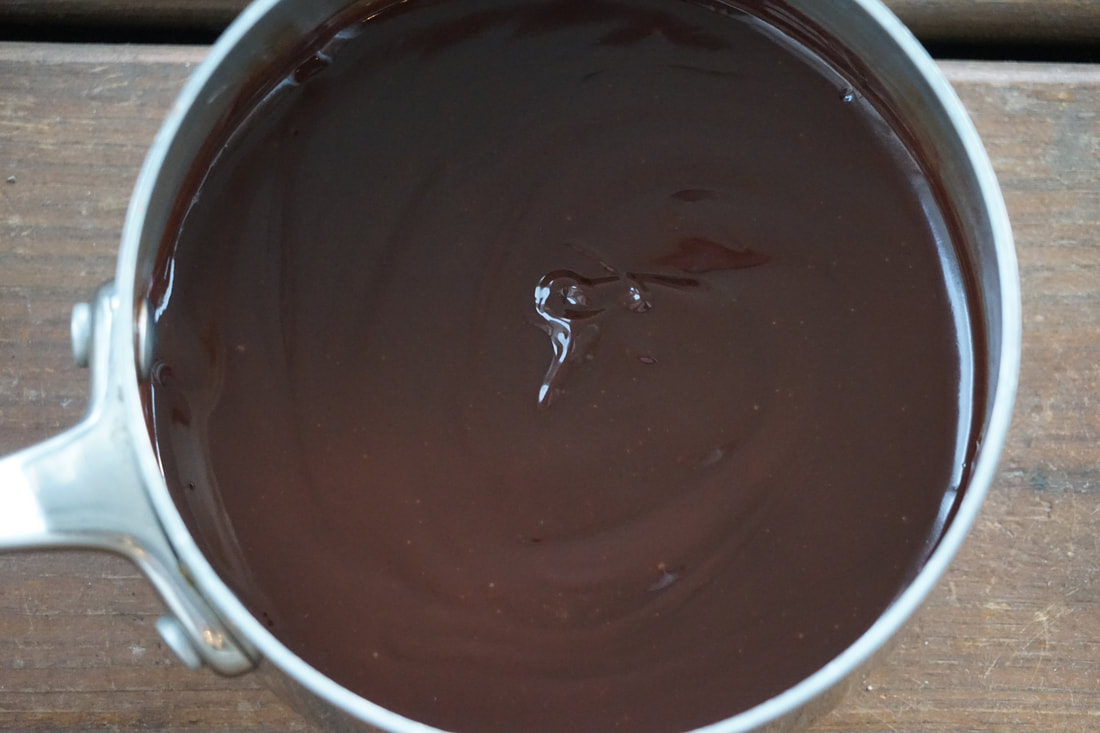
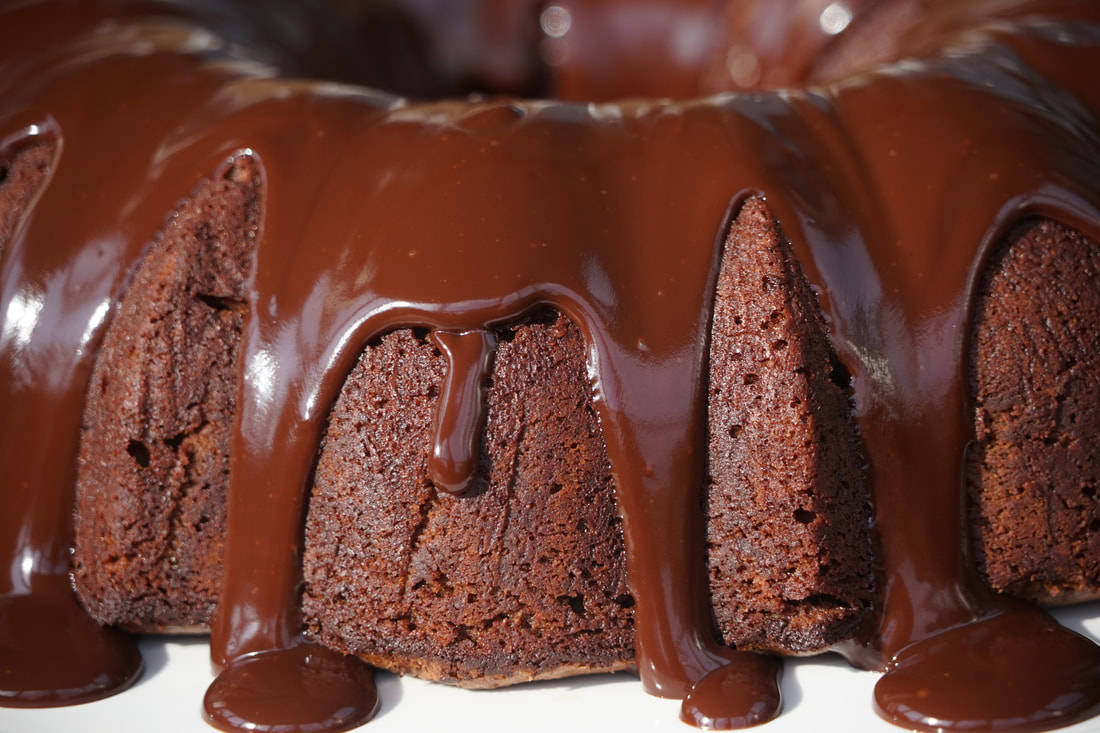
I don't claim to understand all of the science of baking but I do know the very basics behind cake baking. This cake has me absolutely astounded though. One batter that magically separates into a rich chocolate cake and a dark, fudgey center. No truffle filling, no fudge sauce poured into the center, no pudding spooned into the center. It's a true cake mystery friends. I don't know how it happens but I love it. And I'm pretty sure that you will too.  Tunnel of Fudge Cake 1 tbsp. Dutch-processed cocoa powder 1 tbsp. unsalted butter, melted For the cake: ½ cup boiling water 2 oz. bittersweet chocolate, chopped 2 cups (10 oz.) all-purpose flour ¾ cup (2¼ oz.) Dutch-processed cocoa powder 2 cups (8 oz.) confectioners’ sugar 1 tsp. salt 5 large eggs, at room temperature 1 tbsp. vanilla extract 1 cup (7 oz.) granulated sugar ¾ cup packed (5¼ oz.) light brown sugar 20 tbsp. (2½ sticks) unsalted butter, at room temperature For the glaze: ¾ cup heavy cream ¼ cup light corn syrup 8 oz. bittersweet chocolate, finely chopped ½ tsp. vanilla extract
Cool 1 1/2 hours before inverting onto serving platter. Cool 2 hours before slicing. 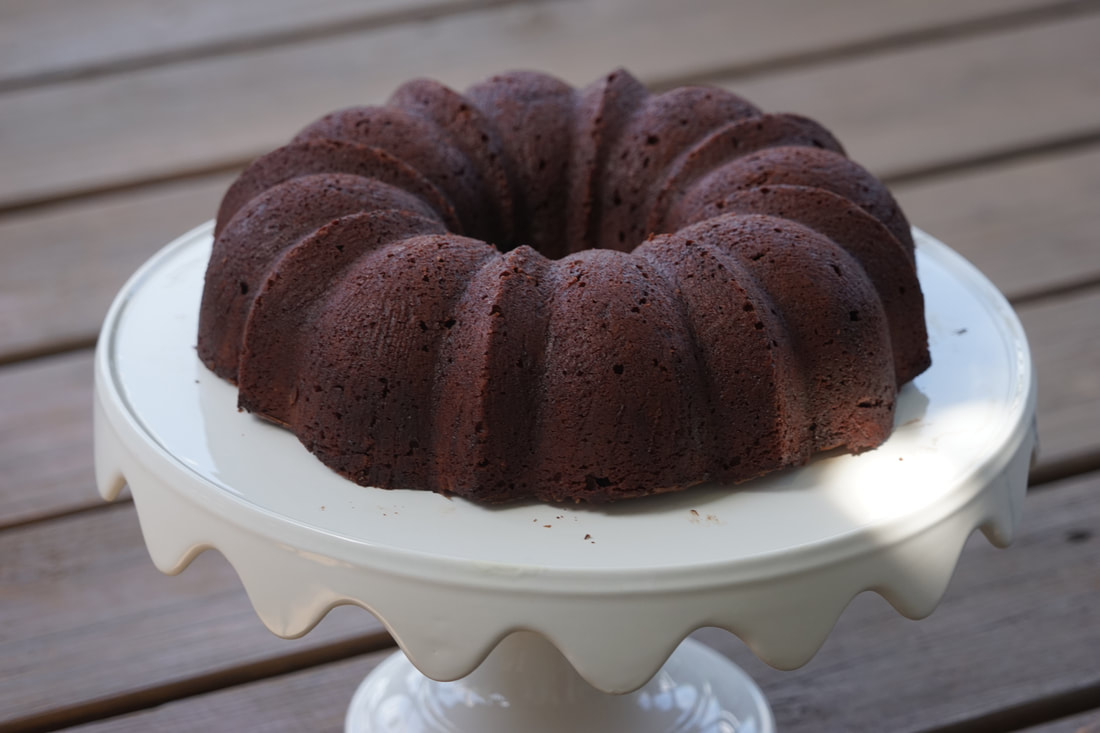
Drizzle over cake and allow to stand for 10 minutes to set.
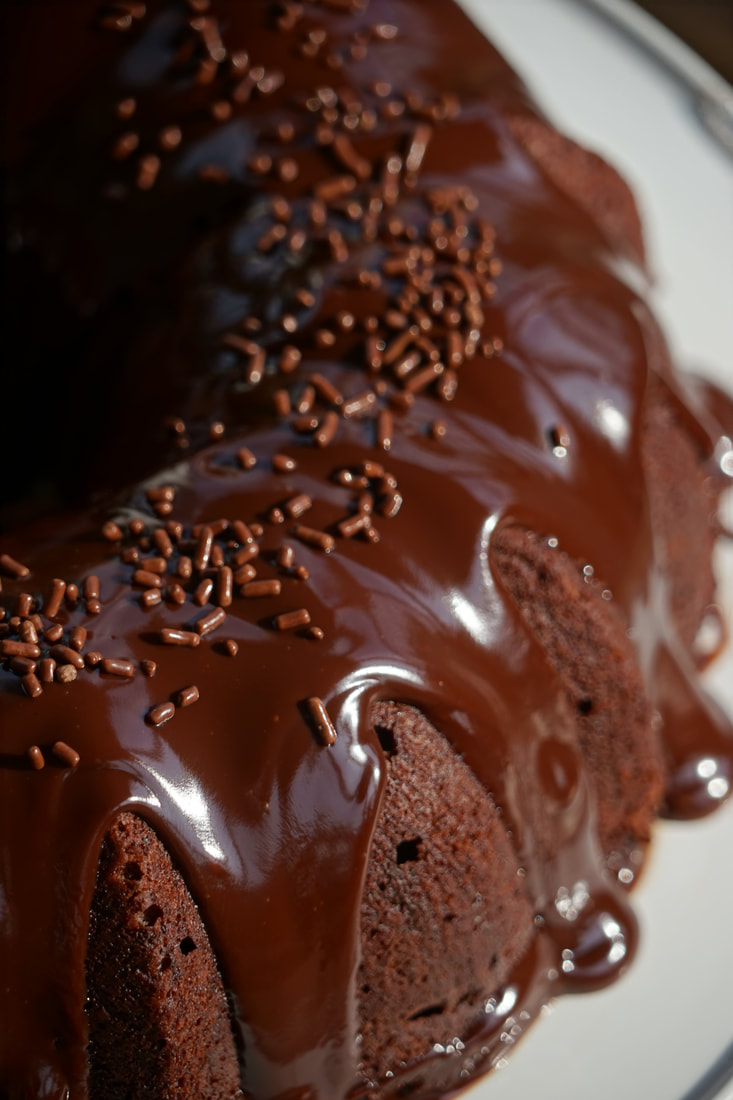
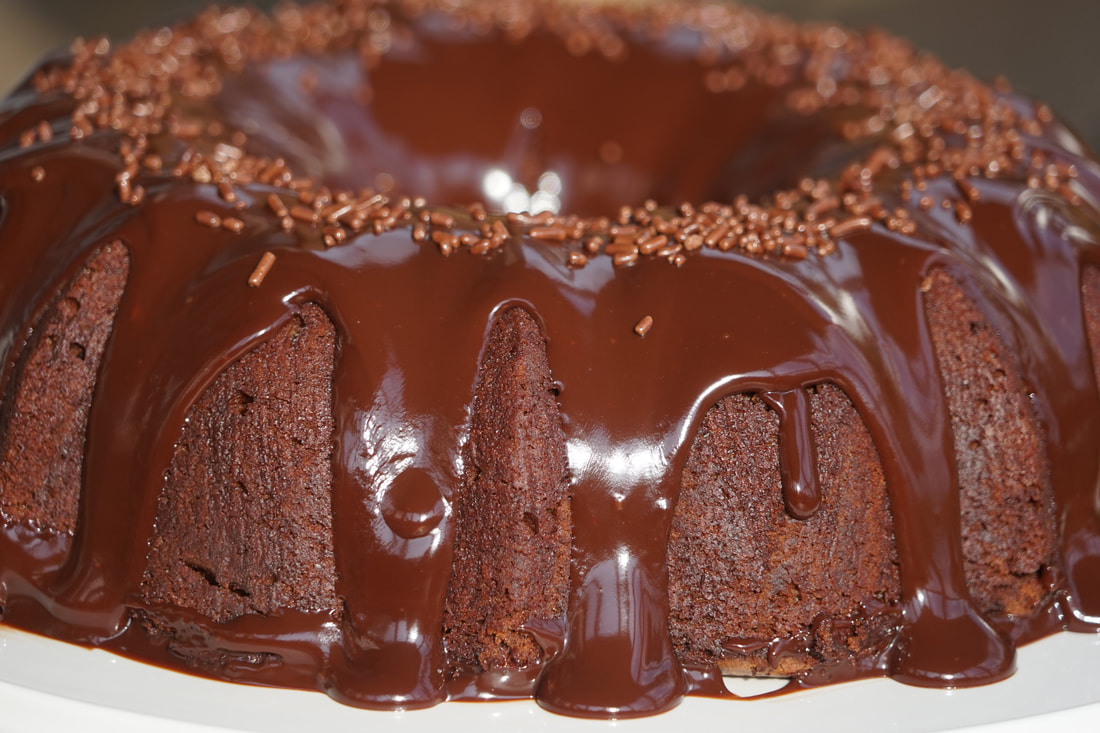
Decorate with sprinkles.
 Some days, I just need chocolate in my life. Like days when my sweet girl is packing up her room and getting ready to move into her apartment at college. It's a good thing we have chocolate in the house this week - I'm gonna need it.
Ciao! |