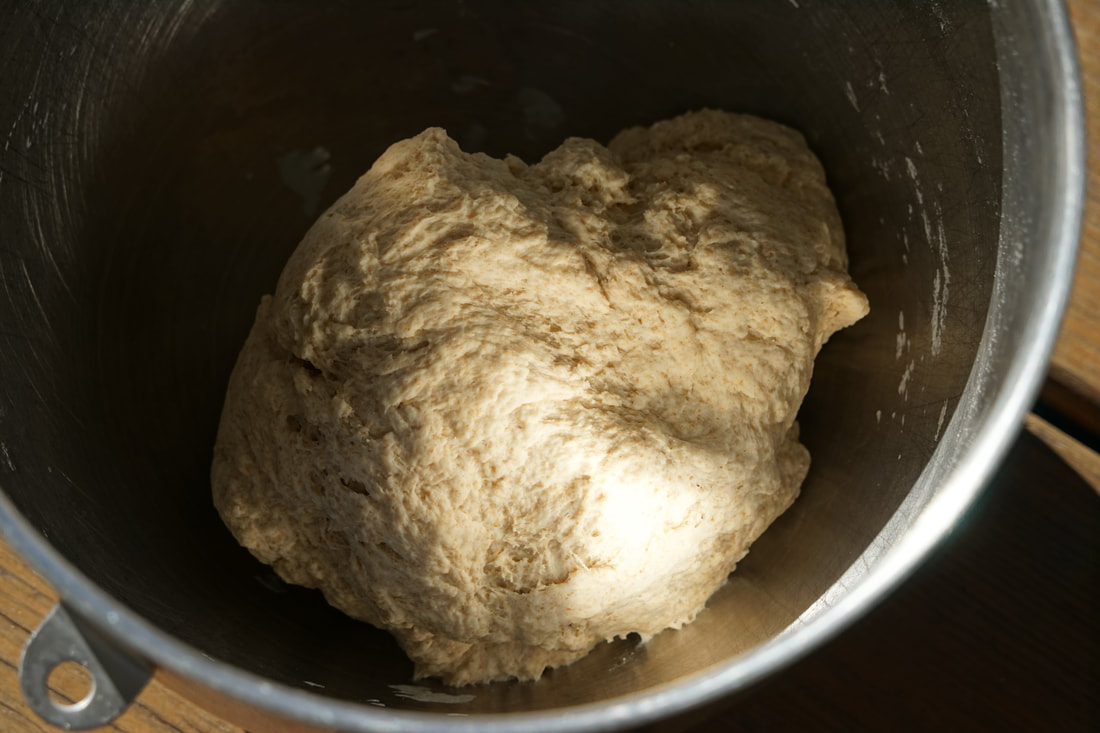
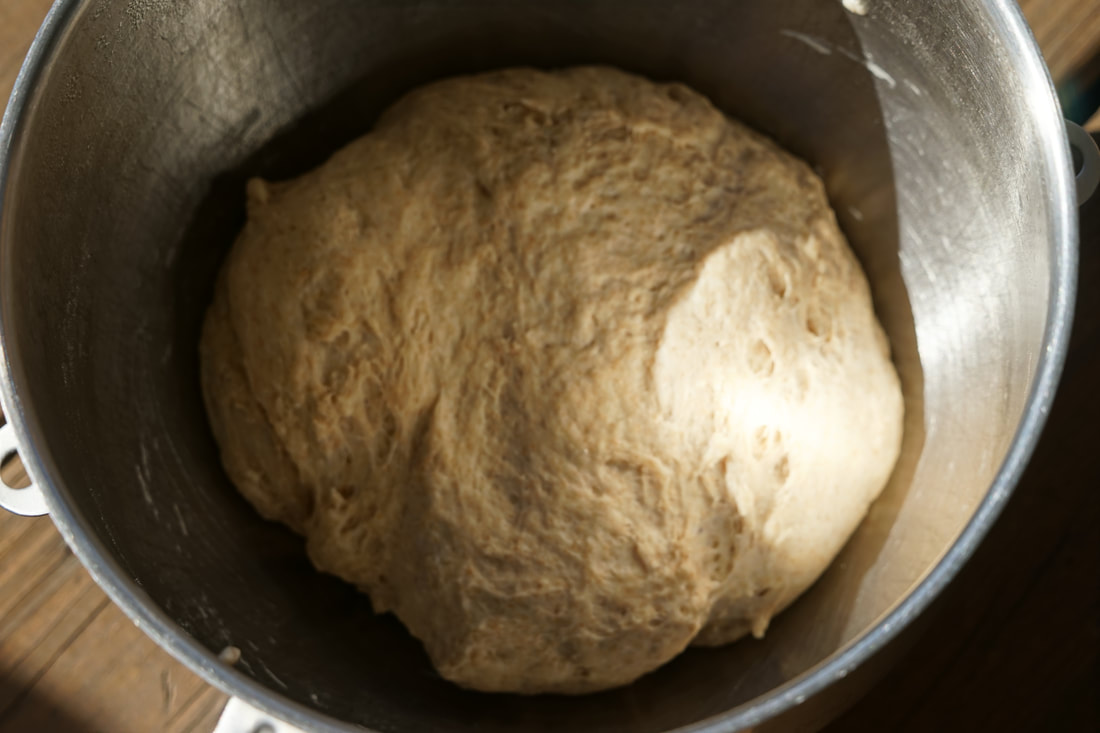
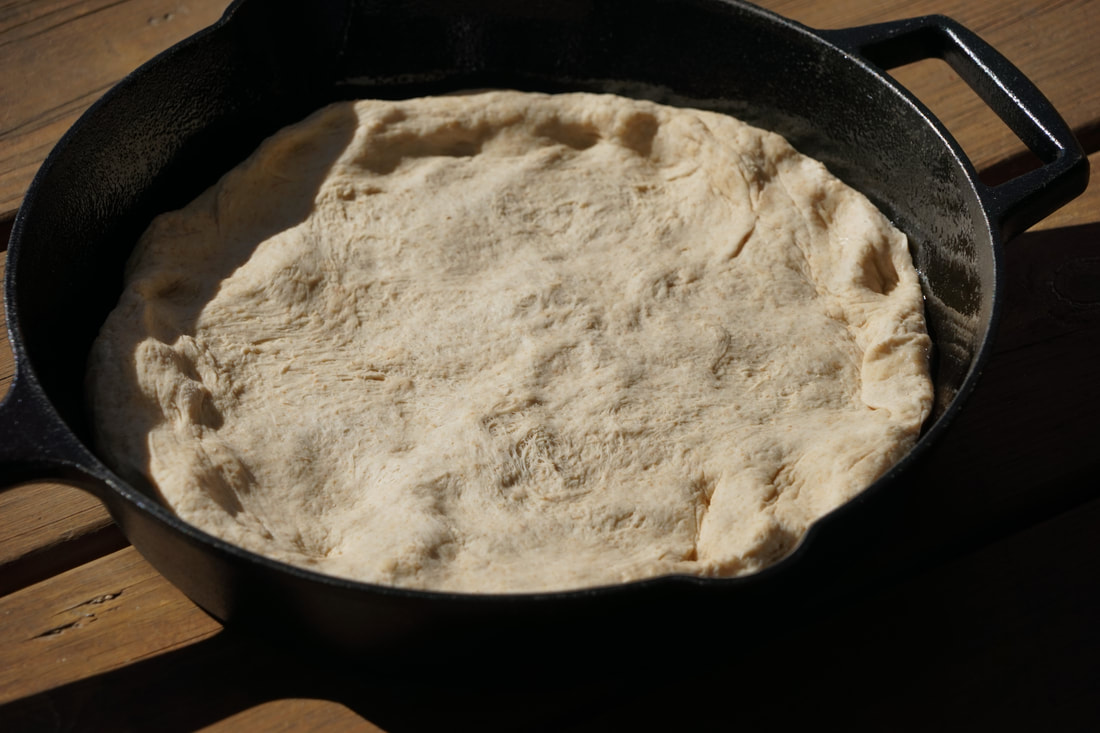
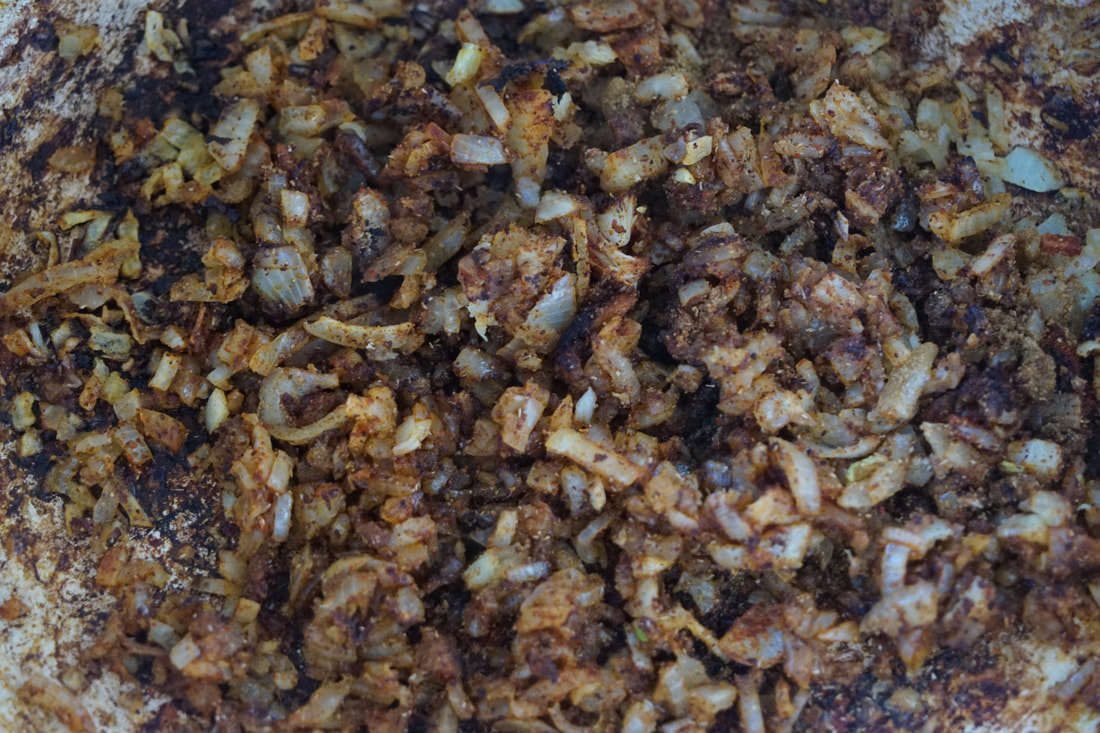
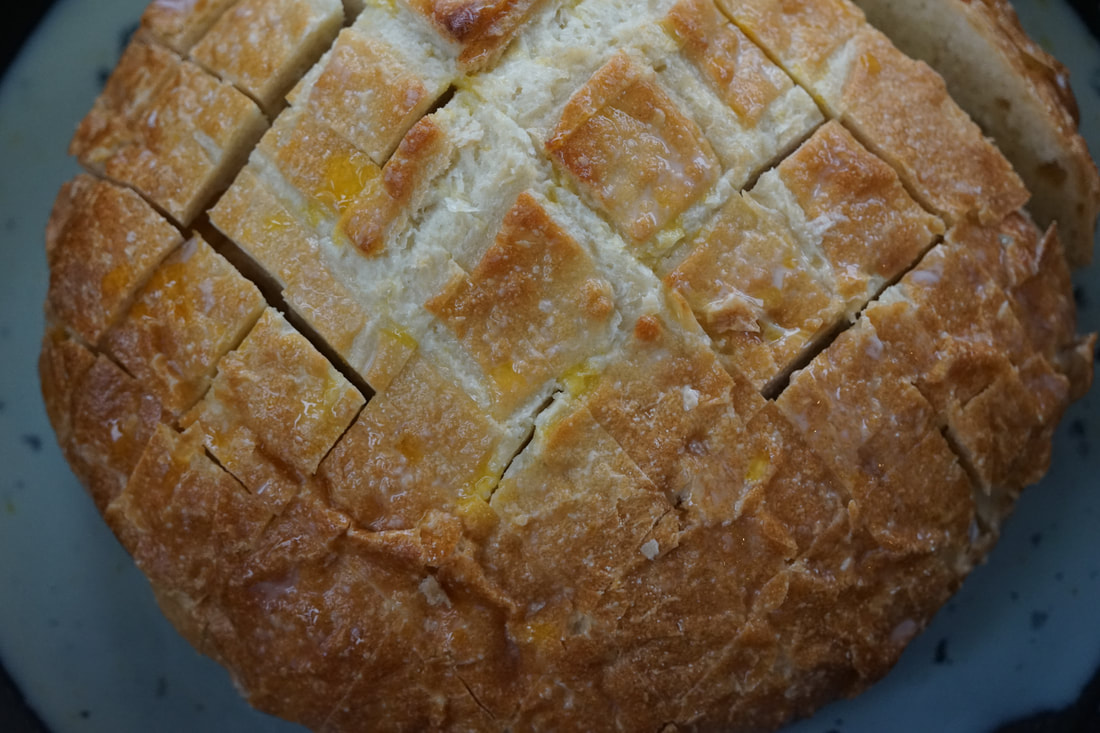
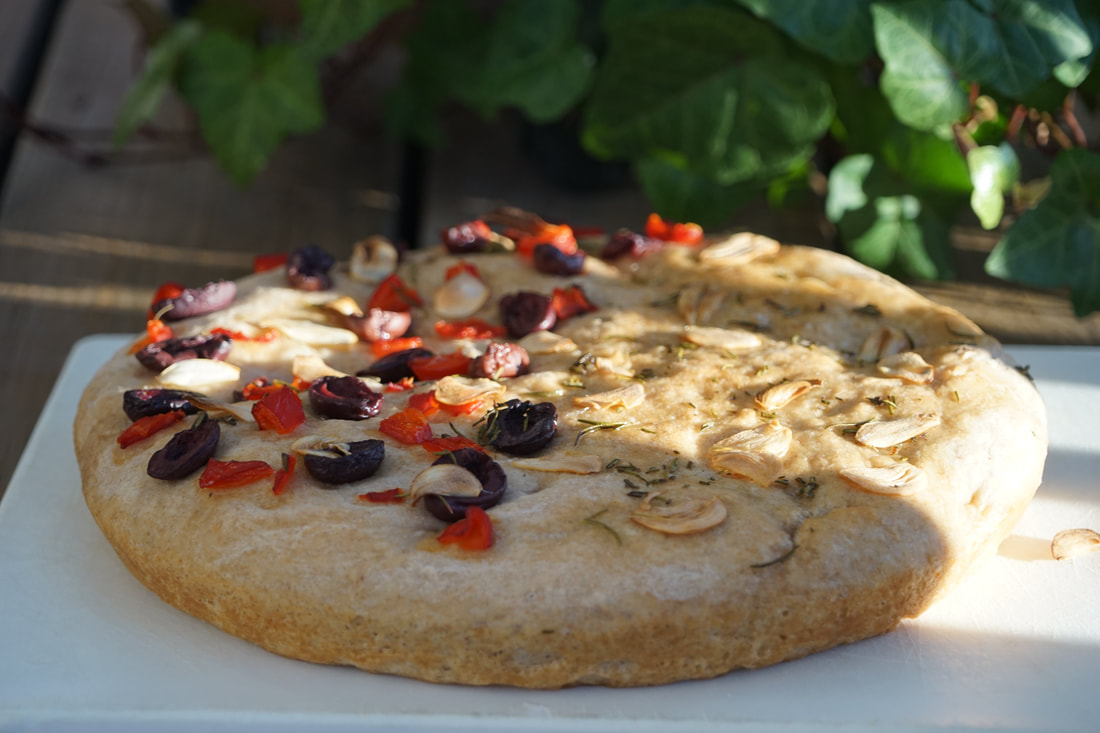
 I would describe myself as a rule breaker and I am married to the ultimate rule follower. I'll give you an example. The moment that someone tells me that I can't do something, my brain instantly starts to devise a way around the obstacle so that I CAN do it. It's just how I'm wired. If you tell my husband that he can't do something, he accepts the boundary and rarely questions the rule. Let's just say that I question EVERYTHING and my beloved accepts regulations and restrictions much more willingly. I am the reason that we ended up on all sorts of crazy "trails" on our trip through Hawaii and he is the reason that we came back without any broken bones. There are a lot of times that I wish that I could be more compliant because it sure would save me a lot of headaches. It's kind of ironic that we have two children and one of them shares Ben content personality and the other has much more of my passive aggressive personality. I won't tell you which is which but if you've ever met them - you know exactly who resembles who. 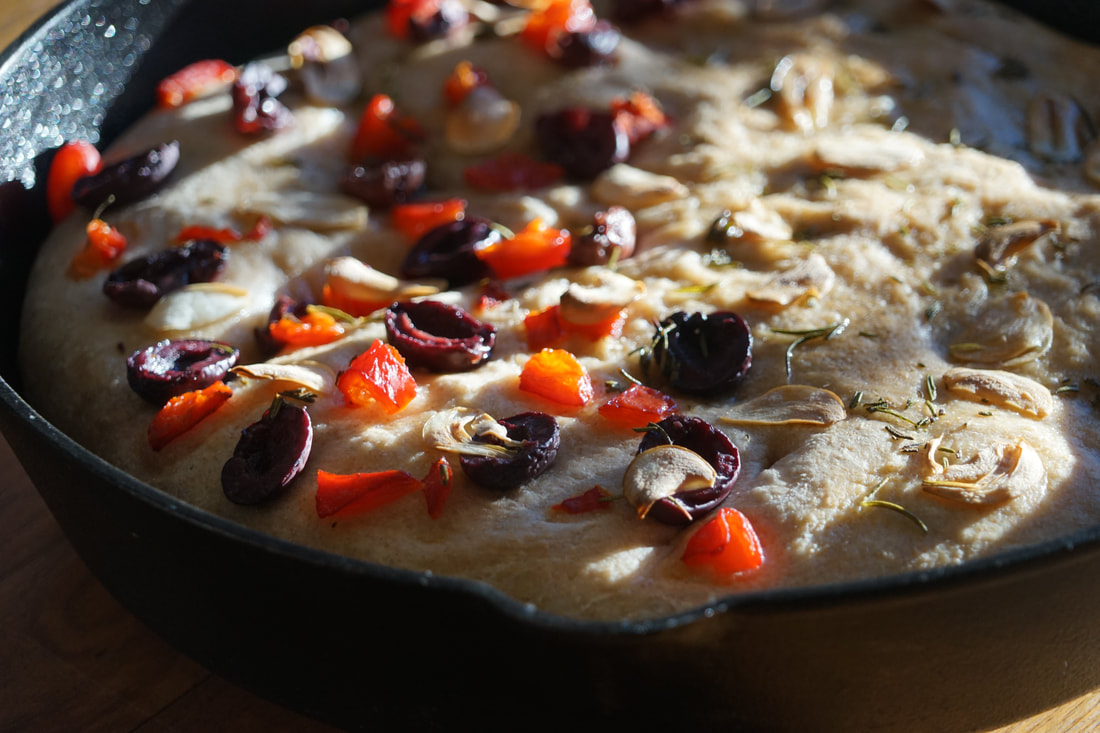 My rule breaking characteristics carry over into my cooking and baking way more than I would like to admit. I modify recipes just to see if I can. Sometimes my adjustments makes recipes easier and sometimes they make them more appealing to my family. Sometimes I change recipes them just for the sake of creating an original. This Olive and Red Pepper Focaccia is a perfect example of a recipe that's been Amy-fied. There were some changes that I made to this recipe to adapt it to the tastes my family. There were other changes that I made because I just completely screwed up. (Oh yeah, that's the other reason that I change recipes.) I must have read through this recipe 4 times before I started to make it and I STILL added all of the flour right at the beginning instead of waiting until after the first rising. I am going to give you the recipe that I WANTED to make instead of the one that I actually created. Just be warned that some of the pictures will seem a little off from the instructions. 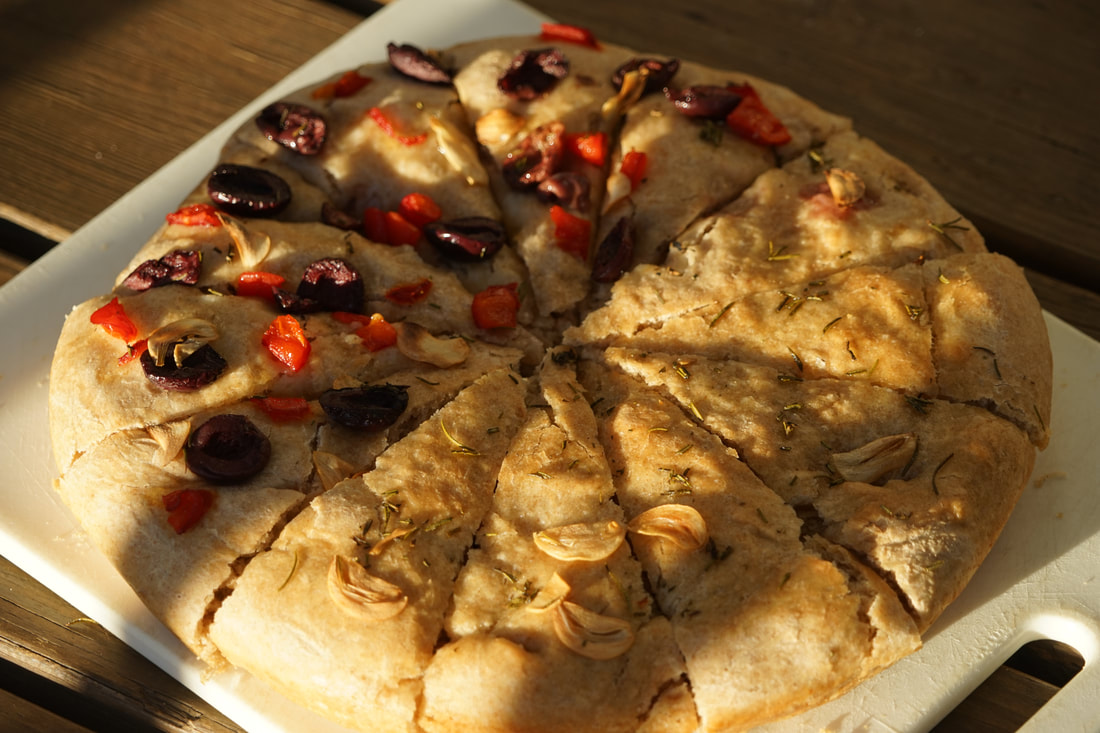 Olive and Red Pepper Focaccia 3 cups flour 3/4 whole wheat flour 1 3/4 teaspoon salt 1/2 teaspoon yeast 1 1/2 cups warm water 1/4 cup chopped Kalamata olives 1/4 cup chopped roasted red peppers 2 teaspoons fresh rosemary leaves 2 cloves garlic, sliced 1 Tablespoon olive oil
Drizzle with additional oil prior to serving.  Remove loaf from pan and cool completely on cutting board. 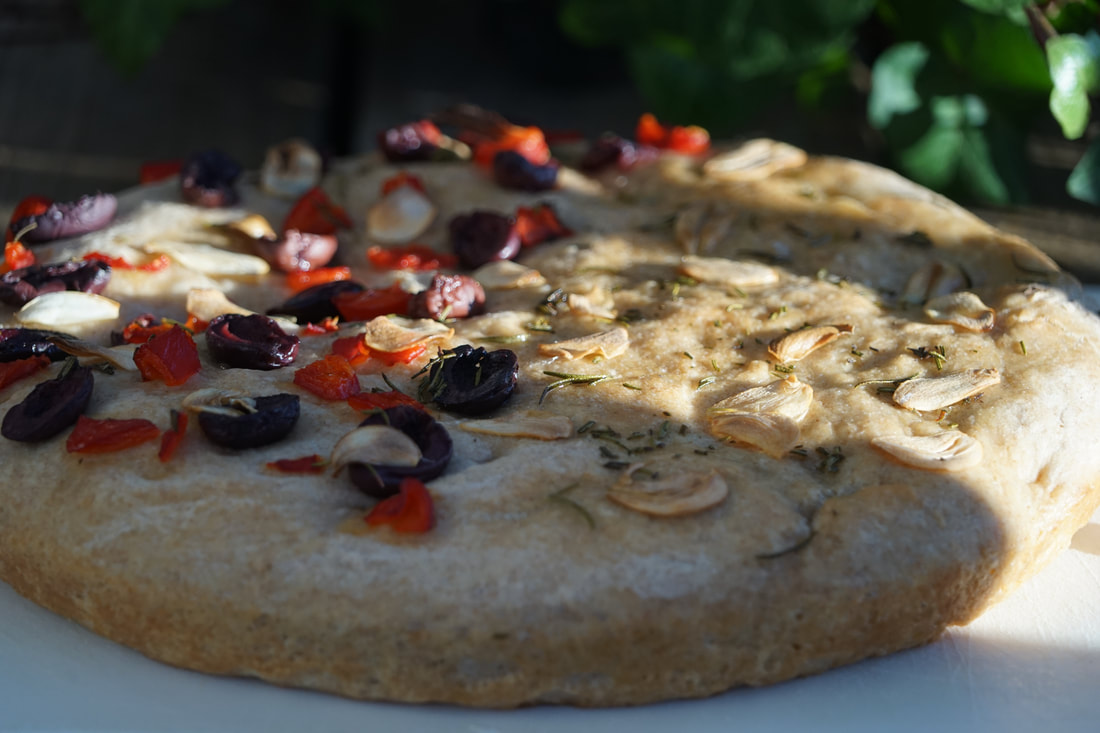 Slice focaccia. 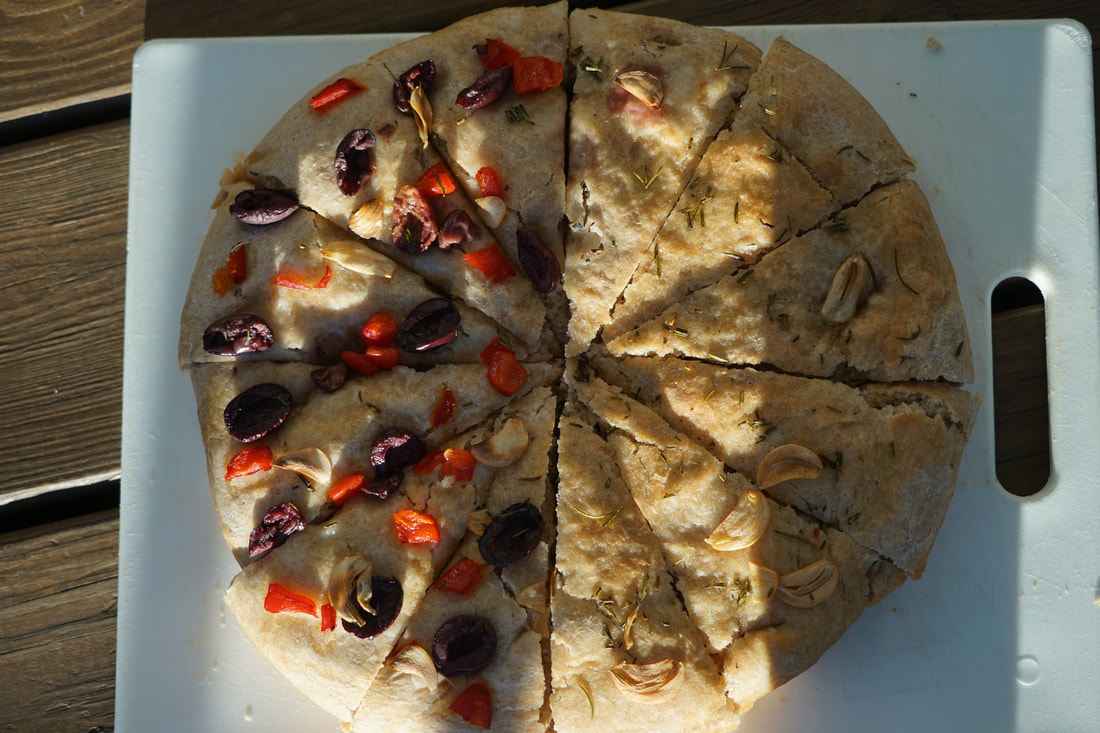 Serve. 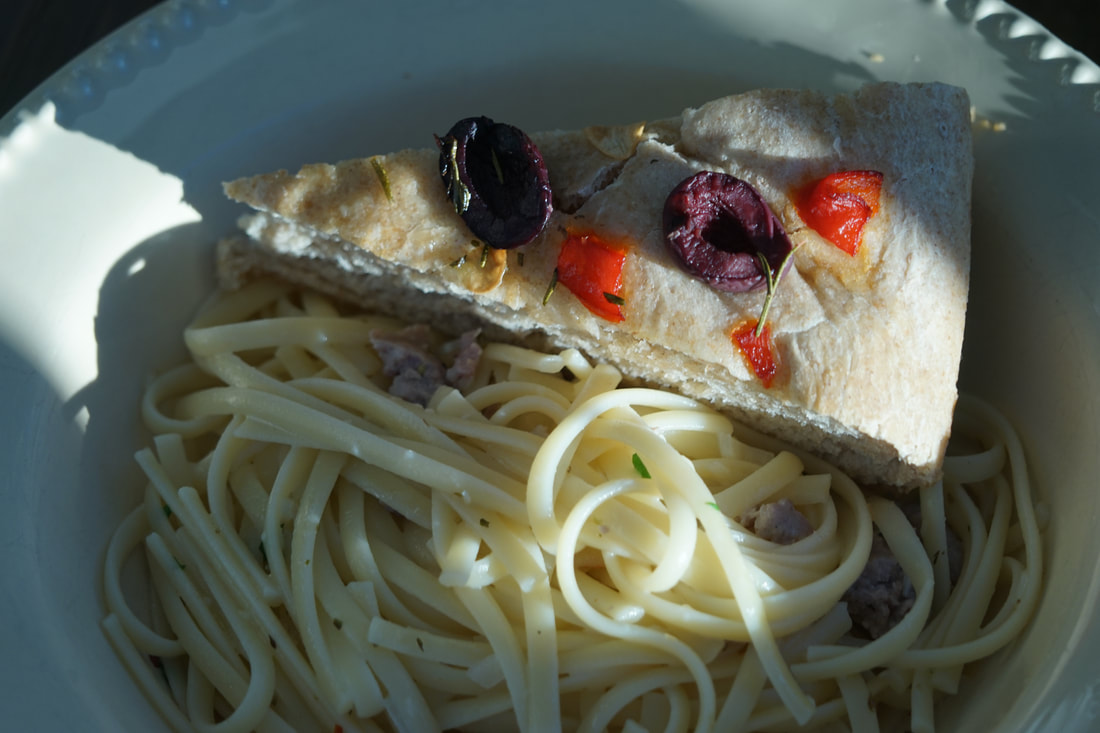 Well, I'm categorizing this focaccia as a lucky accident. My flour mistake really didn't seem to alter the results too much although to be honest, I really don't know what this focaccia was SUPPOSED to taste like. All I can say is that my focaccia was crispy on the bottom, soft and chewy inside and seriously delicious. Now I guess I need to make another batch of focaccia - the right way - to see if it comes out even better than my first loaf.
Ciao!
0 Comments
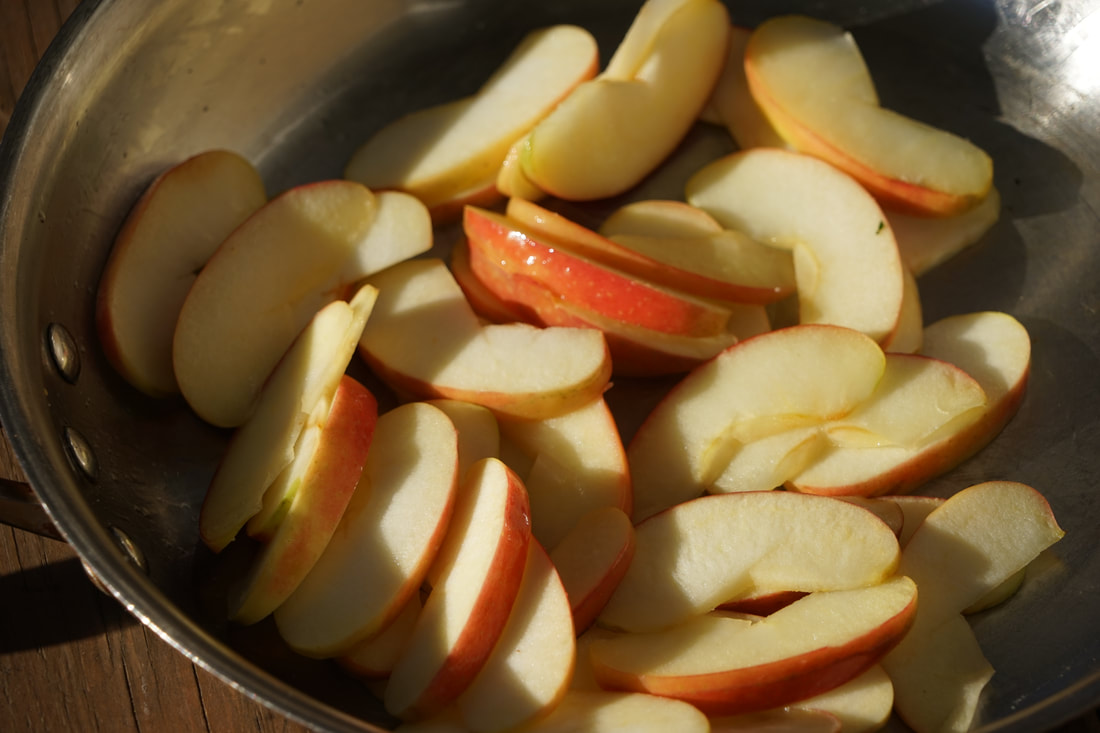
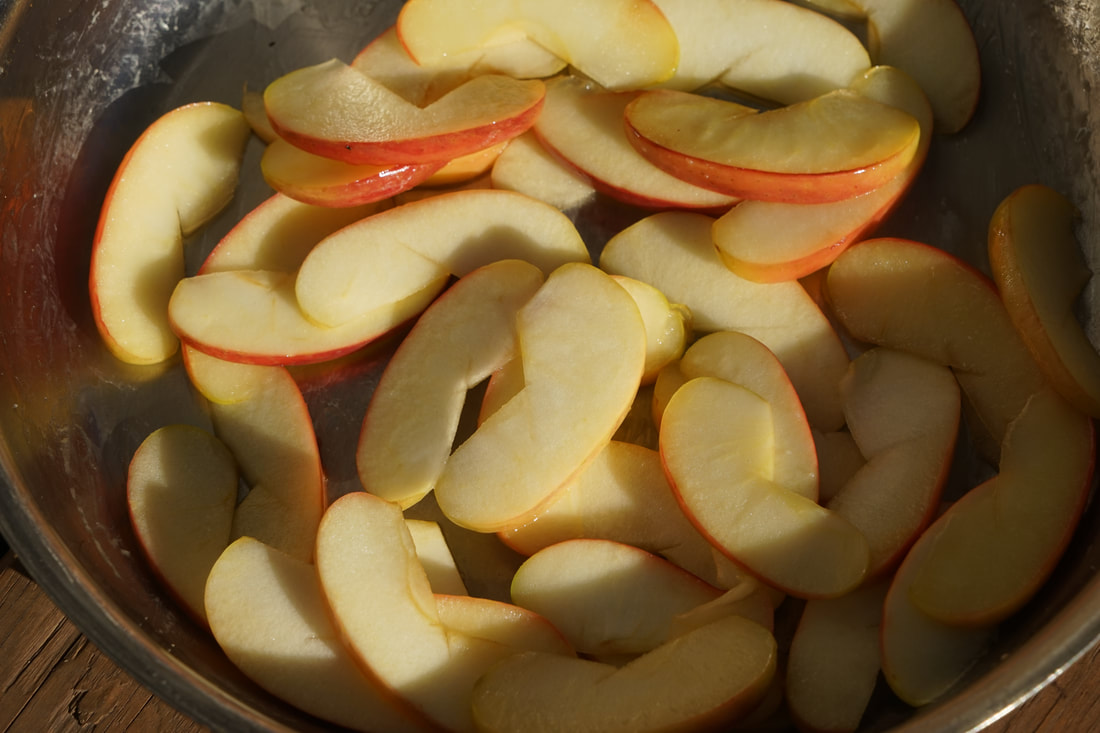
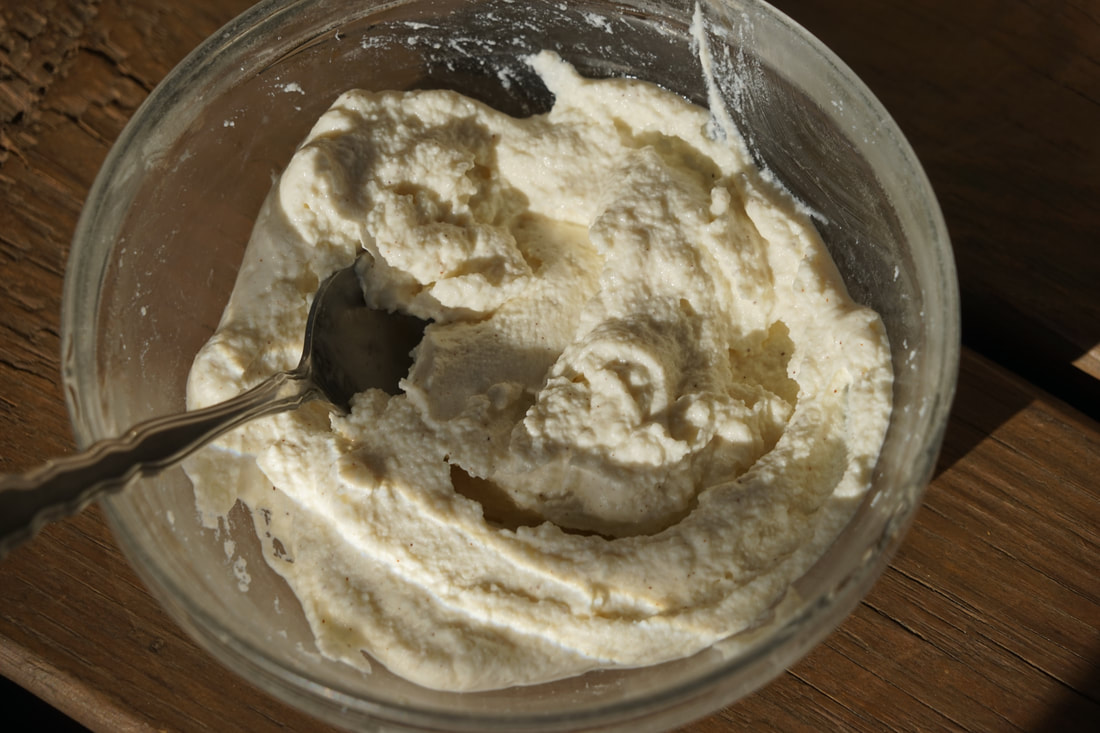
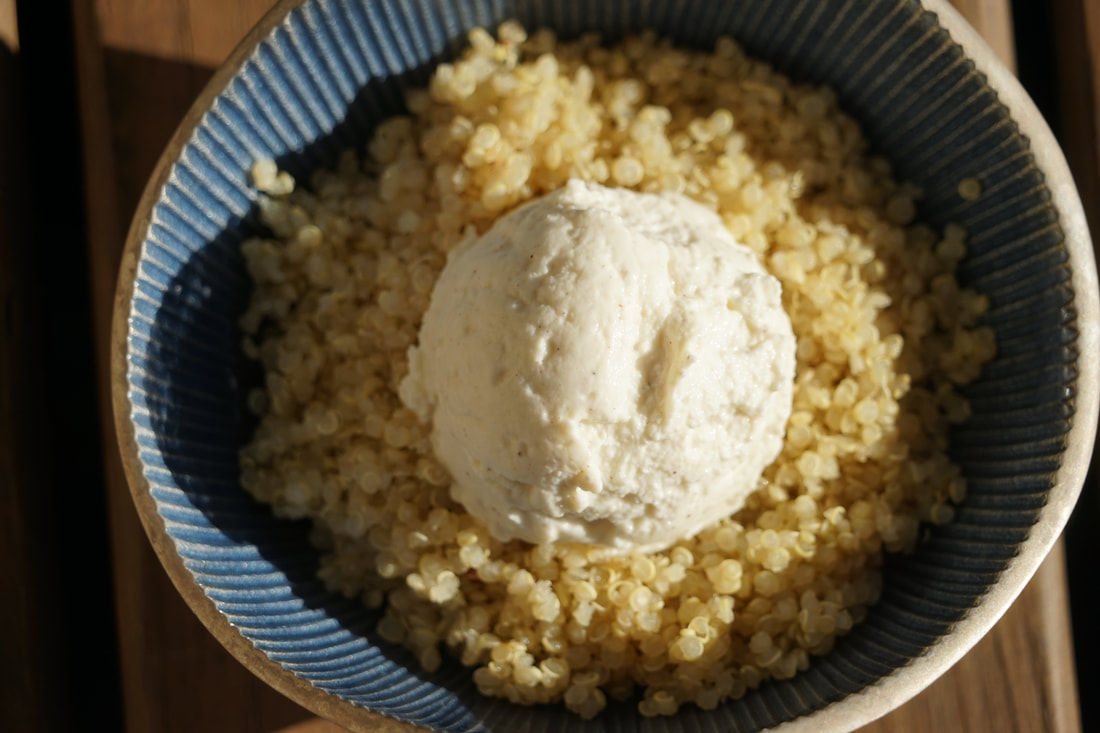
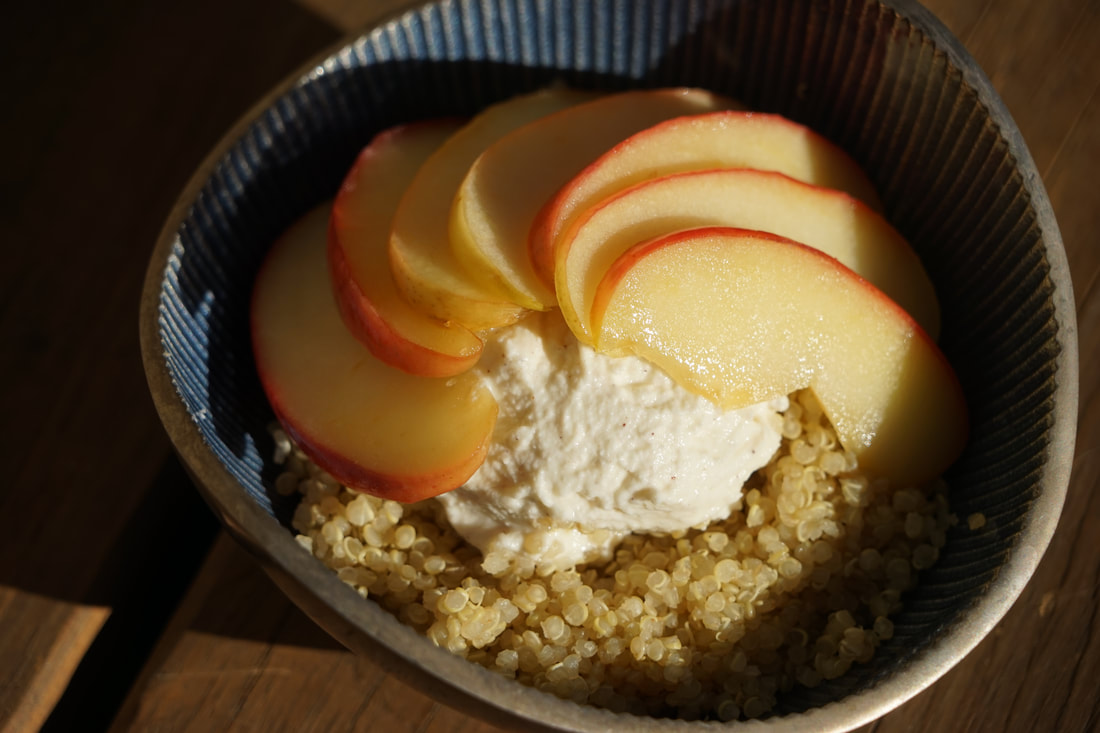
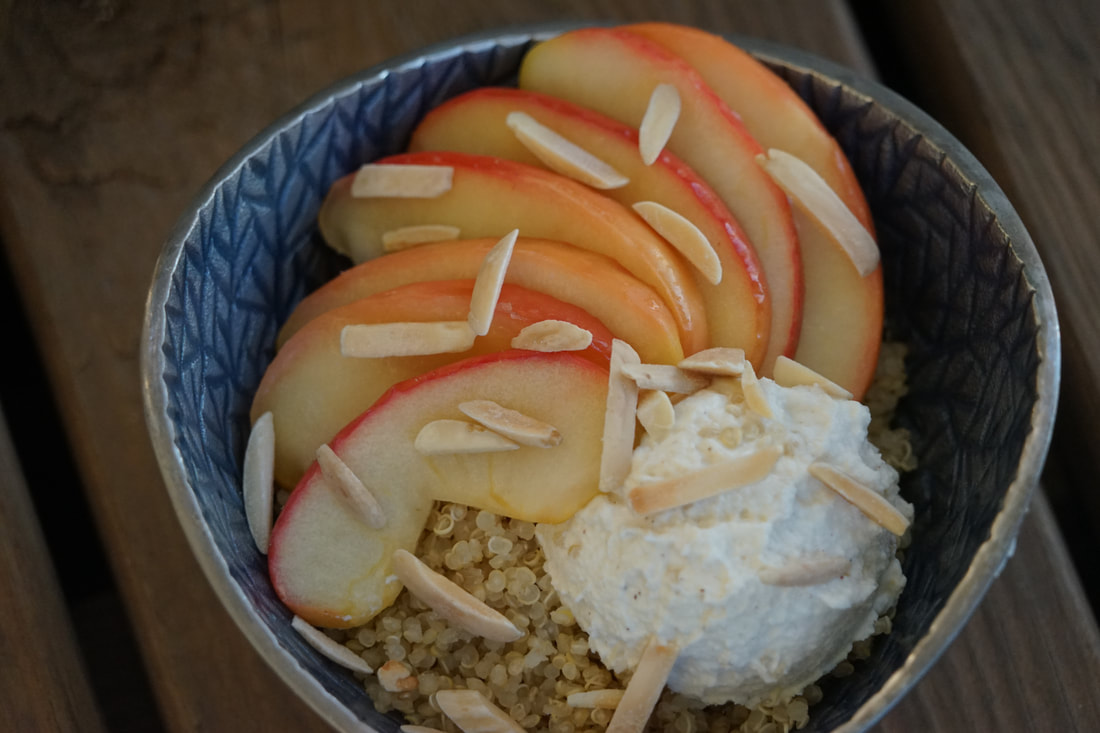
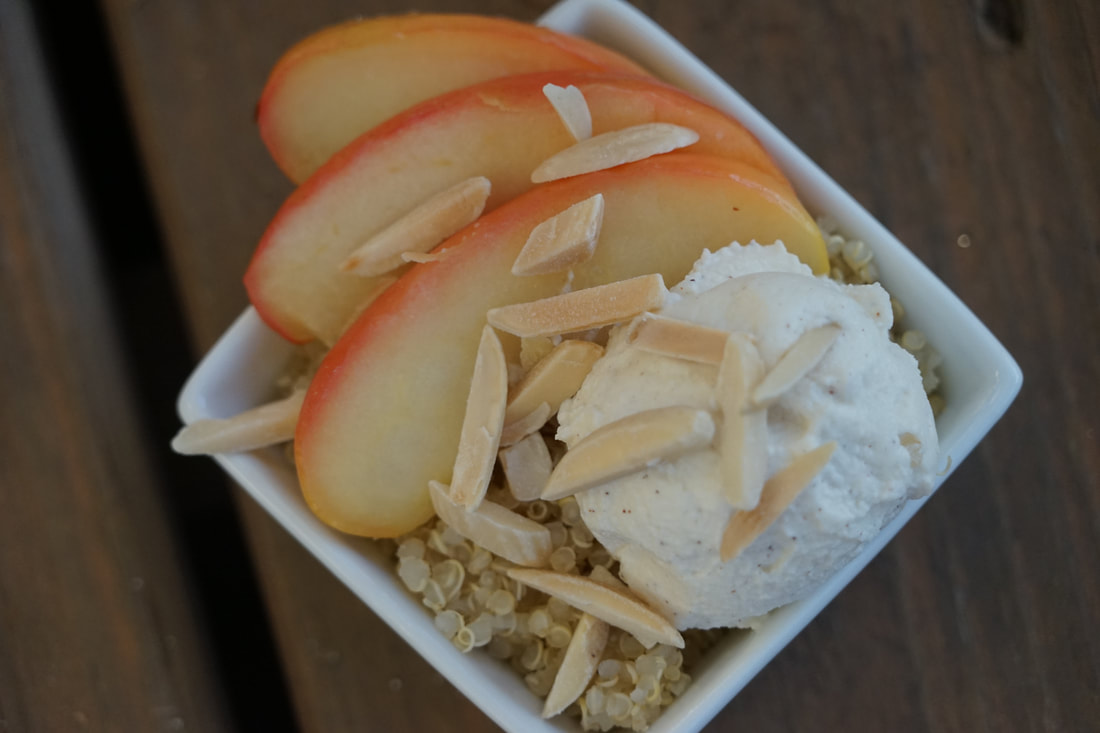
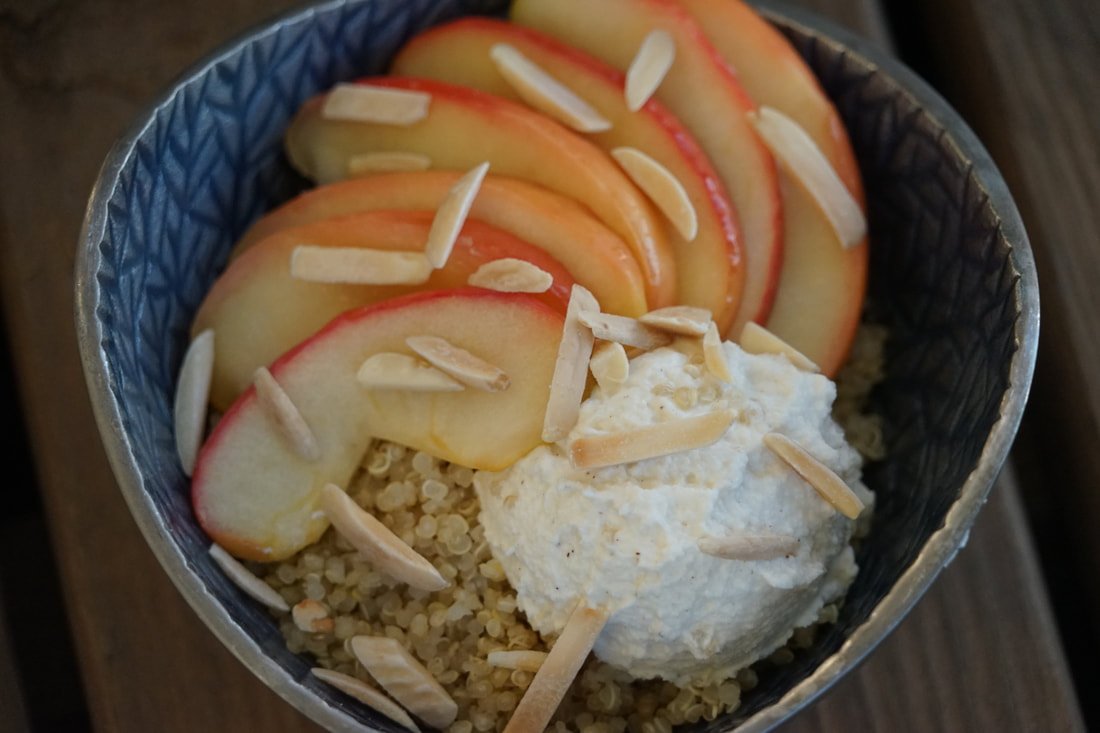 Is there anything better warm apples and cinnamon on a cold winter day? There's not much that compares to the sweet smell of apples and cinnamon baking in the oven and filling every corner of my house with warm cinnamony goodness. The intoxicating aroma comforts my soul with peace and tranquility. Of course I love apple pie but that unmistakable aroma isn't exclusive to pie. Homemade applesauce simmering on the stove can produce the exact same bouquet as that of its pastry cousin. Homemade applesauce is amazing and it's so easy to make. A touch of cinnamon, a pinch of salt and a dash of sugar is all it takes to turn the beautiful fruit into a gloriously sweet dessert. 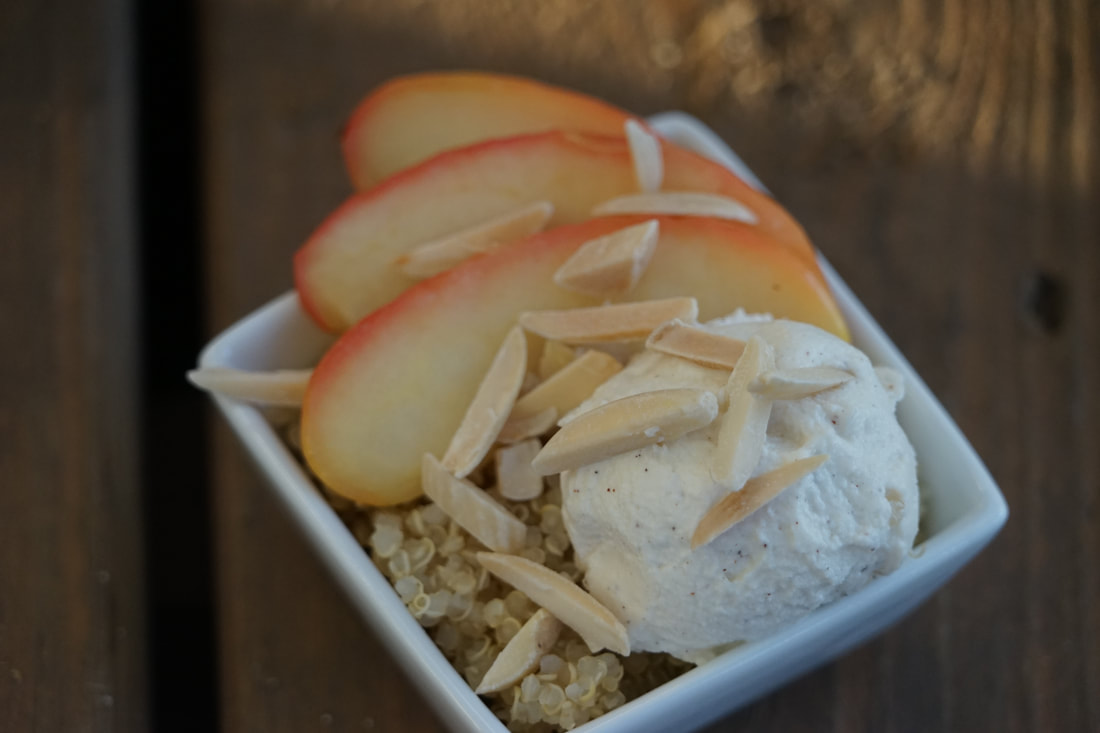 Have I managed to convince you that homemade applesauce can be a great dessert? Healthier than pie but equally as fragrant and delicious. If you think applesauce for dessert is a radical idea - hang onto your boot straps friends. Apple Quinoa Bowl with Cinnamon Ricotta is going to blow your socks off. Easier to make than apple pie, quicker than simmering apples for applesauce and with a little whole grain quinoa - perhaps a little healthier than either. You are going to love this! 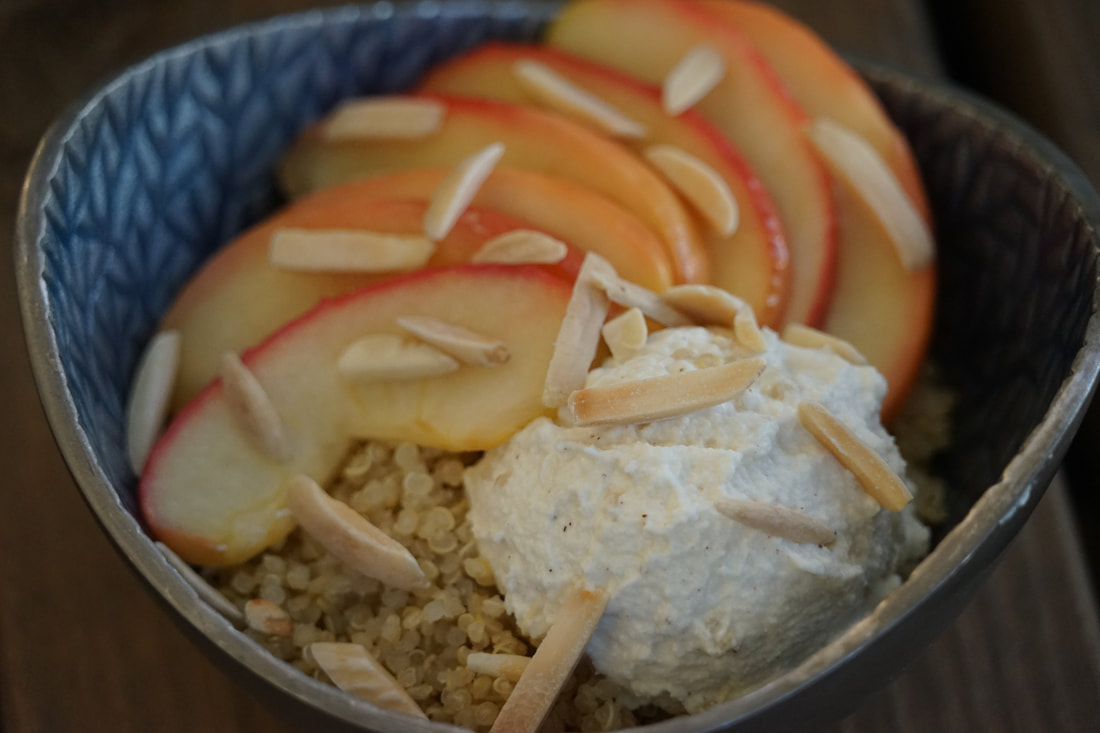 Apple Quinoa Bowl with Cinnamon Ricotta 2 teaspoons butter 2 Granny Smith apples, chopped 1/4 teaspoon salt 2 teaspoons honey 1 cup ricotta 1/4 teaspoon cinnamon 2 2/3 cups quinoa, prepared 1/4 cup slivered almonds, toasted
Sprinkle with slivered almonds and enjoy.
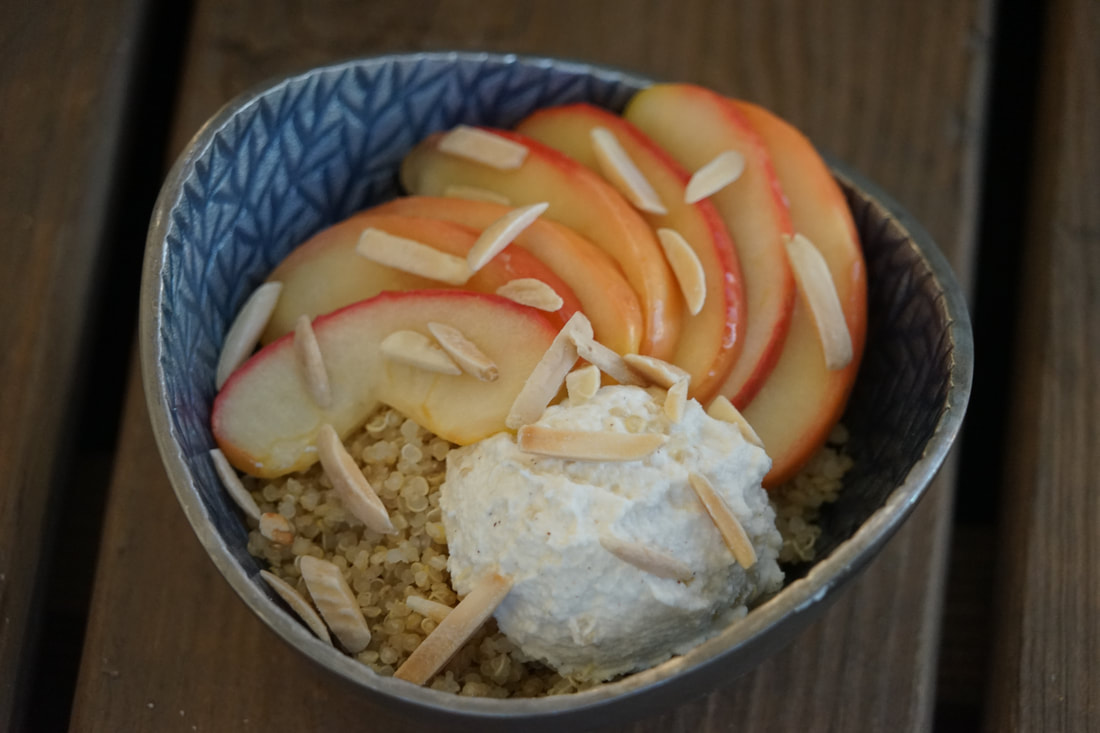 I know that the apple, quinoa and ricotta combination is a radical idea but trust me - it's worth a try. I loved the crunchy almonds paired with the sweet ricotta and warm apples and I didn't feel the least bit guilty about indulging in this healthy-ish dessert.
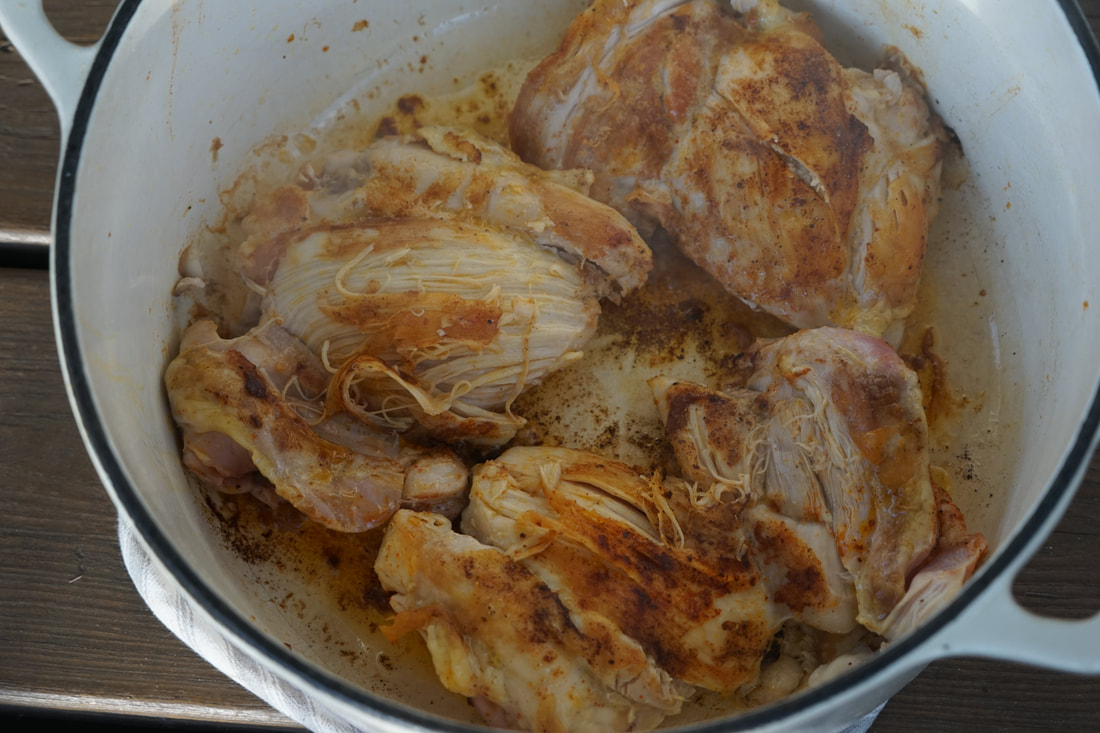
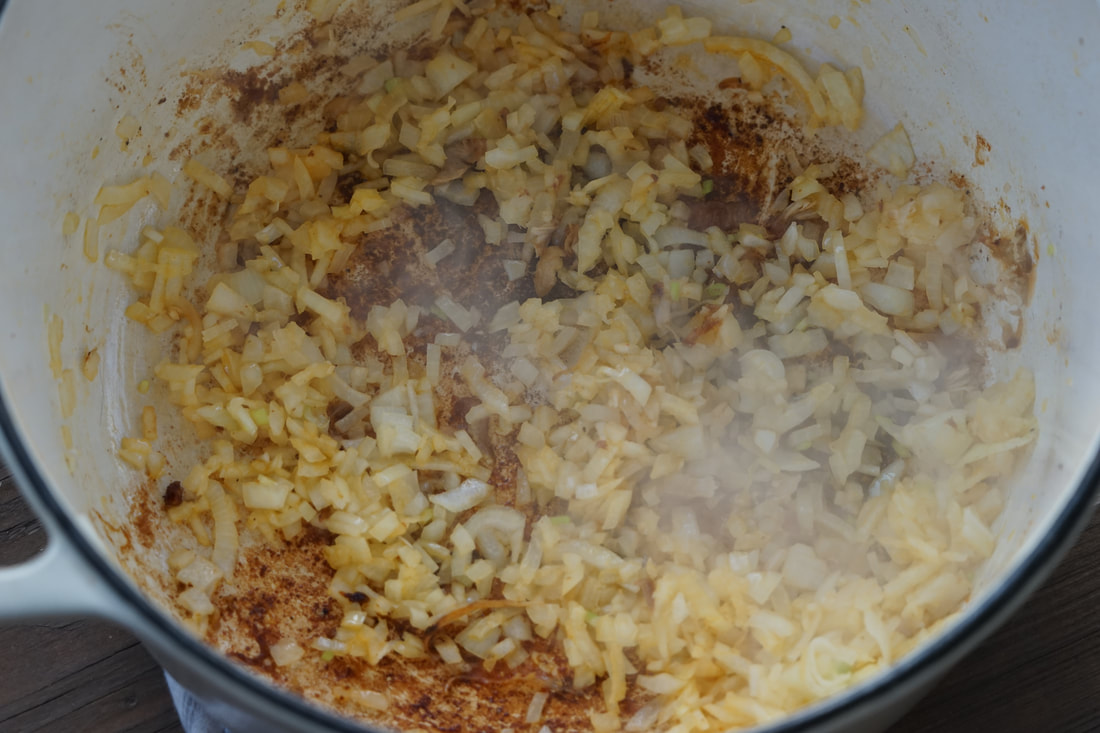
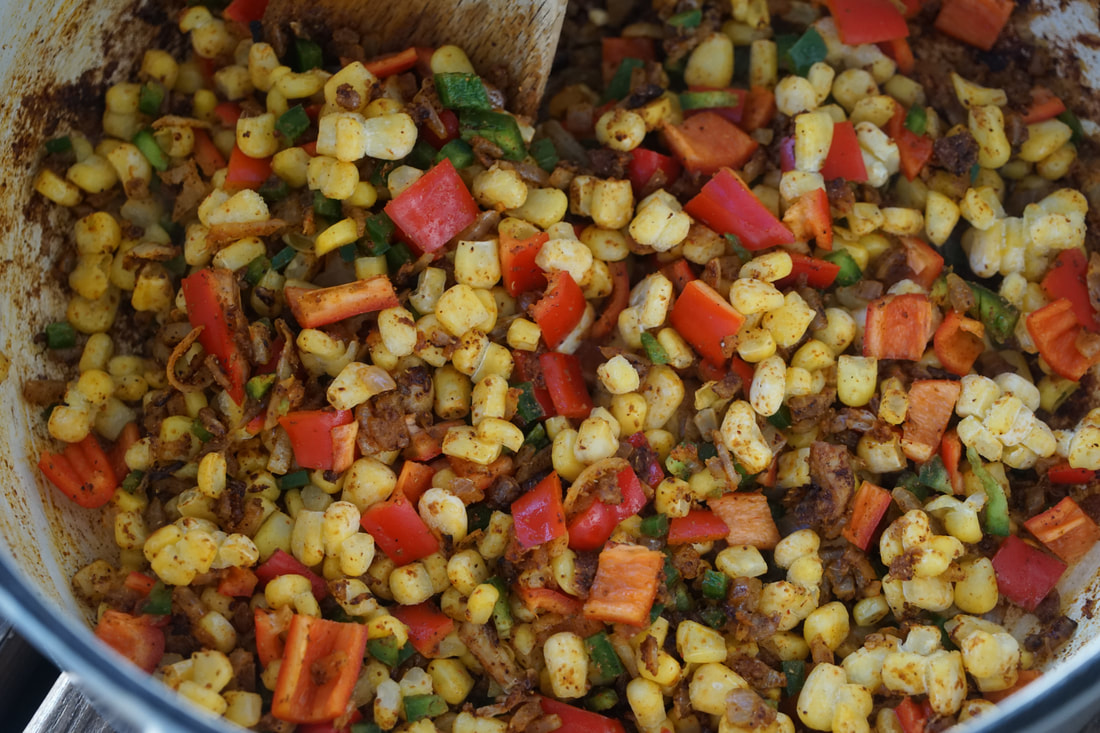
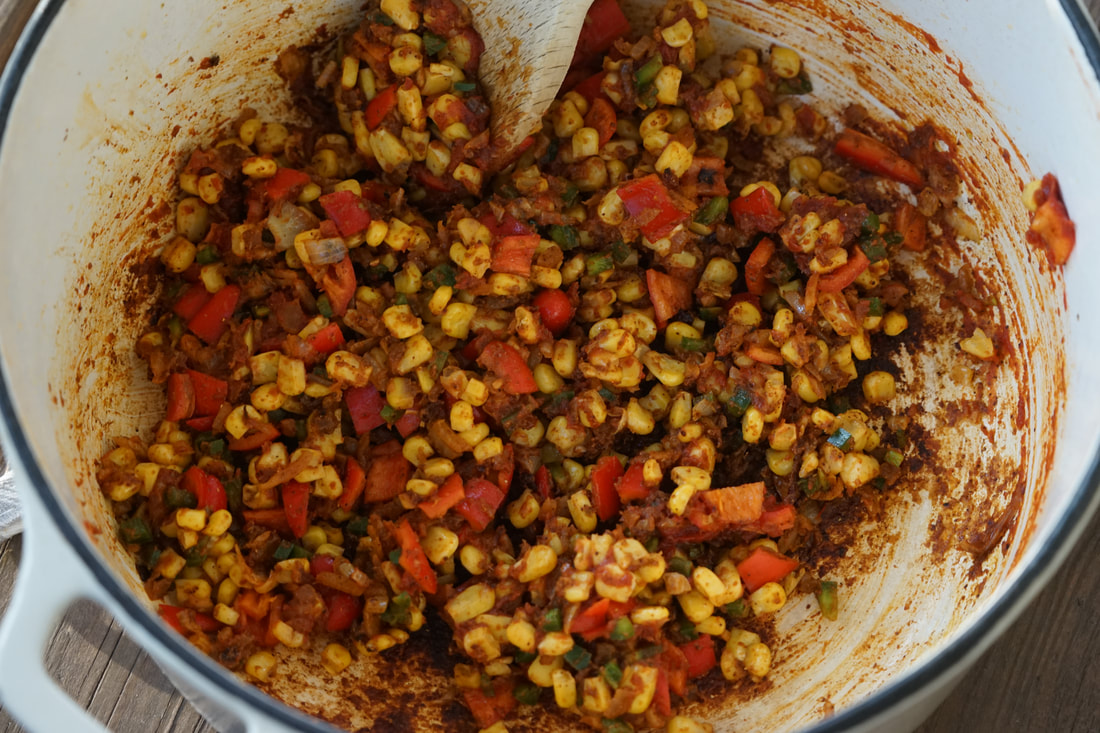
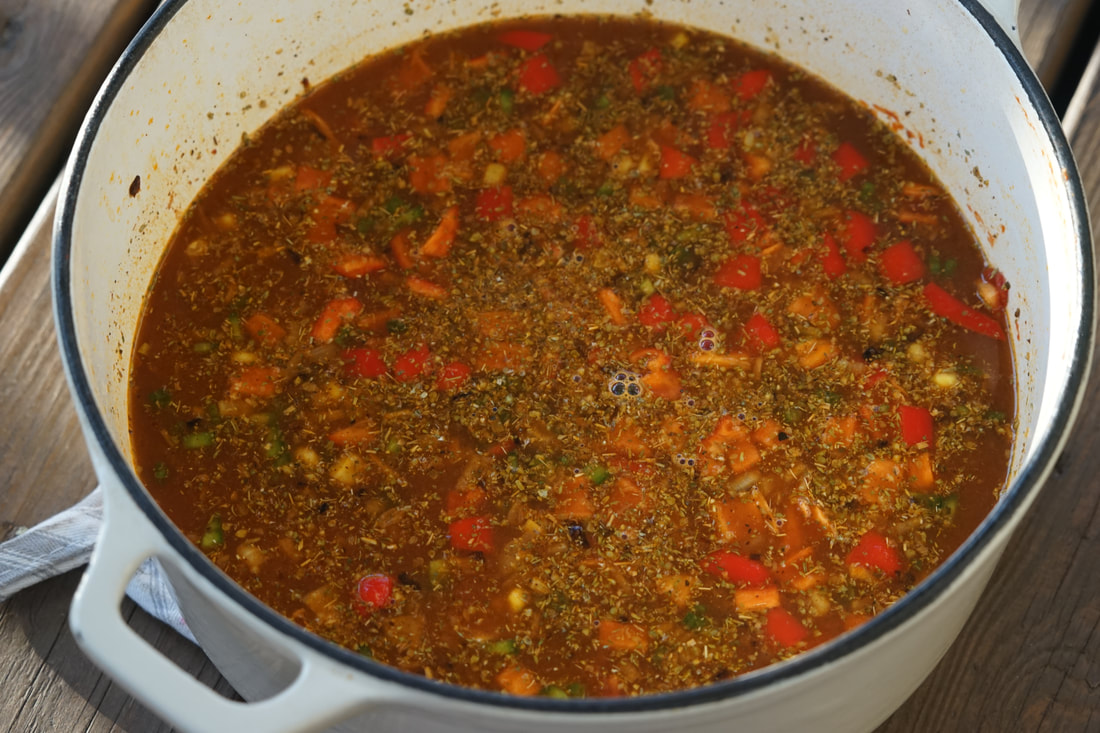
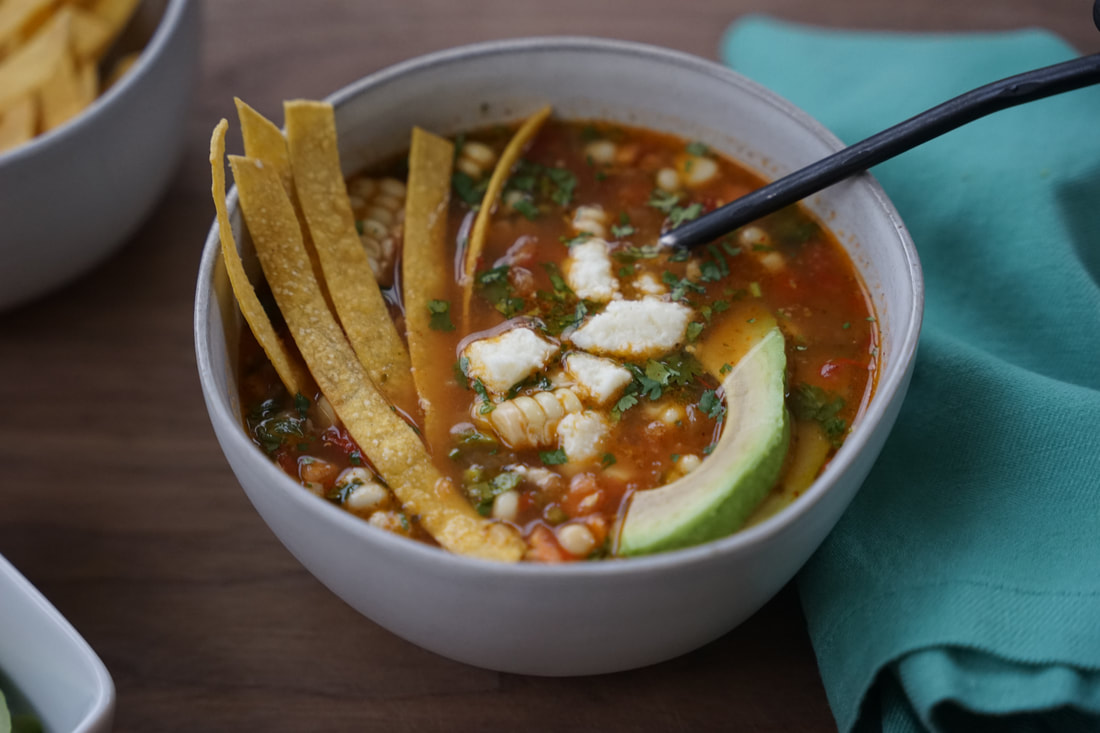
Ciao! 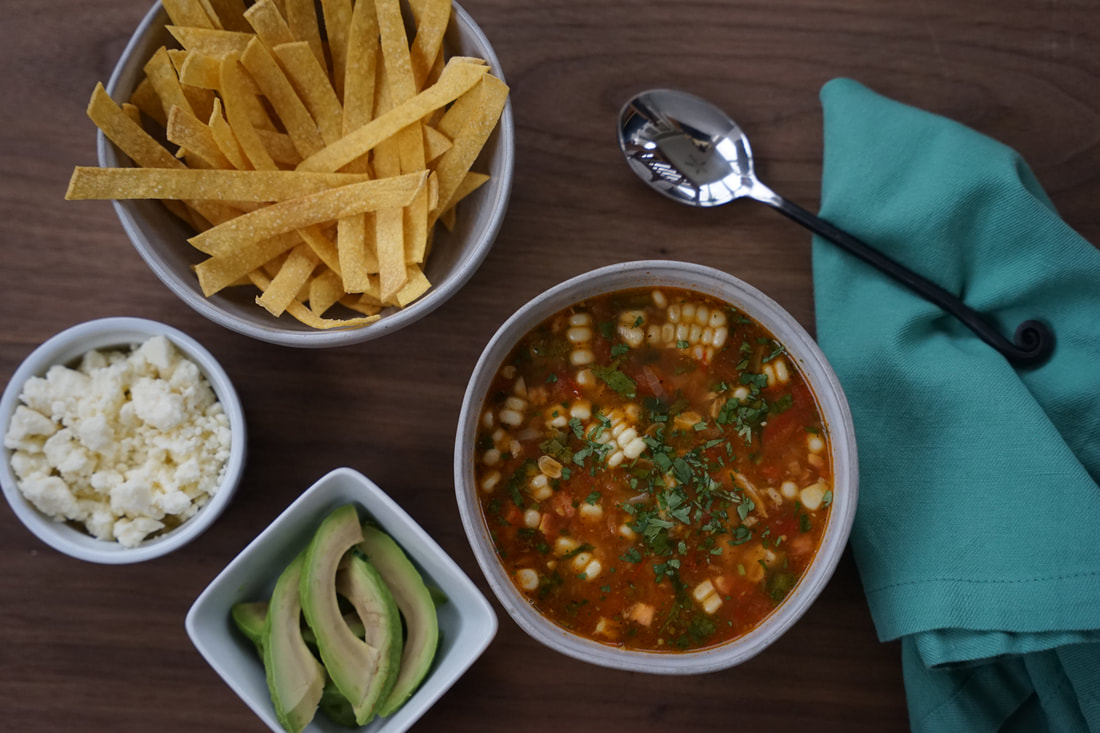 Even though I love Mexican food, it can be hard to find healthy options when we go to a Mexican restaurant. I love munching on the heaping basket of salty, crunchy chips and homemade salsa. I love the melted, gooey queso that blankets a taco. I love a homemade sangria and I don't even get me started on fresh guacamole. Seriously - once I start eating guac, I can't stop. I love all of that but let's face it - it doesn't love me back. My inner child wants me to order a cheesy, chicken wrapped burrito but the healthy me searches the menu for something healthier. My favorite Mexican restaurant actually offers more healthy options than most Mexican restaurants. They have salads with grilled shrimp, chicken and vegetables. They offer fish tacos and they make the most delicious chicken tortilla soup. Their simple tortilla soup is loaded with chicken and avocado and with a squeeze of fresh lime - it's soup perfection.  My chicken tortilla soup is quite a bit different than the clear, broth based soup that I enjoy at the restaurant but I decided to create a tortilla soup loaded with rich, earthy spices like cumin, coriander, chili powder, paprika and oregano. I tossed in a few vegetables, some black beans for added protein and a diced jalapeno for heat and voila - a perfect Chicken Tortilla Soup. Top this beautiful bowl of deliciousness with whatever you like. Sliced jalapeno, sour cream, green onions, cheese, avocado, lime wedges, tortilla strips and cilantro are all good options. Serve toppings on the side so everyone can customize their own bowl and you will have a table full of happy soup eaters. 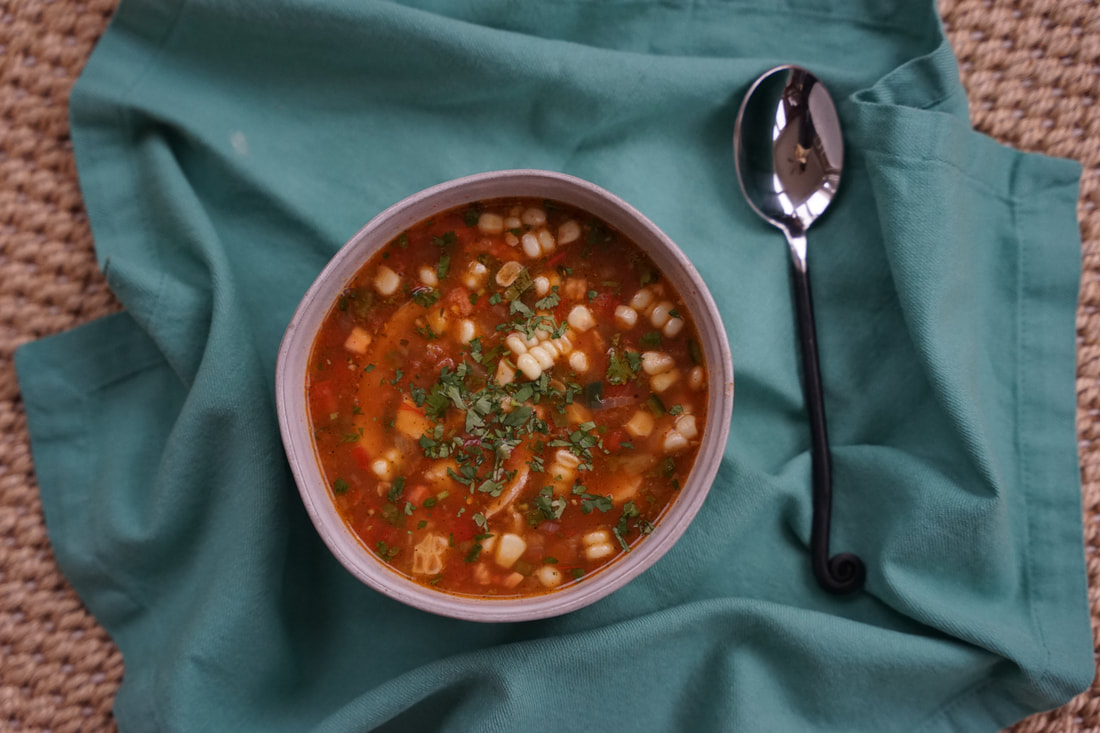 Chicken Tortilla Soup 1 1/2 pounds boneless, skinless chicken breasts 1 teaspoon salt 1 teaspoon paprika 1/2 teaspoon black pepper 2 Tablespoons olive oil 1 cup chopped white onion 2 cloves minced garlic 2 teaspoons cumin 1 teaspoon coriander 1 teaspoon chili powder 1 Tablespoon chopped jalapeno 1/2 cup tomato paste 3/4 cup red bell pepper 1 cup frozen corn 1 cup black beans 14.5 ounce can fire roasted tomatoes 4 cups chicken broth 1 cup water 1 1/2 teaspoons oregano 6 corn tortillas, cut into 1/4" strips 1 Tablespoon lime juice
Bring to a boil. Reduce heat and simmer 15 minutes. Stir in lime juice. Spoon into bowls.  Serve with additional tortilla strips.
 I am definitely in the soup groove lately. In the last two weeks, I've made roasted butternut squash soup, homemade ramen soup, chicken noodle soup and now chicken tortilla soup. A warm bowl of delicious this soup is so satisfying on a cool winter evening and I love warming up a bowl of hearty and nutritious soup for a quick and easy lunch.
Ciao!  I jumped on the mirrorless camera bandwagon almost 3 years ago and I finally decided it was time to take it off of auto mode and see what my camera could do. It's not that I was unhappy about my photos - I was just super hesitant about turning the dial away from the little green rectangle. Quite honestly, I have more faith in my camera to adjust all of my settings more than I do myself. (After all, my camera doesn't need progressive lenses to properly focus.) My camera can set the best white balance, shutter speed and aperture is less than a second - it takes me at least 4 minutes to accomplish the very same settings. My camera is very intuitive and it does a great job of picking just the right settings for each picture. So why in the world would I ever want to override it and rely on my own limited knowledge? Honestly, most of the time I trust my camera more than myself, but there are a few times when I want to take my camera off of auto mode and choose my own settings. It's taken me 3 years but I'm finally moving my camera off of auto mode - for brief periods of time.
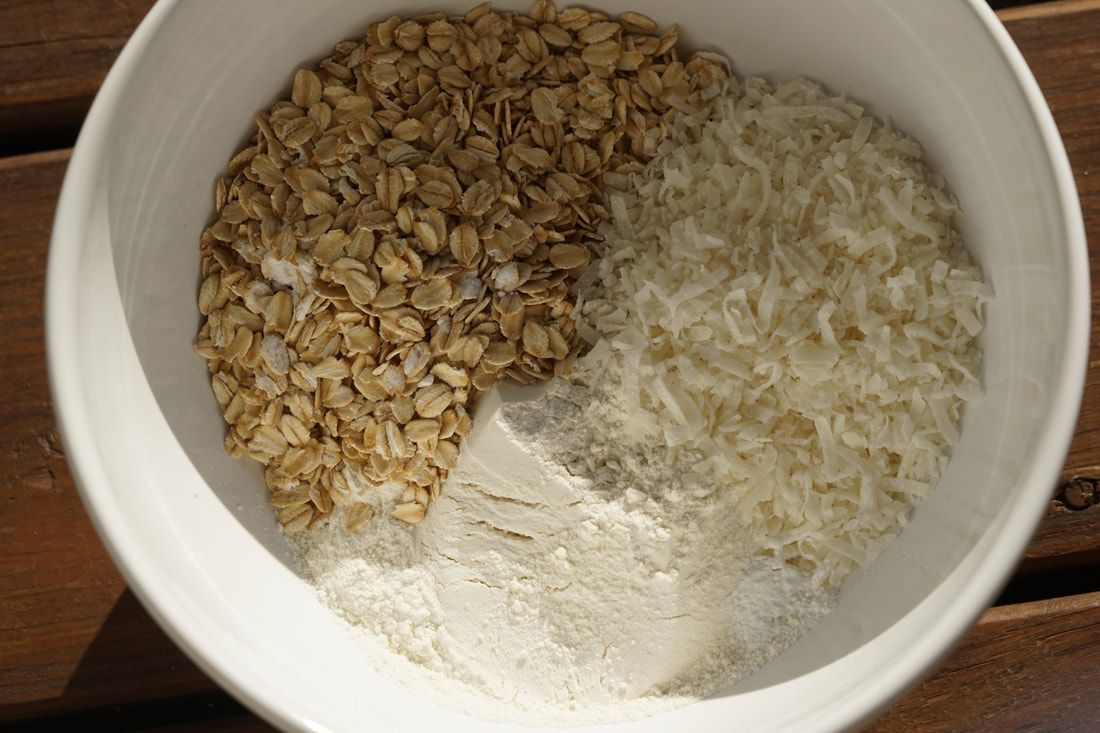
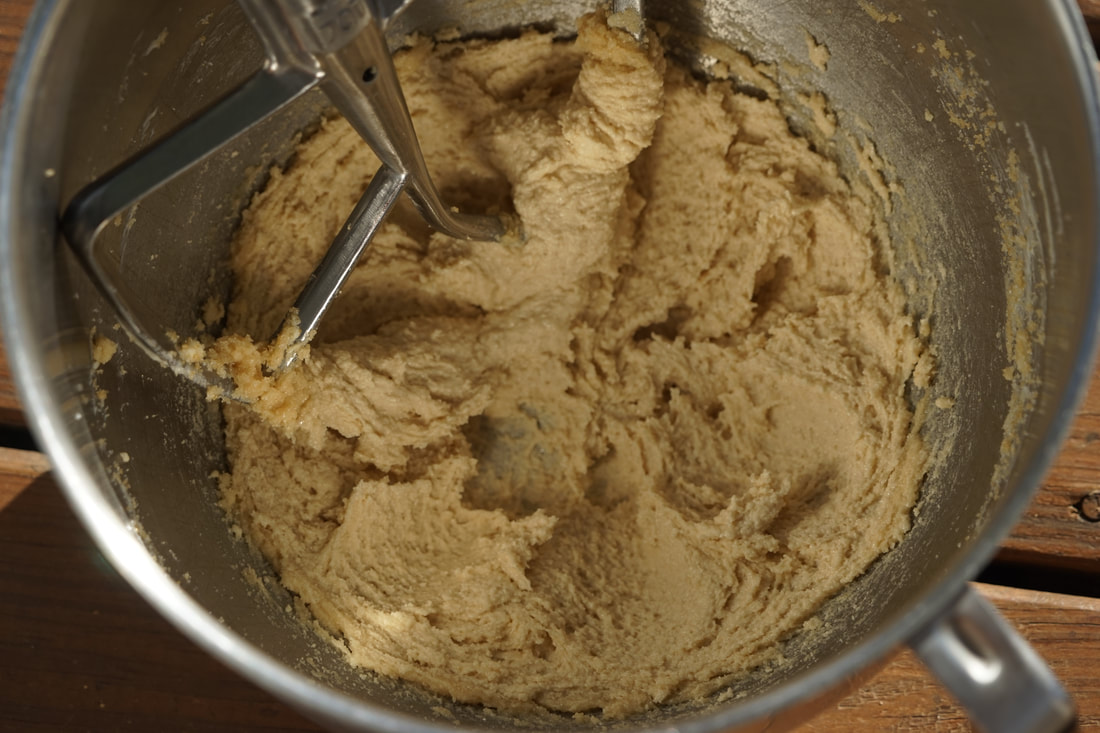
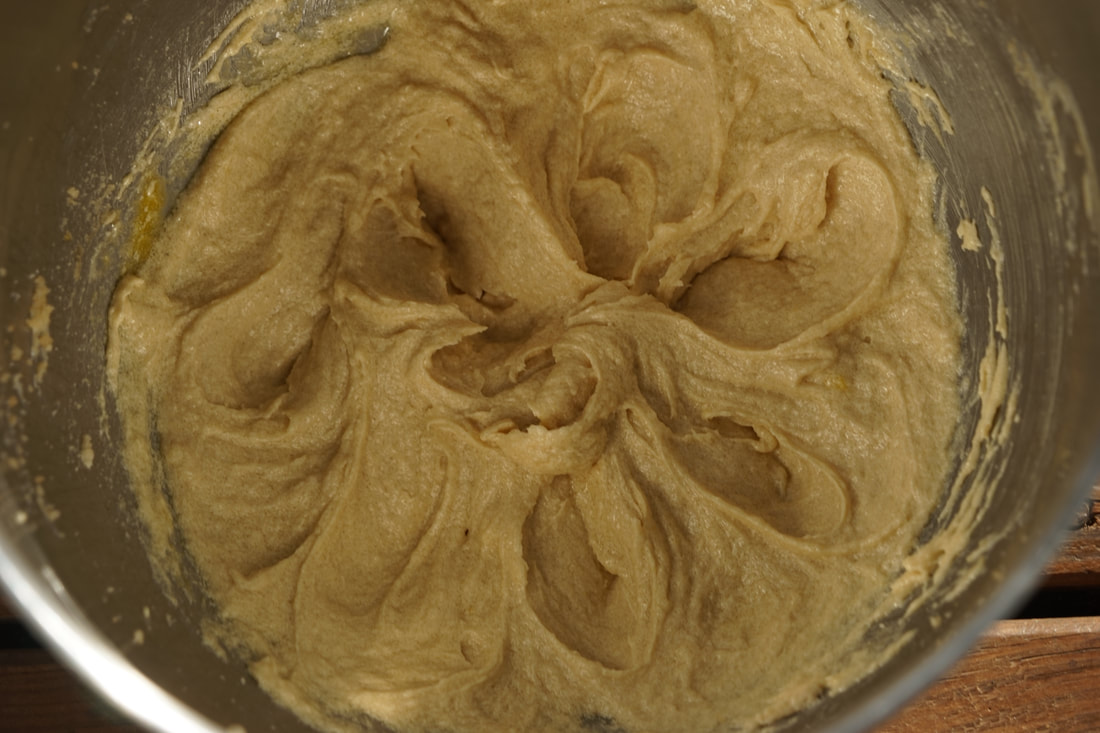
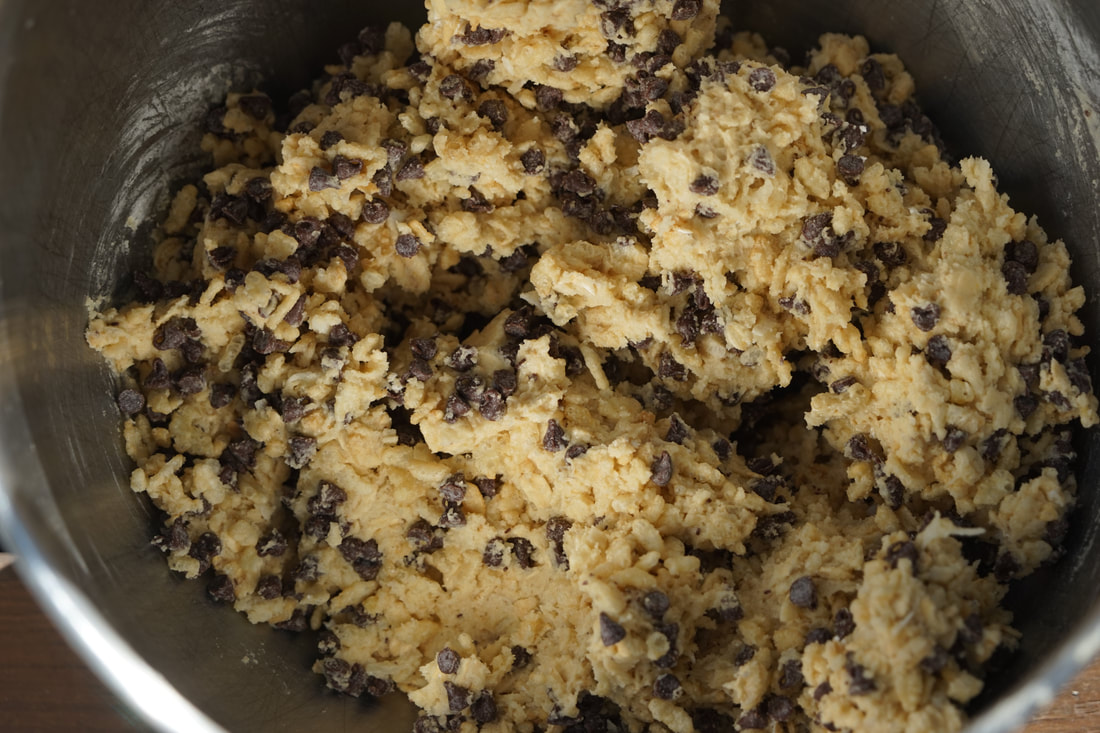
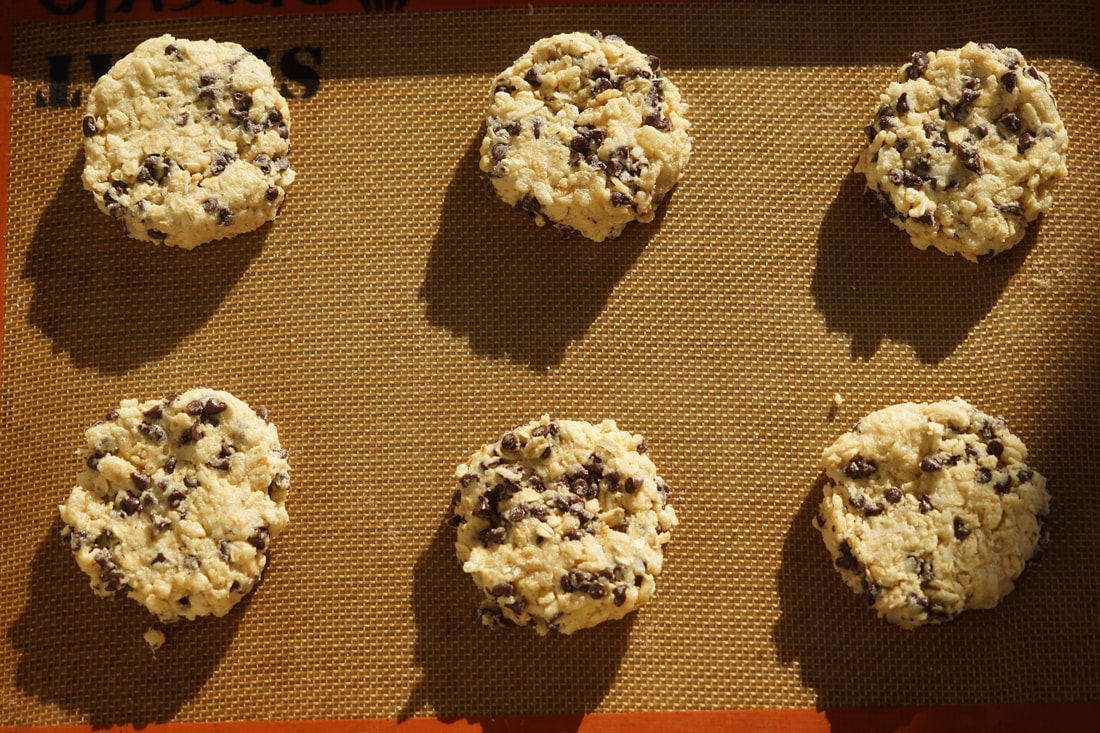
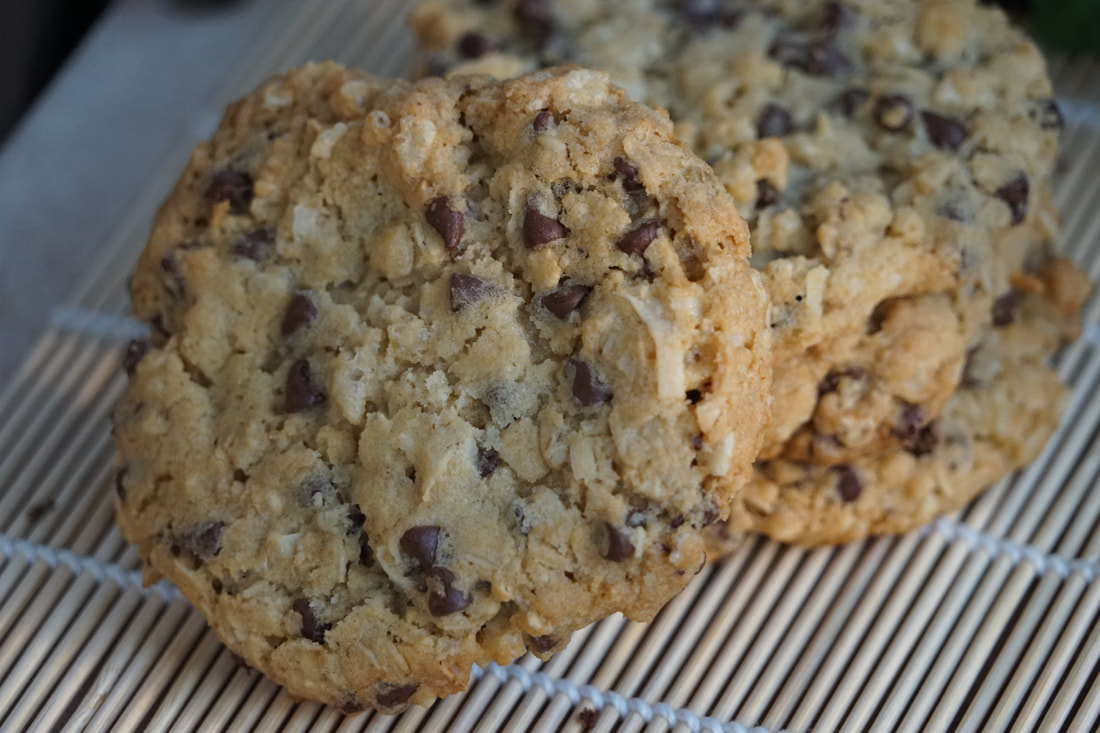
I'm still most comfortable letting my camera chose the best settings but after 10 hours of hands-on camera instruction, I apprehensively put myself in the drivers seat. Let's face it, I'm not trying to be a professional photographer but I do want to take be able to capture really great pictures. The two waterfall pictures above were taken in the exact same spot but I adjusted the settings to create different effects. I'm going to need a lot more practice to really master my camera but I'm having fun learning. (Thank goodness we don't use film camera's anymore.) Waterfalls, sunsets and indoor portraits - these are all things that I'm trying to get better at photographing. When I get frustrated, I go back to shooting what I know best --- food. It never moves, I can put it in the lighting that I want and it never squints in the sun. These ranger cookies are a photographers dream. Capturing the dark brown chips, the flecks of coconut, the golden oats and the bits of cereal is easy compared to getting a natural smile from a 5 year old boy.   Ranger Cookies 1 cup flour 1 cup rolled oats 1/2 cup shredded coconut 1/2 teaspoon baking soda 1/4 teaspoon baking powder 8 Tablespoons butter 1/2 cup sugar 1/2 cup brown sugar 1 egg 1/2 teaspoon vanilla 1 cup rice crispy cereal 3/4 cup mini chocolate chips
Bake 10-12 minutes at 350. 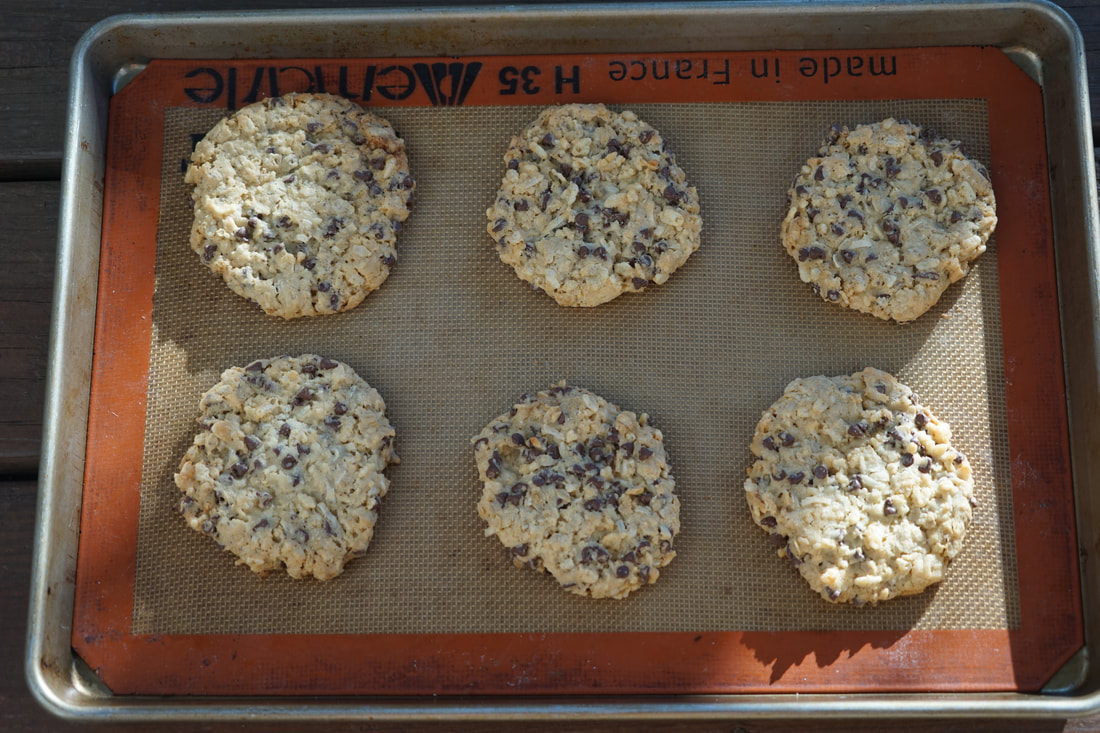 Allow to cool 5 minutes on silpat before removing.
 This cookie has all of my favorite things... oats, coconut, crispy rice and chocolate. I just can't imagine a better combination. I should rename these Amy's Cookies because they perfectly represent everything that I love in a cookie.
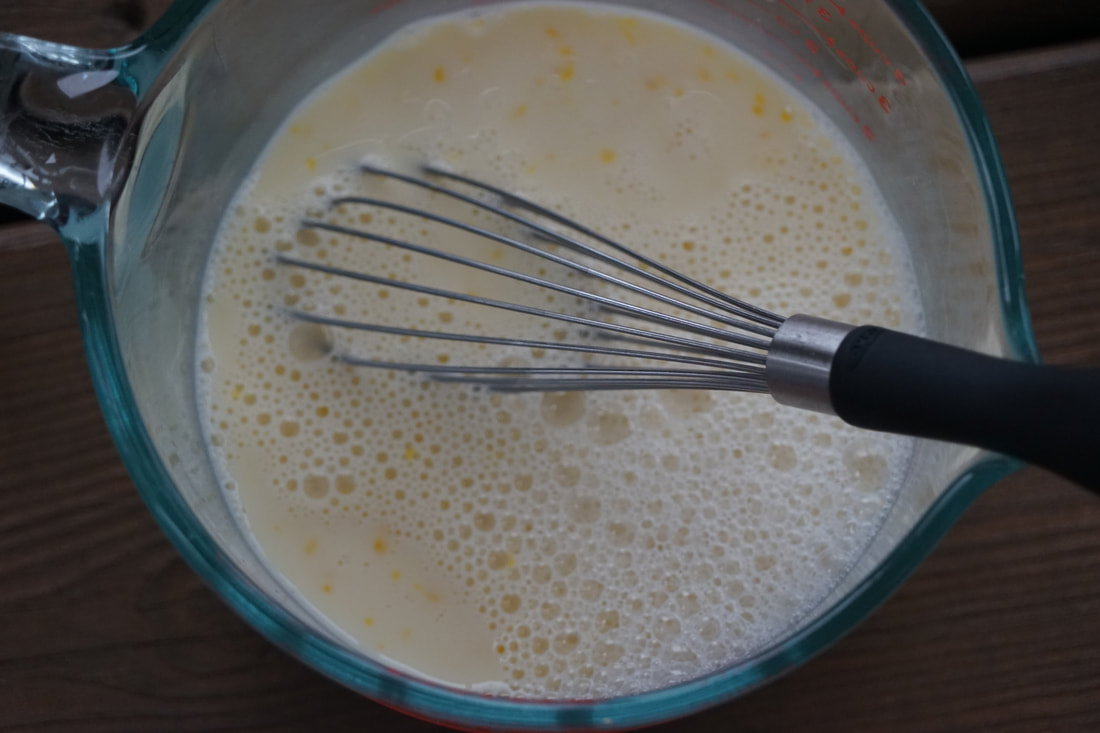
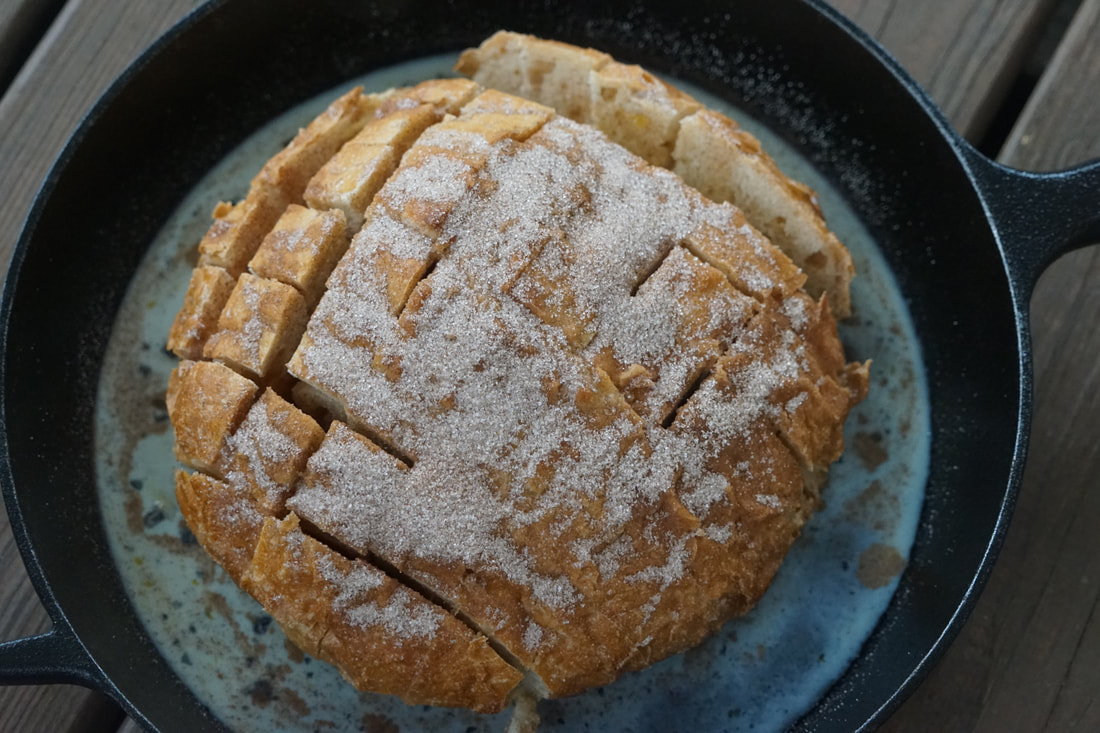
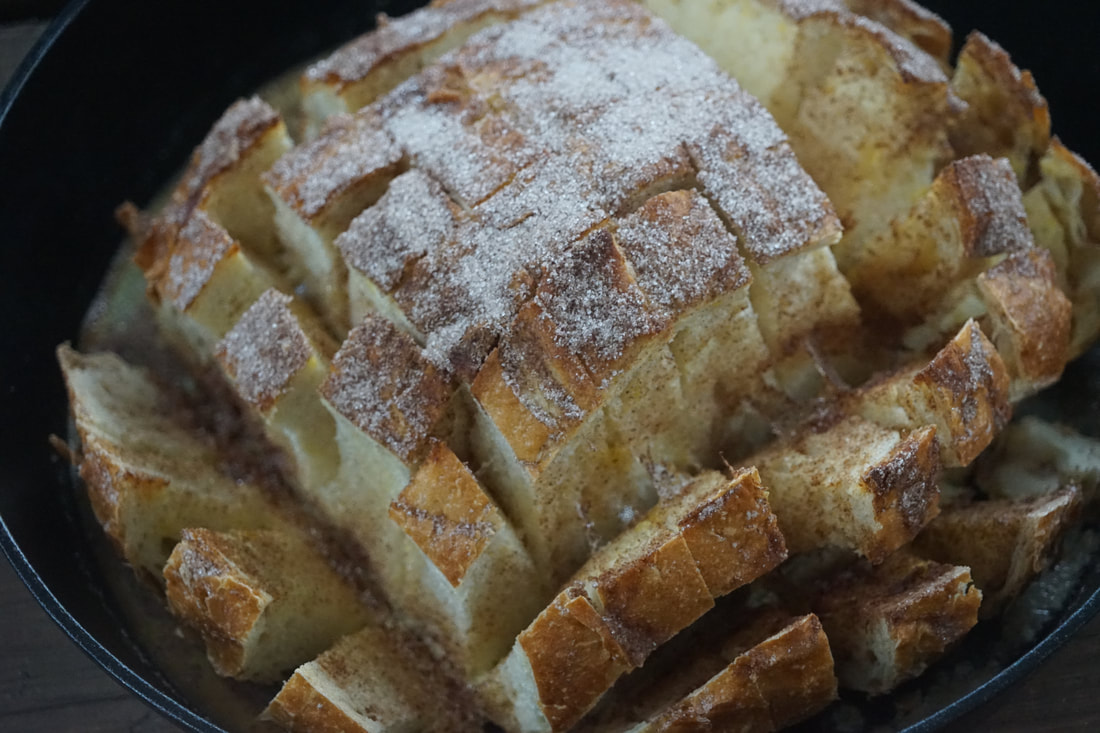
Ciao! 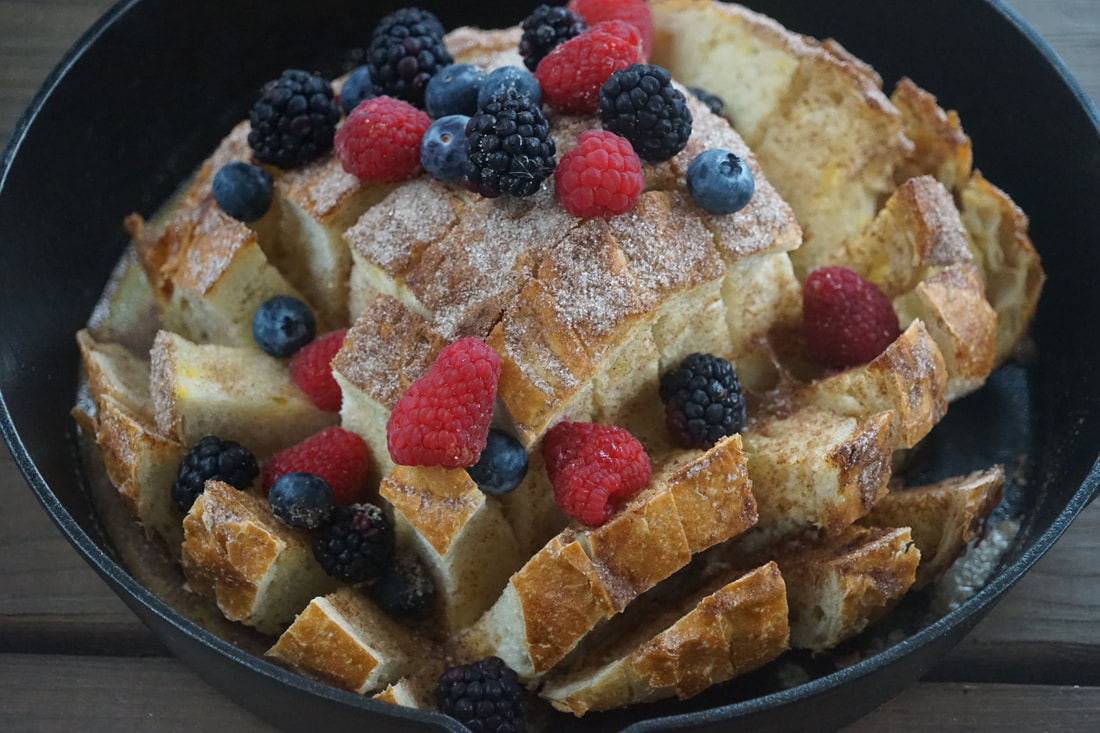 Are you a right on time kind of guy or a fashionably late kind of girl? I have to say that as a general rule, running late (fashionably or not) gives me anxiety. I like to be on time for parties and to appointments. I also expect doctors, hair stylists, dentists, etc. to value my time as much as I do theirs. I'm not above walking out of a waiting room if I feel like I'm being ignored and expected to wait for an unreasonable amount of time. My punctual personality compels me to confess that I first made this recipe just a couple of days after Christmas and this post has been in my que since then. (I think it's moved waaaay past fashionably late at this point.) I'm embarrassed to say that I've been slack in getting it published. It makes me feel like I've been neglectful when in reality, it just got lost in the shuffle. 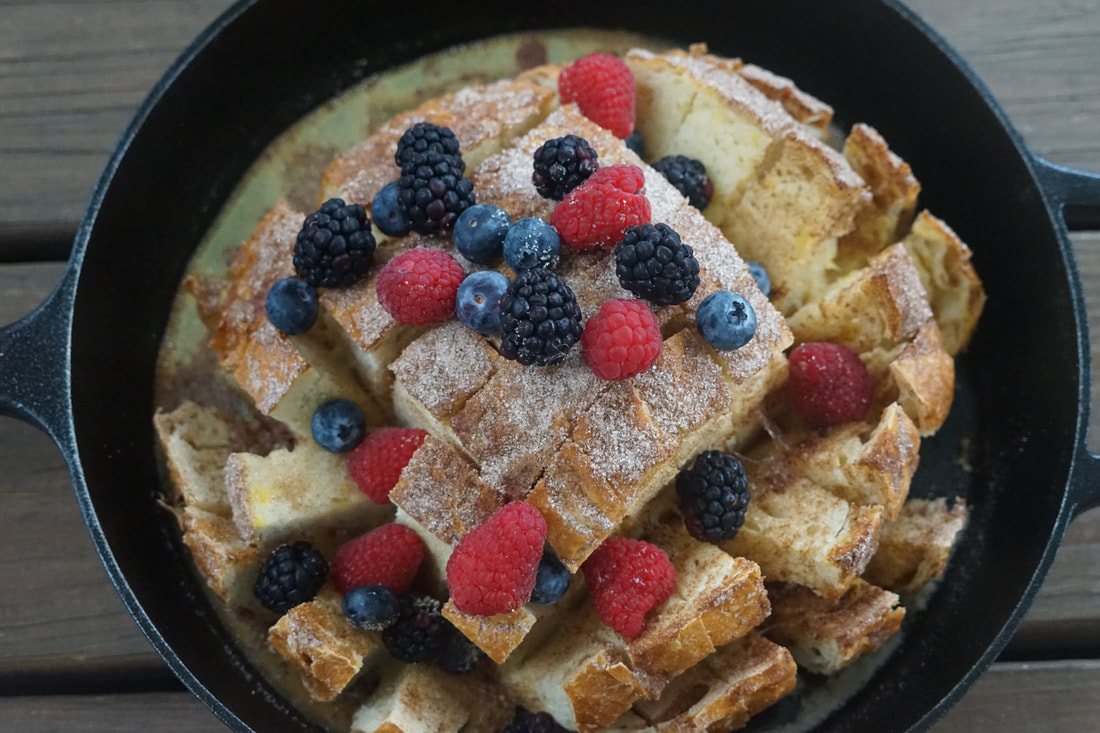 Even though this Baked Pull Apart French Toast was originally intended to be a holiday breakfast treat, it would definitely be just as good today as it was in December. This cinnamon sugar coated treat is super easy to put together and it is a true crown pleaser. Top it with whatever seasonal fruits you love or simply dust it with powdered sugar to create an exceptionally beautiful breakfast treat. 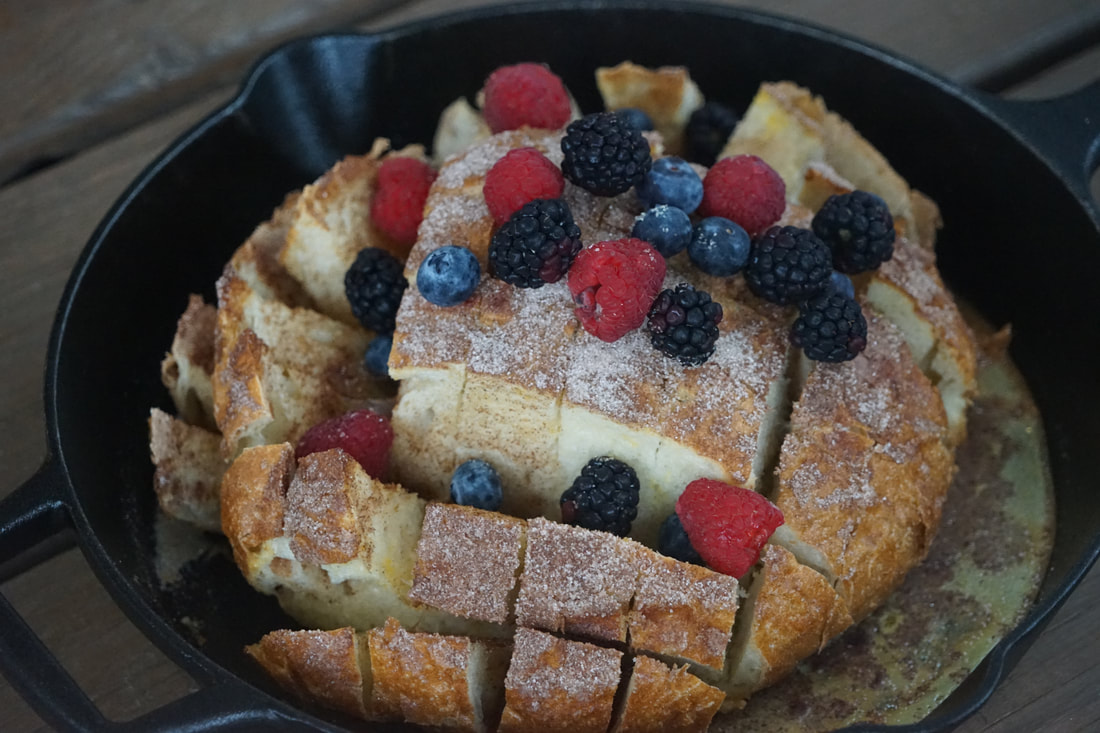 Baked Pull Apart French Toast
Top with fresh berries to serve. 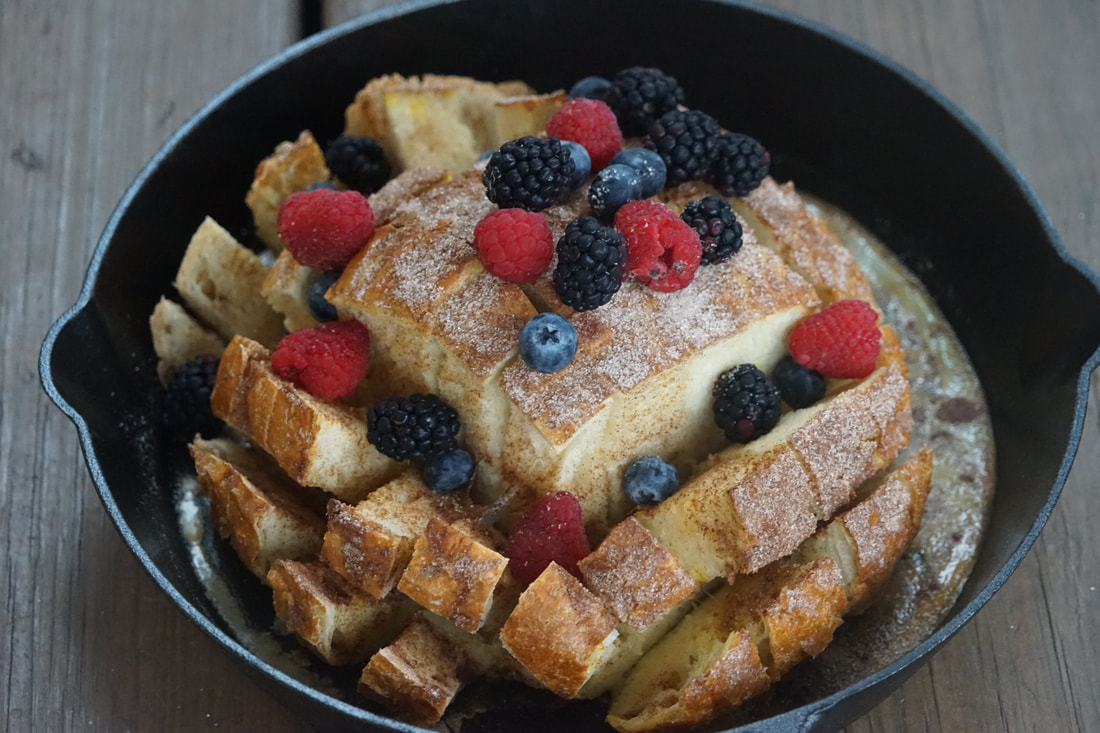 This french toast looks super fancy but it couldn't be any easier to make. I set the skillet in the middle of the kitchen table and everyone helped themselves to this scrumptious french toast. This recipe makes cooking french toast for a crowd - a lot more manageable.
Ciao! |