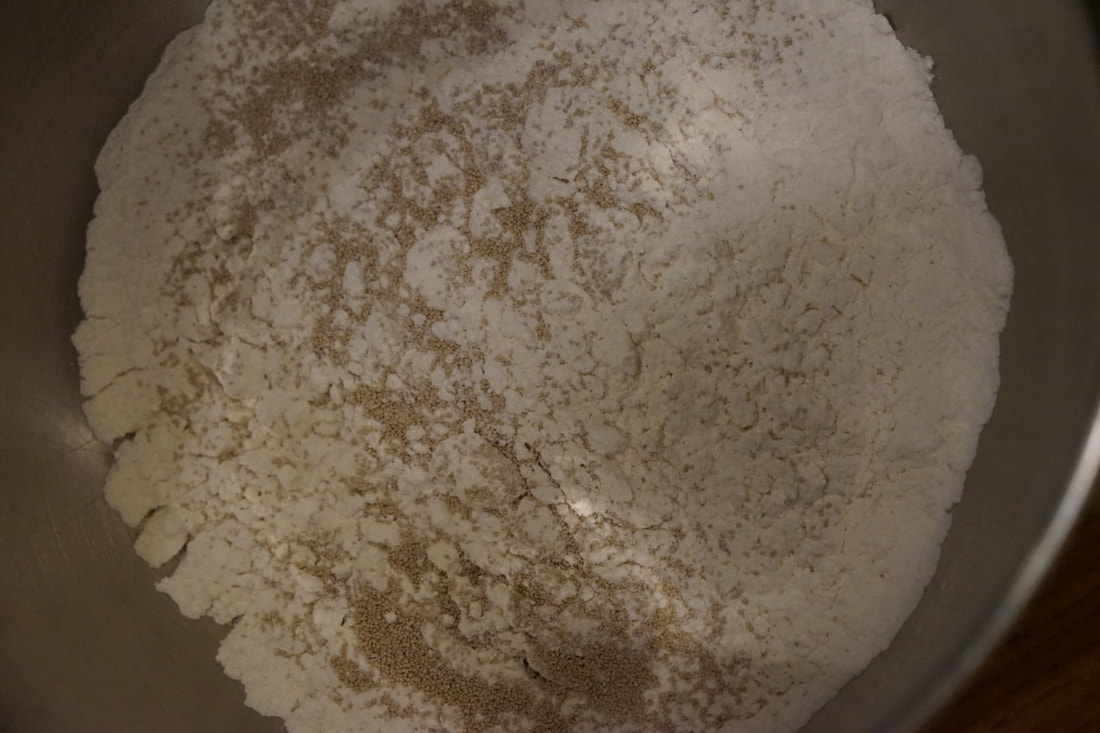
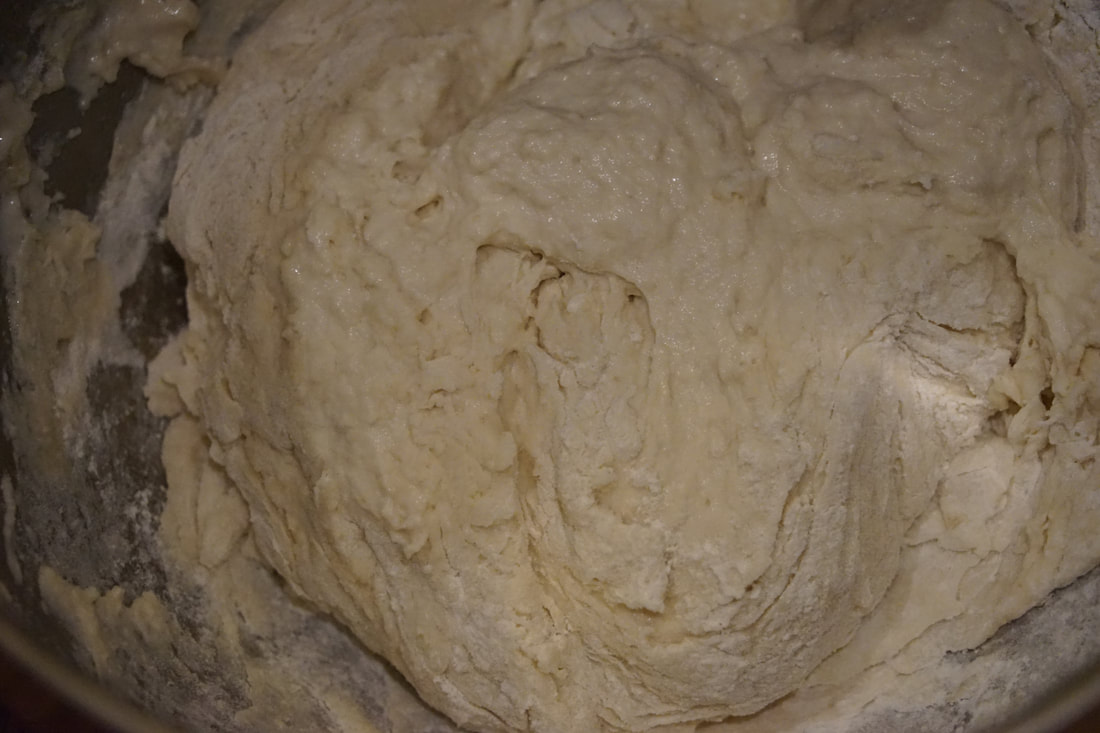
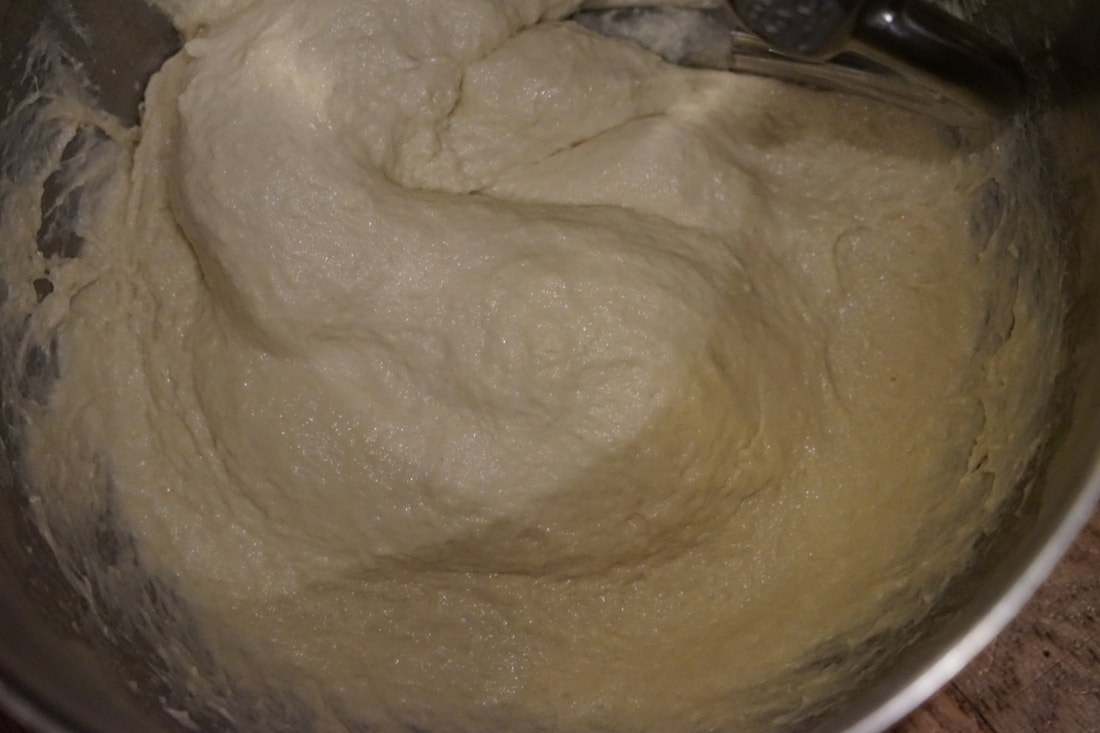
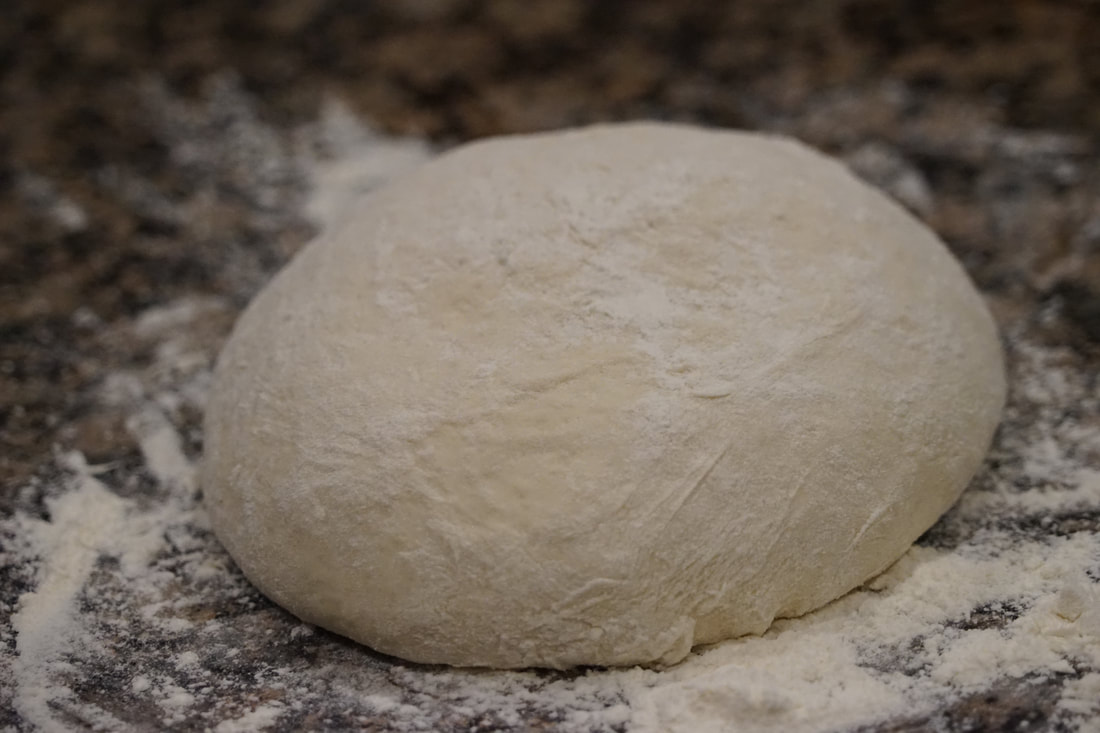
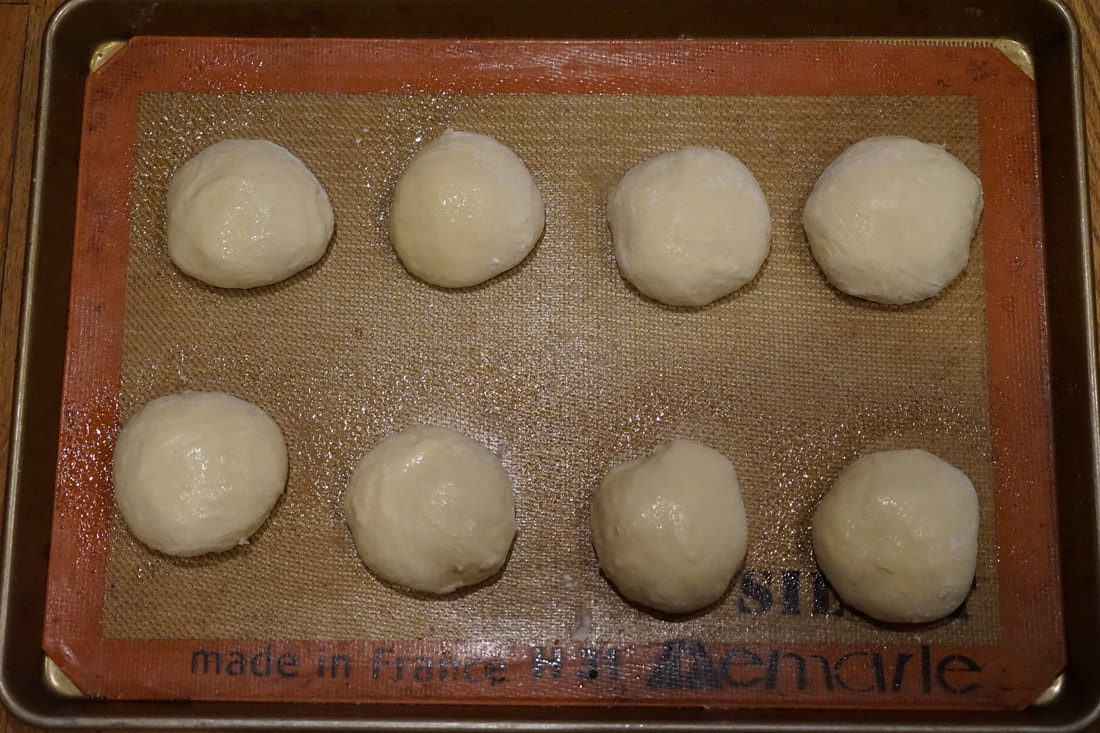
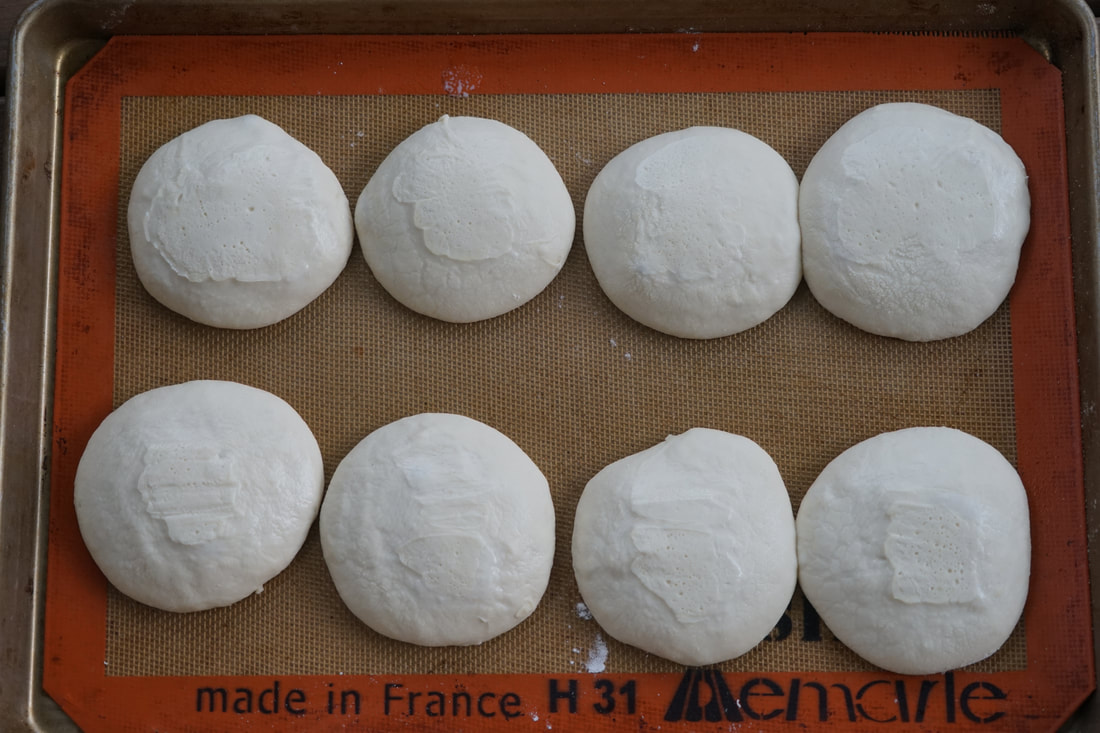
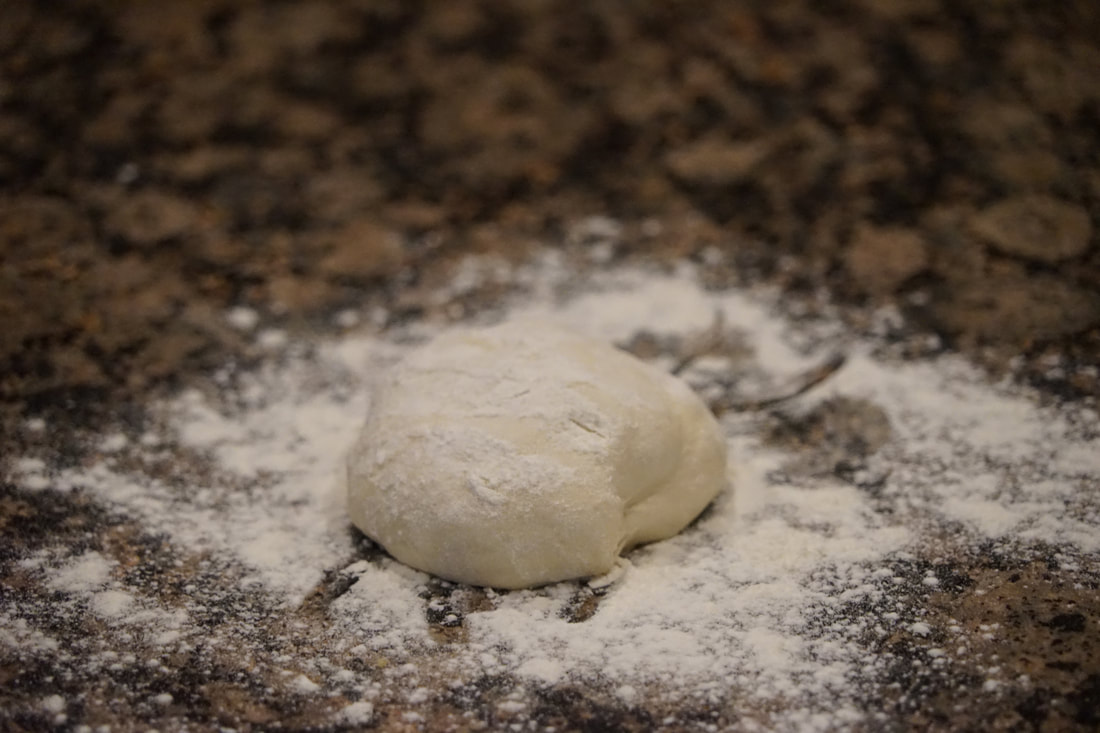
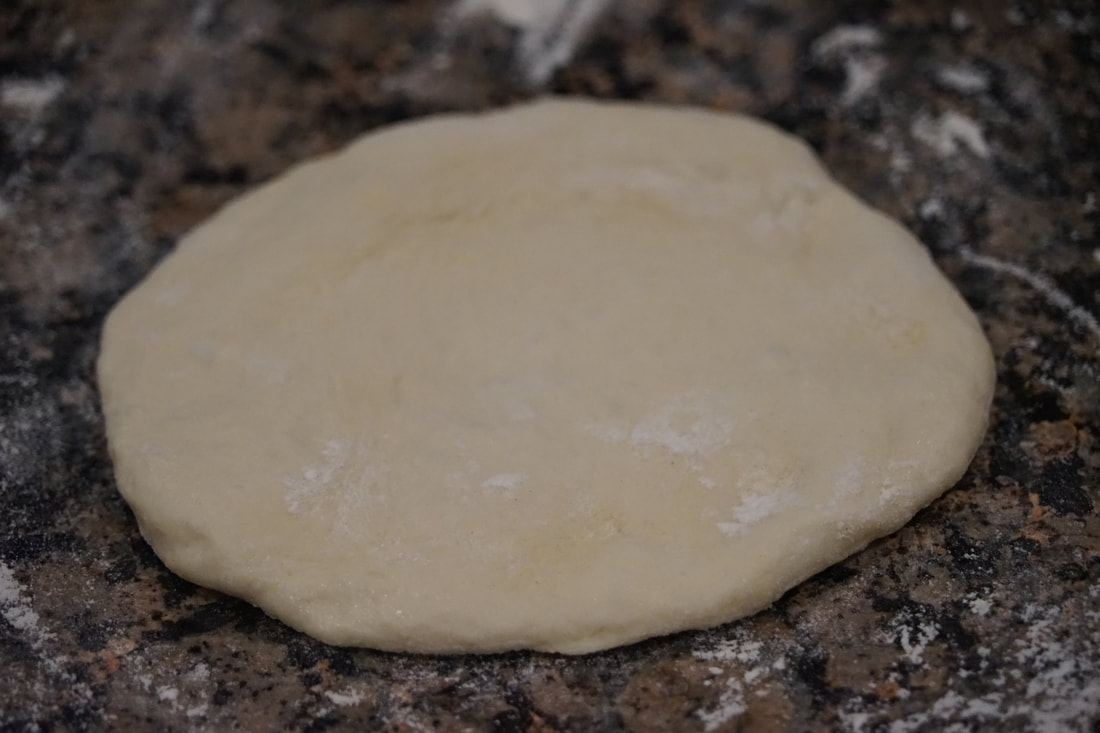
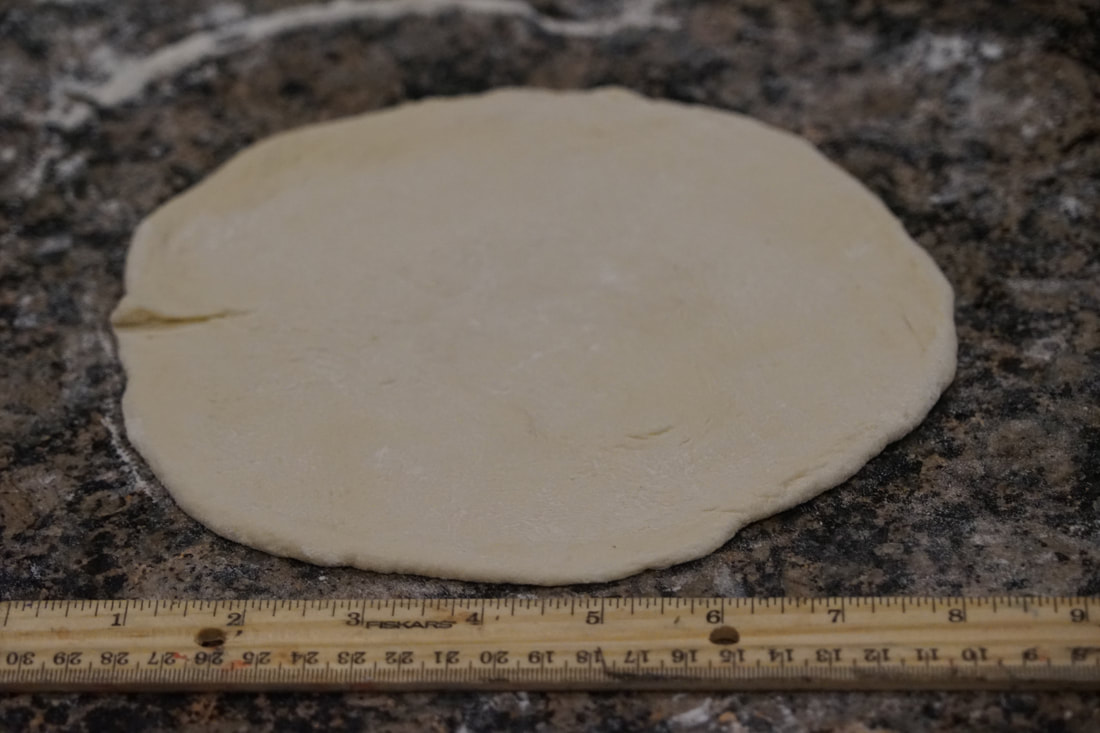
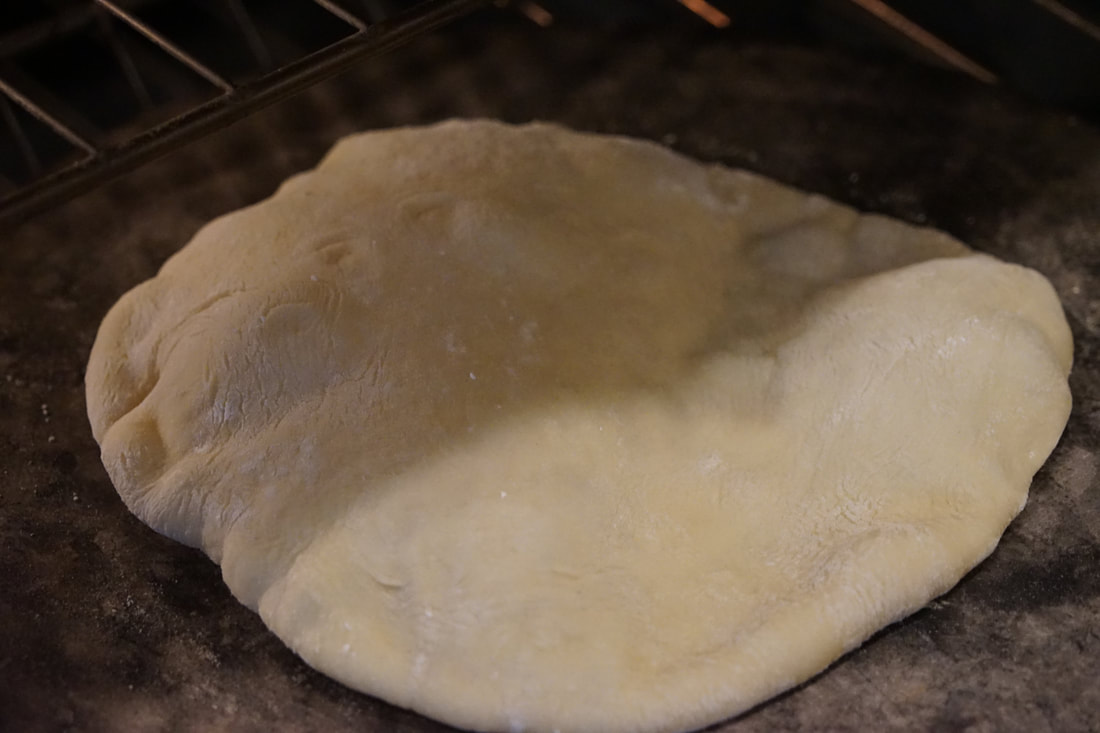
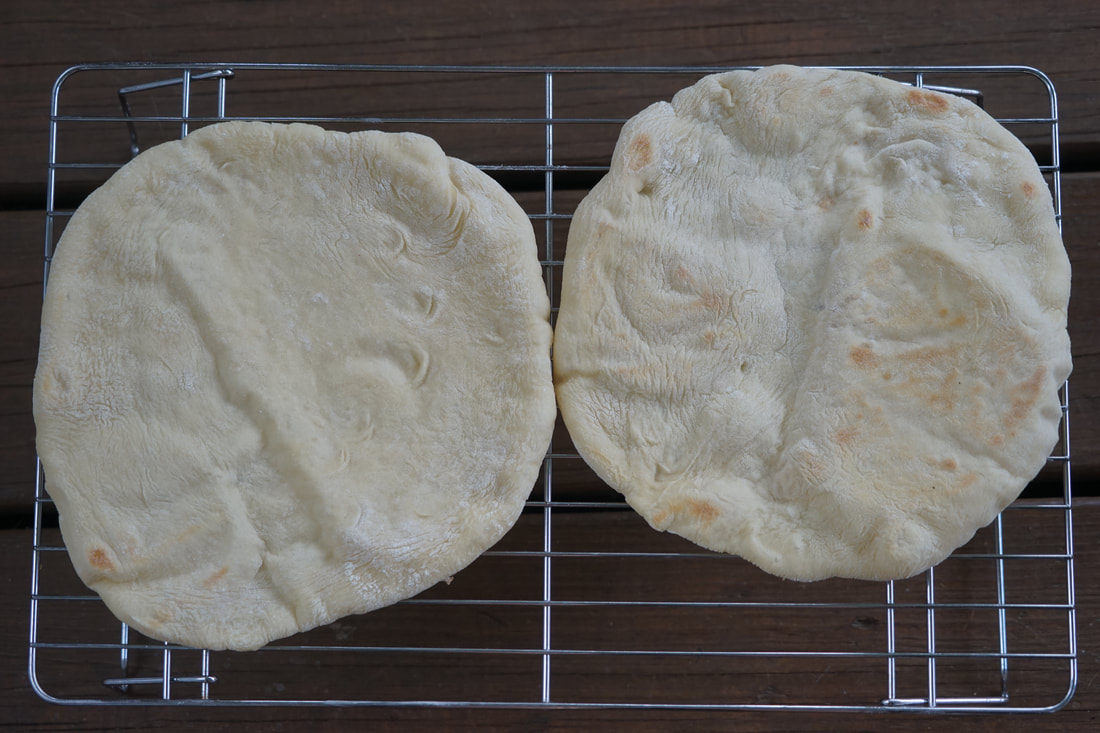
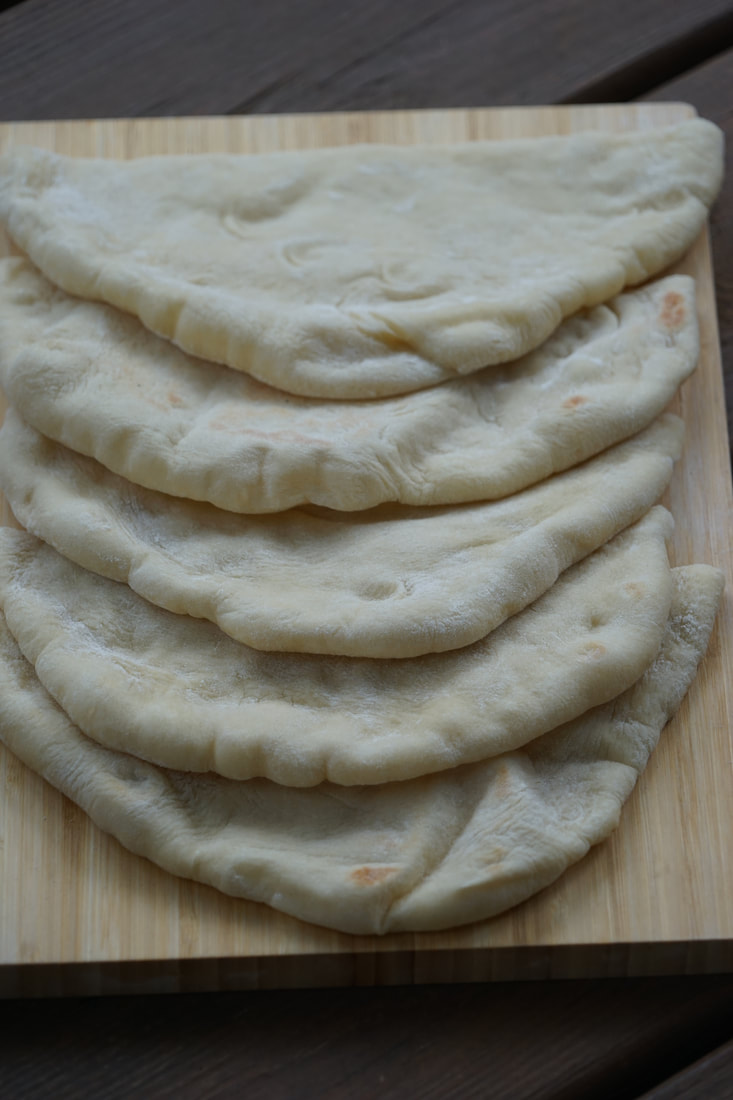
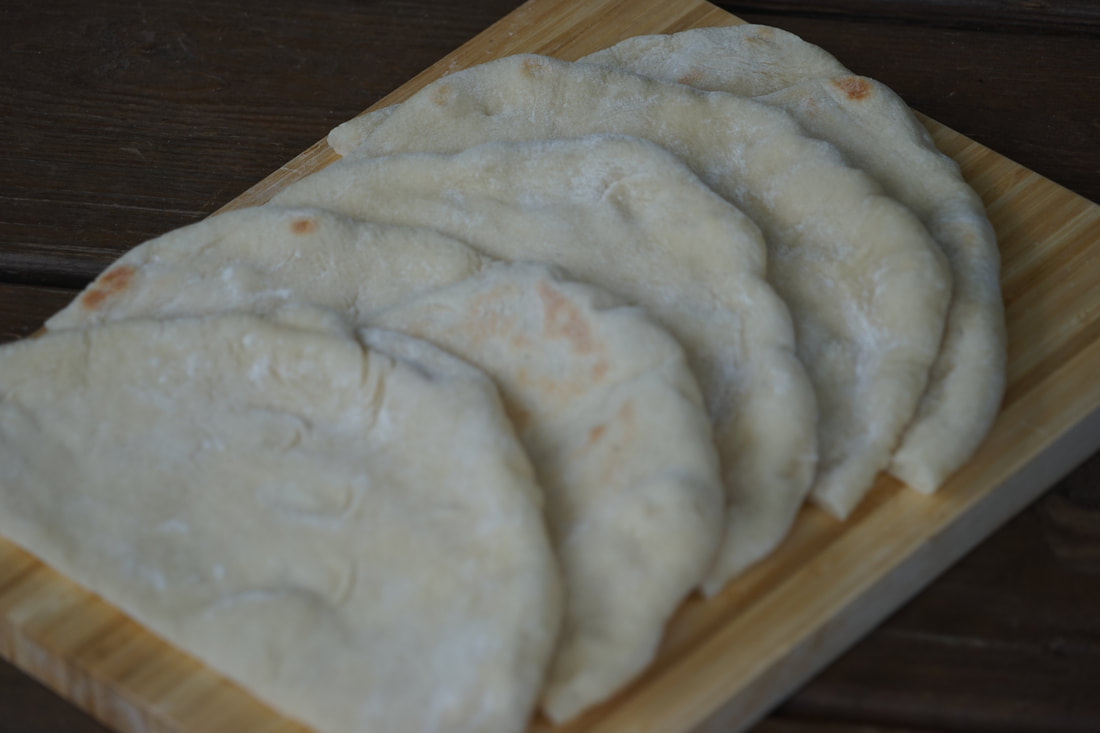
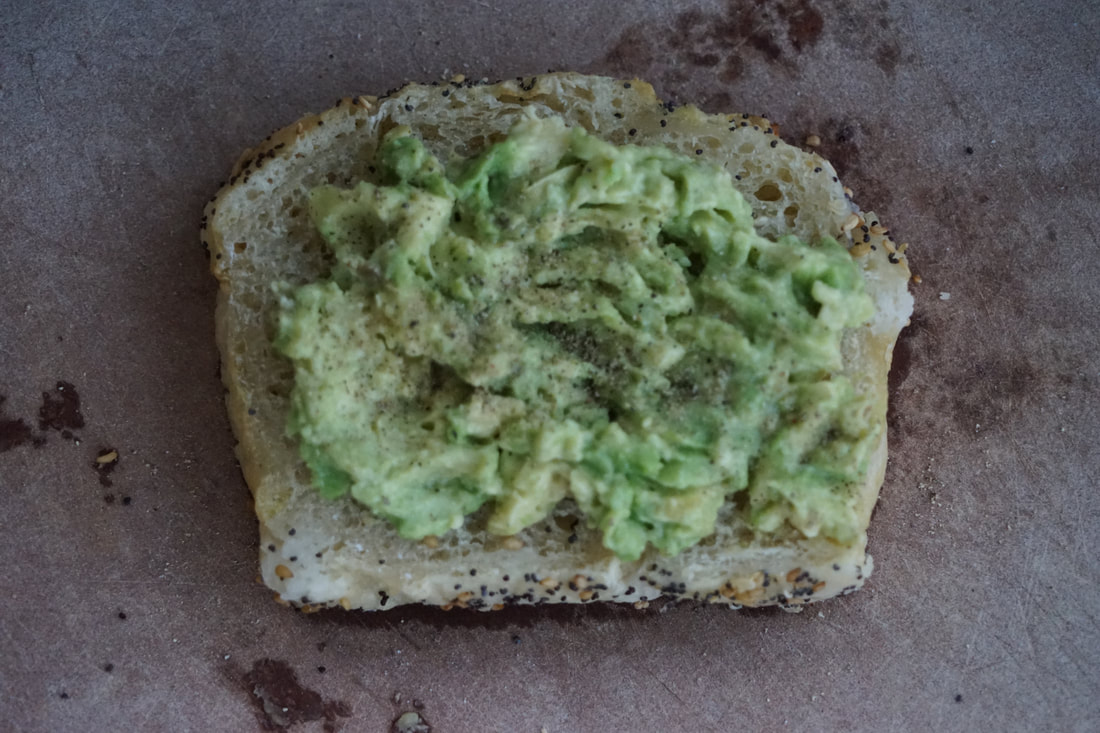
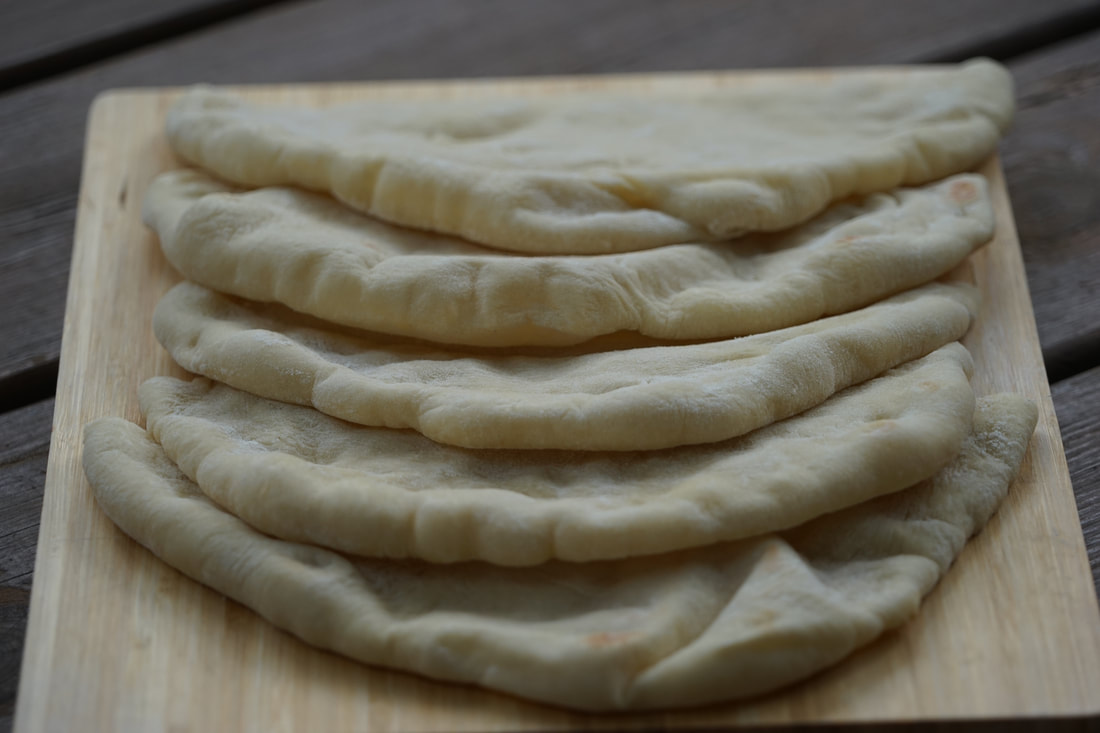
 I am not in the habit of writing deep theological blog posts - I'm a food blogger. I operate under the assumption that my blog readers come to my website looking for great recipes with a few humorous anecdotes from my crazy life thrown in. I like to keep my posts light and fun without a lot of political satire or fictional drama BUT ... since I write this blog about my recipes and my LIFE, my opinions and my personality are inevitably going to creep into my writing. I'm not out to convert you to my republican Christian conservative views - I'm simply sharing my story with anyone who might be interested. 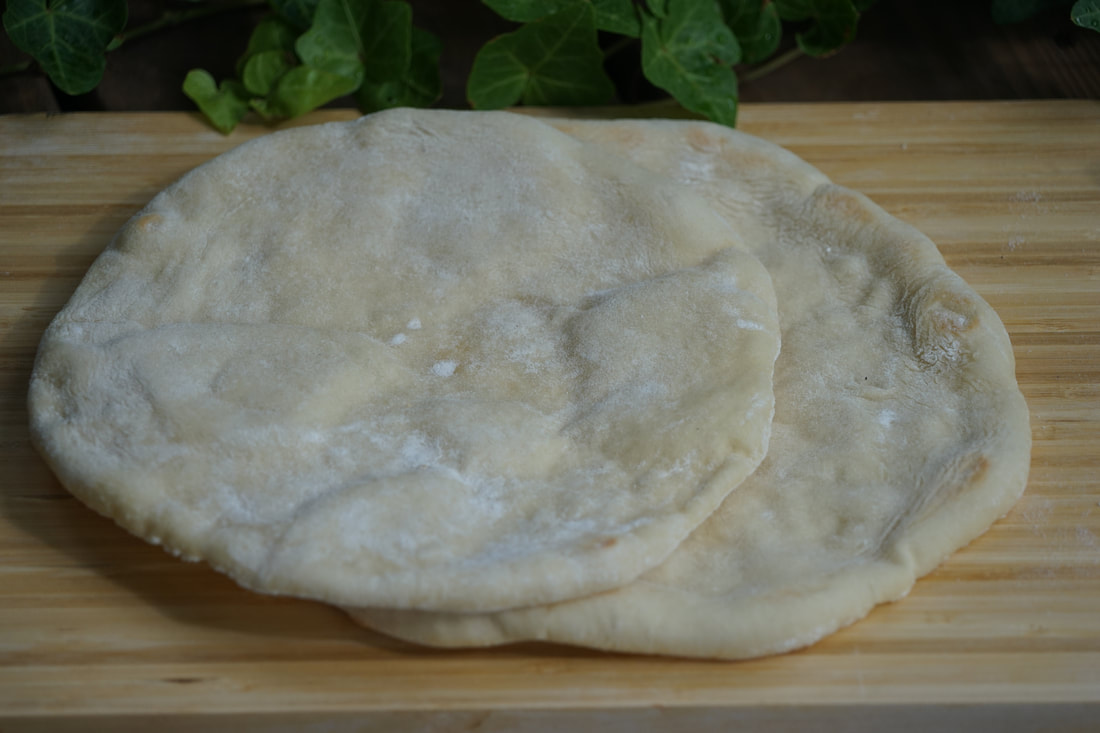 If I'm being perfectly honest, the thought of sharing my innermost thoughts and feelings on the internet for all to read and criticize, is terrifying. So why in the world would I subject myself to such scrutiny? Quite simply, I'm not a good at writing in a journal but I want to record all the stories and memories that I'm likely to forget. I have loved going back and revisiting some of the blog posts that I wrote over 10 years ago. So much has changed since then and I'd already forgotten some of the hilarious stories about my kids. I'm also grateful for a place to store all my recipes. I am super forgetful and I rely on my recipe index more than anyone else. I browse through the index frequently to jog my memory about the delicious recipes that I've made but had forgotten about. My pita bread is going to go down and one of my favorite bread recipes. I loved this bread and it's super versatile. I could eat a pita round by itself but I also like to open it up and stuff it for sandwiches. I loaded this one with chicken, spinach and avocado and it was amazing.  Pita Bread 2 2/3 cups bread flour 2 1/4 teaspoons yeast 1 1/3 cups ice water 1/4 cup olive oil 4 teaspoons honey 1 1/4 teaspoons salt
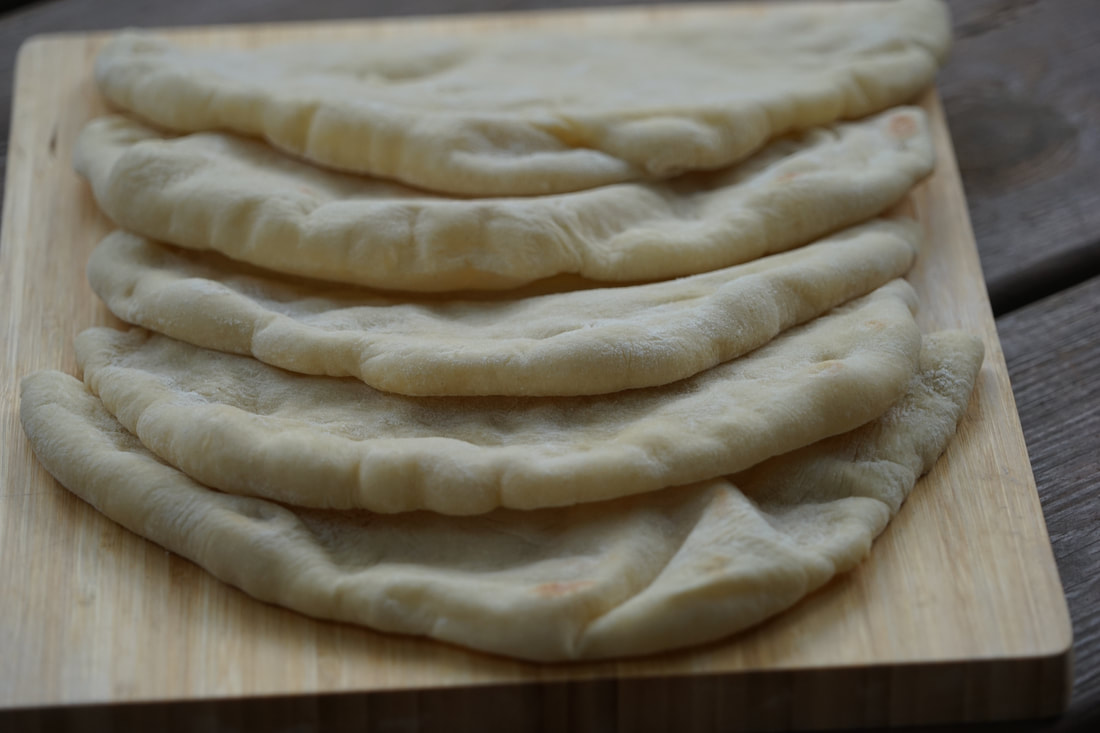
You can let them cool OR you can dive right in while your pita is still warm. Trust me - warm pita are BOMB! 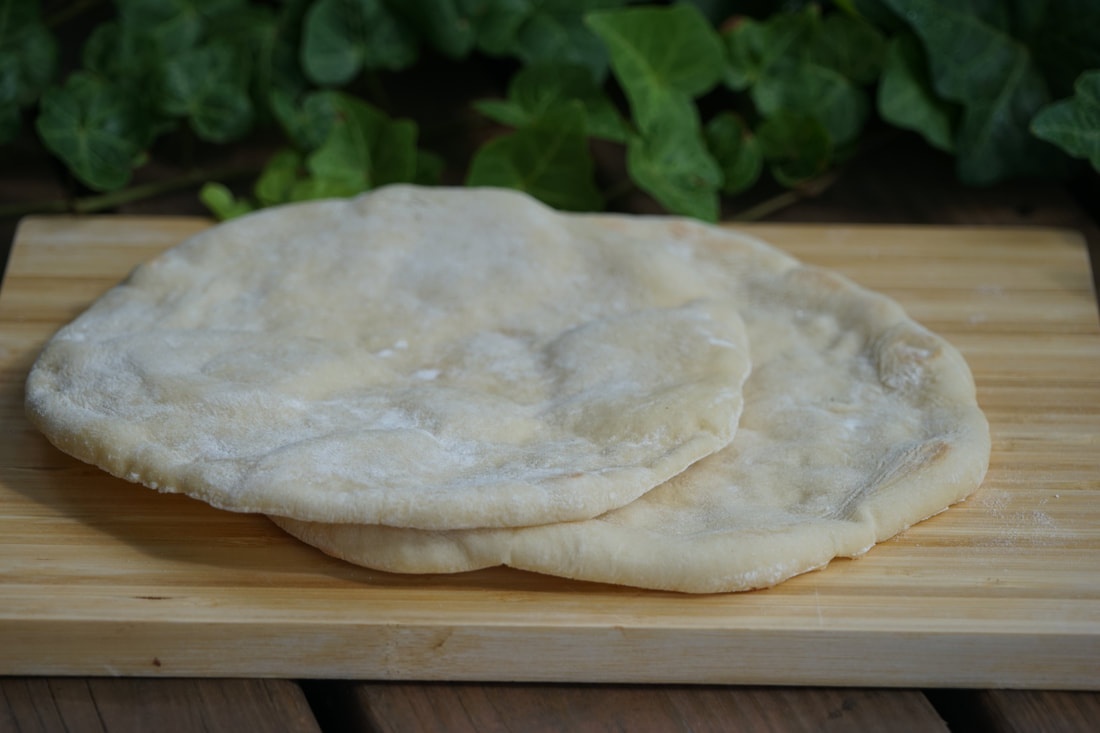 Slice in half.
Stuff and enjoy. 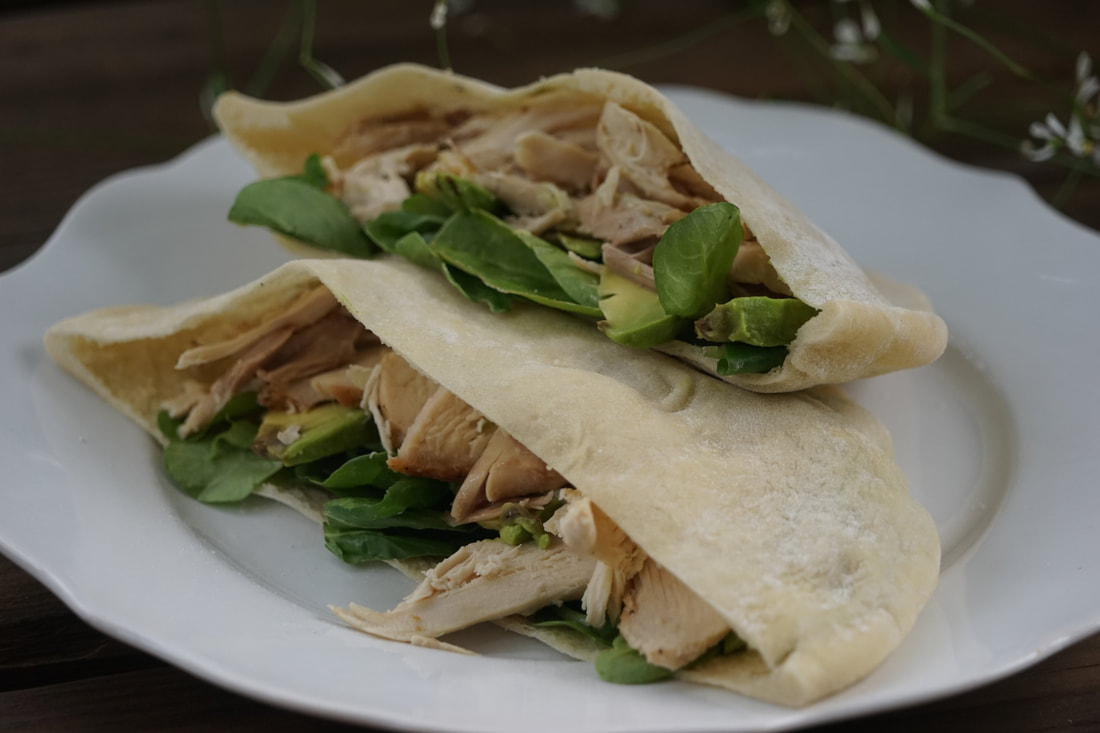 I'm kind of obsessed with warm sandwiches so I also like to warm these stuffed pita sandwiches - panini style. I don't have a panini press but I put them in a skillet with a heavy cast iron pan on top and cook them until browned and toasted. A perfect lunch for a cold November day.
Ciao!
2 Comments
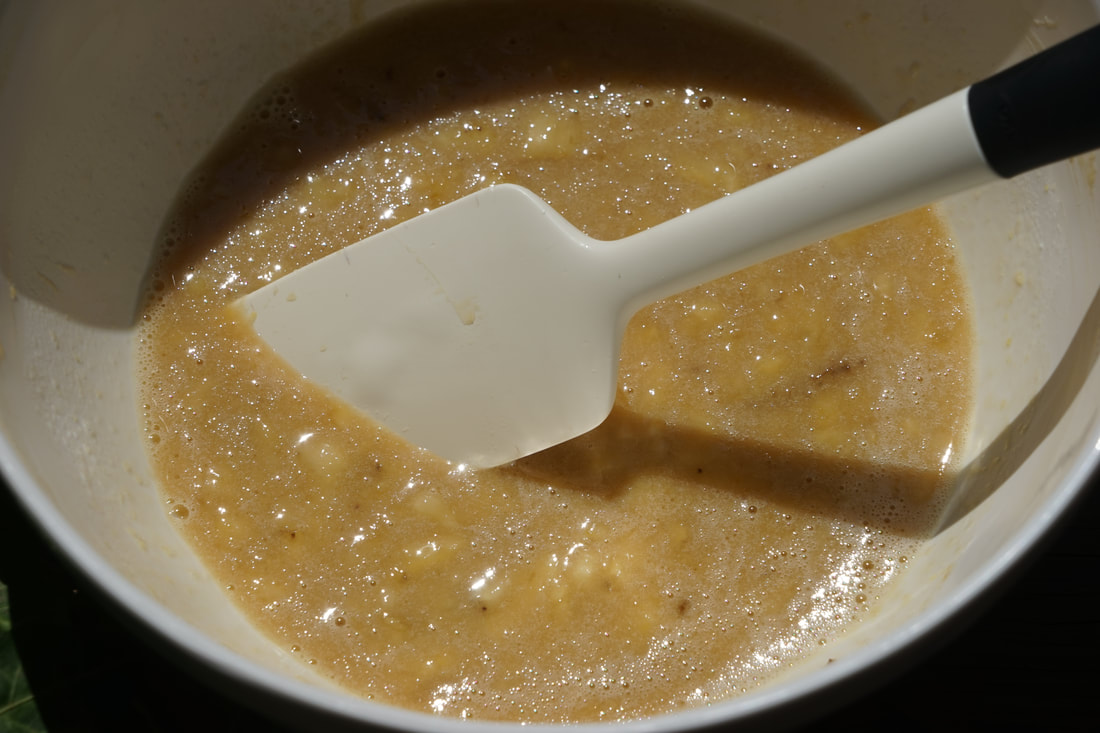
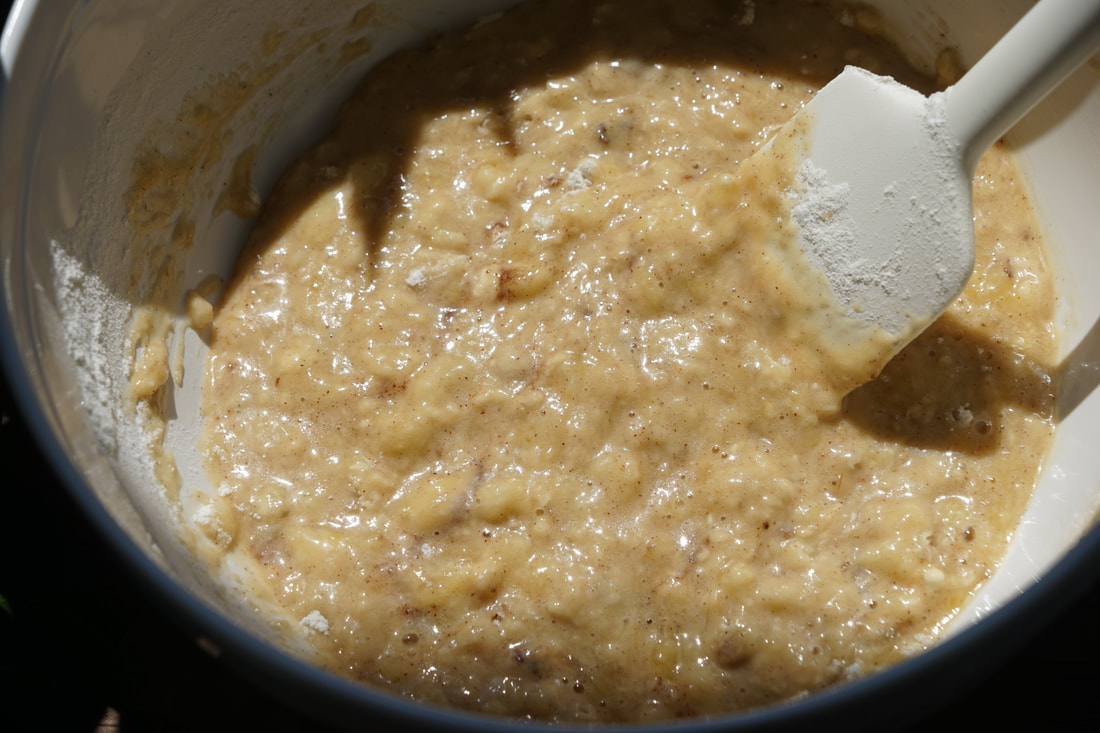
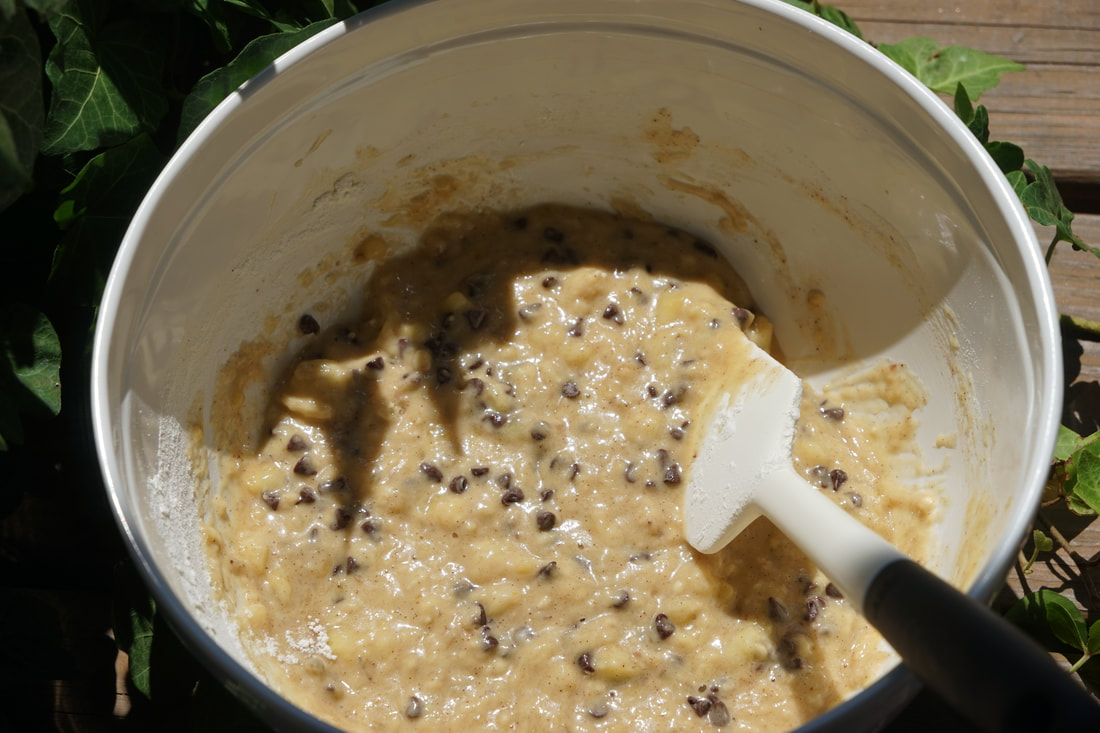
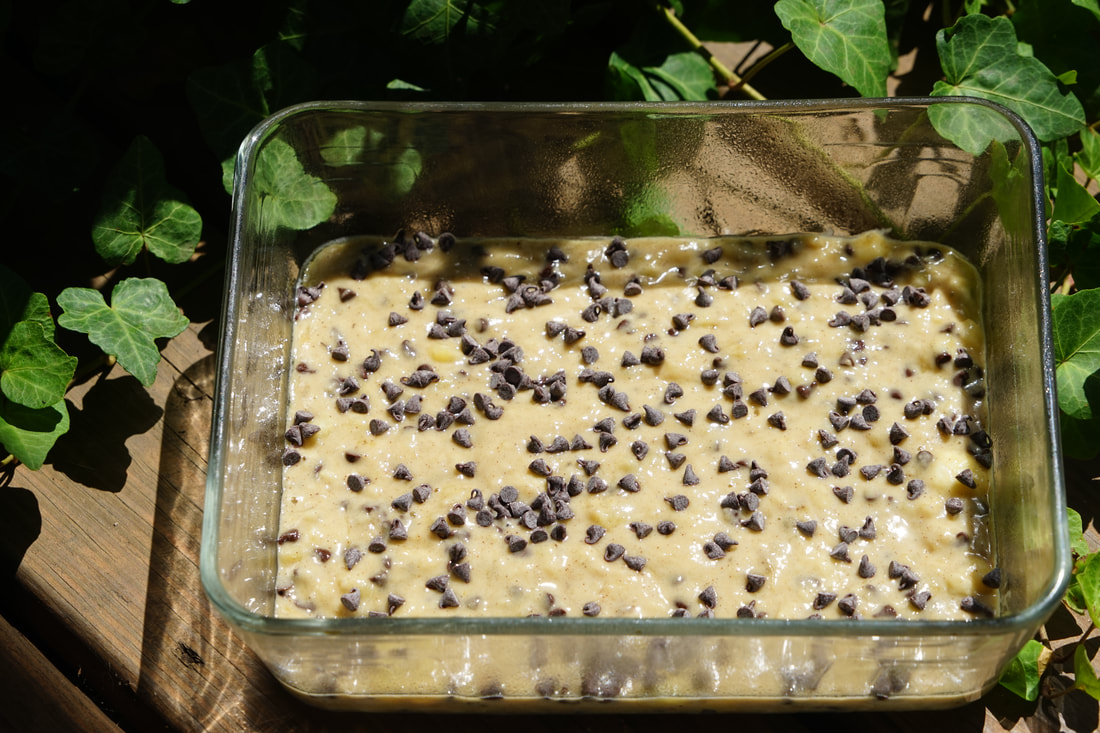
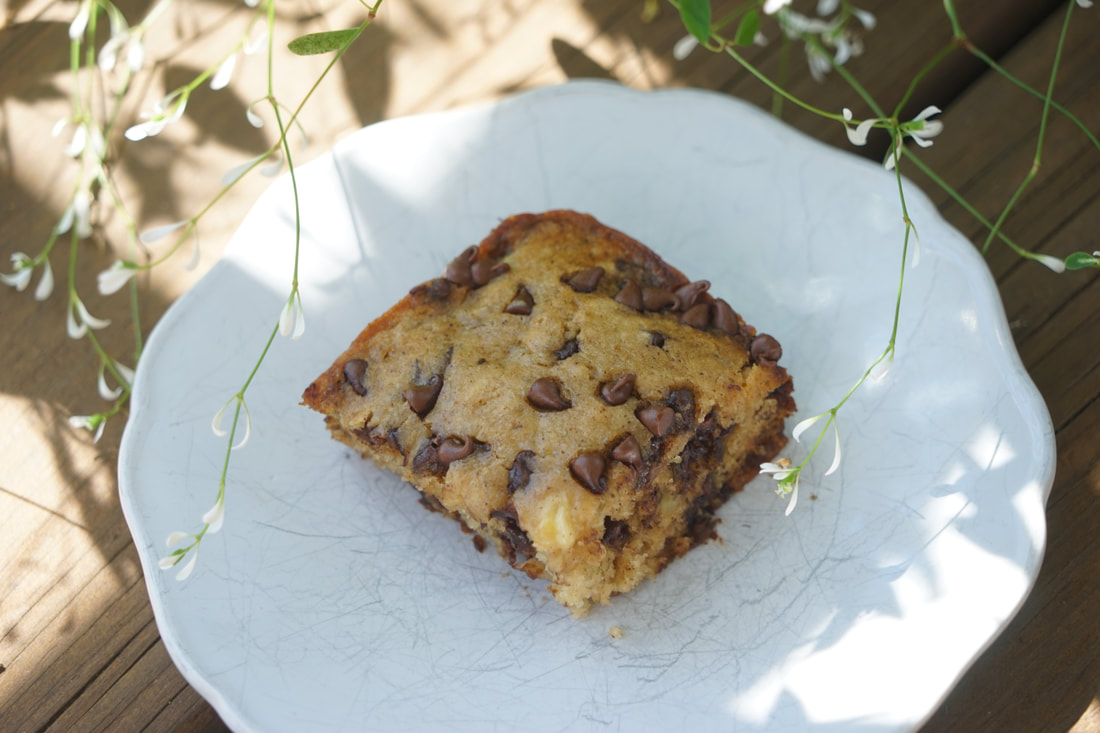
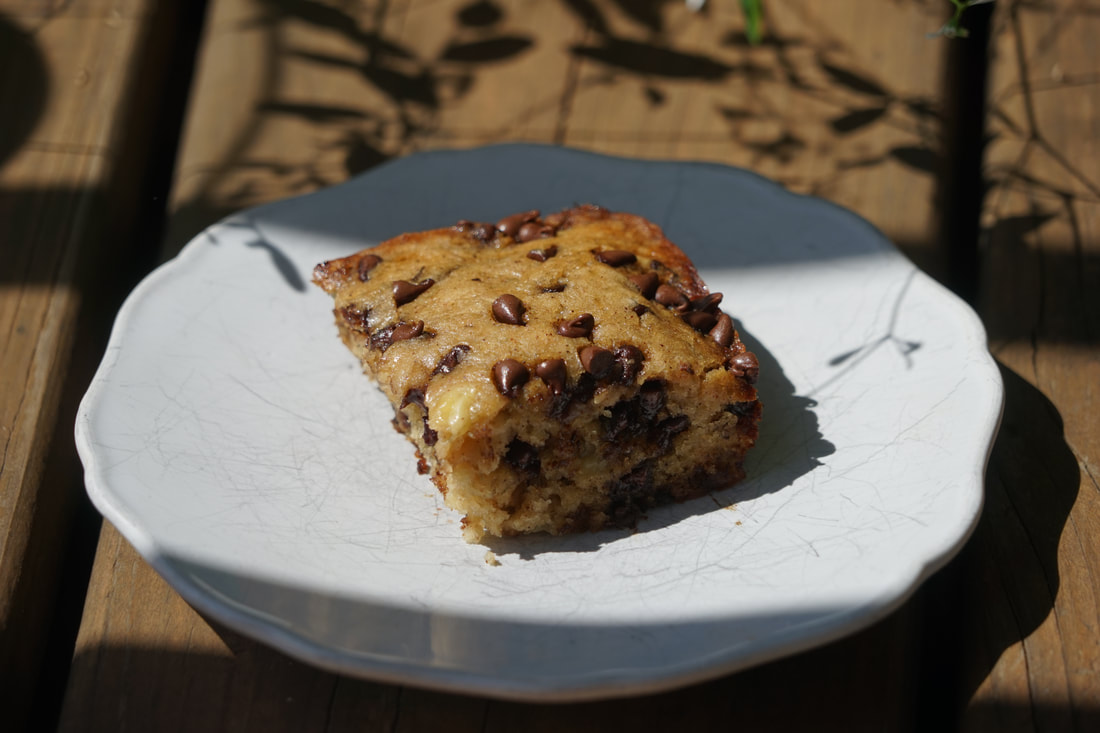
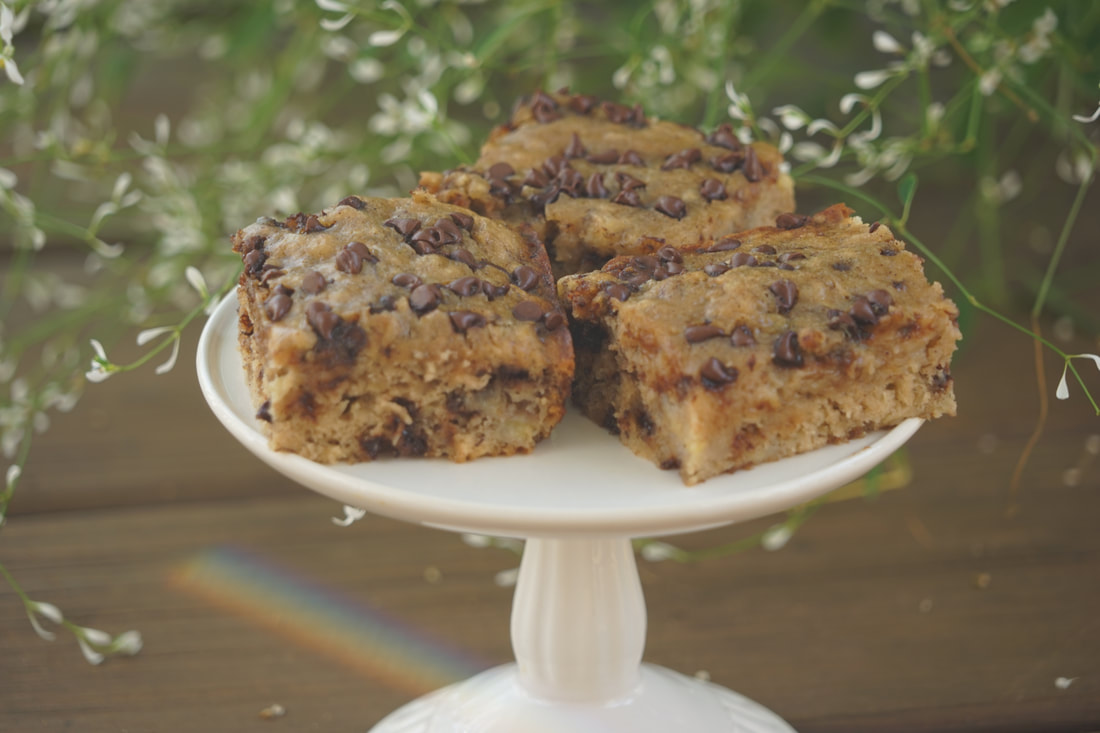 If you know me at all you know that I am all about storing away food for a rainy day. I'm not sure where I picked up this trait but for some reason I feel like if the zombie apocalypse were to happen in my town, my family would need unfrosted cupcakes and biscotti to survive. There are no words to describe the mini panic attack that occurs when I open the freezer and find empty shelves. There's no rational explanation for it, but the absence of perfectly portioned containers of soup, salsa and spaghetti sauce keeps me awake at night. I can honestly say that in my 47 years of life, I can't think of a single time when I was faced with an actual food emergency when I had to rely on my stockpile of freezer food to survive. As a matter of fact, it becomes more of a hinderance than a help sometimes. Last year when hurricane Irma came through Atlanta, I had to figure out how to keep all of that food frozen during extended power outages. (Thank goodness for coolers and ice machines.) The thought of losing all of that freezer food was scarier than losing trees in the yard. Priorities, right? 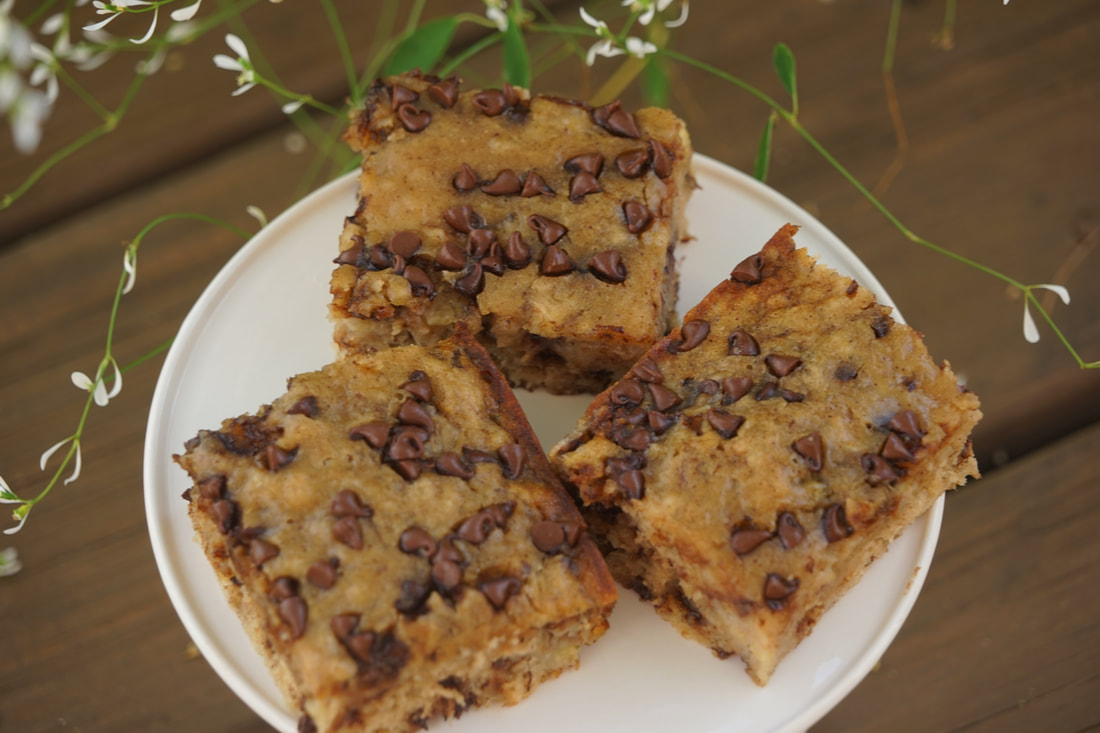 Even though I wouldn't describe them as "emergencies" I do like the fact that I have food available when I want it. When I sign up to bring a dessert to Bible study but then I run out of time to bake - freezer cookie dough to the rescue. When we get a last minute invite to a friends house for a cookout - frozen boston butt. When we decide to join some friends at the lake and I need to contribute something towards dinner - freezer macaroni and cheese. It may not save us from the zombie apocalypse but there is no question that having food in the freezer comes in handy. Rather than try and fight it, I'm learning to try and embrace my food hoarding tendencies. These Chocolate Chip Banana Bars are the perfect freezer food. They're great as a breakfast treat or dessert. Because they're naturally soft and chewy, you really don't even need to let them defrost completely before diving in. 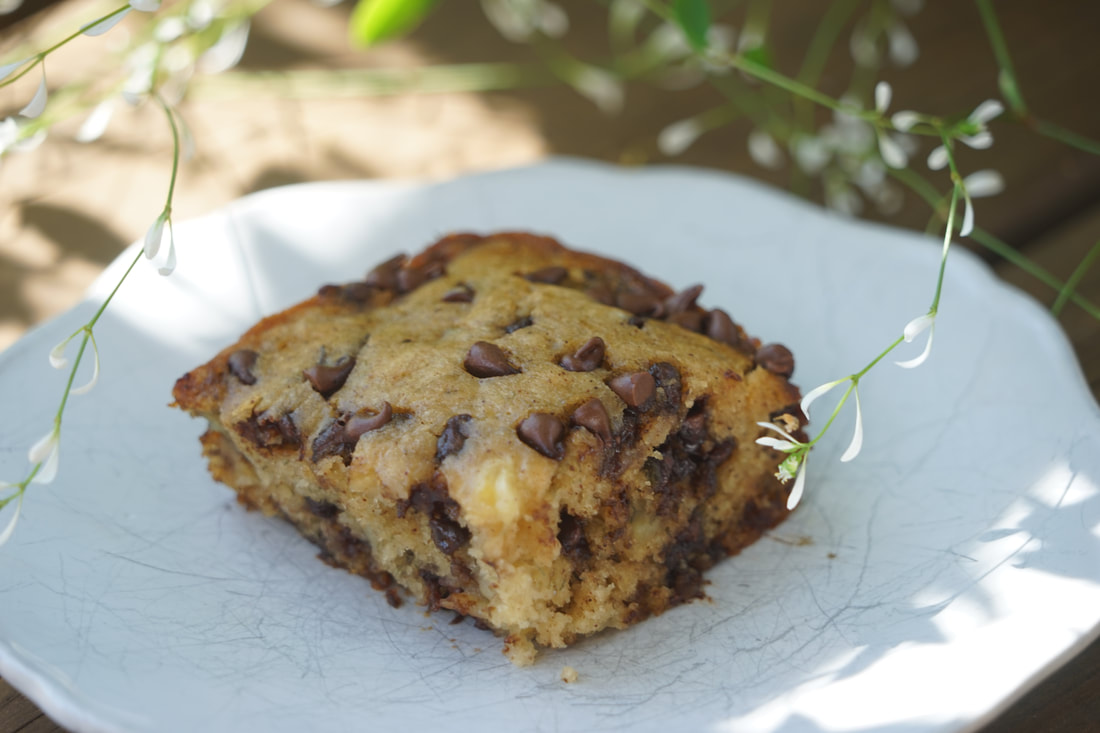 Chocolate Chip Banana Bars 3 bananas 1/3 cup brown sugar 3 Tablespoons oil 3 Tablespoons milk 1 egg 1/2 teaspoon vanilla 3/4 cup + 2 Tablespoons flour 3/4 teaspoon baking soda 1/4 teaspoon salt 1/2 teaspoon cinnamon 3/4 cup mini chocolate chips
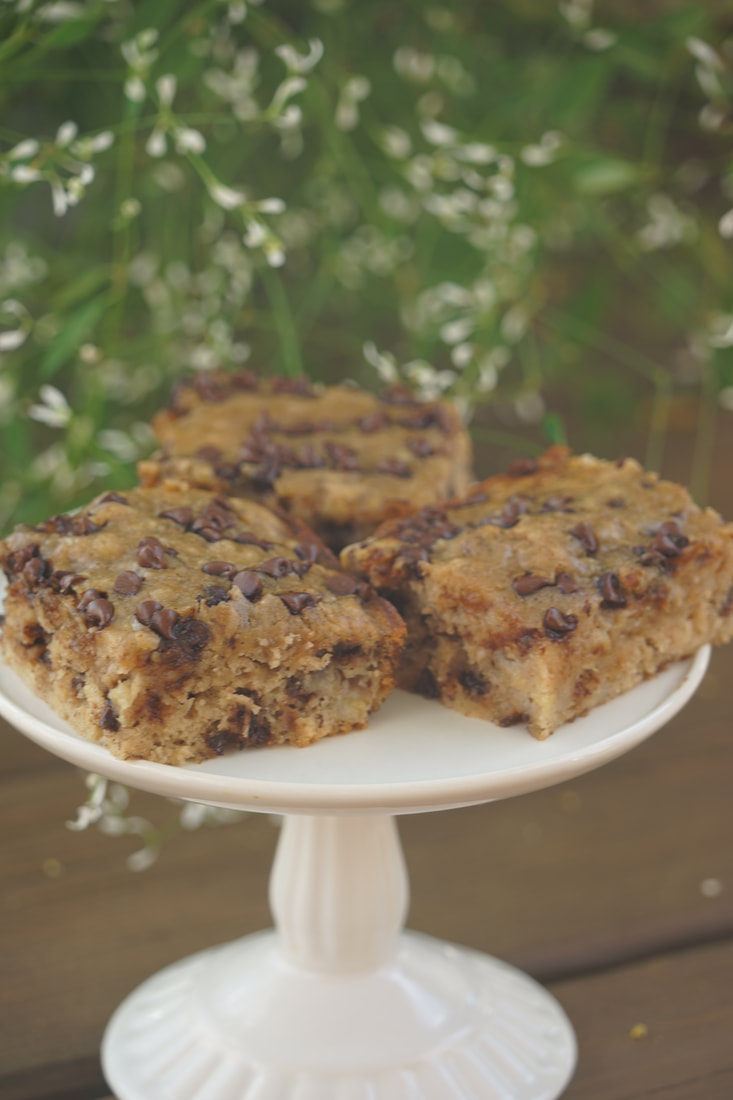
Serve these yummy little treats for breakfast with coffee, for an afternoon snack with tea or for a sweet after dinner dessert.
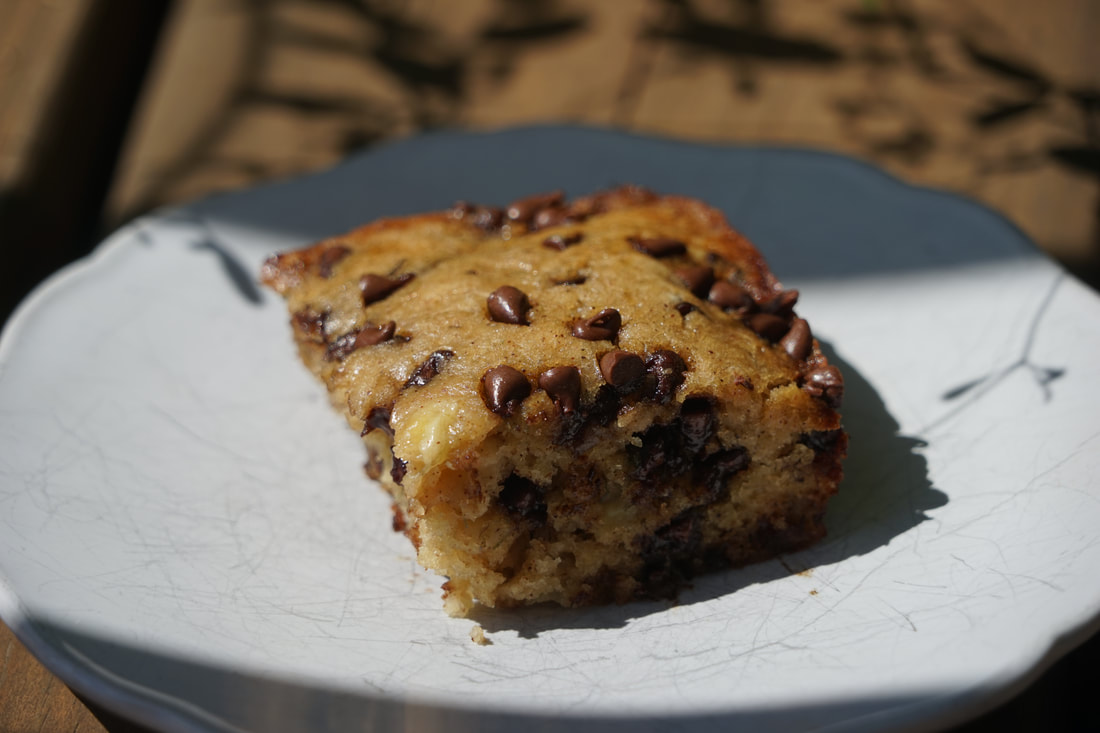
I'm super disappointed in how my pictures of this little treat turned out. (That's what I get for trying to rush through a photo shoot with bad lighting and a dirty lens.) Just don't judge these delicious Chocolate Chip Banana Bars by the pictures - in this case they really ARE better than they look.
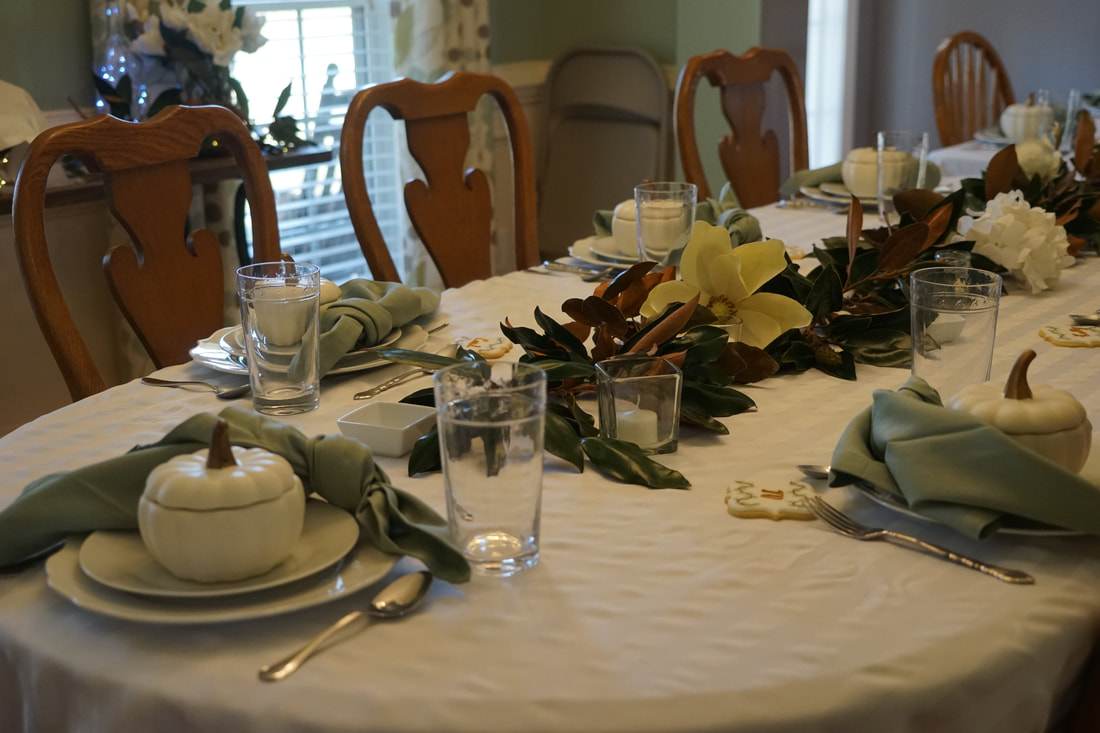
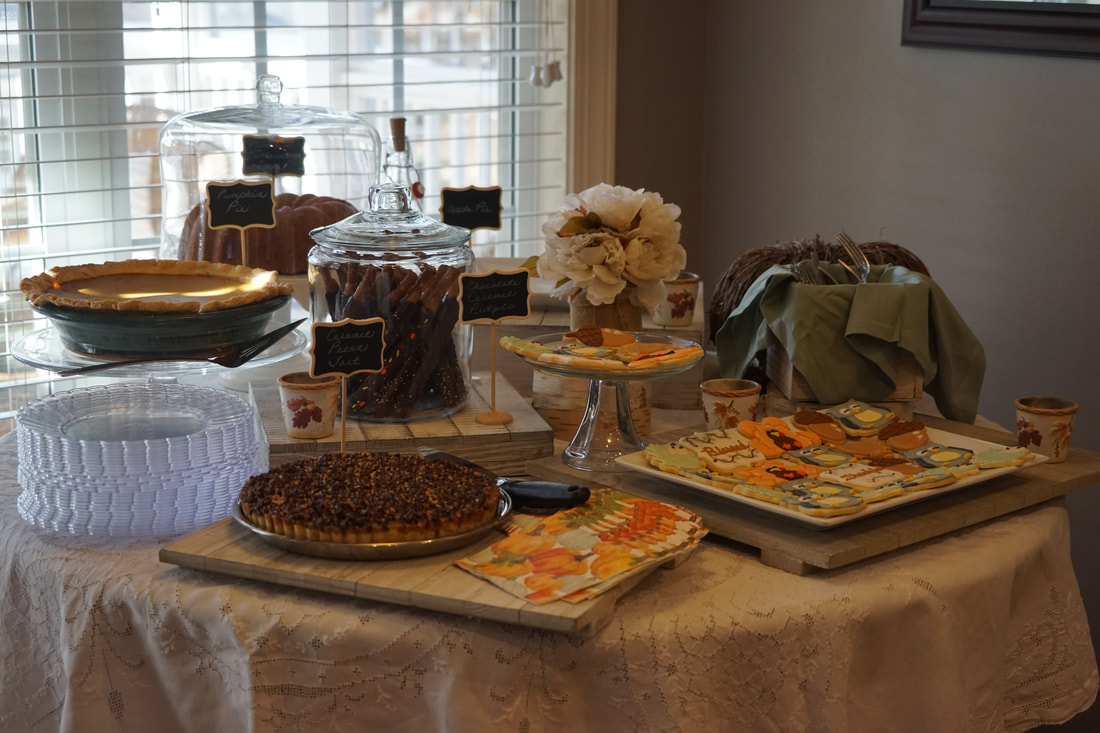
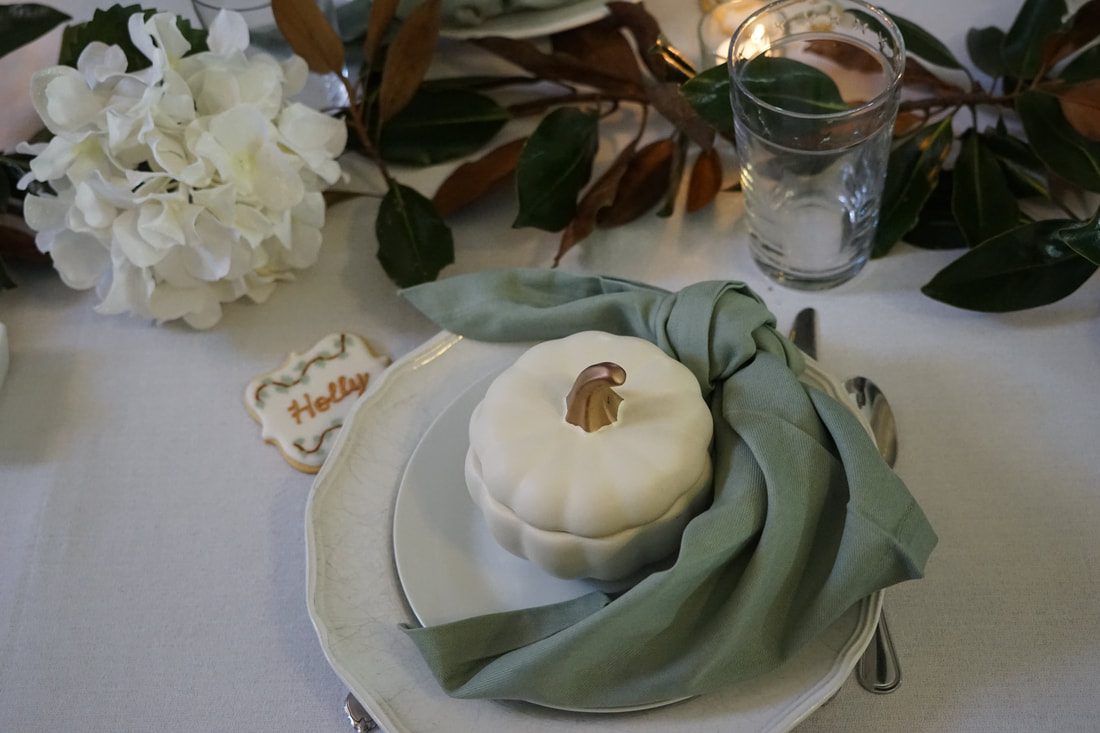
Ciao!  Two turkeys, 15 pounds of mashed potatoes, 6 pounds of sweet potatoes, 4 dozen rolls, 2 salads, gravy, stuffing, green beans, corn casserole, cranberries, 2 pies, 1 cake, 1 tart, chocolate pretzels, sugar cookies and homemade ice cream. I would say that Thanksgiving 2018 was a feast of epic proportions. These are the meals that home chefs live for. Lots of food, lots of wine, pretty table decorations and plenty of guests to enjoy it all.
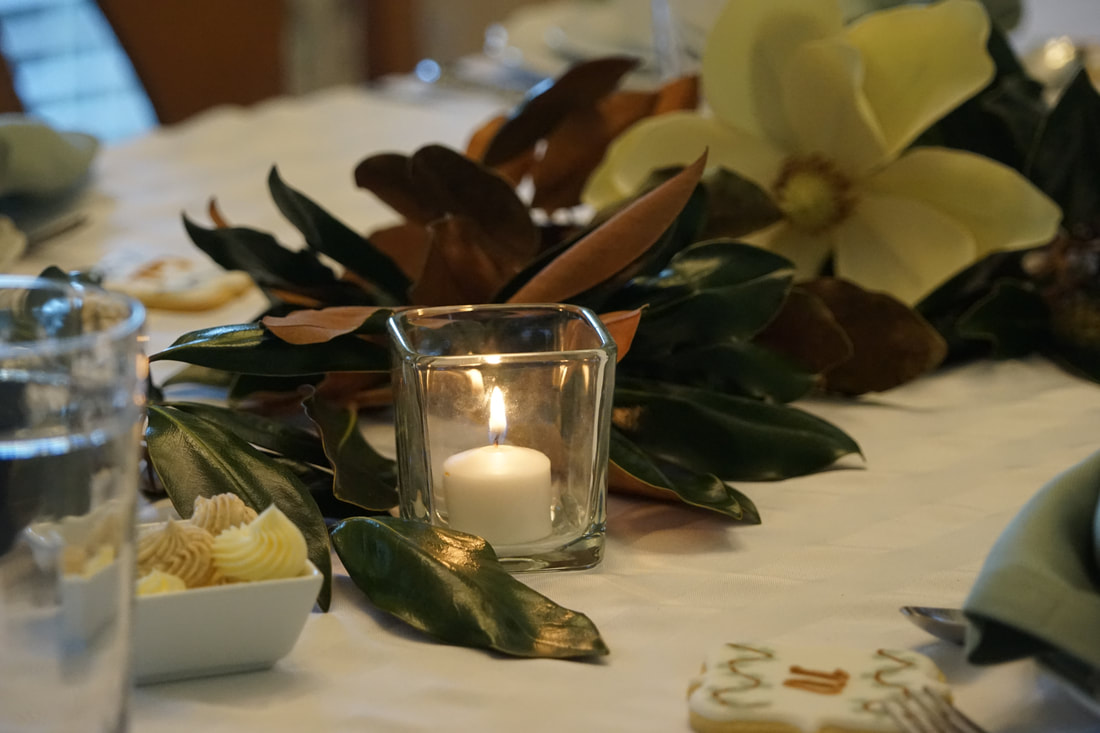
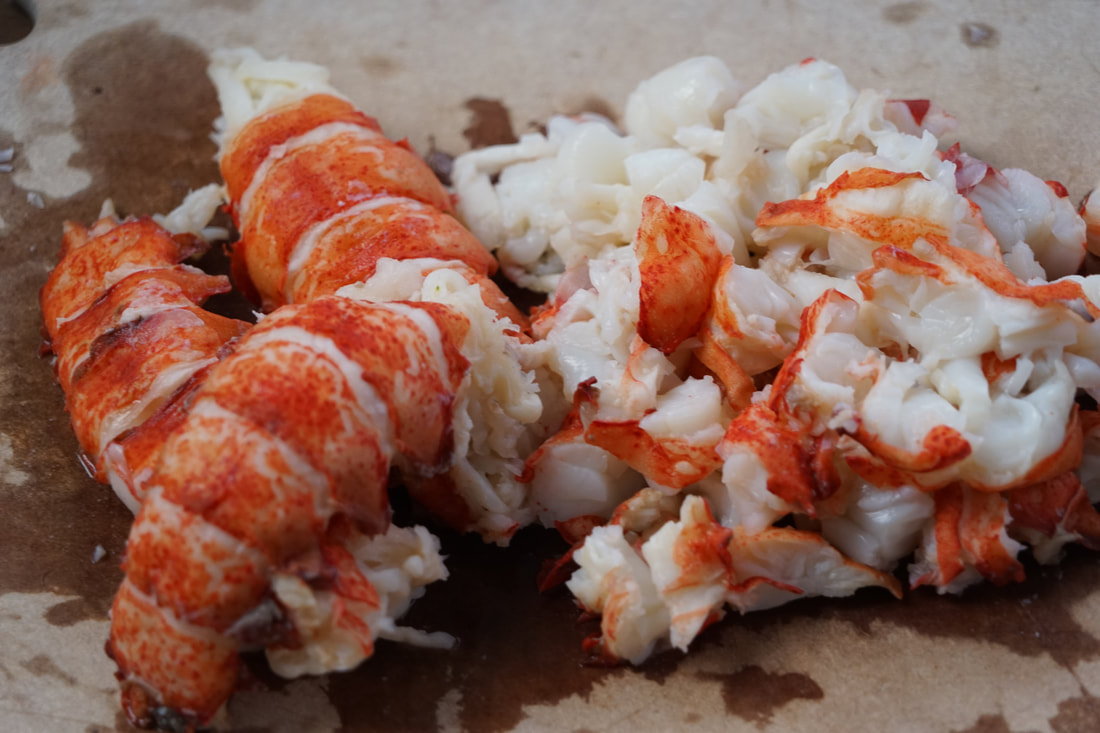
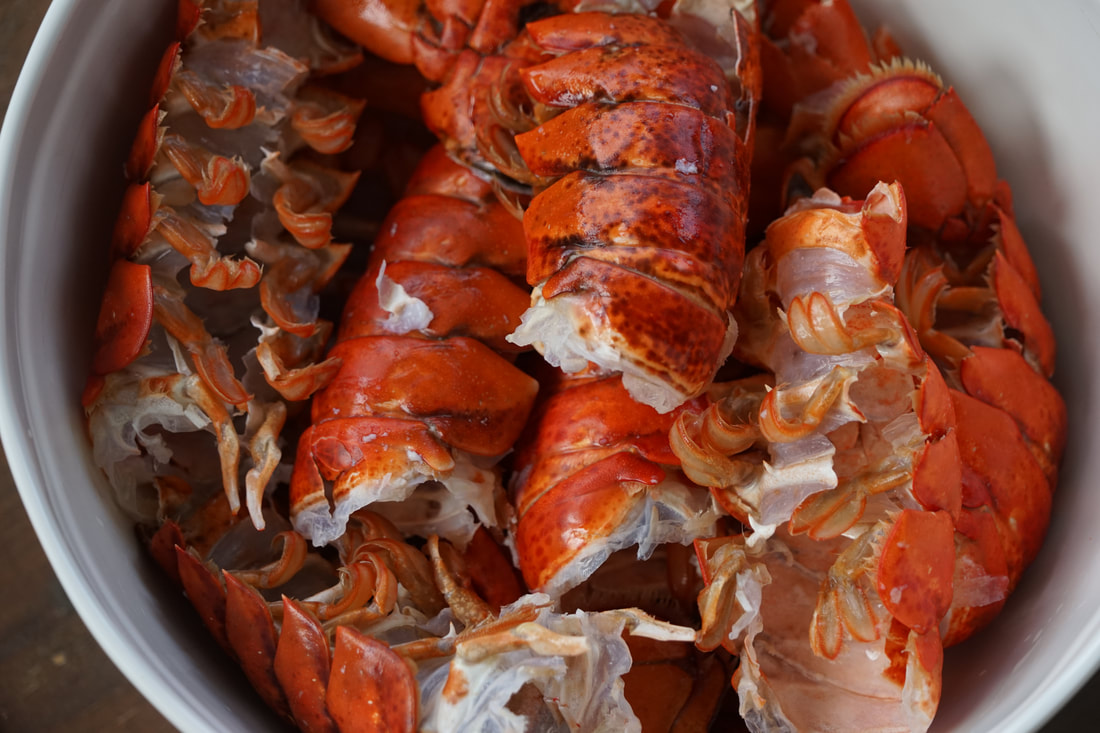
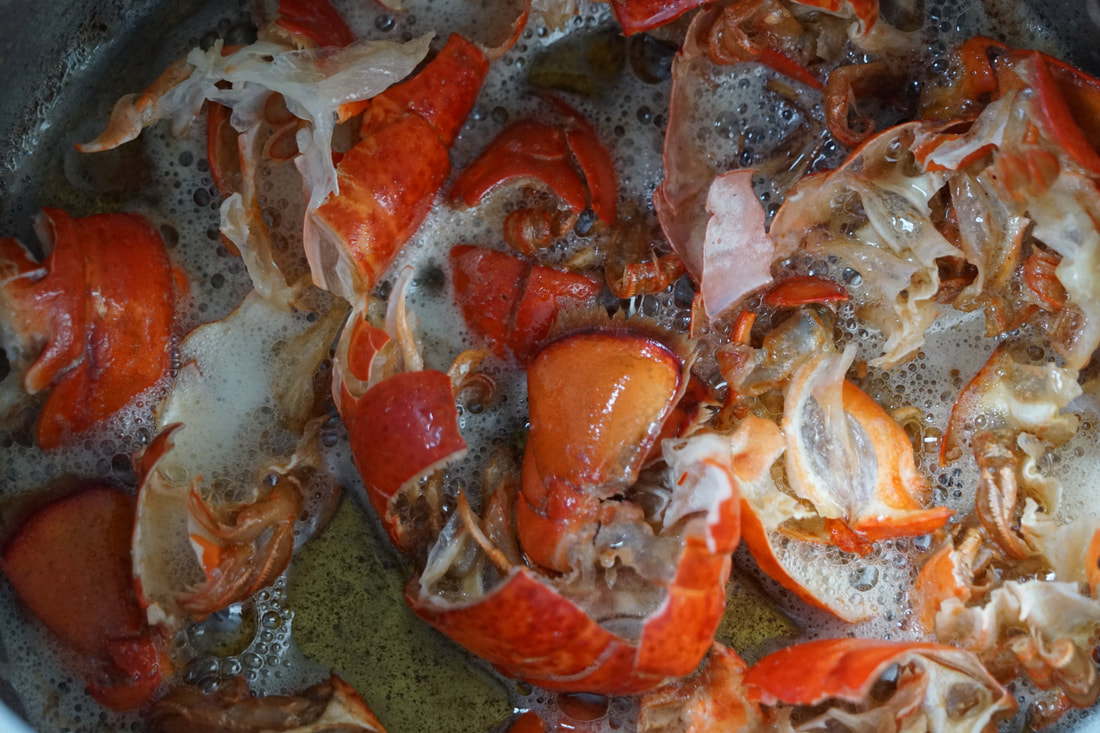
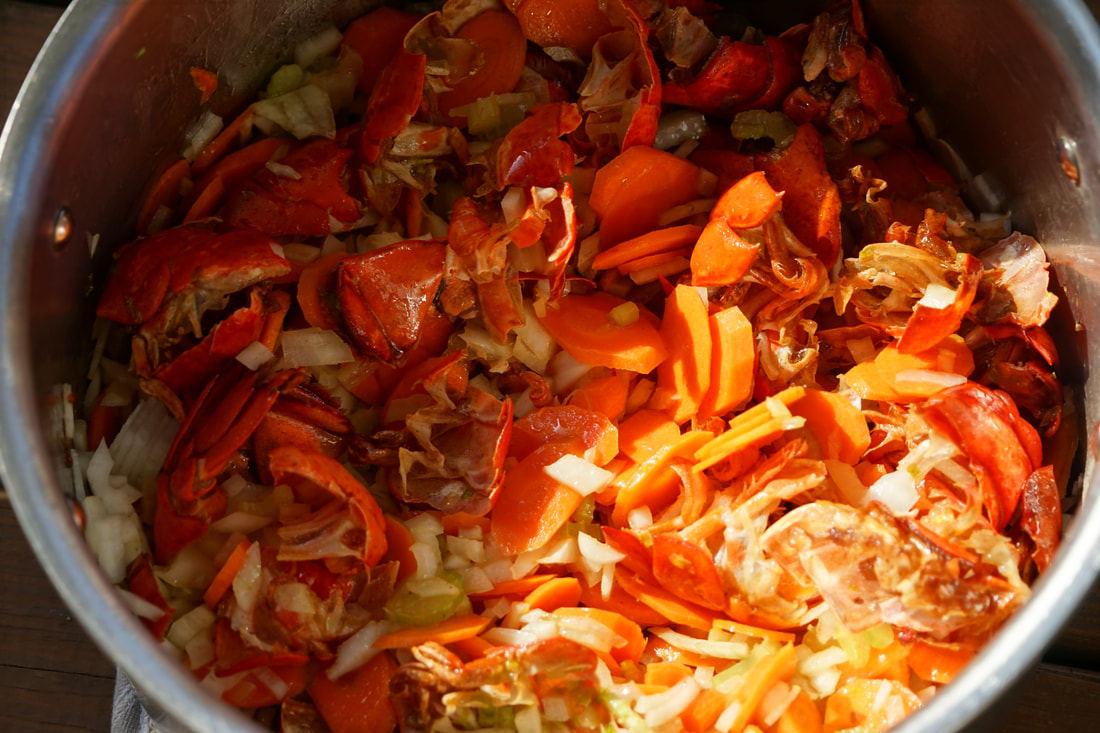
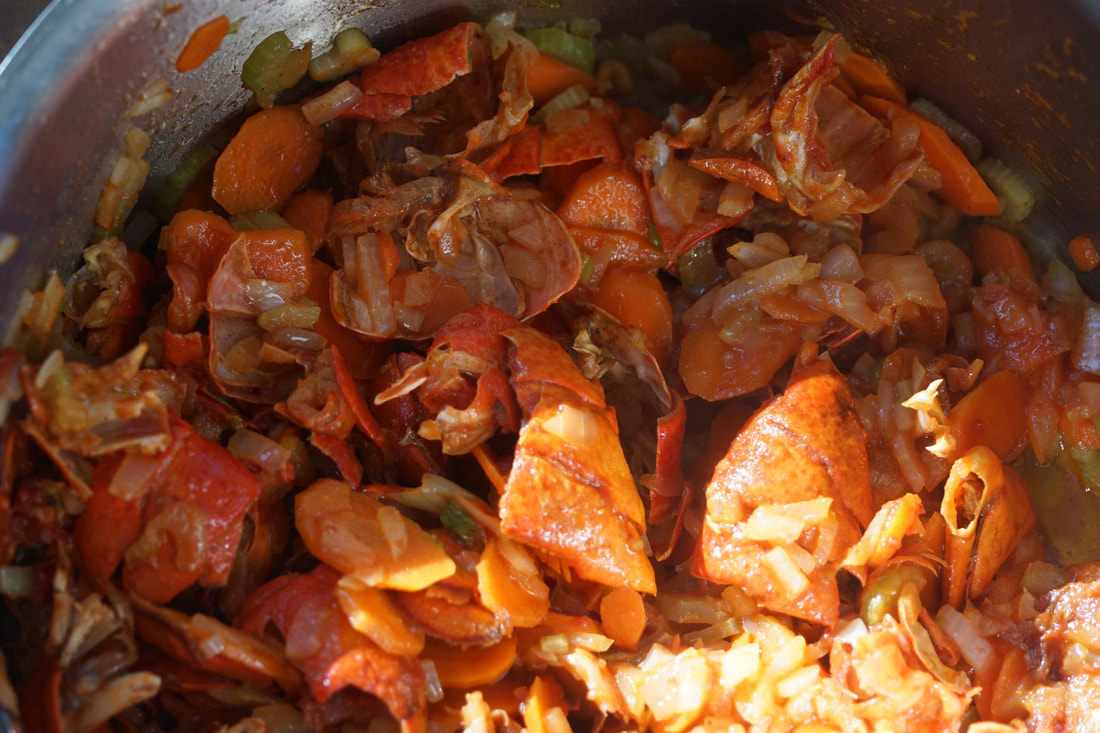
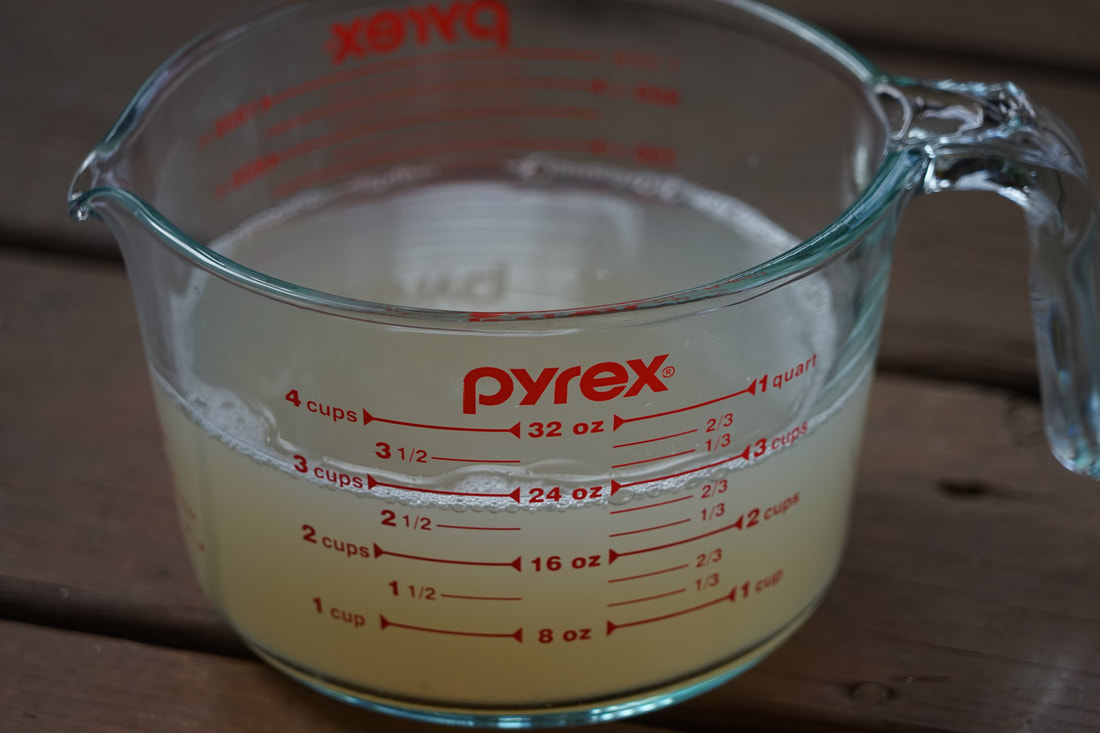
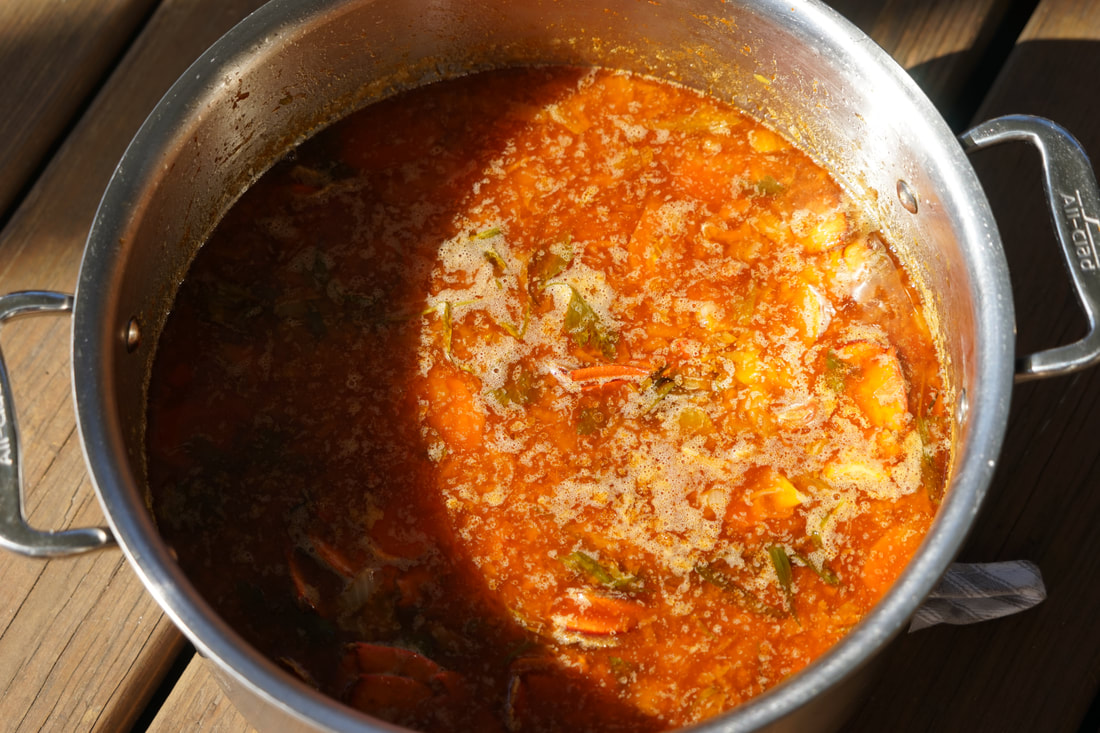
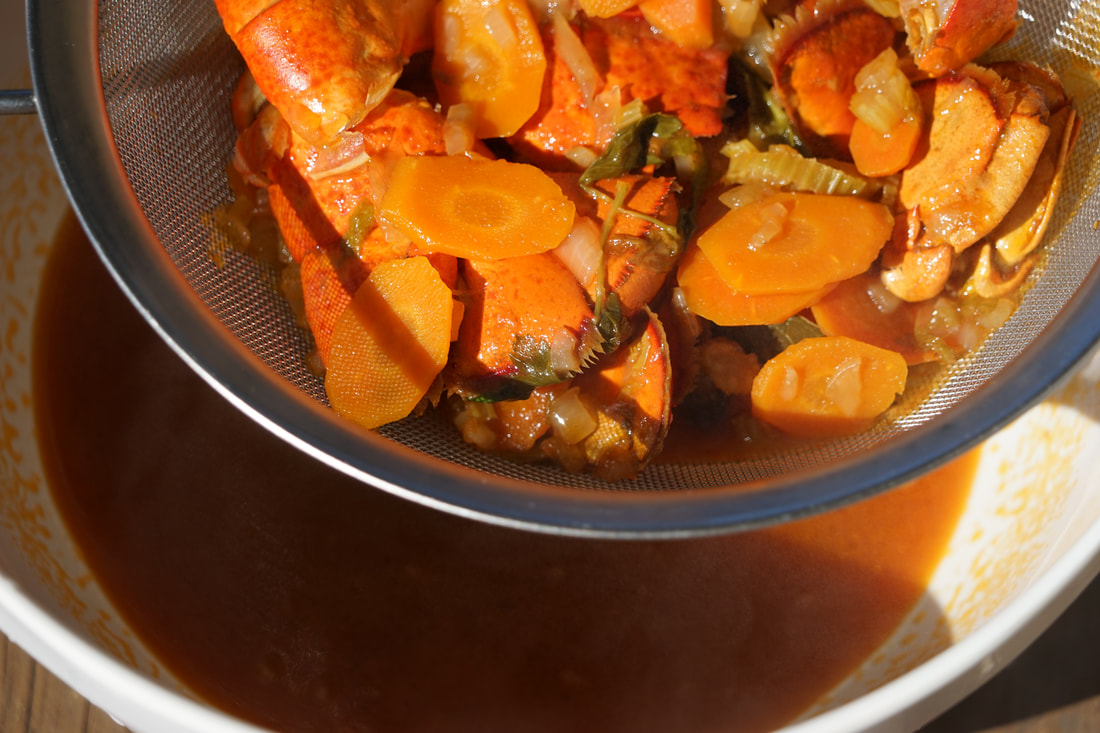
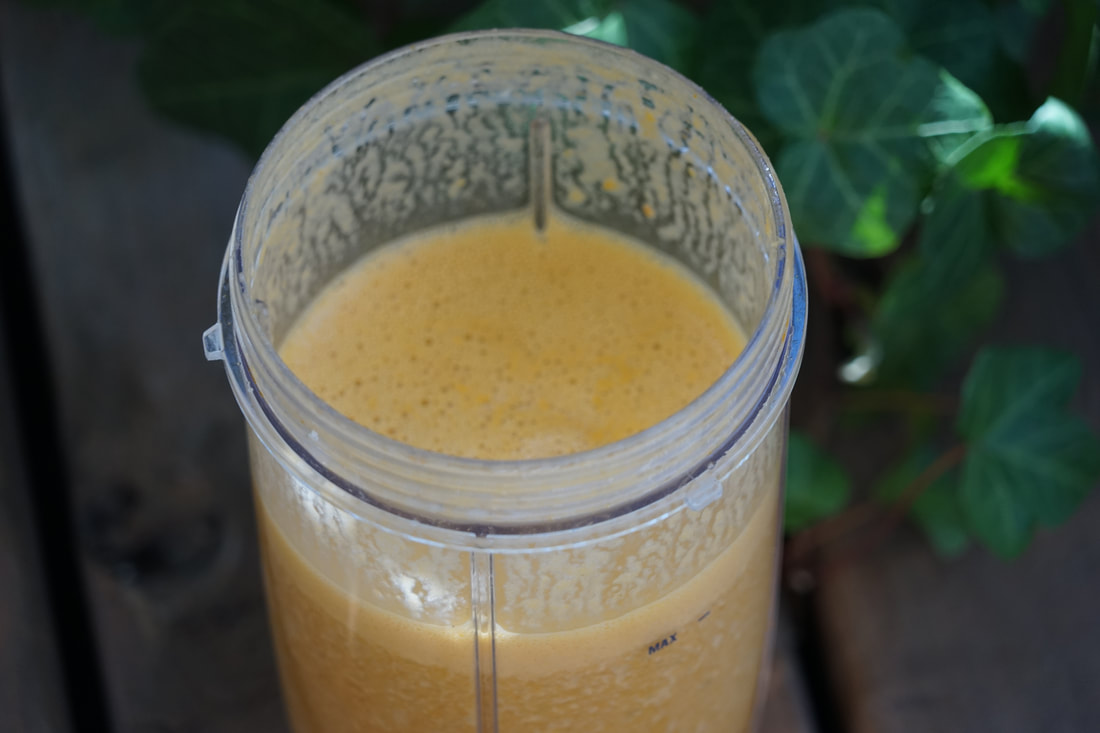
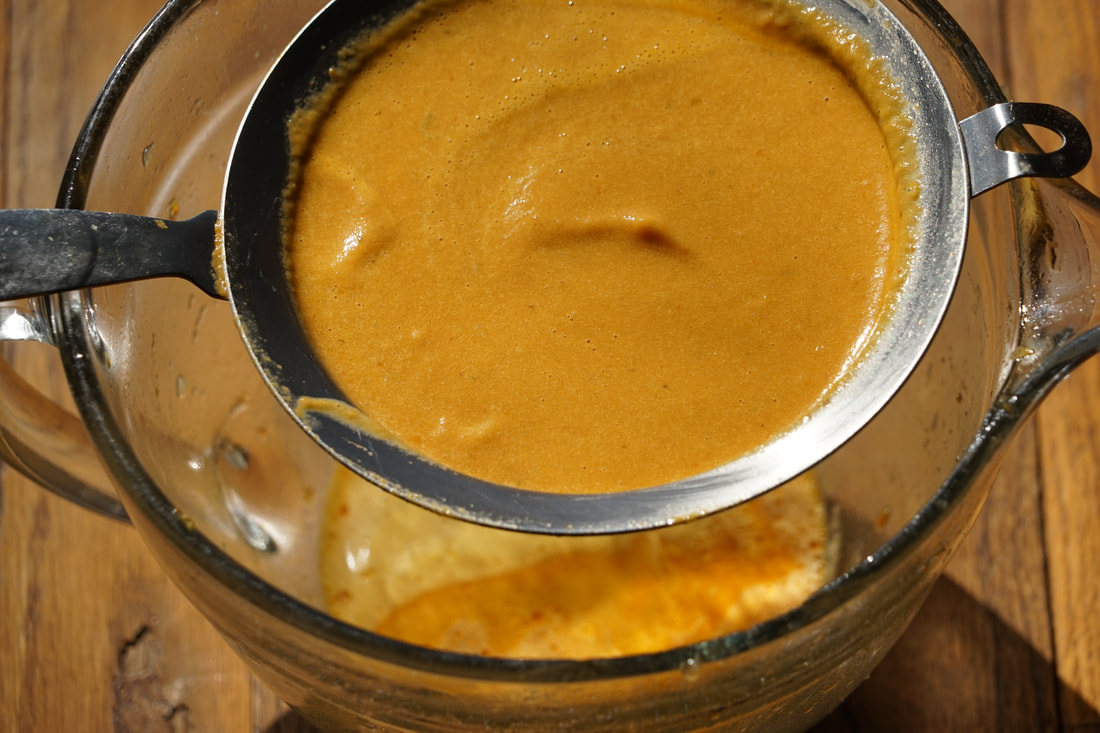
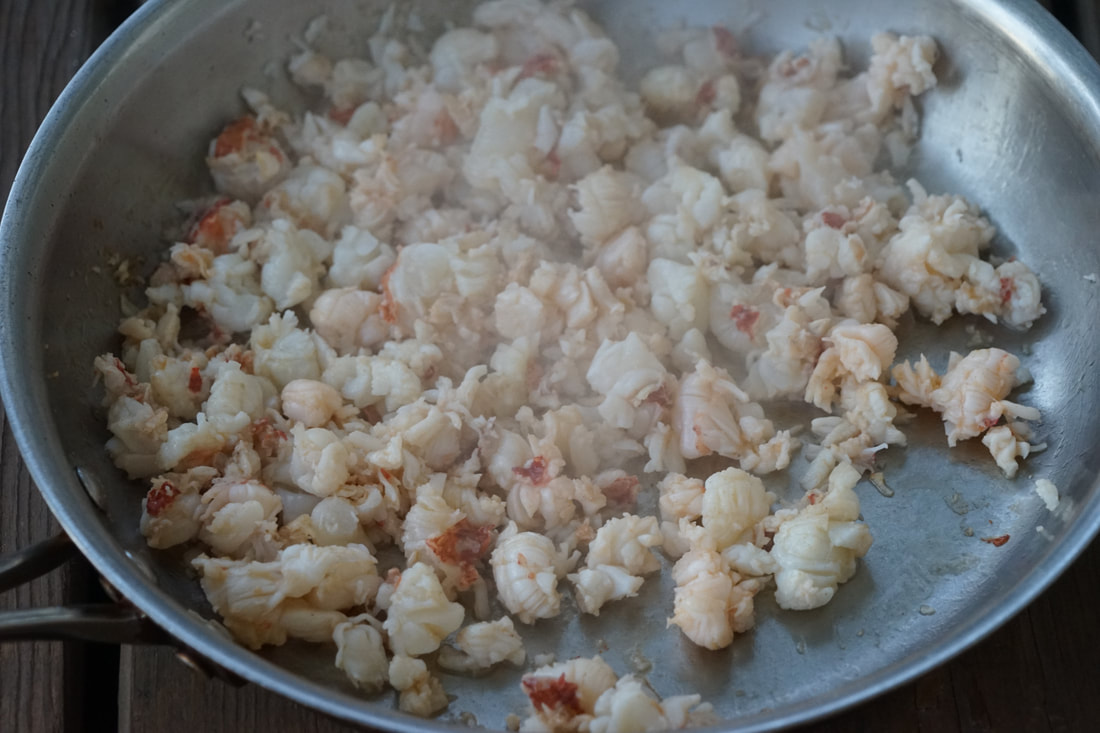
Before we dove into any of that scrumptious Thanksgiving fare - we kicked off our meal with a bowl of creamy lobster bisque. Inspired by the darling little pumpkin bakers that really became table decorations, I decided to start off our meal with a somewhat non-traditional soup course. Lobster bisque was the first thing that came to mind when I started to think through hearty soups to compliment our Thanksgiving meal. After all, who doesn't like lobster? 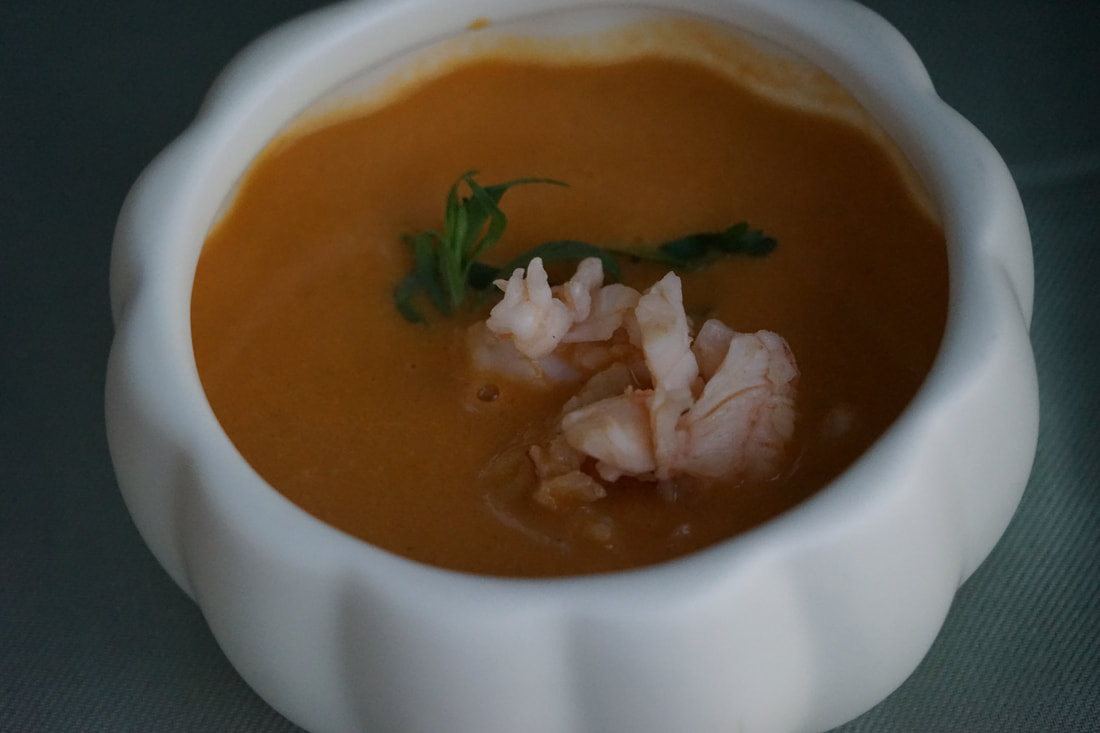 Lobster Bisque 8 lobster tails 1 stick butter 1/3 cup olive oil 4 medium carrots, sliced 2 yellow onions, diced 4 stalks celery, sliced 4 Tablespoons tomato paste 8 cups chicken stock 3 sprigs fresh parsley 3 sprigs fresh tarragon 1 bay leaf 1/2 cup heavy cream salt and pepper Place steamer basket in bottom of a large pot and add 1" of water. Bring to a boil. Add 2-3 lobsters at a time, cover and steam 2 1/2 minutes. Reserve water in bottom of pot. 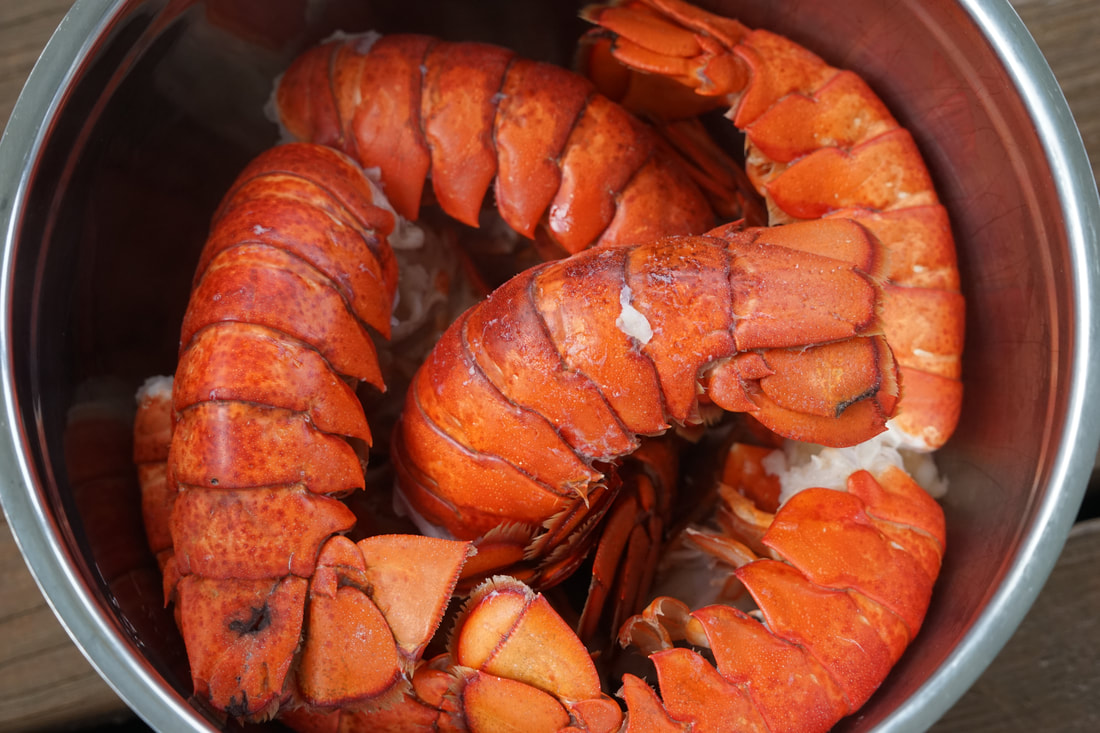 Remove tails, split tails in two and remove meat. Chop meat. Reserve shells. Refrigerate lobster meat.
Chop shells into 1" pieces. 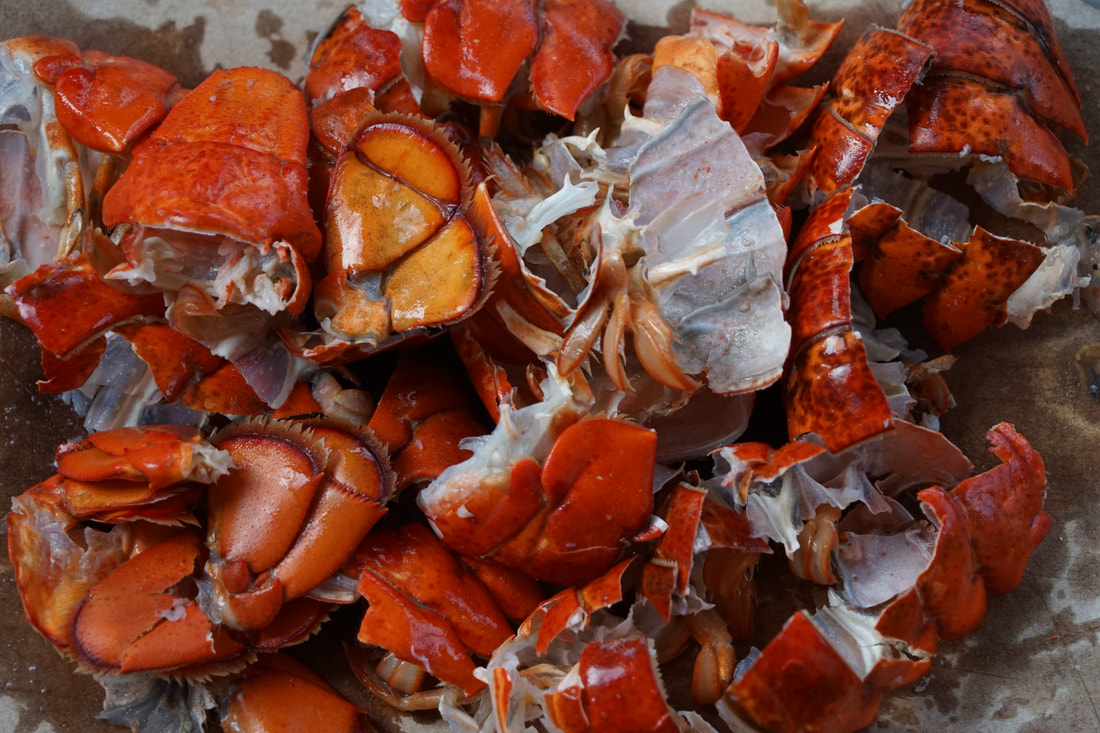
Add brandy and cook 5 minutes. Add wine and cook another 5 minutes on high. 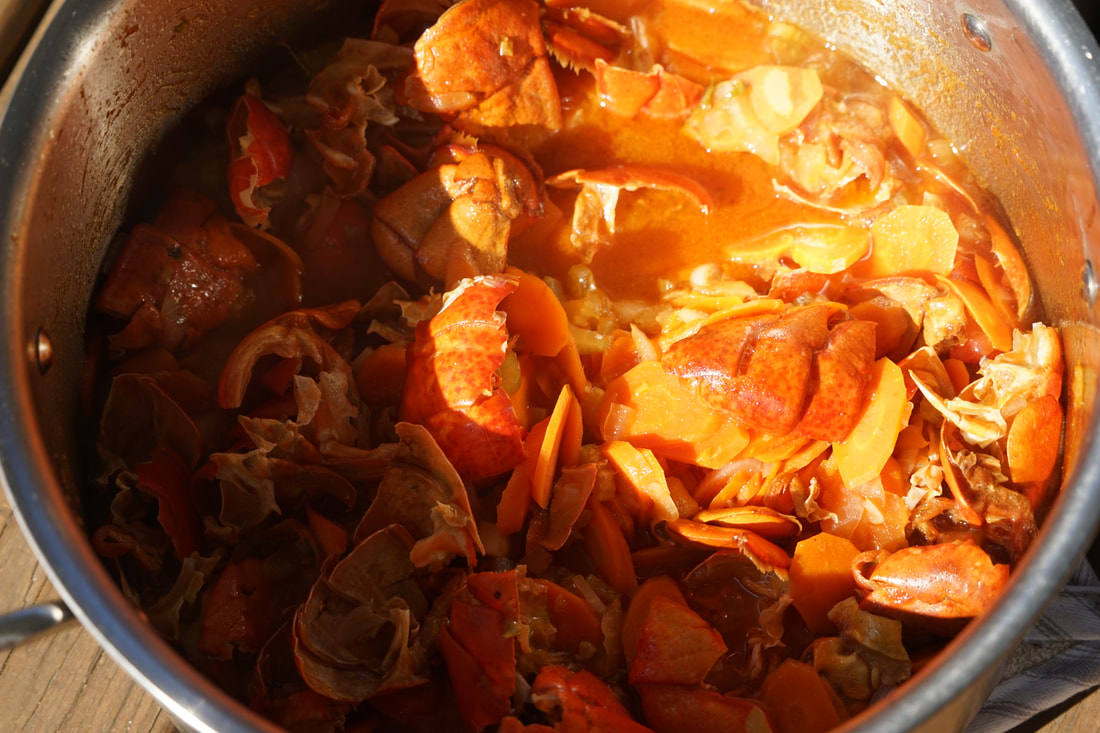 Add reserved steaming water and chicken broth. Bring to a boil, reduce to simmer and cook, uncovered for 1 hour.
Ladle bisque into bowls and top with warmed lobster meat and garnish with parsley and tarragon. 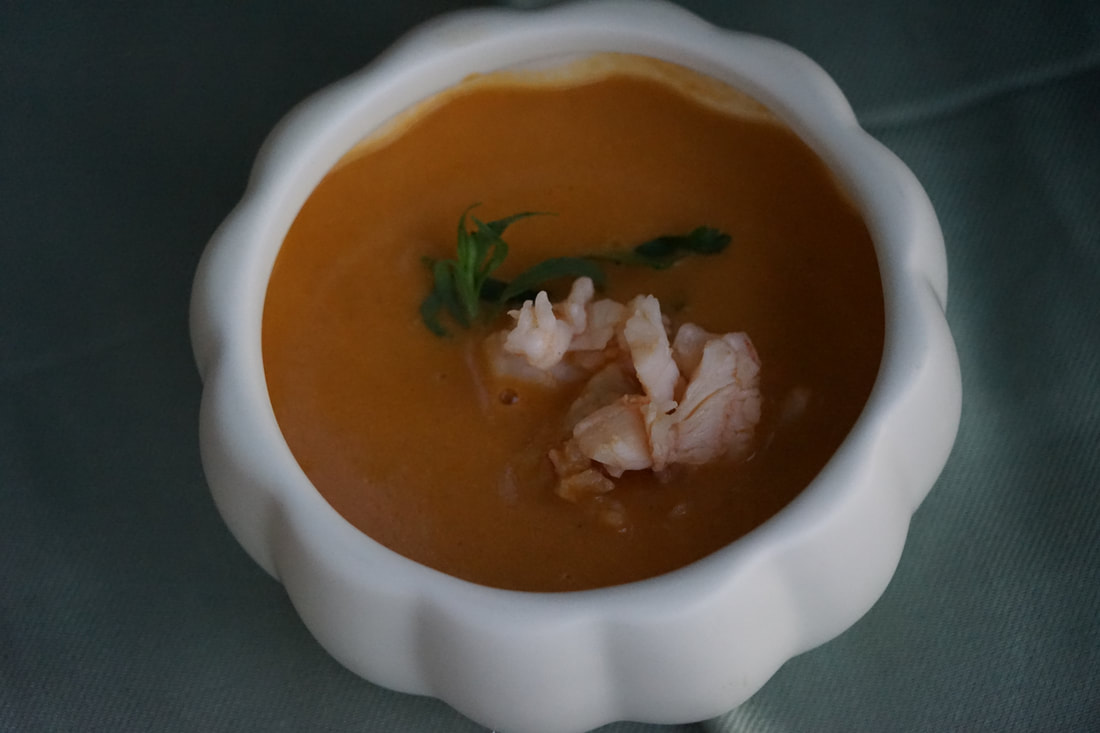 We had 21 people at our house on Thanksgiving to eat up all that delicious food, but we still managed to end up with enough leftovers to get us through at least a couple of extra meals. We did NOT have a lot of leftover lobster bisque though. I guess that means that it was a hit.
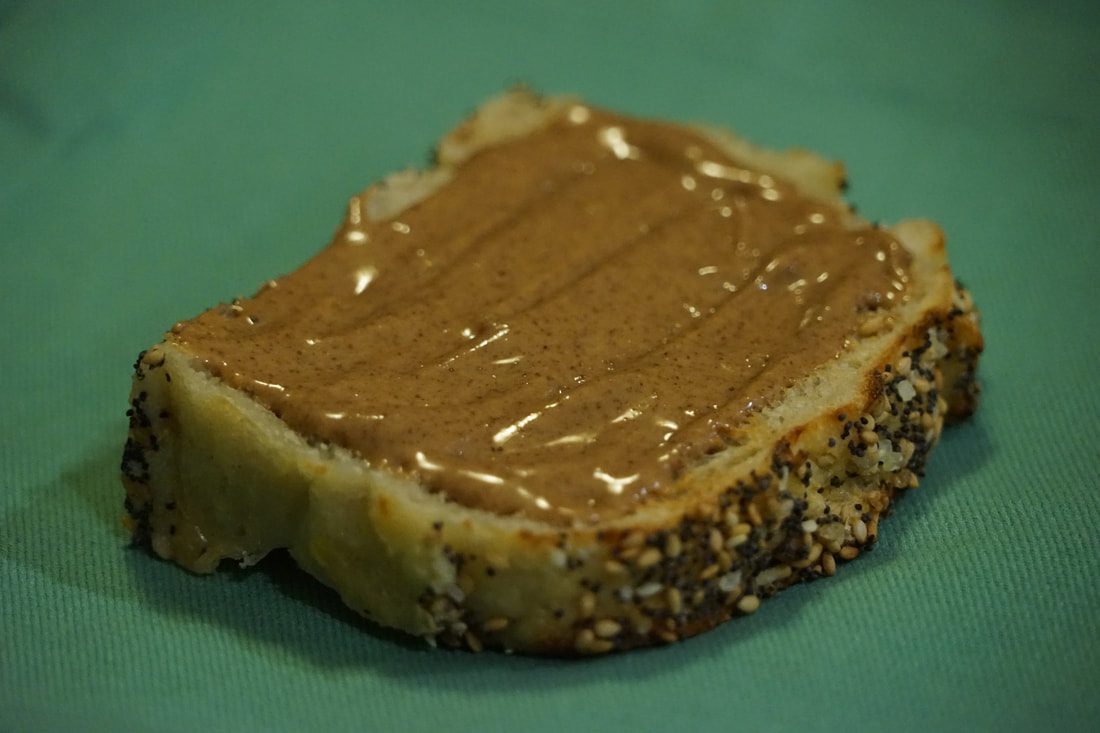
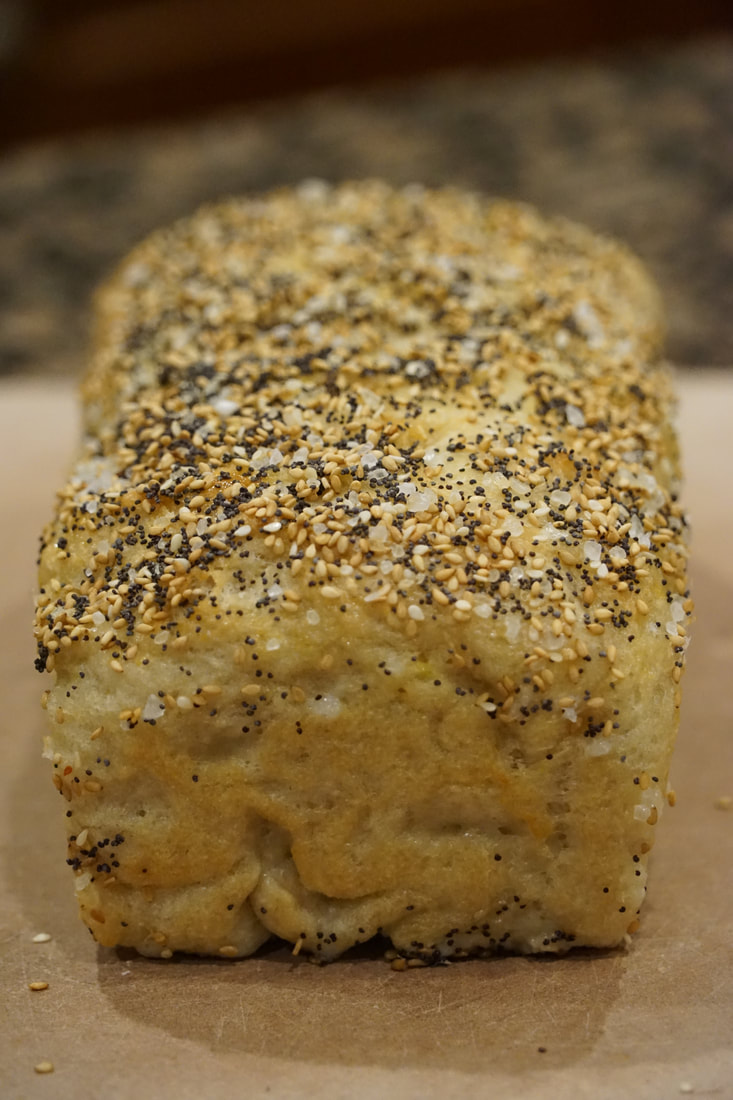
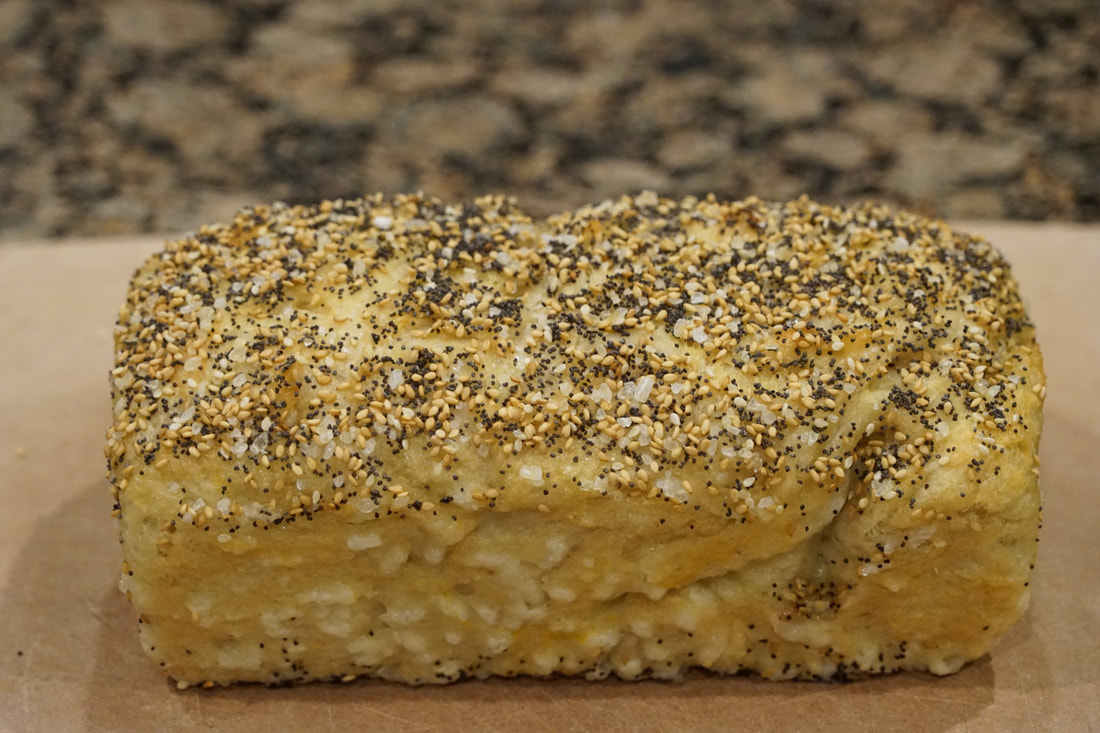
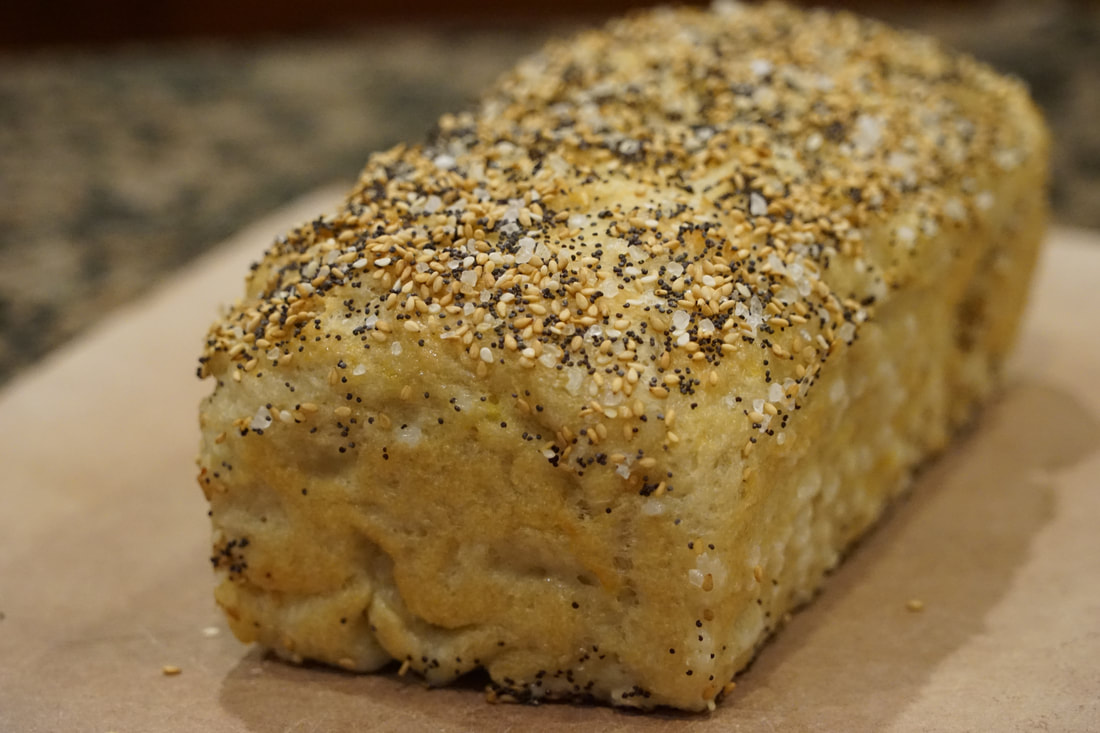
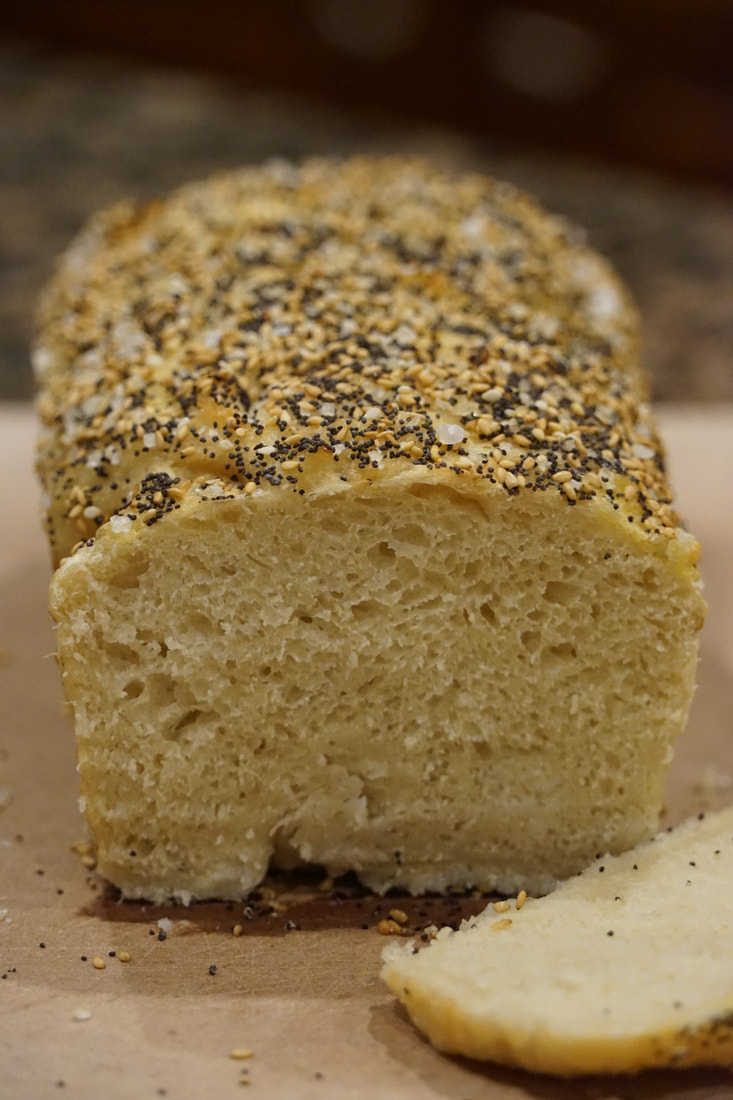
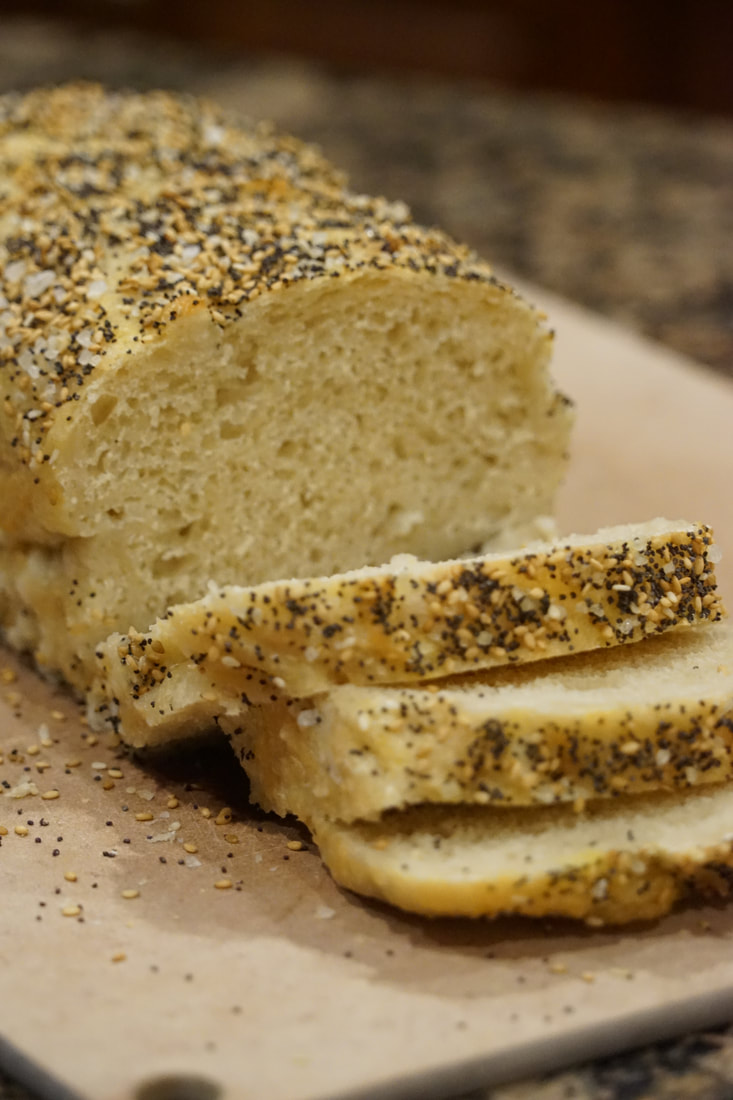
Ciao! 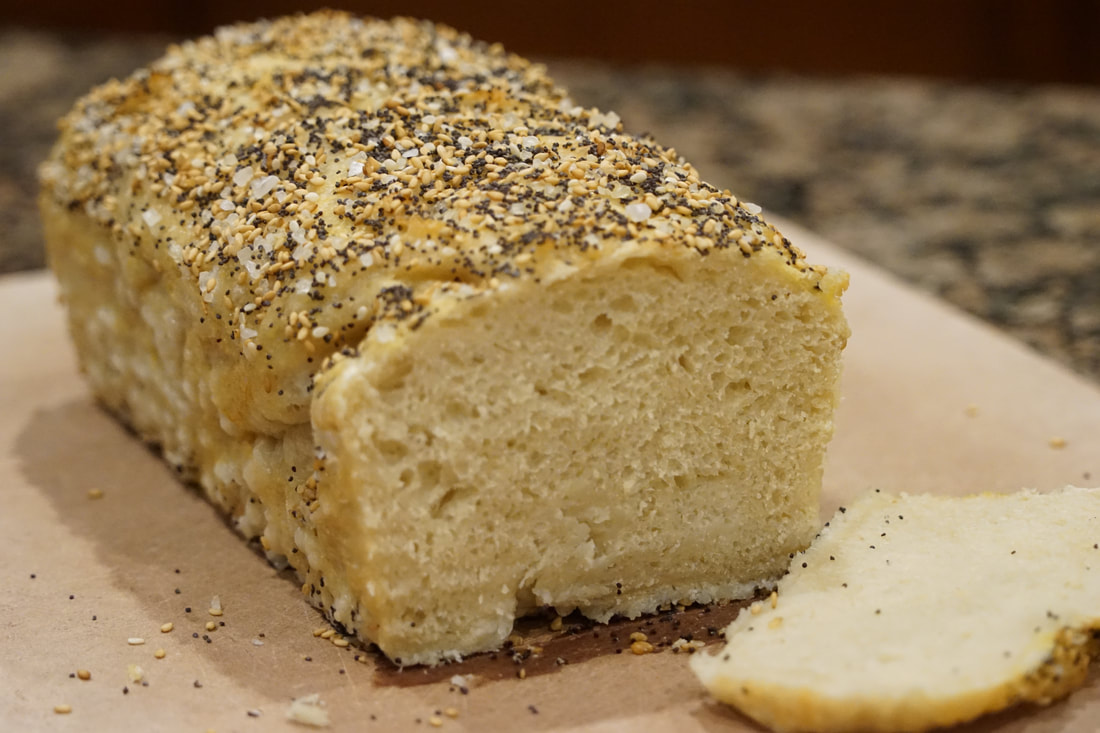 I work out 6 days a week but I'm not an athlete. I sweat a lot but I don't workout out as hard as I can. I follow workout videos and I'm surprisingly uncoordinated. I don't run because - well, wimpy ankle issues. I ride a spin bike because I don't trust myself to stay focused enough to stay on a road bike. I'm not always excited about working out. I whine. I make excuses. I complain. I fail. I've accepted the fact that I'll probably never be able to knock out a proper pull up but I keep trying anyway. I'm recognize that I'm not going to be good at everything but I refuse to quit. I want to be fit and I know that the only way to accomplish that goal is to keep working out even when I feel inadequate. My relationship with food is much the same as my relationship with working out. I'm obsessed with fruits and vegetables and I eat very little meat but I also know that pizza is beautiful. I have mad love for chocolate and warm chocolate chip cookies are my jam. I'm not always going to make the best food choices and if I'm being completely honest, some days it's easier to make healthy choices than others. I may fail miserably more often than not but I'm not going to give up my fight to be a healthy eater.  It's easy to get discouraged in my fitness and eating goals. There's always an excuse to skip workouts or to eat something unhealthy but that's no reason to give up on my goals. I managed to do P90X in a leg brace from the bottom of my foot to the top of my knee for 3 months so any excuse that I come up with now just pales in comparison to my struggle to workout on one leg. It's no secret that I'm a big fan of bread - more specifically - bagels. A warm from the oven, chocolate chip bagel and a decaf latte from Einstein's Bagels is quite possibly my favorite breakfast EVER. I try and not tempt myself with bagels very often but they are one of the things that I crave the most. I love the idea of baking bagel bread. I feel like I have more control over portion size without losing any of the chewy bagel texture that I love.
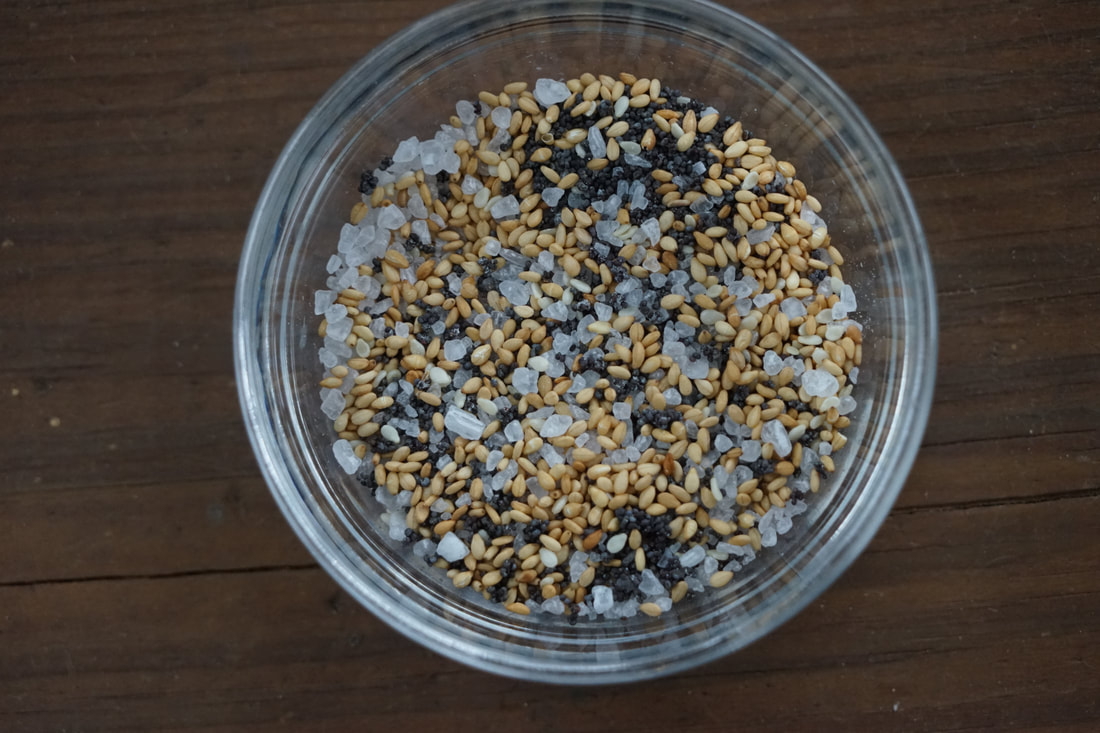
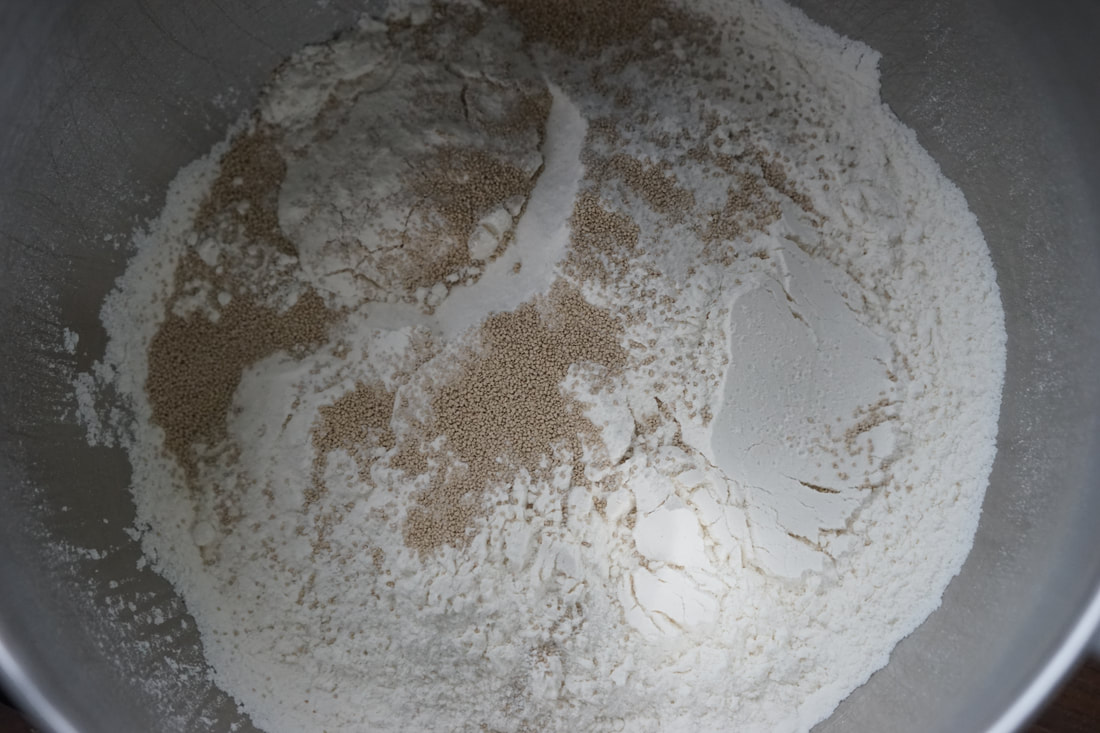
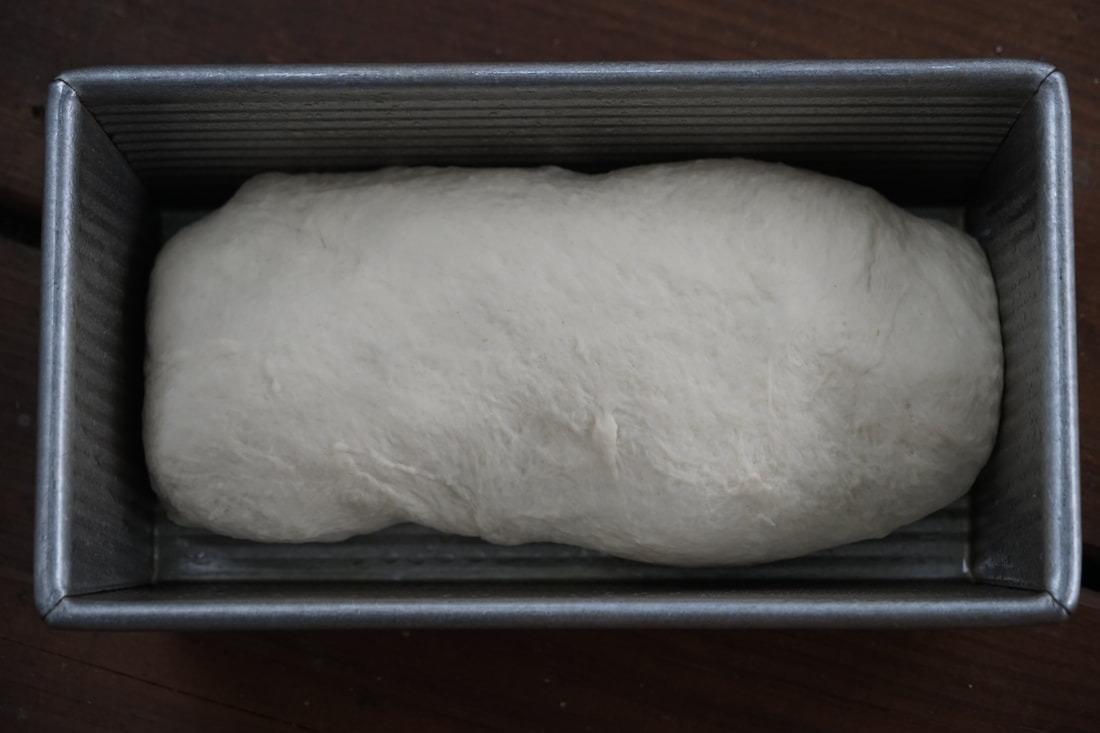
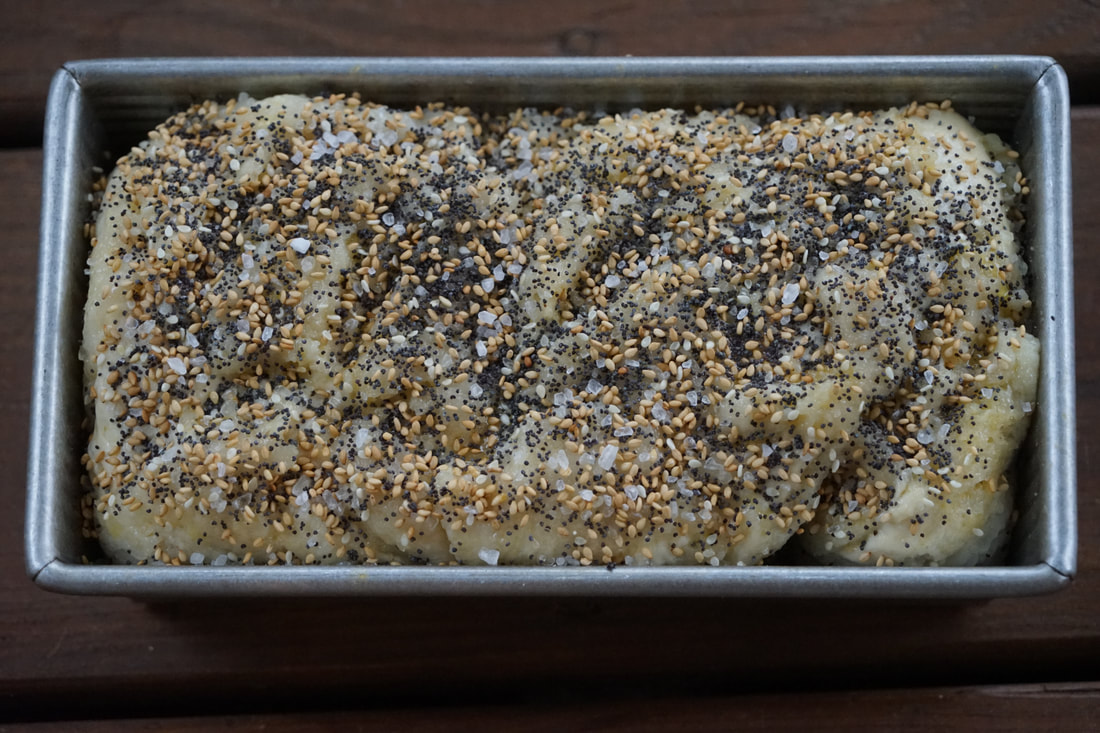
Bagel Bread Topping 2 teaspoons sesame seeds 2 teaspoons poppy seeds 1 teaspoons kosher salt Bread 3 cups bread flour 2 1/4 teaspoons yeast 1/4 cup corn syrup 1 1/2 Tablespoons kosher salt 1 1/2 teaspoons baking soda 1 egg, beaten
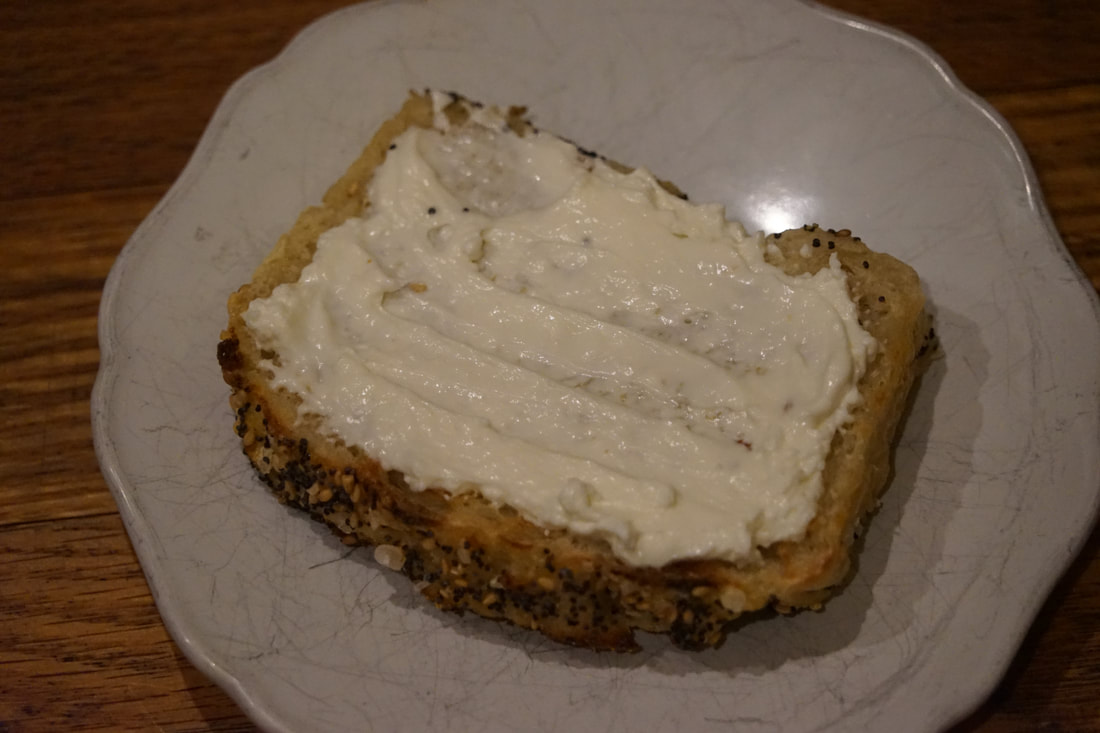
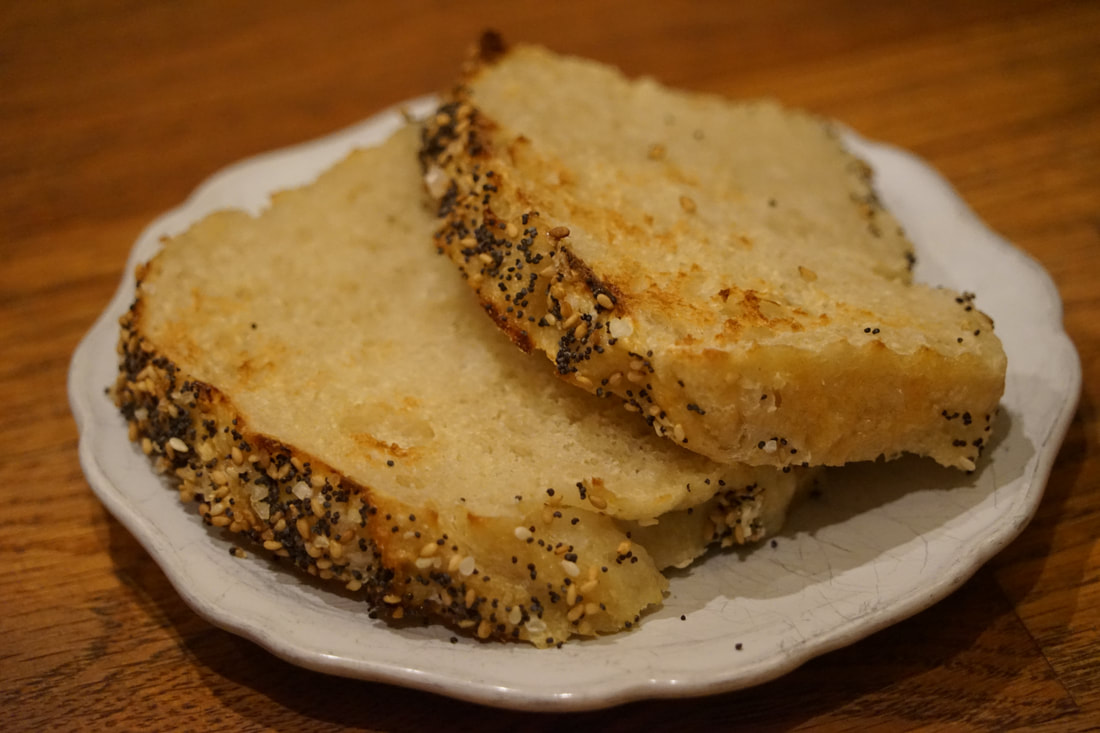
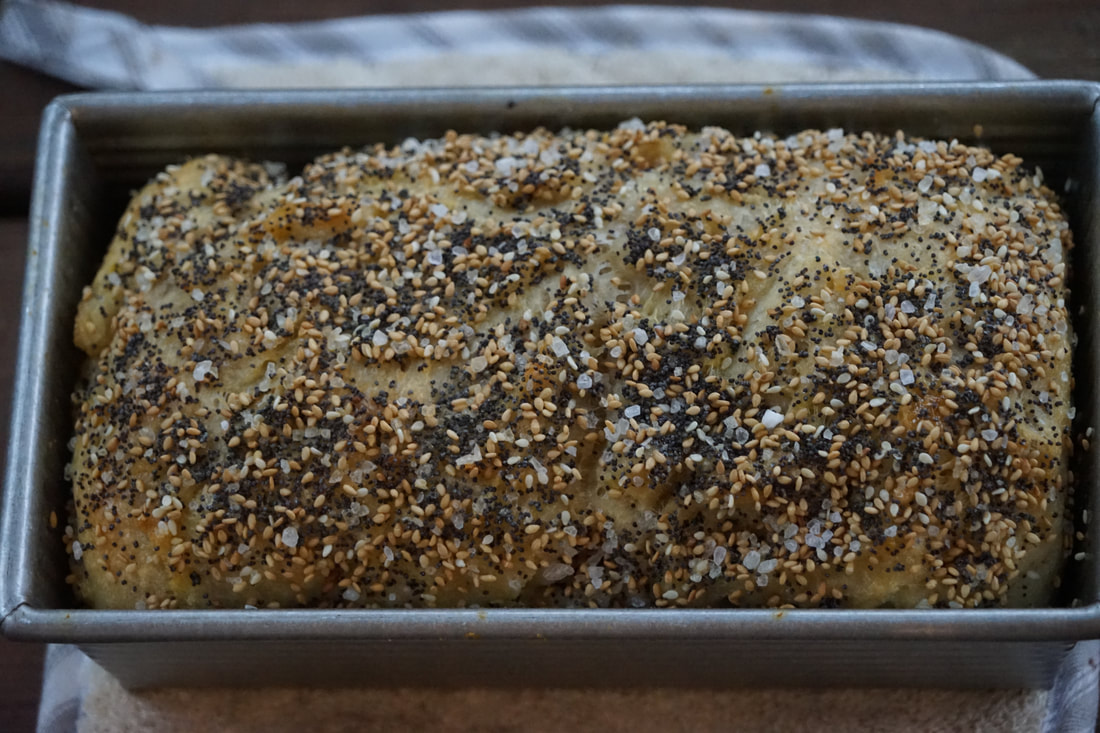
Slice and serve.
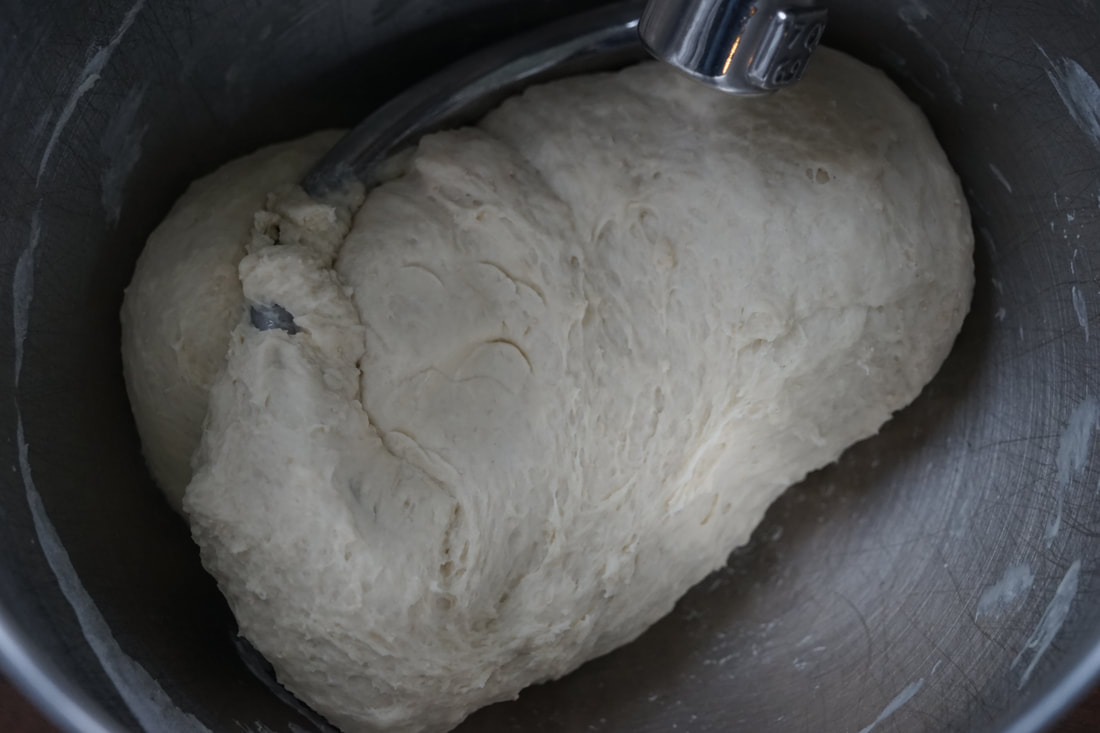
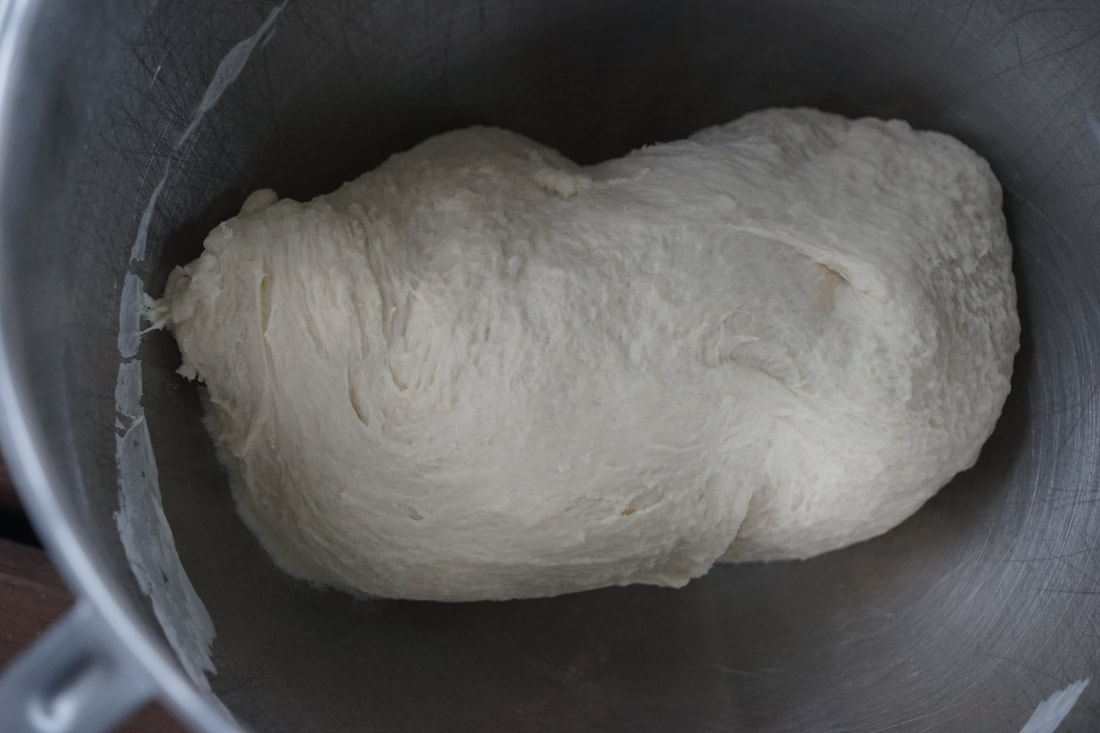
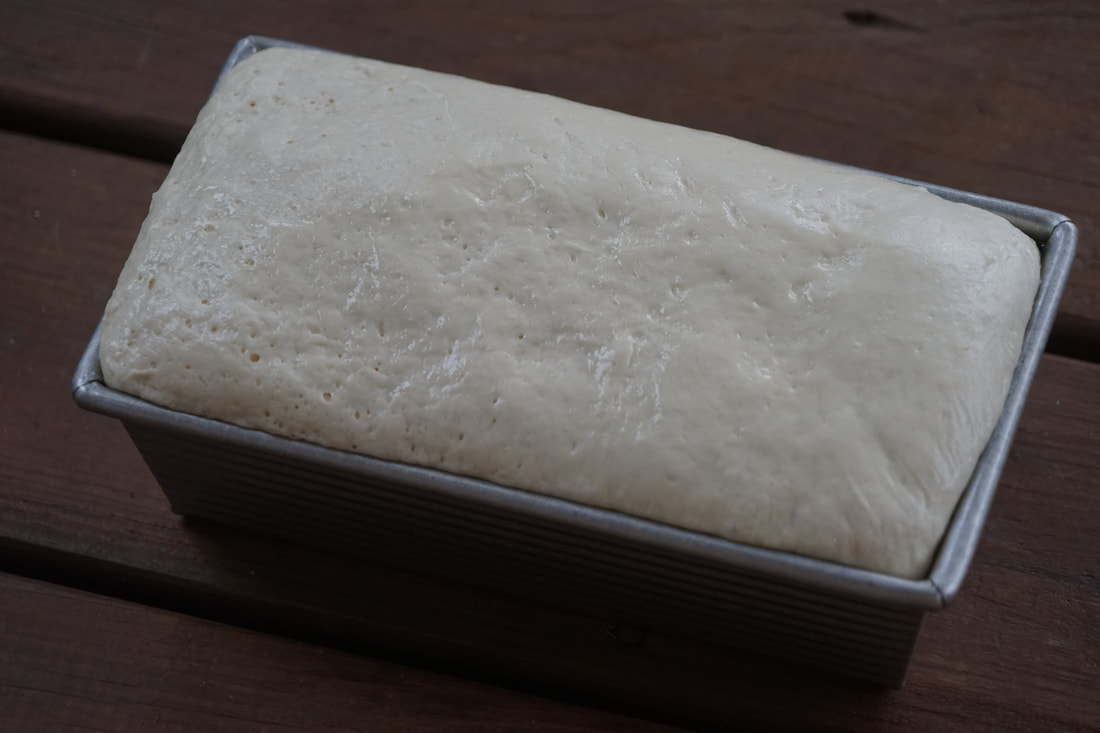
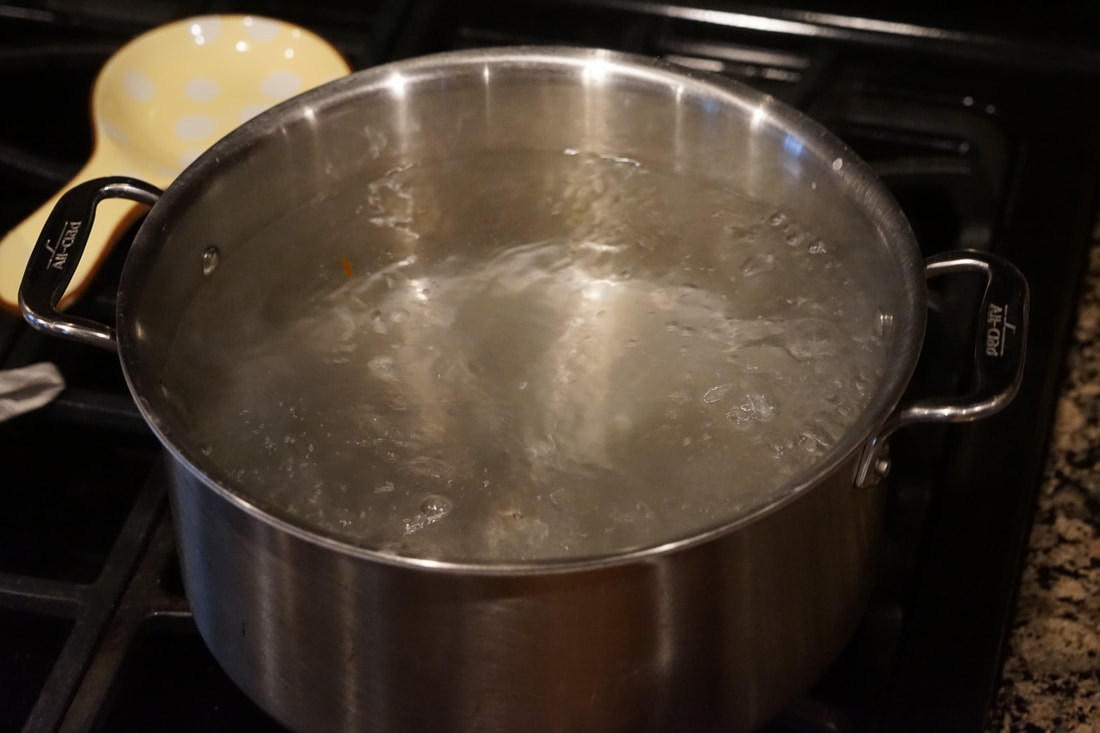
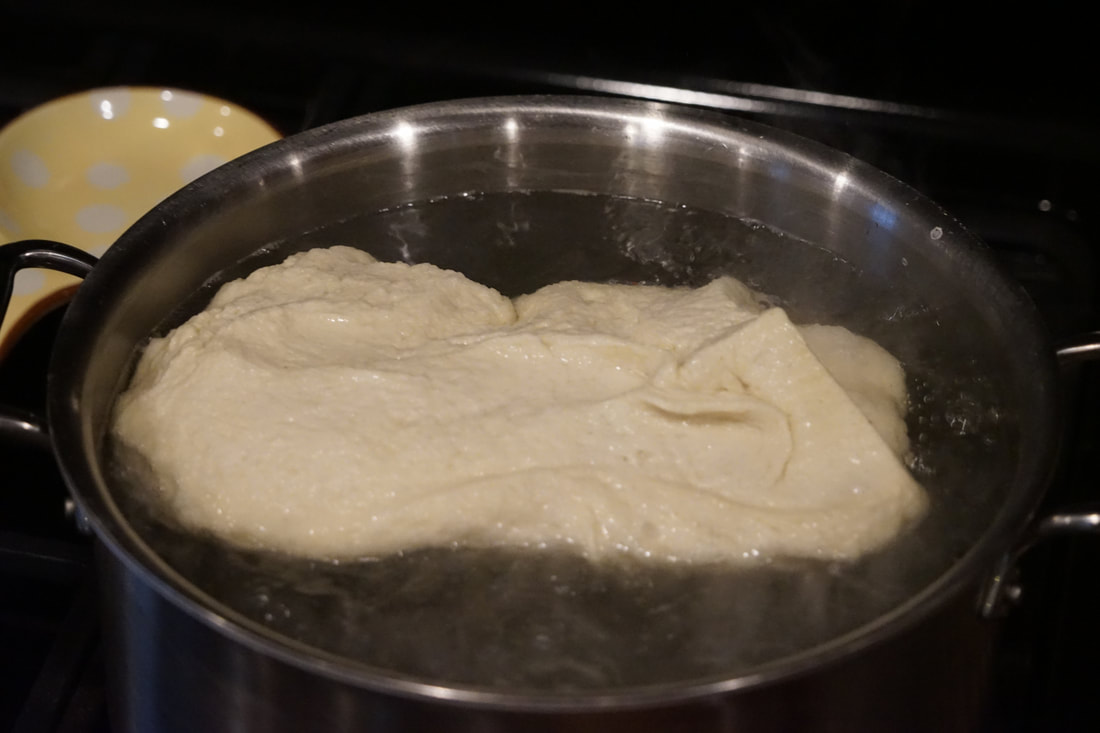
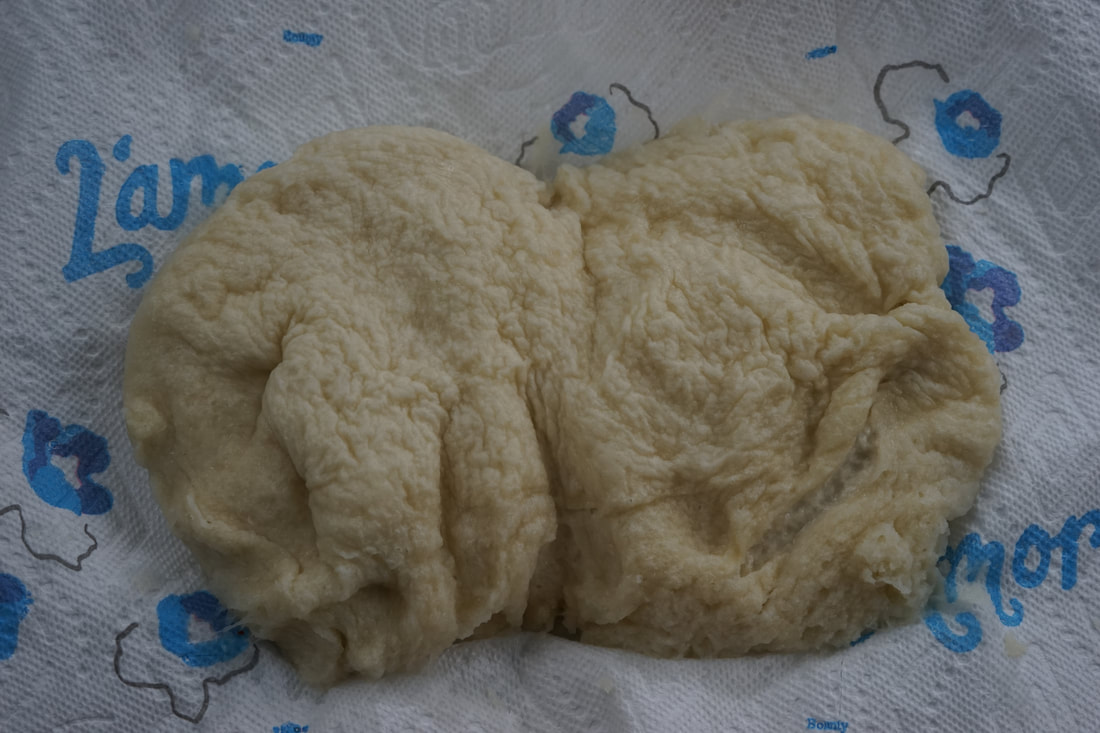
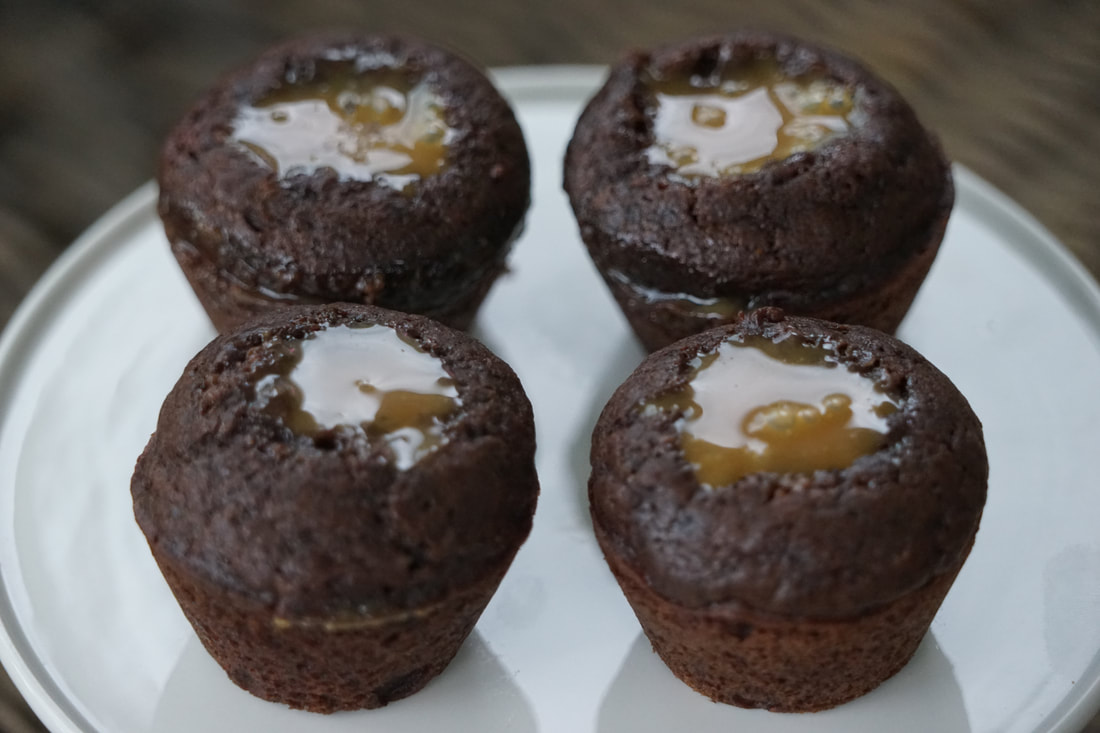
Clearly, there are some recipes that are more appealing on paper than they are when they come to fruition in my kitchen. This was one of those recipes. I was good up until the point when I had to take RISEN dough out of the pan and drop it in a pot of boiling water. I'm still not sure exactly how this was SUPPOSED to be accomplished. I did manage to figure out how it WASN'T supposed to be done. I pulled a weird ameba like blob of dough that didn't resemble anything remotely similar to a loaf out of my pot of water. I managed to squish it back into the loaf pan and then I had to let it rise for another 45 minutes to regain some of it's loaf qualities again.
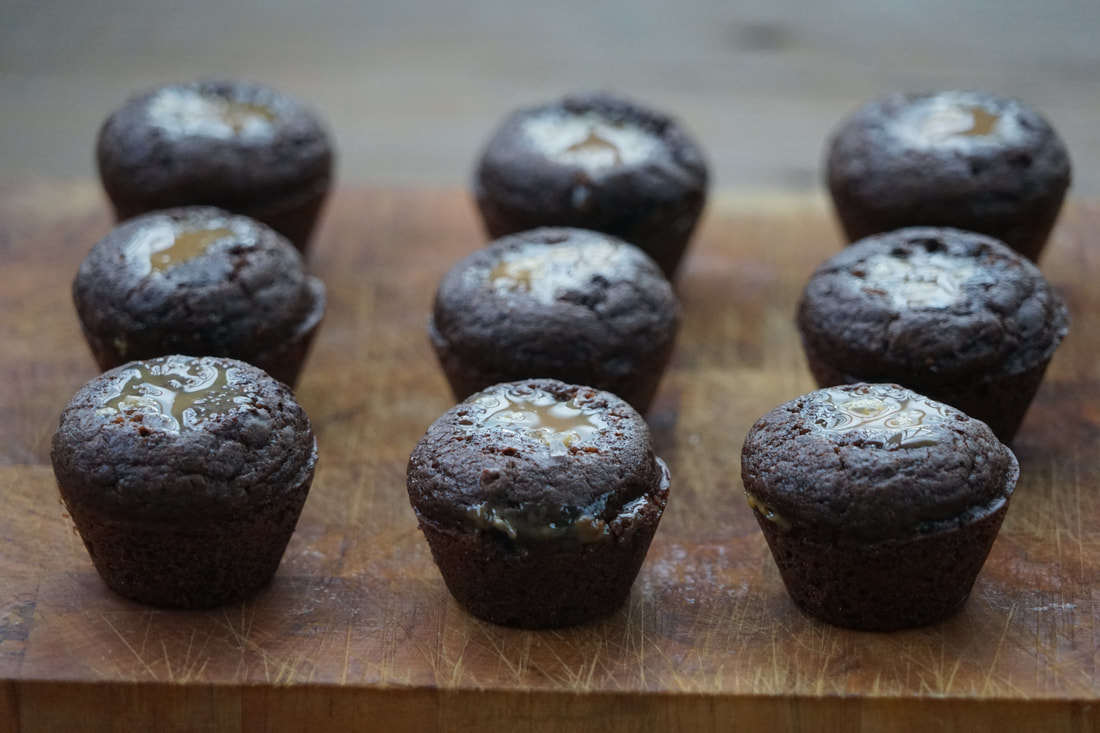
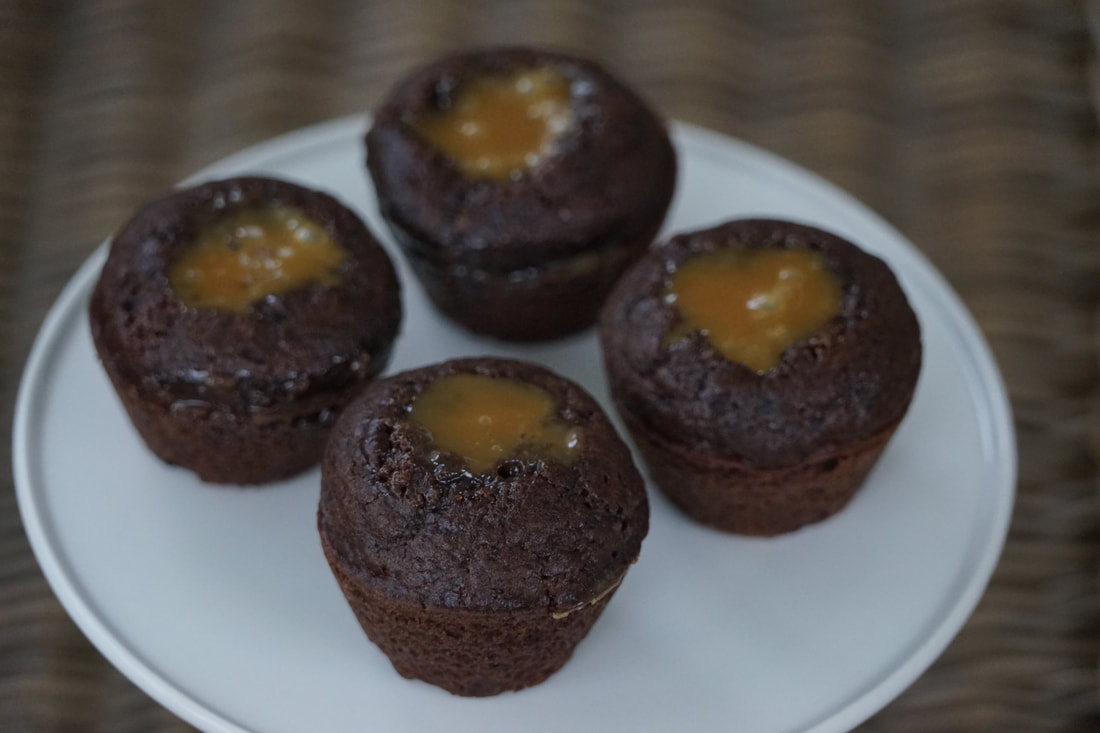
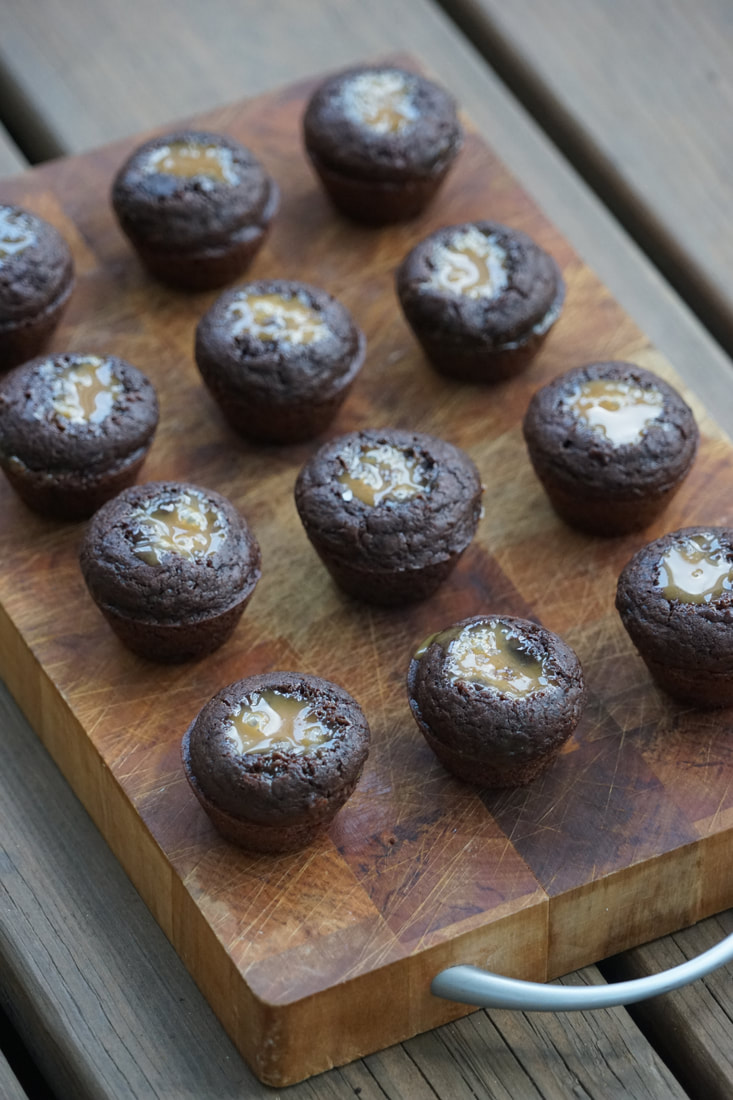
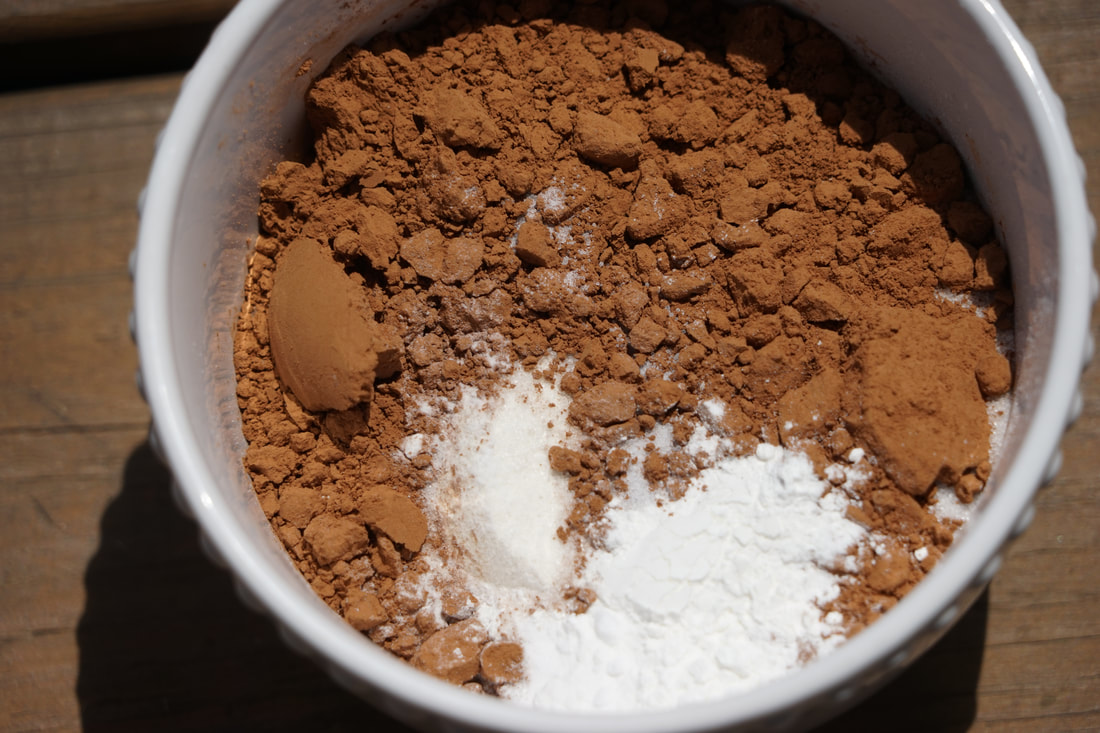
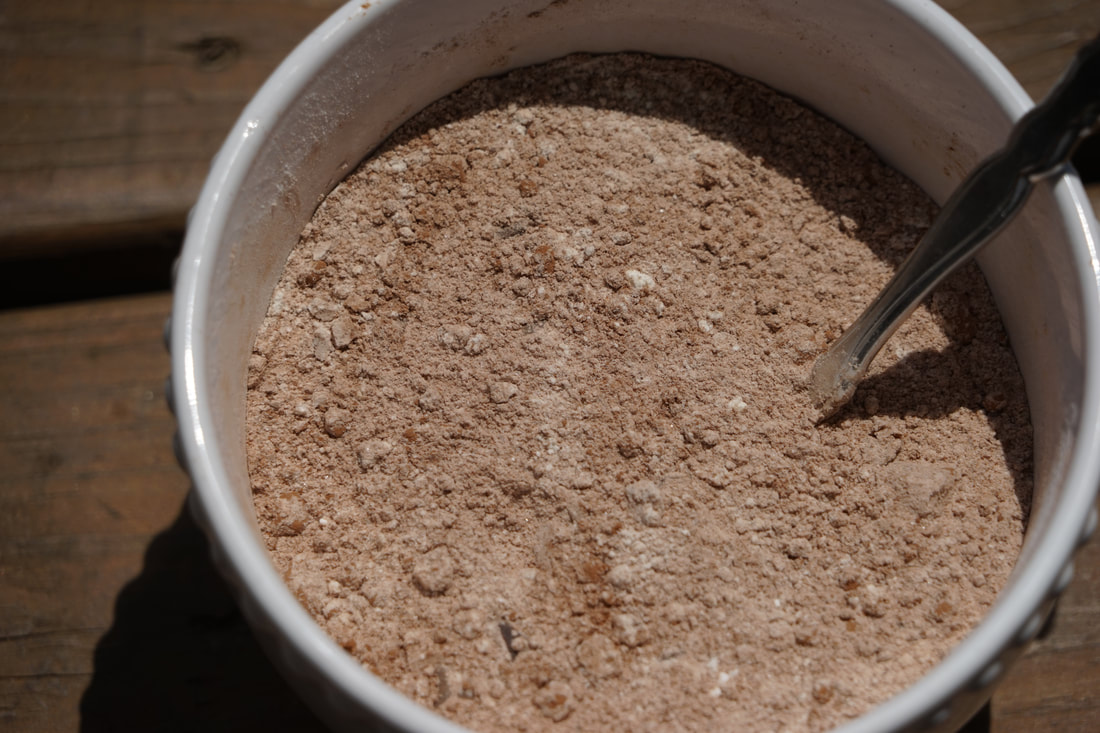
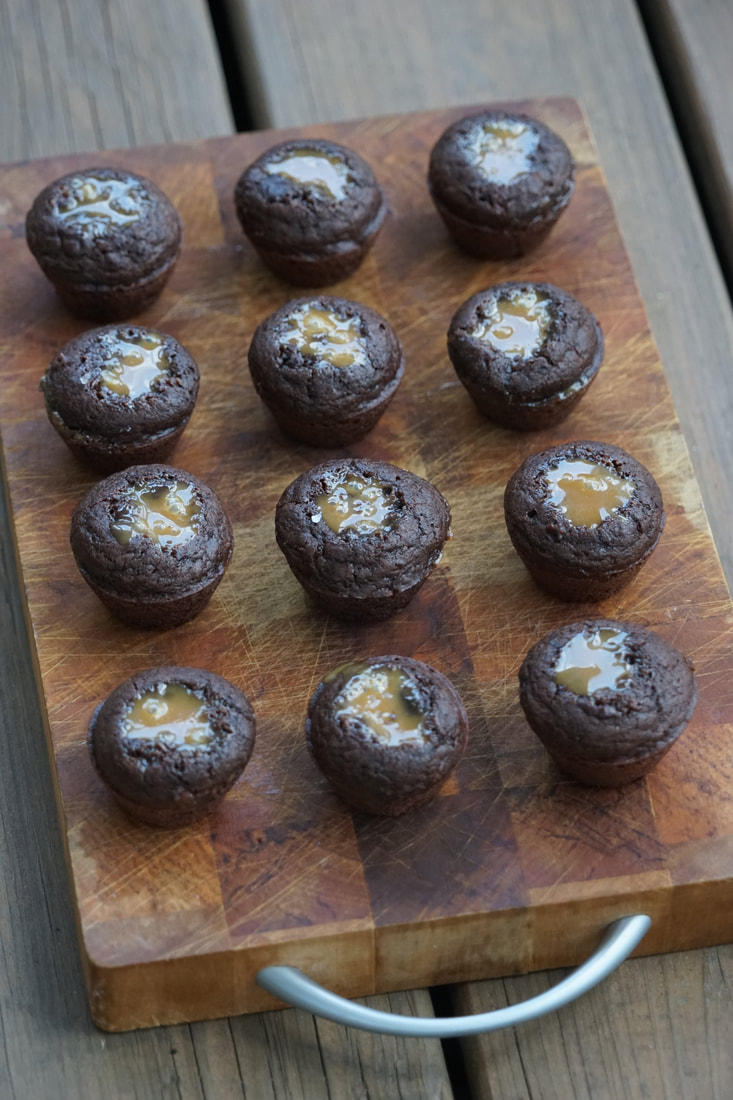
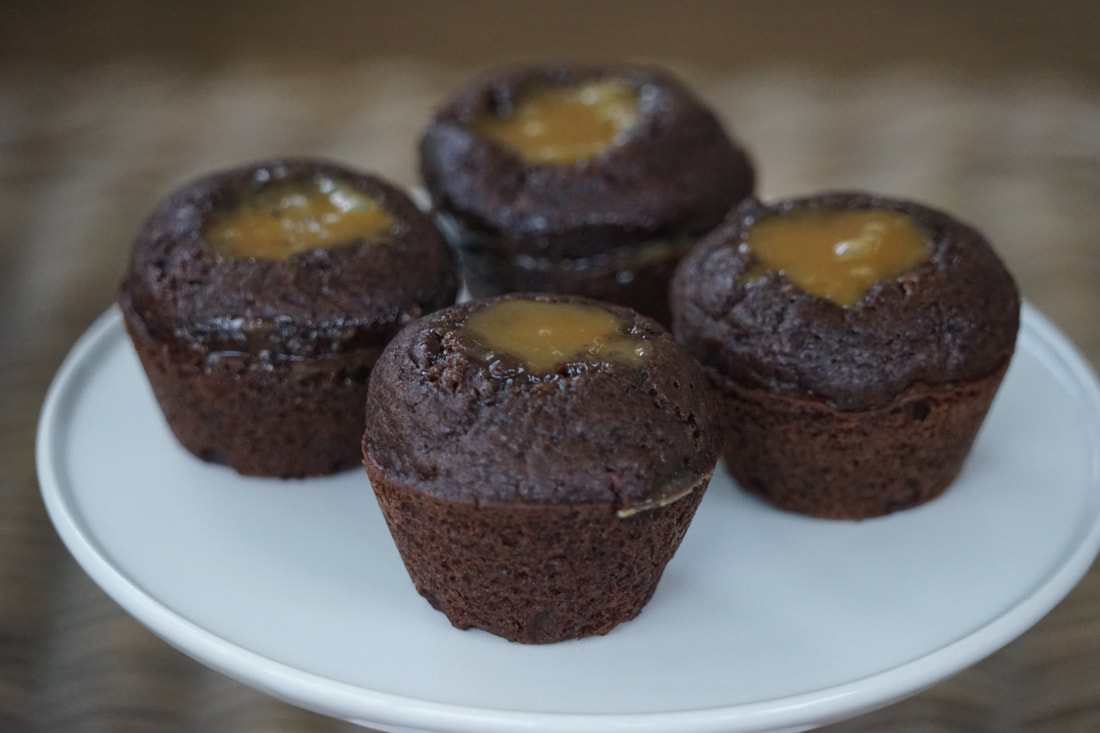
My attempts to salvage my bread were moderately successful but I am looking for advice from my bread baking readers. How in the world are you supposed to boil a LOAF of bread? I recognize that the step is important in creating that signature chewy consistency that's unique to a bagel but there has to be a better way. Help me! Send me your ideas. I would love to make this recipe again - the right way. Ciao! 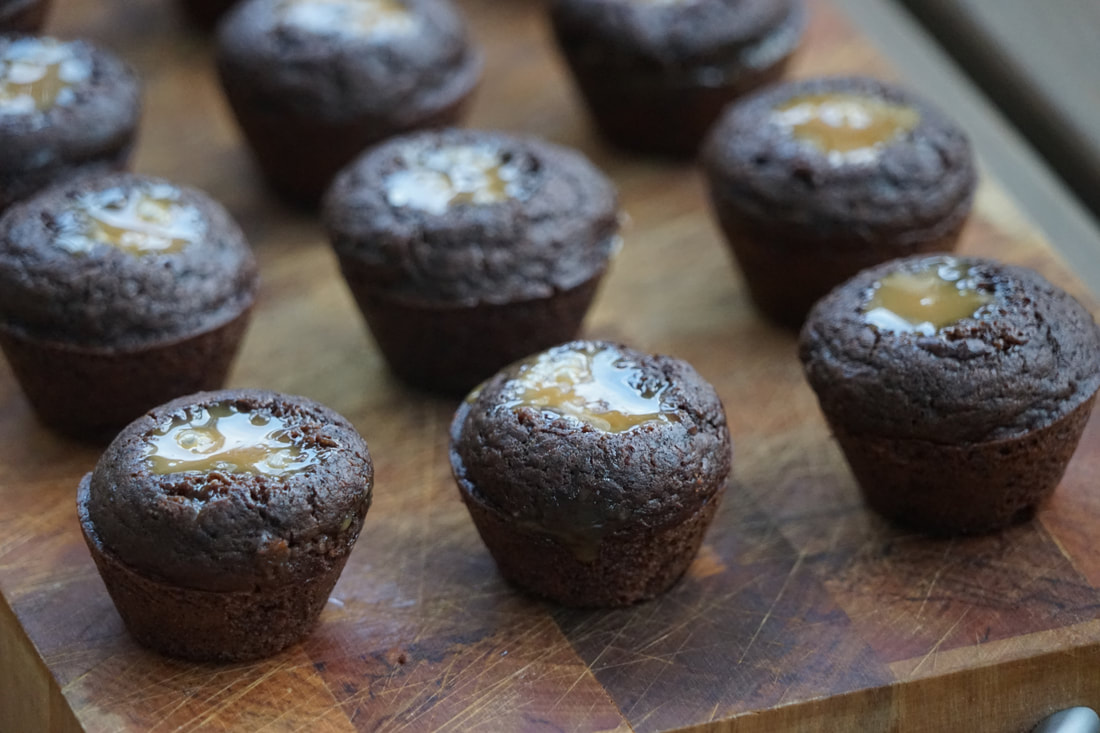 Have you ever gotten into a muffin vs. cupcake discussion with someone who feels passionate about finding the differences between the two? I've been sucked into more of those conversations than I care to recall and there rarely seems to be any resolution. It all very subjective but in my unscientific opinion, if you serve a sweet baked treat before 10:00 AM and you don't put any frosting on it - it'a a muffin. Slap some frosting on that same baked goody after 10:00 AM and bam --- it's a cupcake. It's all about the timing and the presence (or absence) of frosting. 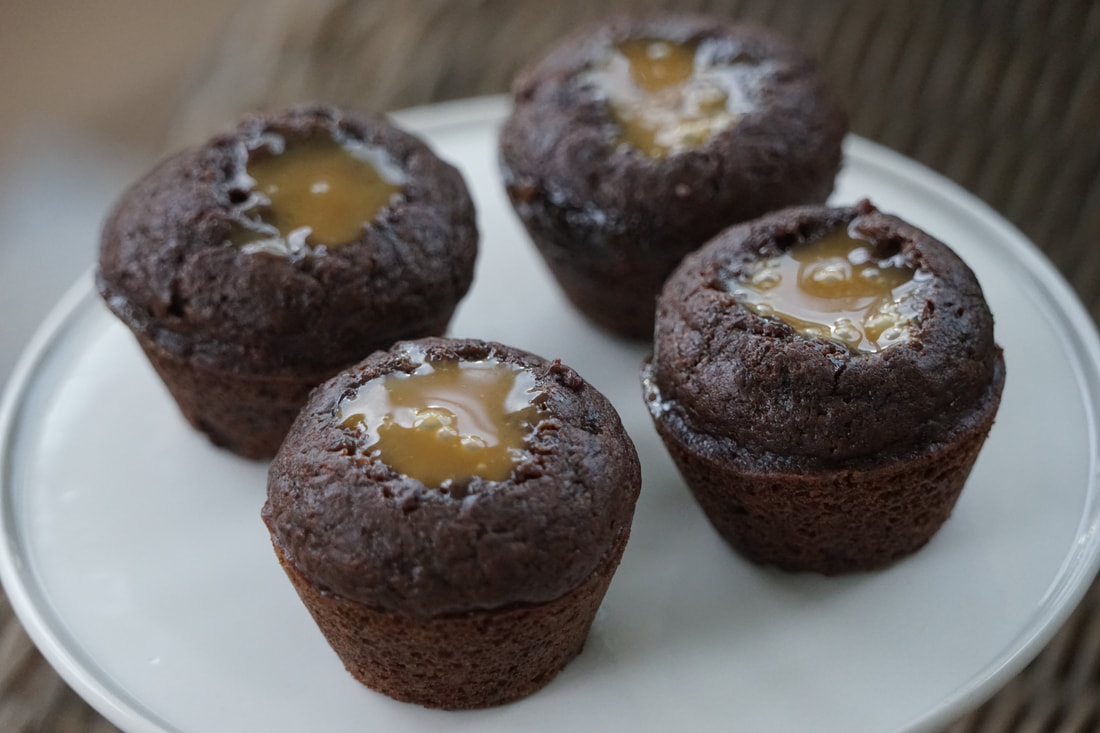 Some people would think that a Double Chocolate Salted Caramel Muffin might be too over the top for a morning breakfast treat but luckily - I'm not one of those people. I've somehow managed to avoid a morning coffee addiction but I seem to have replaced it with a chocolate addiction. (I've got to get my caffeine somehow.) ;) I can eat chocolate from the very moment that I wake up to the moment that I go to bed. My chocolate addiction does not discriminate - I can eat it ALL day.
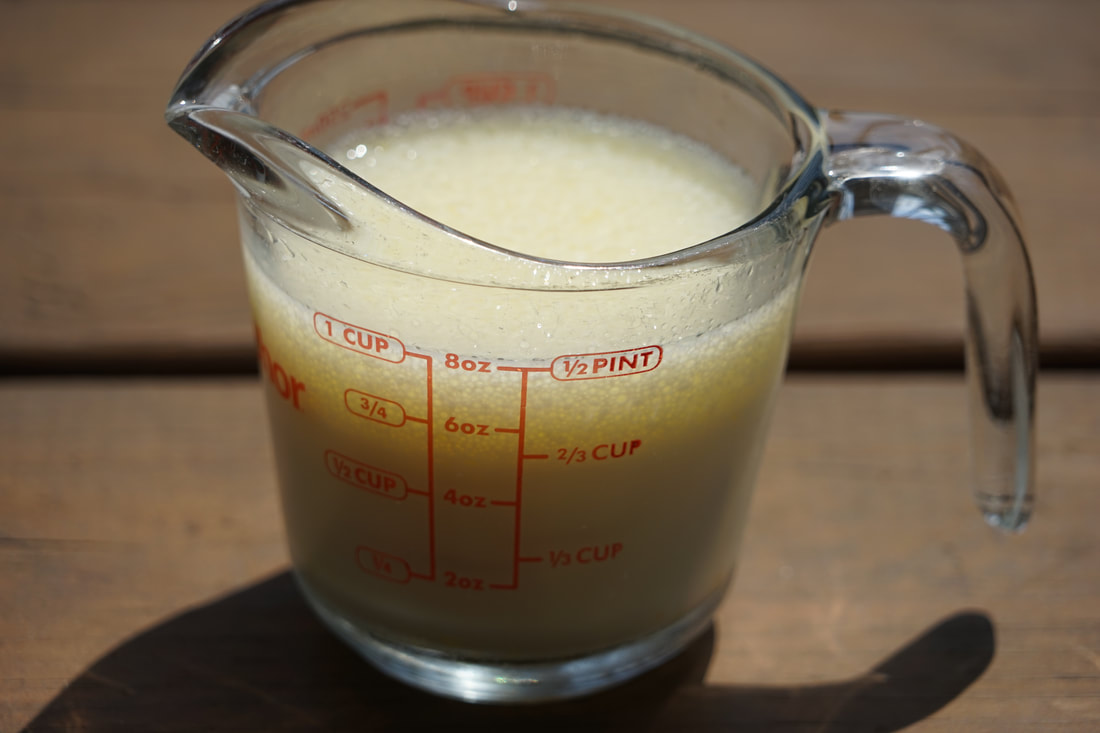
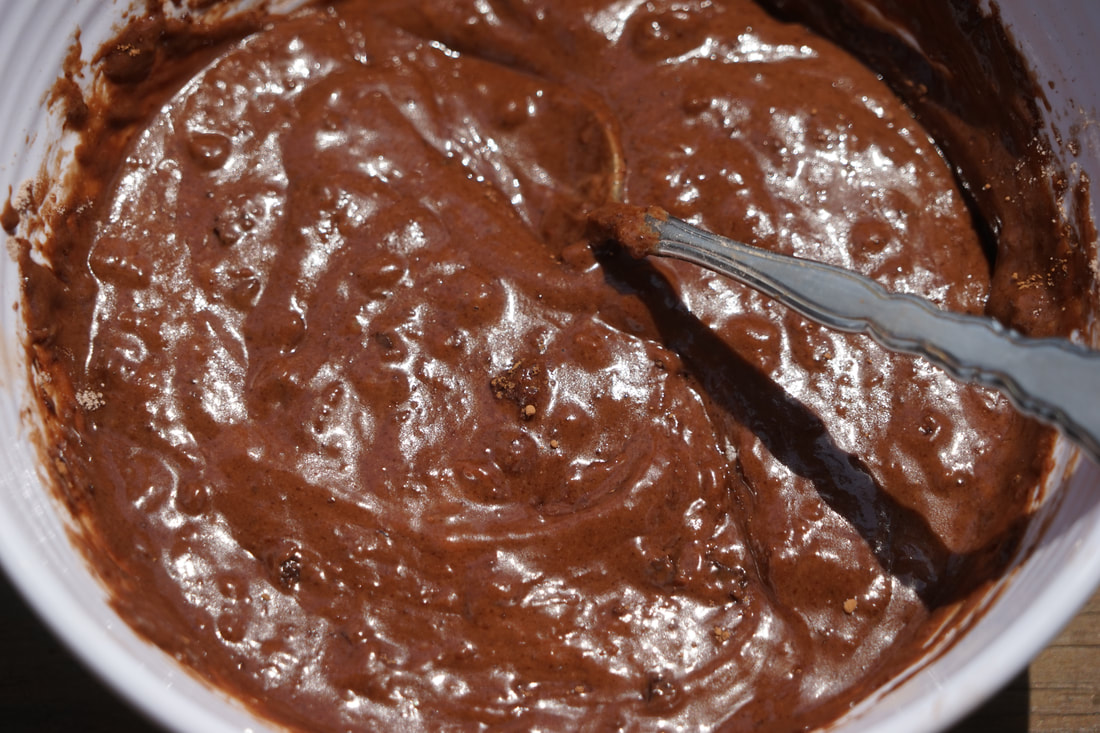
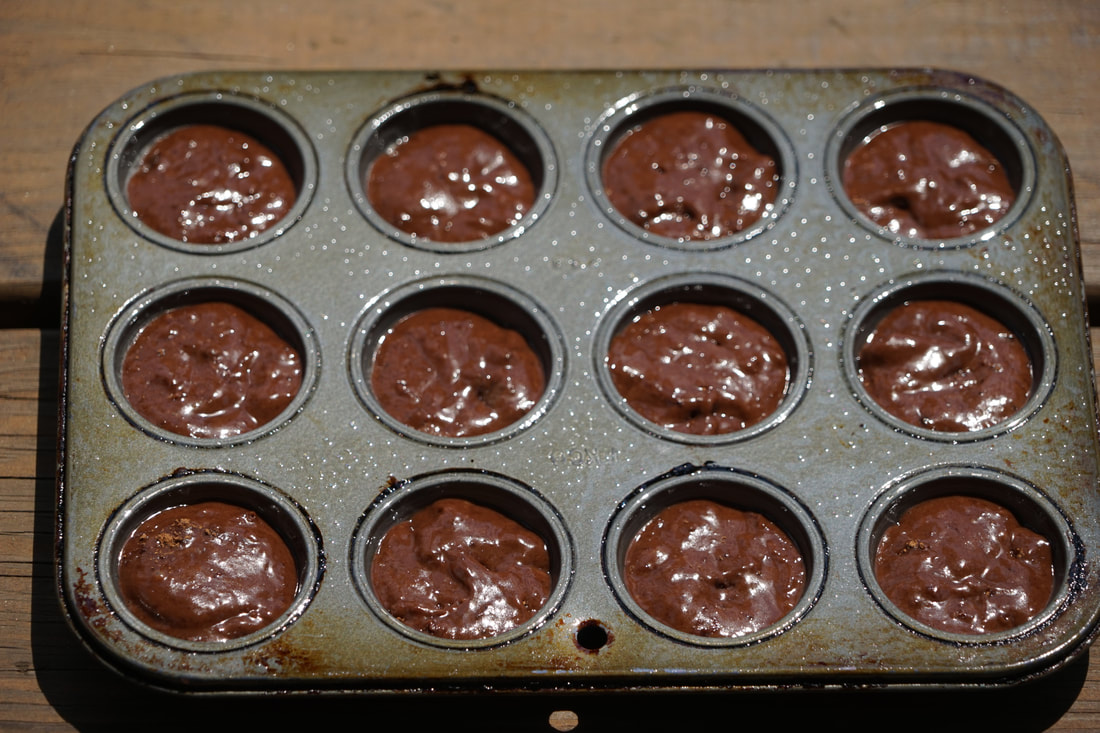
Double Chocolate Salted Caramel Muffins 1 1/2 cups flour 3/4 cups sugar 1/2 cup cocoa 2 teaspoons baking powder 1/4 teaspoon baking soda 1/4 teaspoon salt 1/3 cup semisweet chocolate, chopped 1 cup whole milk 1/2 cup oil 2 eggs 1/2 cup jarred dulce de leche
Divide batter between 12 muffin cups. Bake 12 minutes at 350.
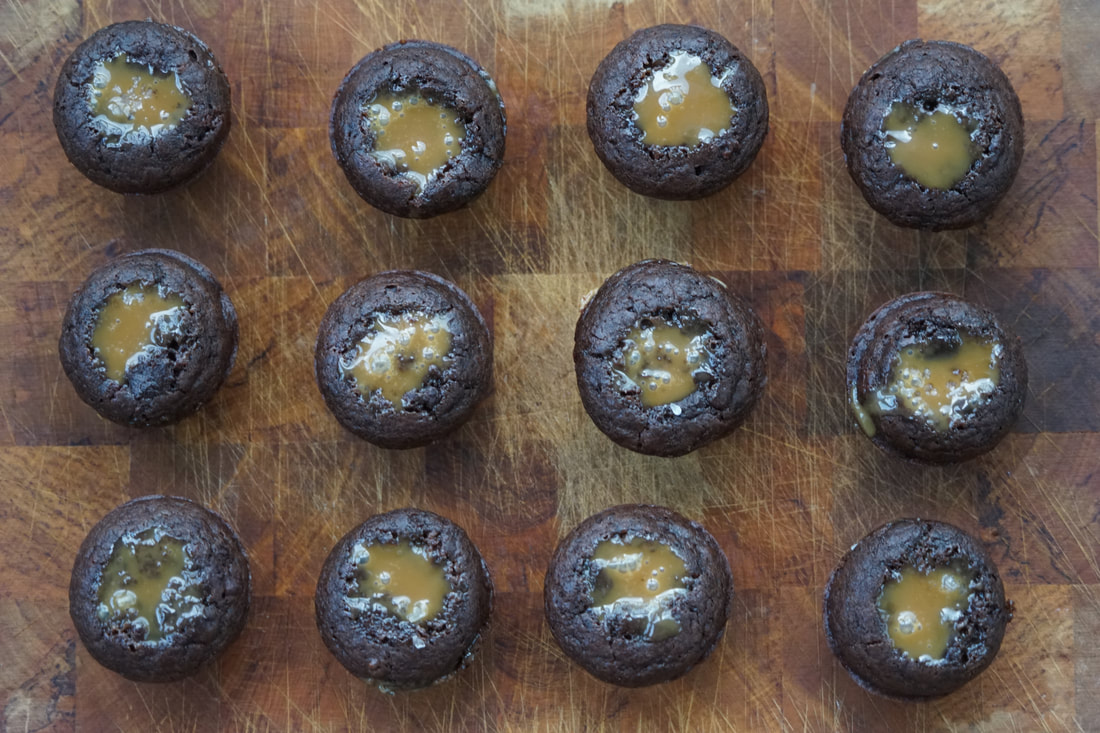
Sprinkle the tops of muffins with grated chocolate and sea salt.
Thanksgiving is exactly one week away and I am sooooo excited. There are so many things that I'm looking forward to - not the least of these is sitting around the kitchen table early in the morning, munching on yummy muffins and talking with my sweet family. Of course, I love turkey and pie too but its mostly about the people that will be gathering around my table.
Ciao! |