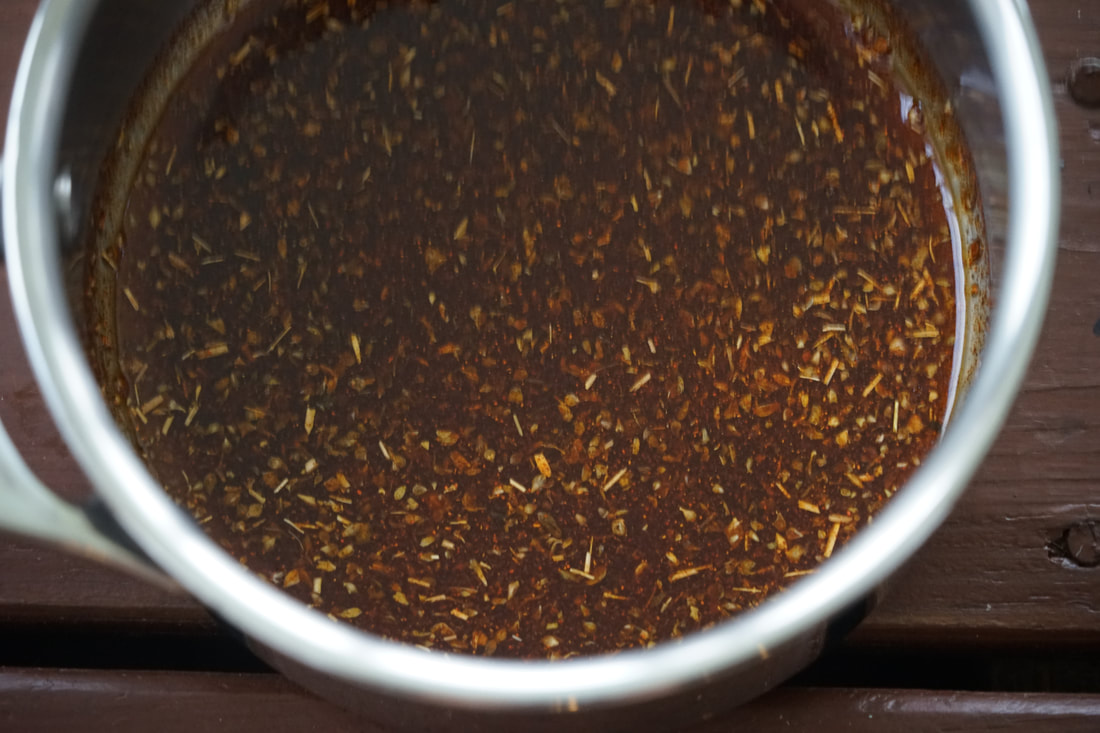
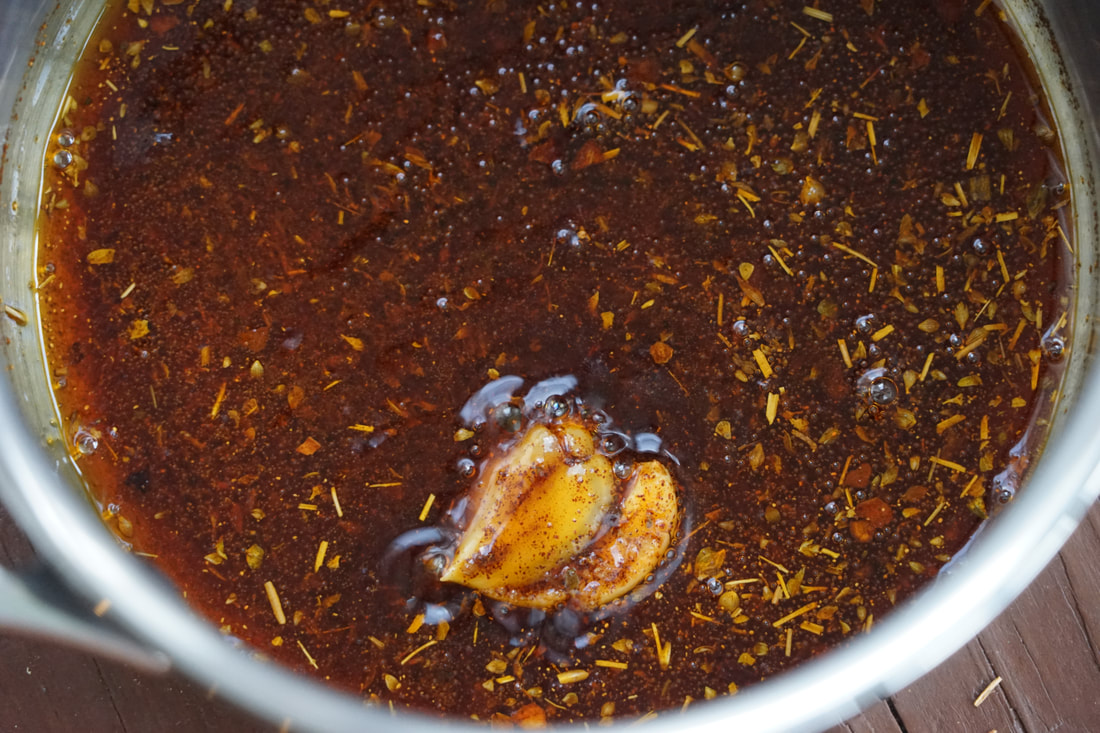
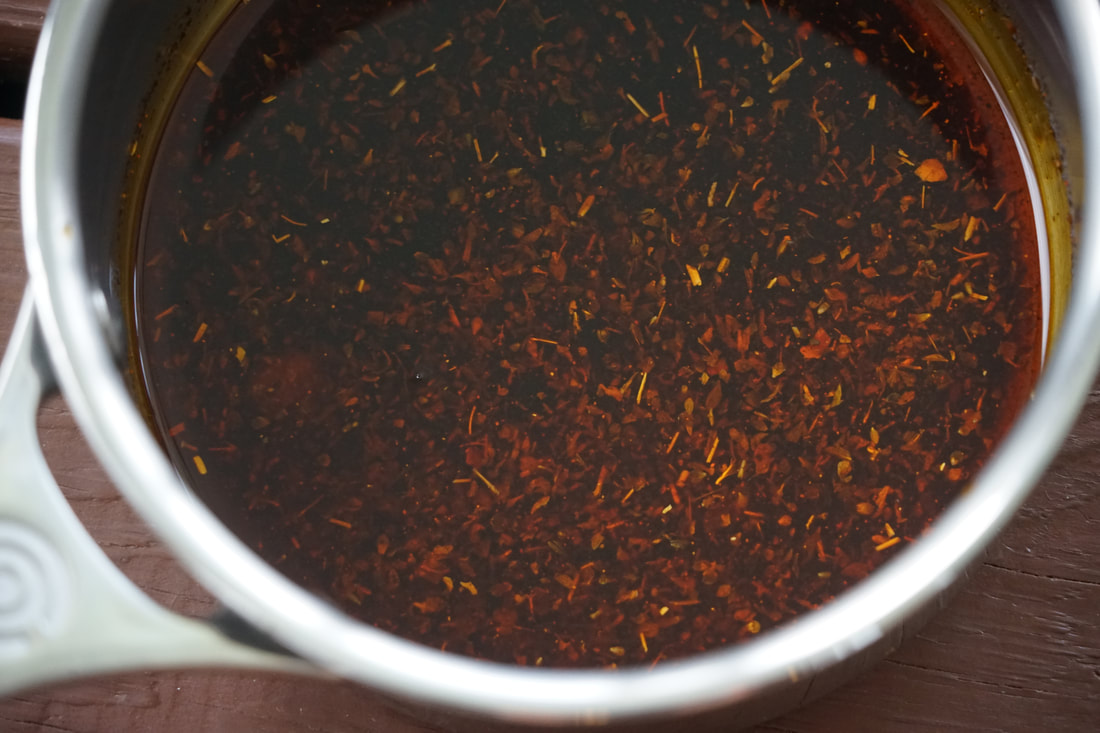
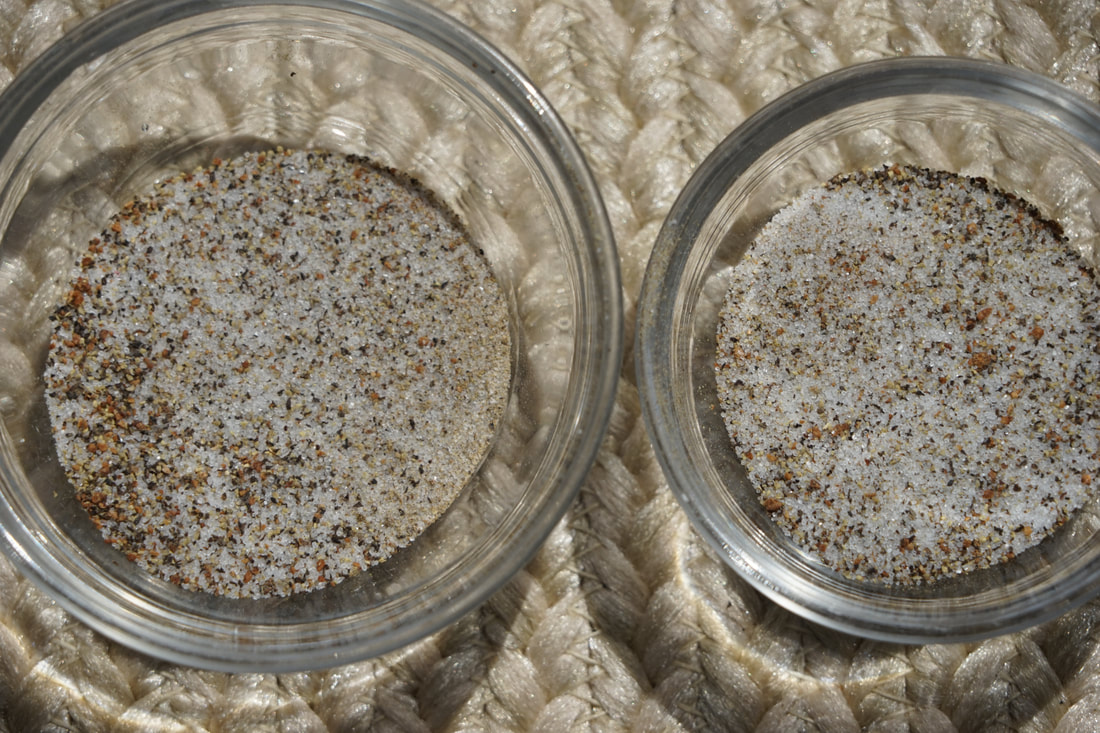
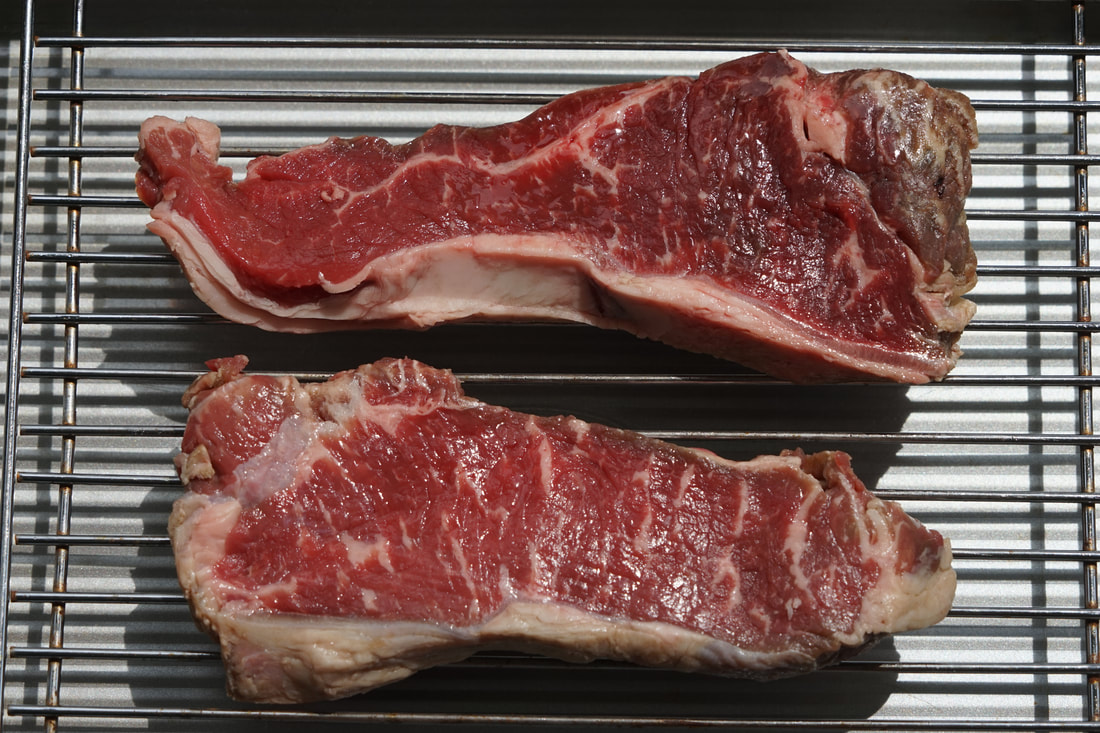
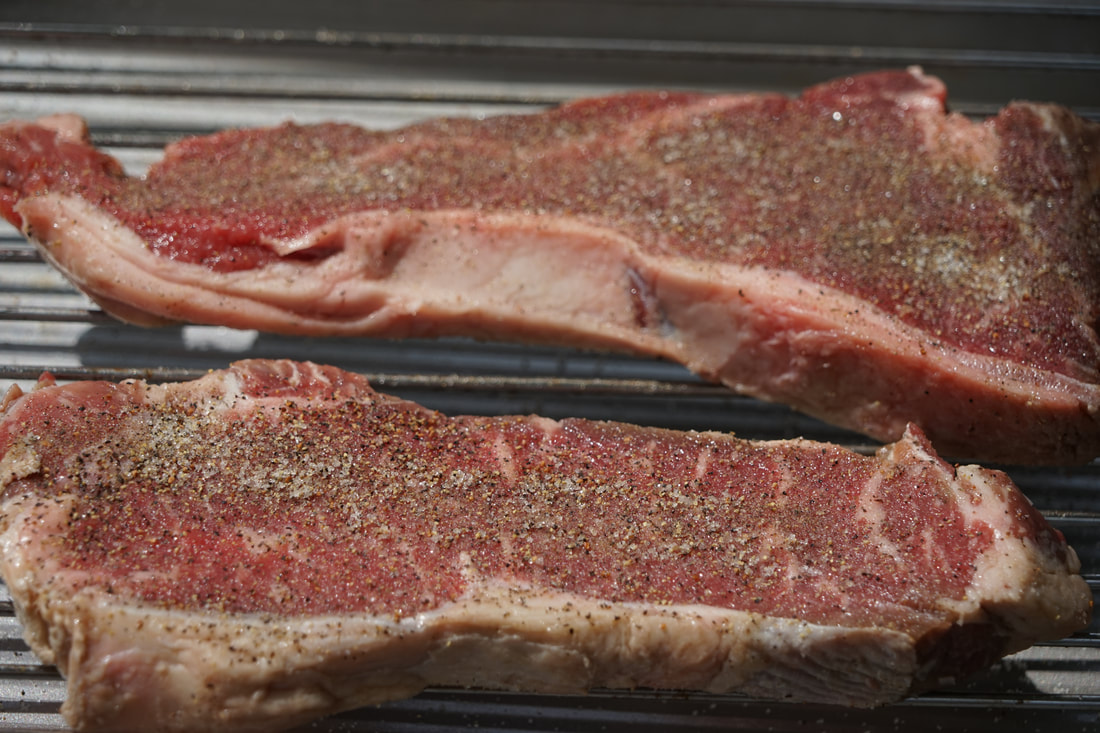
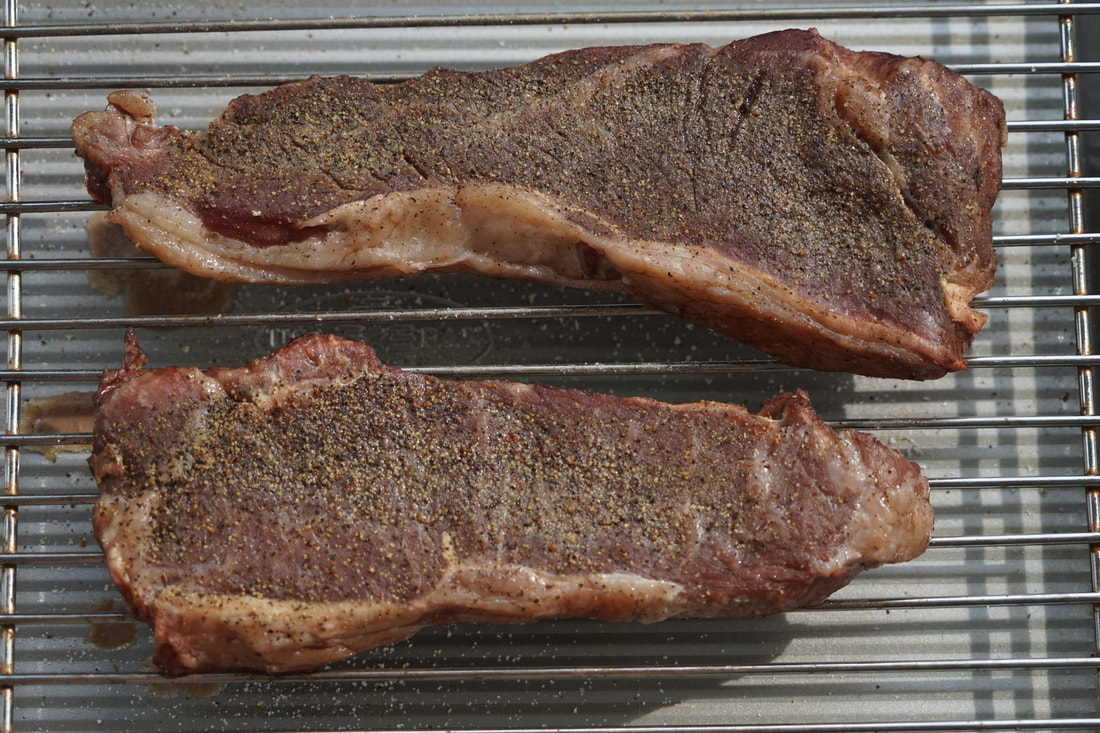
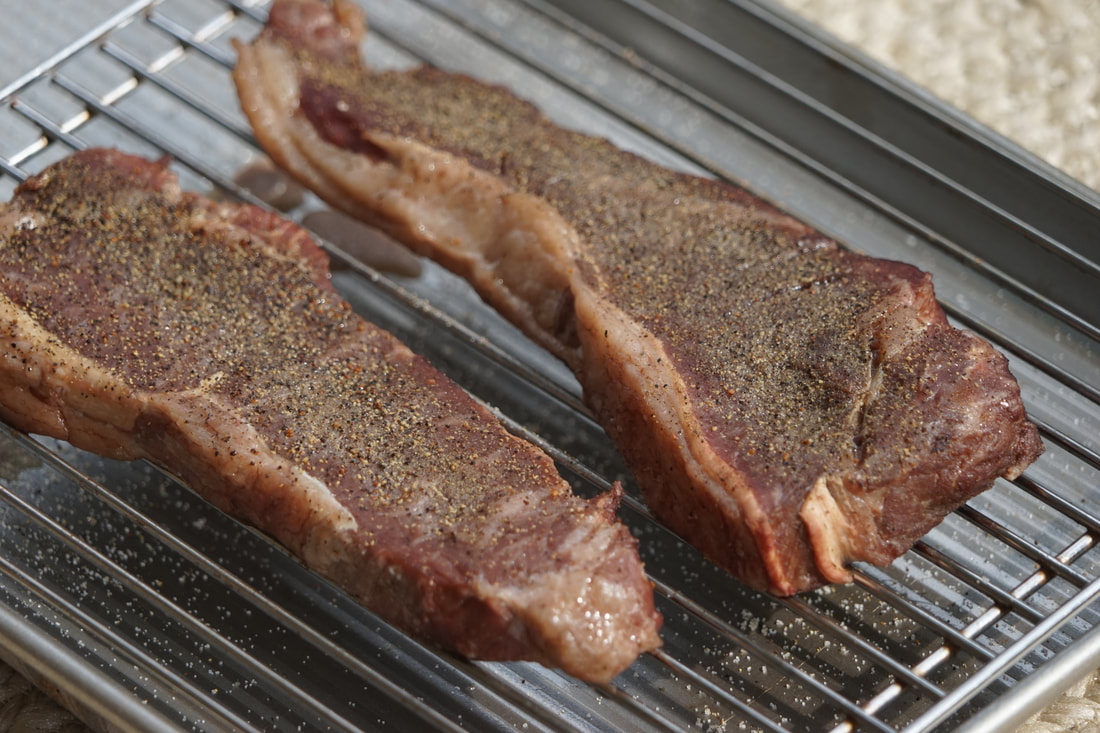
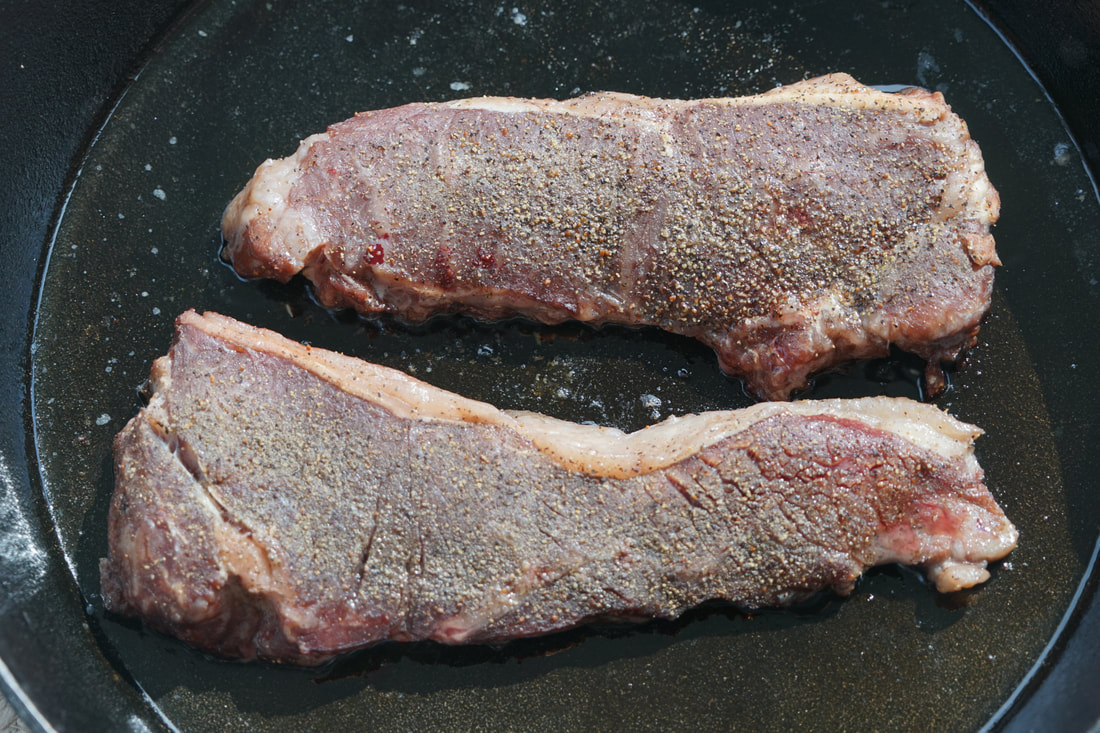
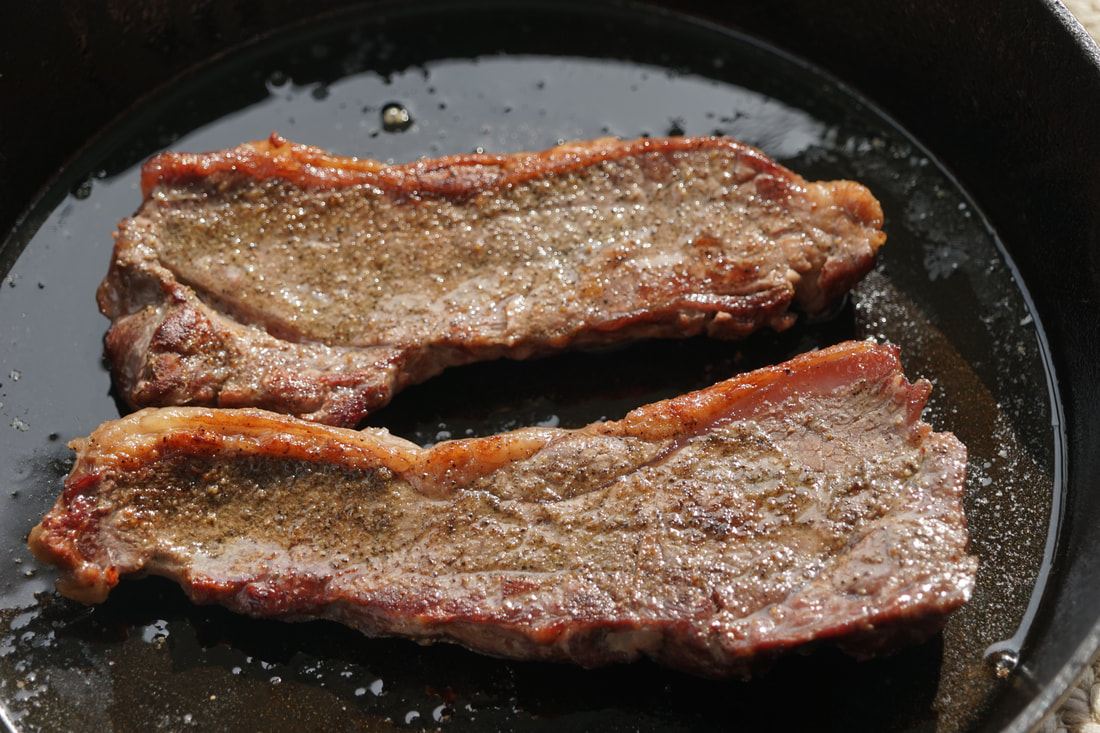
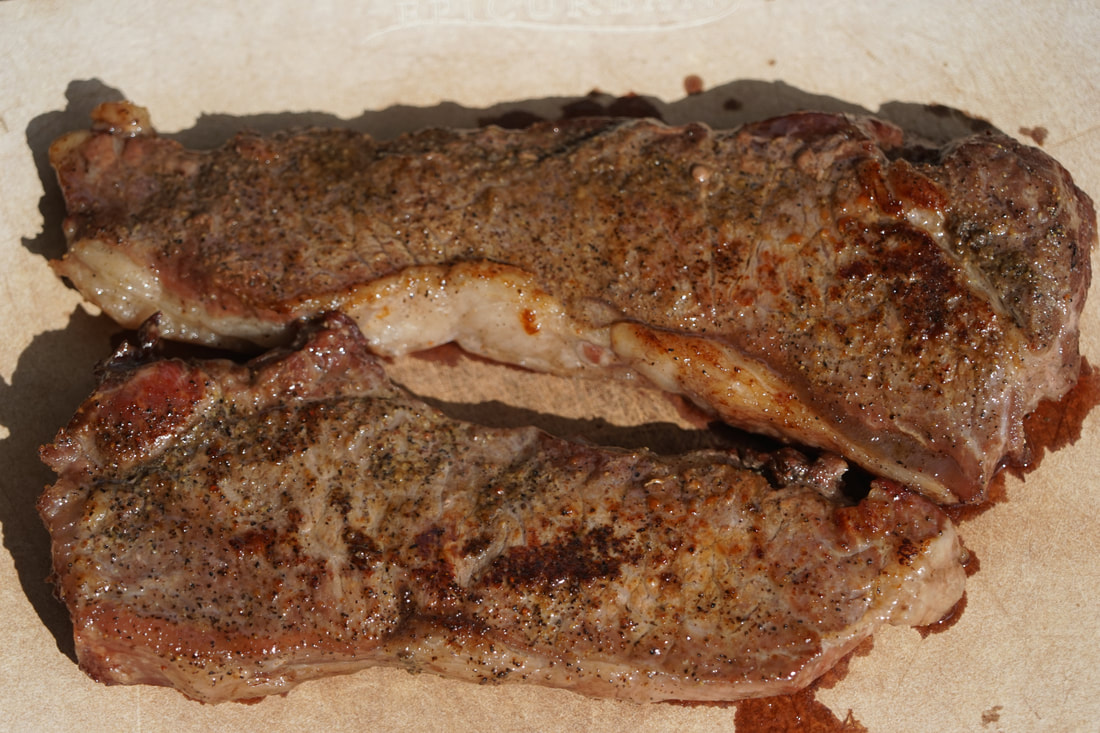
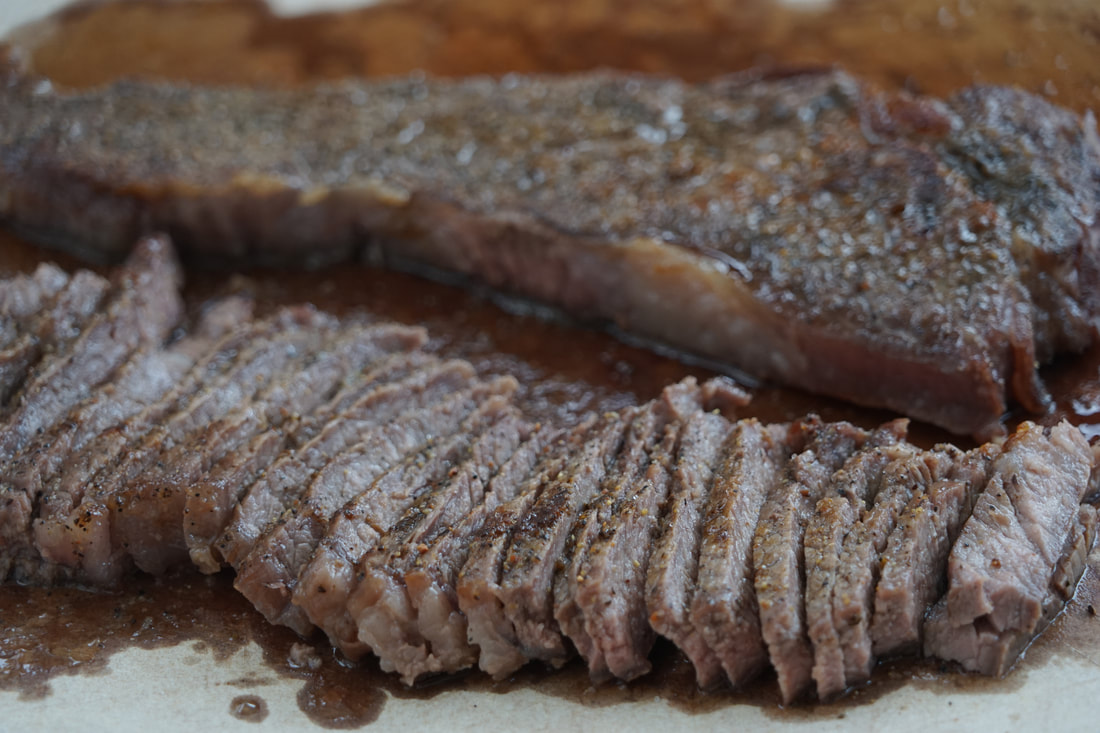
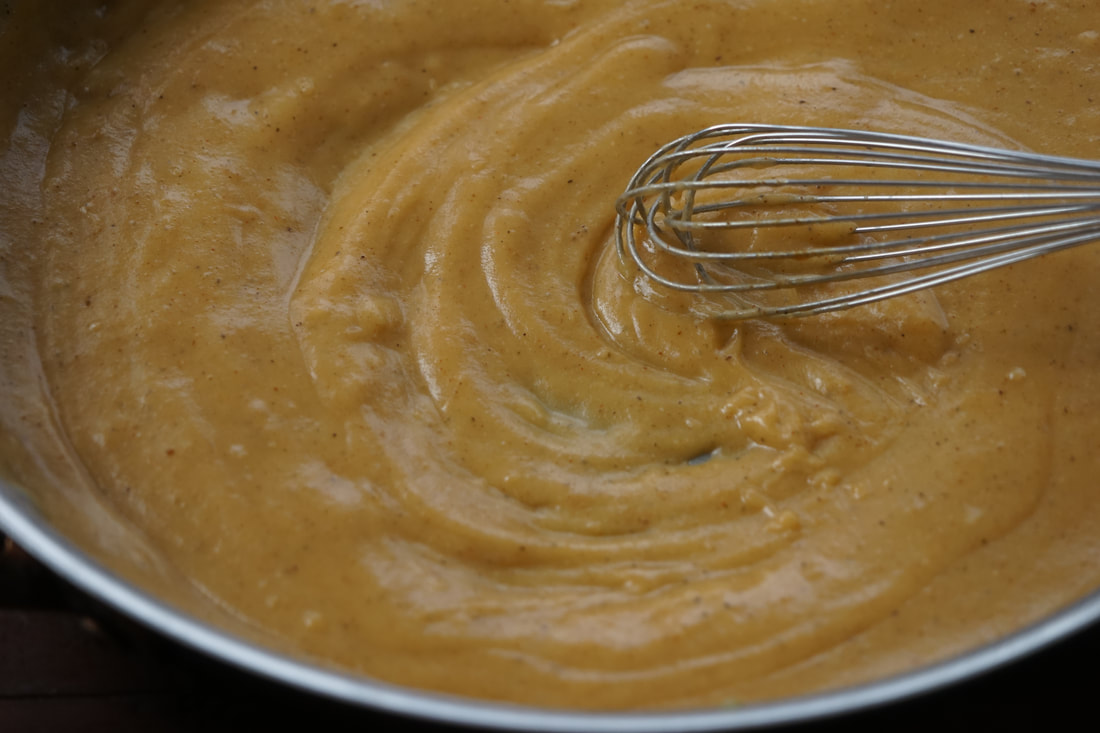
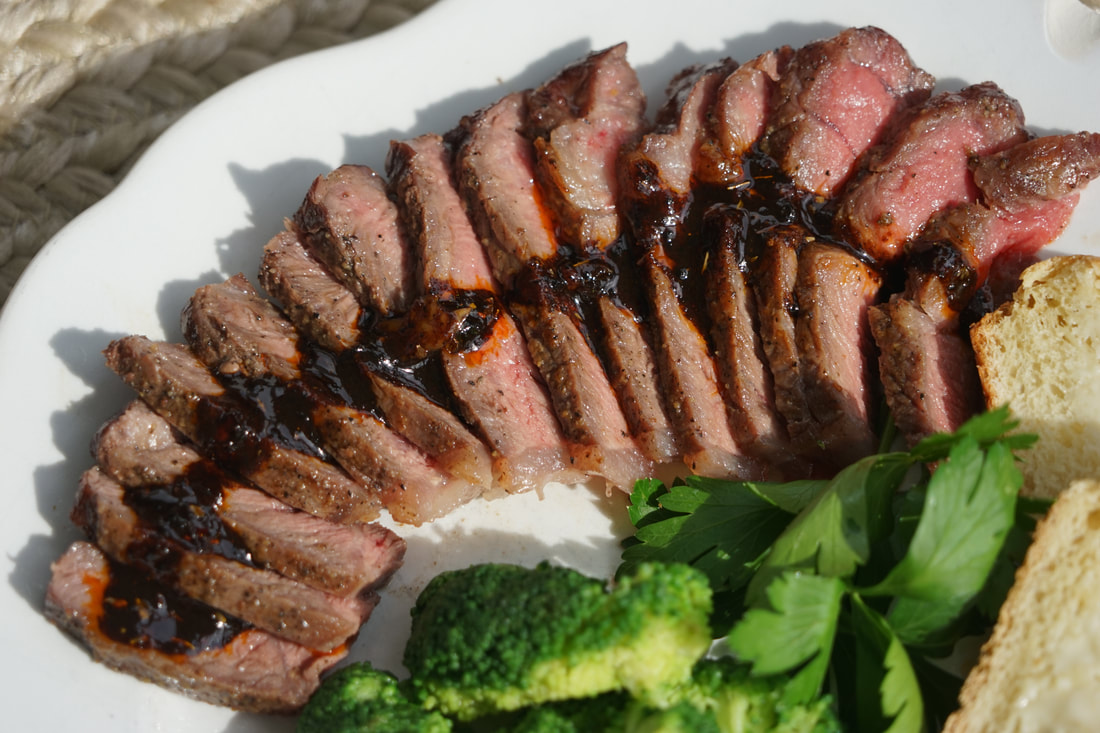
 Ssssssssalsa! Sure it's a dance but it's also a delicious condiment. 💃🏻I definitely don't have the type of coordination or hip mobility required to ever get the hang of salsa dancing but I do intend to master the art of making the condiment. 🌶 Salsa is low in fat, it's packed with vegetables and it's completely customizable to any level of spiciness. What more could I need? I eat a lot of salsa and I was perfectly happy with my salsa experience UNTIL I was introduced to the world of chimichurri. Chimichurri is like salsa on steroids. If you're into big, bold vibrant flavors - you need to start eating Chimichurri. This sauce from Argentina is jam packed with flavor and it can be used on meats, fish, chicken or tacos. It comes in a red version but more commonly, you'll find a cilantro and parsley packed, bright green version. Both are delicious. 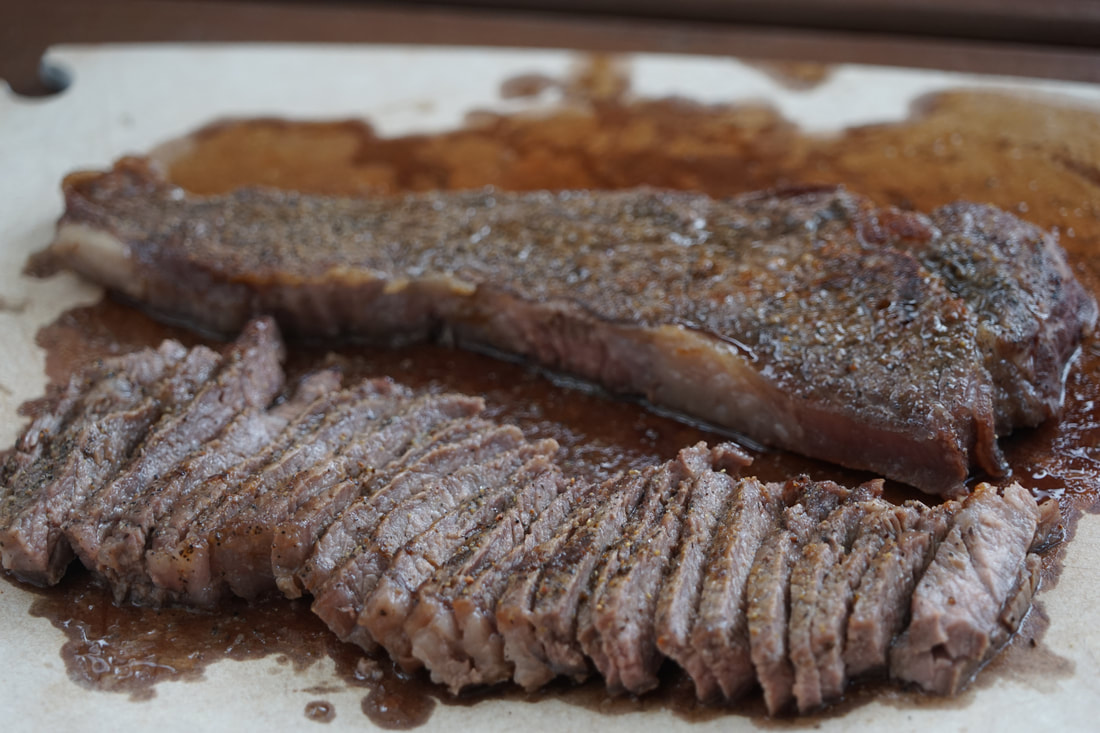 I've been known to make giant batches of homemade salsa that weigh in at 3 or 4 pounds by the time I finish adding all of the scrumptious ingredients. I divide it up into small containers to store it in my freezer so I'm never more than a few minutes in the microwave away from homemade salsa. Now that I've found a new love for Chimichurri, I'm going to have to come up with a way to mass produce large quantities of this finger licking good sauce to store in my freezer as well. This sauce is so good that even a non-red meat eating girl like me is willing to make strip steak - just as an excuse to make more Chimichurri. Yup. I made Strip Steak for the rest of the family and I ate my Chimichurri on a chicken taco. It was AMAZING! AND I still have leftover chimichurri for my grilled fish tomorrow night. Like I said - it's good and everything.  Strip Steak with Chimichurri 2 Tablespoons salt 1 Tablespoon pepper 1 Tablespoon nutmeg 2 teaspoons sugar 2 (20 ounce) strip steaks (2" thick) 2 Tablespoons pecan oil Chimichurri 3/4 cup pecan oil 1/4 cup sweet paprika 2 Tablespoons red pepper flakes 1/4 cup oregano 2 cloves garlic 1/2 cup balsamic vinegar 1 teaspoon kosher salt
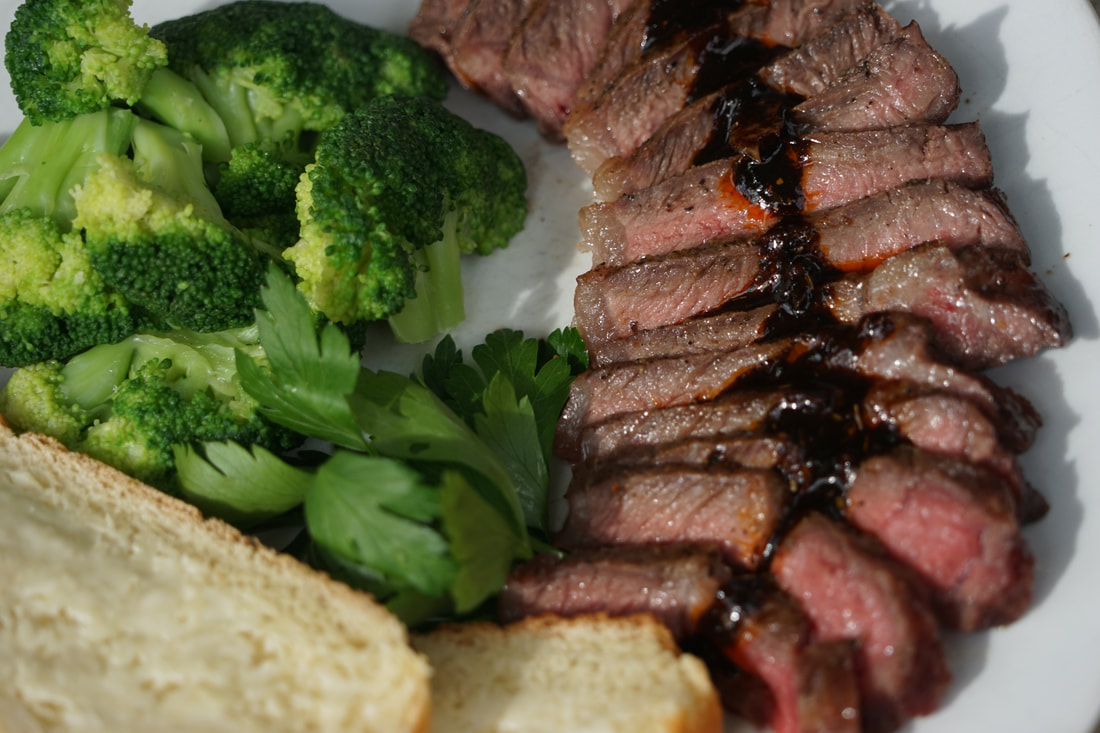 Serve with accumulated juices. Drizzle with chimichurri.
Finding strip steak in my local grocery store can be a challenge. When I go to the butcher shop, I tend to stock up and buy several packages to keep in my freezer. It defrosts quickly and it's super easy to cook on the grill. Ciao!
0 Comments
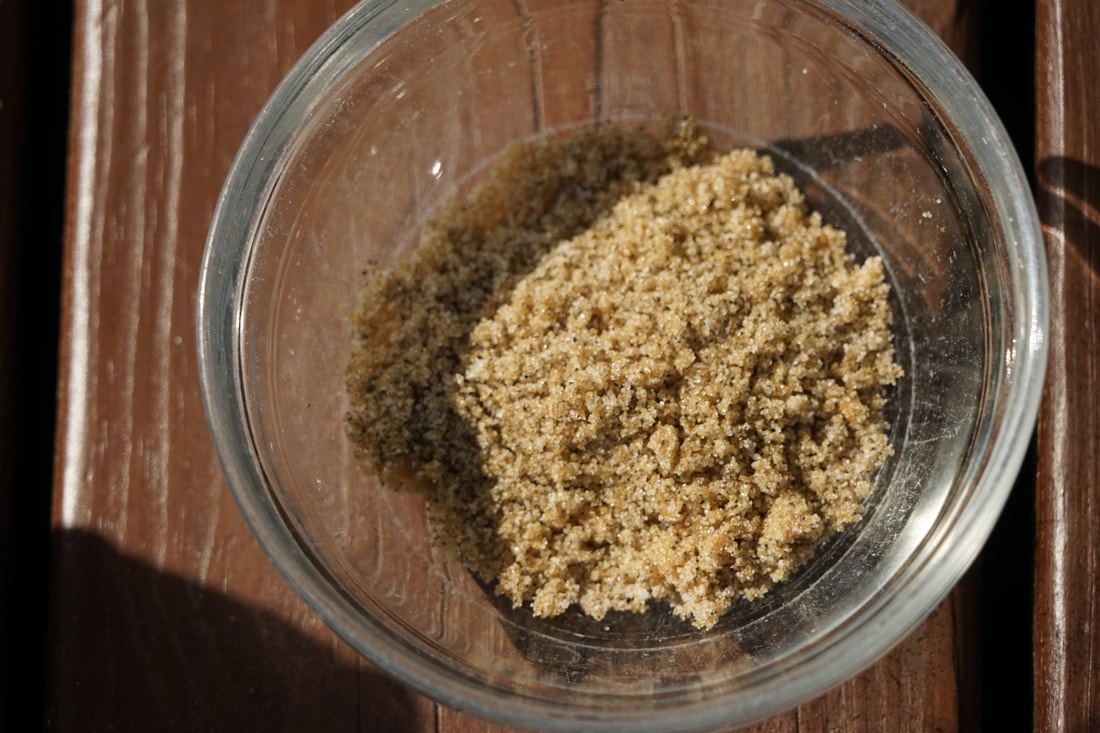
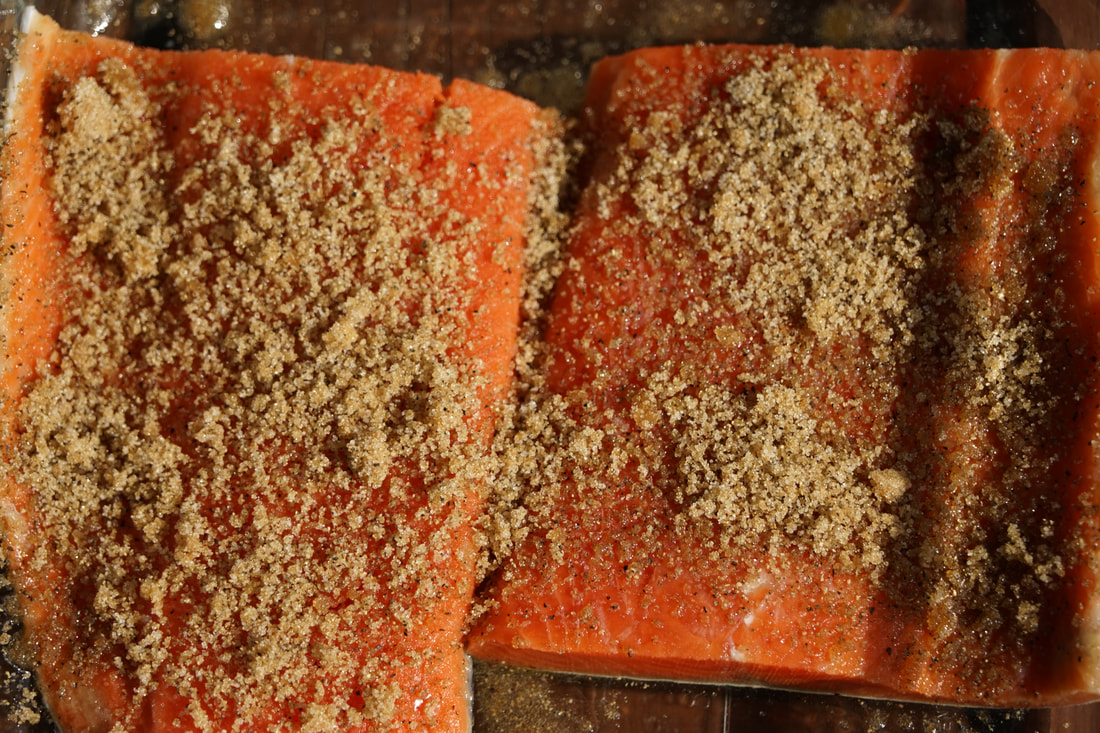
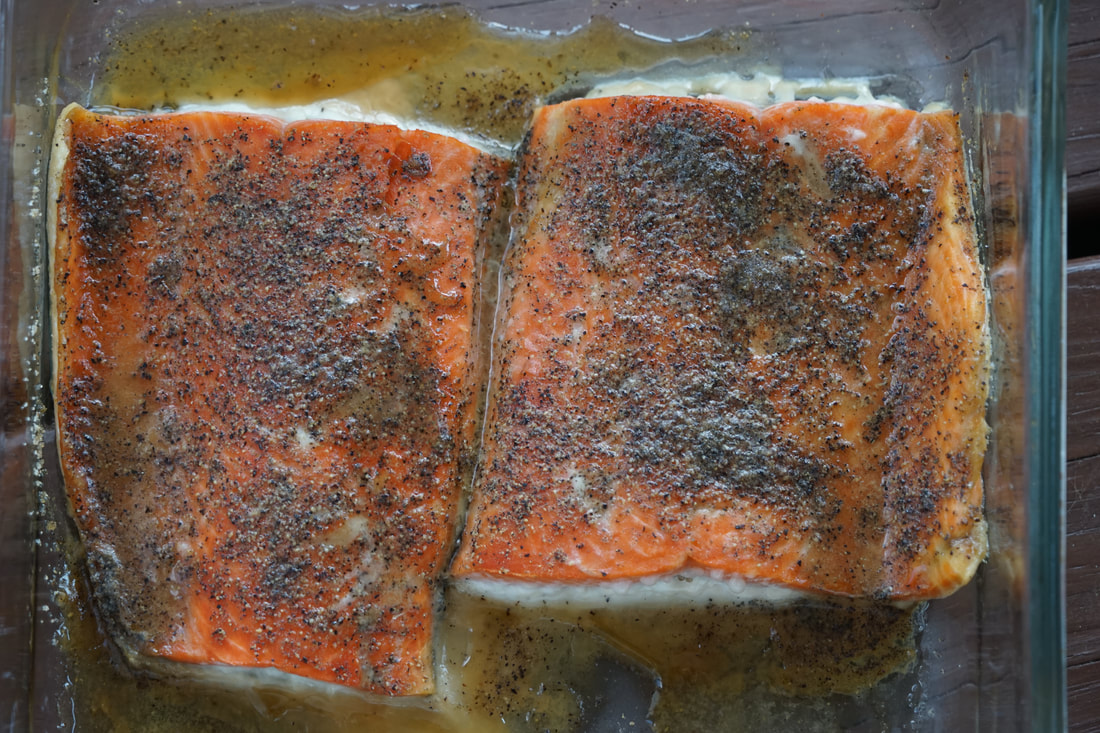
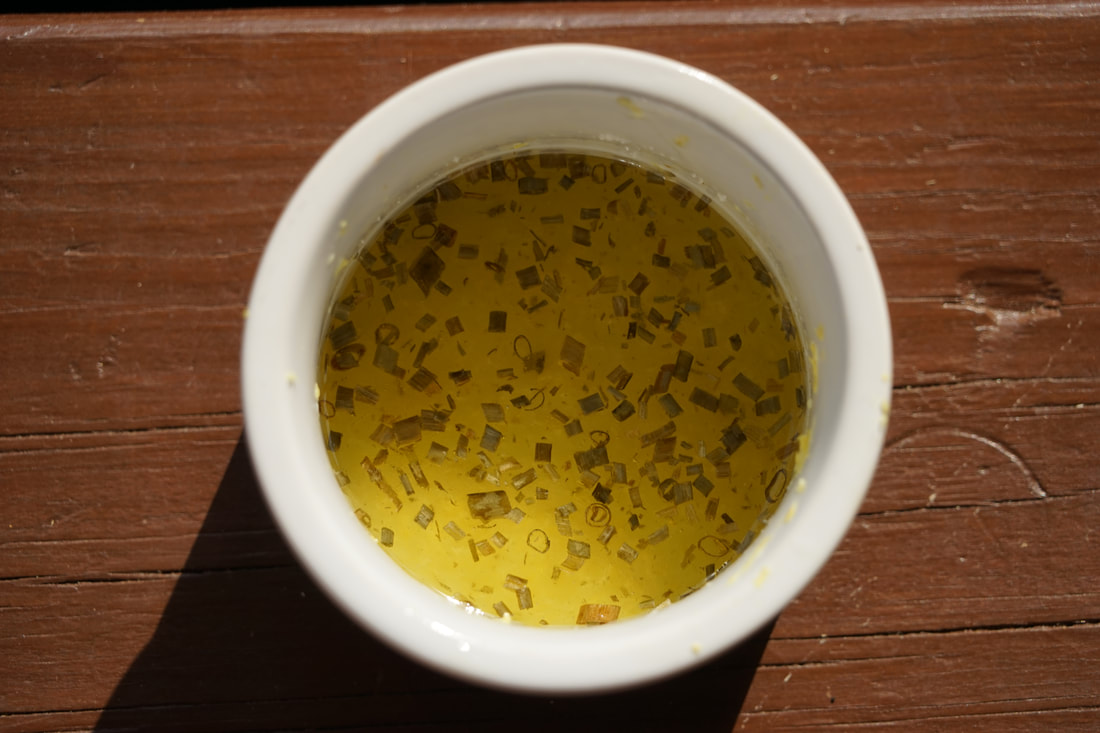
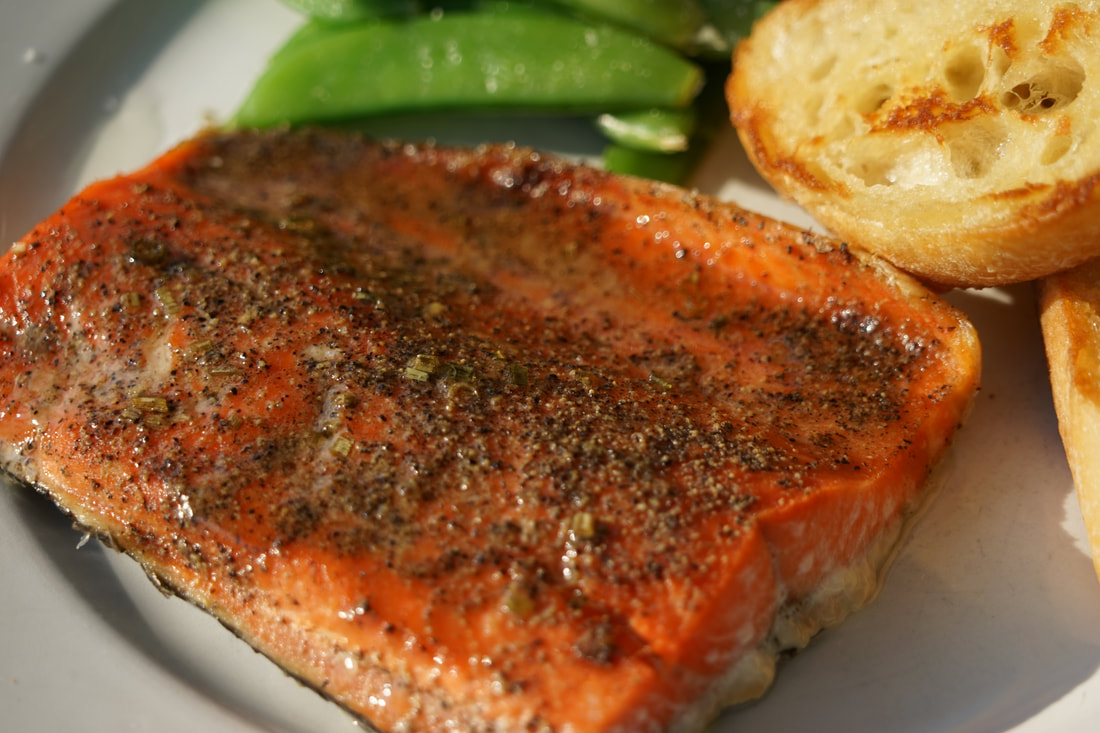 It used to be so awkward for me to pull out my camera every time I cooked a new recipe. I would carry plates all over the house to find the best lighting. I would keep the dog from eating off the plate with one hand while attempting to focus my lens with the other. 📷🐶 It took me a long time to work out the best time and place for me to snap food pictures. It took my family an even longer time to get used to the fact that there would be a 10 minute delay after I announced that a meal was "ready". Ah, the early days of food blogging. Fortunately, all of my trepidation about photographing food has gone by the wayside. After 7 years, I have no apprehension about taking someone's dinner plate outside on the deck and spending 10 minutes trying to capture the contents in the best light. I've been food blogging for so long now that photographing food just comes as second nature. It actually seems weird to fix a meal and NOT photograph it. On average, I probably take 30-40 pictures of each recipe that I post. I bet I have 20 times more food pictures on my computer than anything else. What does that say about me? 😂 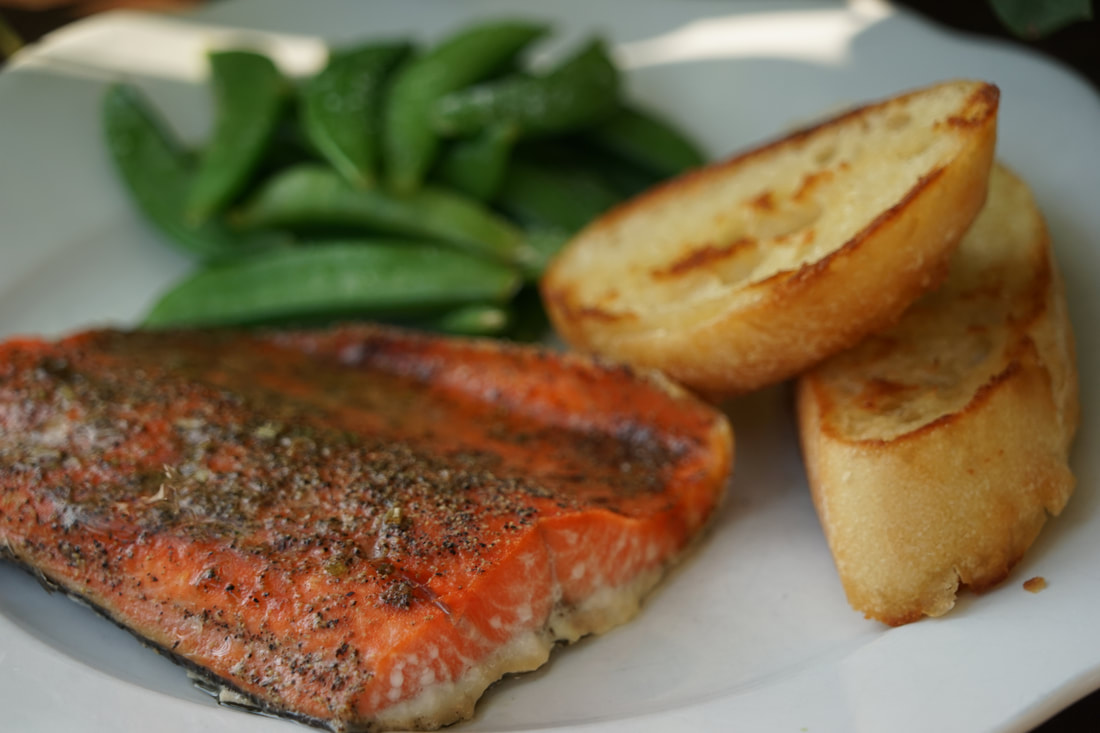 I spend so much time with my camera these days that it's become an extension of my hand. When my kids were in school, I would photograph all of their sporting events. NOT because I was that interested in capturing every moment of every wrestling match and soccer game, but because having a professional looking camera in my hand allowed me access to be closer to the field and more importantly, got me out of the bleachers full of screaming parents. 💁🏻♀️There was more than one occasion when I had a dead camera battery but I pretended to take pictures just to avoid sitting in the stands next to parents who were yelling insulting comments to their children. 😬 My camera has gotten me out of more than one sticky situation but it's also gotten to me in trouble a few times. I'll never forget being asked to leave the grocery store for taking pictures of the pretty displays. 😂🙄😳 This camera and I have been on a lot of adventures together. We've covered a lot of miles and a lot of smiles together. I'm still working on my landscape and portrait photography because I still feel most comfortable photographing food. I can control shadows, there's no wiggling, awkward smiles or complaining. So here I am in my comfort zone - photopgrahing the prettiest of all fish - salmon. I hope that you enjoy this slow roasted salmon recipe as much as we did. 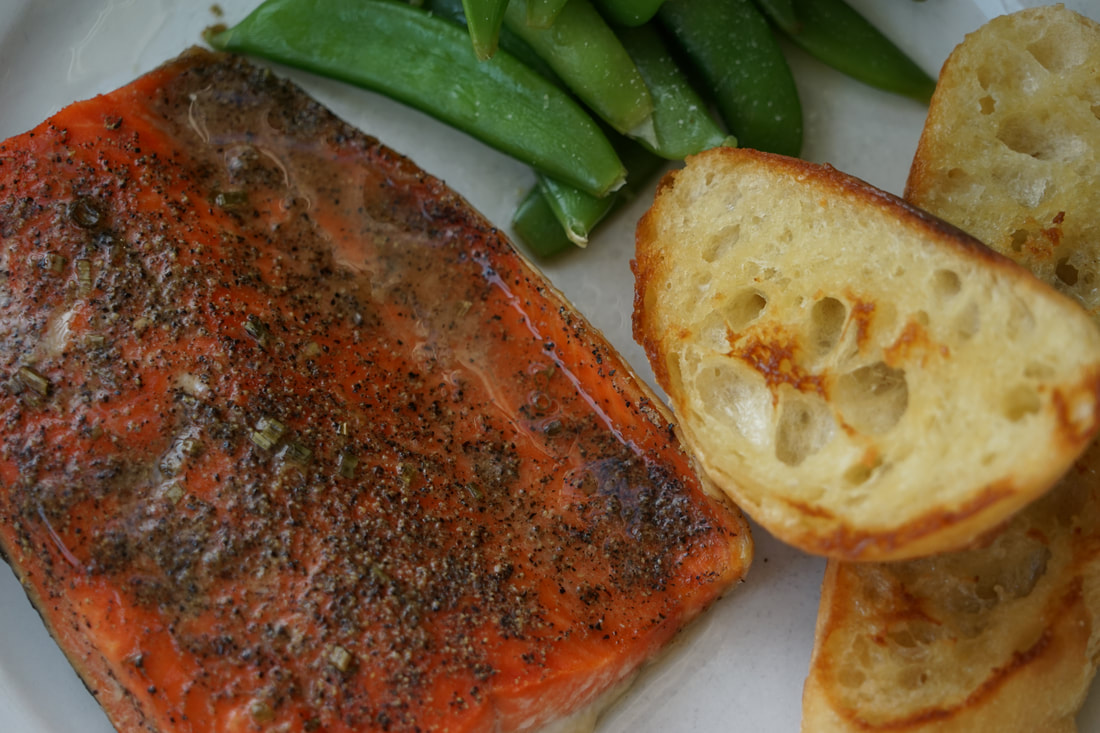 Slow Roasted Salmon with Chives and Lemon 1 Tablespoon brown sugar 1 1/2 teaspoons salt 1/2 teaspoon pepper 2 1/2 pound salmon filet 1/4 cup olive oil 2 Tablespoon fresh chives, sliced 2 teaspoons grated lemon zest 1 1/2 Tablespoons lemon juice
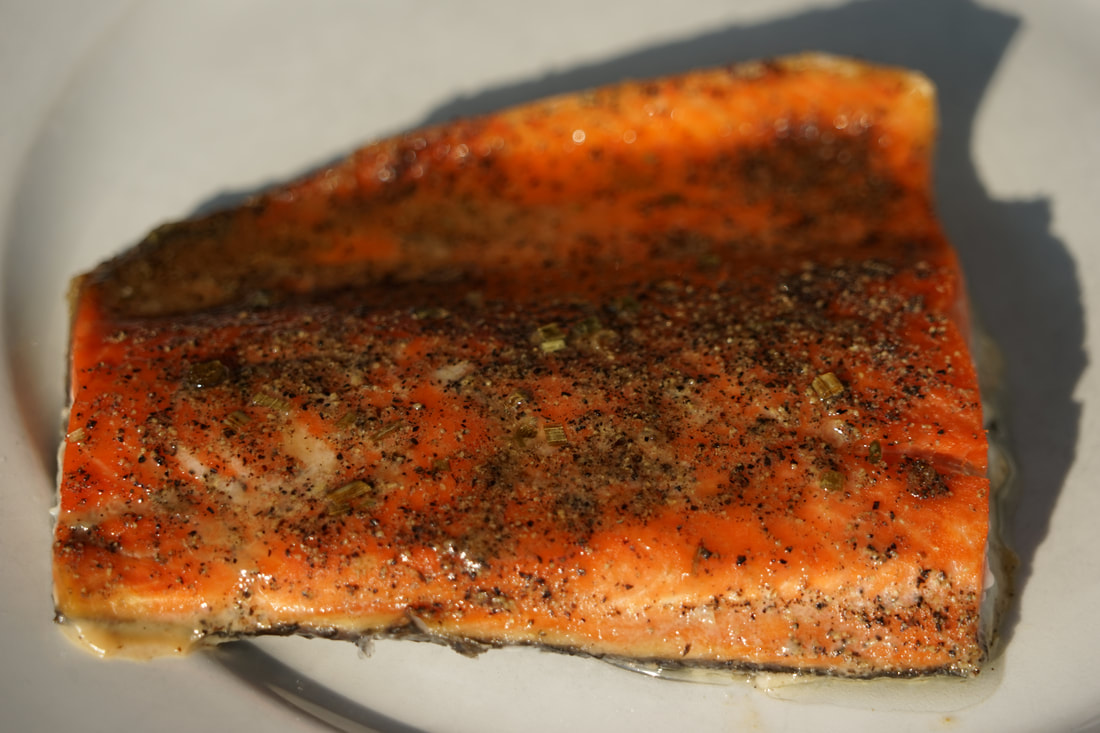 Pour oil over salmon. Let rest 5 minutes. 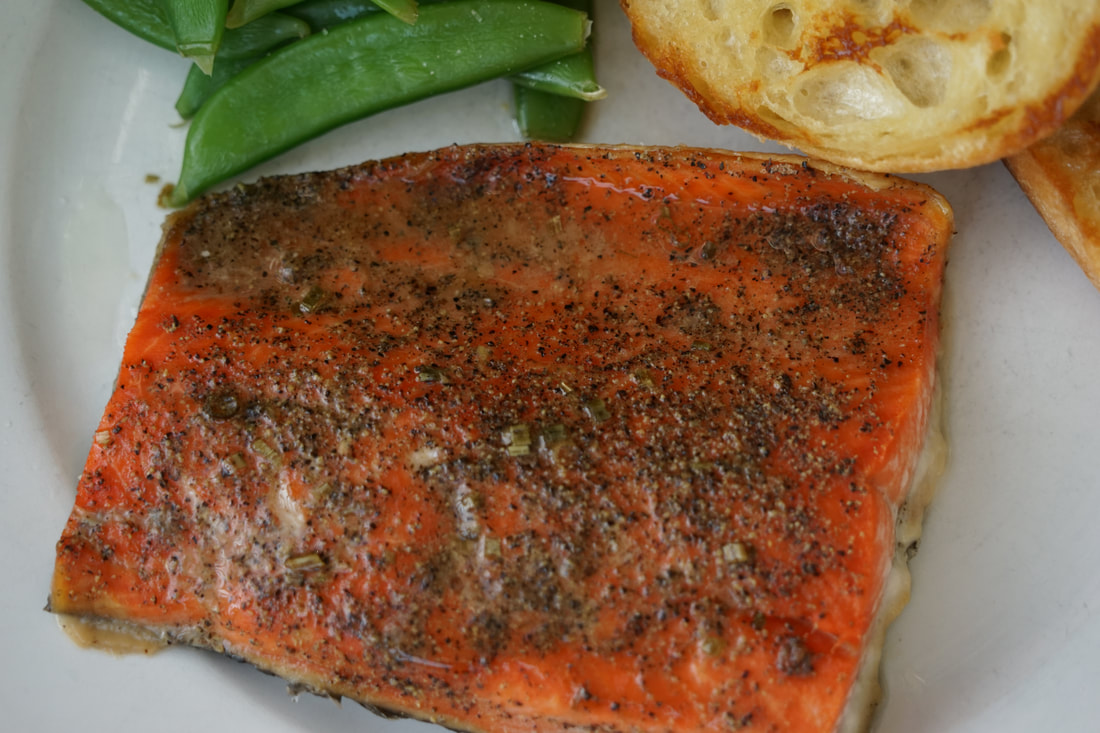 Serve salmon. Spooning any remaining juices over fish on plate.
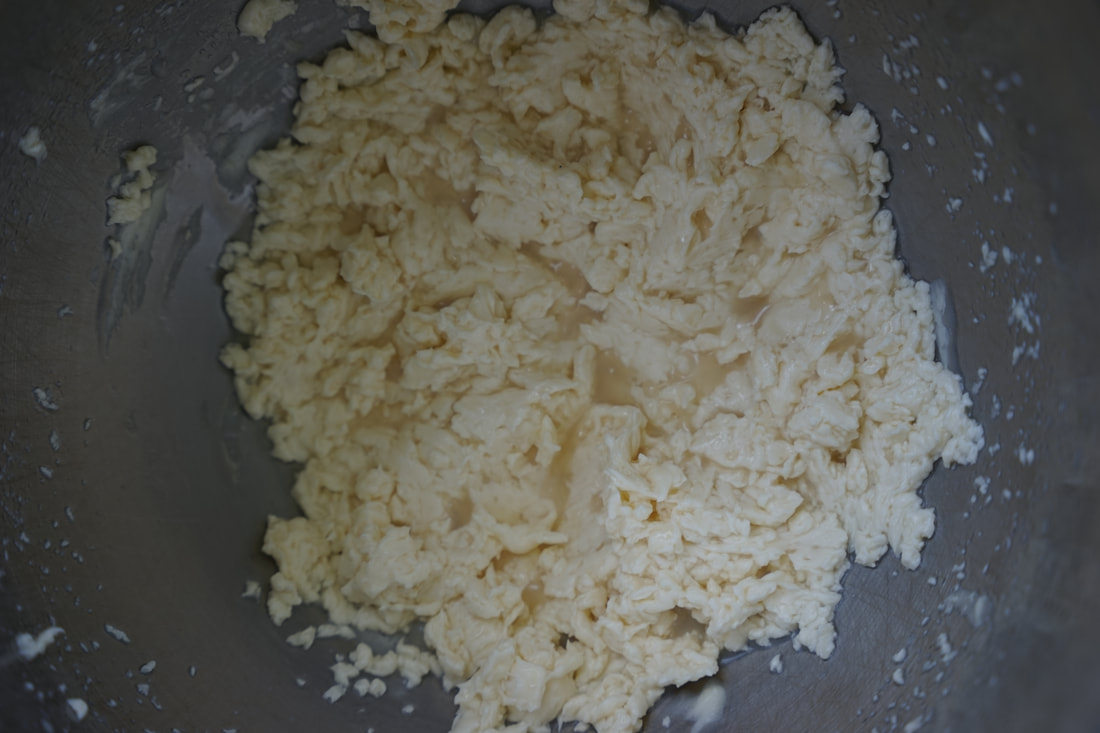
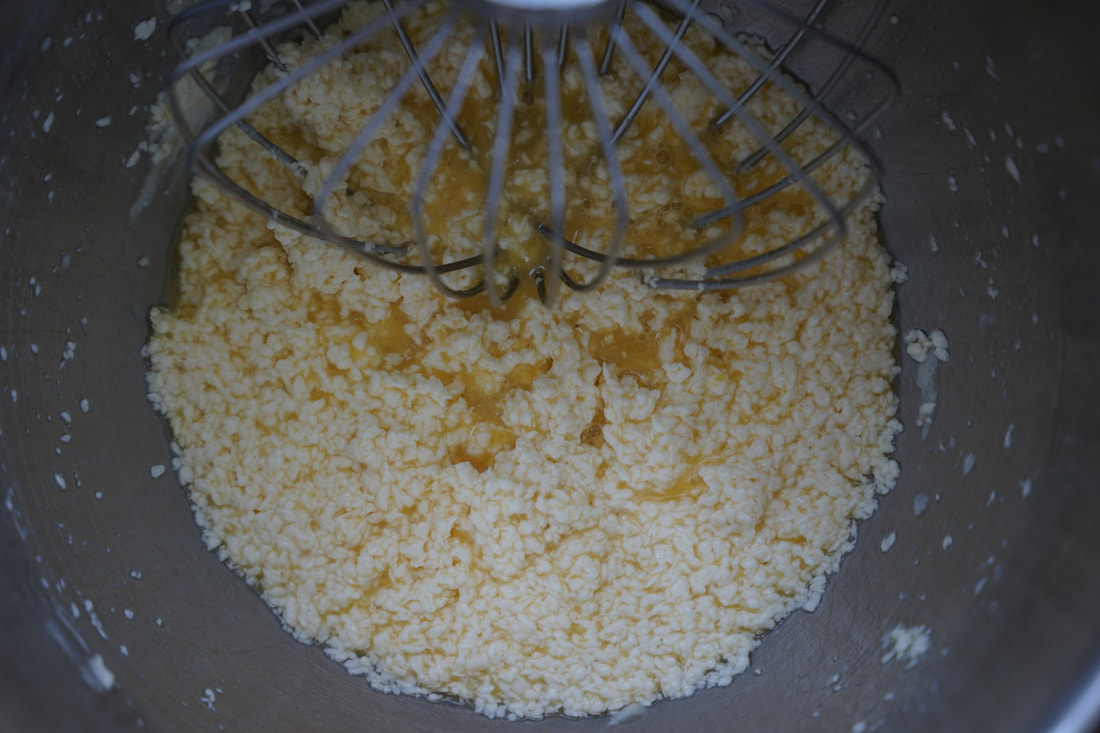
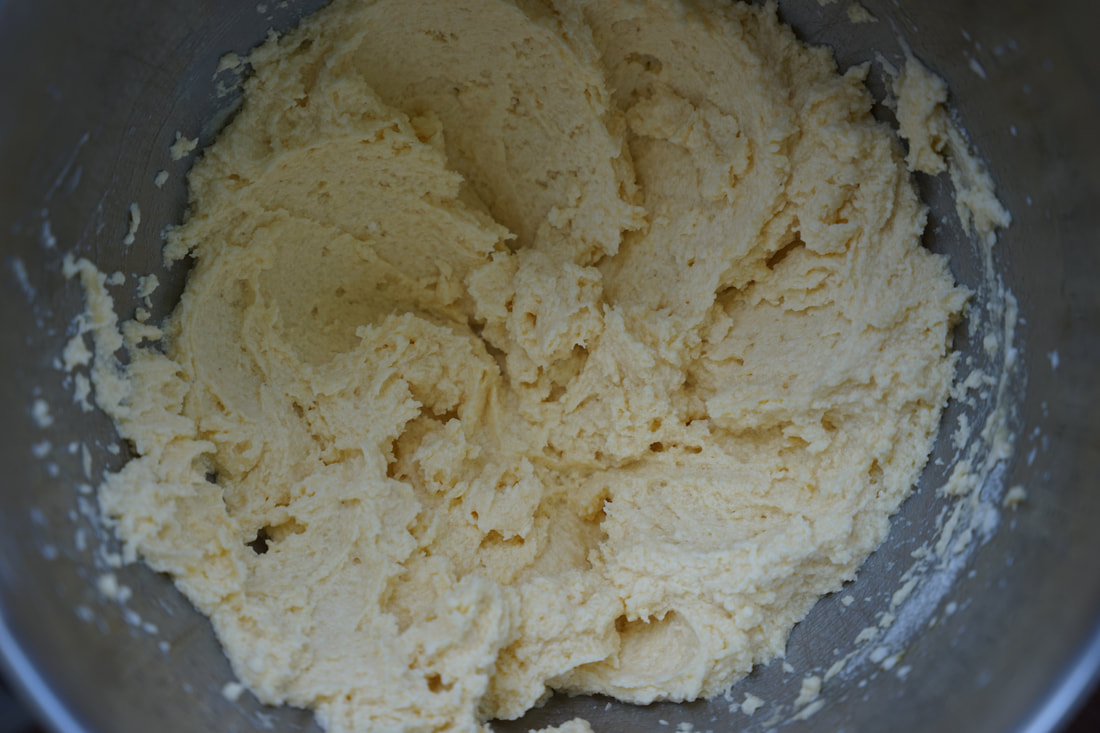
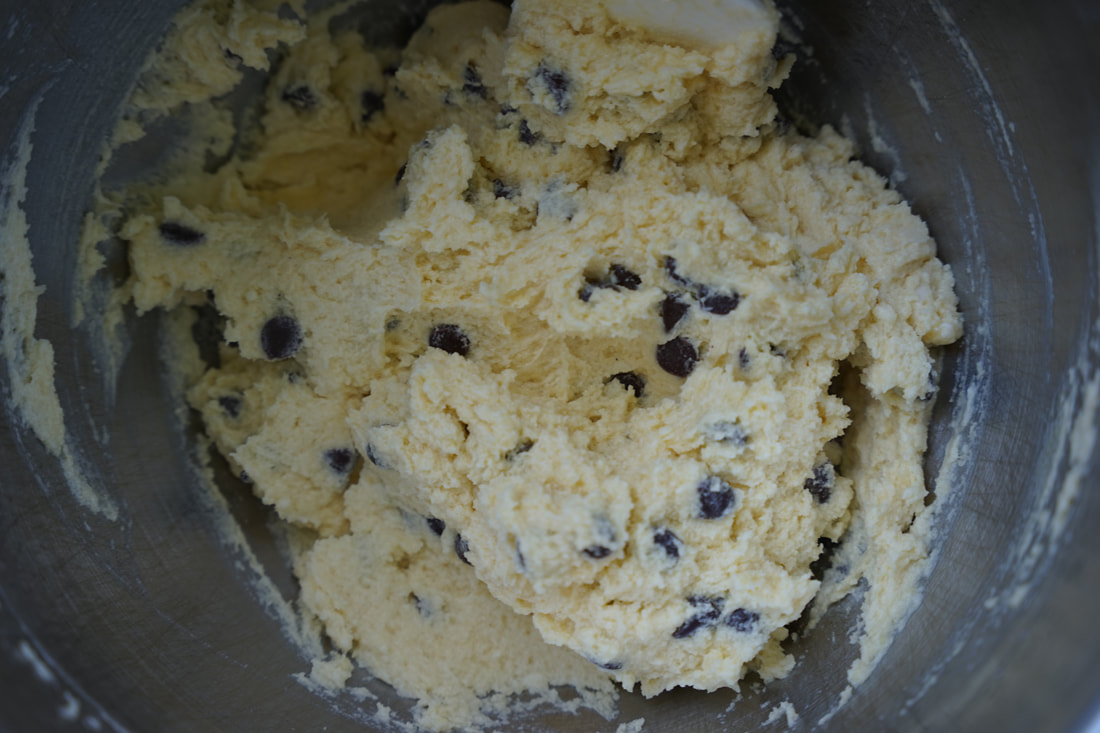
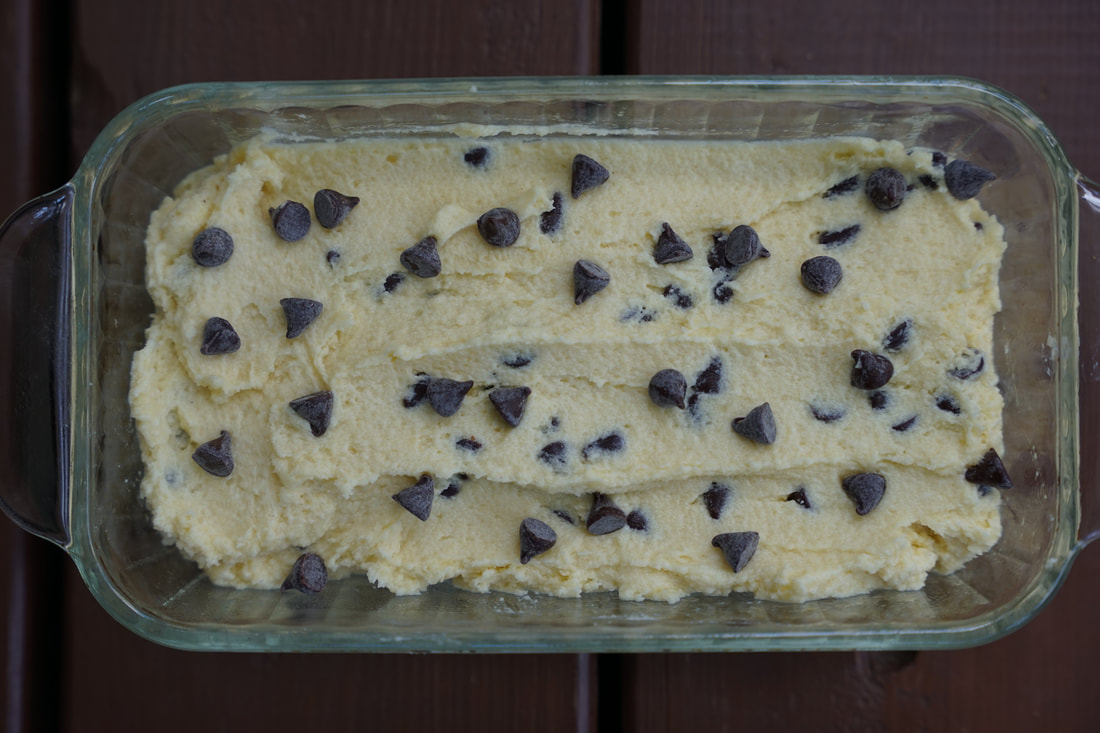
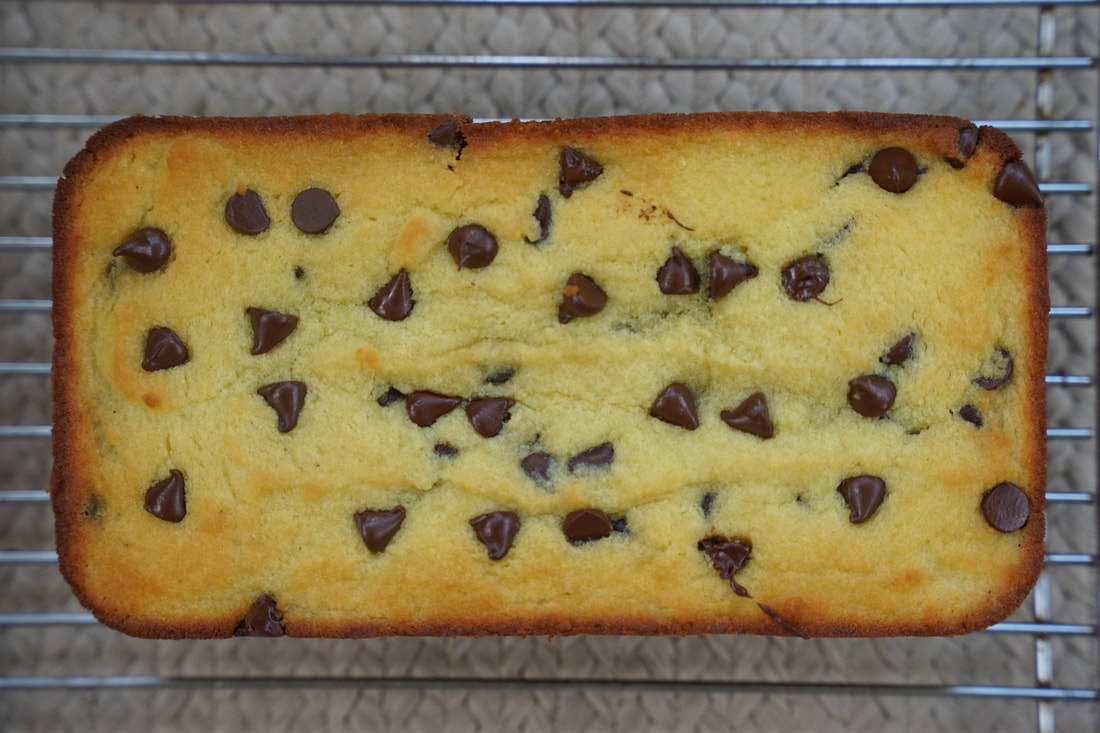
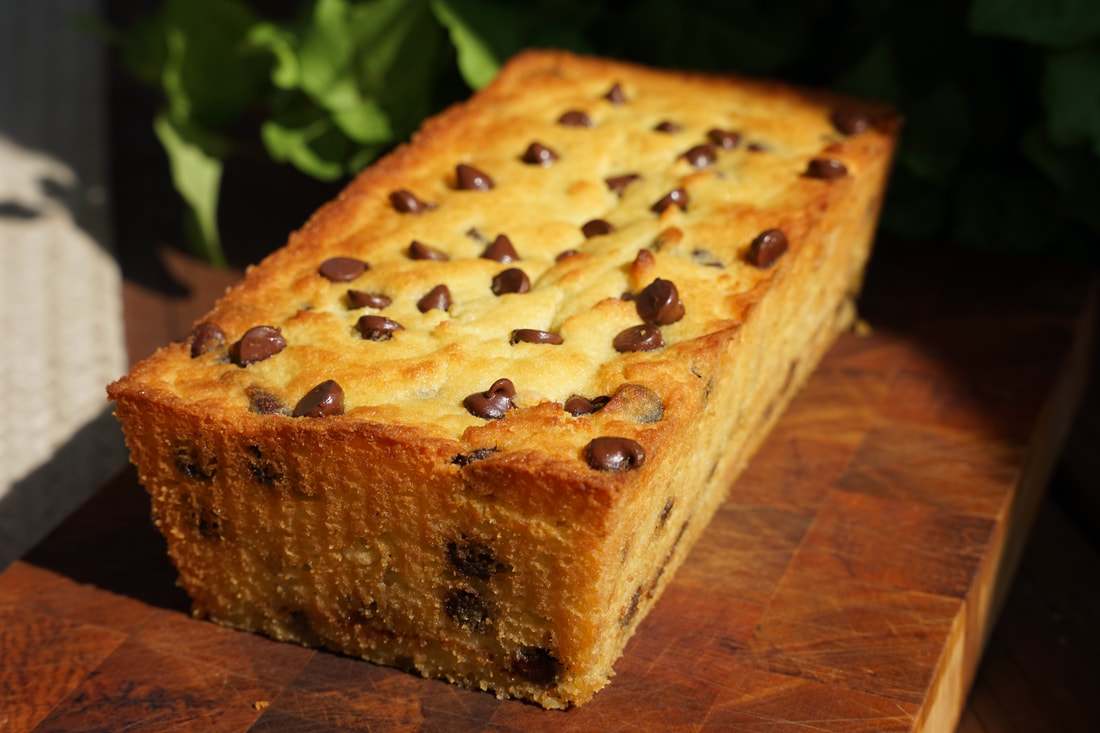
If you've got some great food photography tips - I'd love to hear them. Send me an email or comment your best pointers for food styling and photography. TIA Ciao! 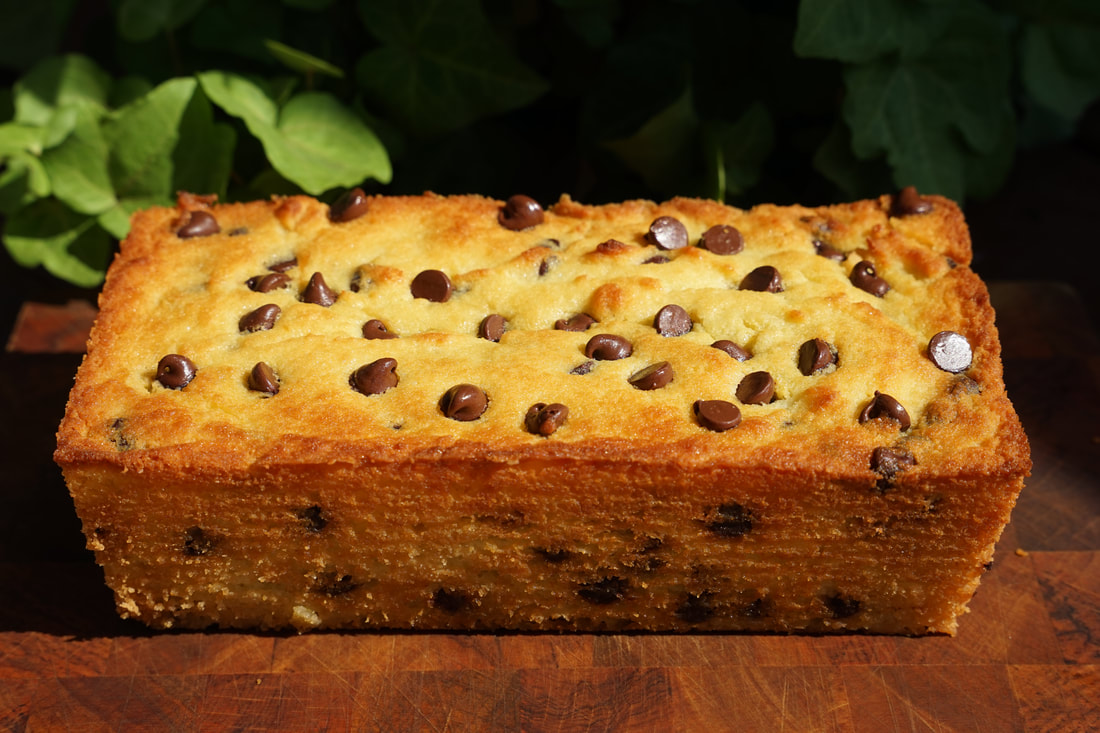 Have you ever invited people over for dinner only to find out, after the fact, that your guests have weird food allergies and preferences? 😬I hate to admit it but, I'm THAT dinner guest. I don't like to eat beef or pork. In recent years, I developed a sensitivity to dairy (mostly milk) and I try and avoid eating any fried foods. Yup, I'm that "hard to plan a menu for" dinner guest. 🤷🏻♀️ I know it and I'm sorry. People also assume that because I'm a food blogger, I'm oozing with culinary knowledge and Gordon Ramsey like cooking skills. 🔪 Truth is, I'm just a girl who learned to cook from her mom and her grandmother. I have a food blog but that doesn't give me any more credibility than people who put cooking videos on tic tock. It's just an avenue to share my passion for food. 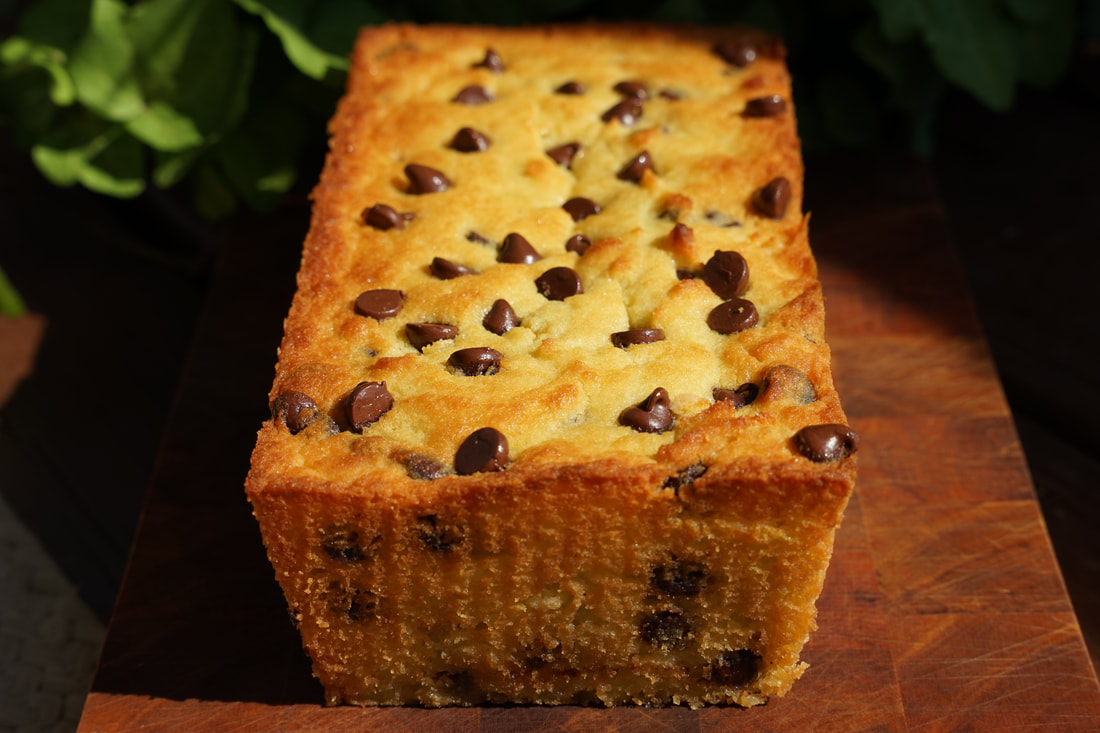 It's hard to believe that with my title of food blogger and my less than typical food habits working against me, that I've ever been invited to dinner. I feel guilty when I do get a dinner invite because I don't want anyone to have to try and plan a menu around my weird eating habits. The truth is I don't even plan my OWN dinner menu around myself. We have steak nights and hamburgers on the grill. I cook pork chops and fried fish and I have no problem serving that to my family while I eat the side dishes for dinner. A big plate of grilled vegetables, a green salad and a slice of crusty bread is a perfect meal for this vegetable loving girl. With every birthday, I feel like I add more foods to the list of things that I can't seem to tolerate anymore. 😅 Lucky for me, gluten is not on that list YET. 🤣 I know a lot of people who are gluten intolerant though. If this is you - or you know someone who has celiac disease, I've got just the perfect recipe. Gluten Free Chocolate Chip Bread is made with coconut flour and it's a nice addition to any brunch or lunch menu. 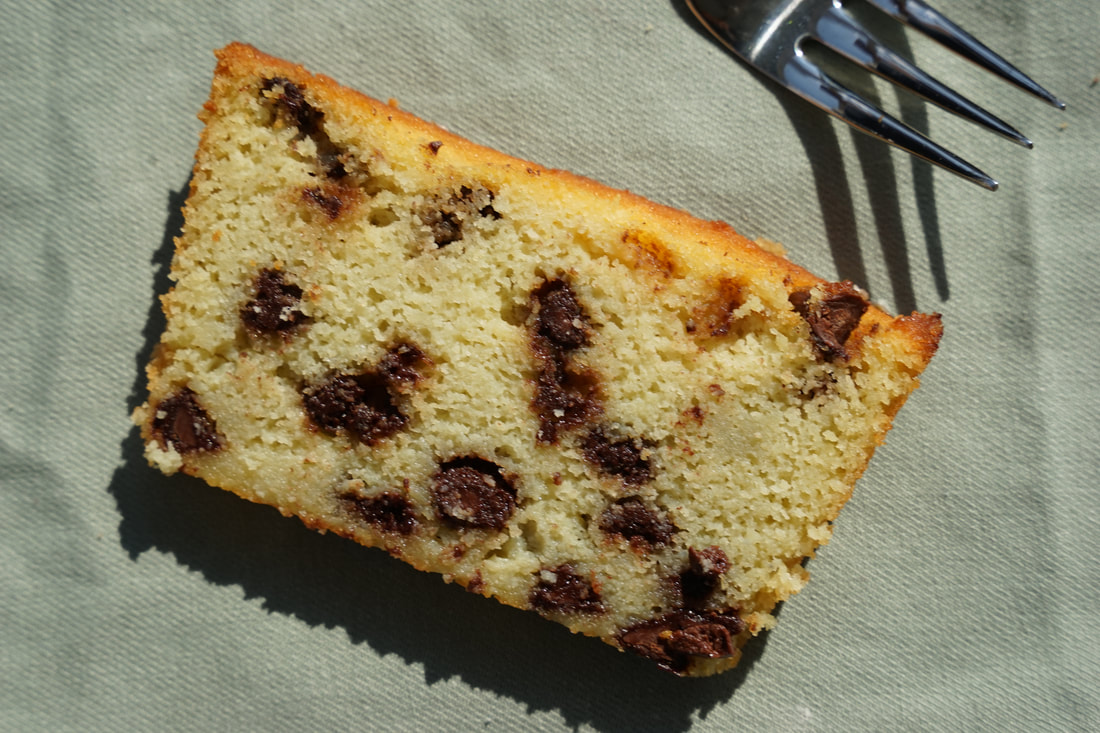 Gluten Free Chocolate Chip Bread 18 Tablespoons butter, melted 2/3 cup sugar 1 Tablespoon vanilla 2/3 cup milk 8 eggs 1/2 teaspoon salt 2 teaspoons baking powder 1 cup coconut flour 1 cup chocolate chips
 Allow to cool before slicing.
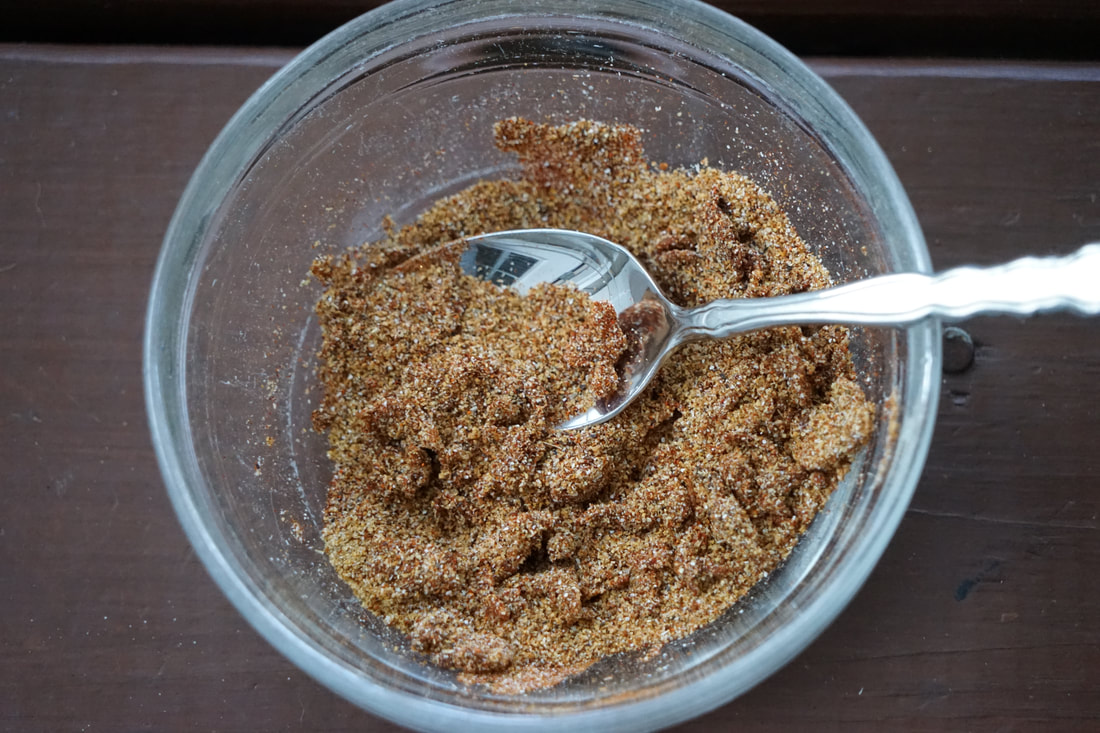
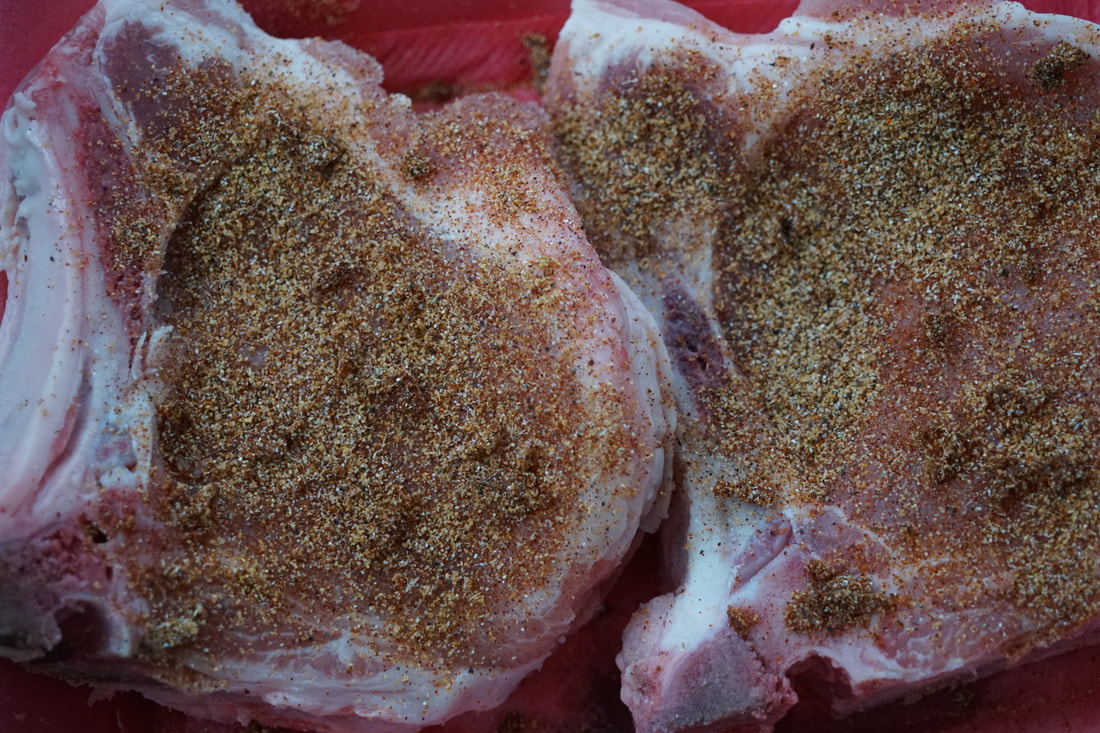
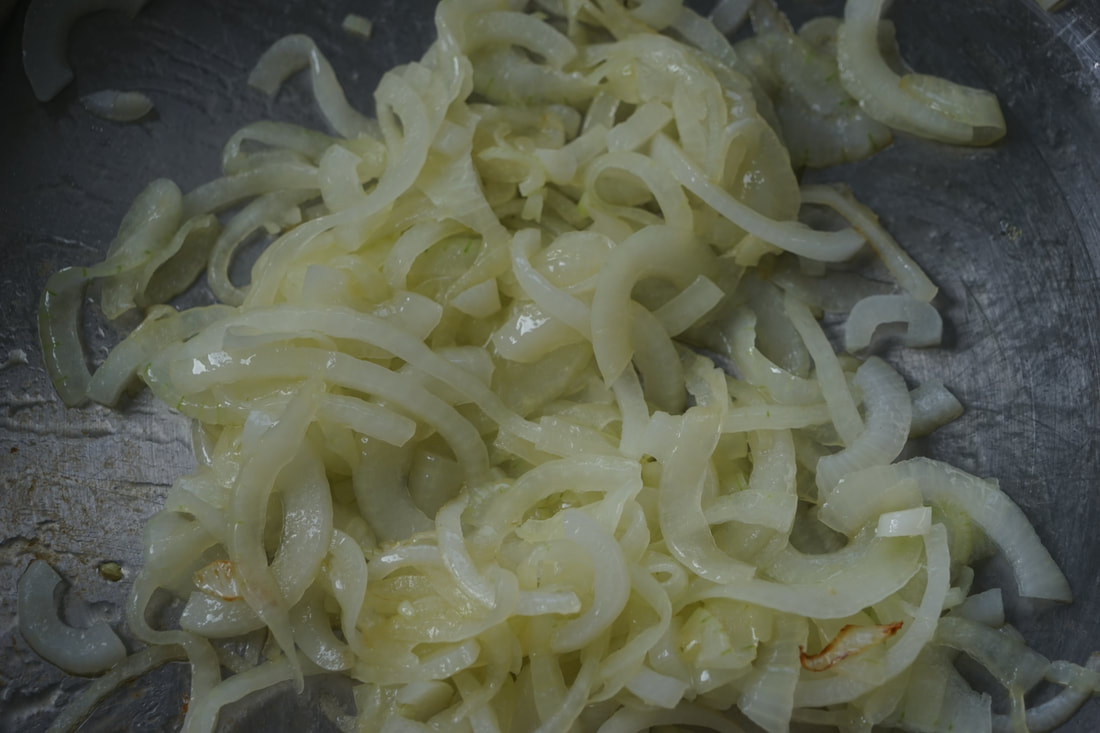
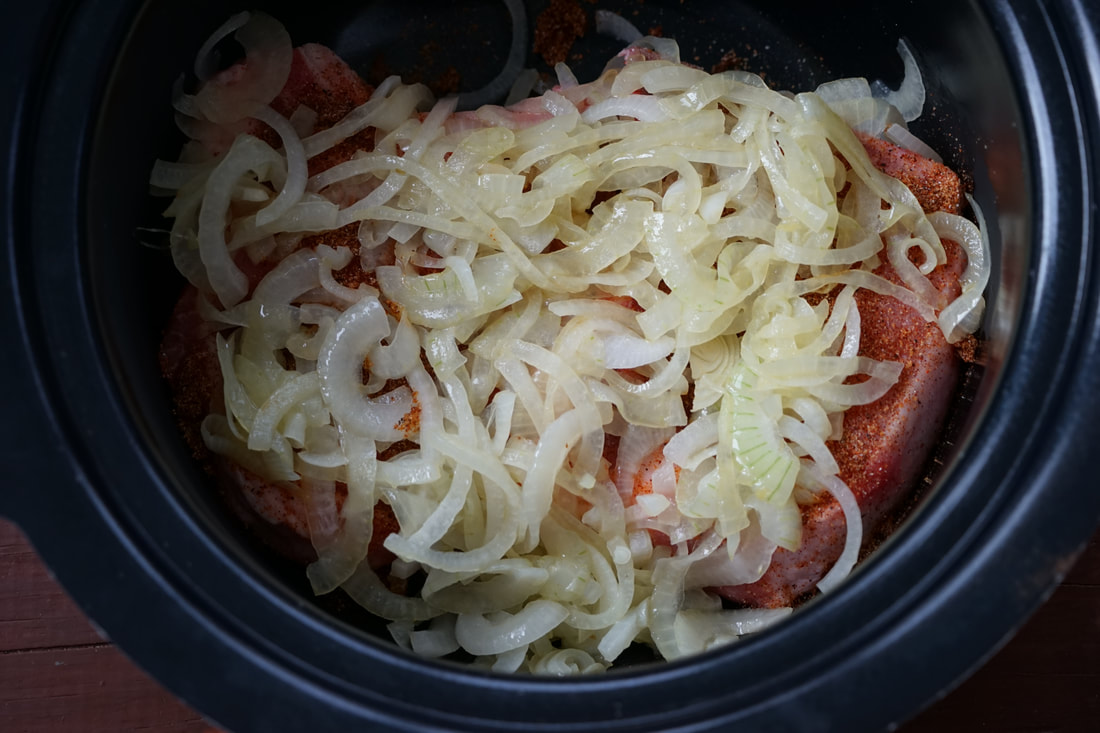
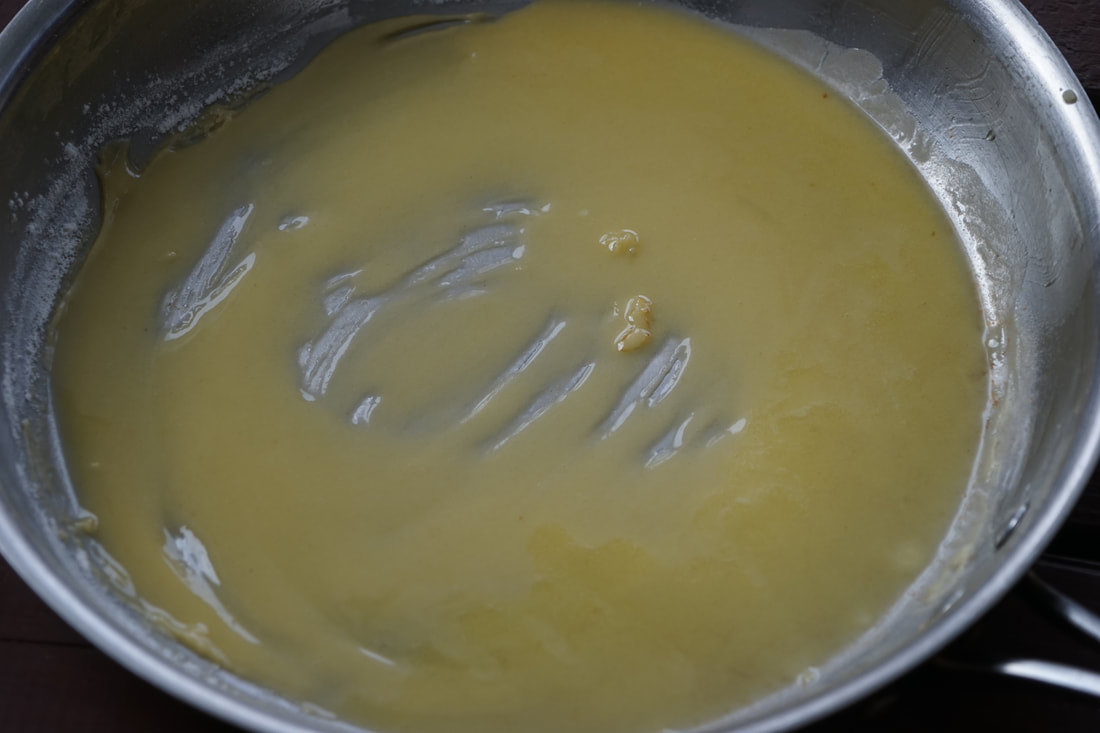
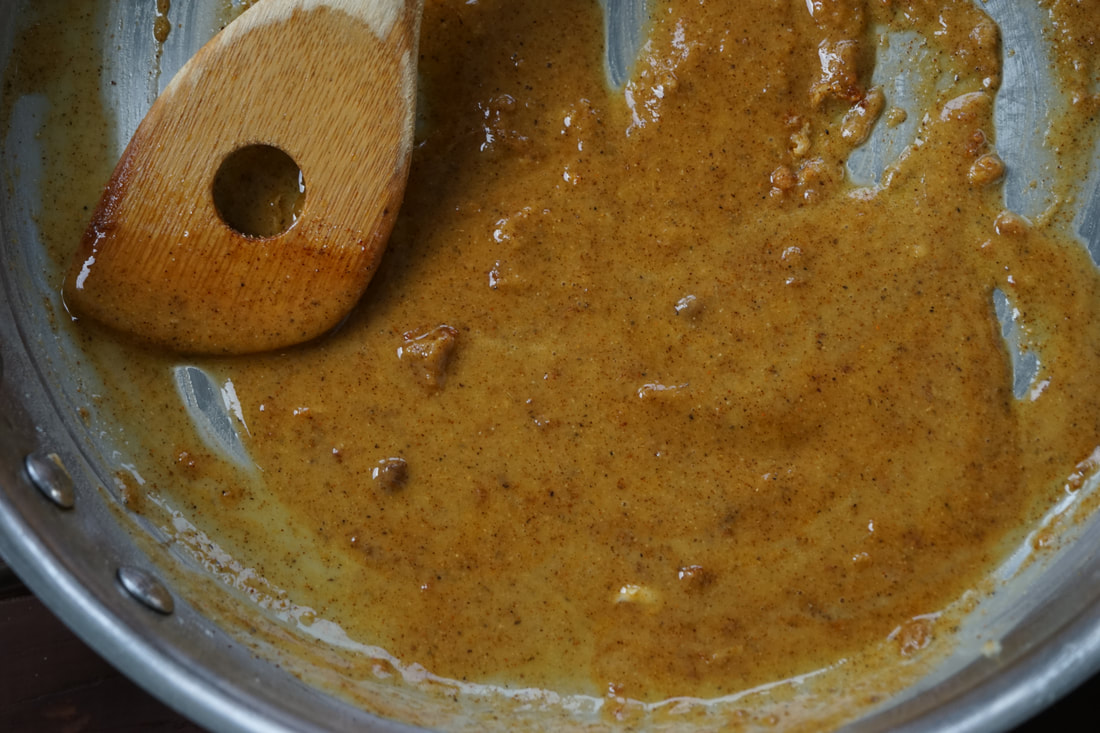
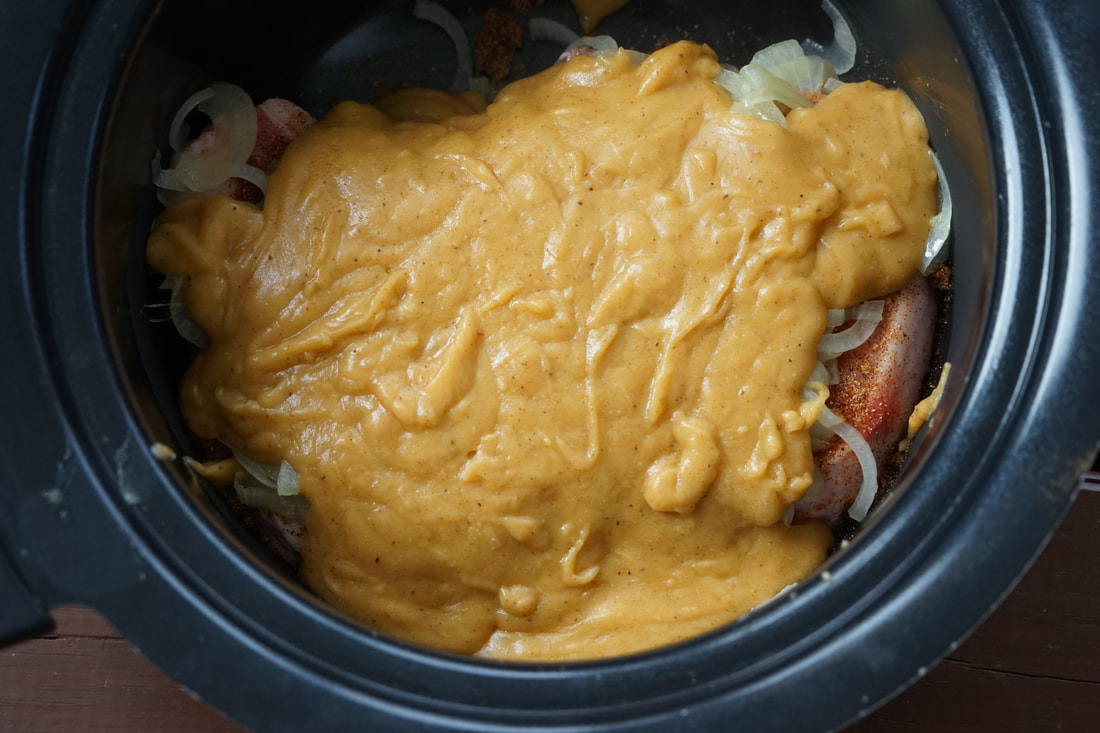
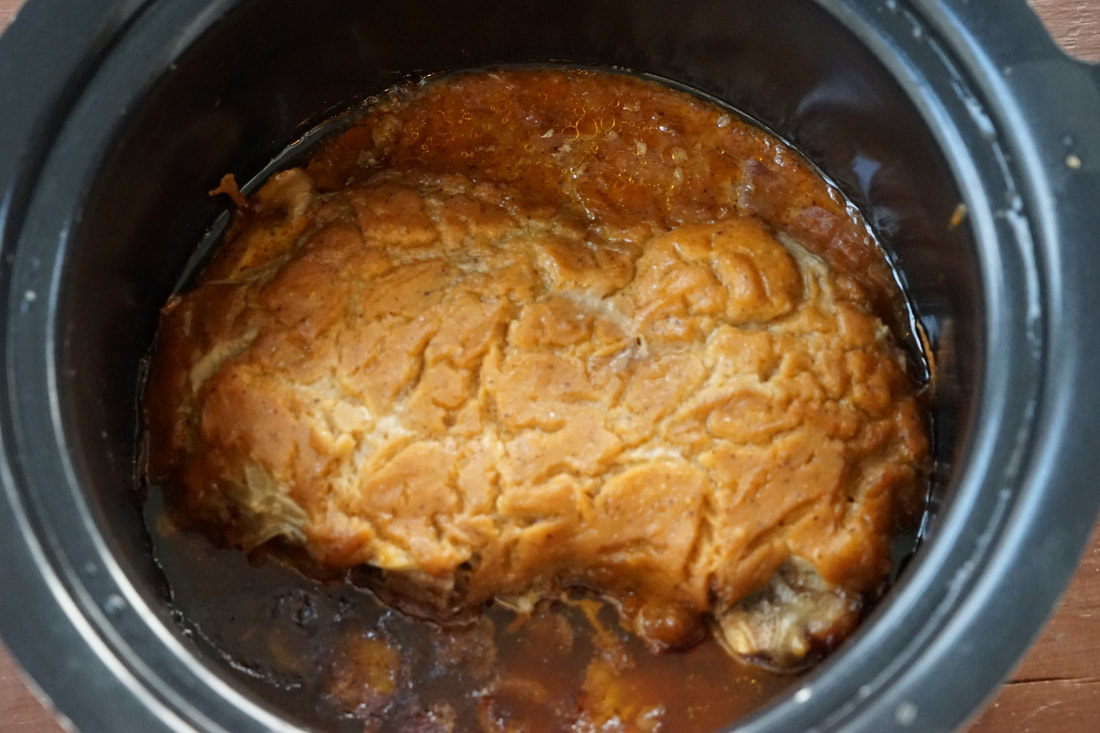
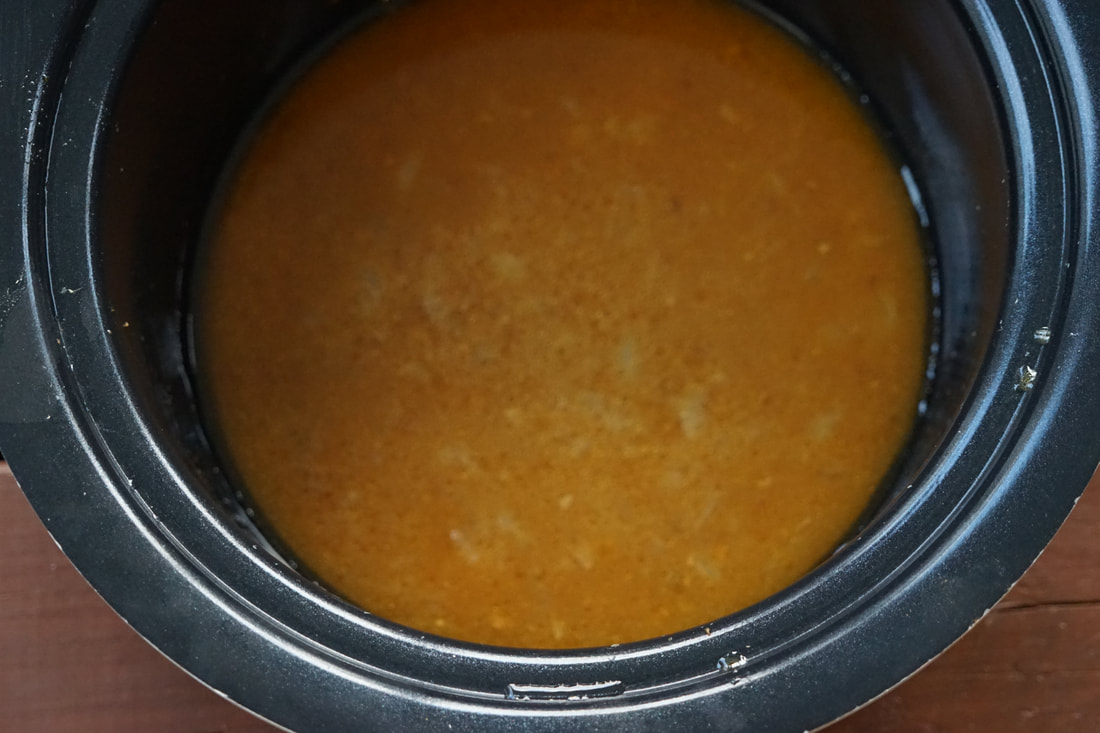
This year, I've gotten more requests for gluten free foods than I ever have before. I'm not a big fan of the 1:1 gluten flour substitutes because I can detect a weird after taste when I bake with them. I much prefer to use coconut or almond flour as a substitute for wheat flour. It's not as simple as a one to one substitution but with a little trial and error (mostly error) I can create something that's delicious AND gluten free. Hope you enjoy. Ciao! 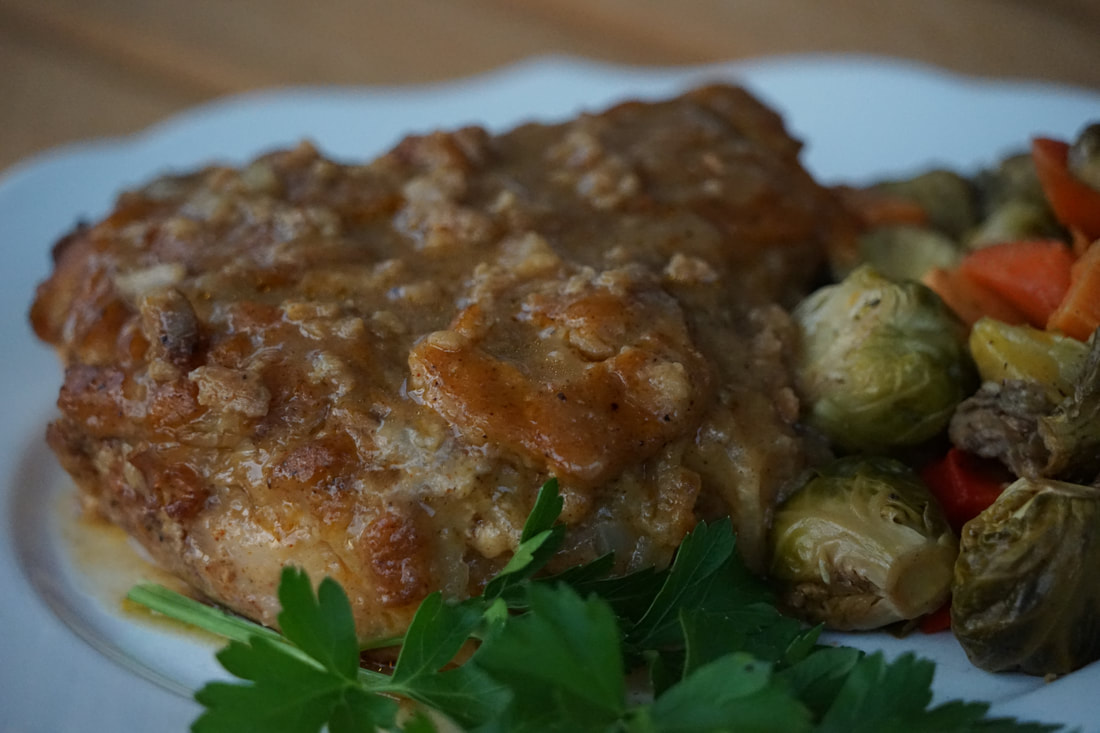 In this world of Instapots and mail order meals - I feel like slow cookers are becoming a thing of the past. Even the name slow cooker seems somewhat counterproductive to our ultra fast paced society. We crave take out meals that we can pick up from our favorite restaurants. We want our groceries to be picked out and delivered to our cars or even our front porches within hours of shopping online. I'm not here to cast judgement. I'm certainly guilty of picking up quick and easy, ready to eat foods more than I probably should lately. (Rotisserie chicken is my vice.) Maybe it's the time of year or because I did more cooking in the last 3 months of quarantine than I did in all of 2019. 😅 Either way, I have less of a desire to hang out in my kitchen all afternoon, rolling dozens of meatballs and chopping vegetables for soups. 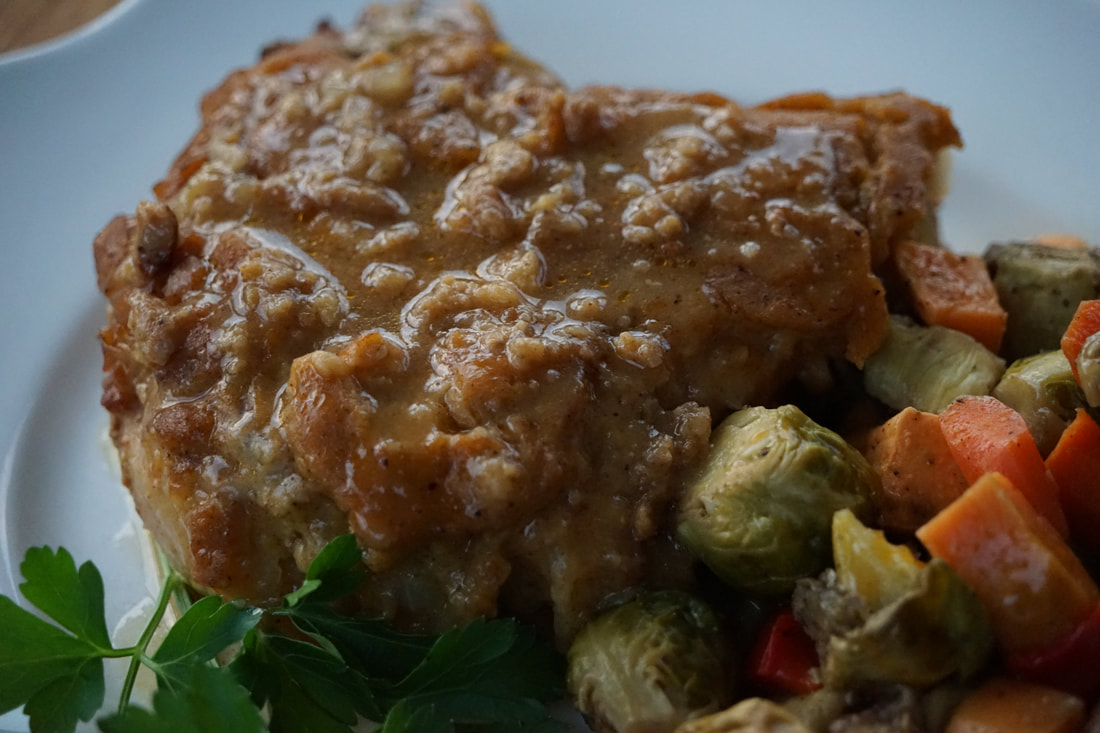 The growing popularity of the instapot has caught my attention recently. As part of my food blogger title I feel somewhat of an obligation to check out the increasingly popular kitchen appliance. Even though I'm drawn to the idea of cooking chicken in under 20 minutes, I'm hesitant to jump on the pressure cooker band wagon. Call me outdated but I love a good old fashioned slow cooker meal. There's something about the aroma of dinner lofting through the house all afternoon while I revel in the fact that dinner prep is done. I may not be in the mood for an all day cooking session right now but that doesn't necessarily mean that we have to order pizza every night. I'm finding a new found appreciation for my slow cooker this summer. Slow Cooker Smothered pork chops are perfect if you're looking for a home cooked meal but you're not excited about spending hours in a hot kitchen, preparing dinner. 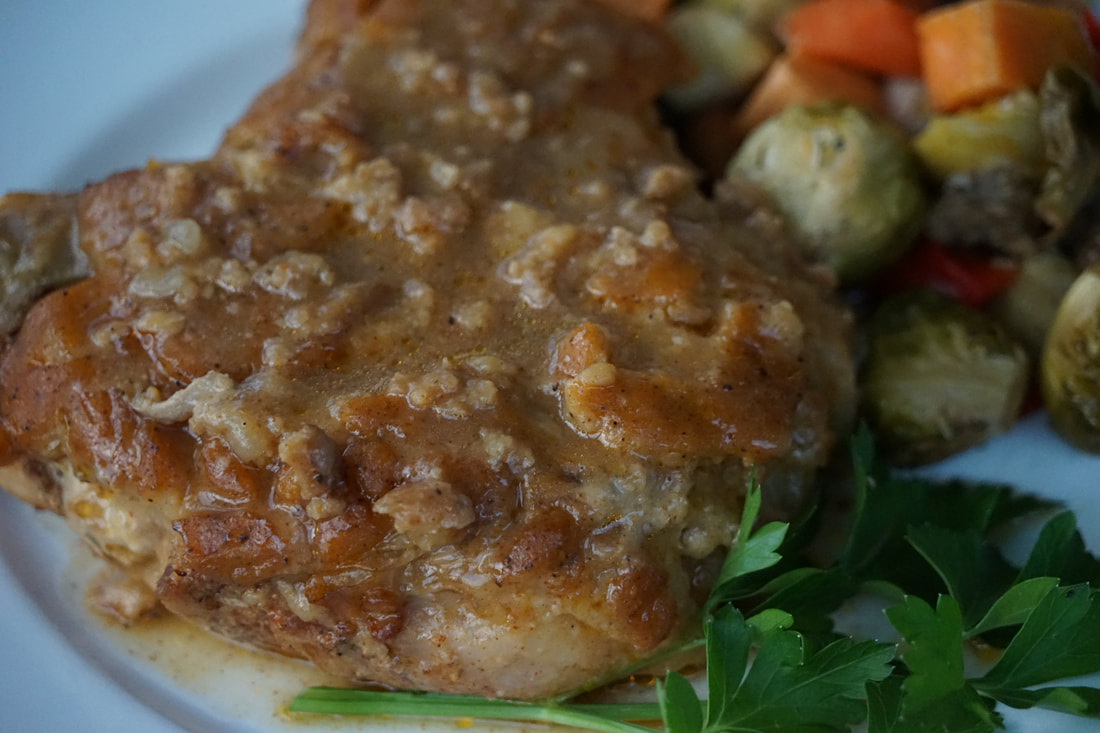 Slow Cooker Smothered Pork Chops 1 Tablespoon + 2 teaspoons Seasoned salt 2 teaspoons paprika 1 1/2 teaspoons onion powder 1 teaspoon pepper 1 clove garlic, minced 6 thick bone in blade cut pork chops 1/2 cup oil 3 cups thinly sliced onions 1/2 cup flour 2 1/2 cups water 1 1/2 teaspoons vinegar
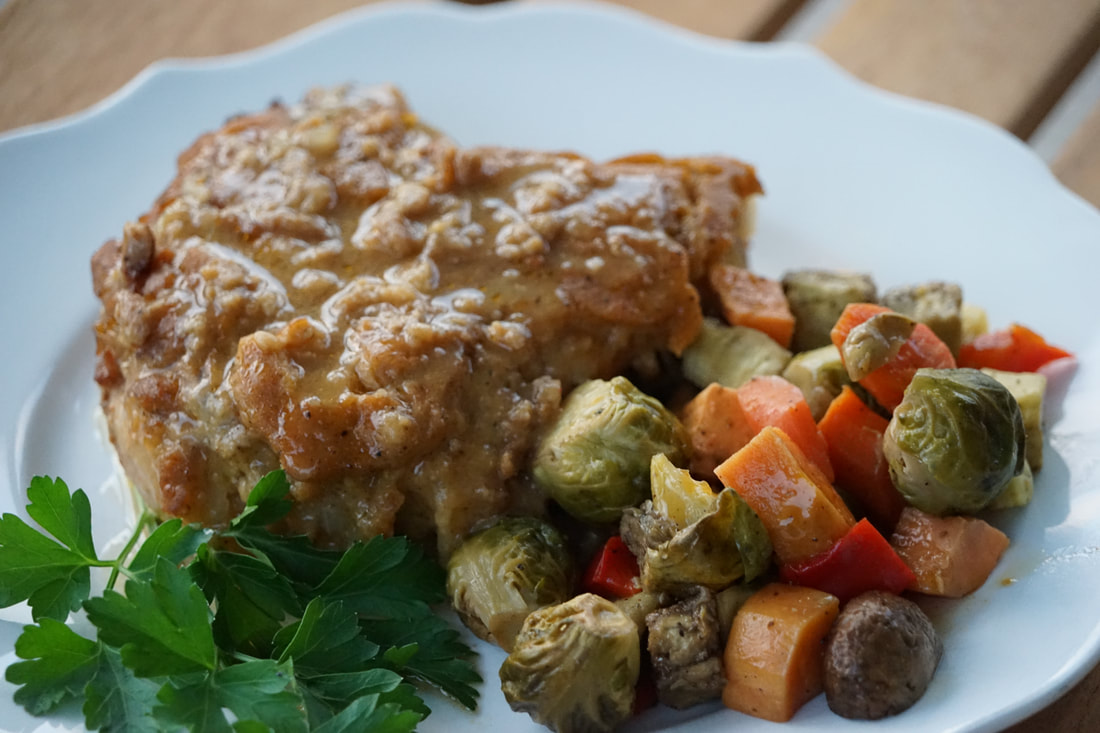 Pour gravy over chops to serve.
Blade cops are perfect for the slow cooker. They have just the right amount of fat to keep them moist during the long, slow cooking process. These slow cooker smothered pork chops are the most tender and flavorful pork chops that you've ever tasted. Ciao! 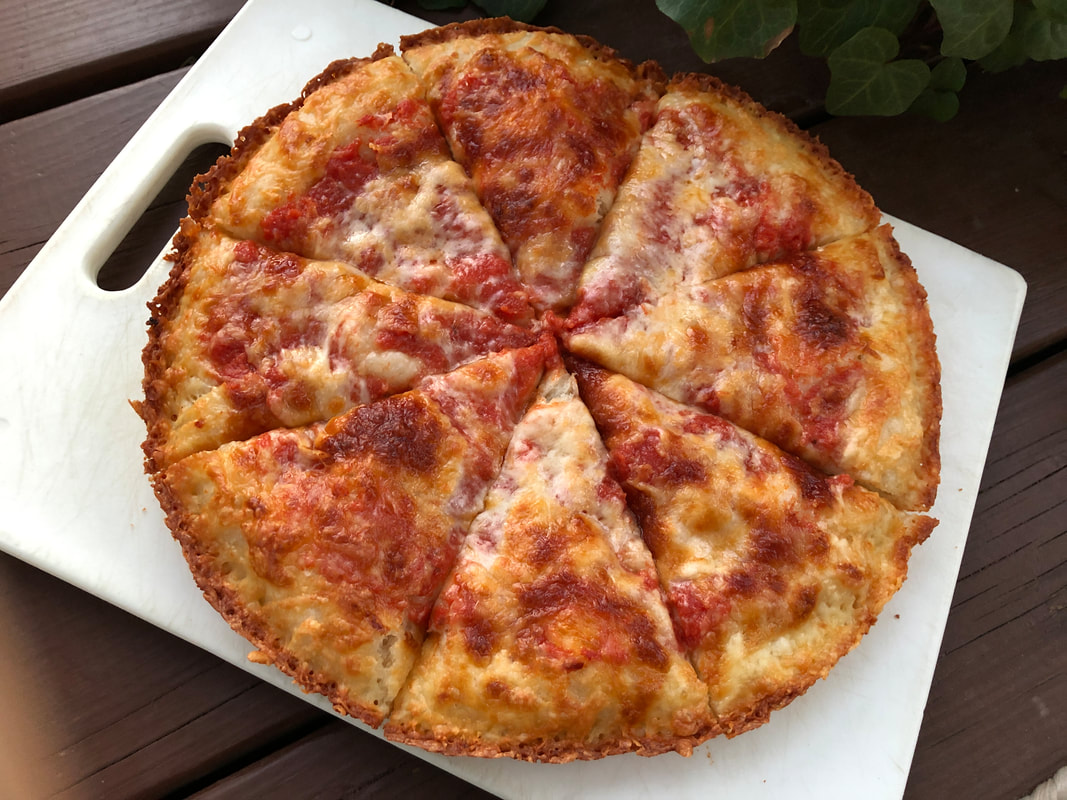
In my very complex pizza ranking system, Lombardis pizza is only second to the pizza that I ate in Italy. 🤣It's hard to compare the pizza that I ate in Italy to the pizza that I had in New York City. Maybe it's the water or the flour or the tomtoes but there's just something special about a pizza made in Italy. I'm pretty sure that sitting at a table for 2 in a bustling piazza in the heart of Venice, nibbling on a hand crafted pie influenced my taste buds. 🇮🇹The smells, the sounds, the people - eating pizza in Italy is a memorable experience.
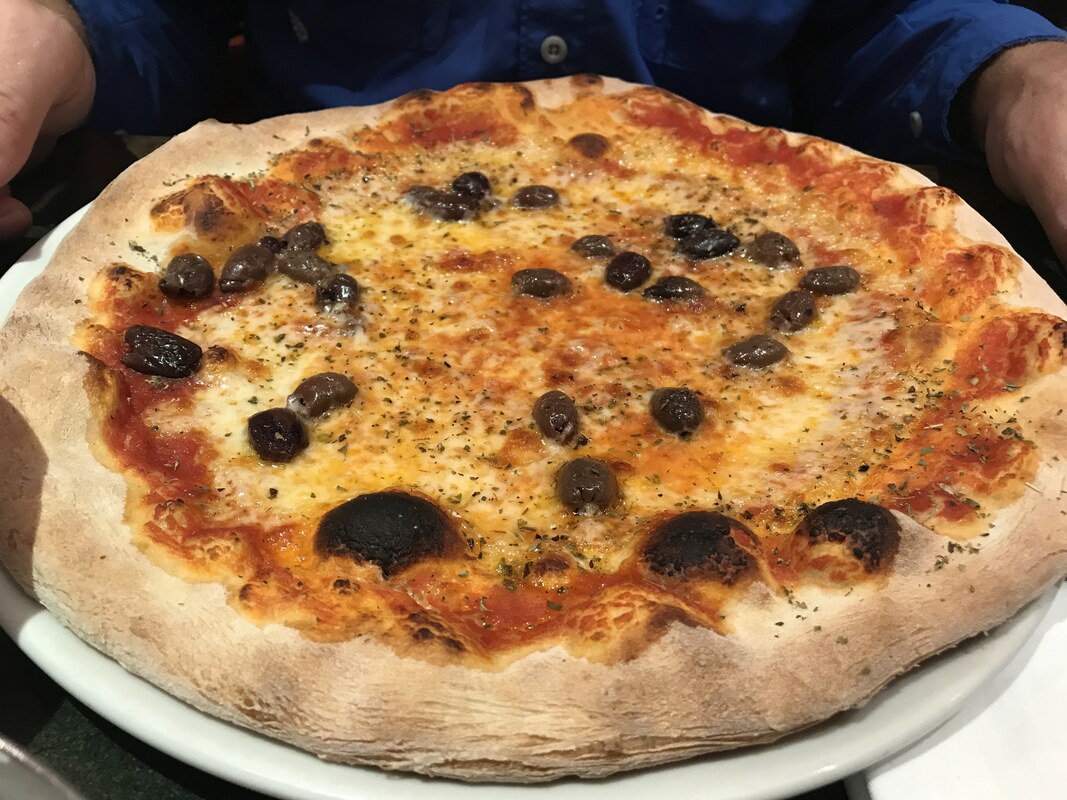
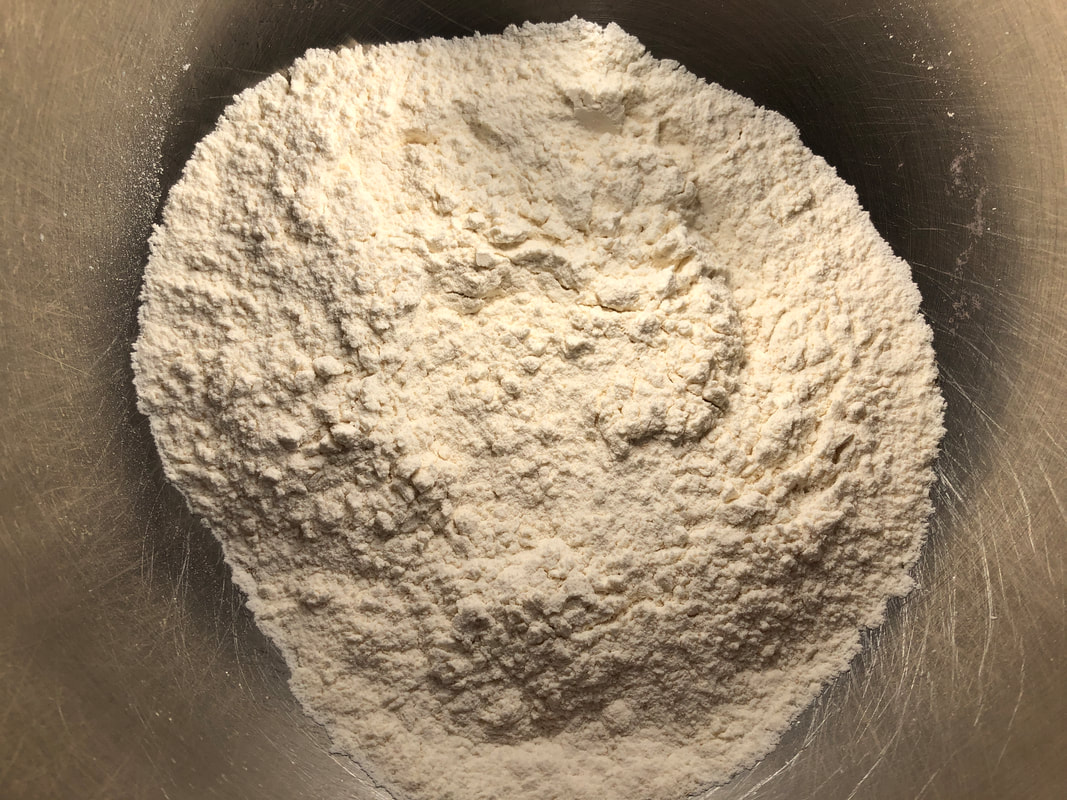
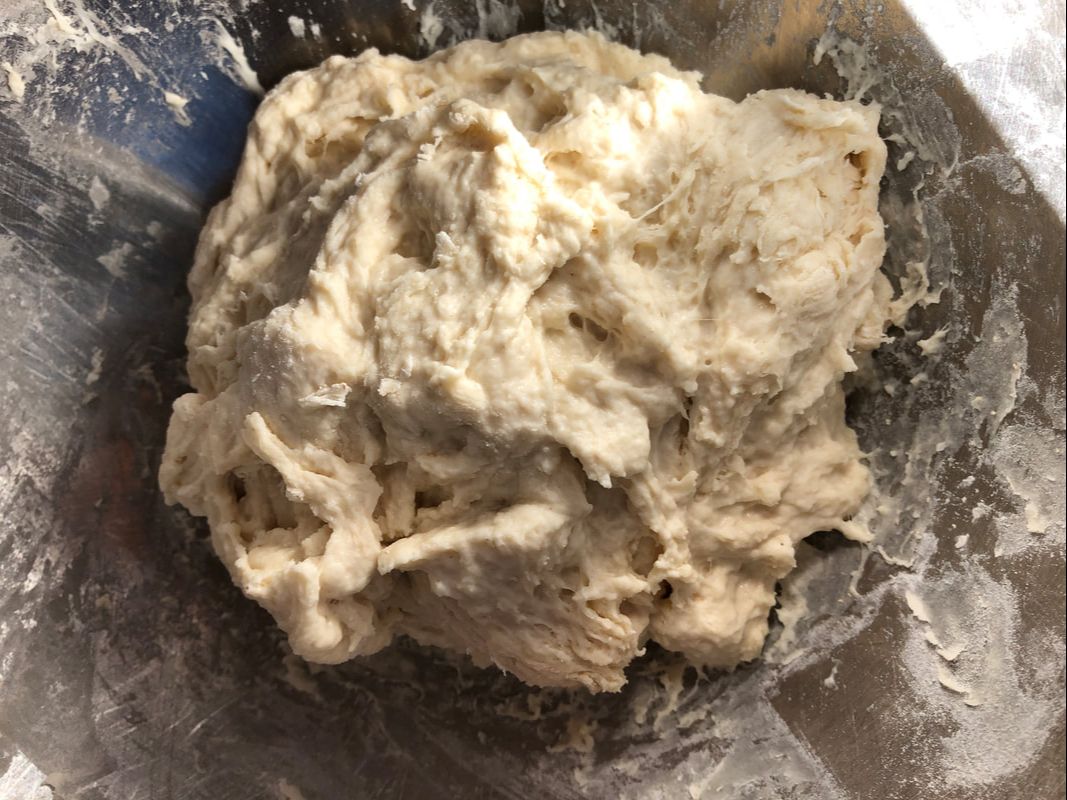
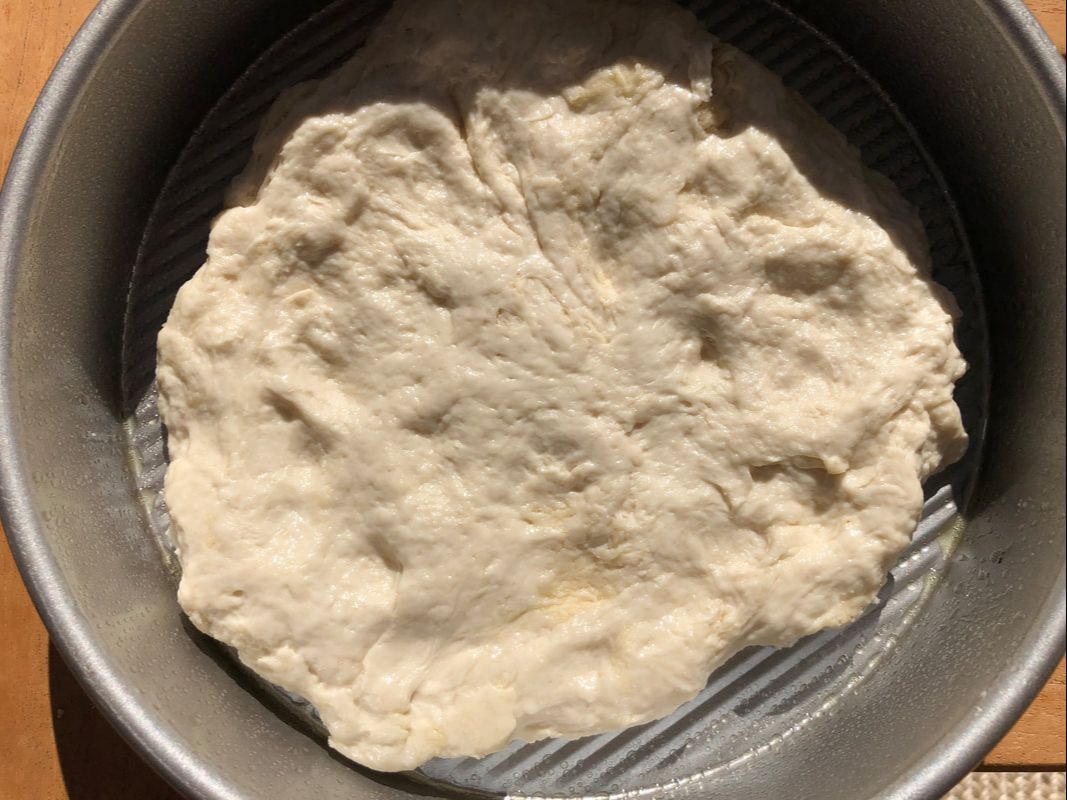
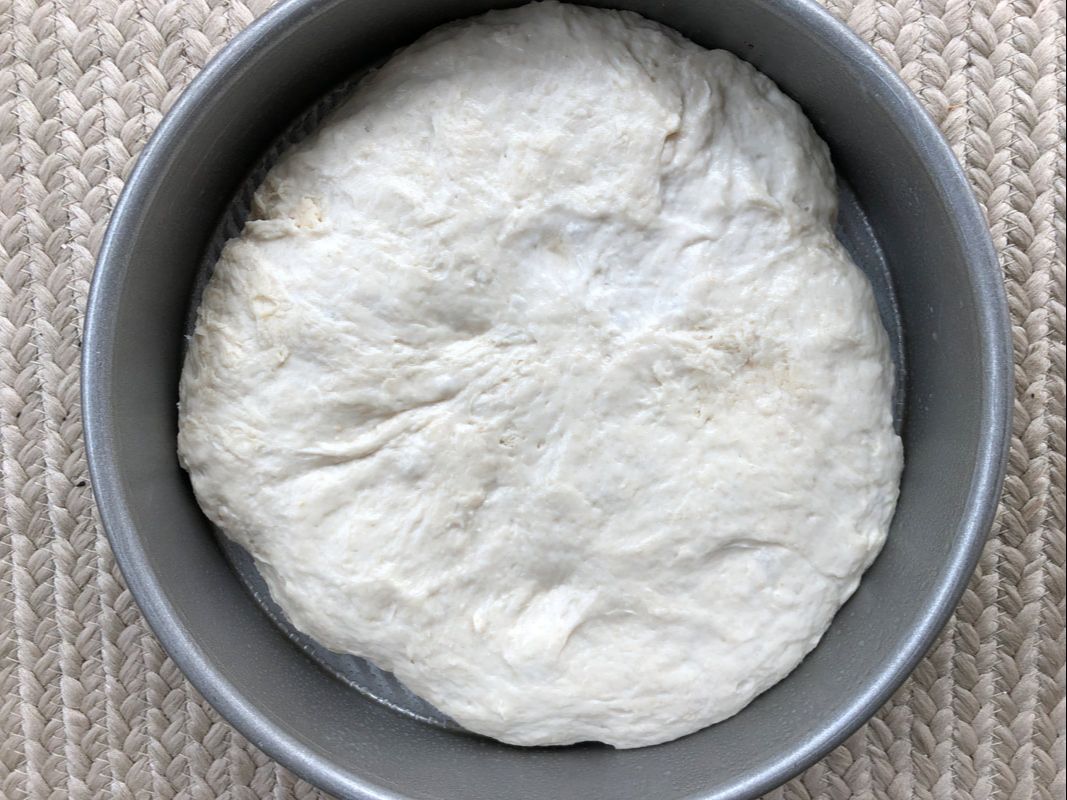
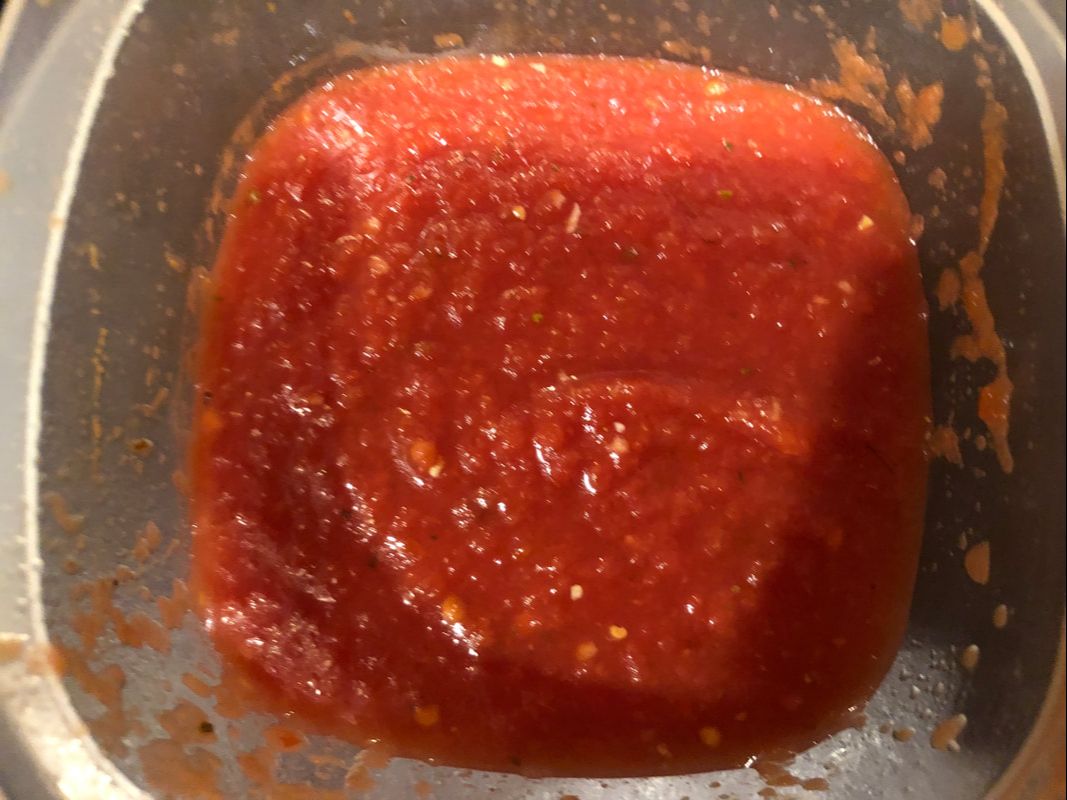
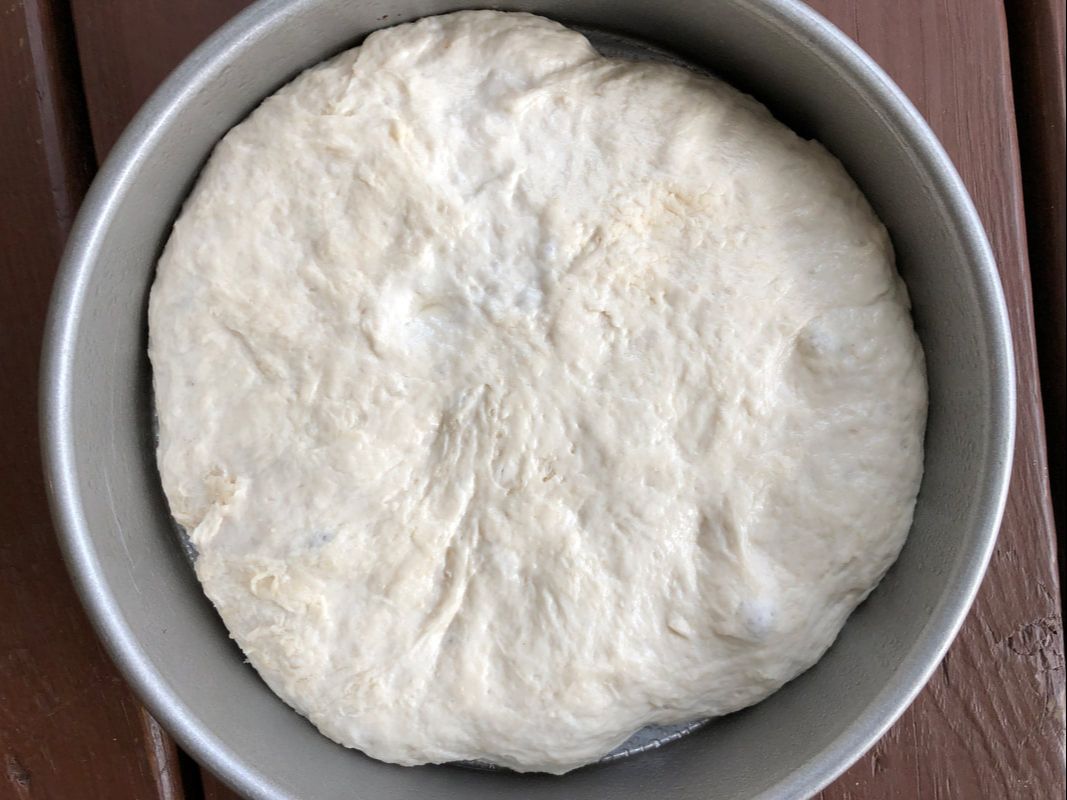
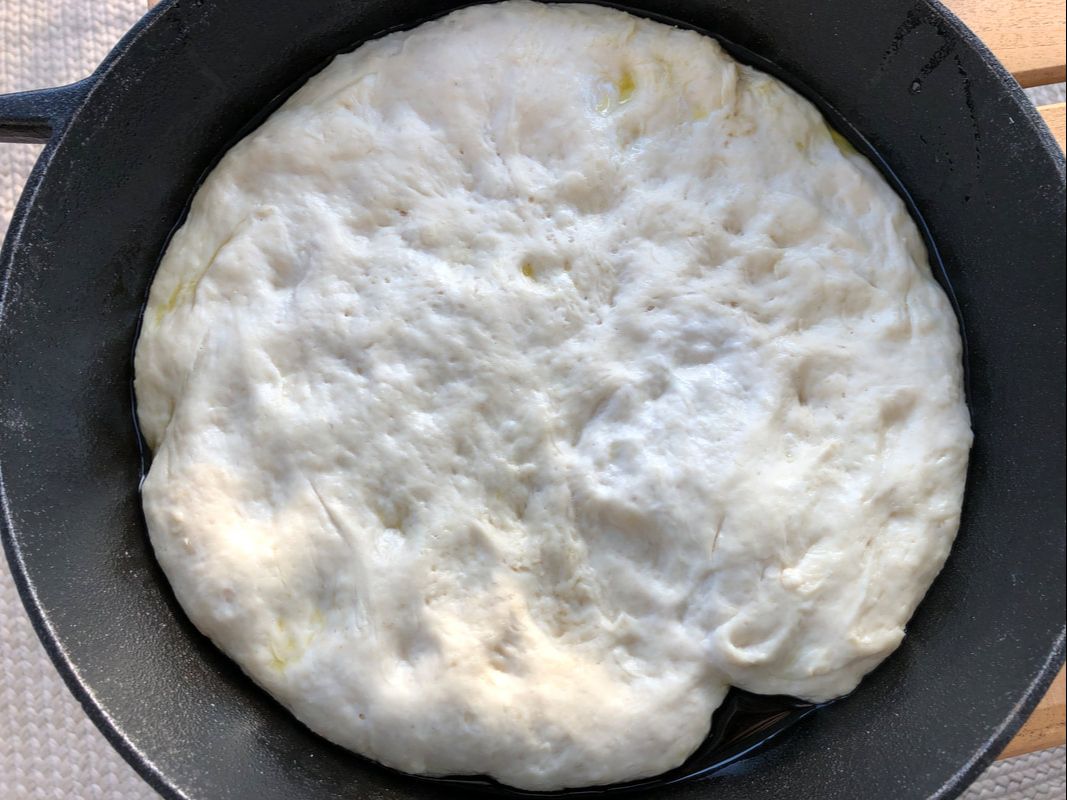
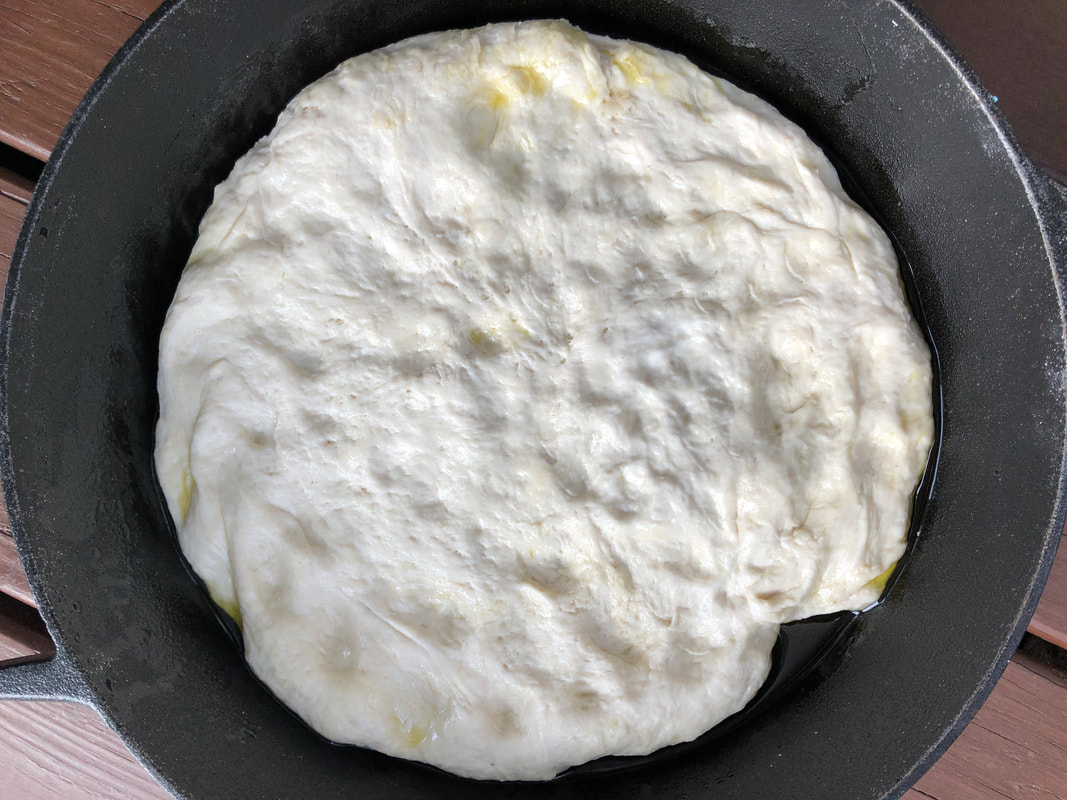
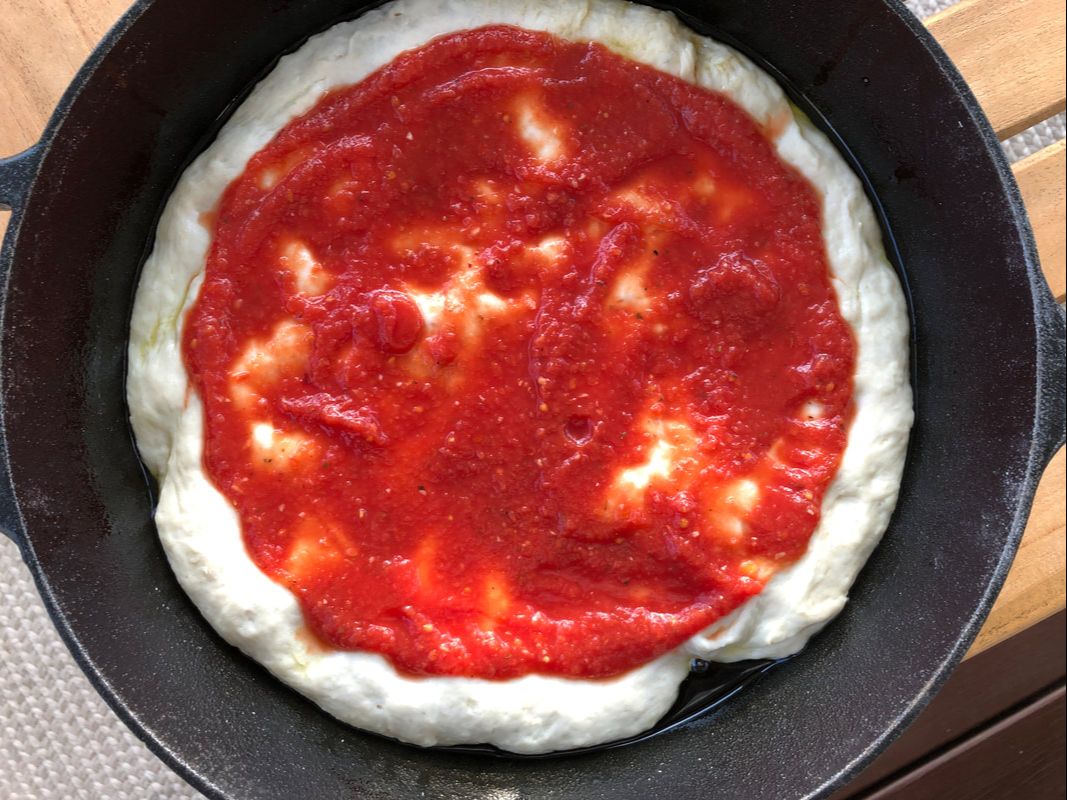
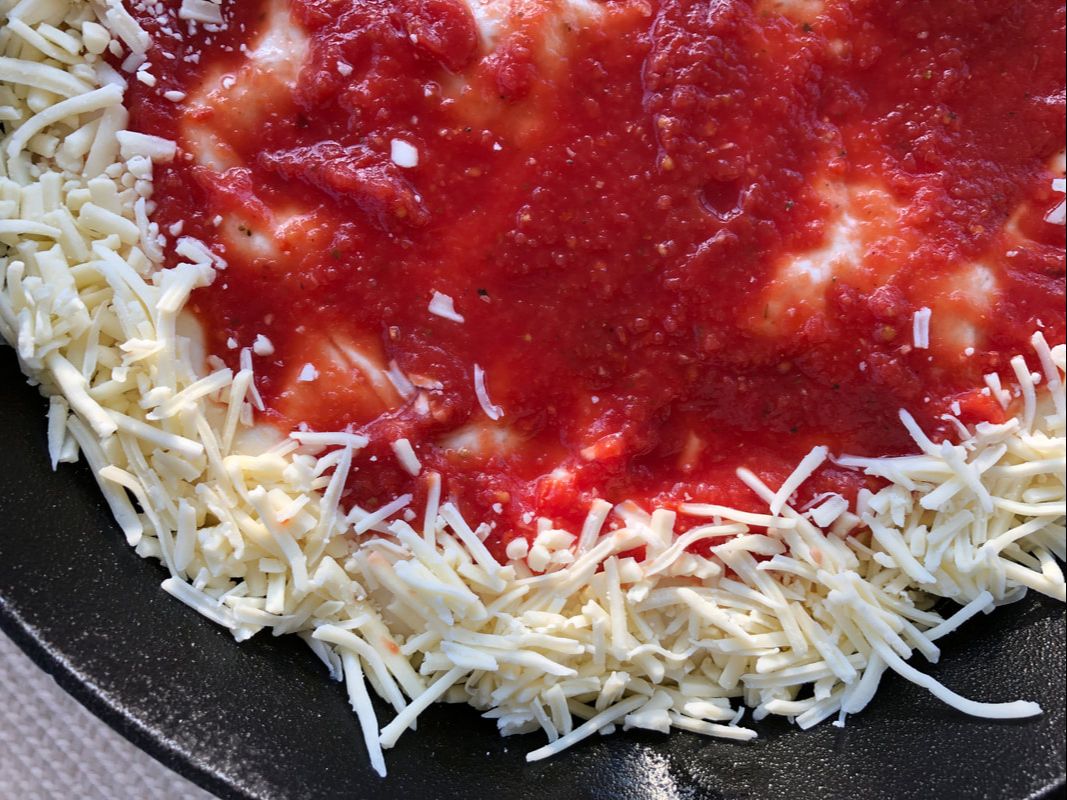
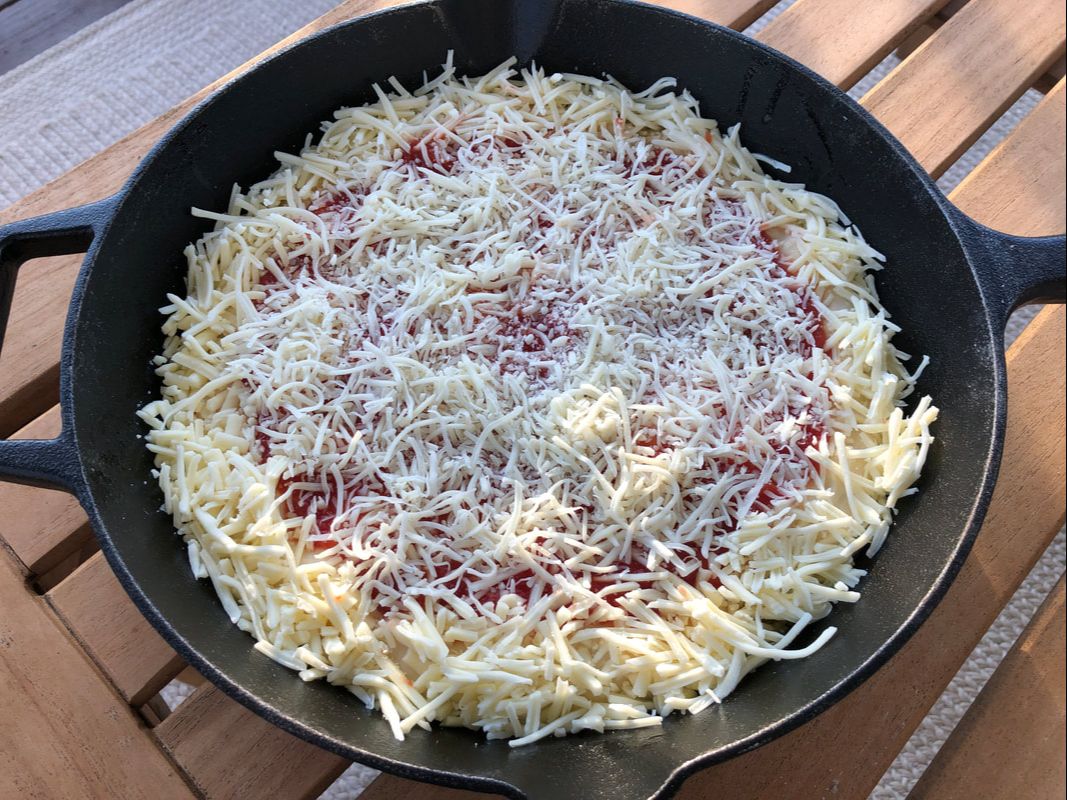
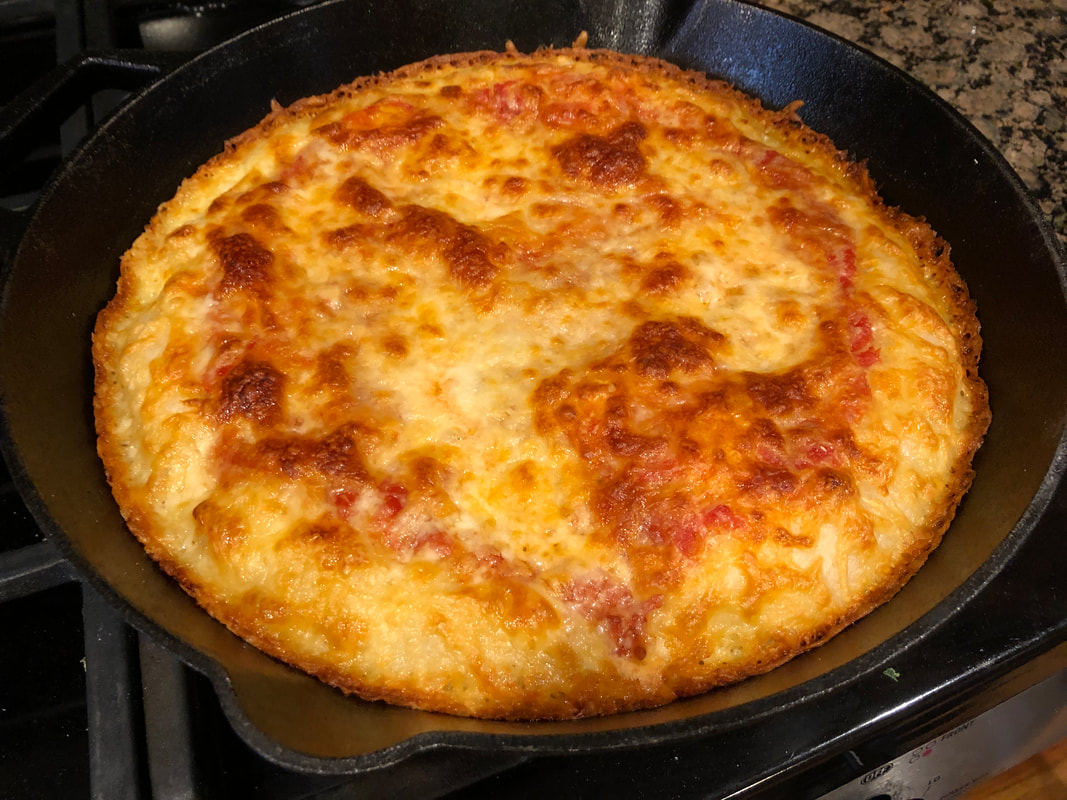
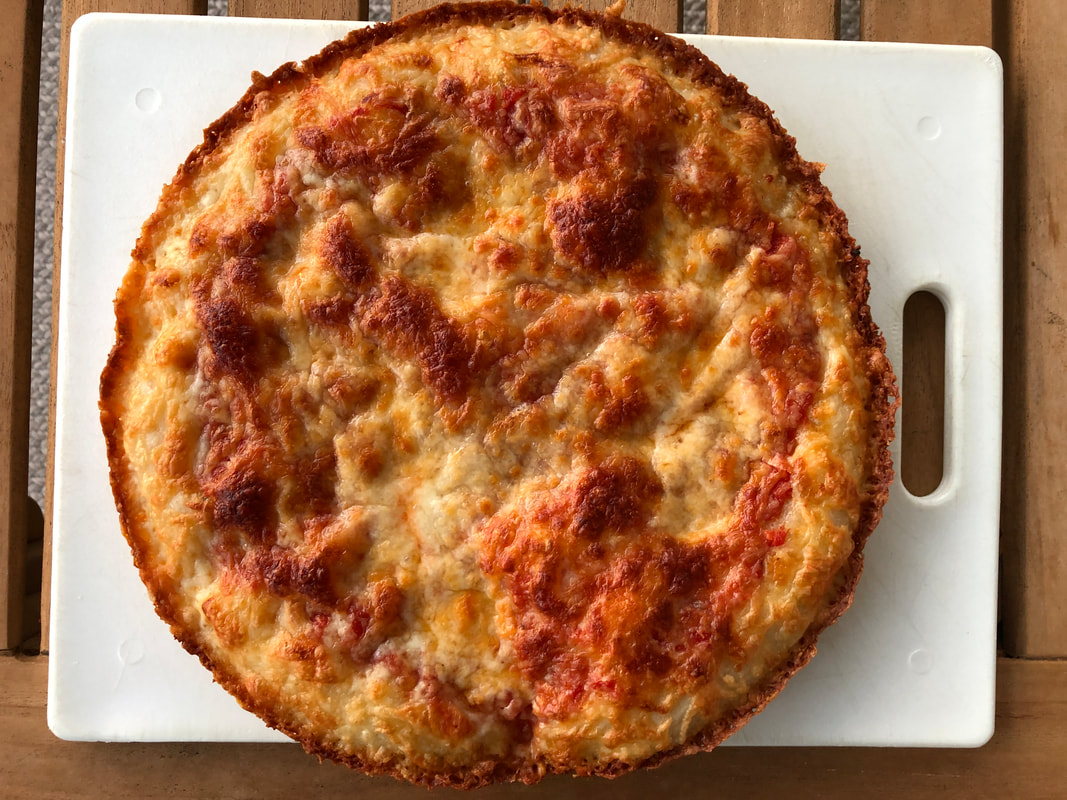
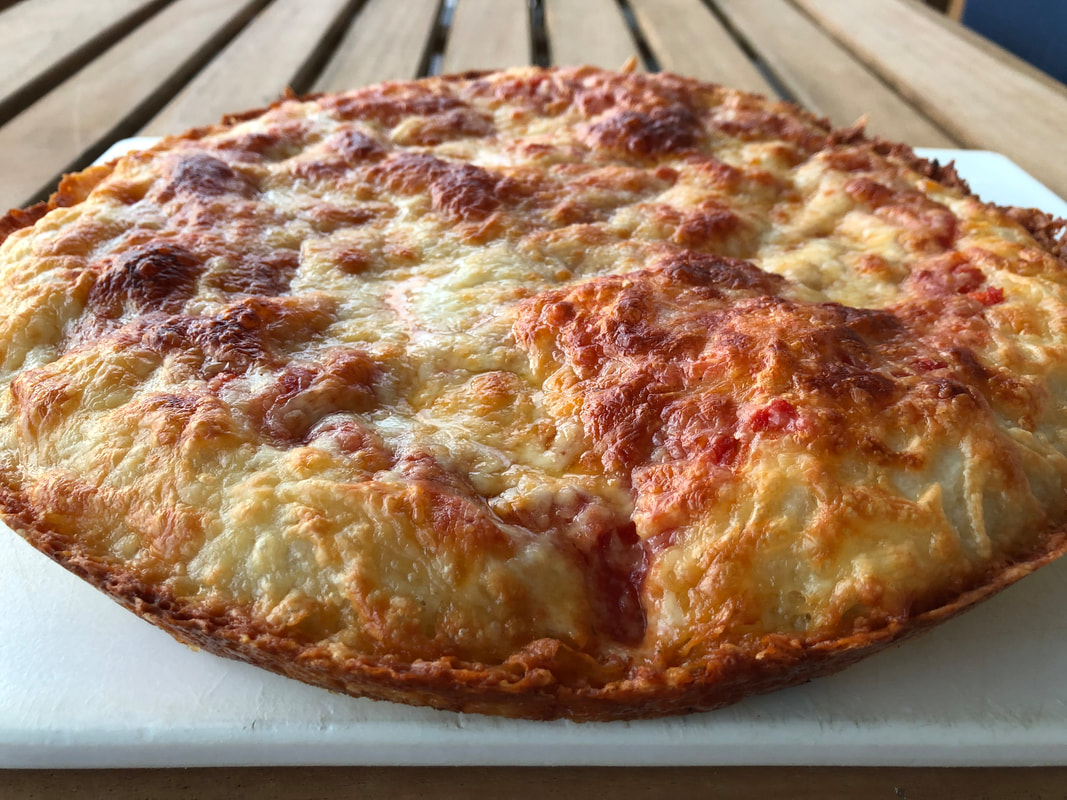
We can actually get pretty decent pizza here in Georgia but my favorite pizza and the one that I try and recreate at home is the pizza we ate in Italy. It's hard to find pizza places that have mastered the perfect combination of crust, sauce and cheese. So I've taken matter into my own hands and I've got to say that the process of learning to craft the perfect Italian pizza in my own kitchen is one of my favorite cooking experiments of all time. 👩🏻🍳 My favorite way to cook pizza at home is on my Big Green Egg. Check out my recipe here: https://www.mystoryinrecipes.com/blog-posts/thin-crust-pizza. If you prefer a heartier pizza with a thicker crust, (or you don't have a Big Green Egg at your disposal) you need to check out this recipe for Cast Iron Skillet Pizza. 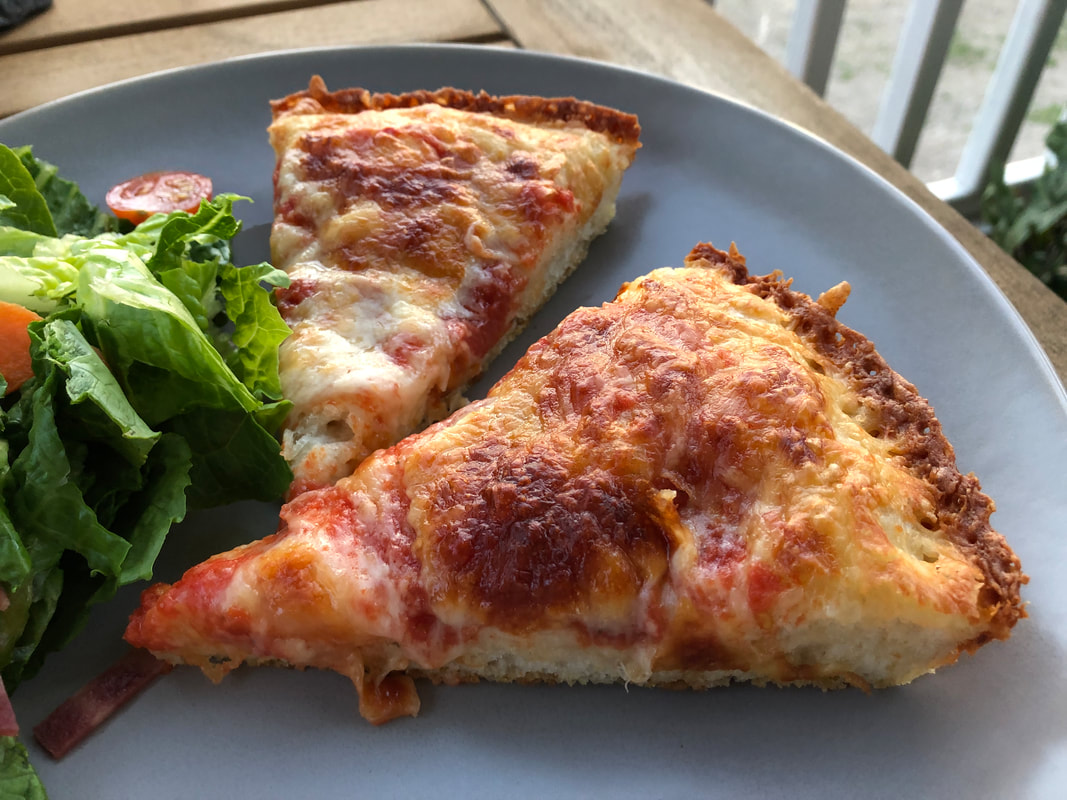 Think of it as an upgraded version of the Pizza Hut pan pizza. But this is WAY better than any ordinary take out pizza. This might not be Italy or New York City quality pan pizza but it's way better than the take out pizza in my town. It's hearty enough to hold up to big pieces of vegetables and piles of meat but still soft and chewy. 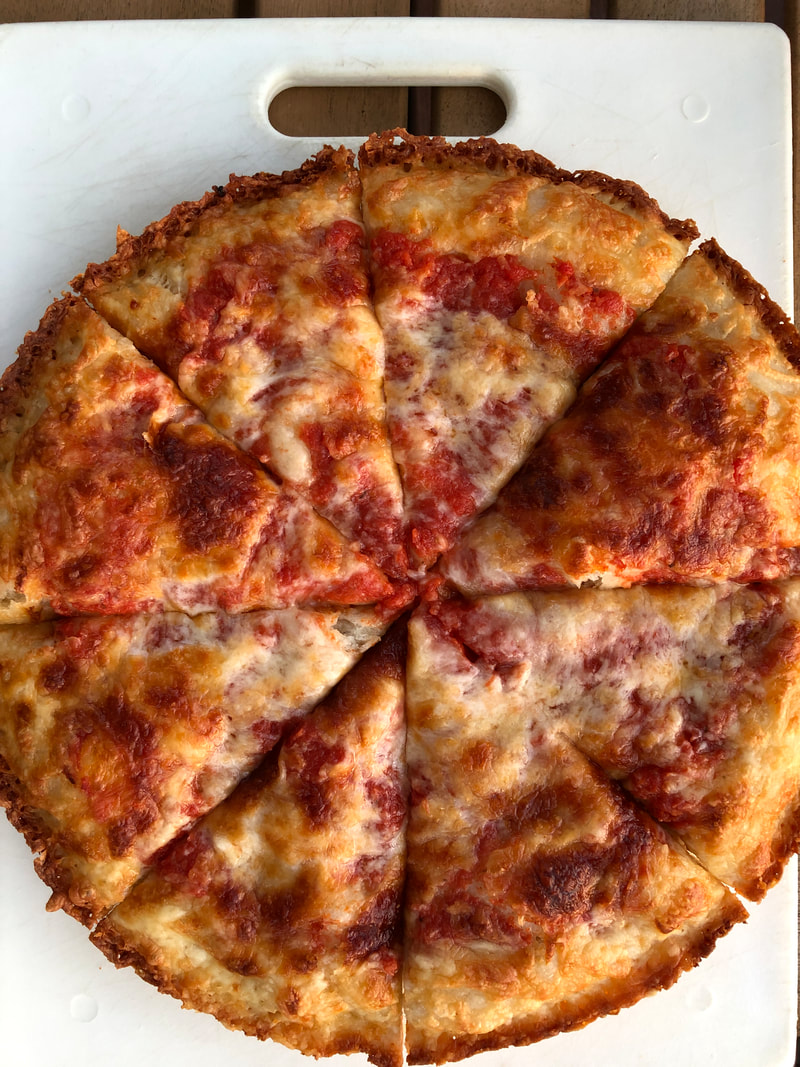 Cast Iron Pizza Dough 2 cups bread flour 1 teaspoon salt 1 teaspoon yeast 1 cup warm water Sauce 14.5 ounce can diced tomatoes 1 teaspoon olive oil 1 garlic clove, minced 1/4 teaspoon sugar 1/4 teaspoon salt 1/4 teaspoon oregano pinch of red pepper flakes Pizza 3 Tablespoons olive oil 1 cup shredded Monterey Jack cheese 1 3/4 cups shredded Mozzarella cheese
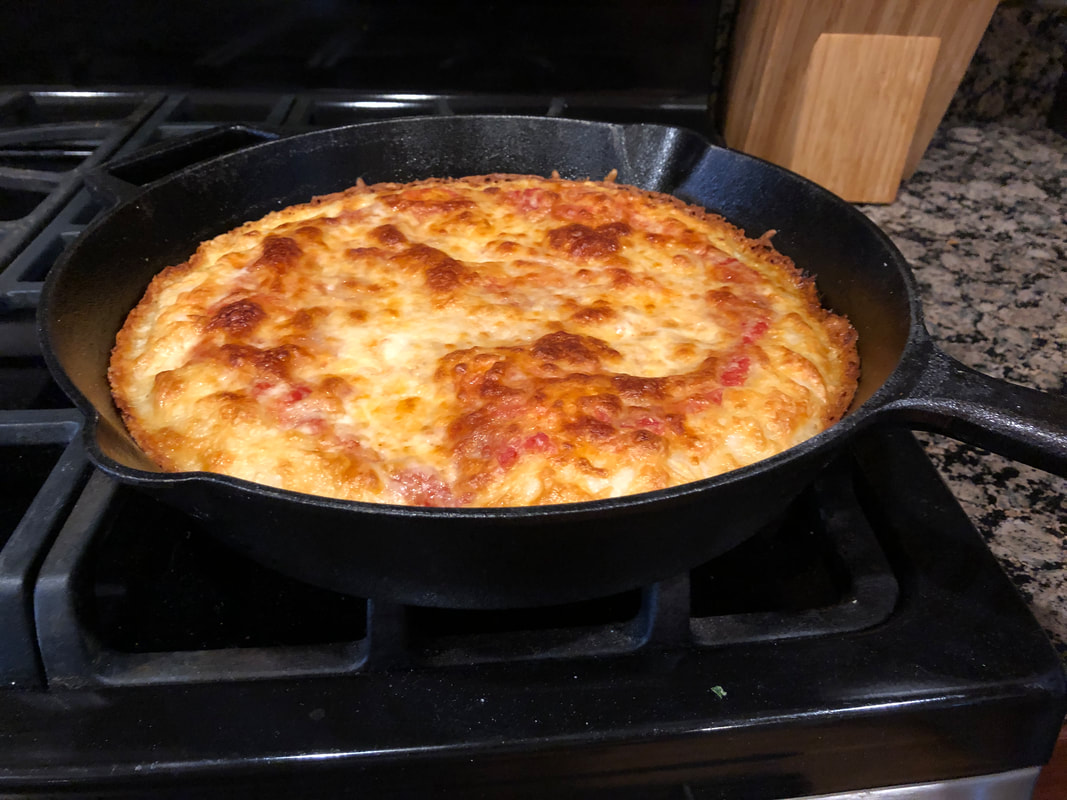 Transfer to stovetop and let sit 3 minutes. Cook pizza over medium heat until bottom is evenly browned.
Transfer pizza to wire rack to cool for 10 minutes. 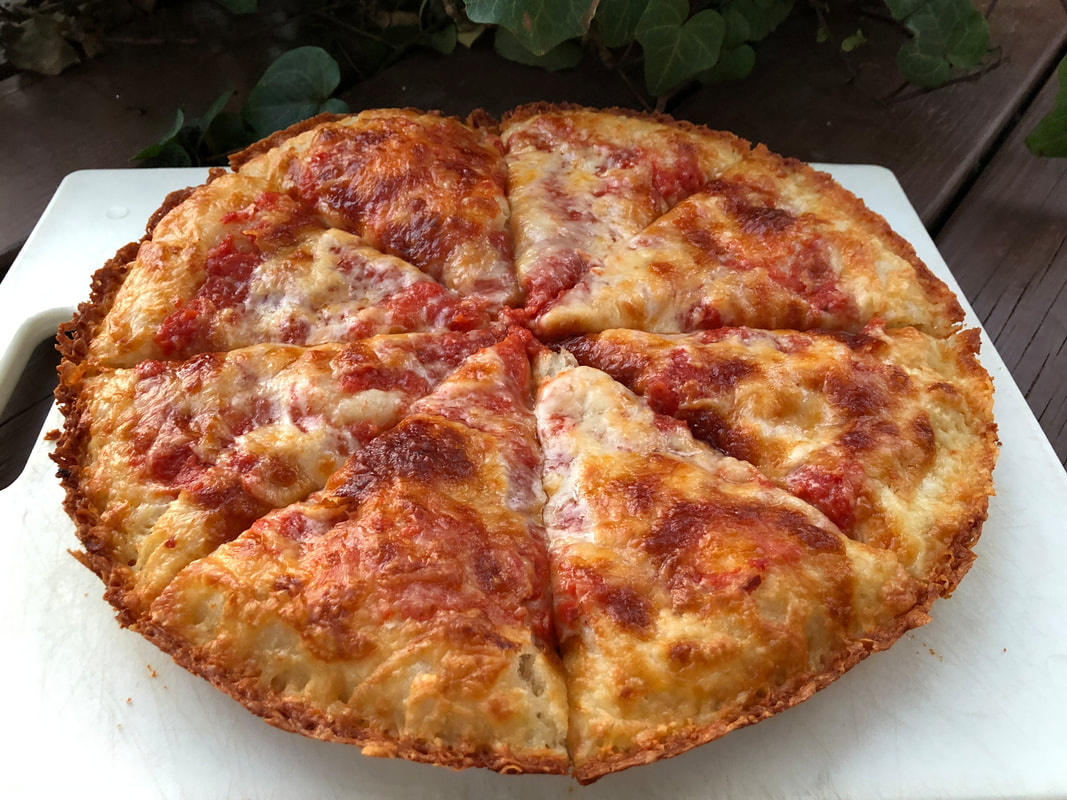 Slice and serve.
I was hesitant about putting Monterrey Jack cheese on a pizza but let me tell you - don't knock it till you try it. It's pretty darn delicious. Watch out mozzarella and provolone - there's a new pizza cheese in town. Ciao! |