|
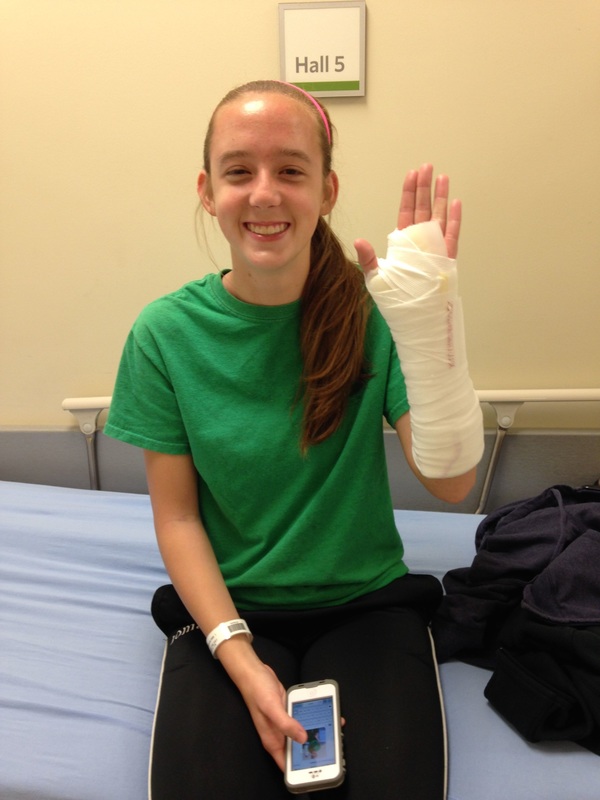
Every mom has had that moment when the thought, "I wish I could just bubble wrap my kids before sending them out to play" has gone through their head. Well, I actually got to live that dream! No kidding - I got to bubble wrap Courtney before sending her out on the soccer field last week. And, it was just as satisfying as I imagined it would be. Let me back up a little so you can understand WHY I bubble wrapped my beautiful 16 year old daughter. About 5 weeks ago, Courtney came home from practice with a taped up wrist. She had fallen on it at soccer practice but had chosen to stay and finish out the last 30 minutes of practice anyway. By the time she drove herself home, she was in tears and her poor hand was so swollen that she could barely move her fingers. To make a long story short, we ended up in the emergency room that evening and the x-rays revealed that she had fractured her wrist.
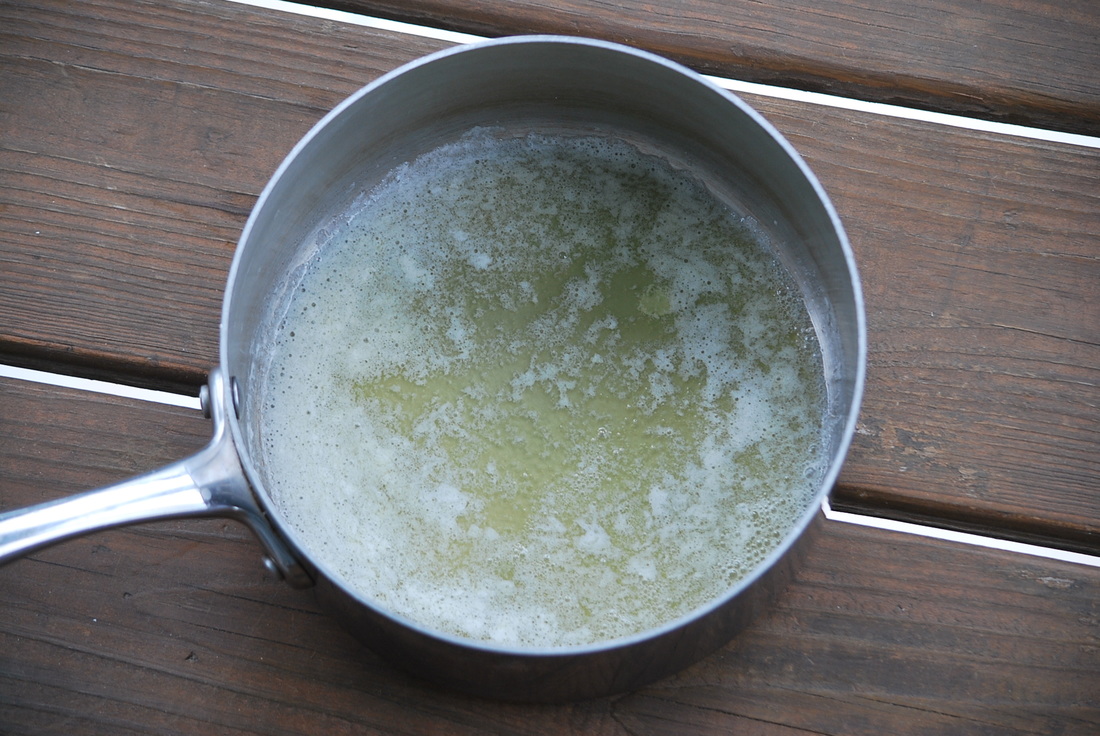
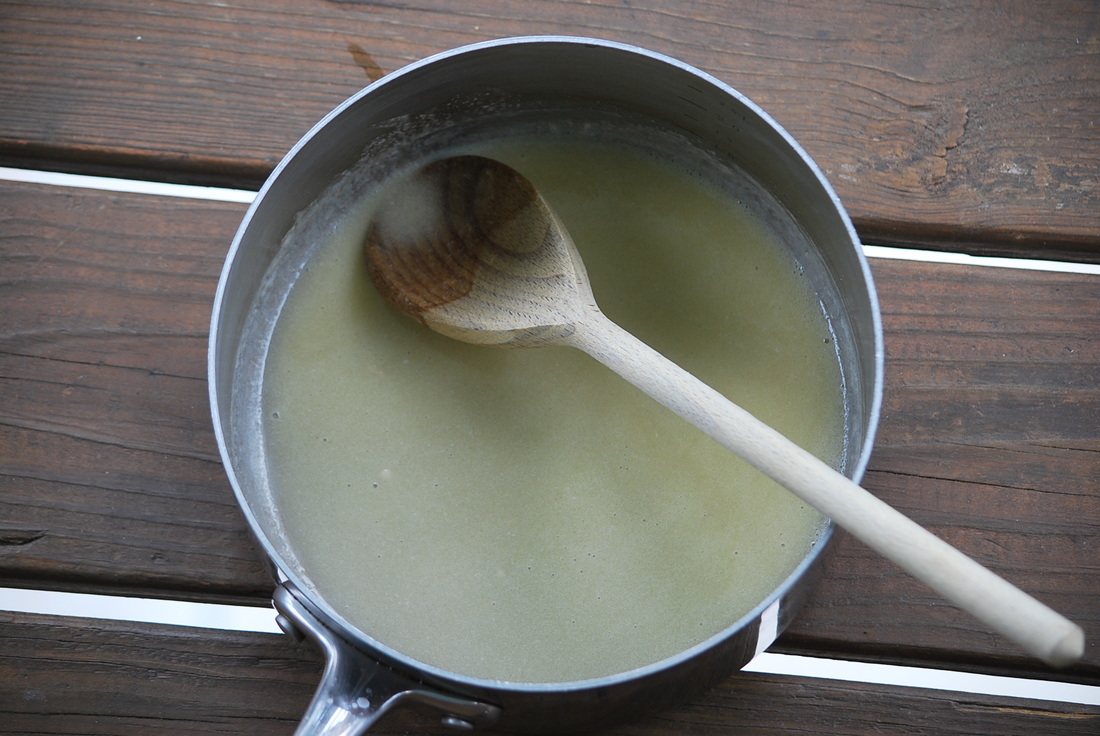
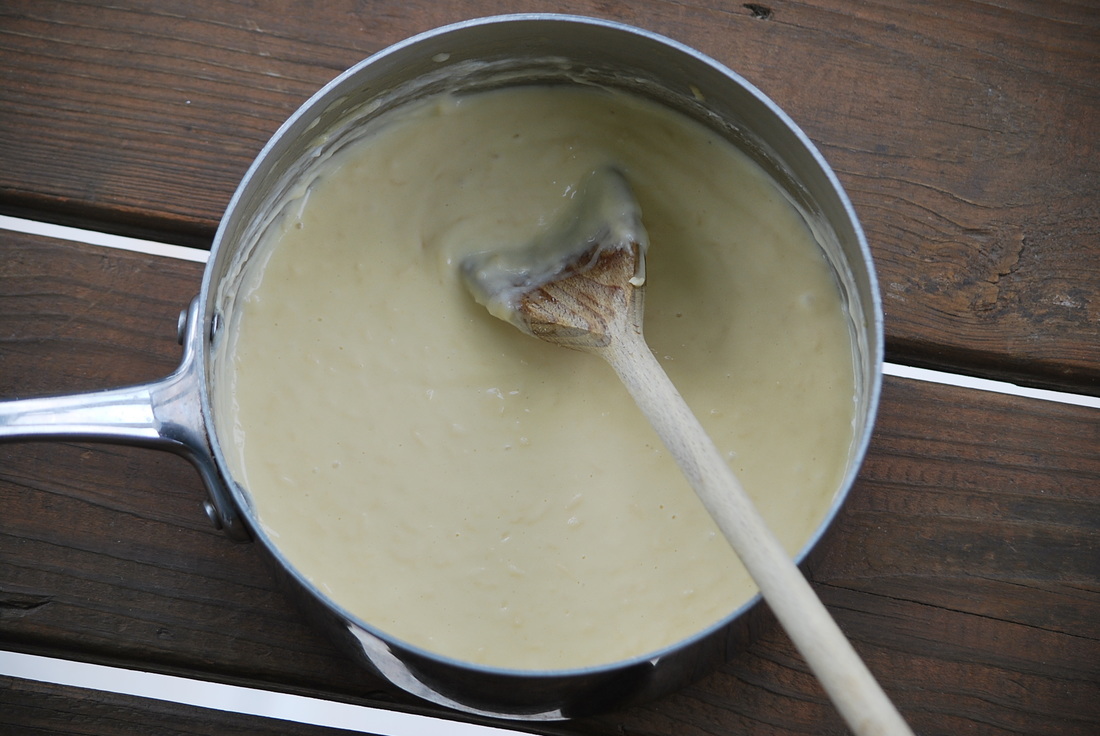
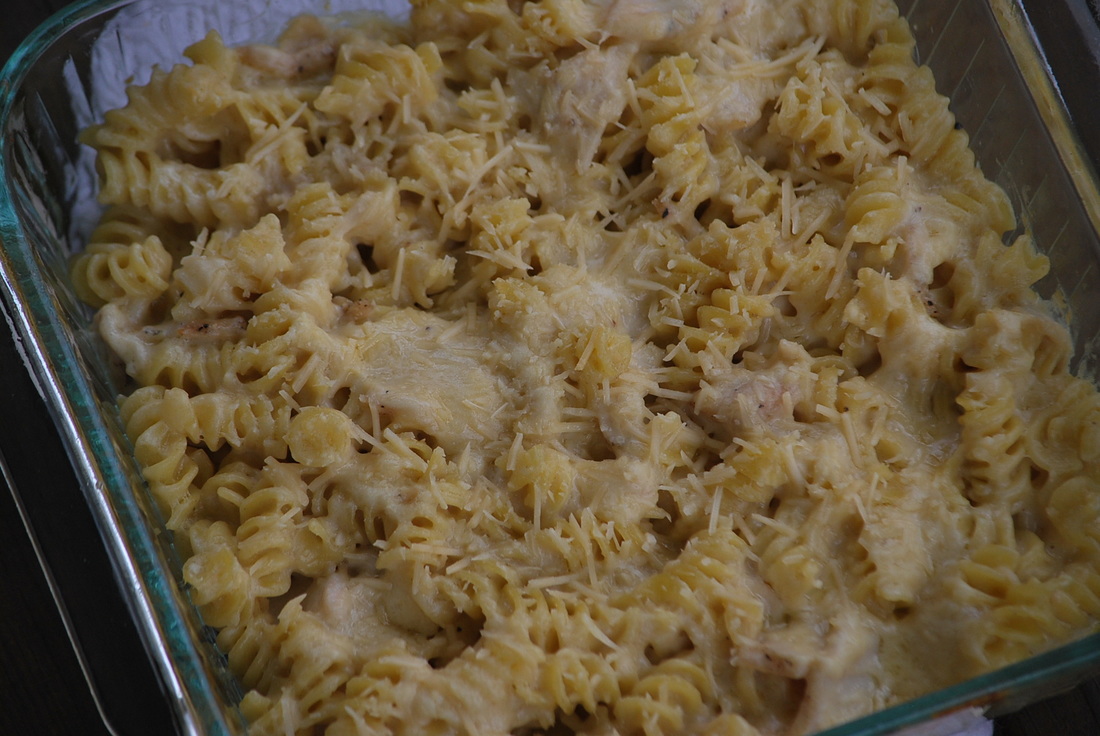
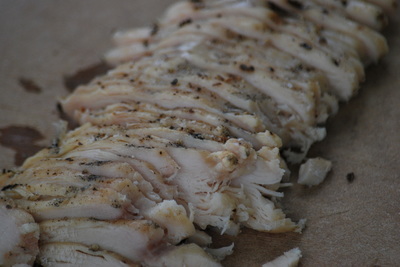
 By the way - she smiled like that the ENTIRE time that we were in the ER. A couple of days after our ER visit, we followed up with an orthopedic who put Courtney in a long arm cast. You have no idea how many things you CAN'T do without an elbow until you've got a long arm cast! Once again though - best attitude ever. After 2 very long weeks of a long cast - she transitioned to a short cast. I've never seen her so happy to see her elbow! She spent two weeks in the short cast and then transitioned to a removable brace. Her very first question to the doctor was "Can I play soccer in this?" Did I mention that she showed up to her appointment in her soccer uniform? (subtle)  Fortunately she was cleared to play as long as we could wrap the brace before she got on the field. I left the doctors office with this girl who was grinning from ear to ear, jumped in the car and headed across town try and get her to the game. We stopped at a couple of pharmacies along the way to try and find something to wrap around the brace. We couldn't find what we were looking for so we bought a roll of bubble wrap and headed to the game. We arrived just minutes before her team took the field. We bubble wrapped her and sent her on the field - a mom's dream come true. Courtney was so excited to be on the field again - she played like a pro. She even scored a goal during her comeback game! Not much can bring this girl down - certainly not a broken wrist. I have no doubt that she will come back stronger than ever after this little set back. I couldn't make her wrist pain go away or make her cast less itchy but what I could do was make her favorite foods while she healed. Two of her favorite things are macaroni and cheese and fettuccine alfredo. I found a recipe on Pinterest that combined her two loves - Four Cheese ChickenPasta. Thank you adashofsanity.com for this little gem. 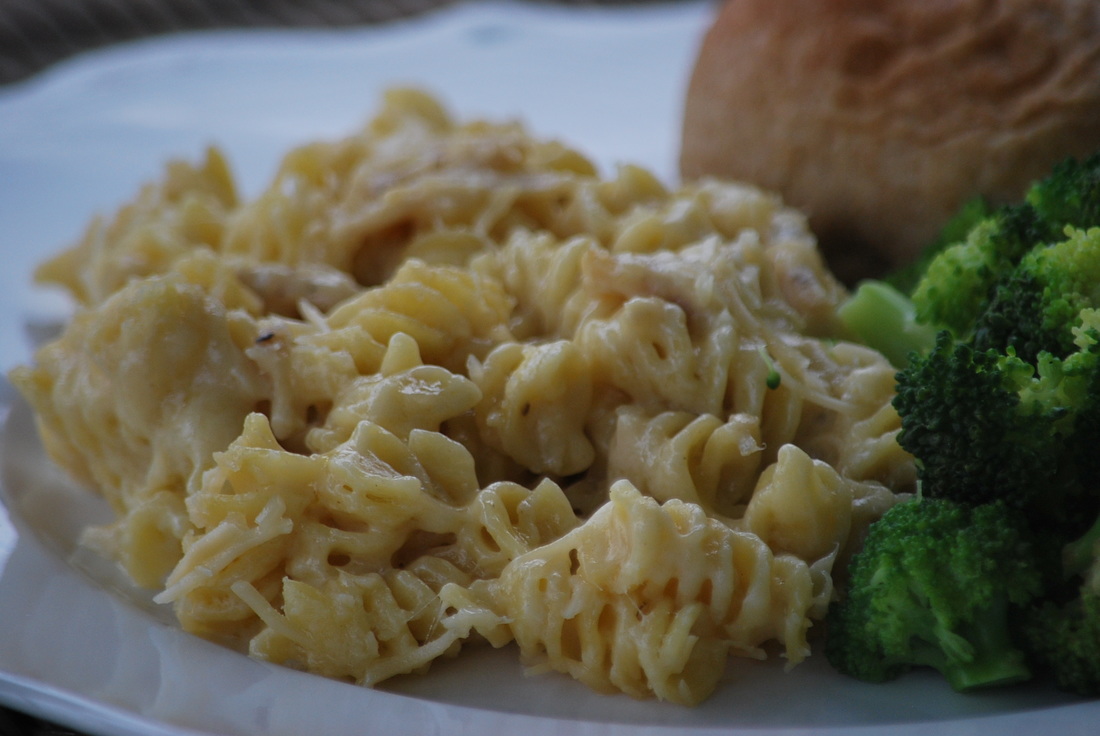 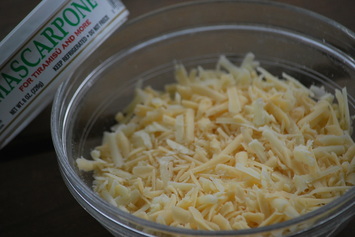 Four Cheese Chicken Pasta 1 pound rotini pasta 9 Tablespoons butter 4 1/2 Tablespoons flour 14.5 ounces chicken broth 1/2 cup 1/2 and 1/2 1 cup + 2 Tablespoons parmigiana cheese, shredded 1 cup + 2 Tablespoons gouda cheese, shredded 1 cup + 2 Tablespoons white cheddar cheese, shredded 6 ounces marscarpone cheese 2 grilled chicken breasts, sliced thin 2 Tablespoons parmesan cheese, for topping  Heat oven to 350. Spray oval baking dish with cooking spray. Cook and drain pasta as directed on package.
 Stir in chicken and pasta. 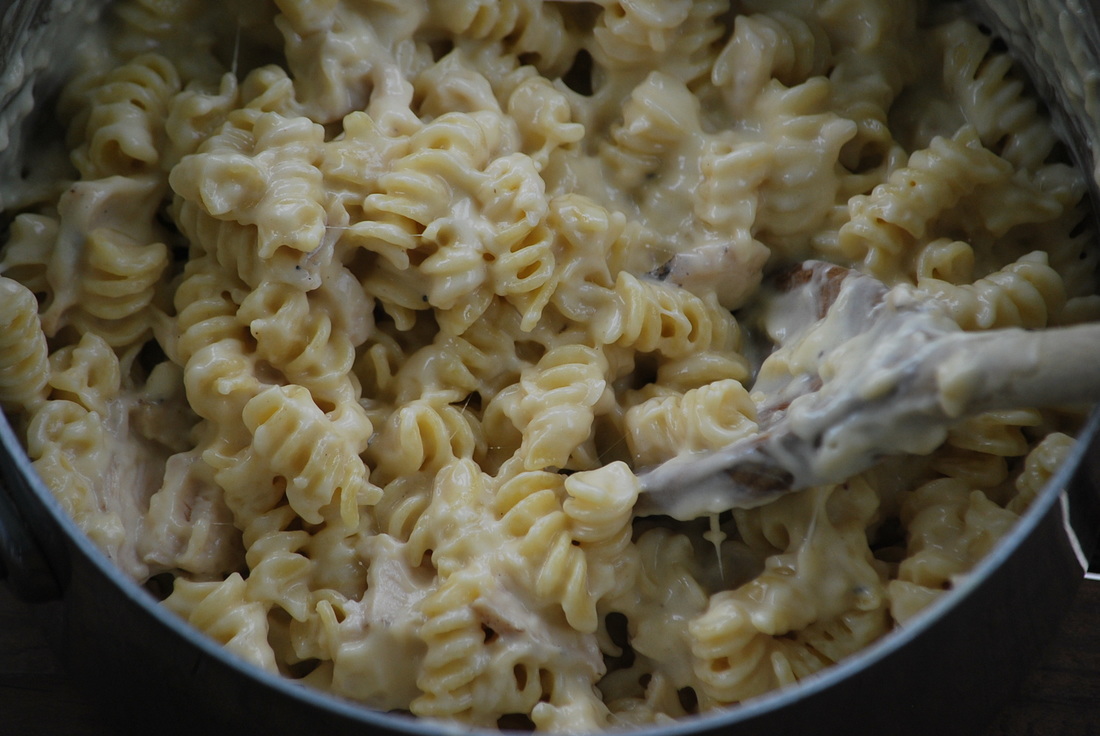 Spoon into baking dish and top with additional parmigiano. 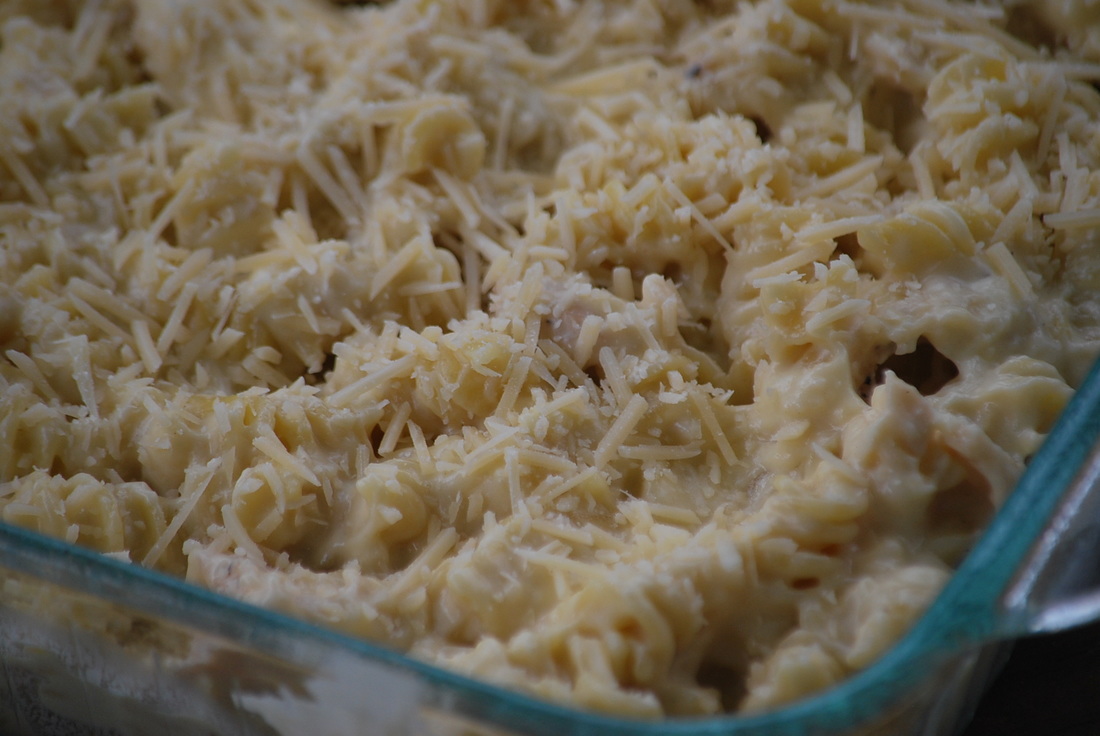 Bake 15 minutes.
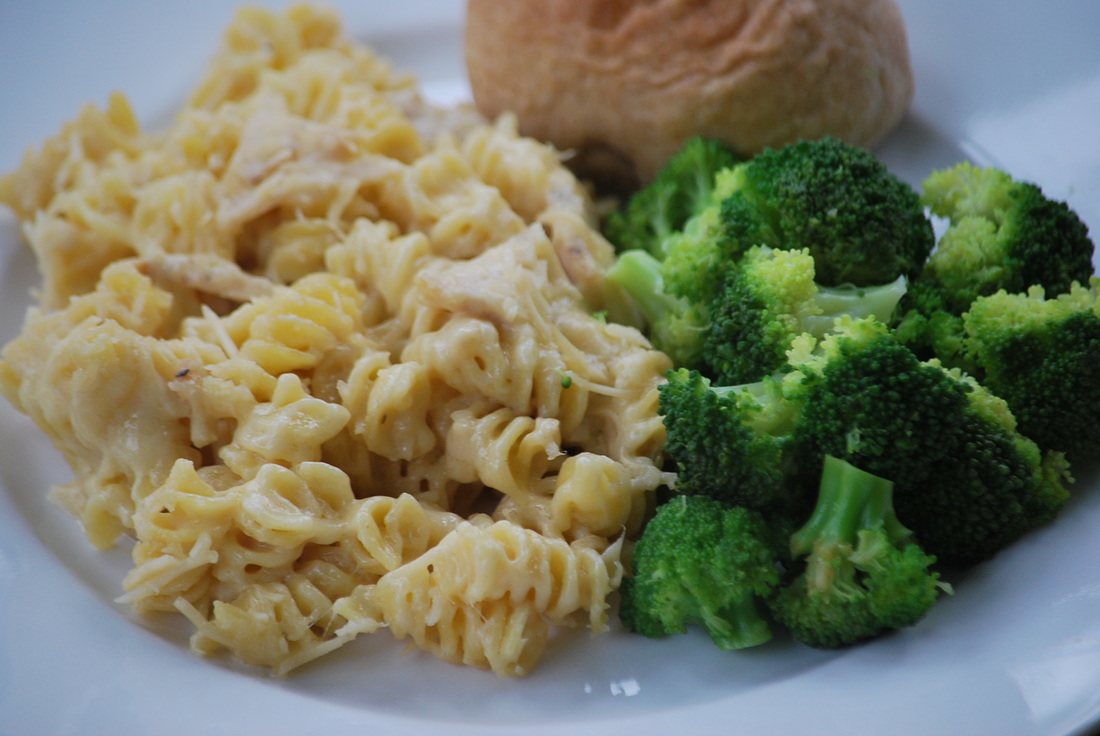
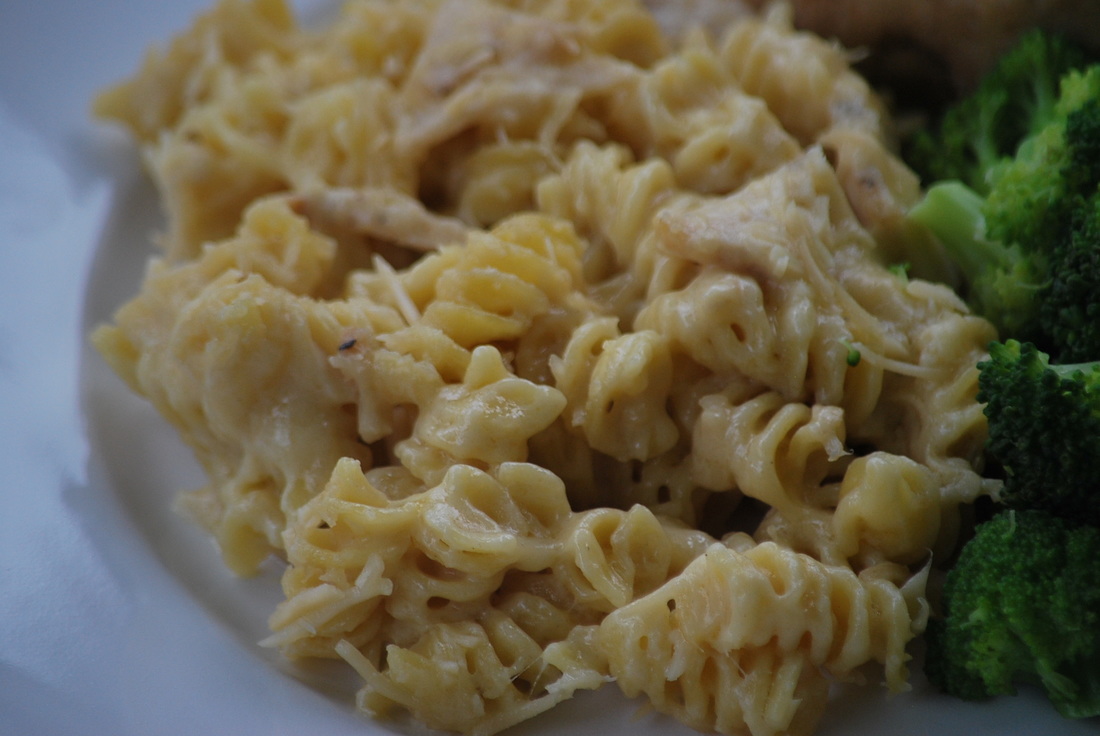
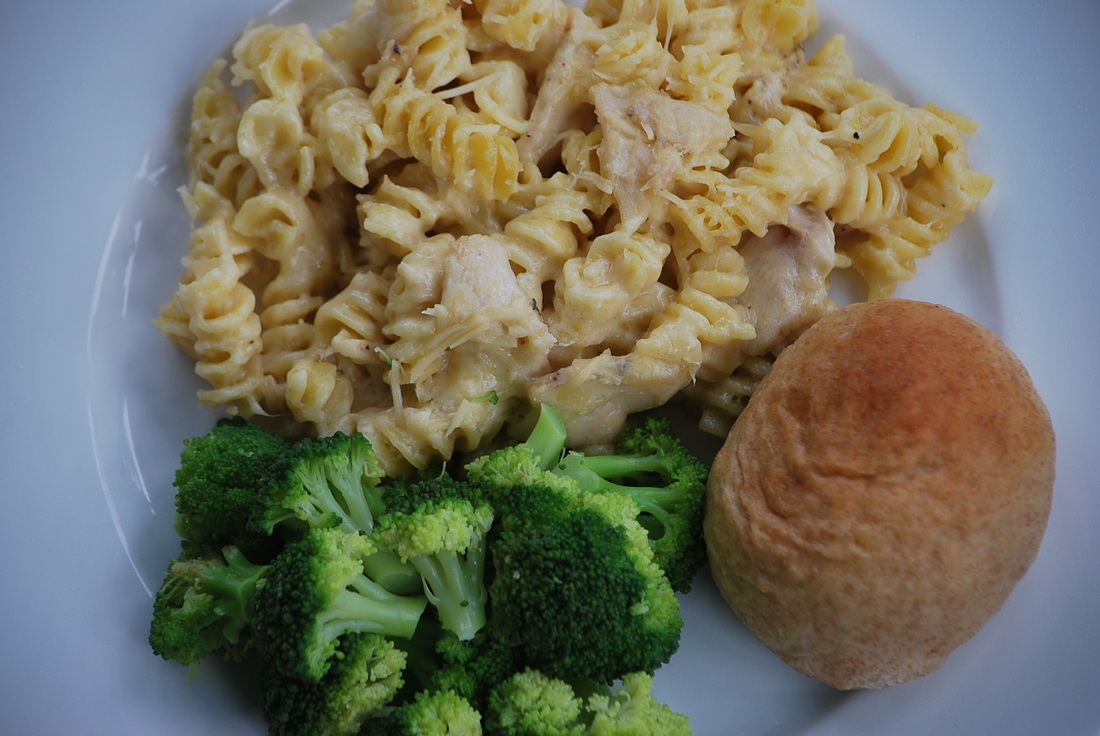
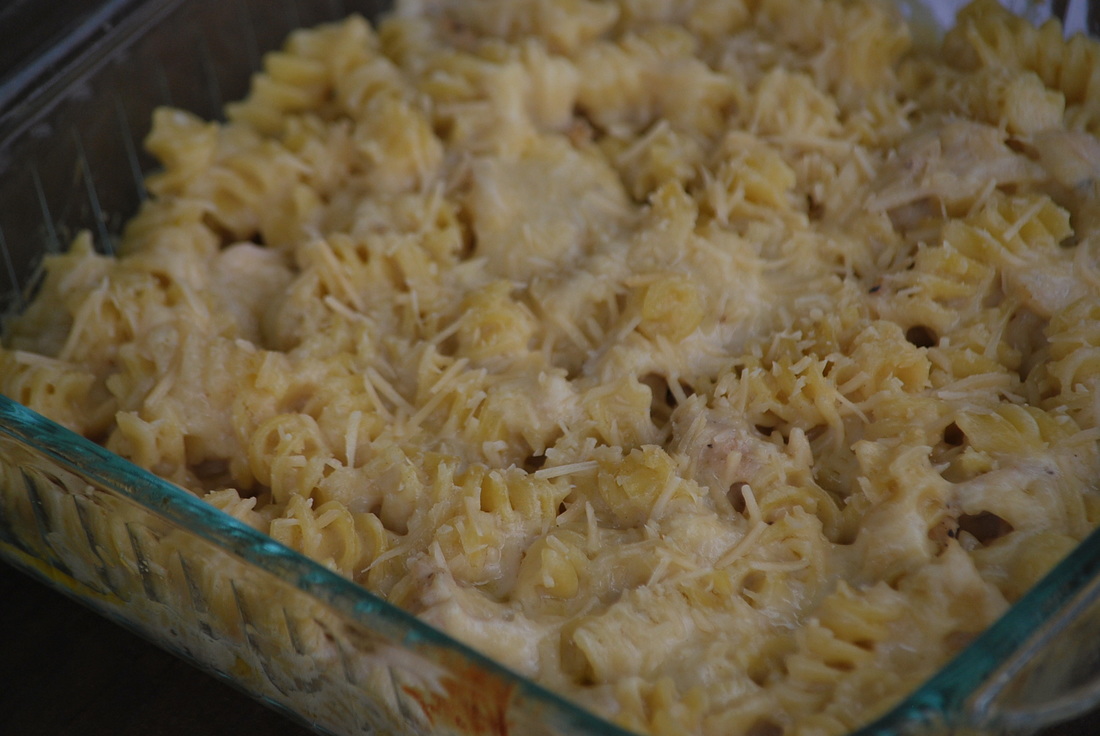  I served my Four Cheese Chicken Pasta with steamed broccoli and a whole wheat roll.
The Courtney verdict - She loved it! This one is a keeper. Ciao!
0 Comments
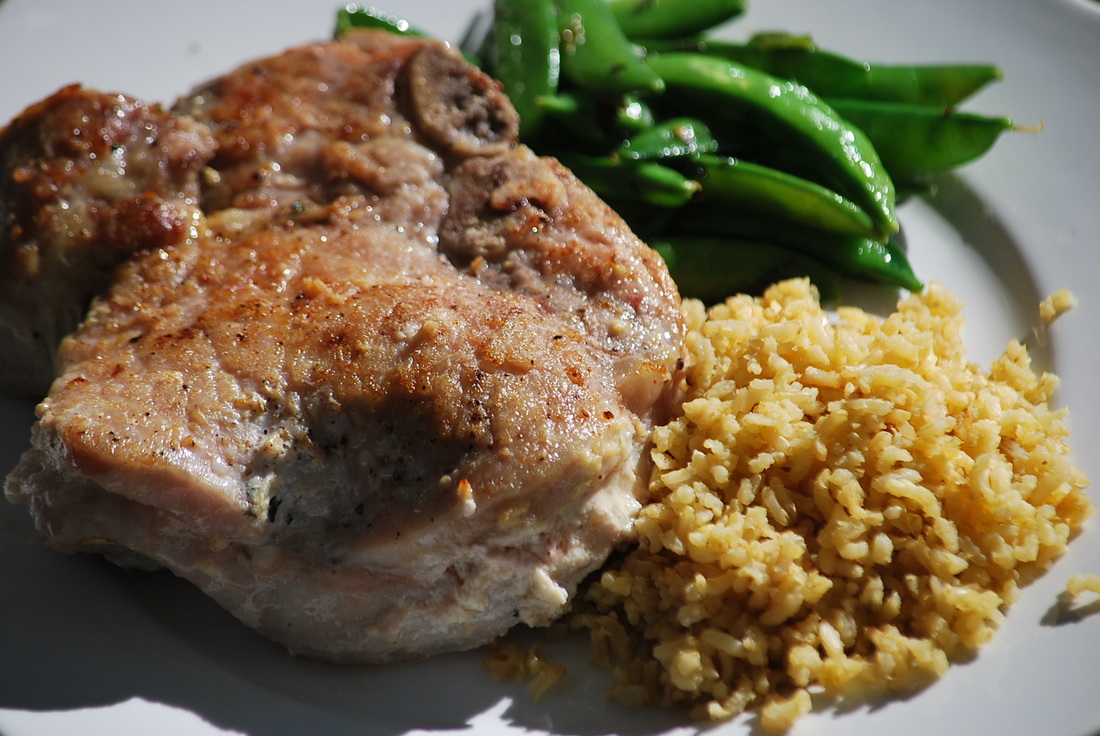
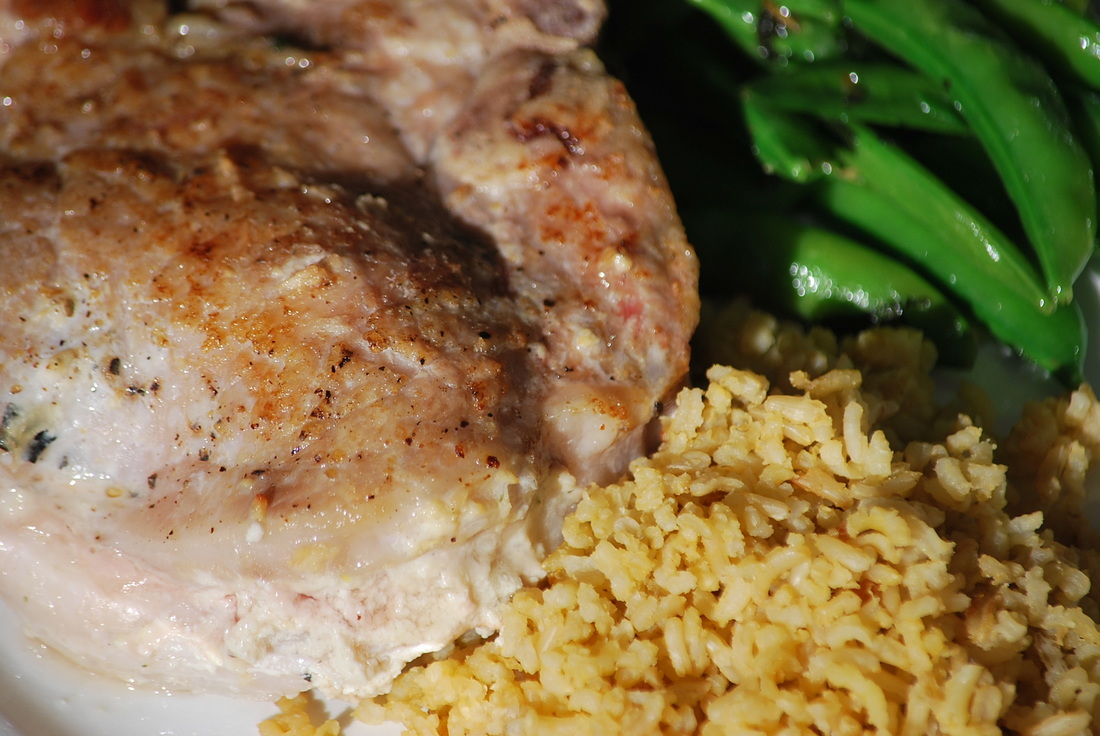
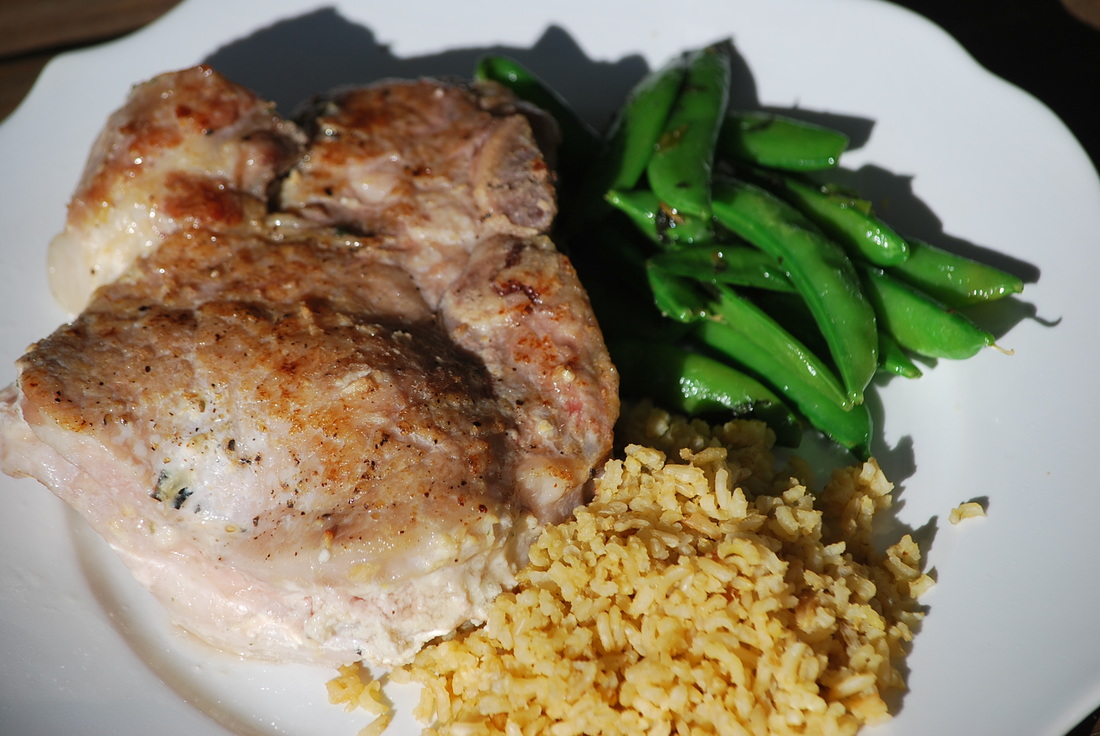
I am all for "unplugging" and disconnecting from electronic devices periodically. I find it helps me to refocus and regain lost motivation. I really have learned to embrace being "unplugged" ... EXCEPT when it's not my choice. I have spent the last 3 days without a home phone or internet service. The first 18 hours were peaceful and quiet - then I started to get really irritated. Having to cook dinners without being able to access my recipes online, trying to communicate with clients without the ability to email pictures were just 2 of the big obstacles that I had to overcome. Apparently I like to "unplug" when its my decision and when it's convenient for me - not when I am forced to. OK - rant over. I've never been happier to be back on line and sharing a new recipe with you. Enjoy this recipe for ricotta stuffed pork chops everyone.
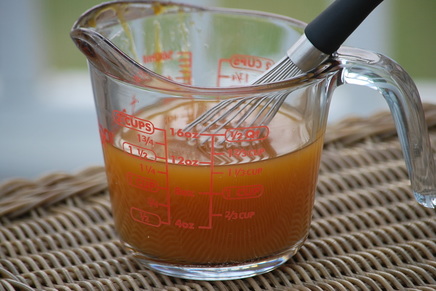
Ricotta Stuffed Pork Chops 3 Tablespoons oil 1/4 cup chopped onion 1/2 roasted red pepper, chopped (I used a mini red and a mini yellow pepper) 3/4 teaspoon fresh rosemary 1 clove garlic, minced pinch of red pepper flakes 3/4 cup ricotta cheese salt and pepper 6 bone in pork chops, thick cut  Heat 1 Tablespoon oil in skillet. Add onion and cook until softened. 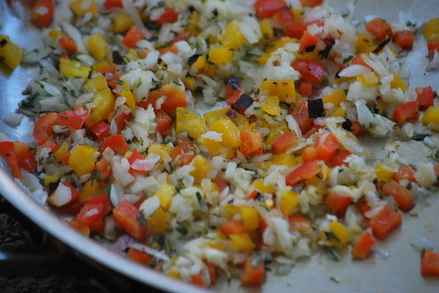 Add roasted red pepper, rosemary, garlic and red pepper flakes. Cook until fragrant. Transfer to a bowl to cool. Stir in ricotta. 
Heat remaining 2 T. oil in skillet. Sear pork chops on each side.  Transfer to a baking sheet and put in a 325 degree oven and roast until internal temperature is 135 degrees.  Remove toothpicks and let rest 5 minutes before serving.
 Whip up a batch of these pork chops to impress your dinner guests. They'll love you for it.
Ciao! Its a rainy Saturday in Atlanta so I decided it would be a perfect day to try my hand at homemade New York Bagels! Not before I ran out and dodged the rain drops to snap a few pictures. Rain is so pretty.
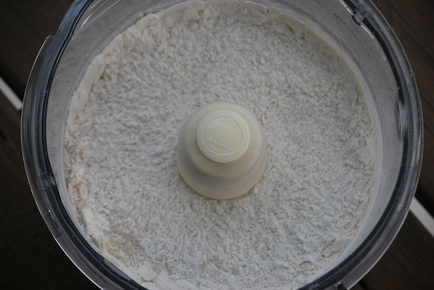
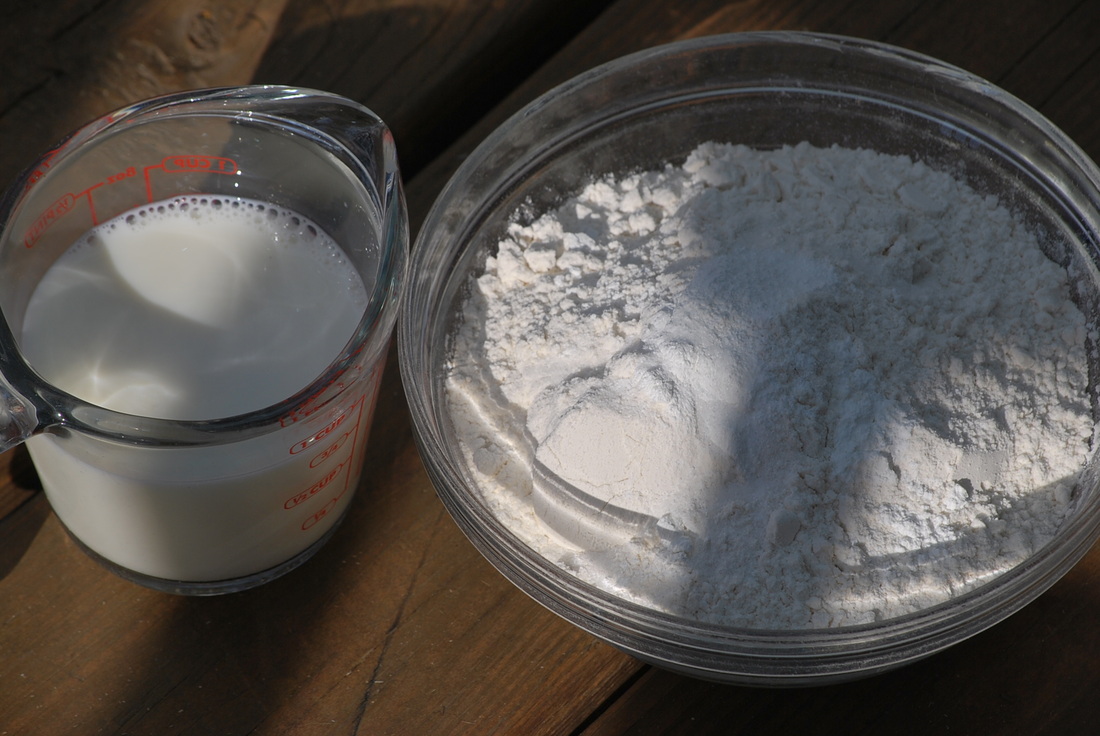
I've made bagels before and they turned out pretty good but when Cook's Illustrated comes out with a bagel recipe - it's definitely worth another try.  I thought I was really prepared for my bagel day. After several failed attempts to buy vital wheat gluten and malt syrup this week, I finally located both products in a specialty food market. I started my dough last night and had the bagels formed and resting in the frig overnight so they would be ready to bake up nice and fresh this morning. Unfortunately, I made one vital flaw - I just assumed that an 8 hour overnight stay in the frig would be sufficient. Looks like I should have started my bagels yesterday morning because these bagels needed to be refrigerated 16-24 hours! Looks like its bagels for lunch today!  New York Bagels 1 1/4 cups ice water 2 Tablespoons malt syrup 2 2/3 cups bread flour 4 teaspoons vital wheat gluten 2 teaspoons yeast 2 teaspoons salt 1/4 cup cornmeal 1/4 cup sugar 1 Tablespoon baking soda
With processor running, slowly add ice water mixture and process until dough is just combined. Let stand for 10 minutes. 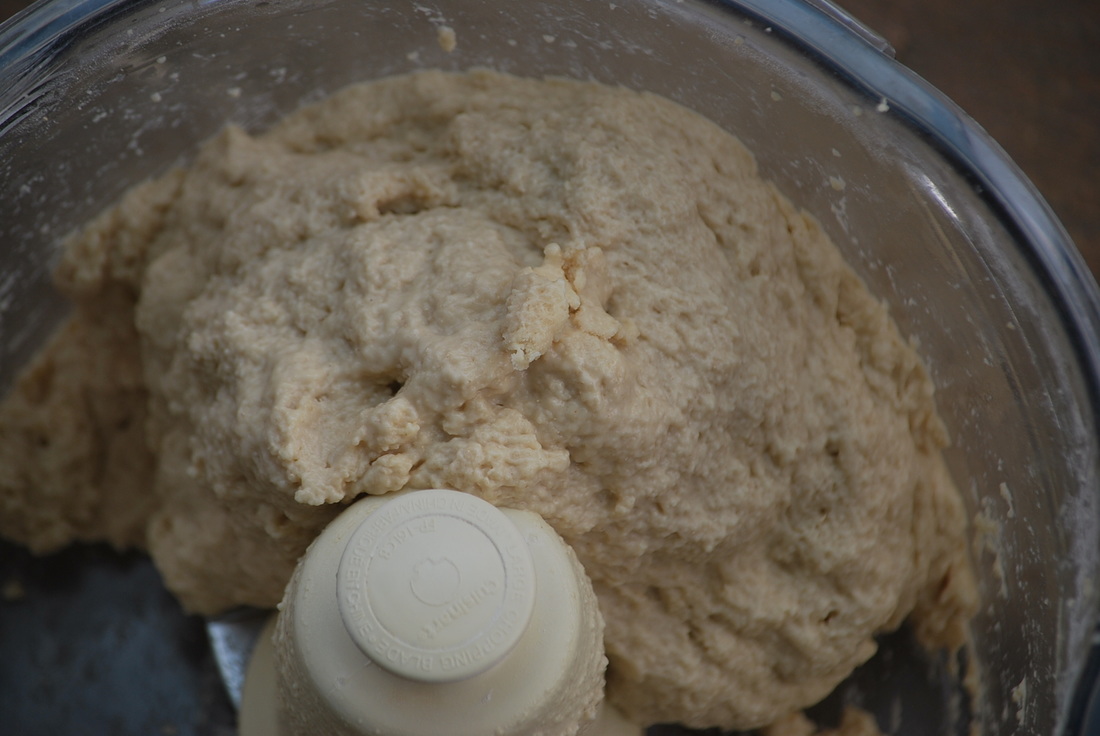
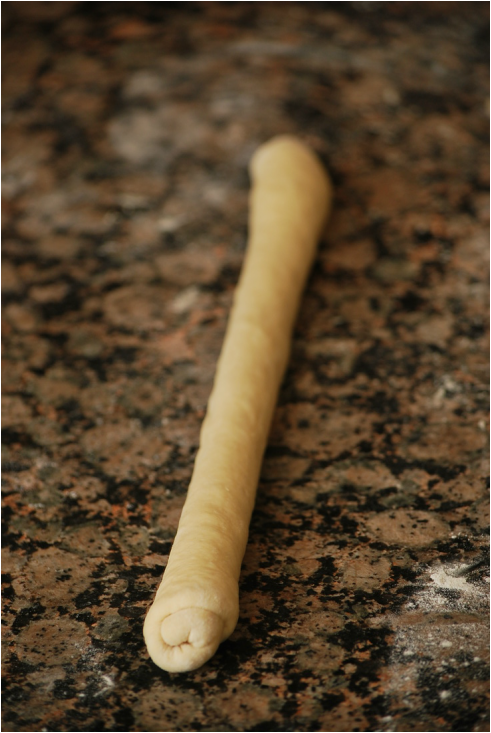
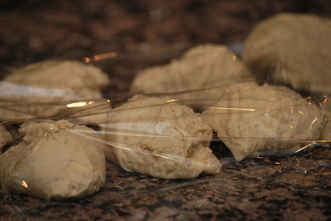 Divide dough into 8 pieces and cover loosely with plastic wrap. Working with one piece at a time, roll dough into smooth rounds. Let rest for 15 minutes. 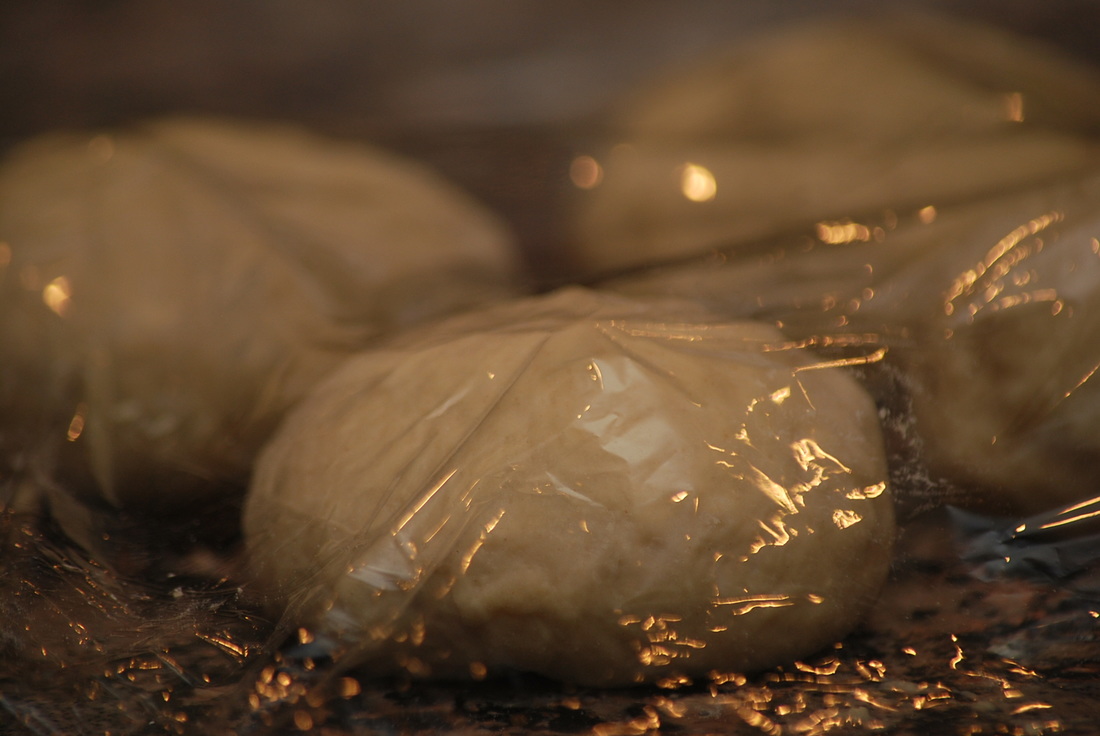 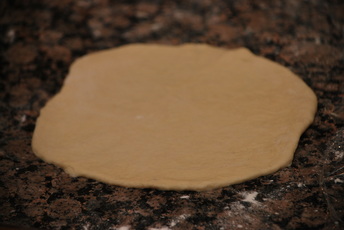 Sprinkle baking sheet with cornmeal. Working with 1 piece at a time, lightly coat dough with flour. Use rolling pin to roll dough into a 5 inch round.
Twist rope to form a tight spiral. Wrap rope around your fingers, overlapping ends 2 inches. Press and roll seam on counter to seal. Transfer rings to baking sheet. Let bagels stand at room temperature for 1 hour.
Cover baking sheet with plastic wrap and refrigerate 16-24 hours.  Place baking stone in oven and preheat to 450. Bring 4 quarts of water, sugar and baking soda to a boil. Set wire rack in baking sheet and spray with baking spray. 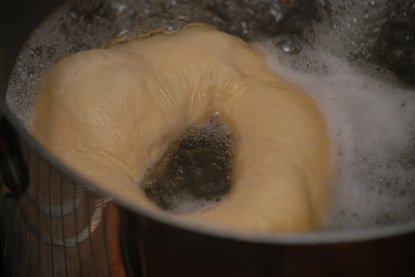 One at a time, transfer bagels to boiling water and cook for 20 seconds. Using a skimmer, flip bagels over and cook 20 seconds longer.  Using a skimmer, transfer bagels to wire rack with cornmeal side facing down. Place sheet with bagels on baking stone and pour 1/2 cup water into bottom of sheet. Bake 10-12 minutes. Flip bagels and bake 10-12 minutes longer.
Remove sheet from oven and let bagels cool at least 15 minutes.
Want to see my yummy bagel lunch creations?
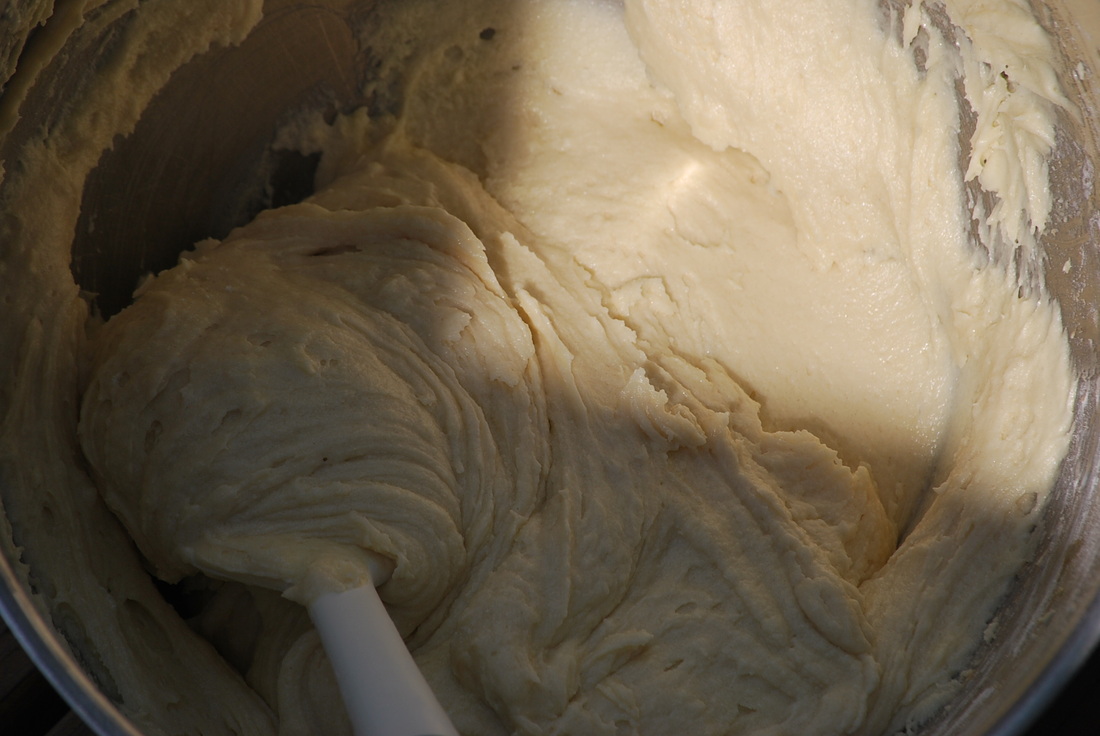
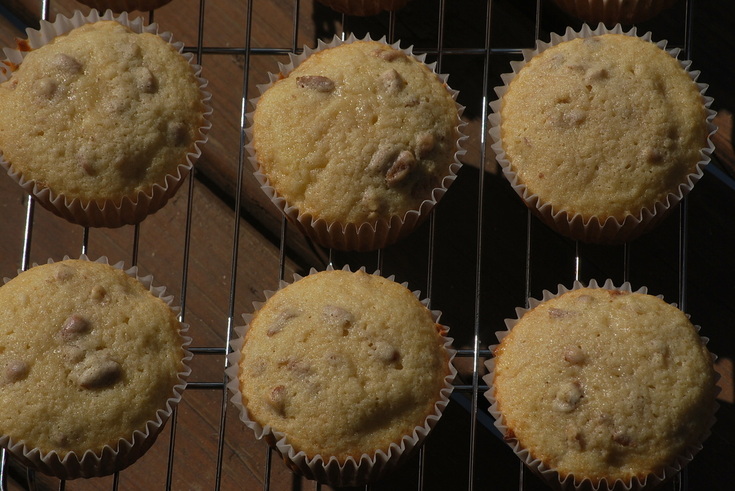
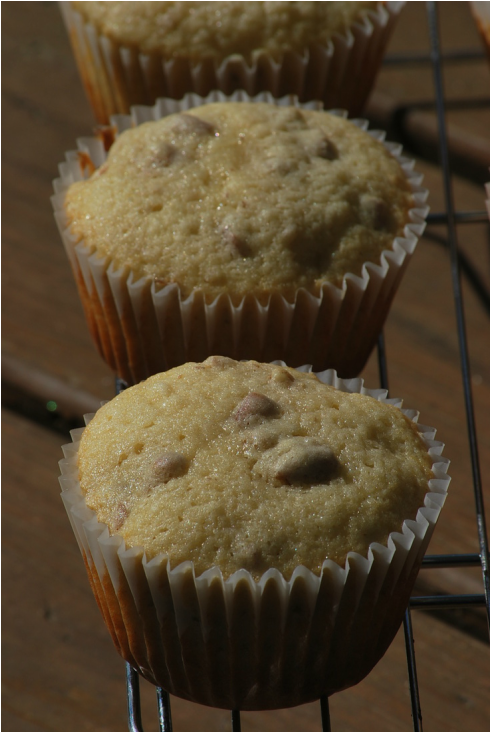
Turkey, lettuce and avocado bagel sandwich - so delicious. Next time, I'll start my bagels 24 hours before I want to eat them and I just might be able to have them ready for breakfast. Ciao! For all of you who have been asking, uh I mean BEGGING me to find a way to get my blog posts to your email once again - your wish has come true. Check out the fancy new "subscribe" box in the upper right corner of the blog! Now you can get an email to notify you every time that I post a new recipe on the blog. No more having to remember to check the blog daily to see if there's a new recipe. You can also save the emails for recipes that you want to try at another time so you don't forget about them. Don't forget that you can also save my recipes on a Pinterest board. Click on any picture on the blog to pin it to your board and it will automatically link back to the blog whenever you're ready to start cooking. Follow all of my Pinterest boards to see pictures of the most recent recipes. Recipes like these Toasted Buttered Pecan Cupcakes, for example.   Toasted Buttered Pecan Cupcakes 3/4 cups + 2 Tablespoons butter 2 1/4 cups flour 1 1/2 cups chopped pecans 1 1/2 teaspoons baking powder 1 1/2 cups sugar 1/2 teaspoon salt 3 eggs 3/4 cup milk 2 teaspoons vanilla Melt 2 T. butter in skillet. Add pecans and toast 4-5 minutes. 
Combine flour, baking powder and salt. Add to batter, alternating with milk.
Stir in pecans. 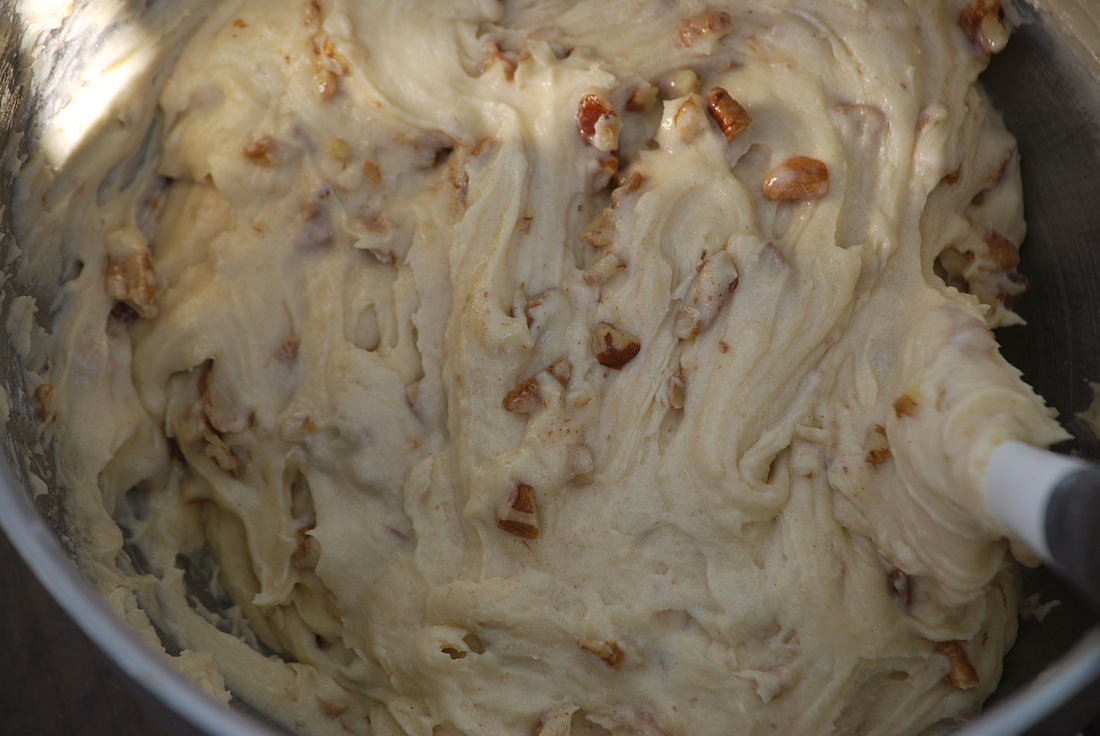 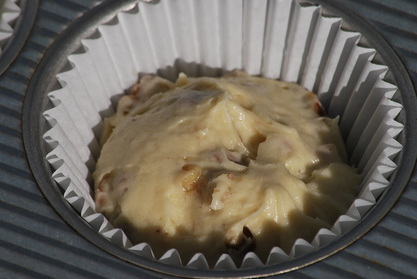 Scoop batter into paper lined jumbo cupcake pans. (My batter made exactly 12 jumbo cupcakes.)
Frost cupcakes with vanilla buttercream and garnish with chopped pecans.
Toasted buttered pecan cupcakes - this one is going to cost me extra sit ups but it's soooo worth it. Ciao!
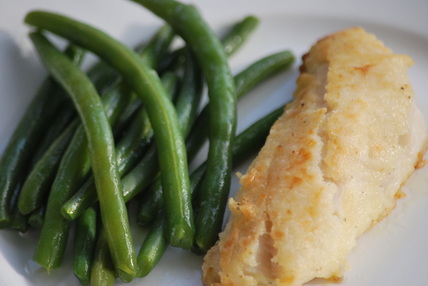
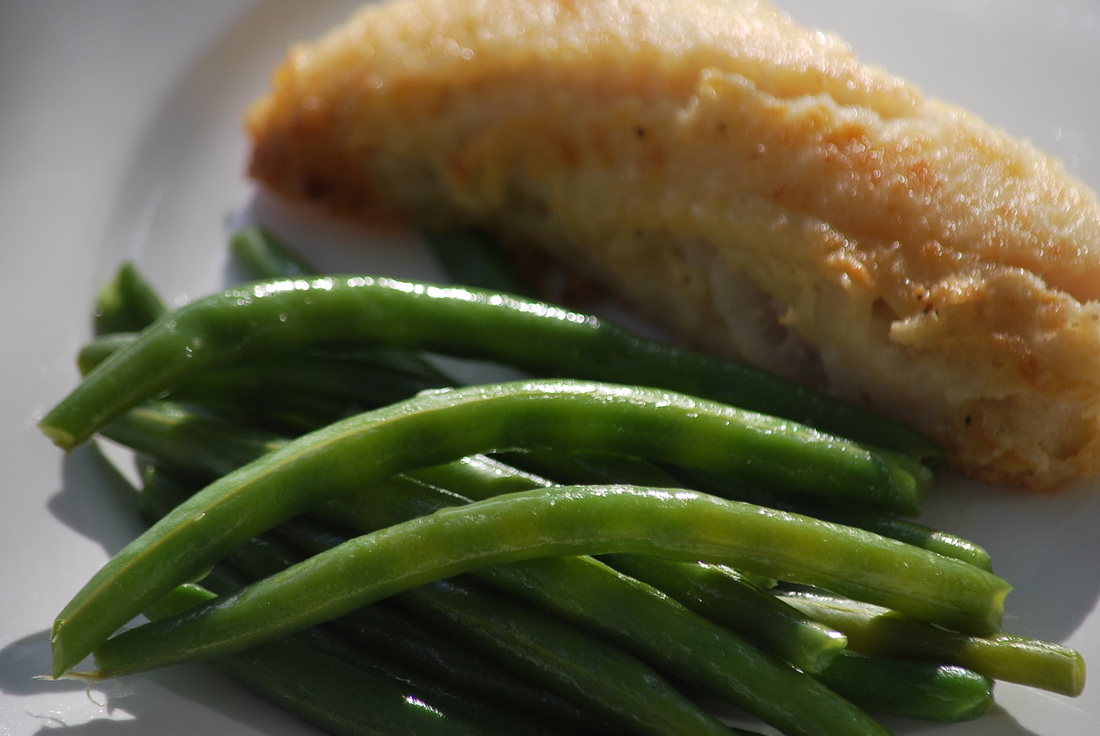
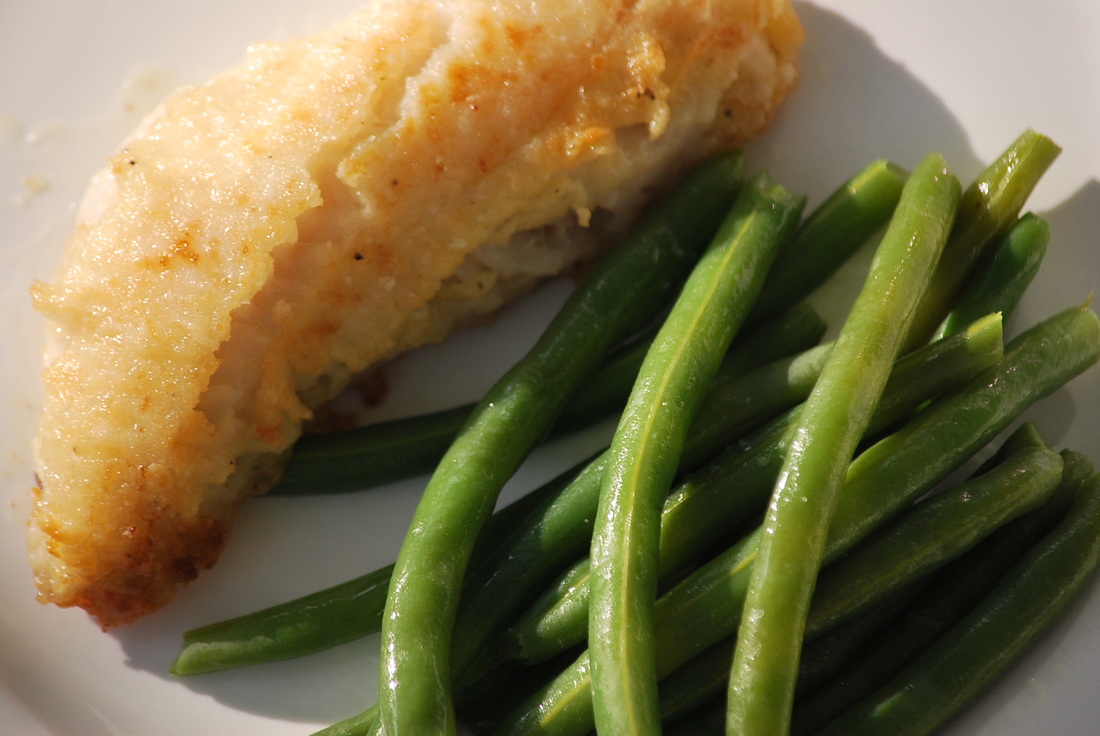
Keep that last scenario in mind when your looking at the pictures in this blog post. I was STARVING and this dinner looked and smelled so good that I just couldn't bring myself to make the plate look any prettier without eating. Don't be fooled by the amateur looking pics though - this was some of the best fish that we've had in a long time.
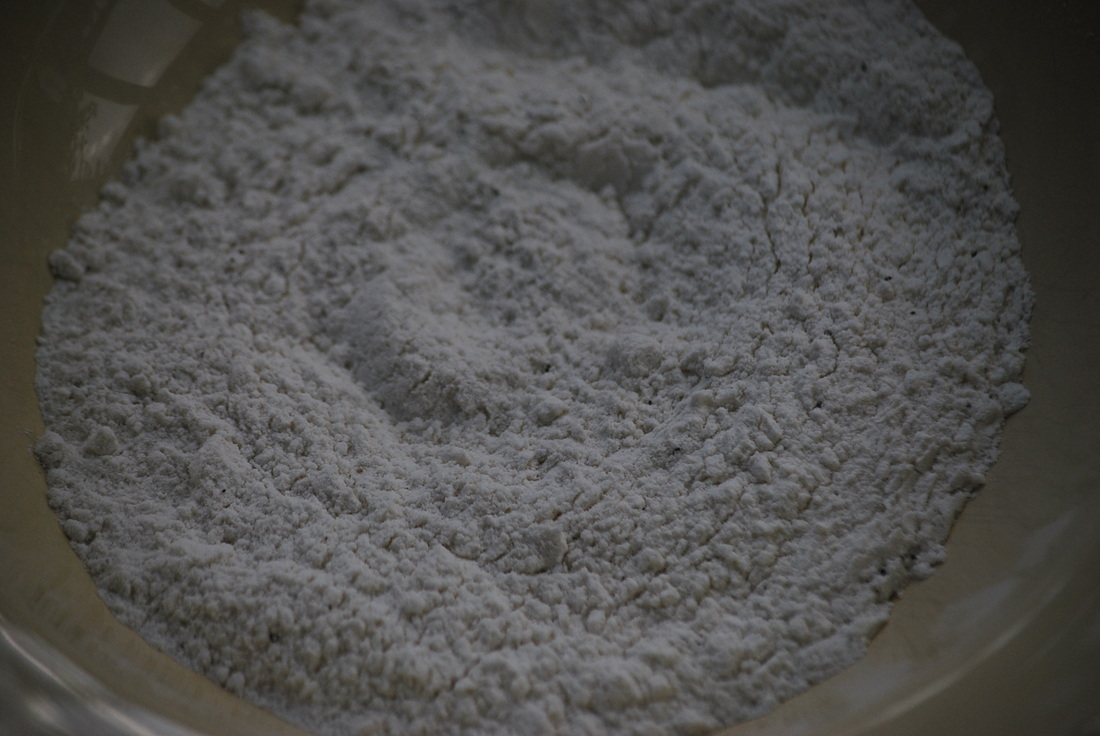
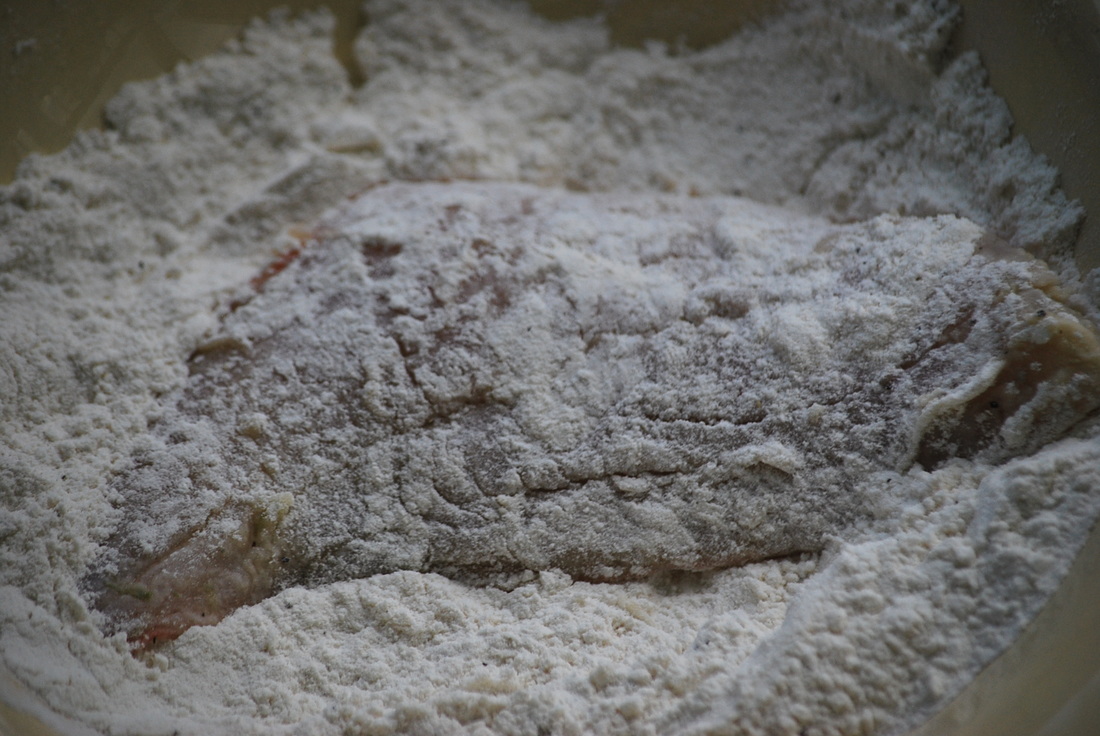
Honey Lime Perch Filets zest and juice of 1 lime 1 Tablespoon olive oil 1 1/2 Tablespoons honey 1/2 teaspoon salt 1/2 teaspoon pepper 1 clove garlic, minced 3-4 perch filets 1/2 cup flour salt and pepper 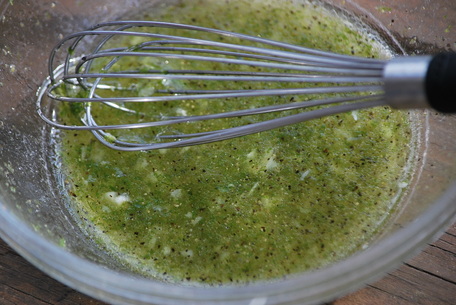 Combine lime zest, lime juice, oil, honey, salt, pepper and garlic. Pour marinade over fish, cover and refrigerate 1-4 hours. 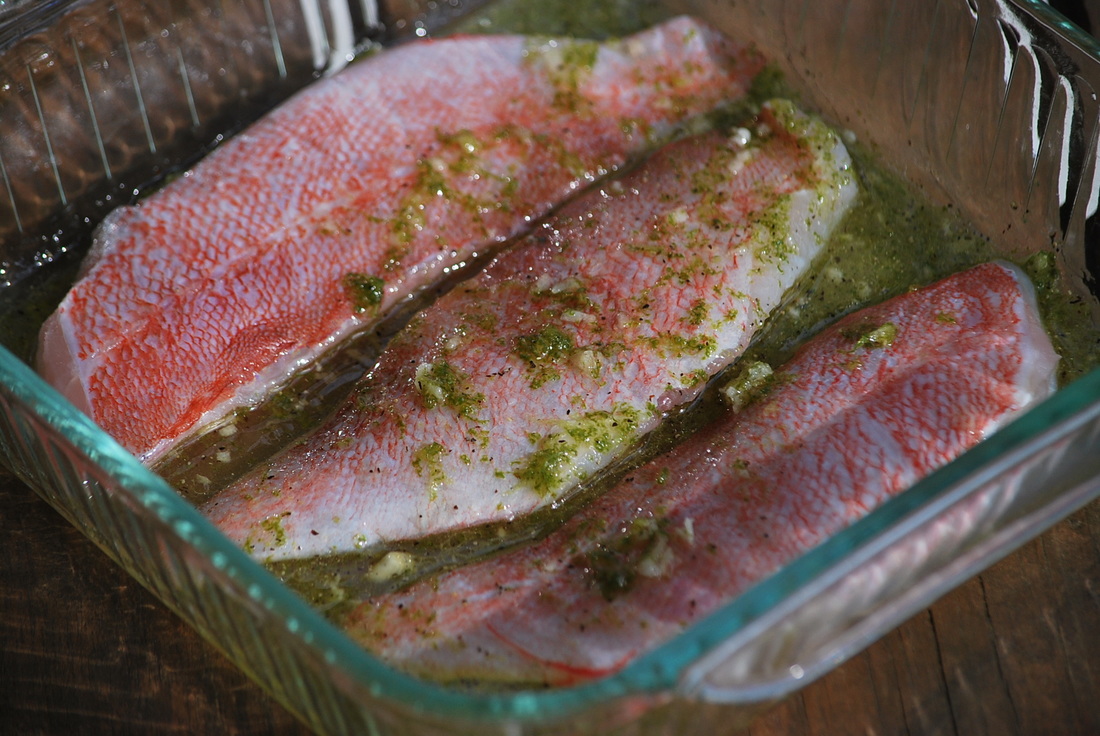
Heat oil in skillet and brown fish on both sides. 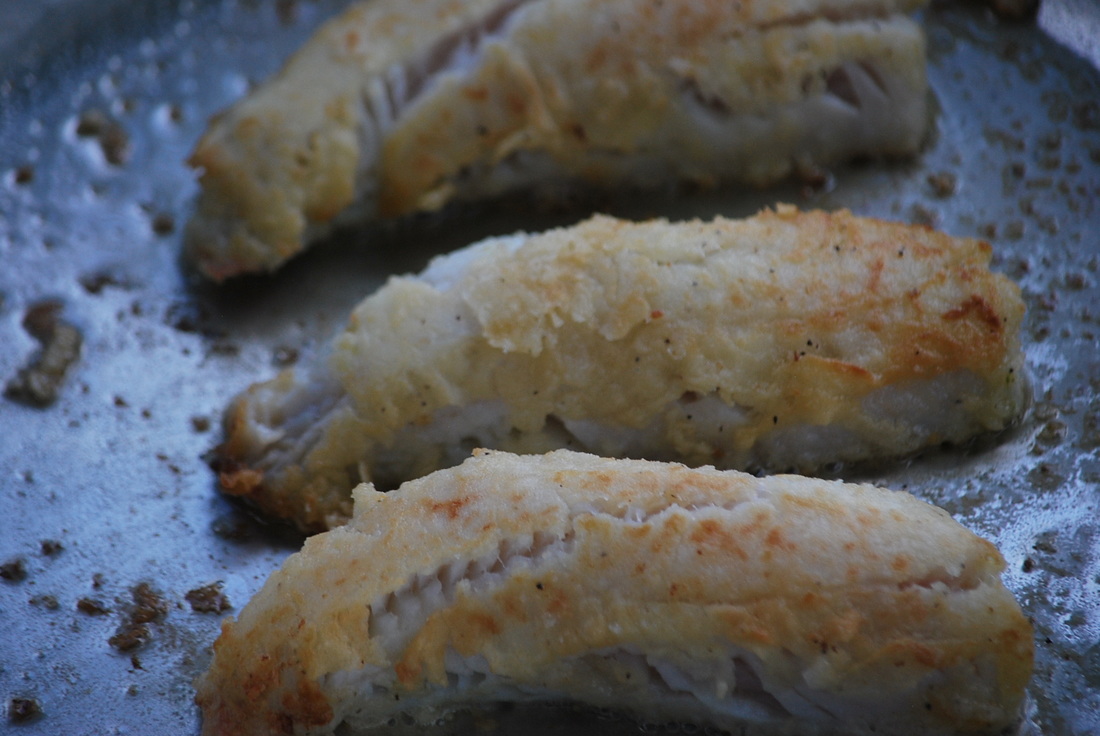 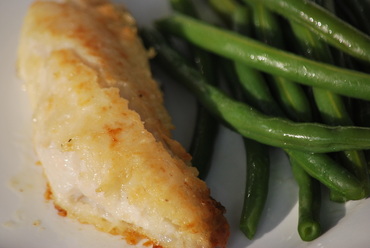 Transfer skillet to a 350 degree oven. Cook until fish is translucent and cooked through. 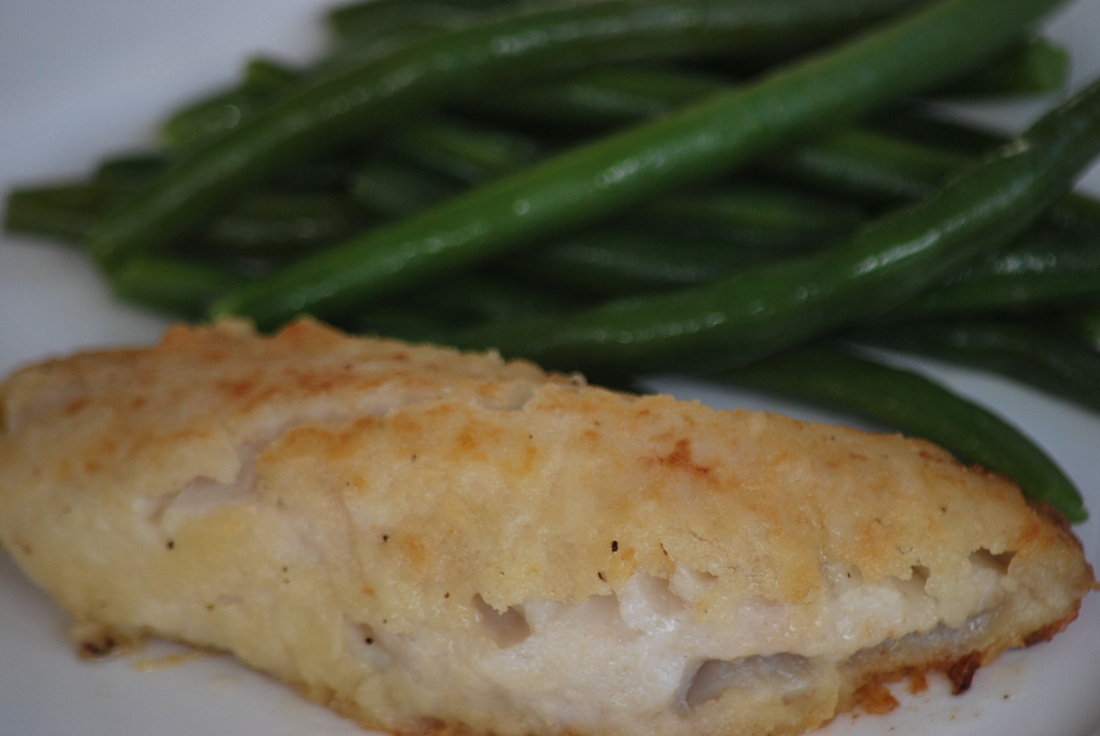 This recipe would work with almost any light fish filet that you wanted to use. I tend to buy whatever is on sale when I'm at the fish market. This week it was ocean perch fish filets and they were DELICIOUS!
Ciao! |