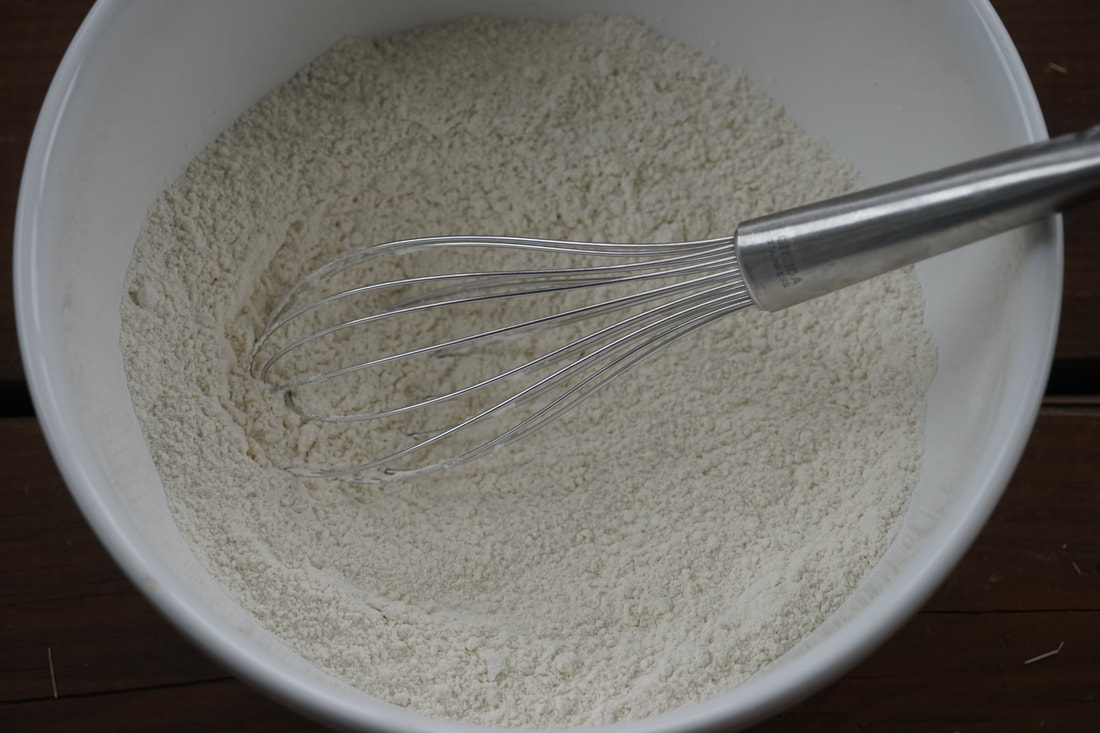
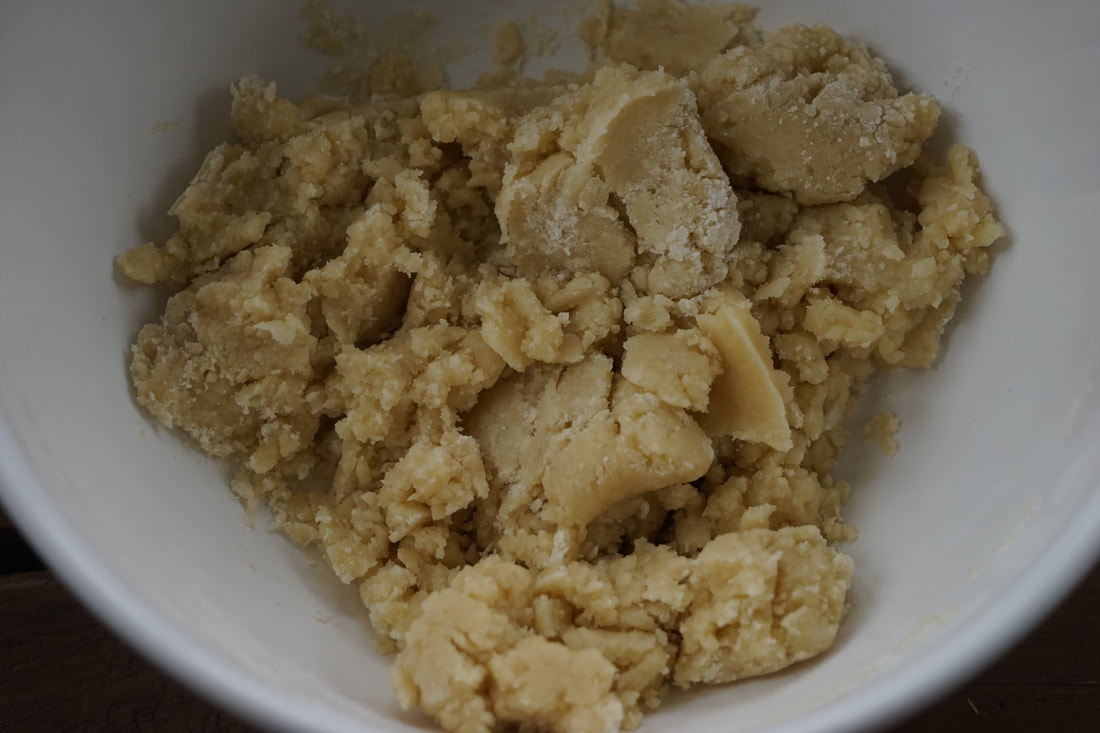
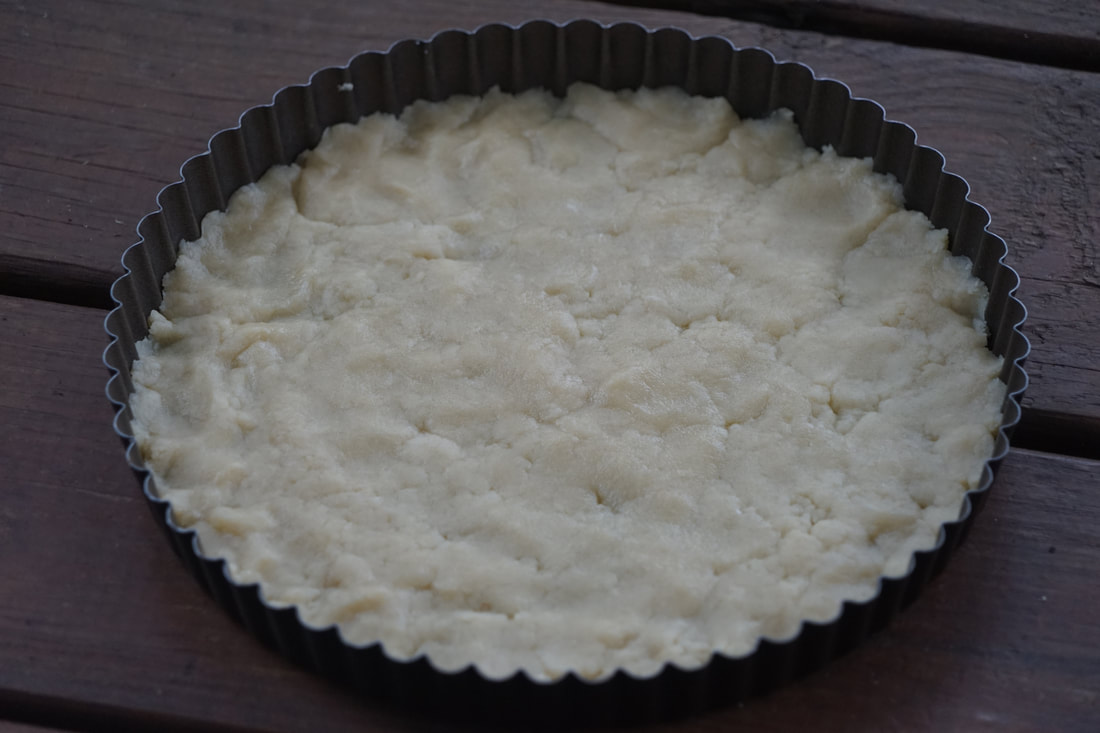
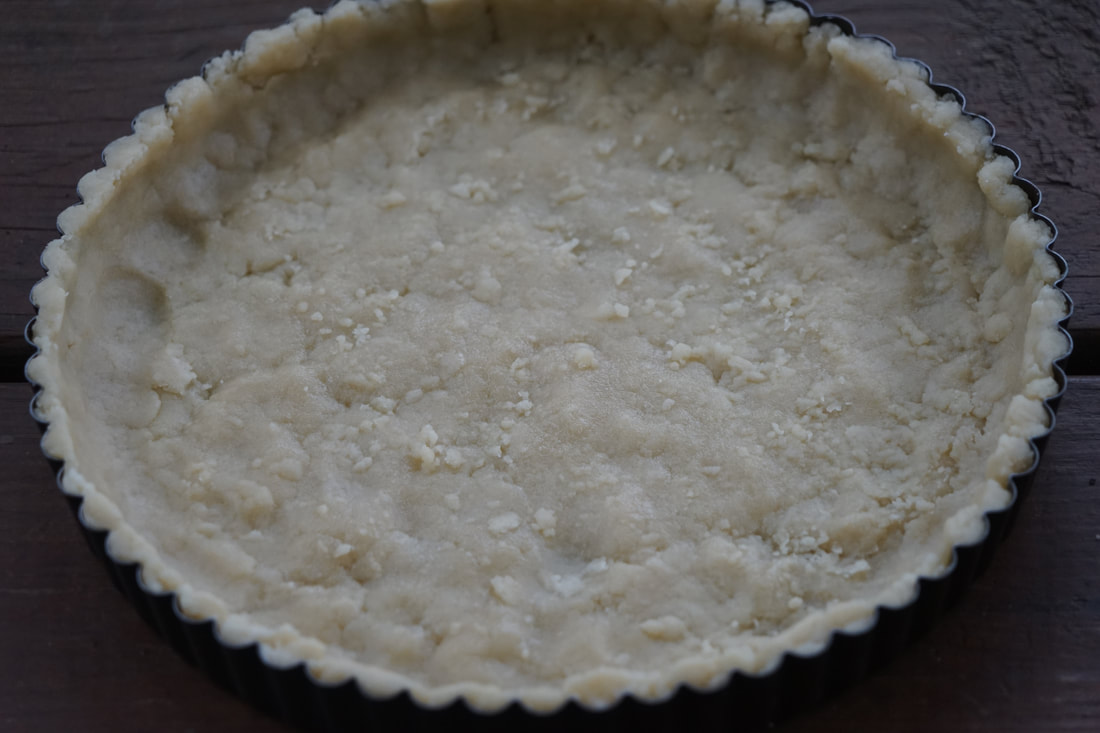
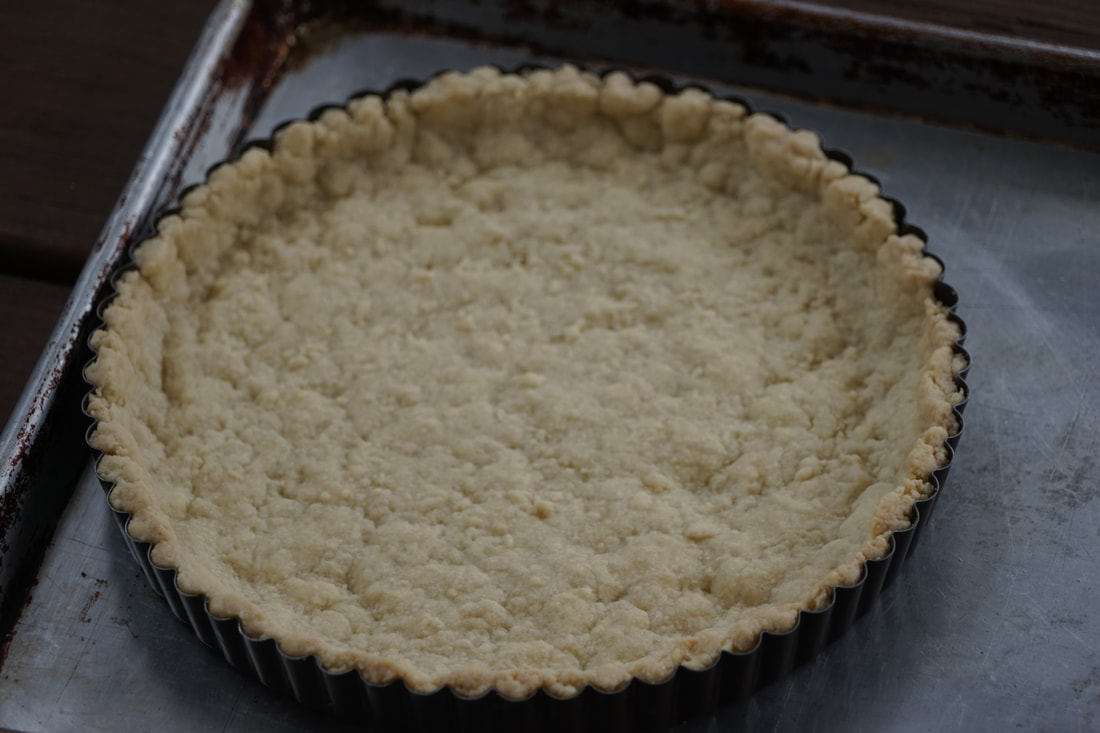
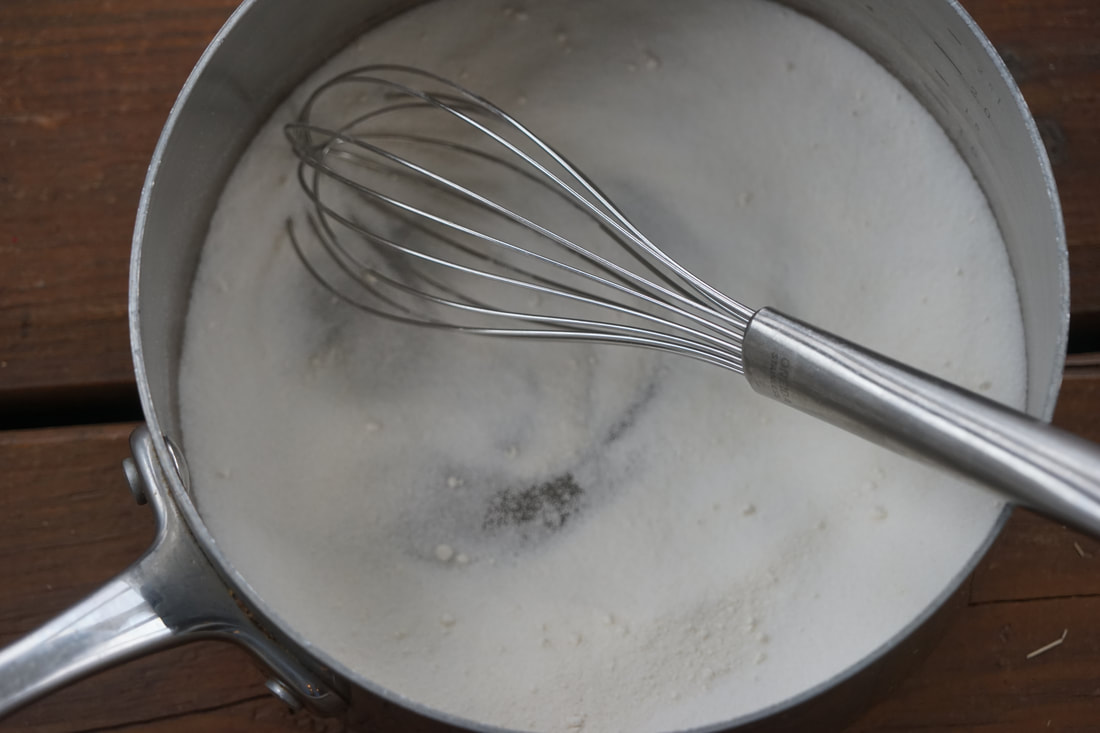
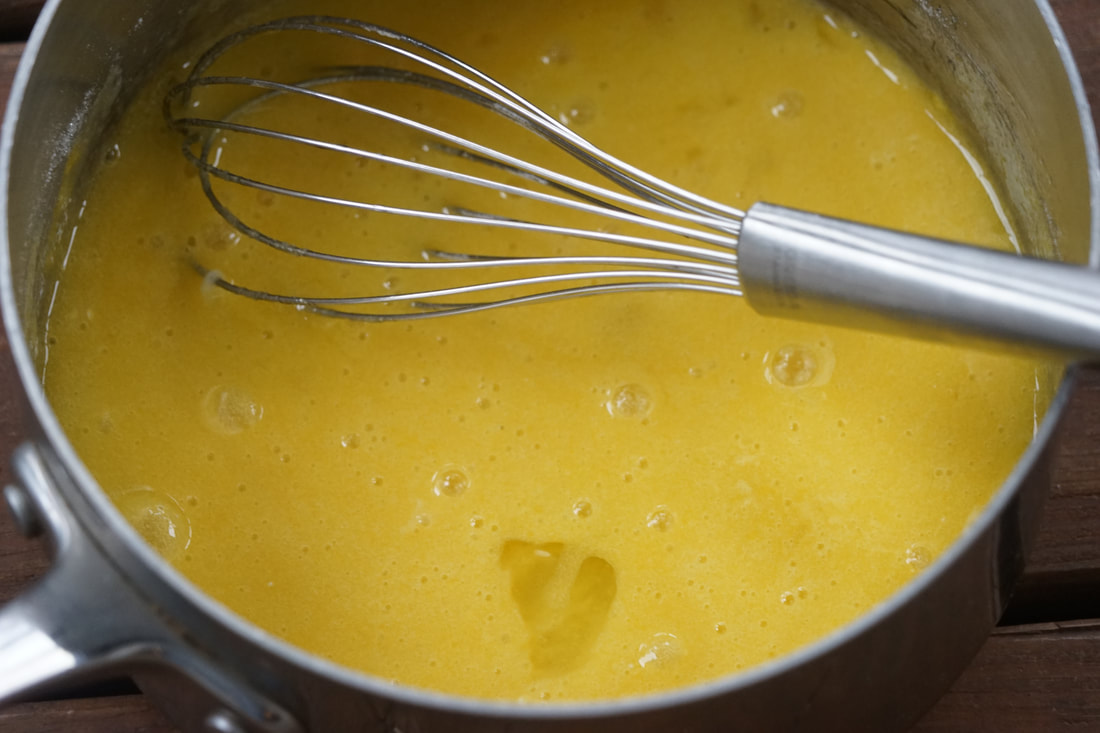
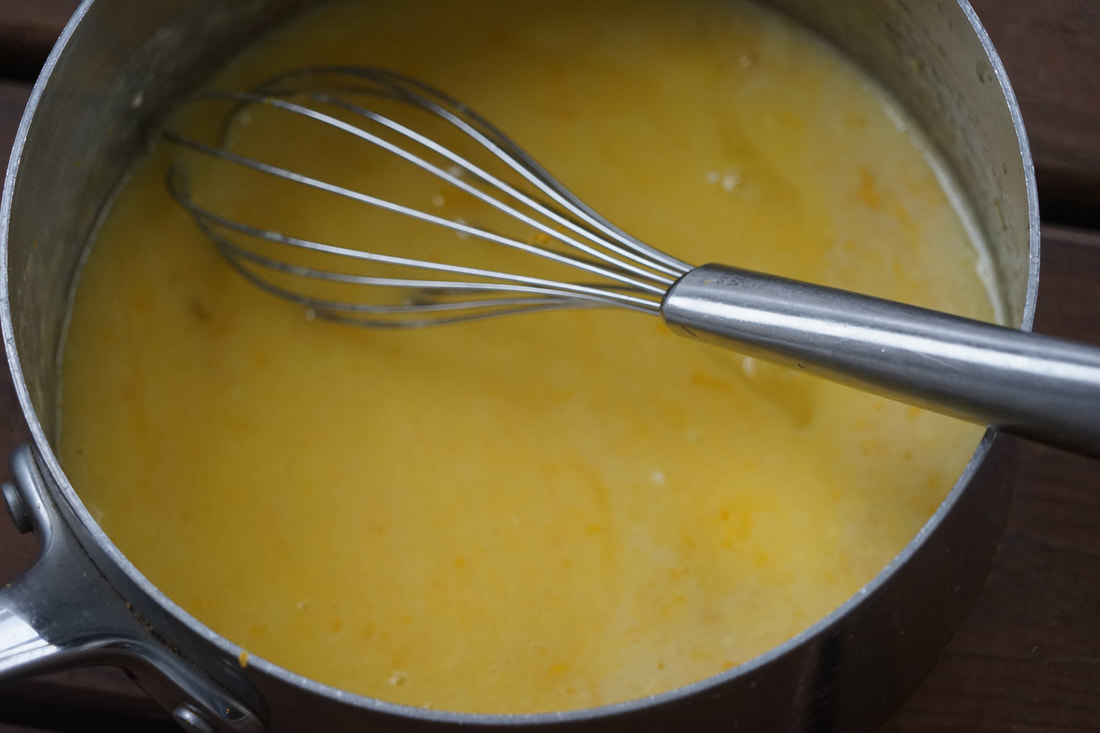
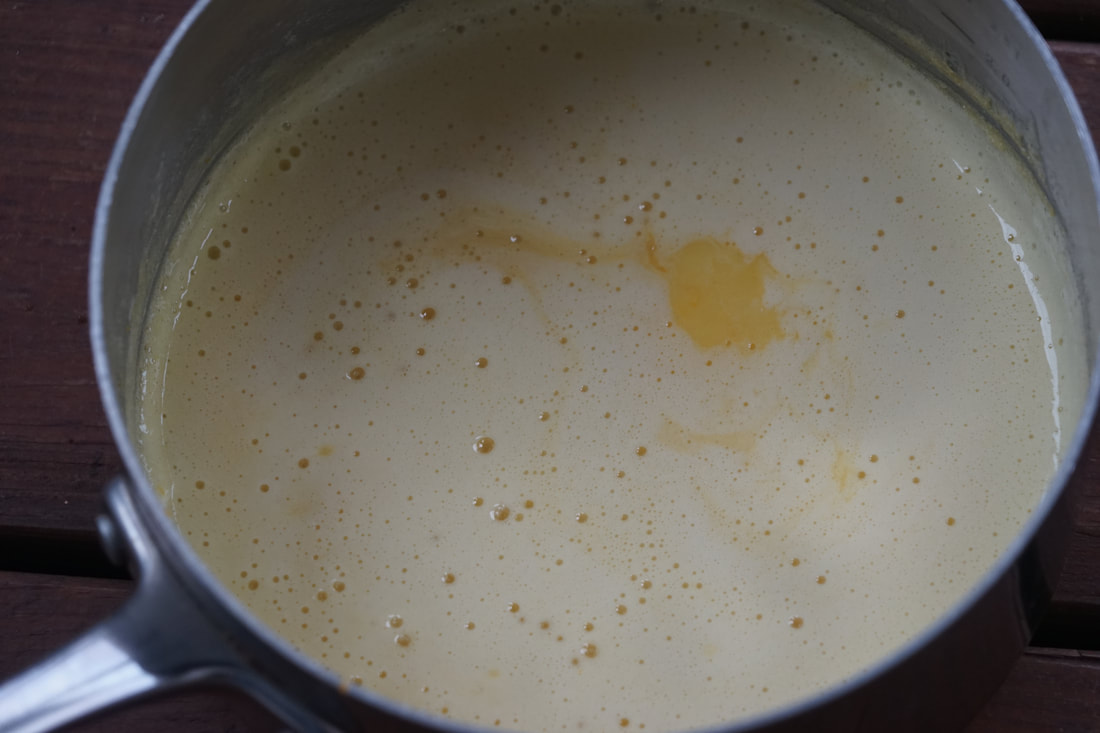
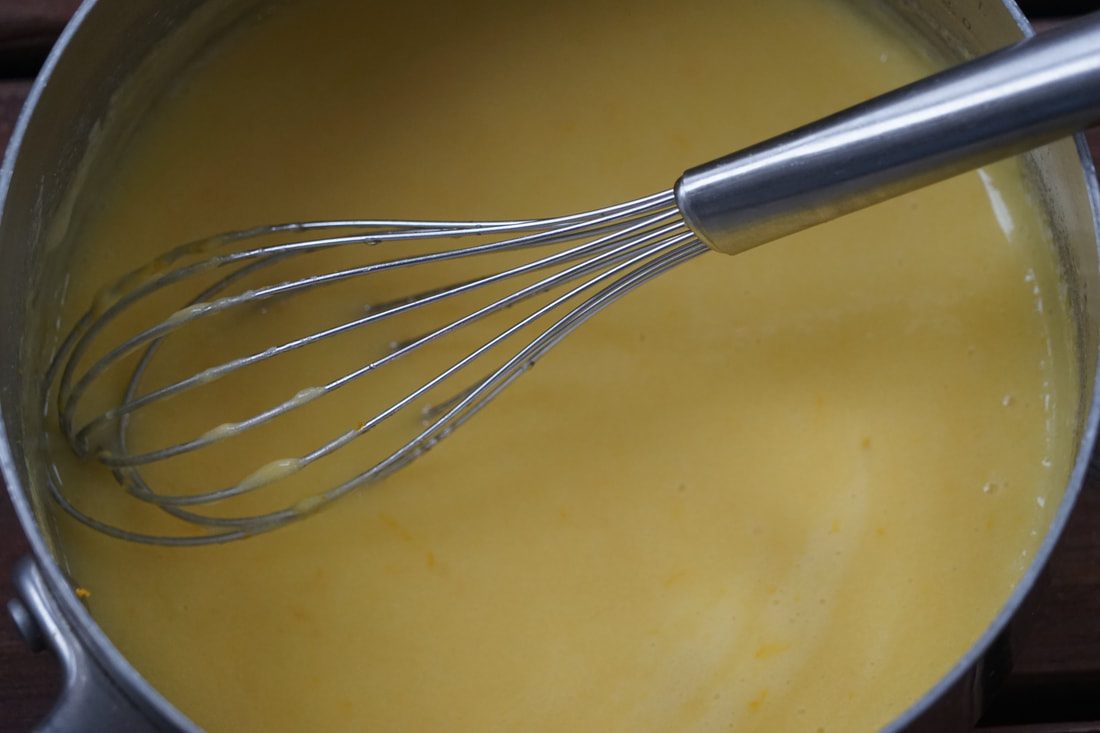
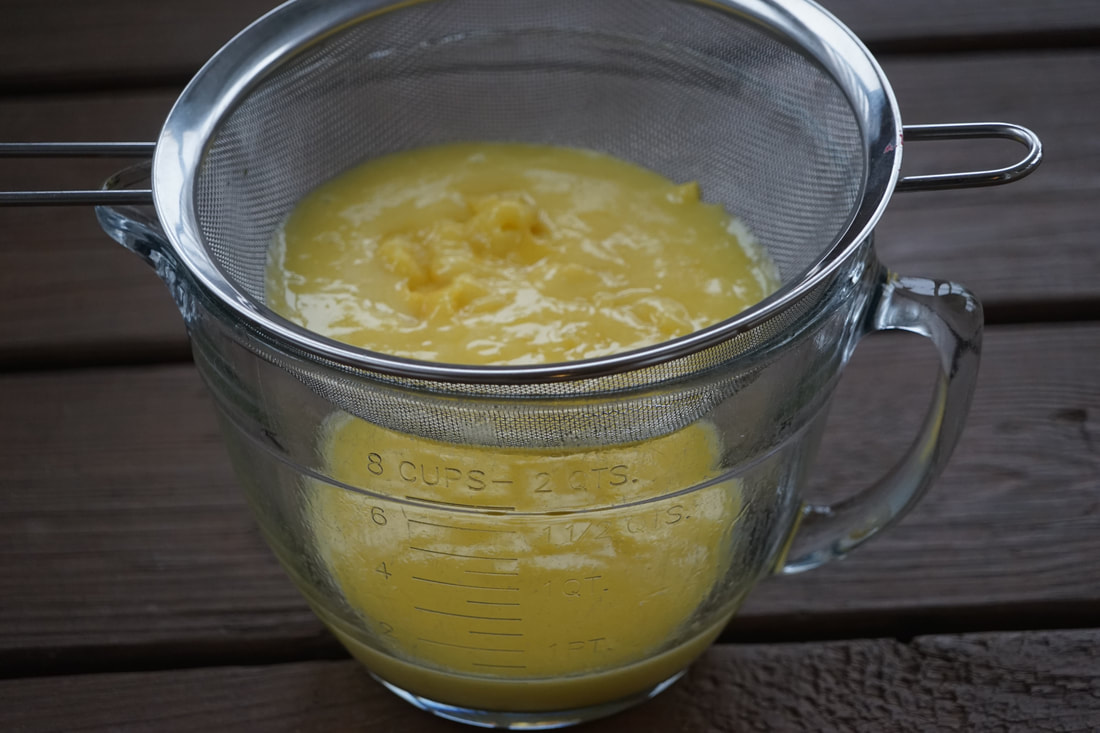
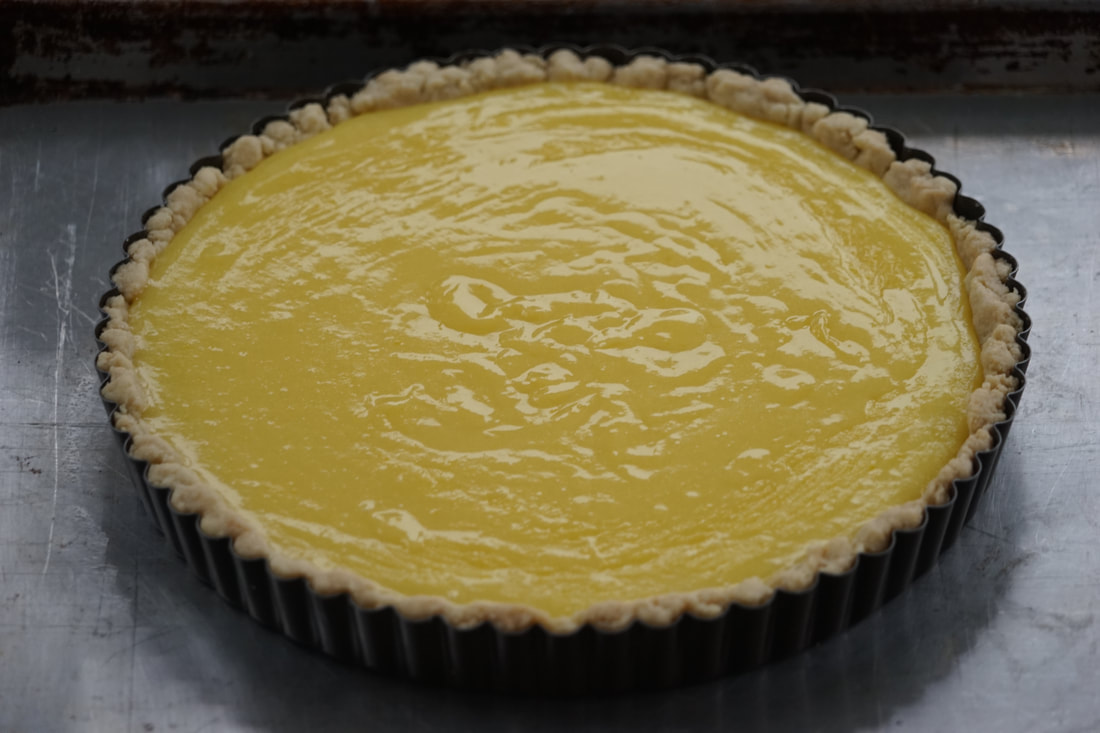
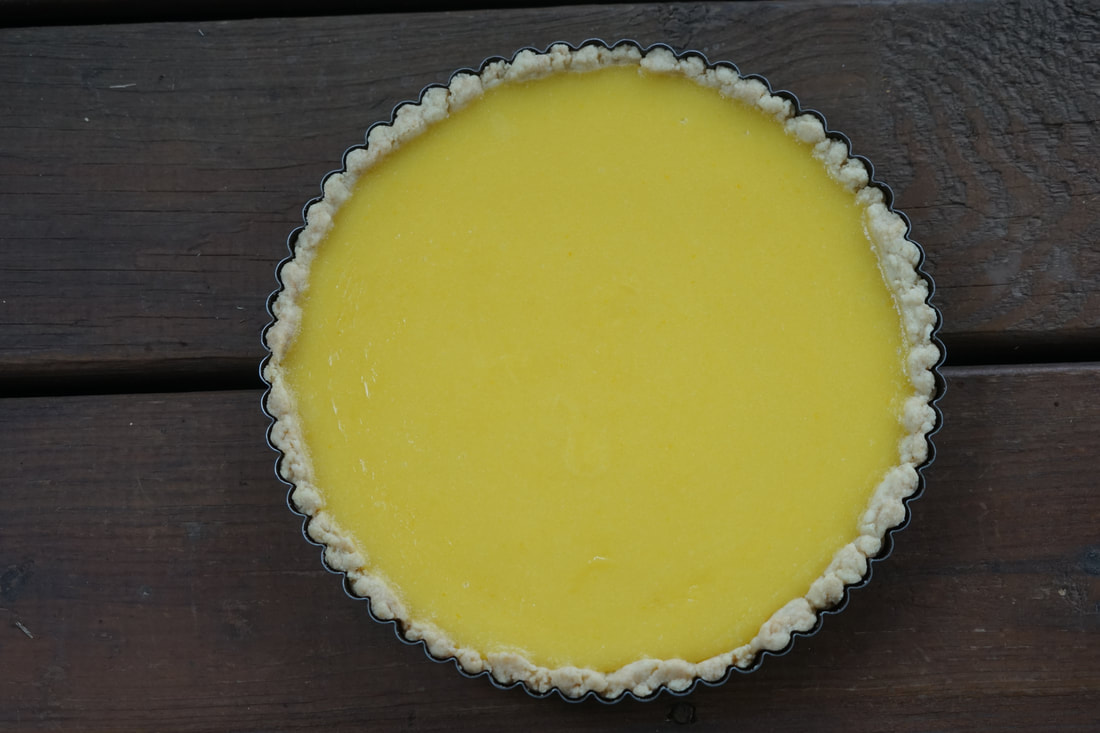
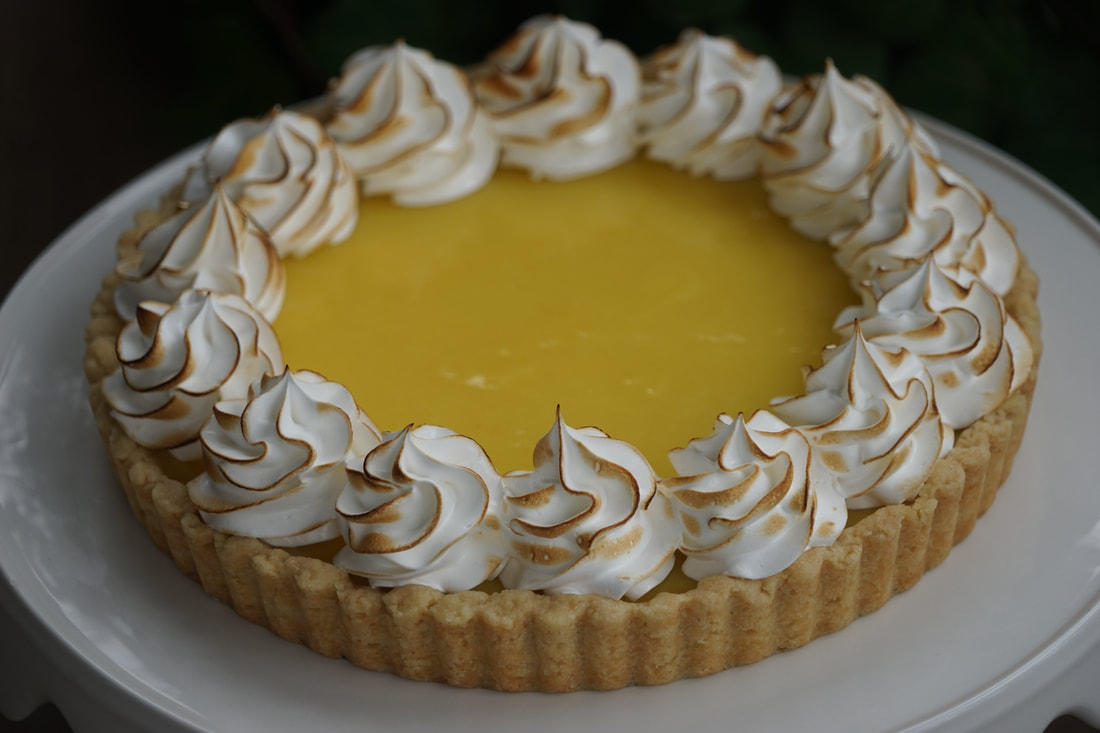
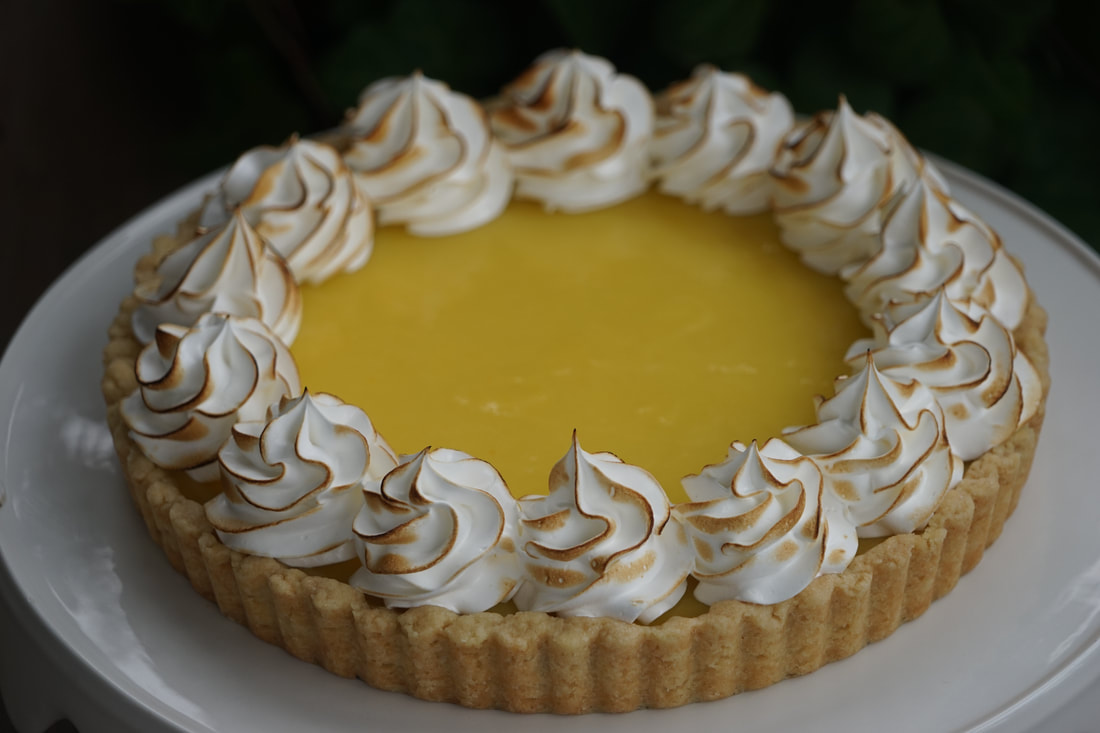
 I don't think that anyone would argue that dessert should be scrumptious, decadent and extravagant. But if you're on a dairy free diet, you know that finding a delicious sweet treat that contains no butter or dairy products can be a real challenge. I don't want to diminish the appeal of a slice of light and fluffy Angel food cake but there has to be other options for dairy free dessert eaters. I've attempted to alter quite a few recipes using dairy substitutes. Believer it or not my dairy free Key Lime Pie turned out even better than the original condensed milk version. I've tried just about all of the dairy replacements that I could get my hands on in my attempts to make dairy free recipes. I've found that dairy-free sour cream and cream cheese are very good and almost indistinguishable from their milk containing counterparts. Unfortunately, I haven't been had the same experience with butter substitutes. I haven't been able to find a butter substitute that I like. (Yes, I've tried Earth Balance and Smart Balance.) I can't get over the displeasing aftertaste from these butter substitutes. 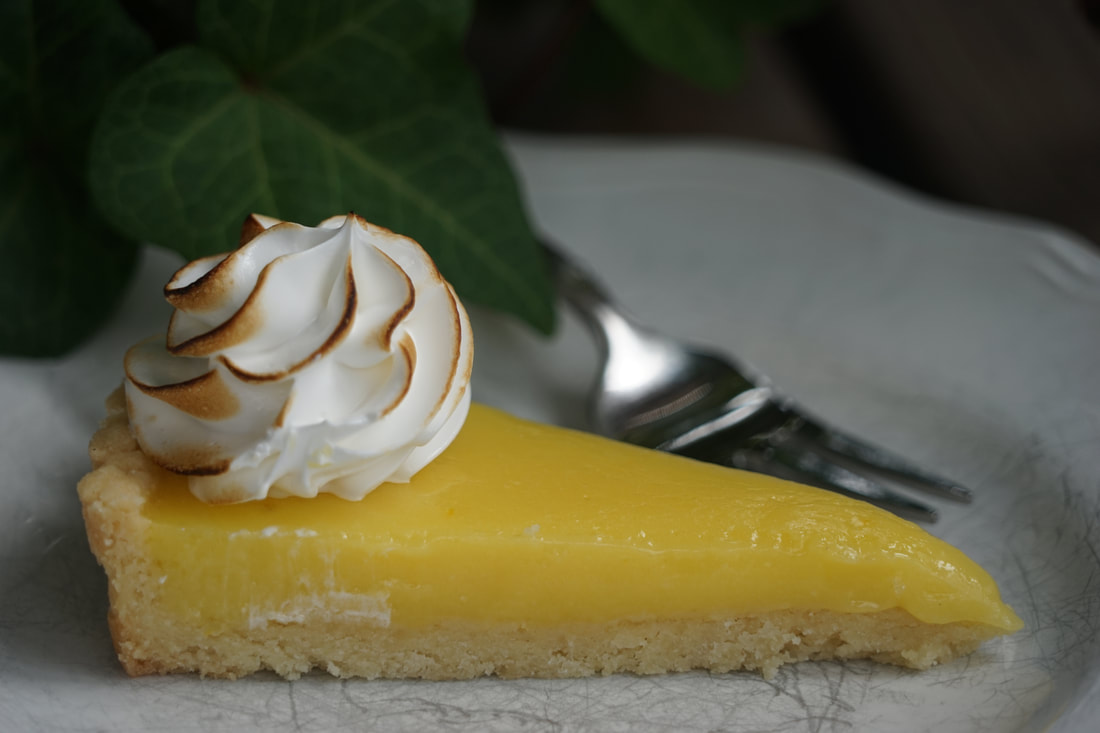 In my opinion, there really is just no good substitute for real butter. It's the real thing or nothing. The best substitute that I've found for recipes that contain butter is not a butter substitute at all, but olive oil, avocado or applesauce. That's why I was so excited when I found this recipe for Lemon Olive Oil Tart. It was perfectly dairy free - just like it was. The light and lemony tart in a crispy, crunchy crust is perfect for dairy free eaters and everyone who loves lemon treats. 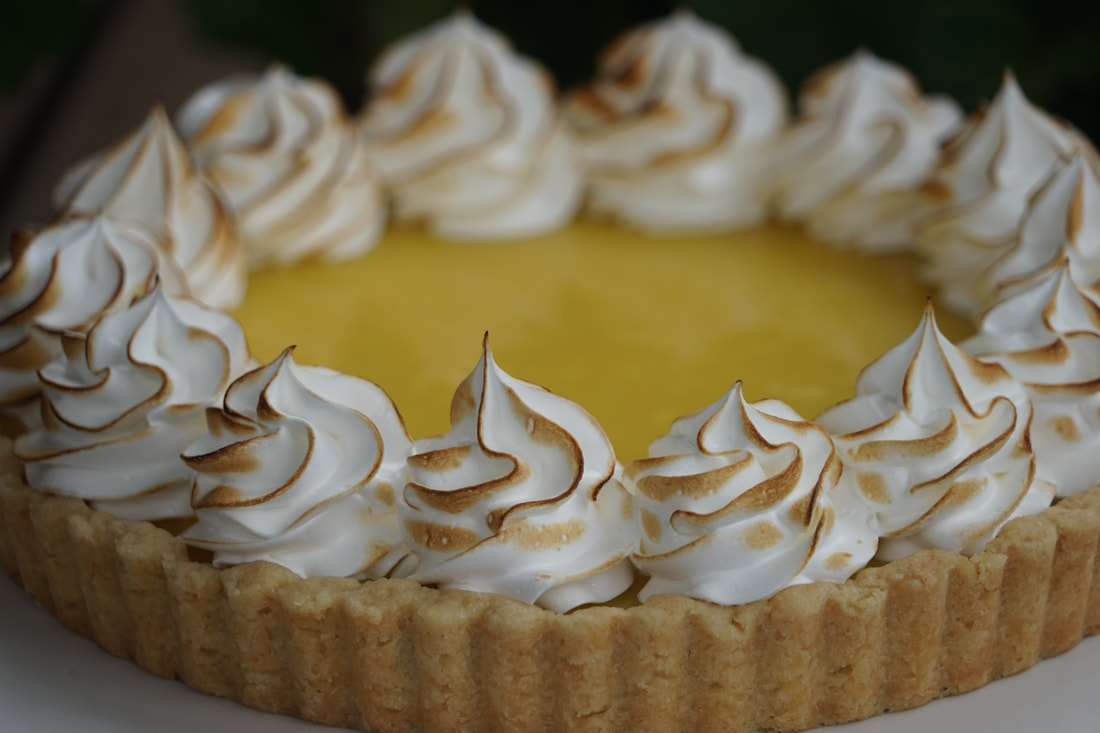 Lemon Olive Oil Tart Crust 1 1/2 cups flour 5 Tablespoons sugar 1/2 teaspoon salt 1/2 cup olive oil 2 Tablespoons water Filling 1 cup sugar 2 Tablespoons flour 1/4 teaspoon salt 3 eggs plus 3 egg yolks 1 Tablespoon grated lemon zest 1/2 cup fresh lemon juice 1/4 cup olive oil
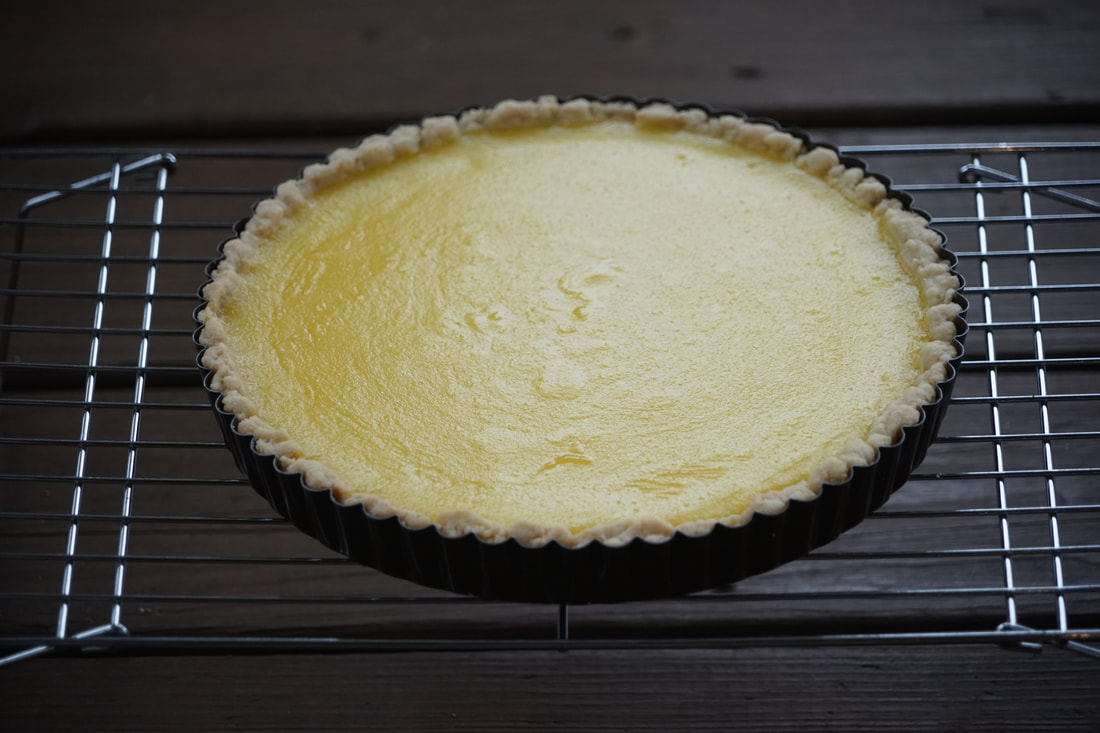
Remove from pan. 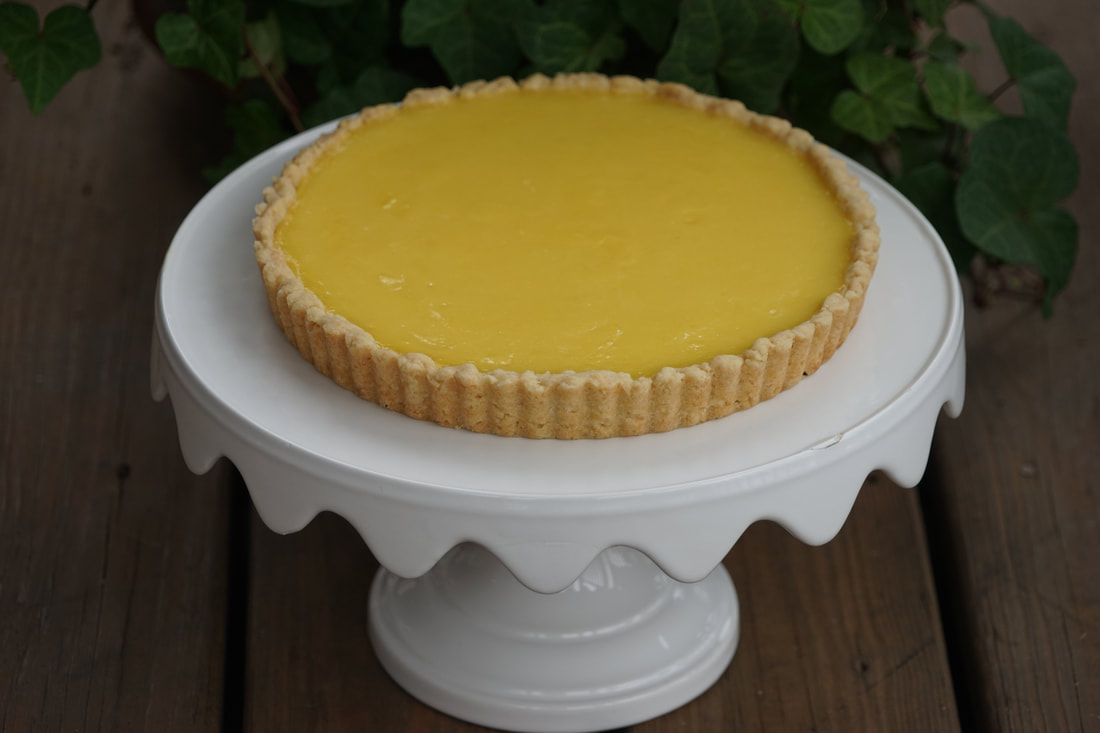 Top with meringue.
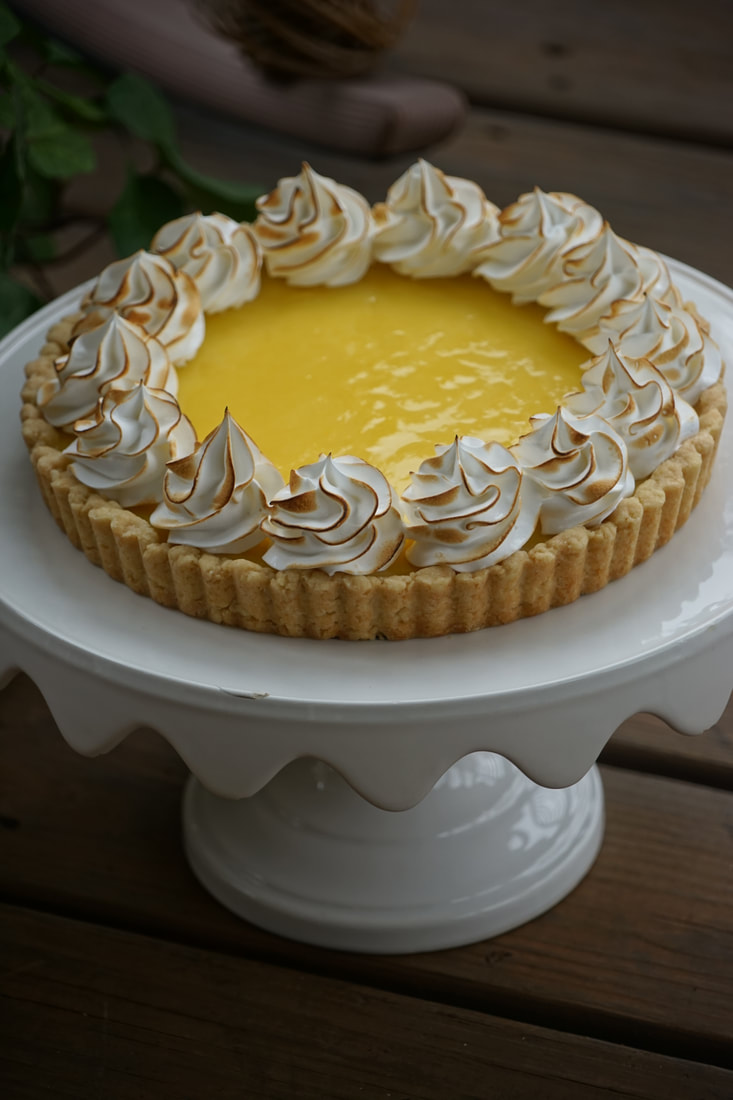
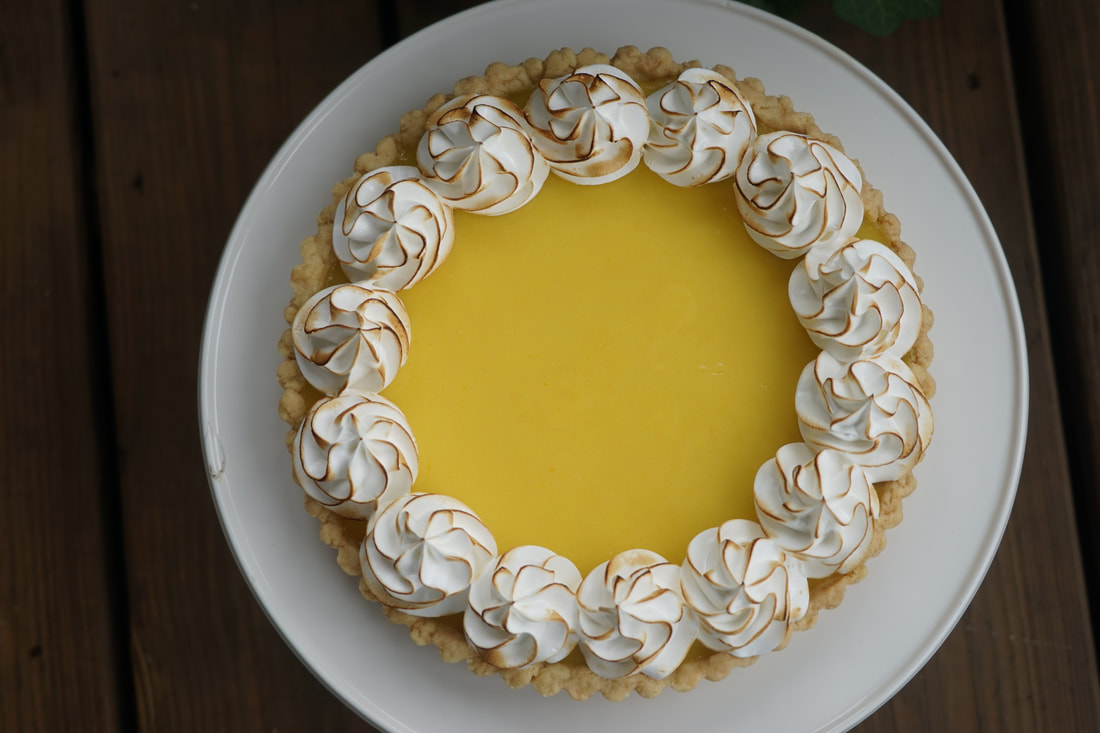
Slice and Serve. 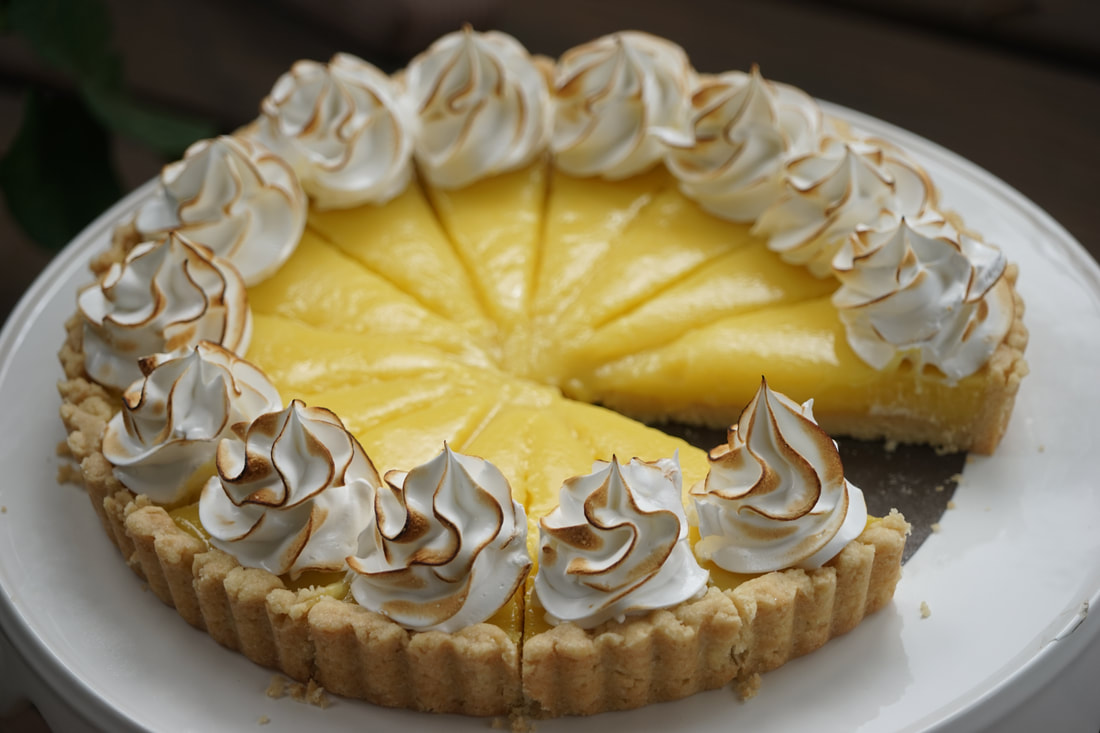 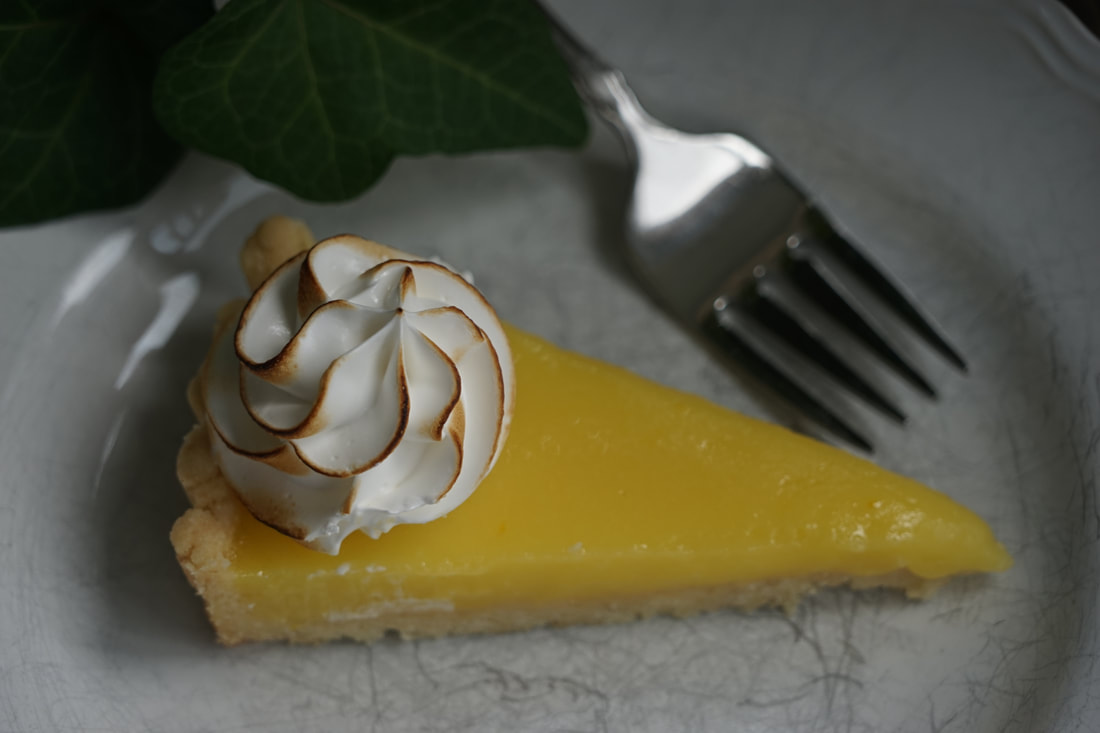 Nothing says "welcome summer" more than a meringue topped tart bursting with bright lemon flavor. I'm normally a rich, decadent chocolate dessert eater but when the temperatures soar into the upper 90's, I crave lighter, fruity desserts. This sweet lemon tart is a perfect summer treat.
Ciao!
1 Comment
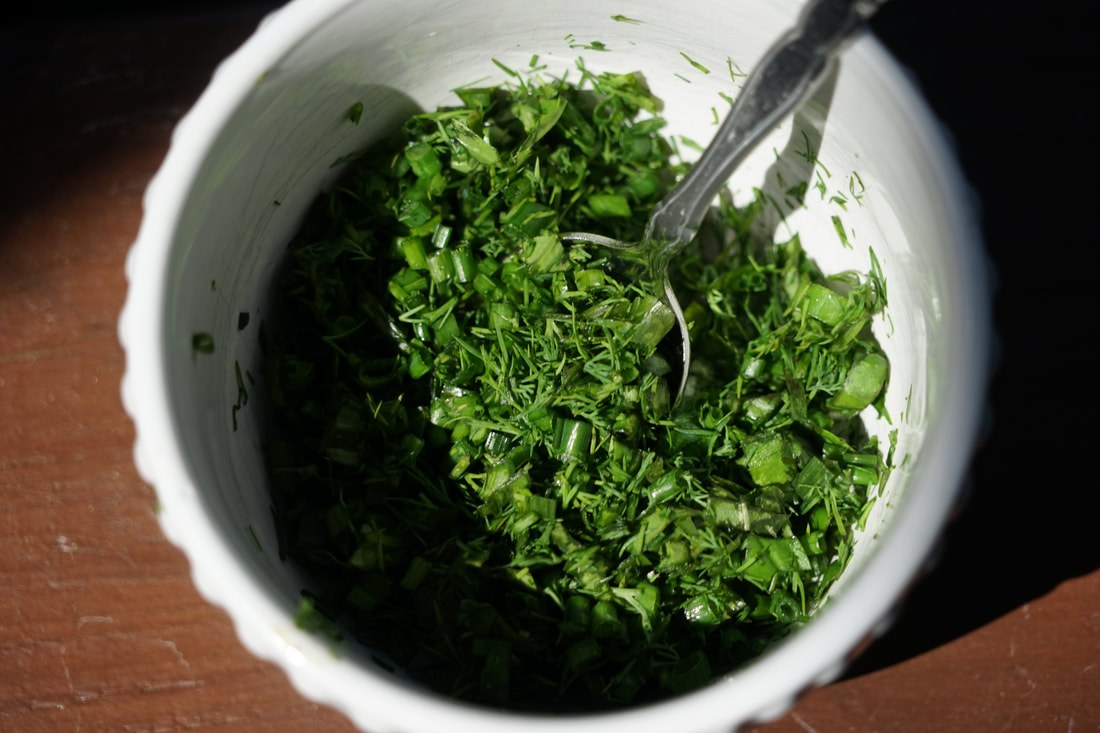
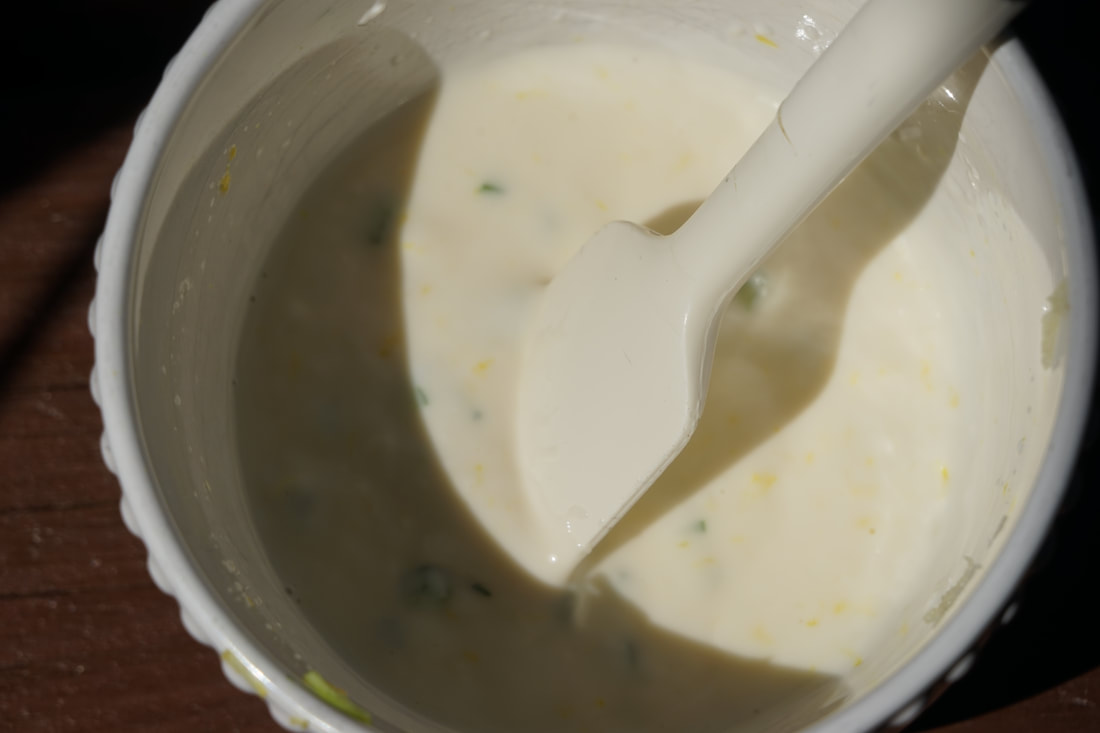
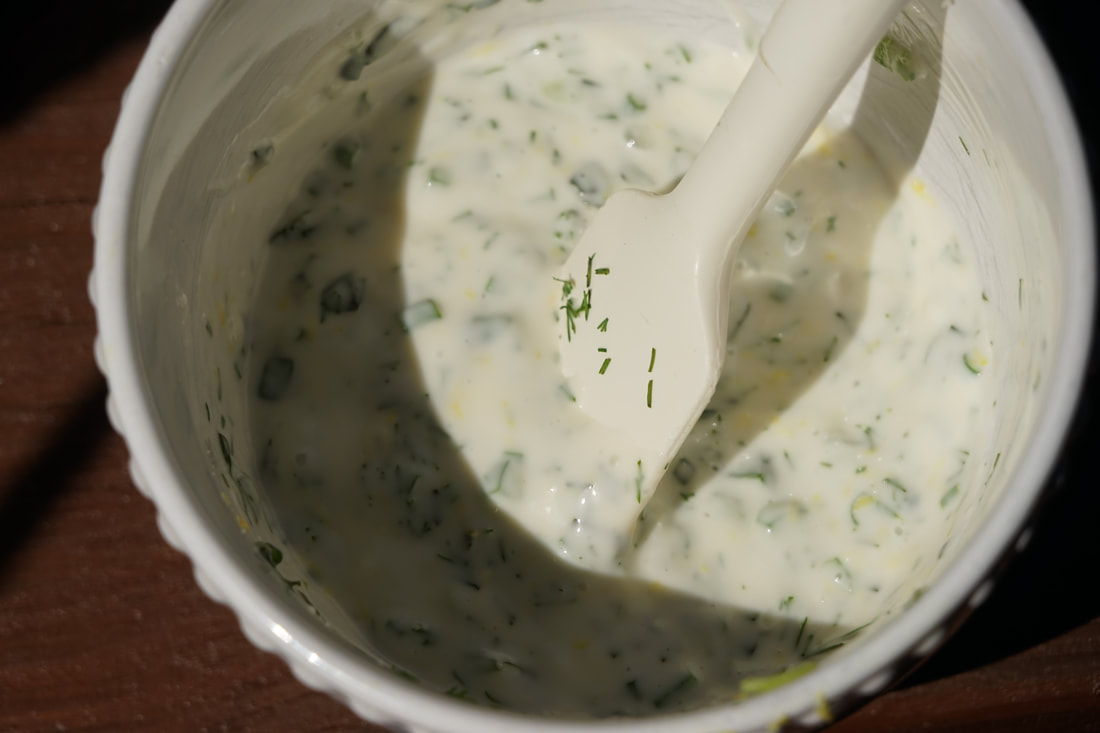
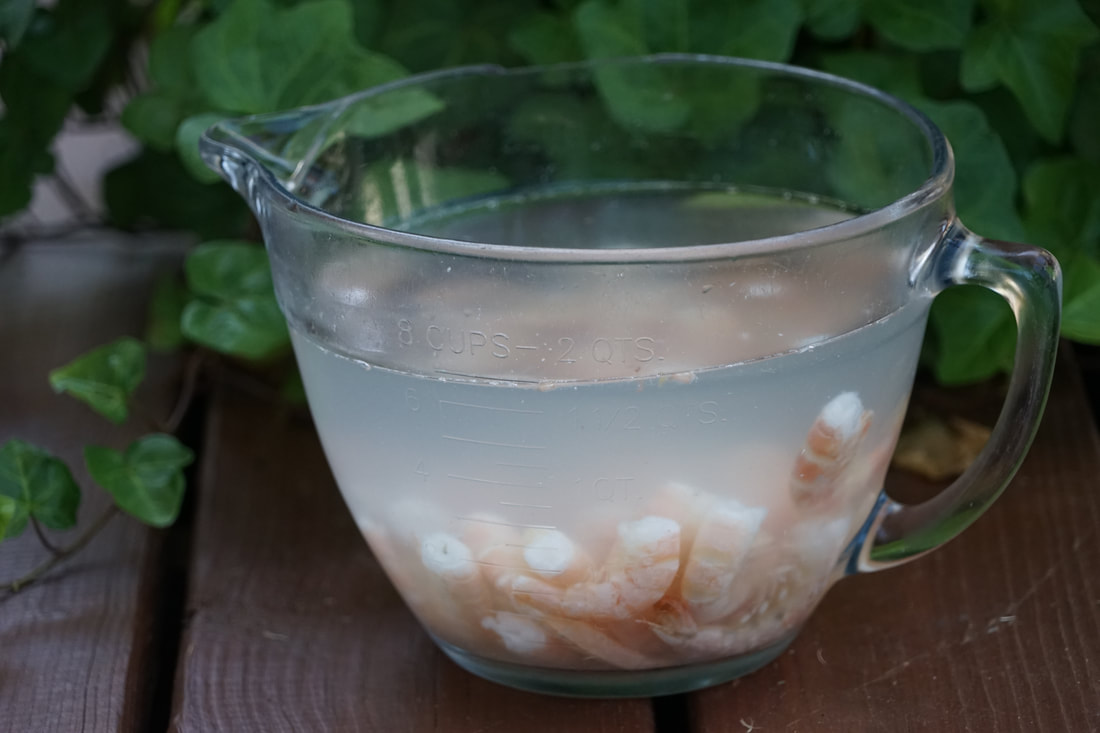
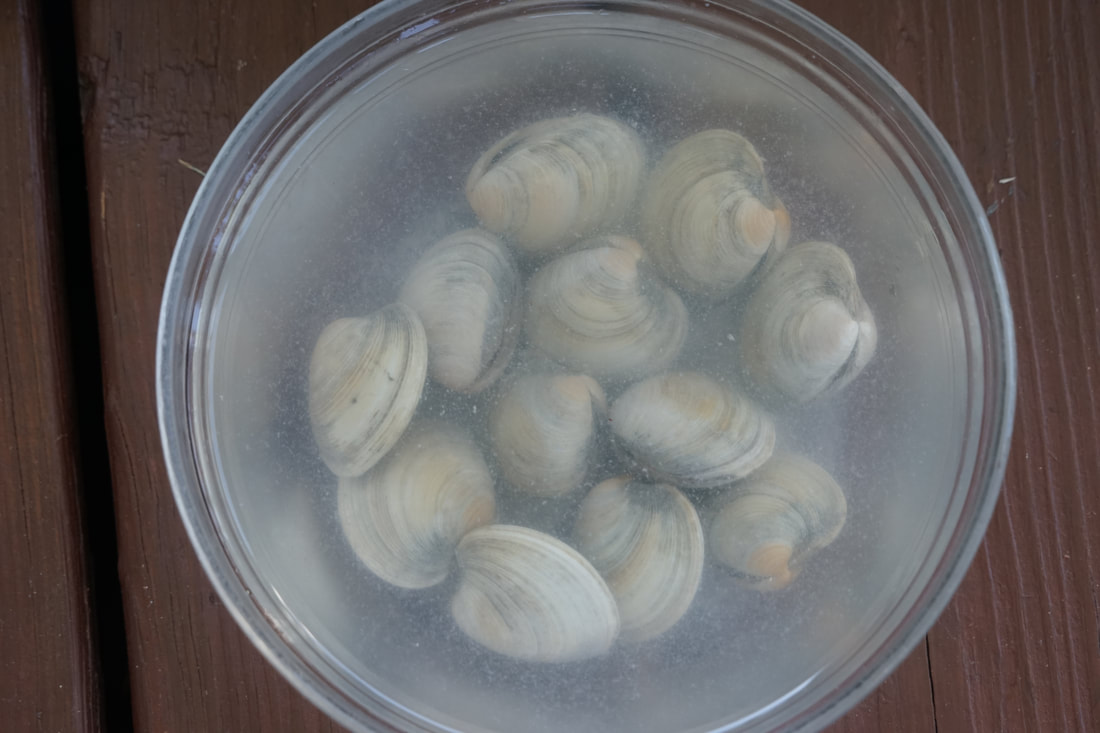
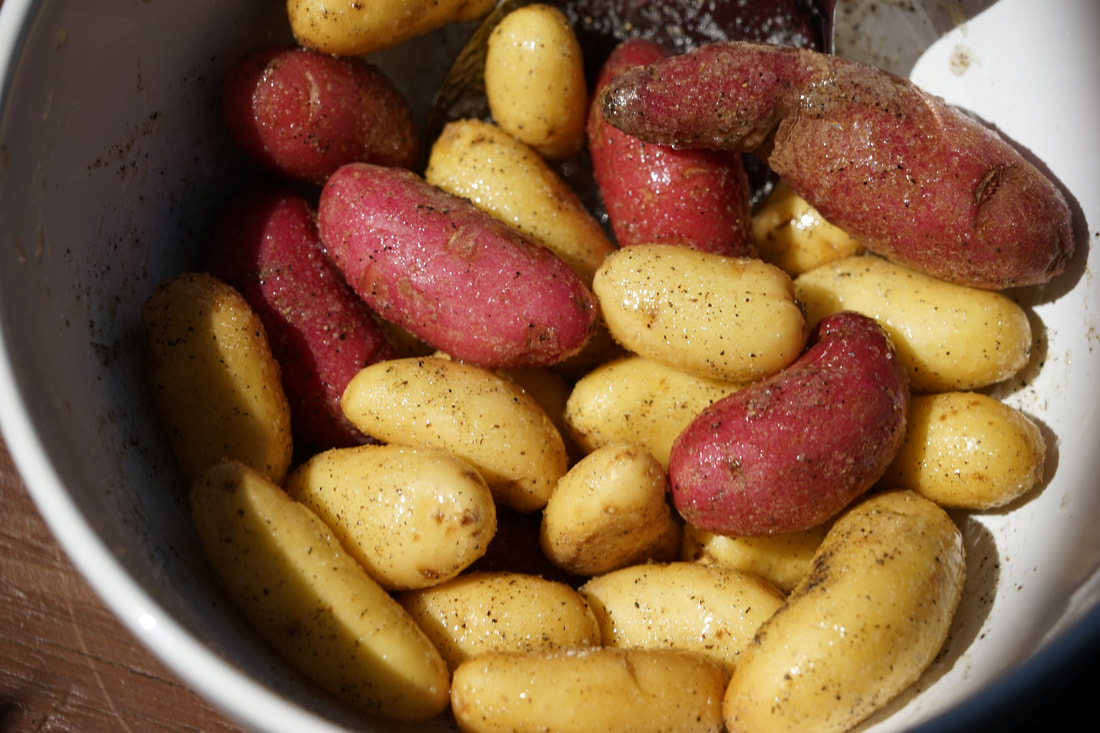
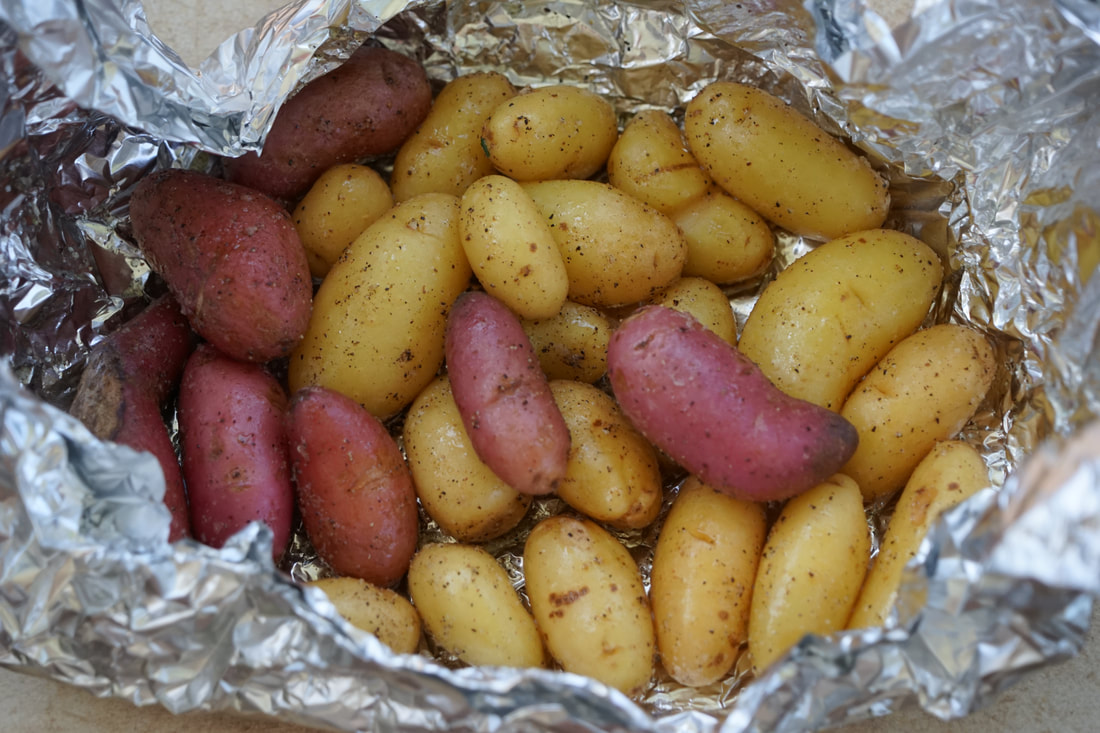
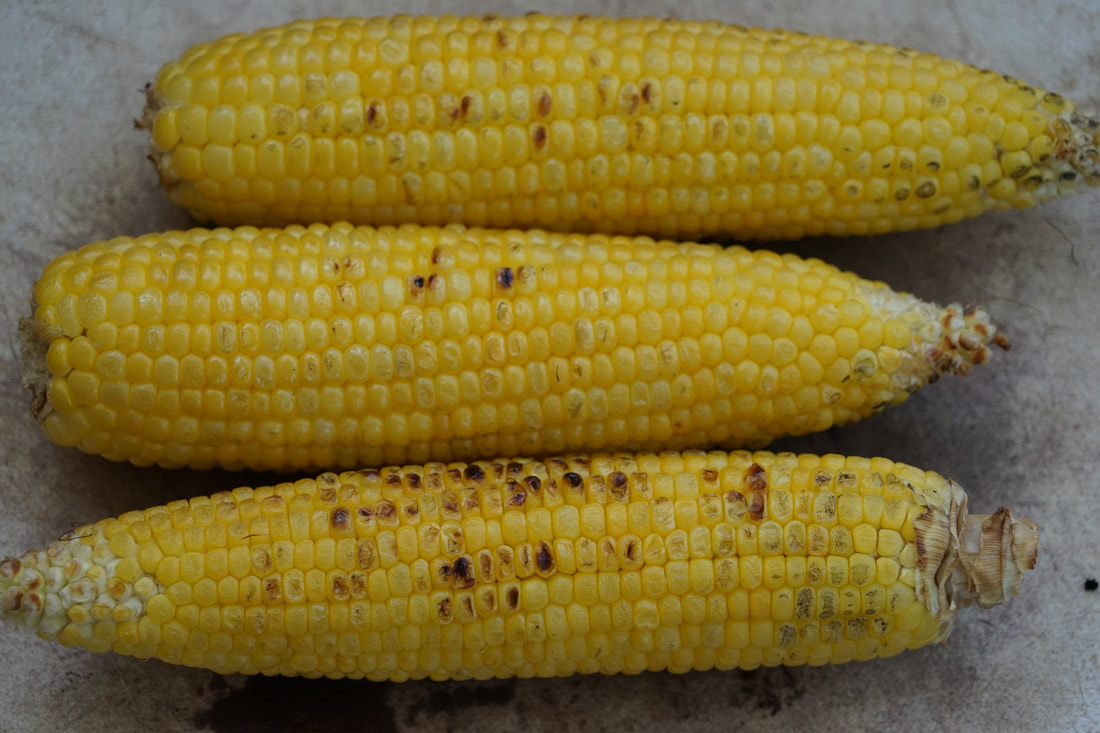
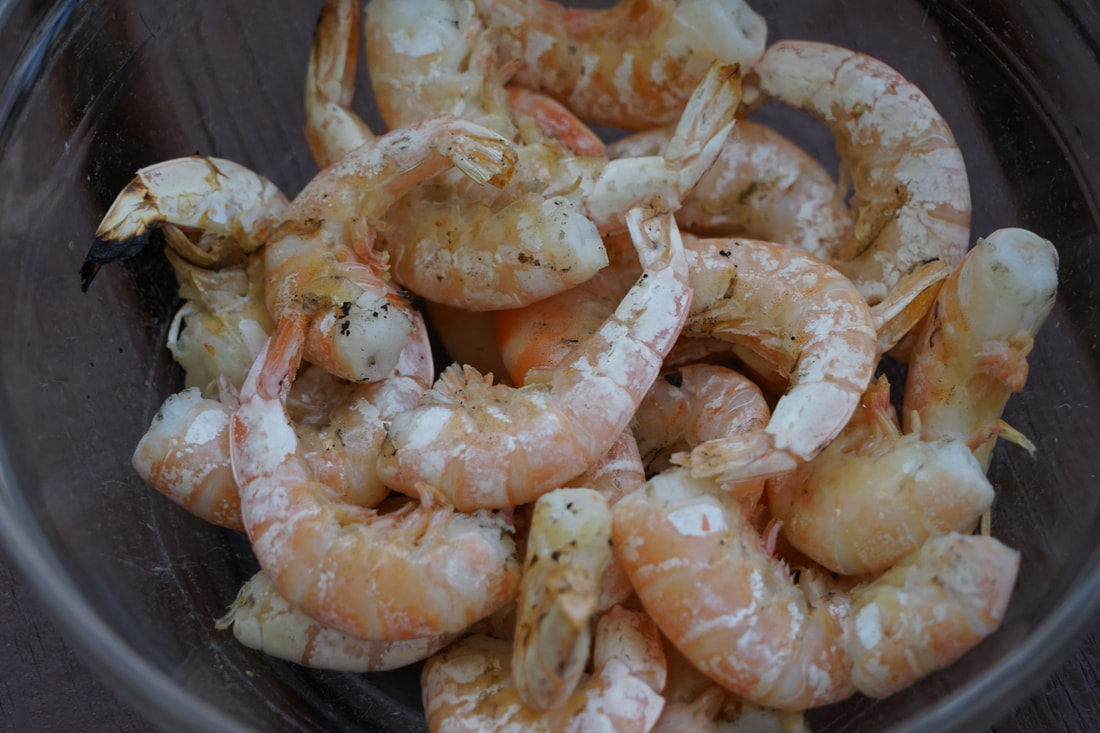
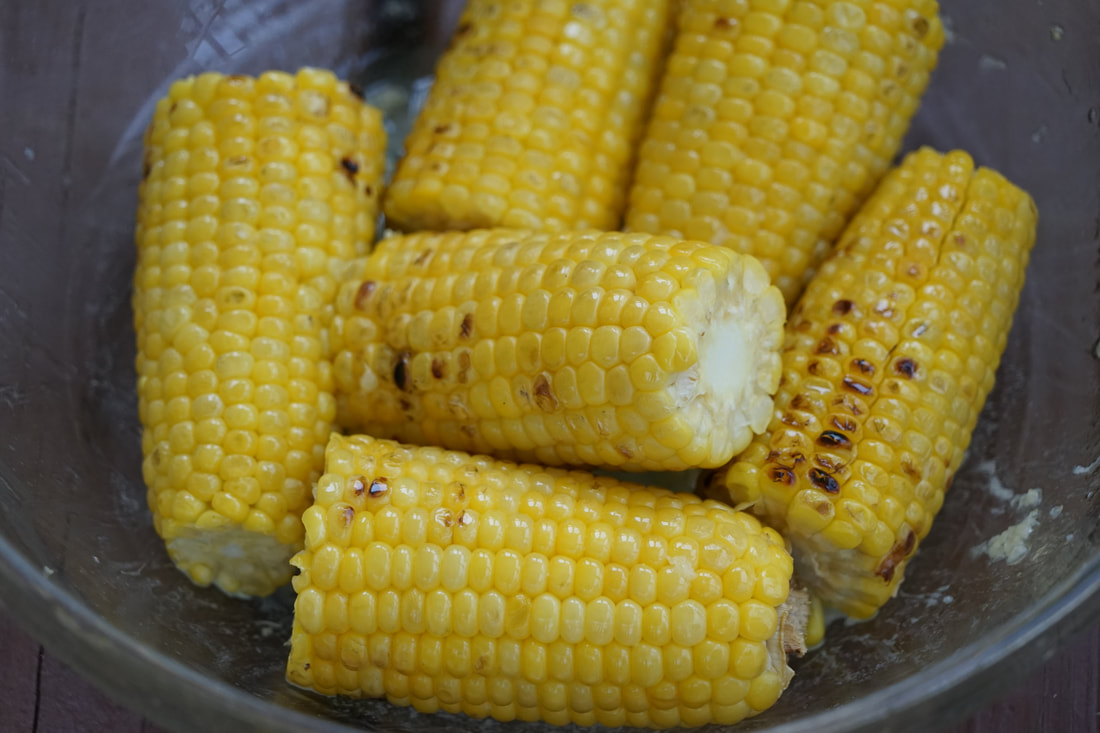
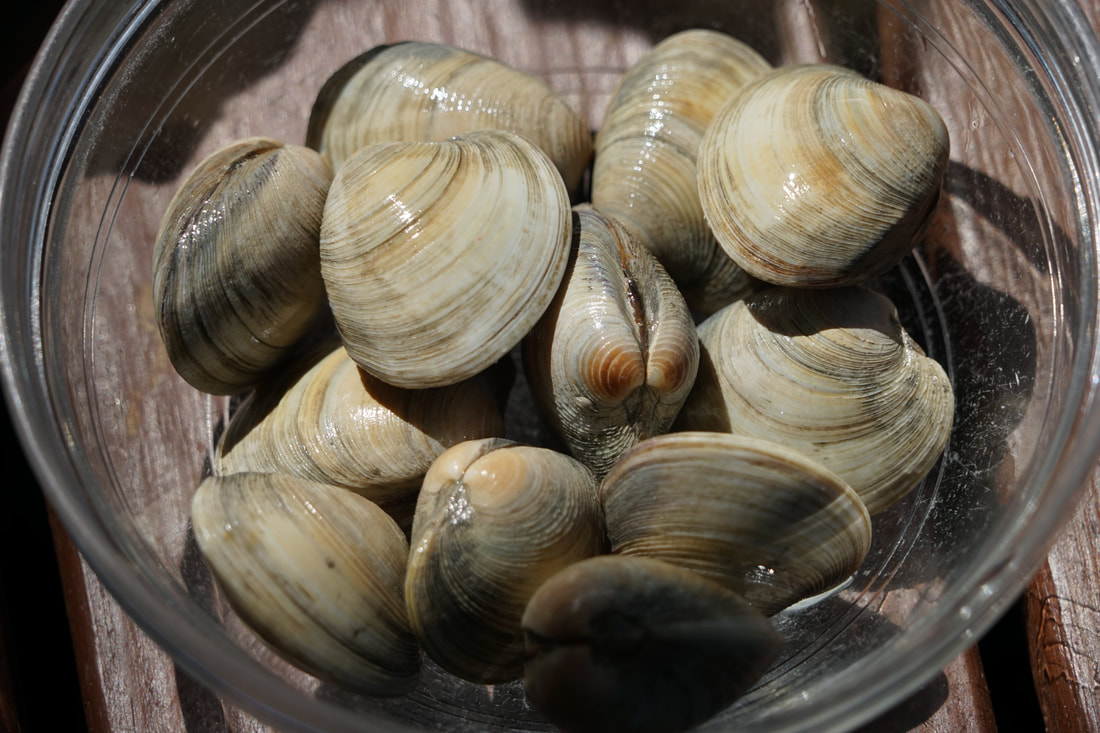
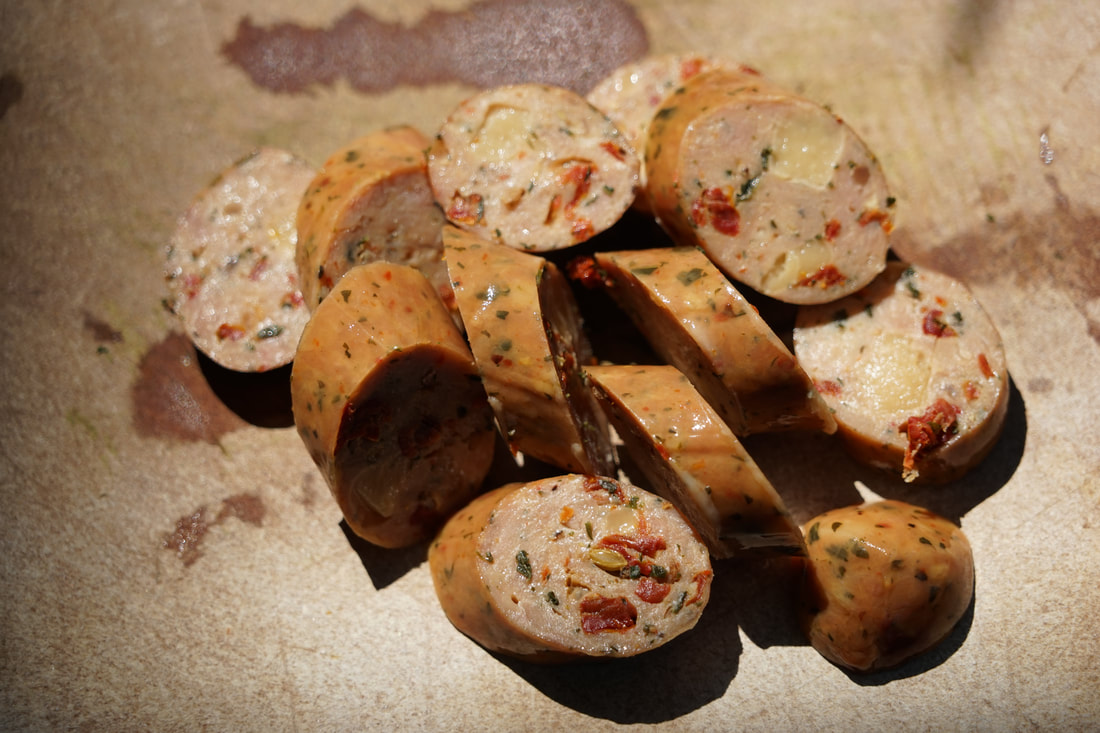
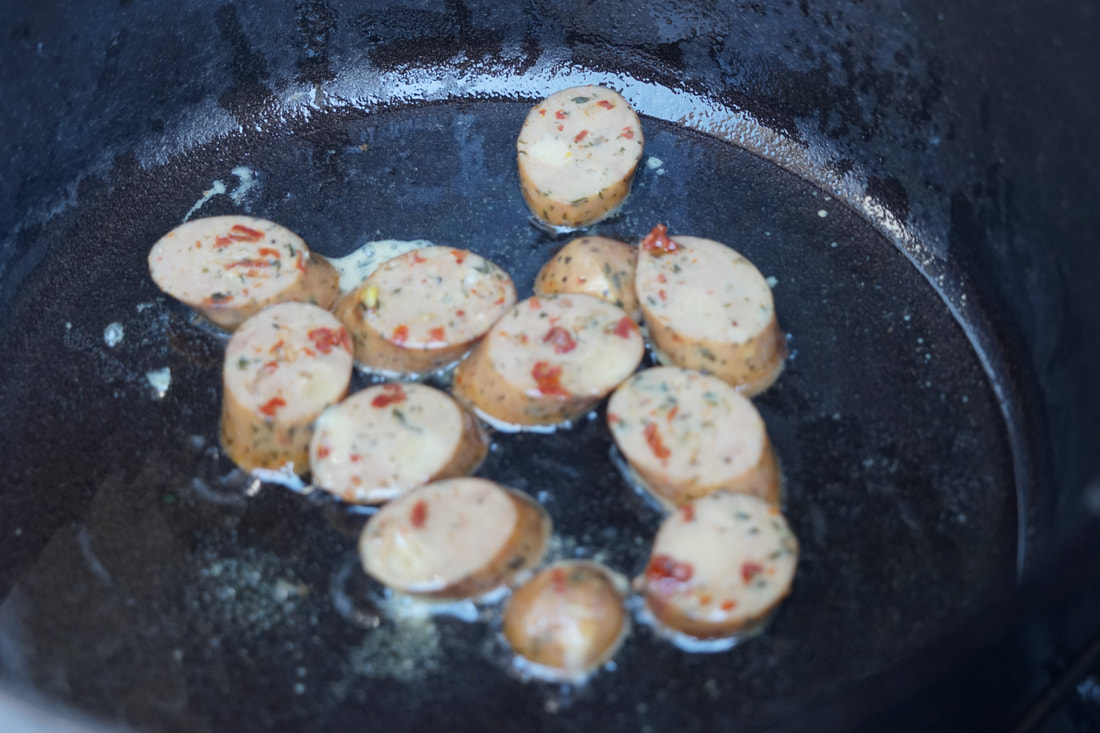
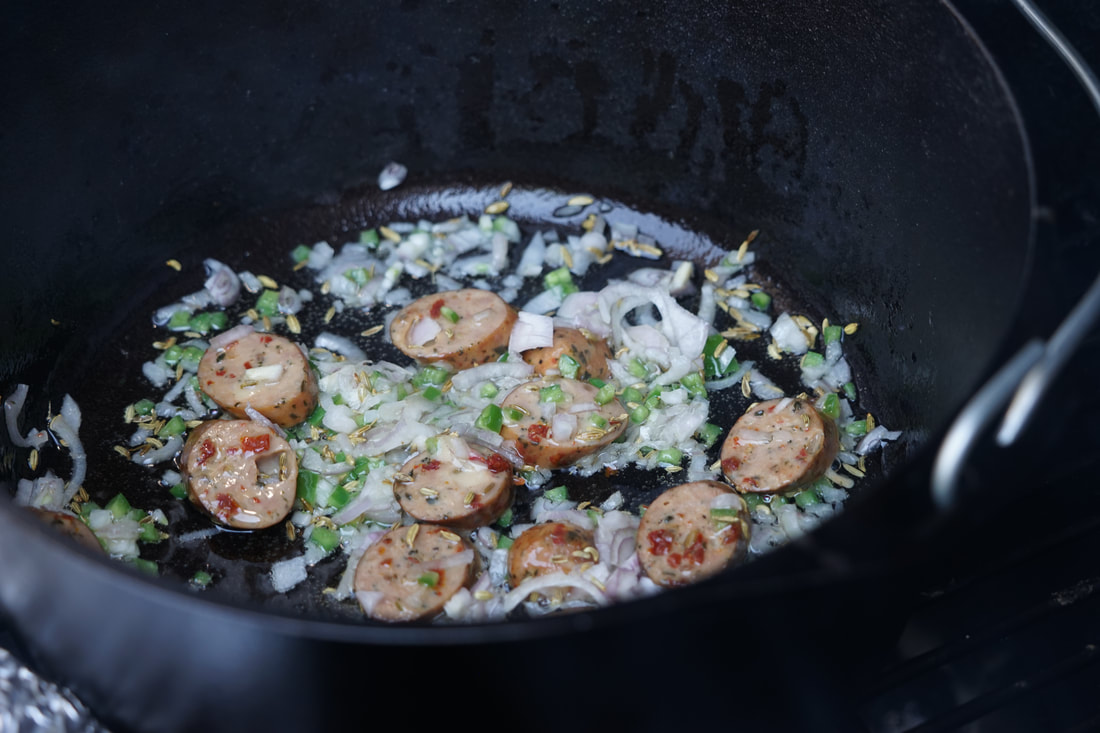
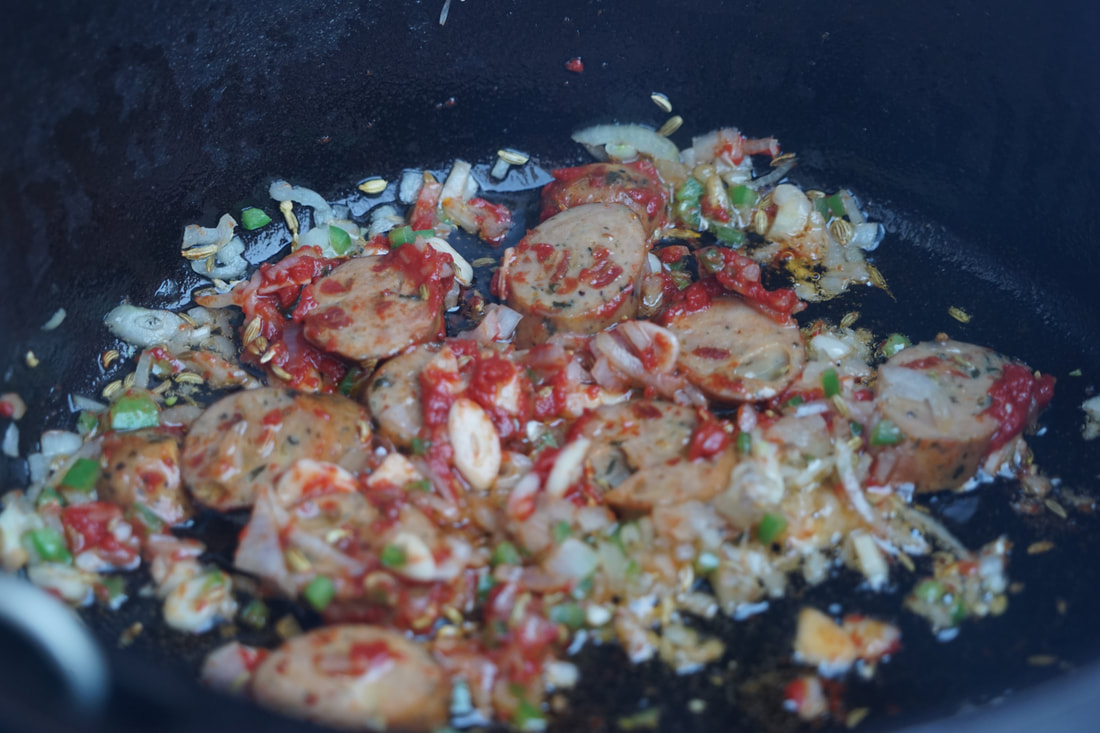
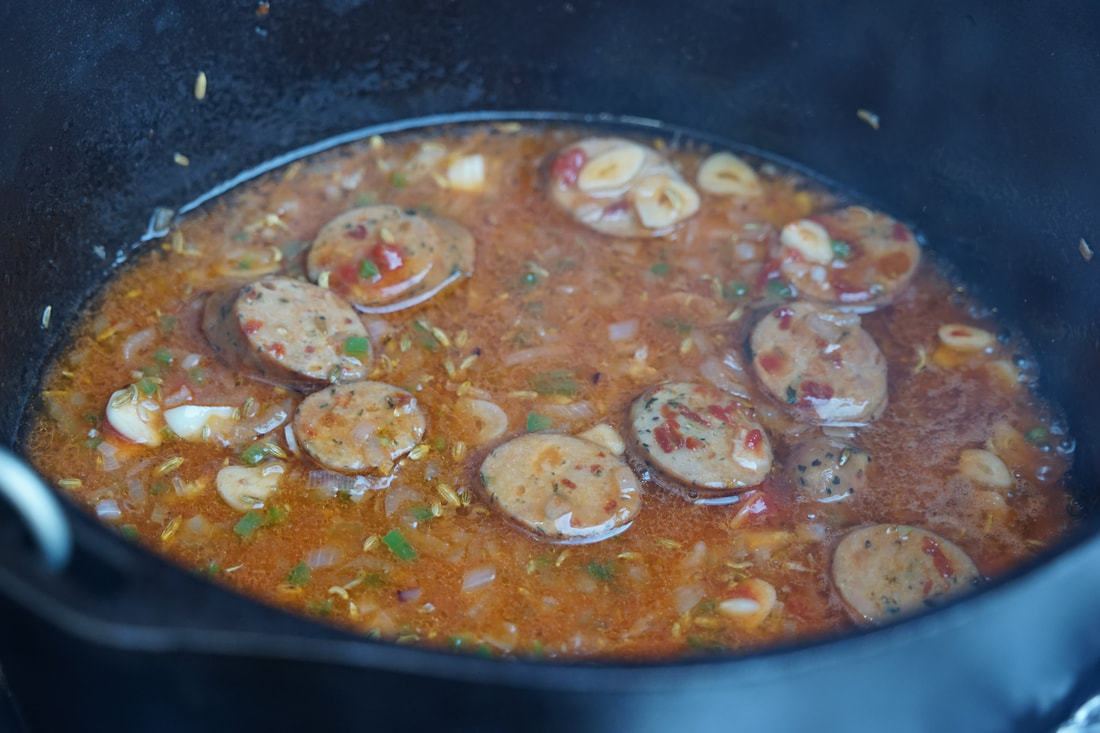
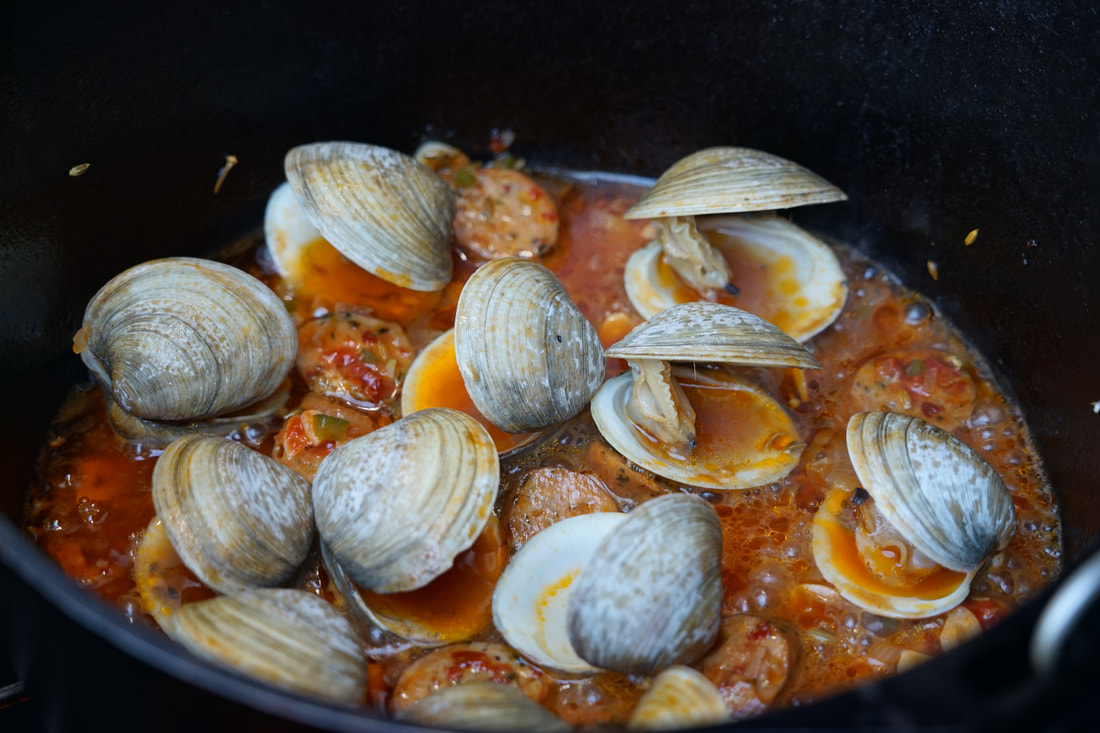
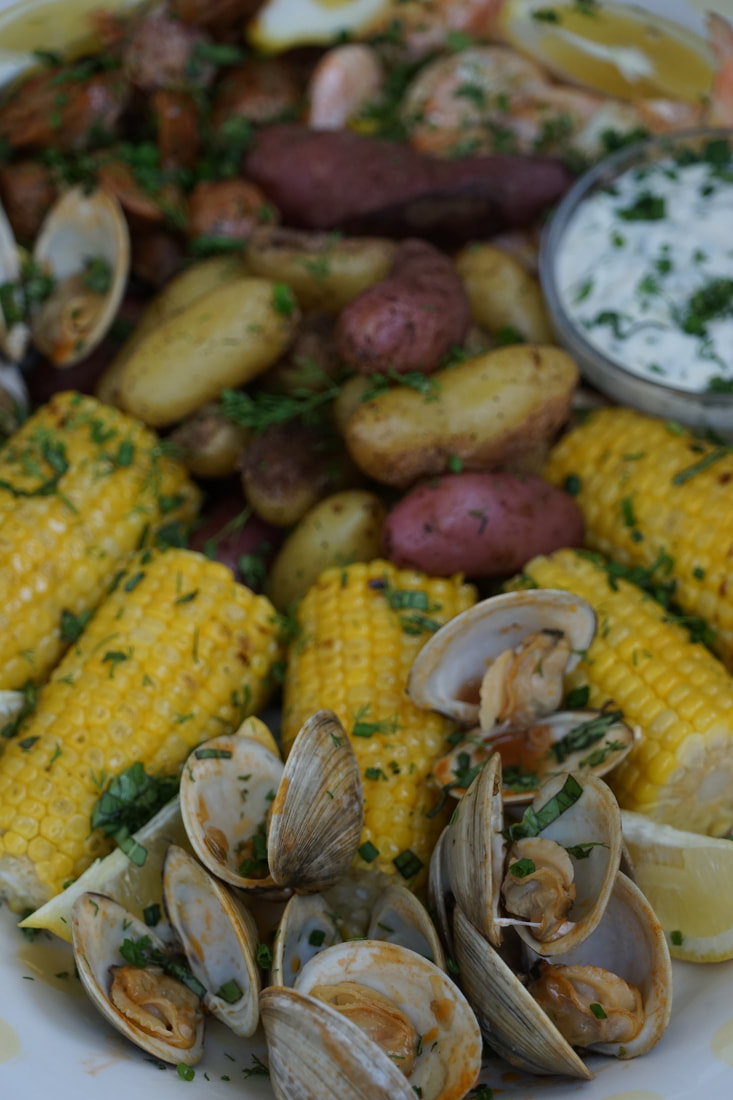
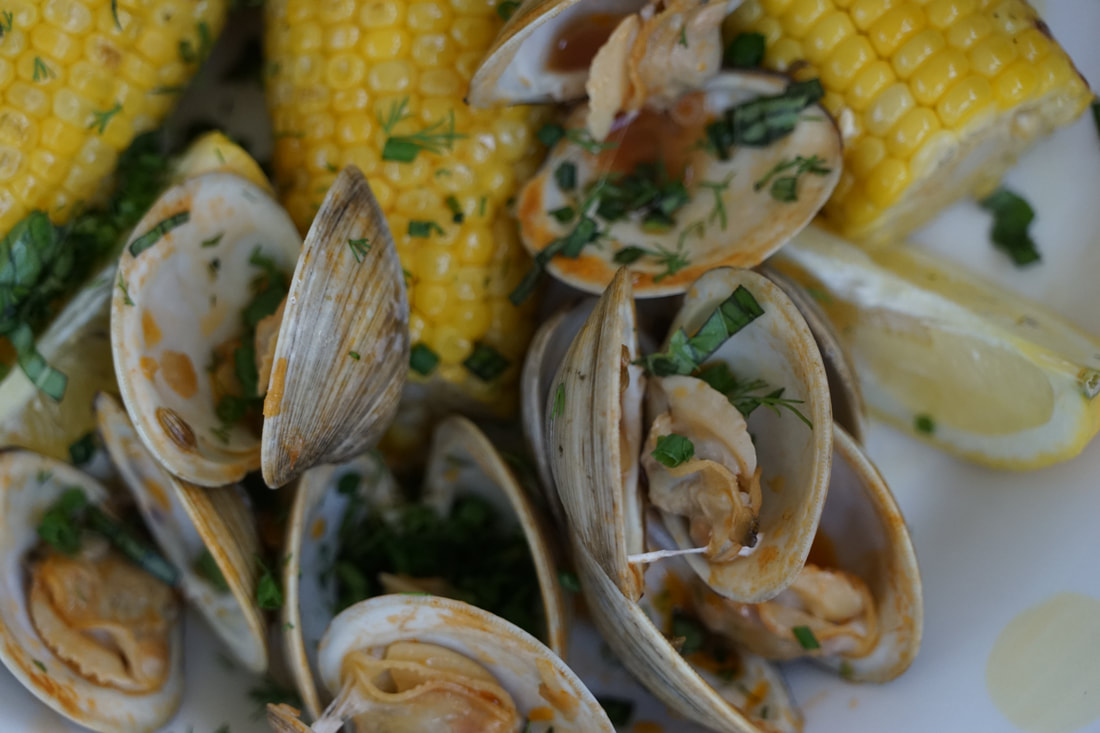
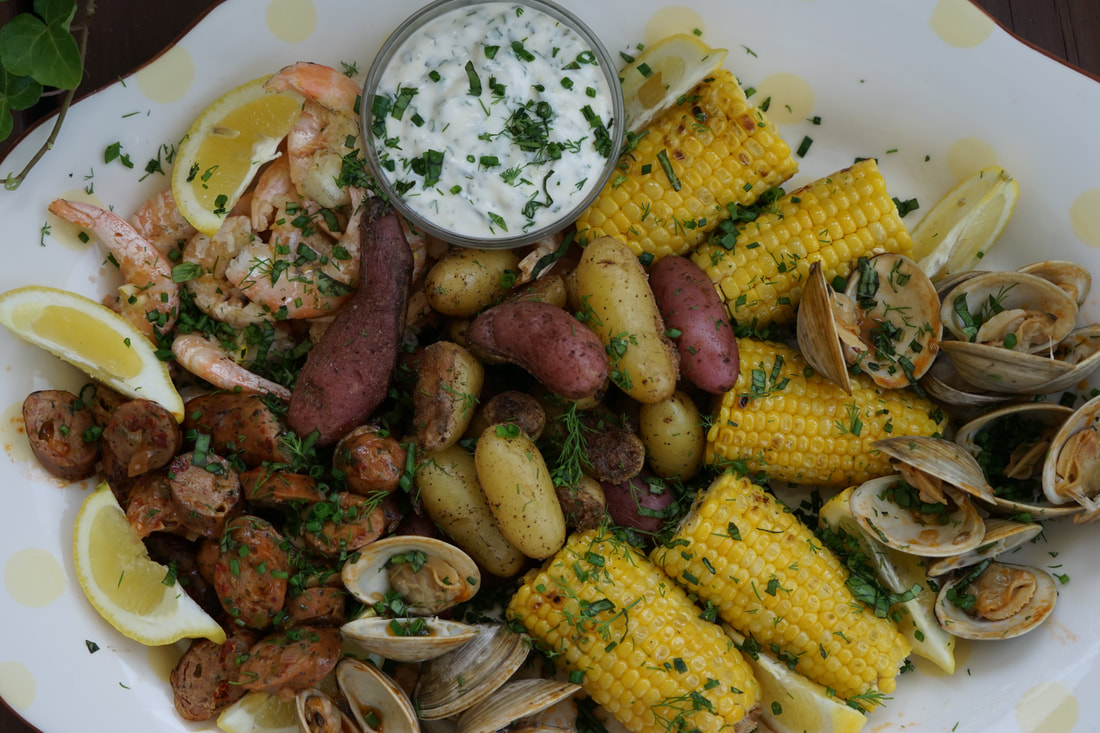
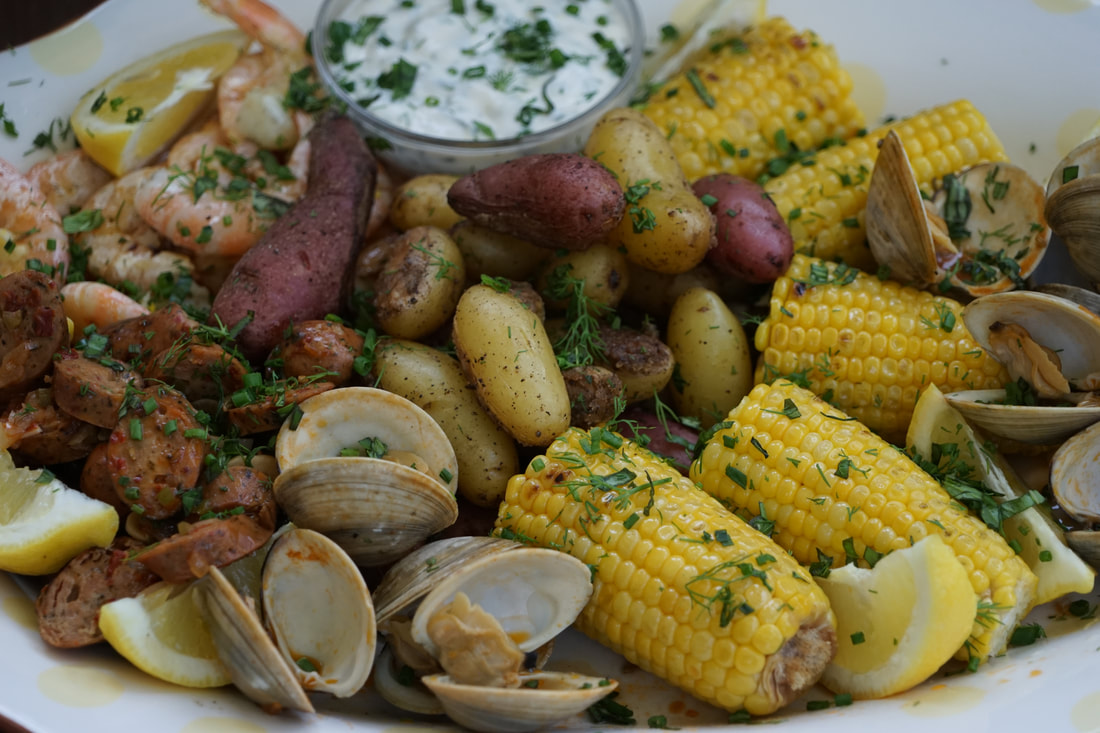 This year, we decided to kick off the summer with a Memorial Day clambake. I have to admit that I was a little intimidated by the thought of tackling a whole clambake by myself. The clams, the shrimp, the corn, the potatoes, the sausage - that's a lot of food for one person to prepare. I've dabbled a bit in trying to steam clams but I've never actually made a whole clam-bake, complete with all the trimmings. Not to mention the fact that most clambakes feed 20-30 and we are a family of 3 right now. 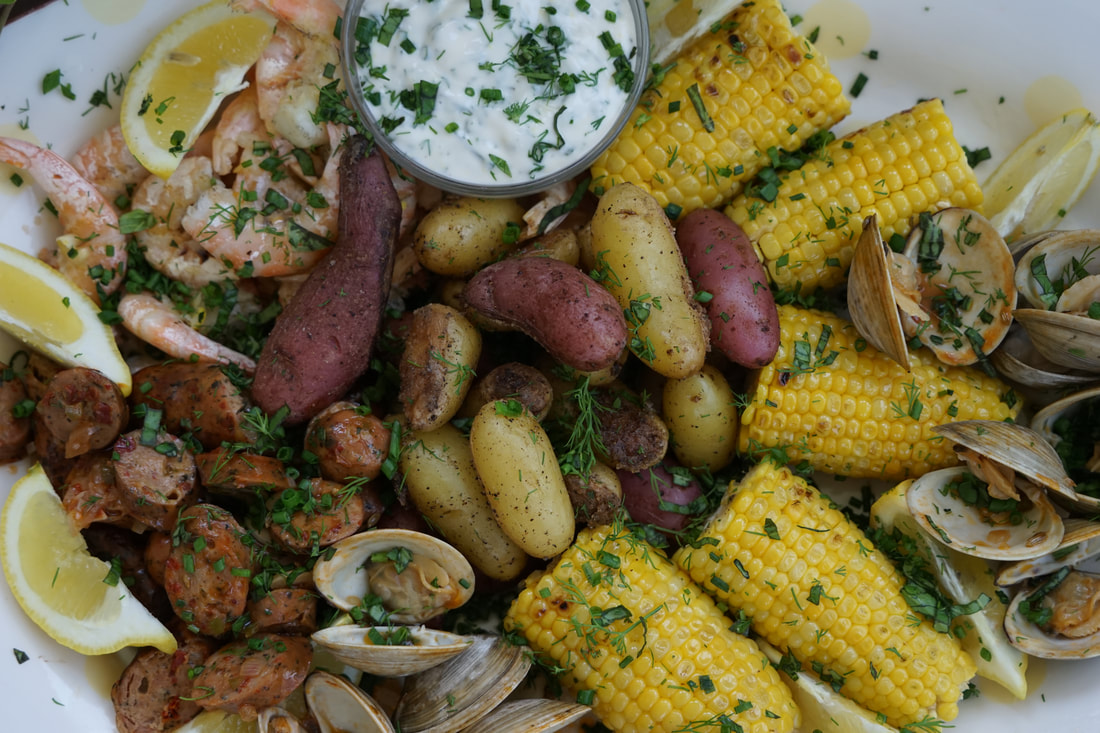 My dad has always been the clambake King of our family. He makes EPIC clambakes every Fall. I don't want to even try and recreate my dad's ultimate clambake so I've decided to go a different direction and develop my own clambake style. The less traditional - grilled clambake. Not sure if grilled clambakes even qualify as a "clambake" but I've got to say - it worked out pretty great for me. Don't be intimidated by the lengthy ingredient list, or by the number of steps in the recipe. Preparing a clambake is a process. Embrace the journey and put your own stamp on the recipe. I cut this recipe in half and it was perfect for 3-4 people. 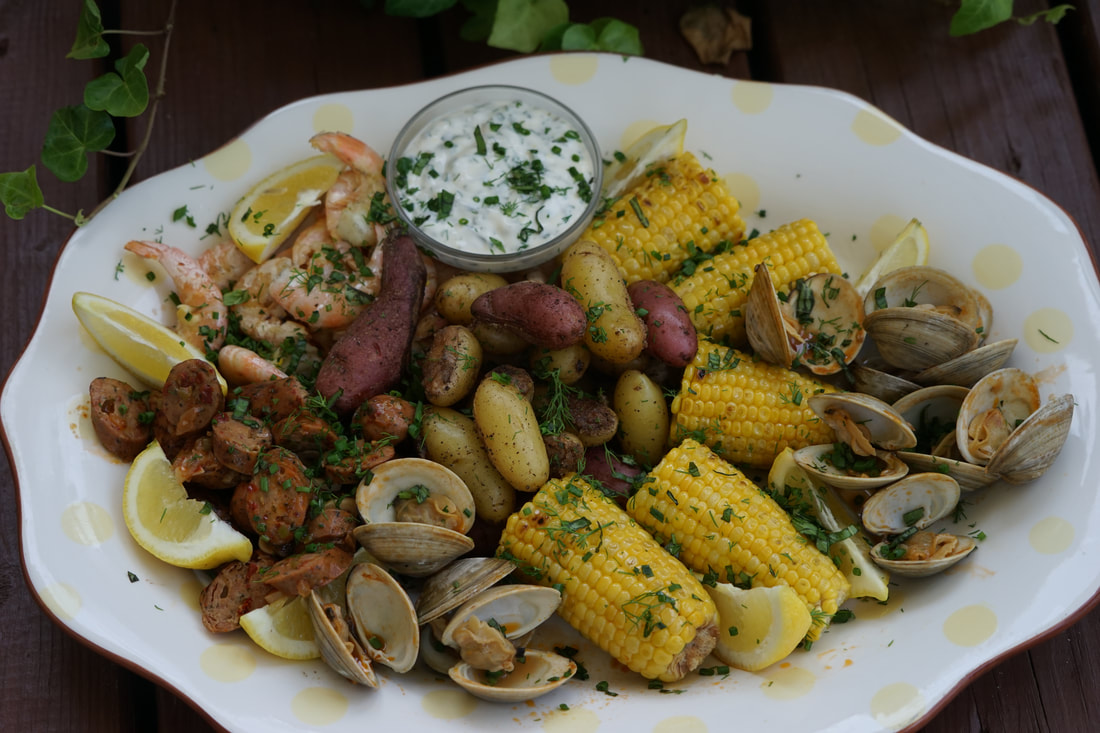 Grilled Clambake 1/3 cup fresh basil 1/3 cup fresh dill 1/4 cup fresh chives 1 cup mayonnaise 1 serrano pepper, chopped 1 teaspoon lemon zest 1 Tablespoon lemon juice 6 cloves garlic, 2 minced & 4 sliced 1/2 teaspoon kosher salt 2 Tablespoons water 24 jumbo shrimp in shell, deveined 1 Tablespoon sugar 24 littleneck clams, scrubbed 3 pounds fingerling potatoes 1/2 cup olive oil 2 pounds sausage (I used a caprese chicken sausage) 4 ears corn, shucked 1 stick butter, melted 1/2 small fennel bulb, thinly sliced 2 shallots, thinly sliced 1 Tablespoon tomato paste 1 cup dry white wine
Serve with lemon wedges, reserved herbs and herbed mayonnaise.  Here's the skinny of the grilled clambake. 1.) The herb mayonnaise sauce is completely unnecessary. Everything is SUPER flavorful anyway and we didn't see any need to add additional sauce or herbs to any of the seafood or vegetables. 2.) The corn does not need to be drenched in garlic butter. The grilled corn would have been just as tasty with just a sprinkling of the fresh herbs. 3.) The broth that the clams cook in is by far the most tasty part of this whole recipe. Do not throw it away or waste it. Serve it on the side and mop up every ounce of this liquid gold with your shrimp, clams or extra bread.
We devoured this platter of goodness in no time. It took about an hour and a half to prepare all of the food but it was definitely worth it. Sooooo tasty. Ciao! 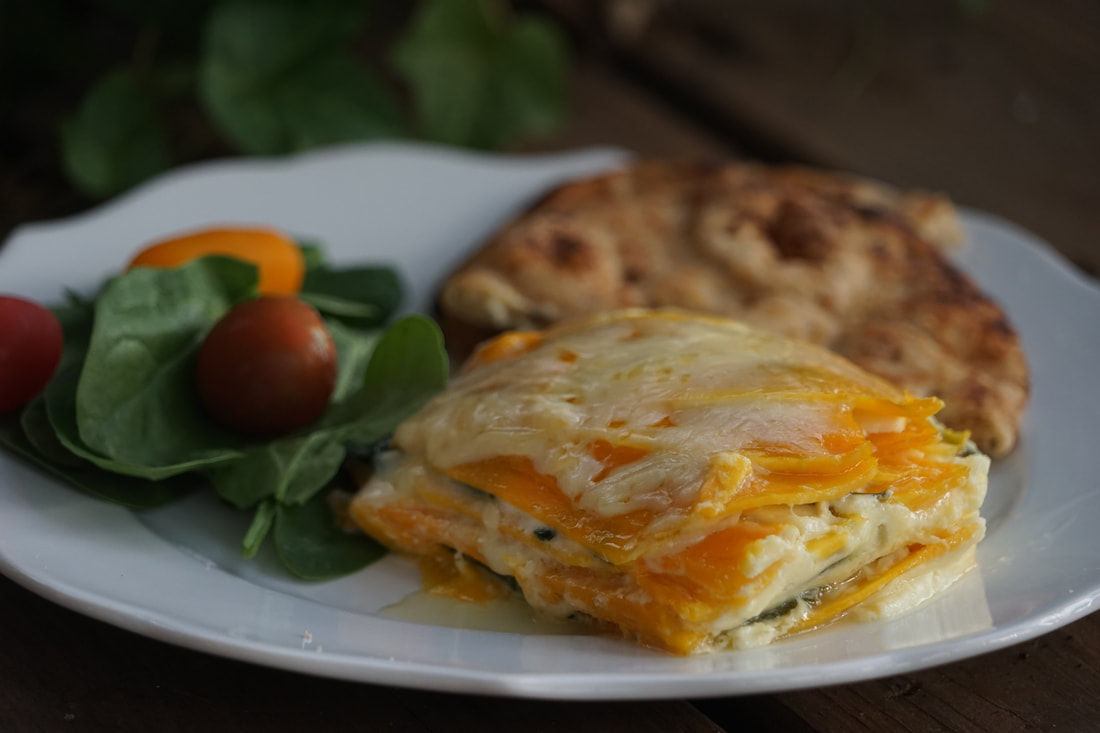 The wait is over. I've decided to bring back my "Monday's with Mia" posts! I know this is big news - try and contain your excitement. If your Mondays have been melancholy and just haven't been the same since I stopped posting adorable dog pictures on my instagram feed - never fear. Your Monday morning is about to take a change for the better. Our beloved Weimaraner turned 12 last October and I feel like it's only right that she would get to take the instagram spotlight once a week. If I were to describe my four legged family member in three words, they would be: mischievous, astute and phobic. She has a BIG personality that is all her own. She's hides when she hears rain or thunder. Anyone wearing a hat - terrifies her and she fiercely protects her yard and her family from anyone walking by our house. She also smiles, yes, smiles, when she sees her favorite people. (By the way, that doesn't include me.)
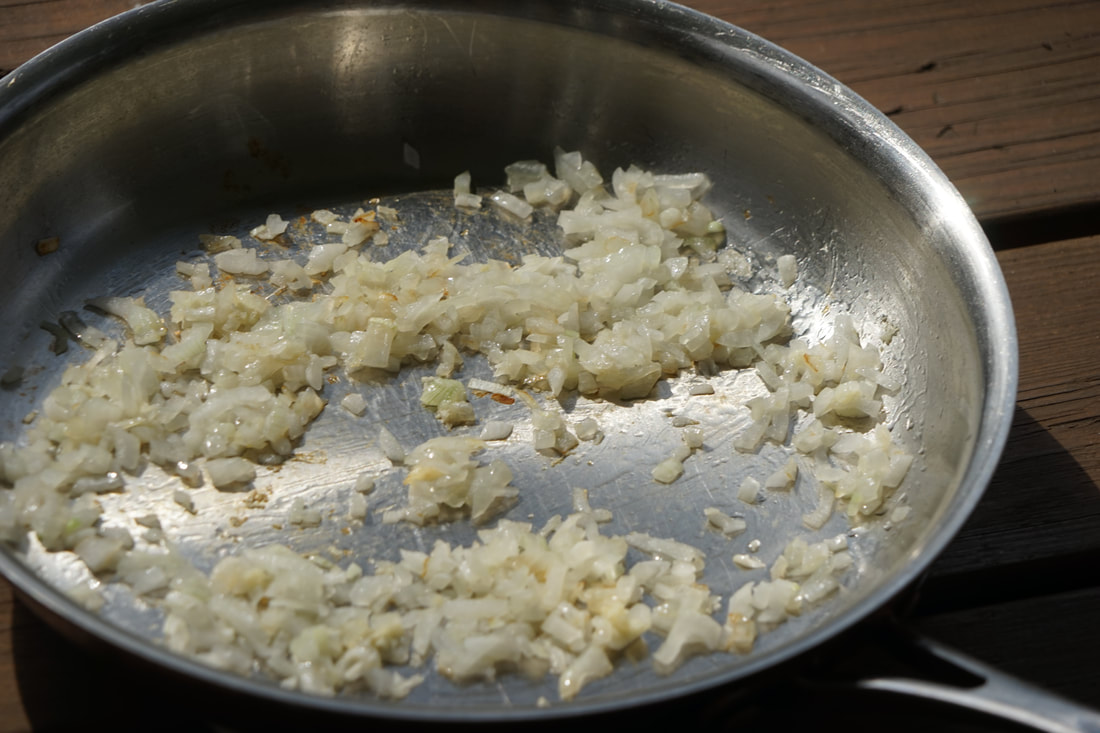
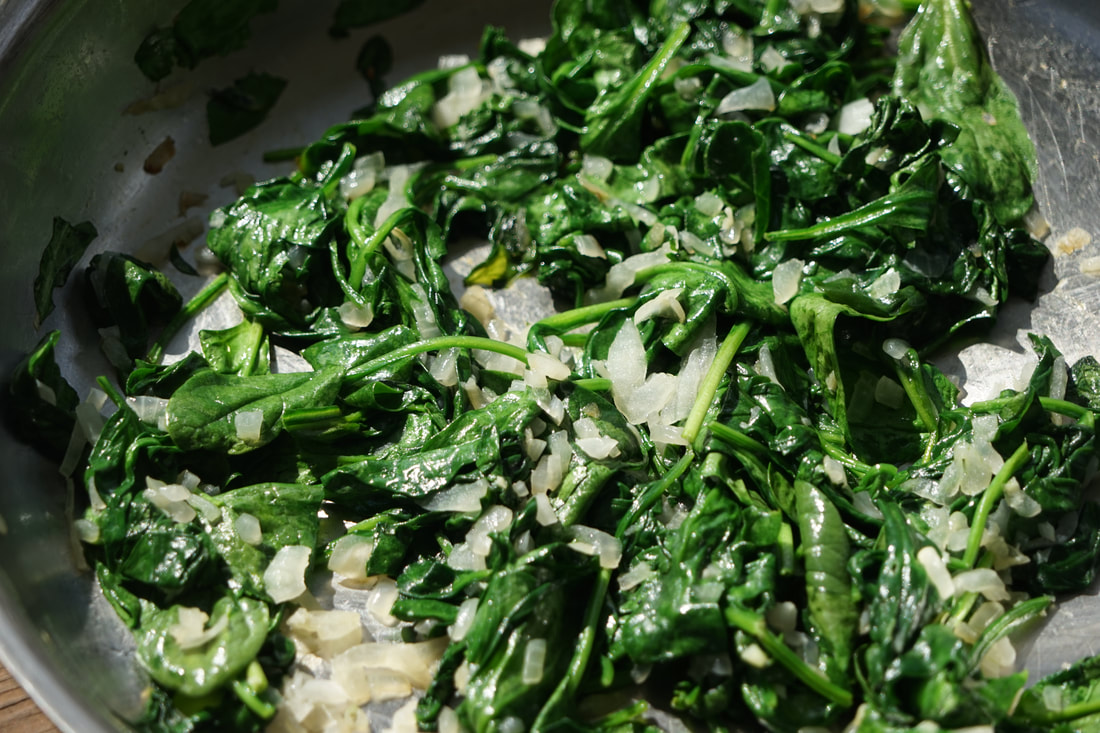
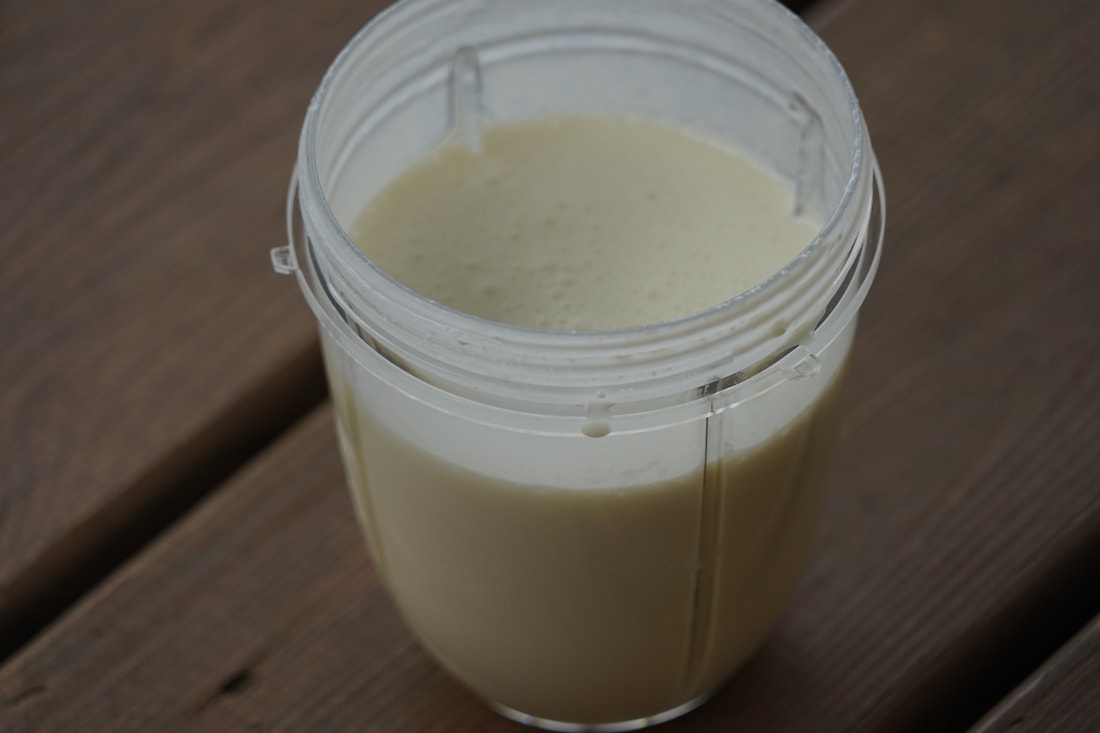
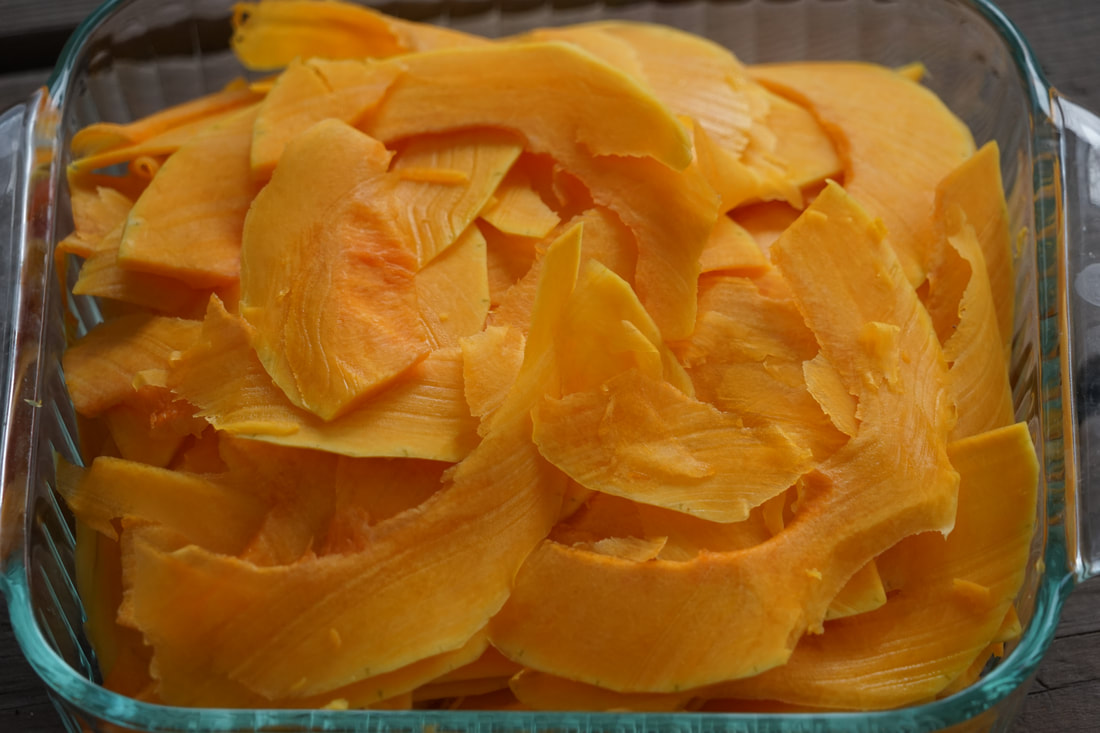
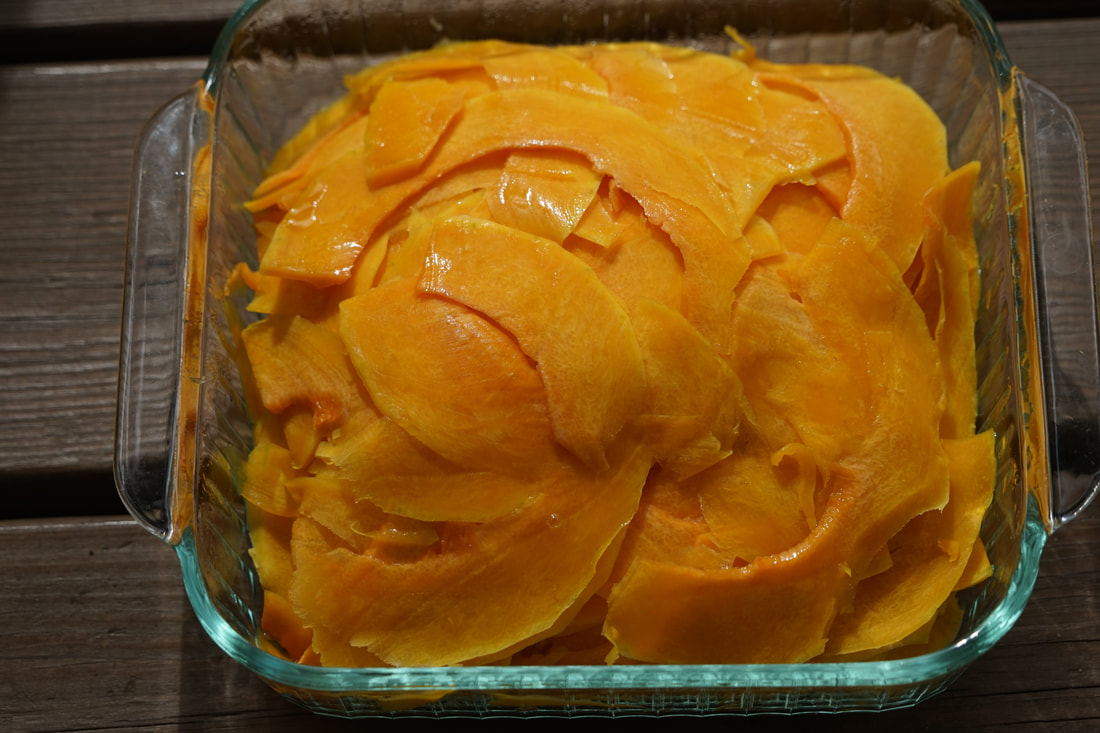
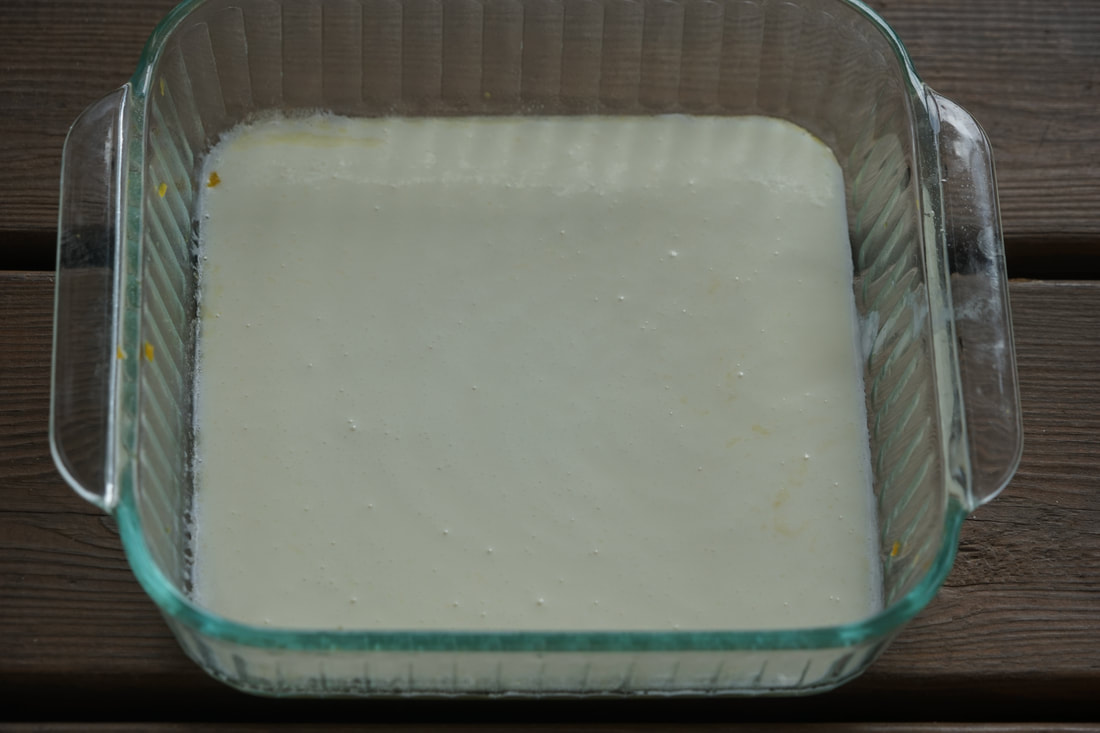
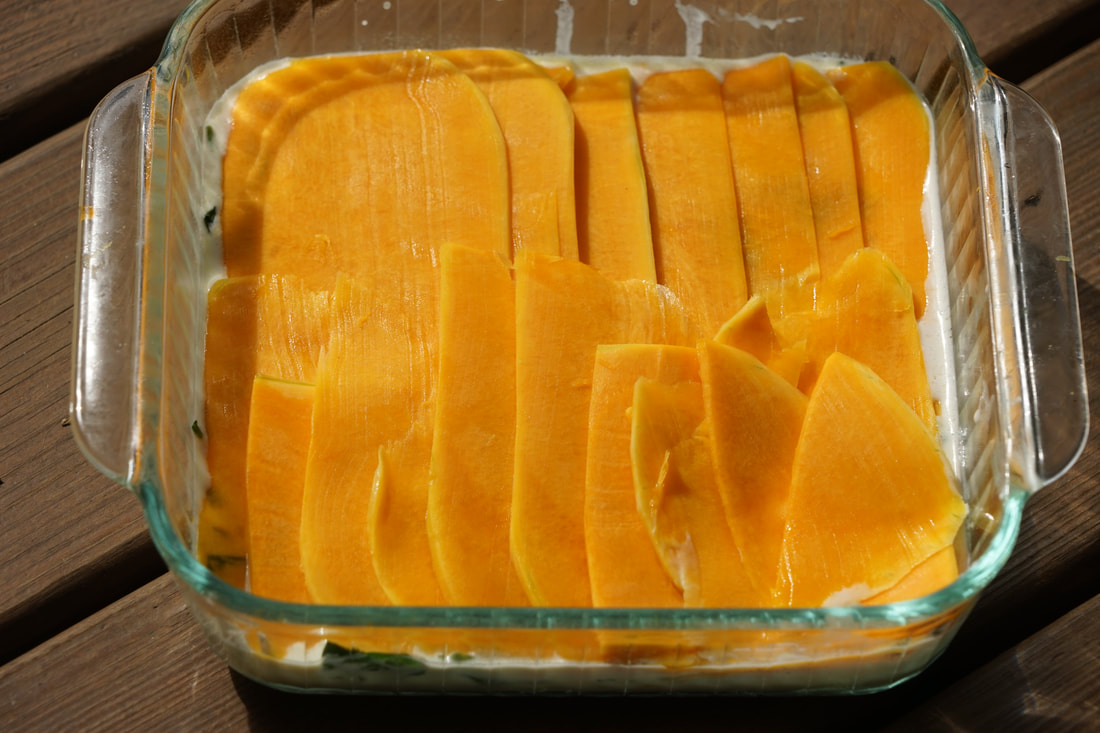
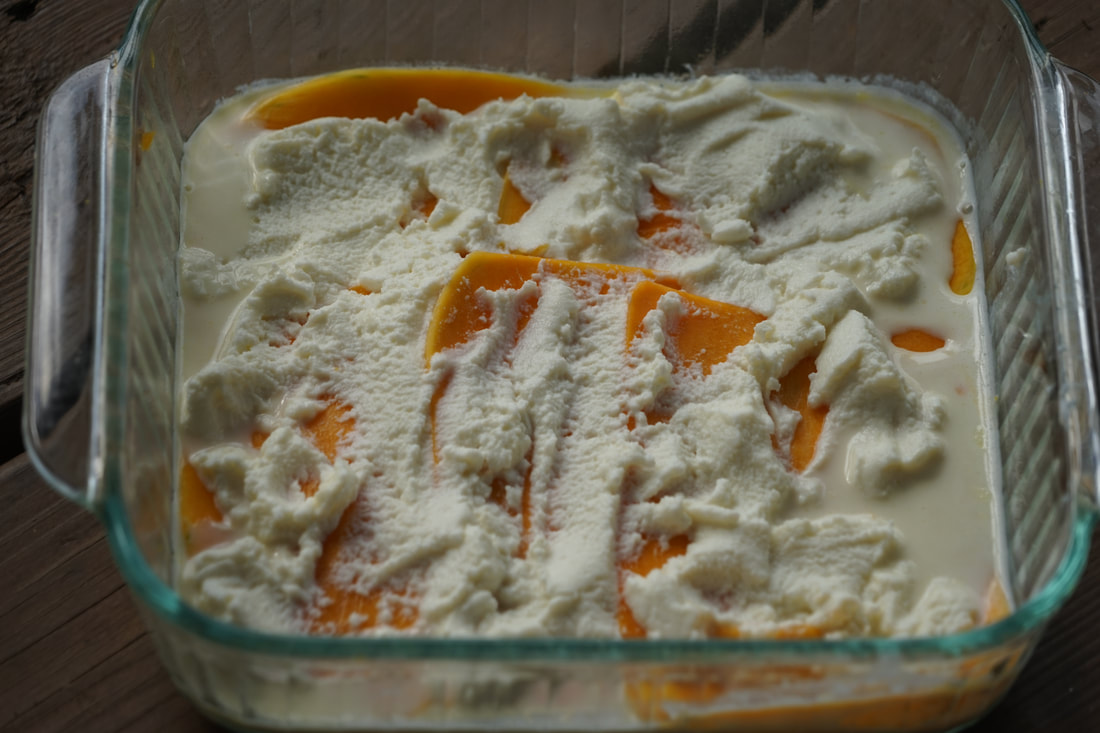
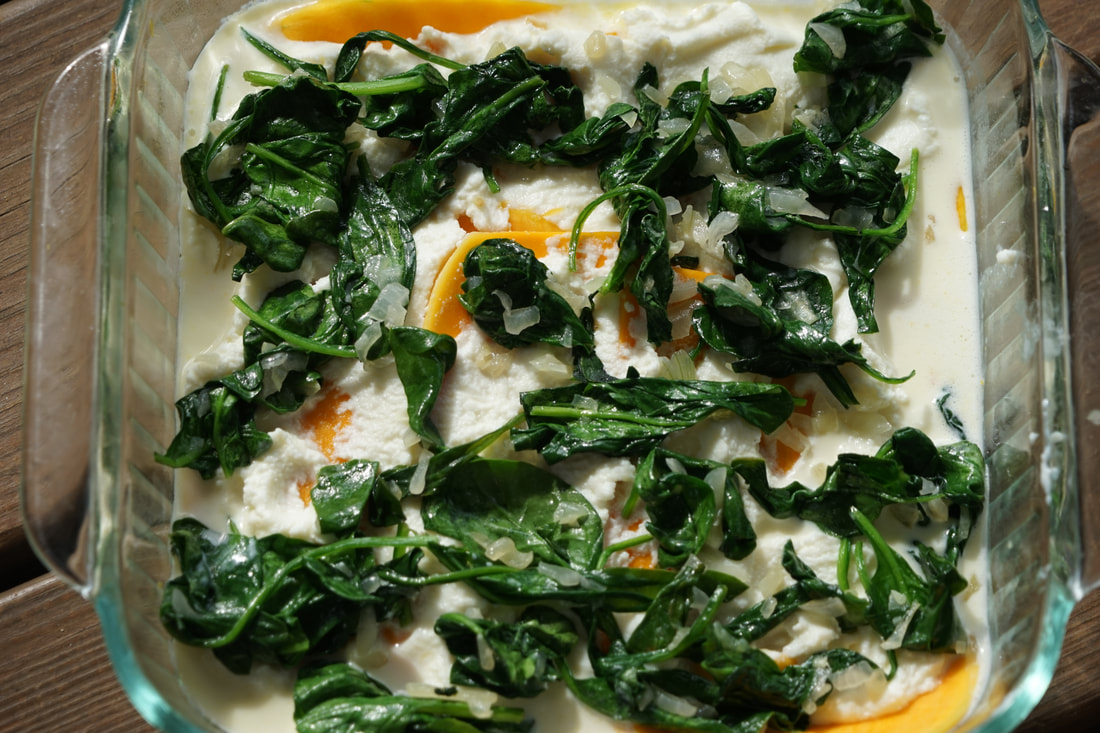
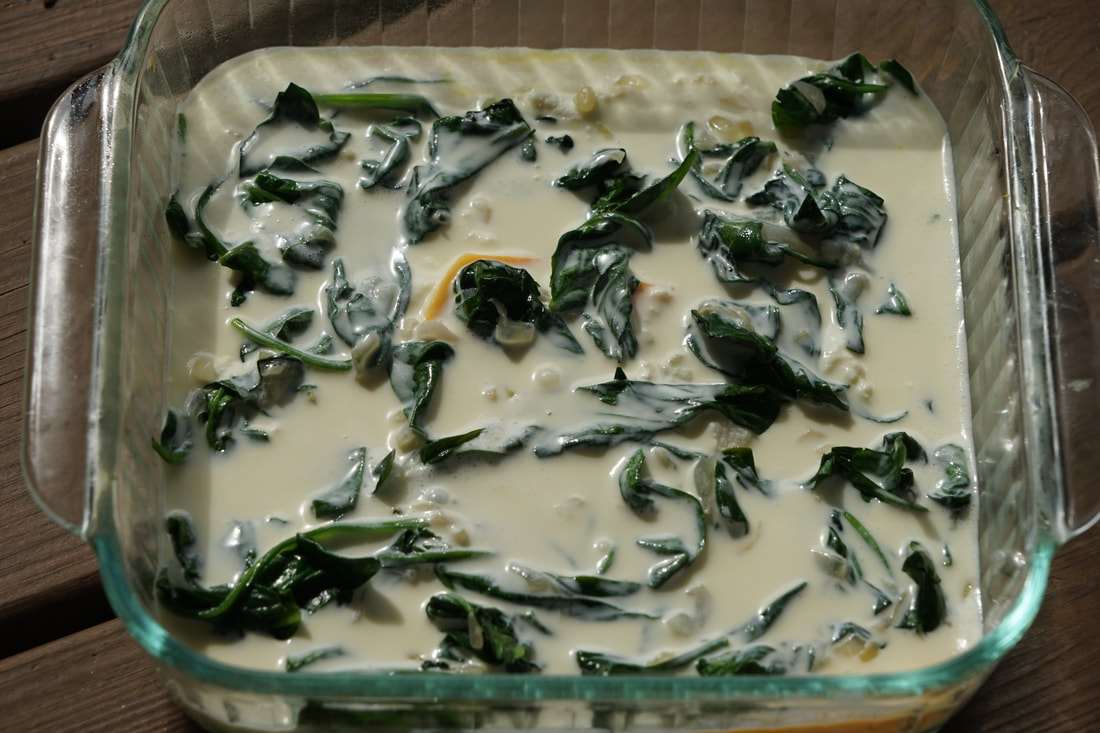
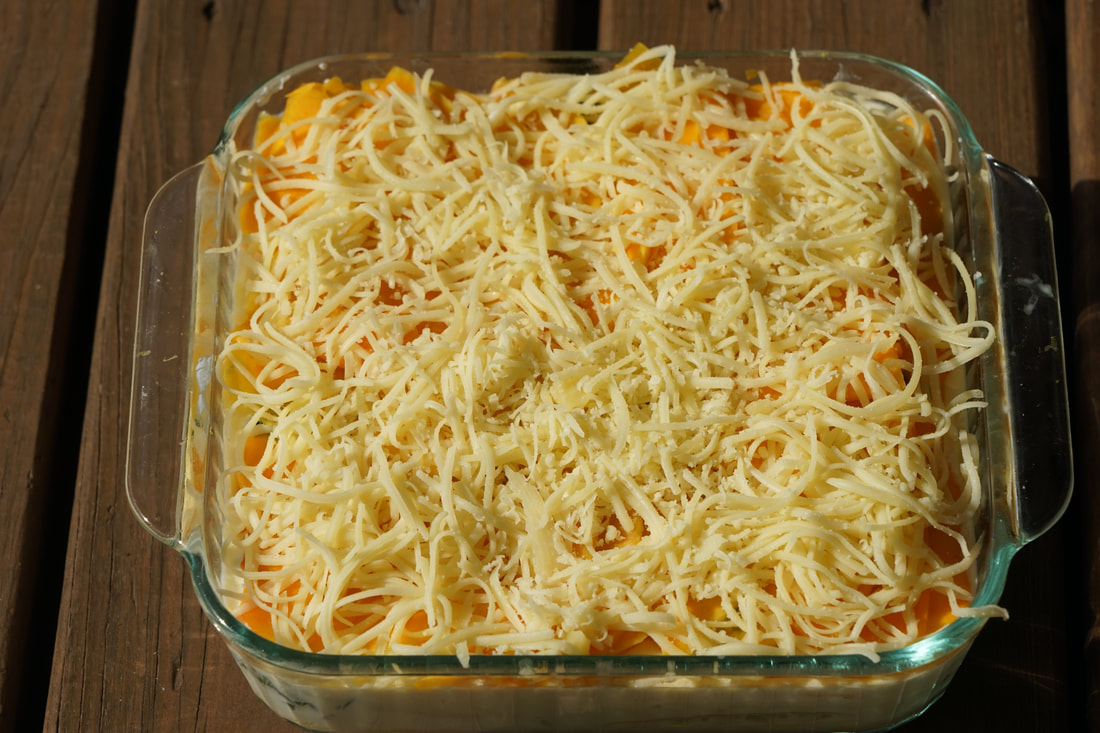
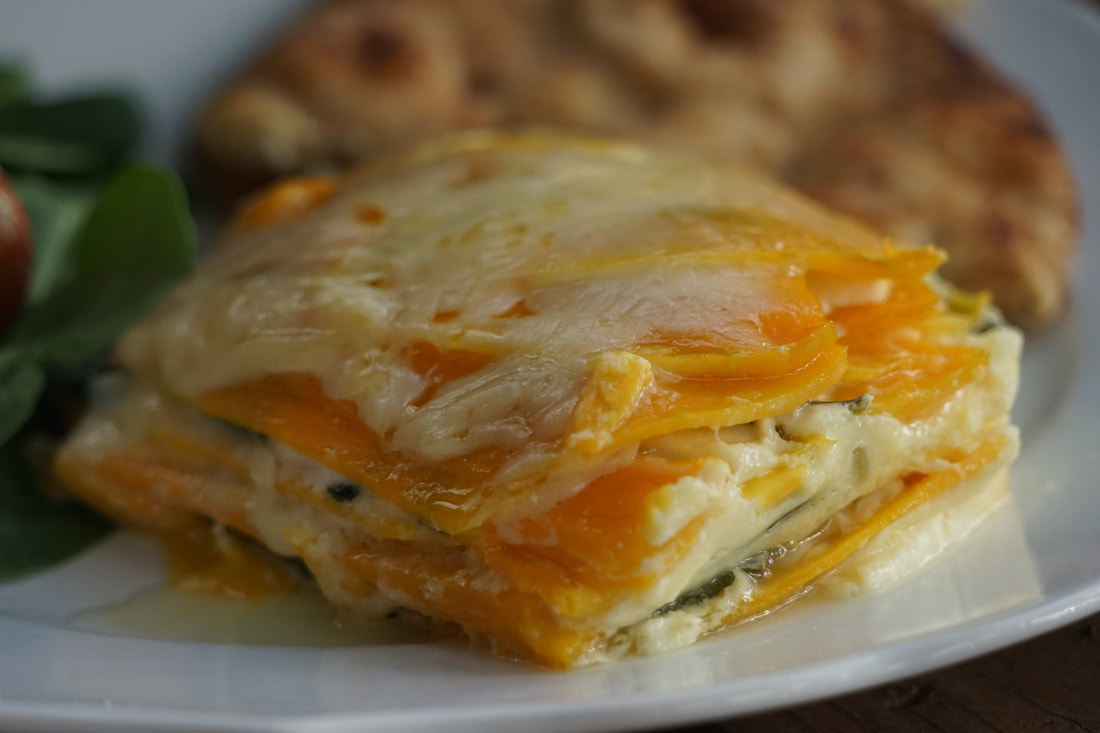
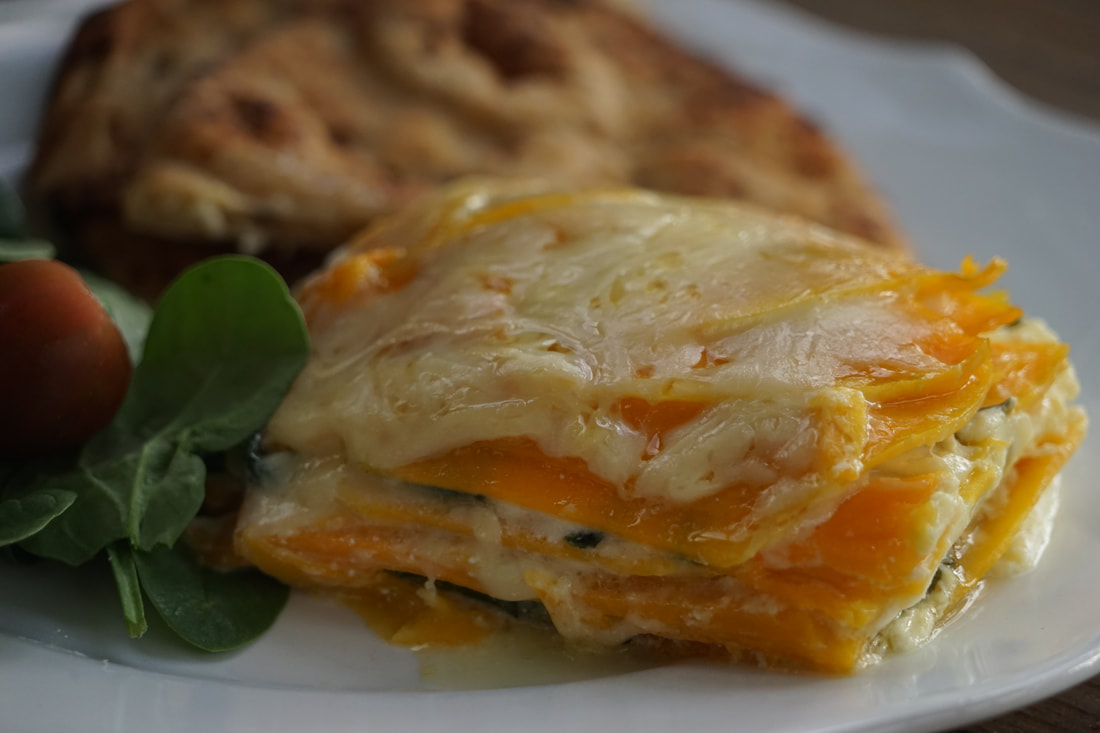
Mia is not a support animal. Quite the opposite really. We've come to the conclusion that we're going to have to register my husband as Mia's support person. And yes, we do have plans to get him a yellow vest to wear that identifies his role as a DSP. (dog support person.) You see, Mia can't actually function without him. In a nutshell, she HATES to be away from Ben for any length of time. To some extent, I guess I can understand her frustration. He's a pretty great guy to hang around and I've also been known to pout when he leaves but I DON'T resort to eating the drywall off the wall to express my heartache. I prefer to drown my sorrows in squash and spinach lasagna. Throw in a side of warm Italian bread and you're looking at the perfect comfort food meal to overcome despondency over an absent husband or DSP. I love this lower carb version of a classic vegetable lasagna. Give these squash "noodles" a try before you pass judgment - you just might be surprised. 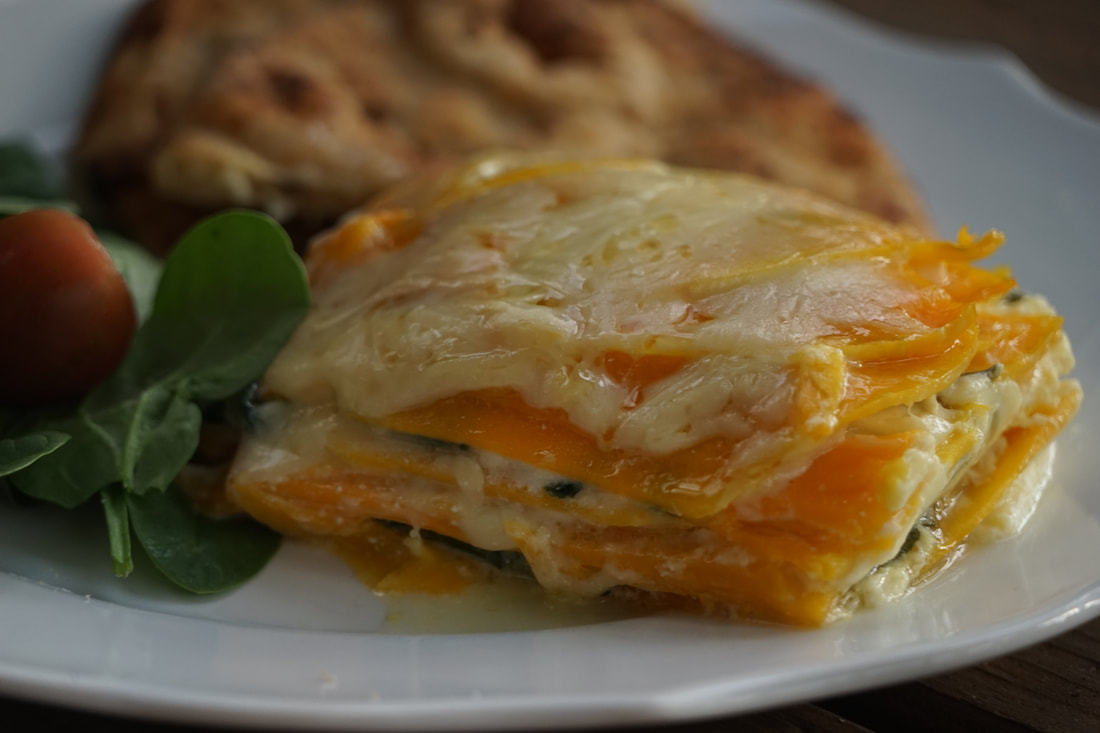 Butternut Squash and Spinach Lasagna 2 teaspoons oil 1 red onion, sliced thin 1 clove garlic, minced 6 ounces baby spinach 3/4 cup plain Greek yogurt 1/3 cup milk 3 ounces sliced provolone 1 1/2 Tablespoons flour 1 teaspoon salt 2 eggs 1 butternut squash 1 cup ricotta cheese 1/3 cup grated Gruyere cheese
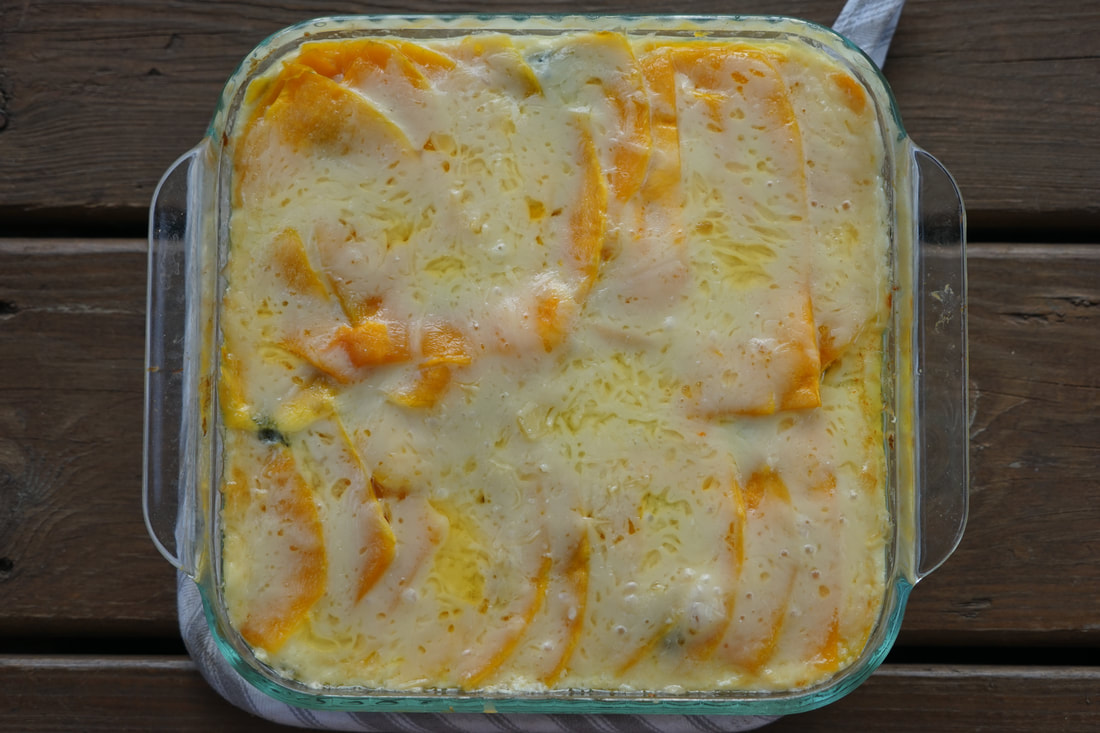
Remove foil and place under broiler for 4 minutes until browned. Let rest 20 minutes.
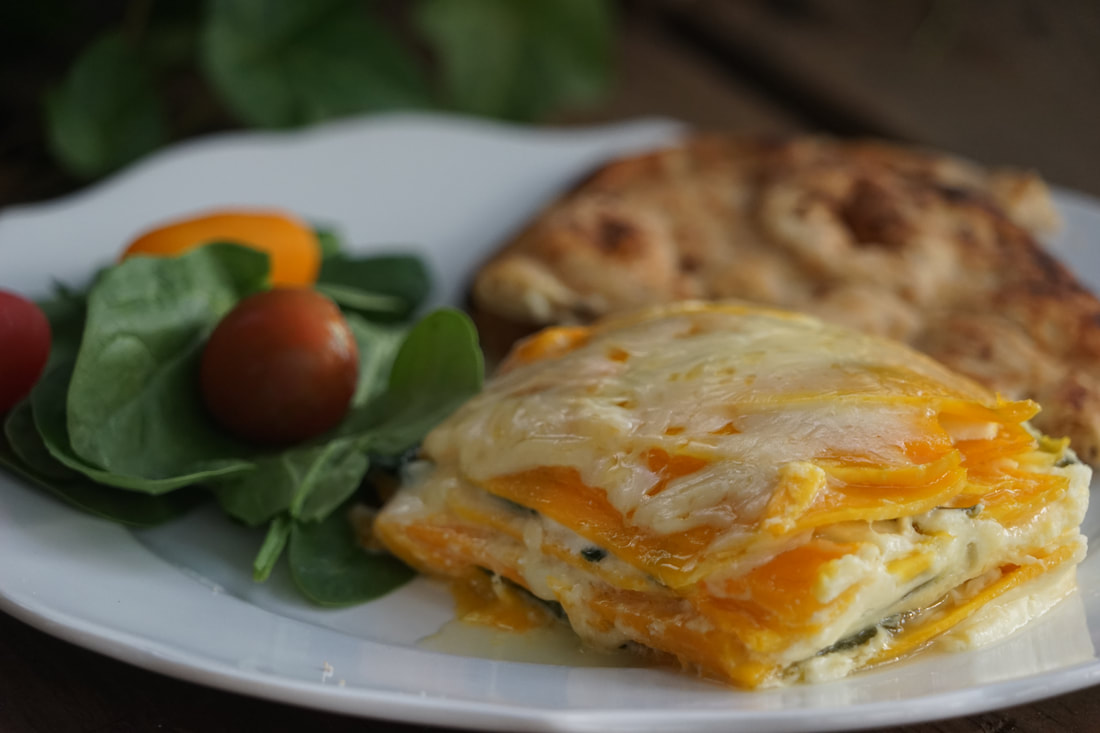 I realize that butternut squash lasagna is not your traditional Memorial Day fare but I decided to go ahead and post it anyway because it is just that good. And if your region of the world is experiencing unusually cold weather or record breaking heat like Atlanta, you might just be looking for an indoor cooking option anyway. Have a great weekend friends!
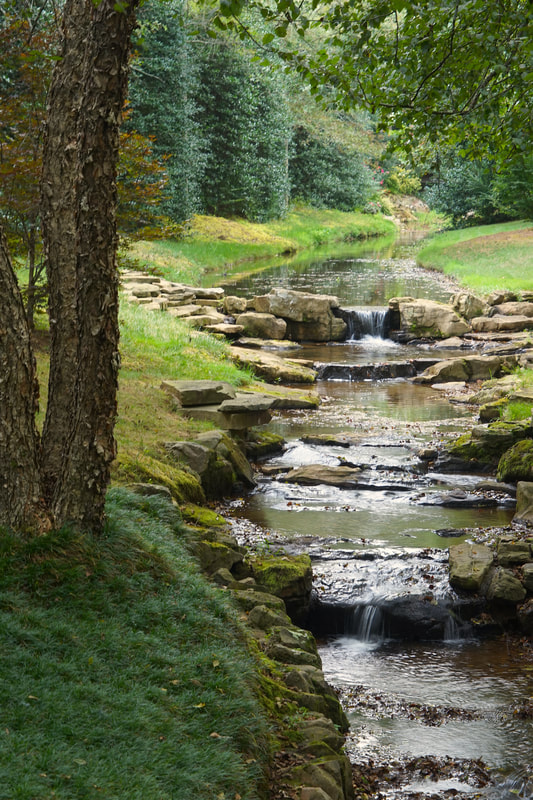
Ciao! 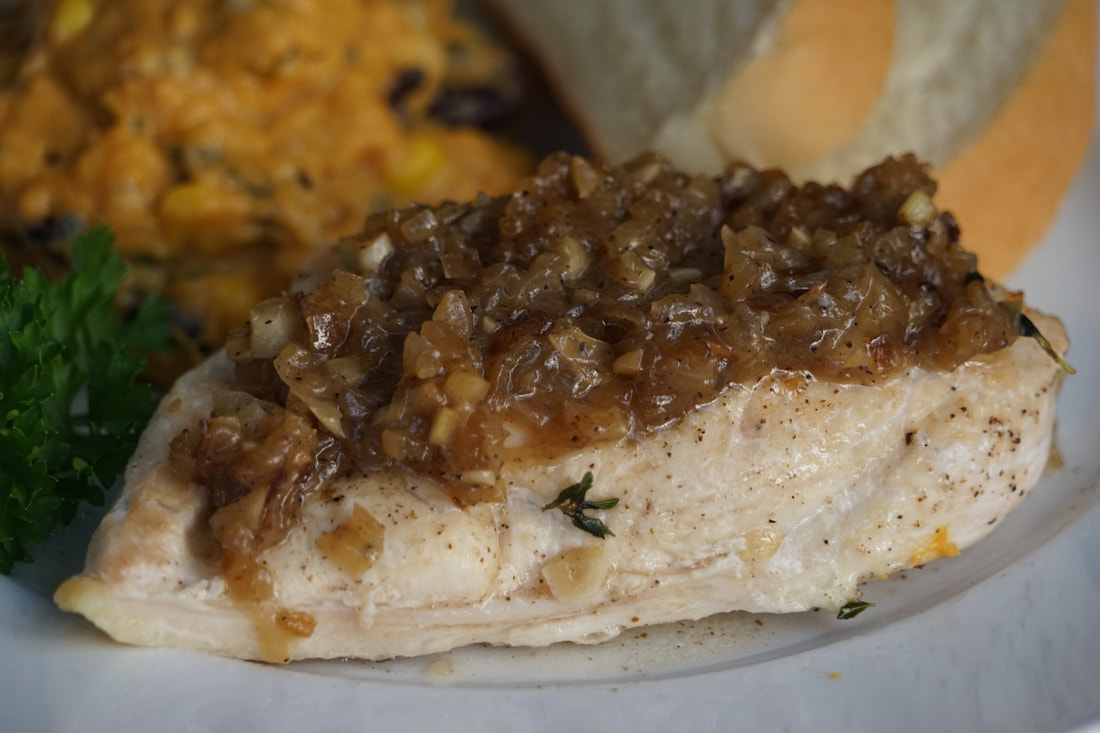 Signing up for a camera class was one of the best ideas I never had. I did so much complaining about being an inadequate photographer to my husband that he finally got tired of hearing it and he bought me a gift certificate to the Atlanta School of Photography. His not-so-subtle gift was just the nudge I needed to get myself the help that I needed to improve my photography skills. I hesitantly signed up for the most basic level workshop that the school had to offer and and invited a friend so I wouldn't have to endure the class alone. If I was going to look like a complete incompetent, I needed to bring along some emotional support. Even though my friend and I were confident that we were about to make fools of ourselves, we packed up our gear and headed to Atlanta for our 5 hour, intensive, hands-on camera workshop. What did we have to lose - except our pride?
Much to my surprise, we were not the most unknowledgeable students in the class. Our class was made up of 6 other inexperienced camera users just like ourselves. The instructor was amazing and at the end of the day our heads were swirling with terms like aperture, focus points and metering mode. Feeling overwhelmed with information, I feared that it would all be forgotten unless I started to practice right away. So, Ben and I spent the next several weekends practicing my newly discovered camera skills. We scoped out the most picturesque places in Georgia. We visited majestic waterfalls and beautiful gardens - all in the name of experimenting with my camera. My family was SUPER patient with me while I honed my camera skills. They carried around all my gear and patiently waited 4-5 minutes for me to make all of the necessary adjustments to my camera to set up a single shot.
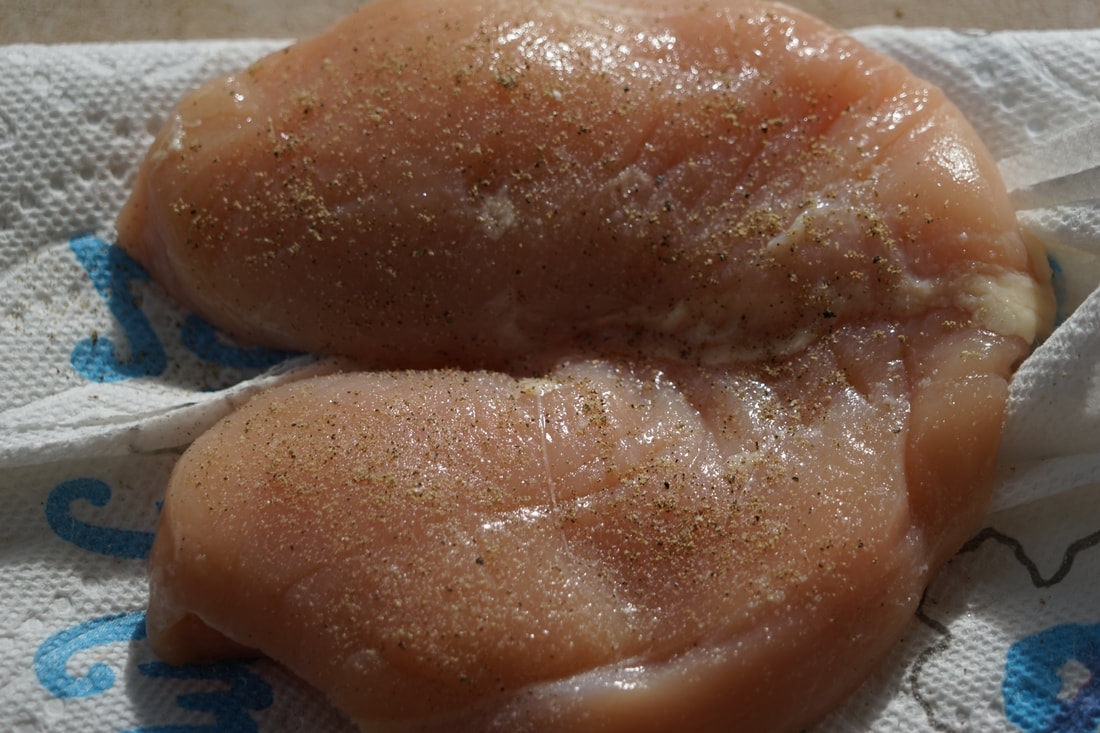
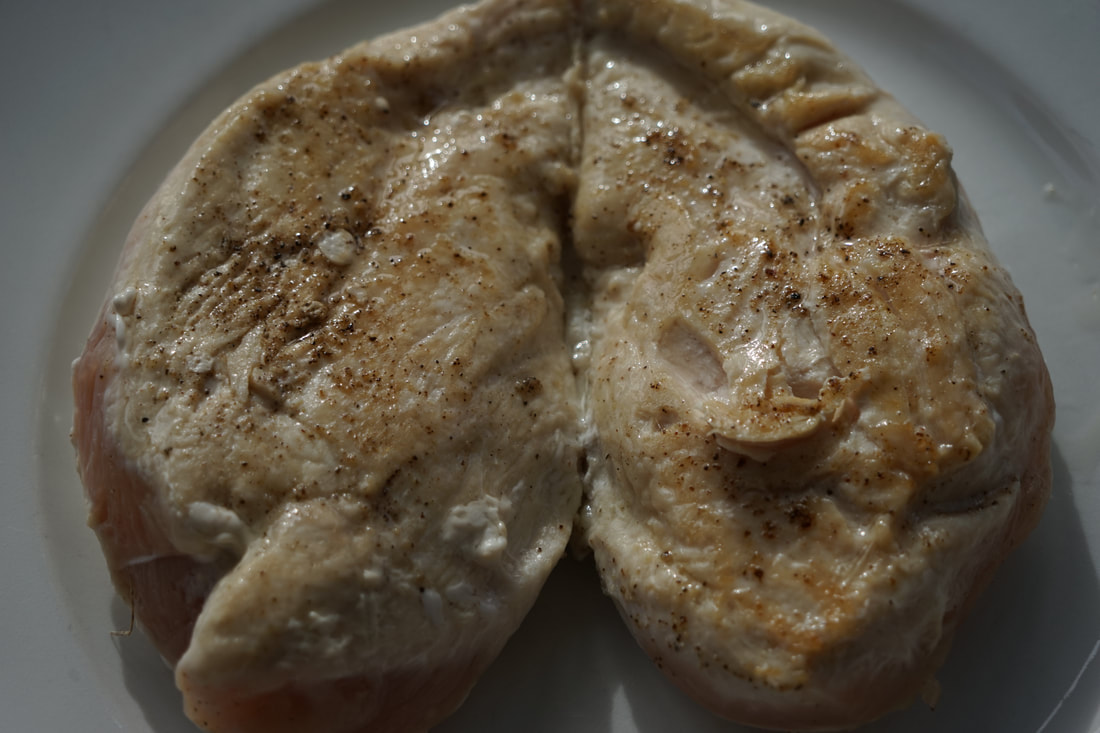
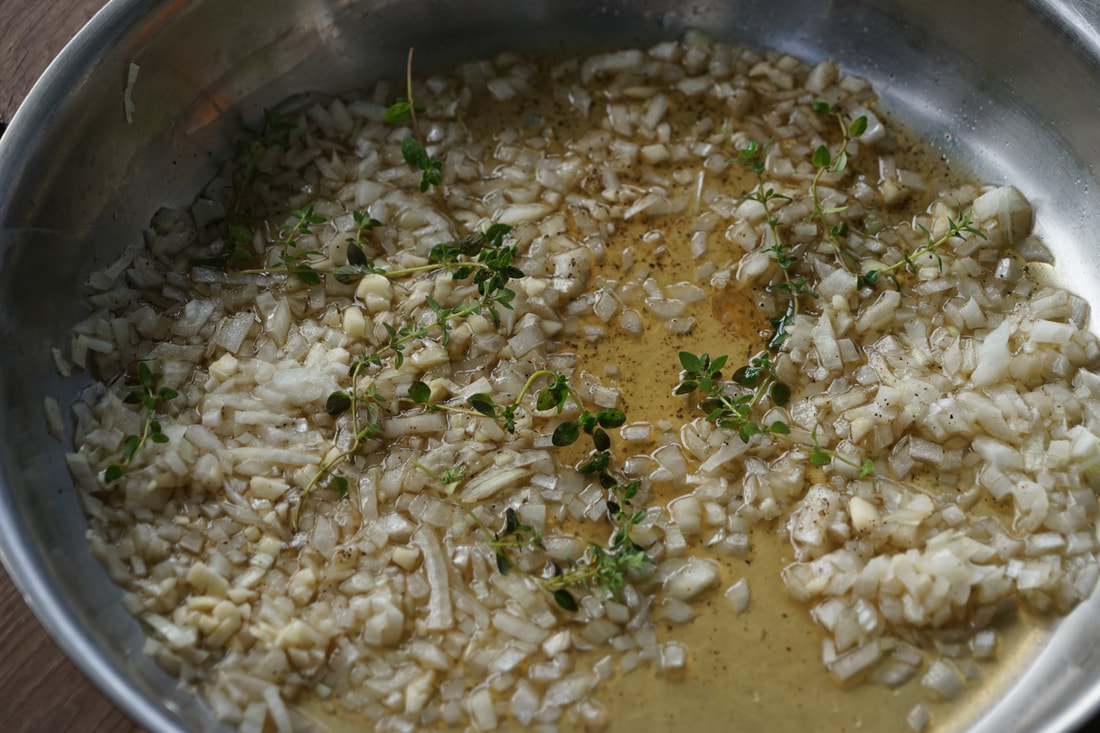
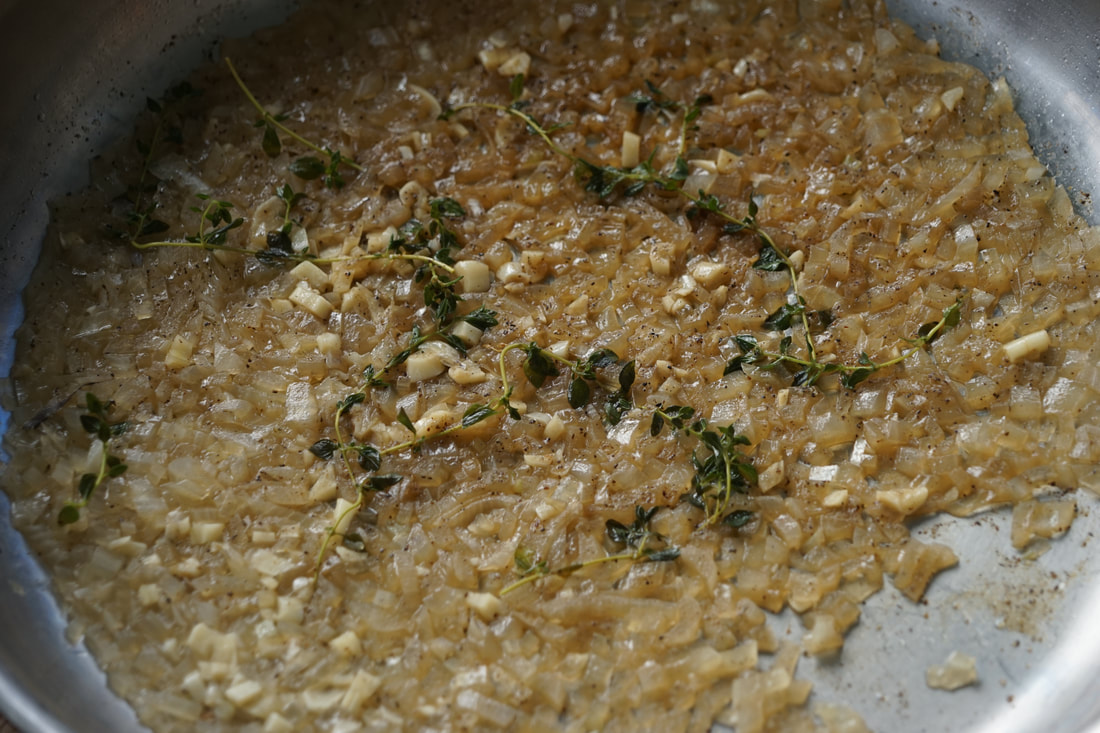
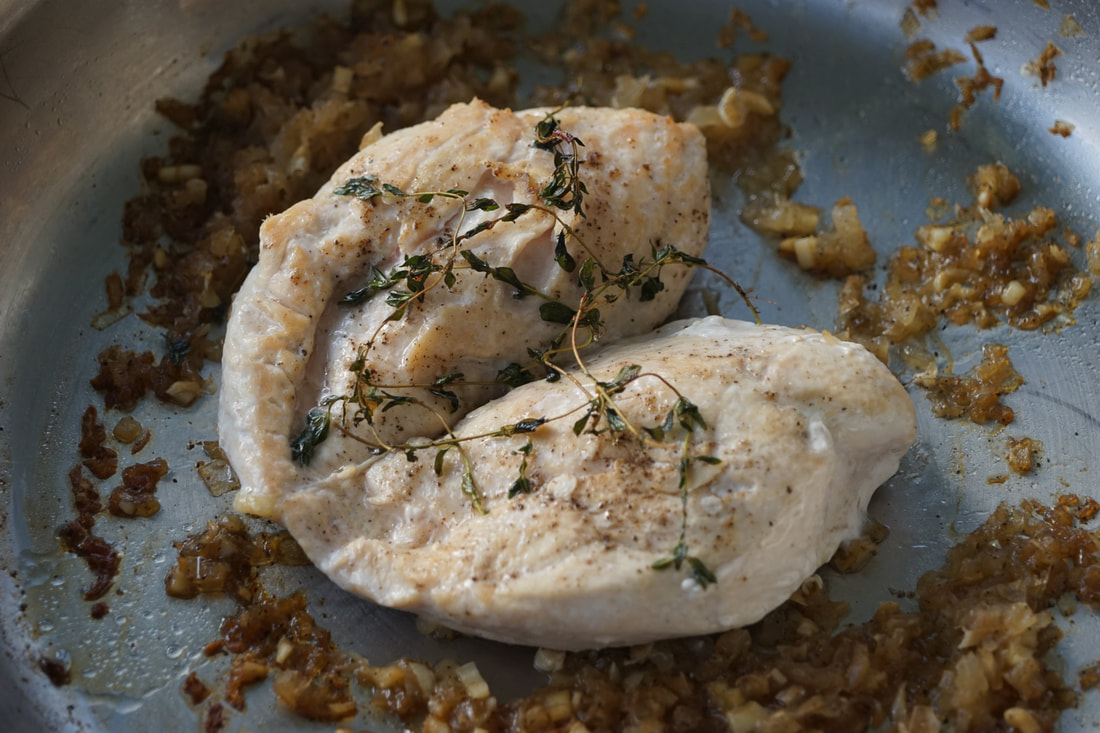
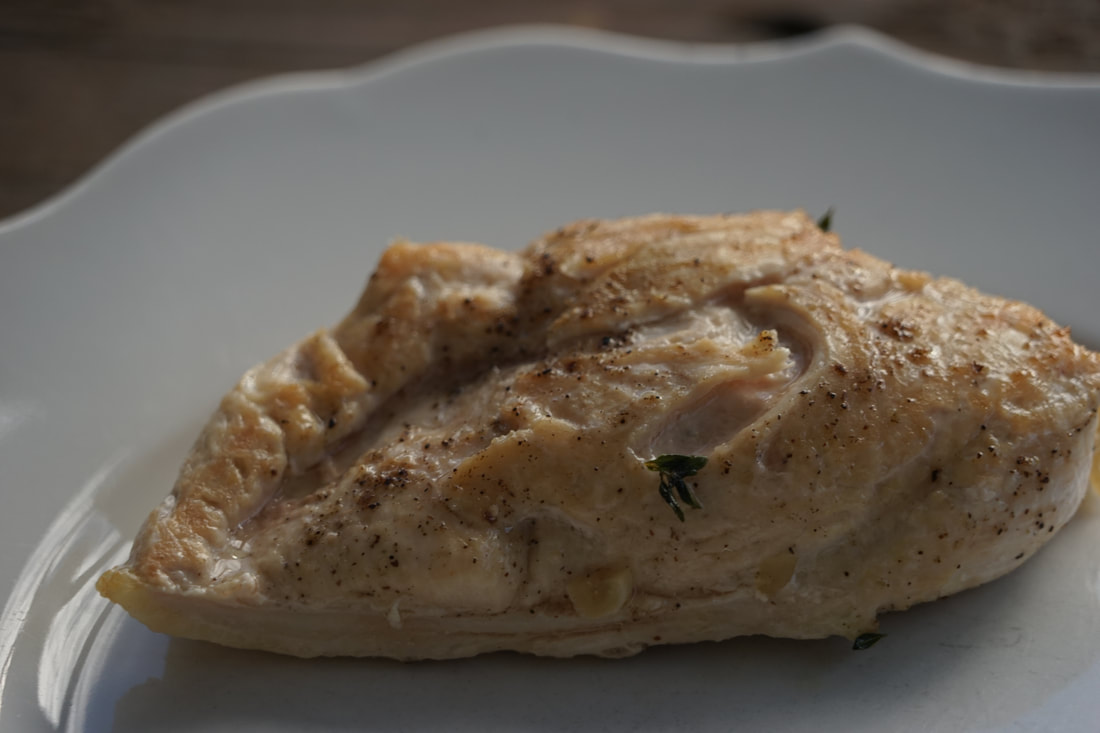
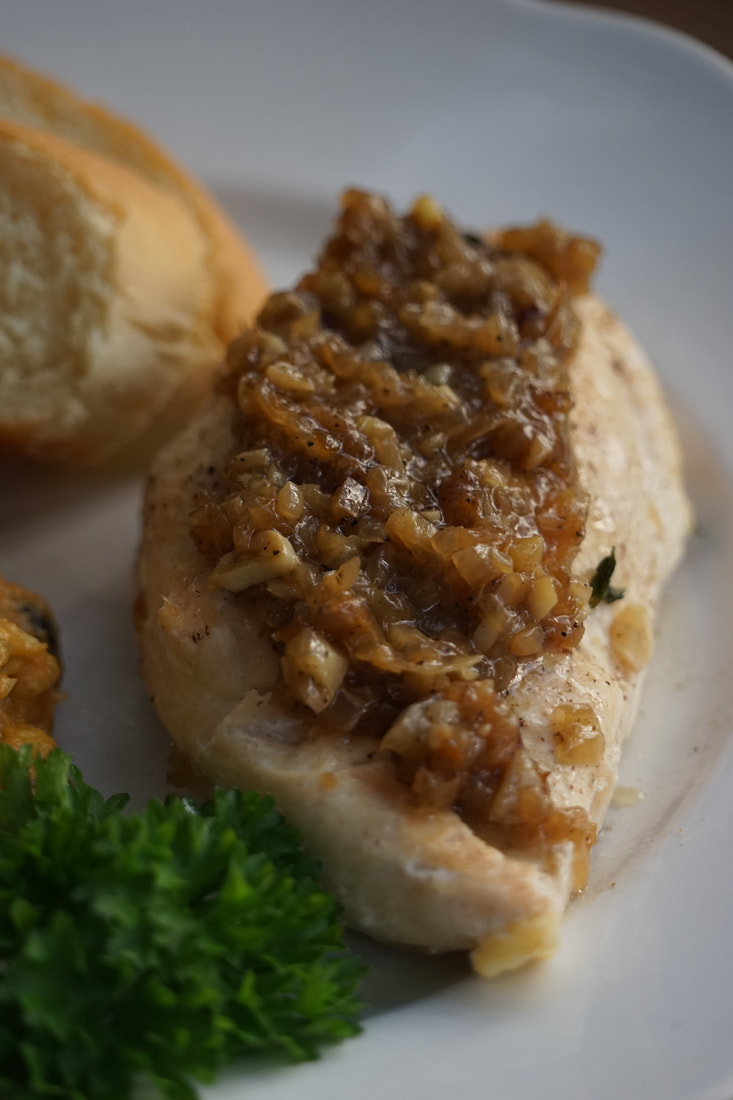
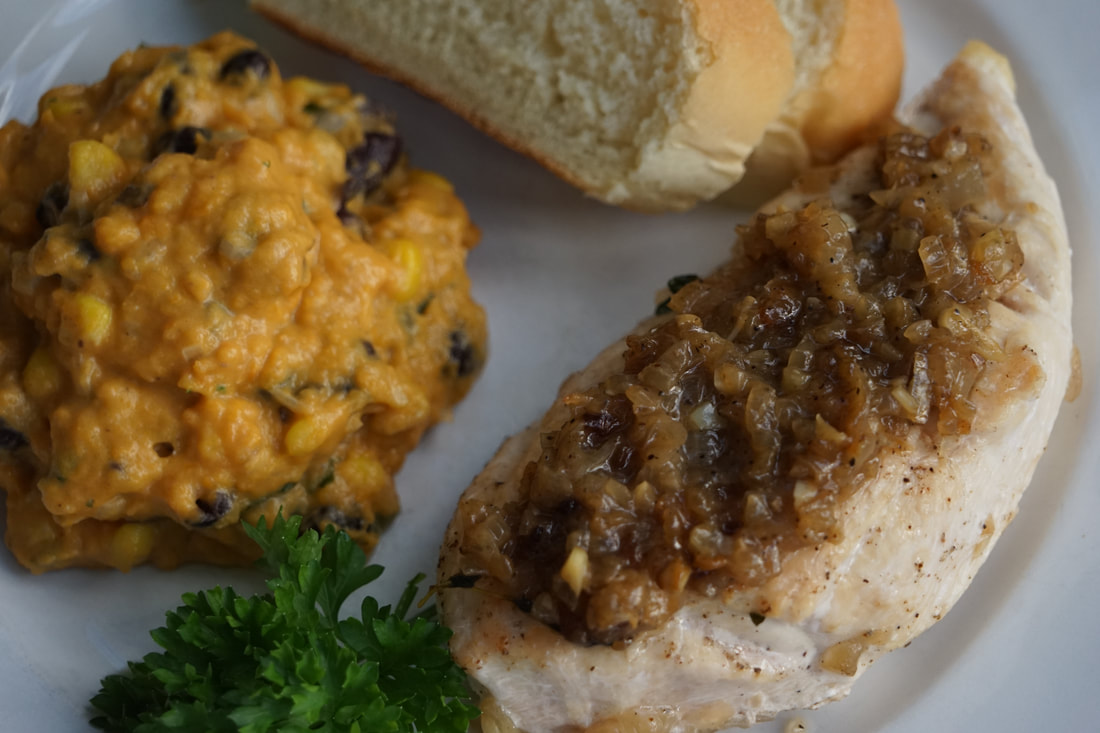
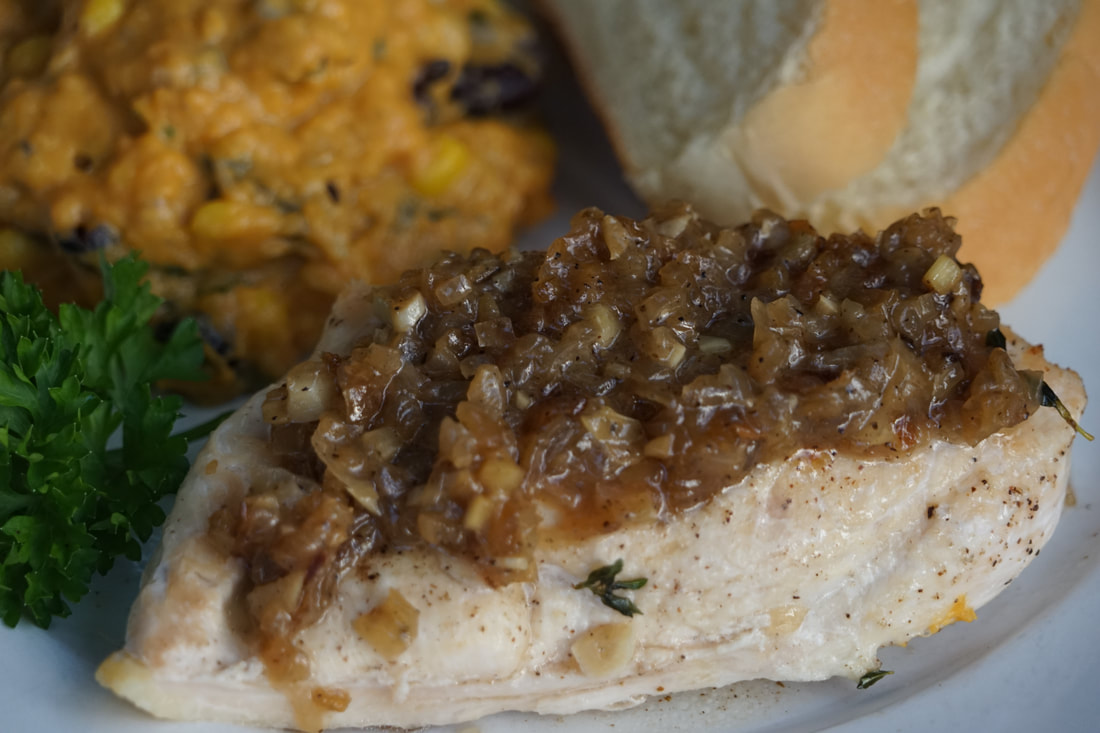
I had a great time snapping pictures of landscapes and people but I still feel most comfortable with food photography. There's no wining, squinting or moving from a cheeseburger. I've been doing it so long that I know how to put the product in the perfect lighting to avoid shadows and over exposure. With any luck (and lots of practice) someday, I'll be just as efficient at landscape and portrait photography as I am at food photography. Today, I'm back in my comfort zone. Capturing the colors, the textures and the juiciness of this Brandy Chicken. I only wish that my photographs could capture the amazing aroma and intense flavor of this dish. 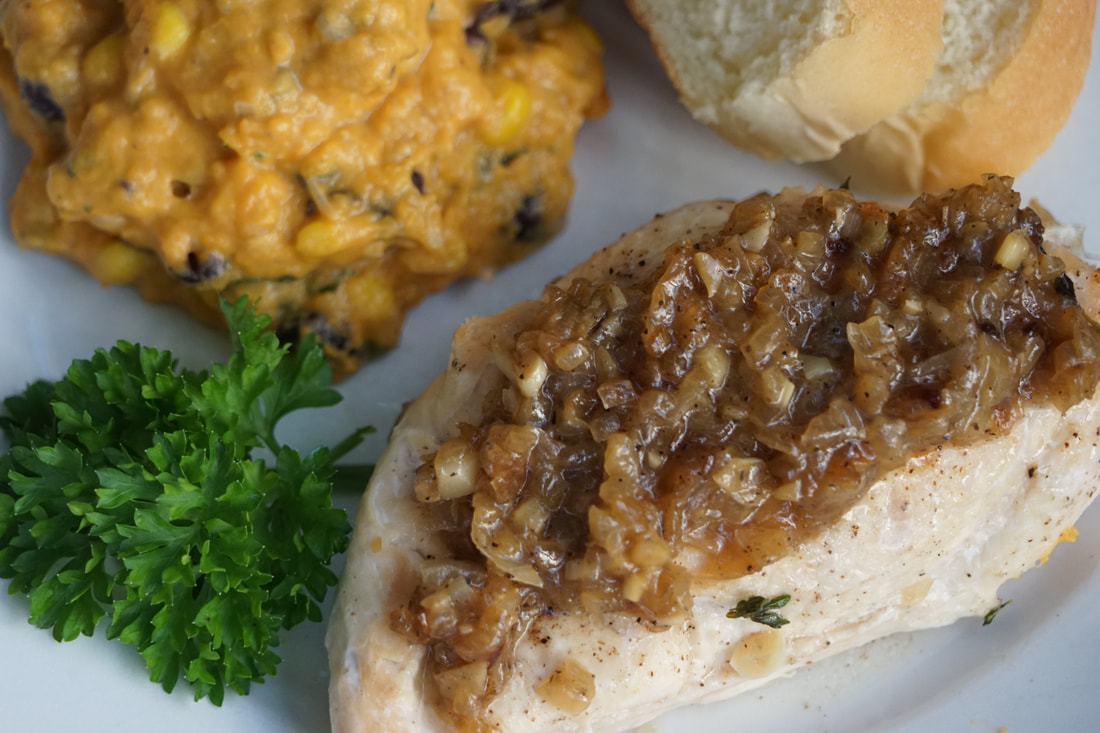 Brandy Chicken 4 boneless chicken breasts 1 Tablespoon kosher salt 2 onions, sliced thin 1/2 cup + 1 Tablespoon brandy 6 cloves garlic, minced 3 sprigs fresh thyme 2 Tablespoons butter 1 Tablespoon fresh parsley, chopped
Spread onion mixture around chicken and sprinkle with parsley to serve.
Clearly, brandy chicken isn't the most photogenic of food subjects. Even though the colors are monochromatic, this chicken is anything but bland. The rich brandy, onion sauce really takes this chicken to a new level.
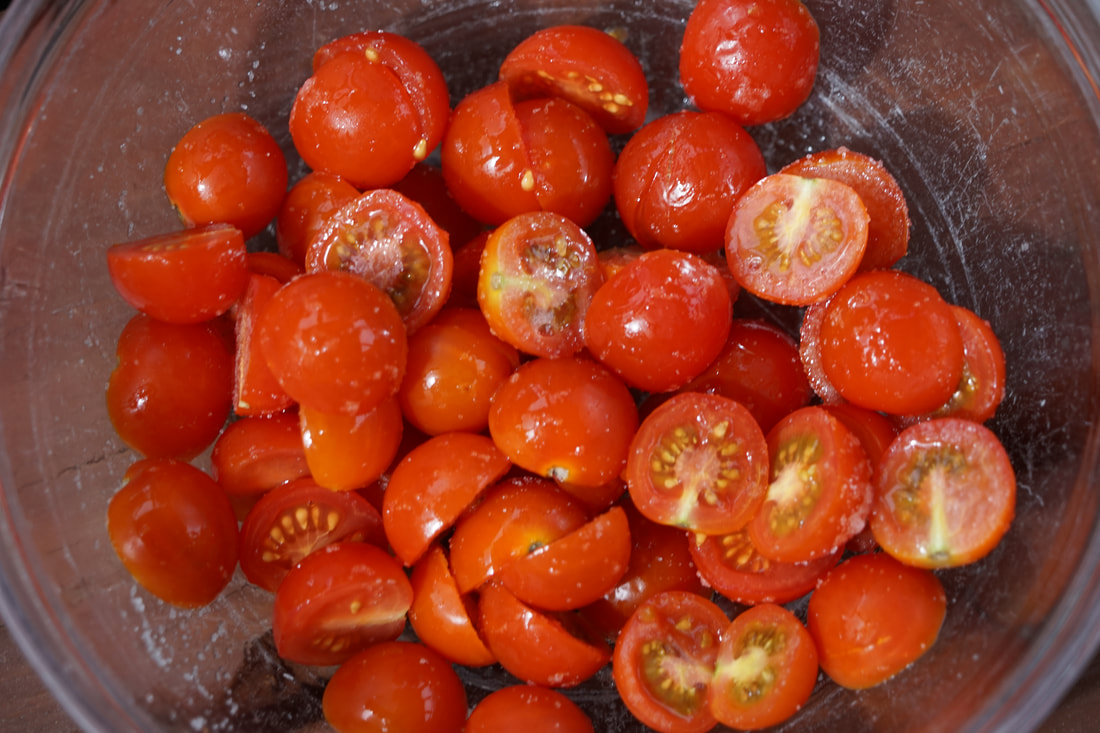
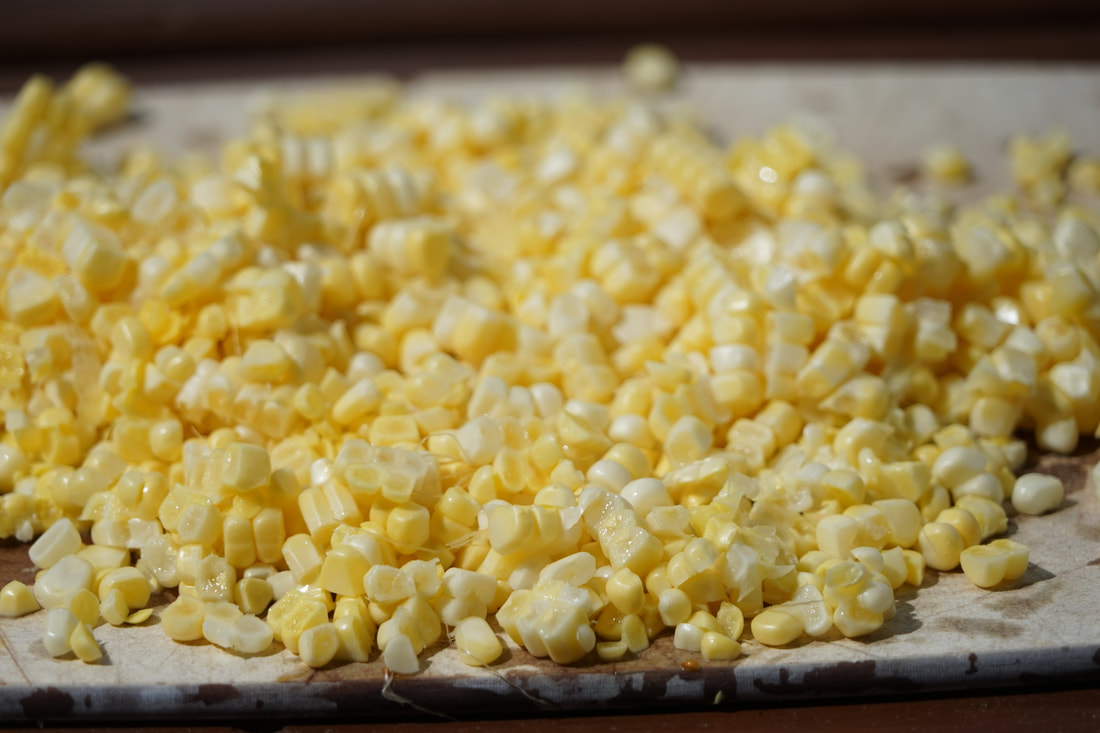
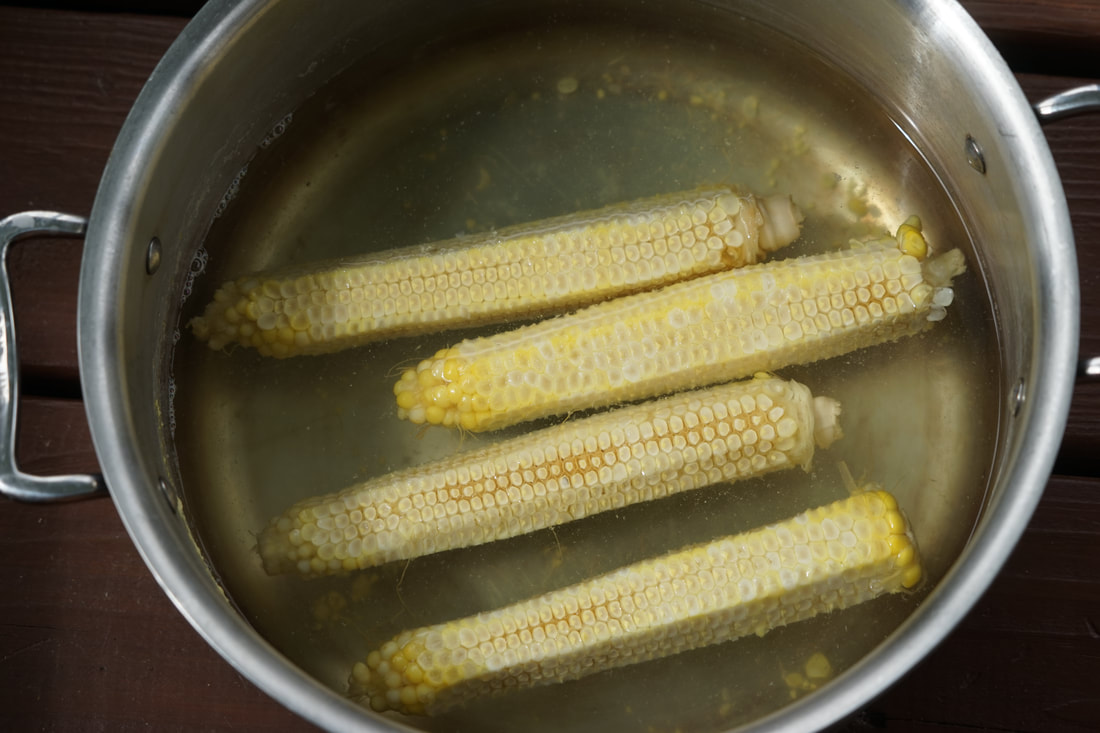
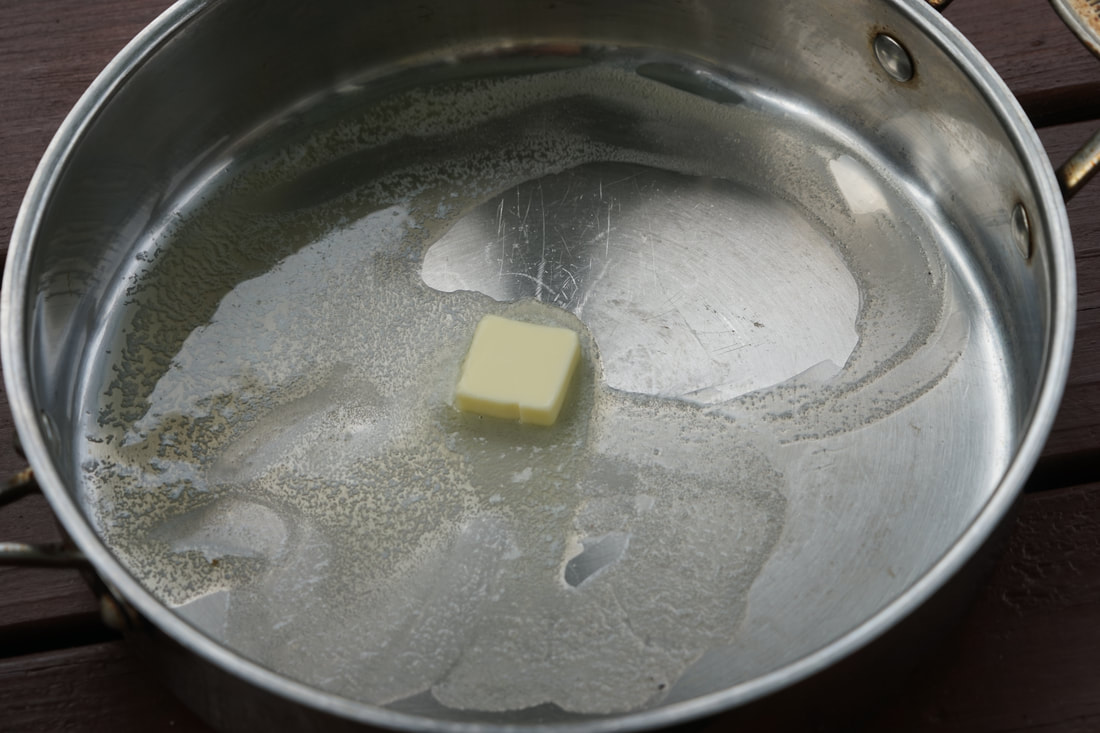
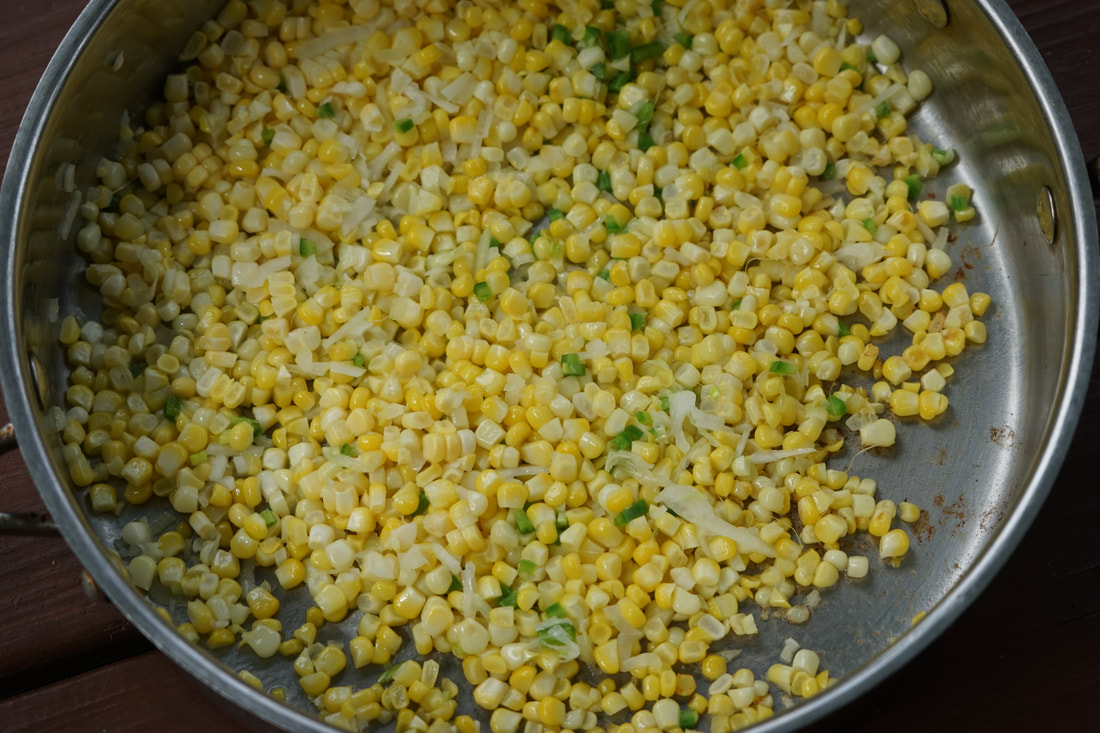
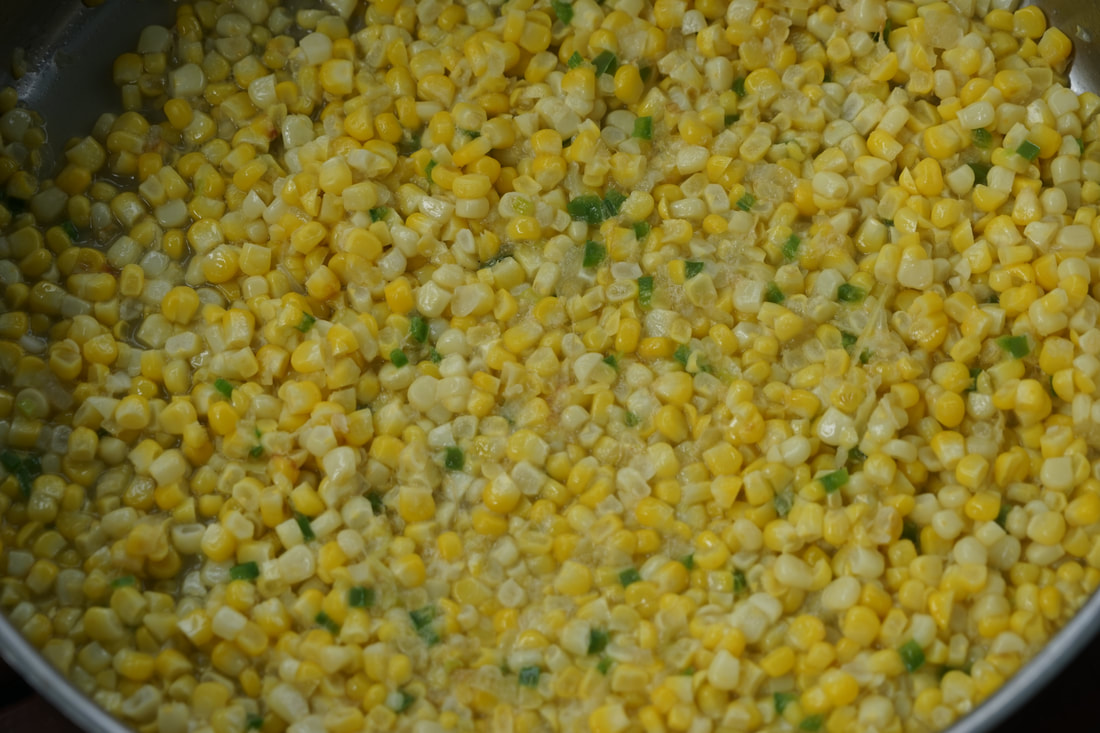
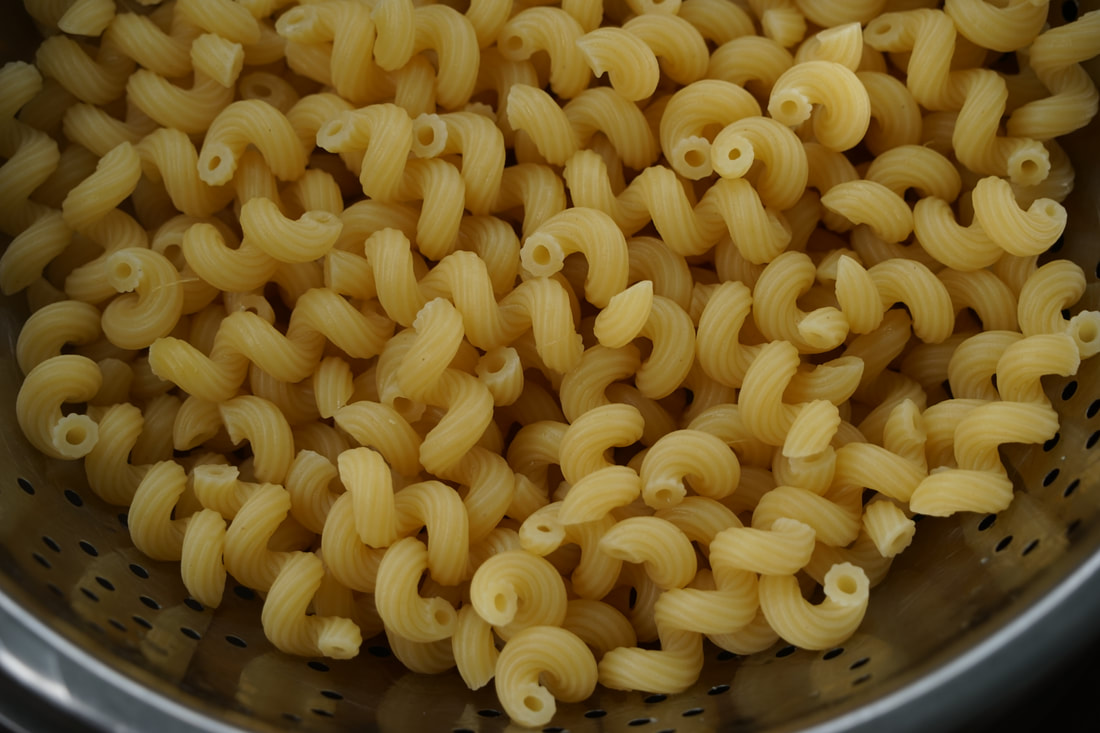
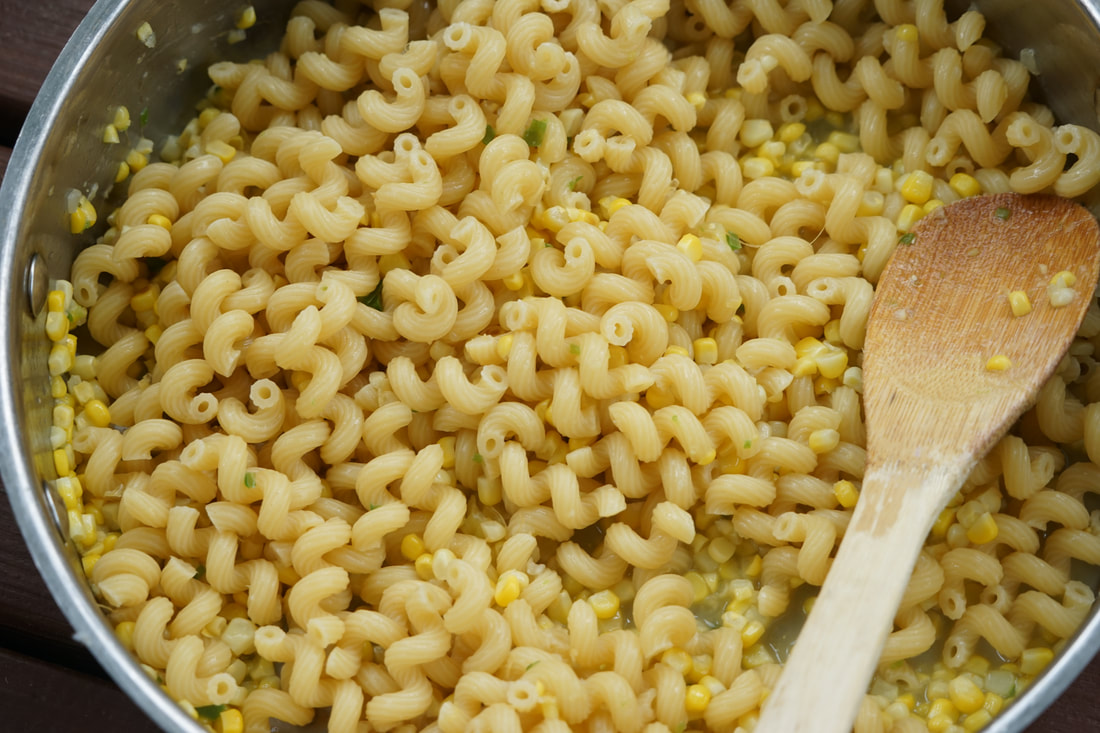
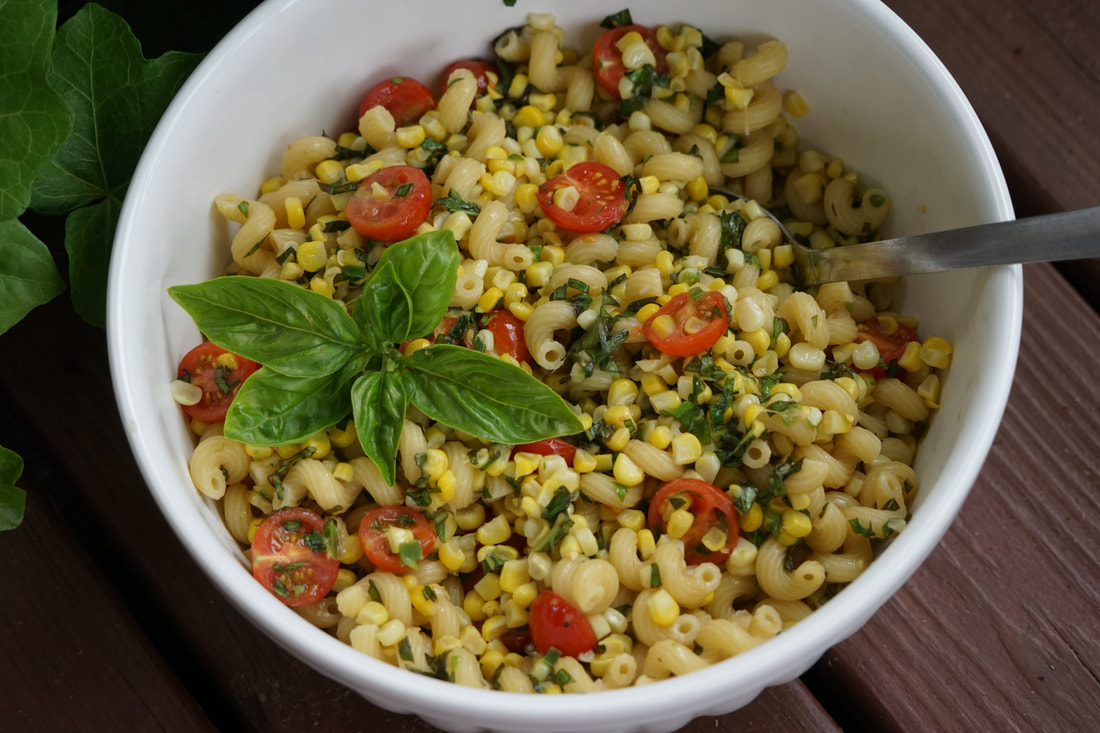
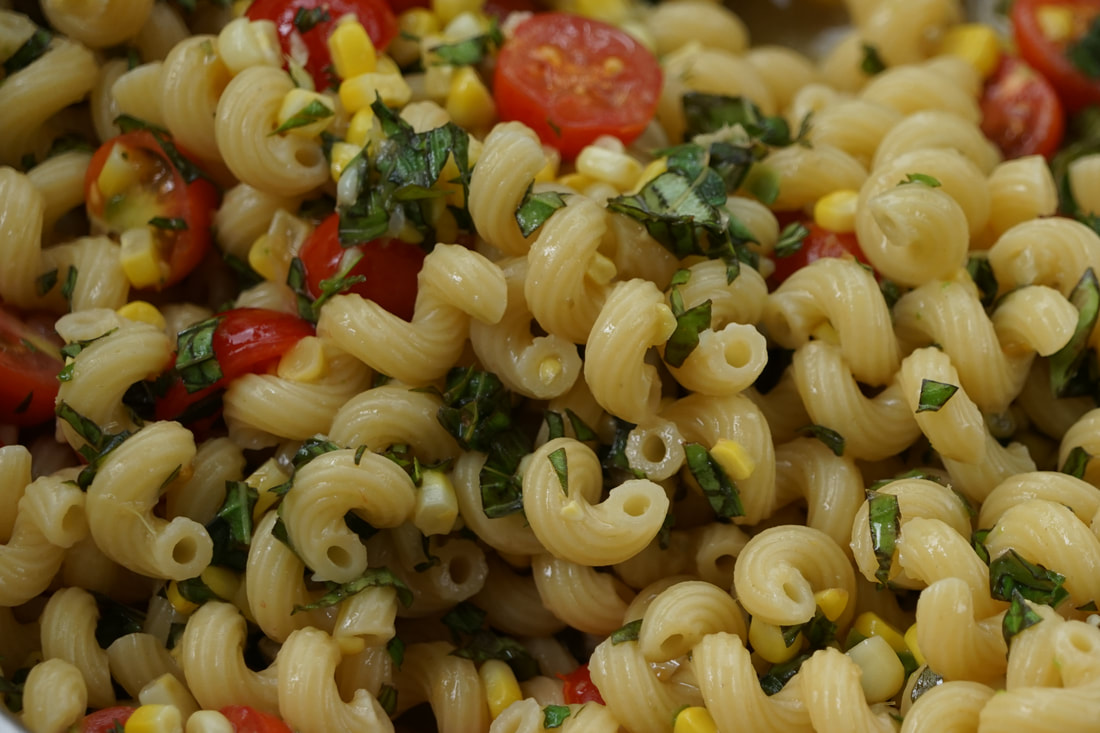
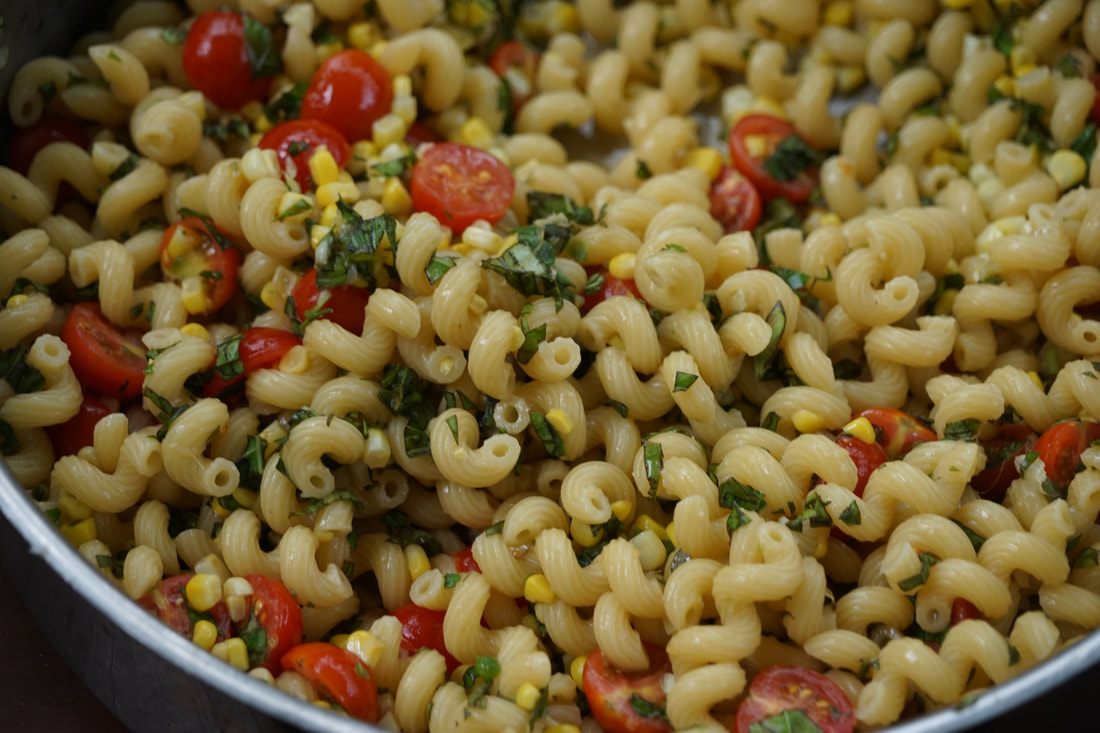
Ciao! 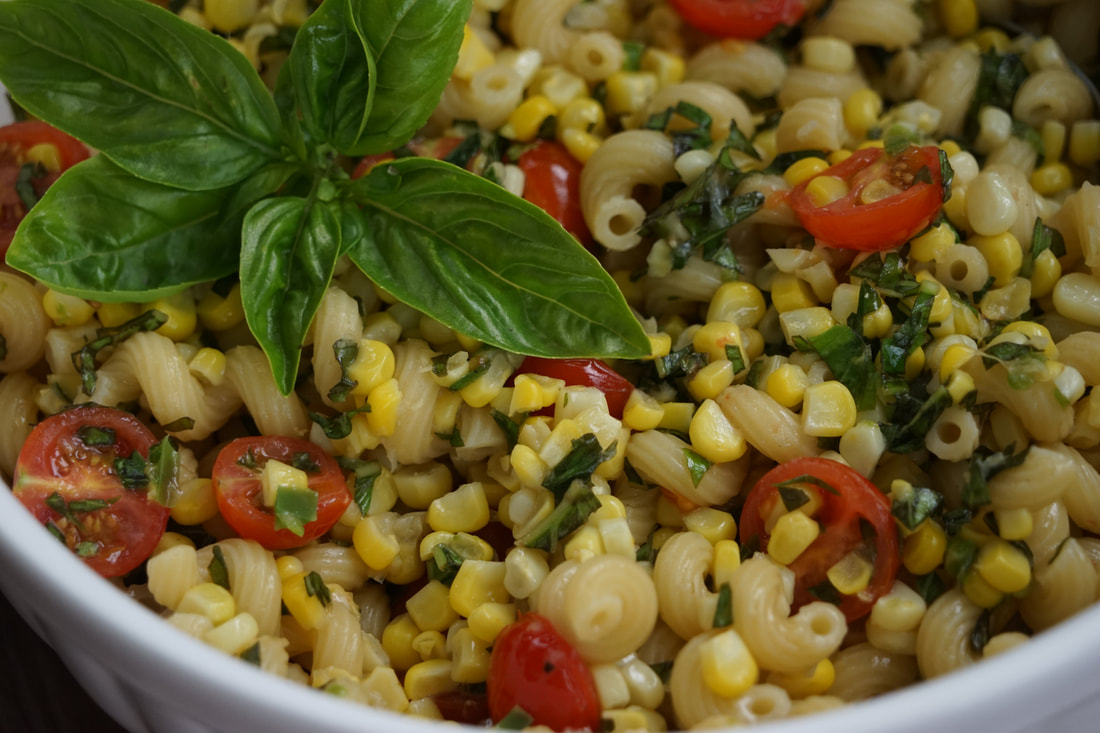 Our summer has barely begun and I've already got a severe case of "summeritis." Haven't heard of it? Summeritis is a serious condition I develop every summer that results in an aversion to cooking hot meals. I crave hearty, vegetable based meals but I don't want to turn on my oven or stand at the stove stirring hot sauces for hours. I've also chosen to live in a climate where cooking dinner outside on the grill becomes a sweaty, uncomfortable experience in May. So what's a girl with summeritis to do? Quick and easy summer meals packed with garden fresh vegetables and energy boosting carbohydrates. I try and make them as light as possible because you know - it is bathing suit season after all and no one wants to see my food baby after I've devour an entire pizza. 🍕👙 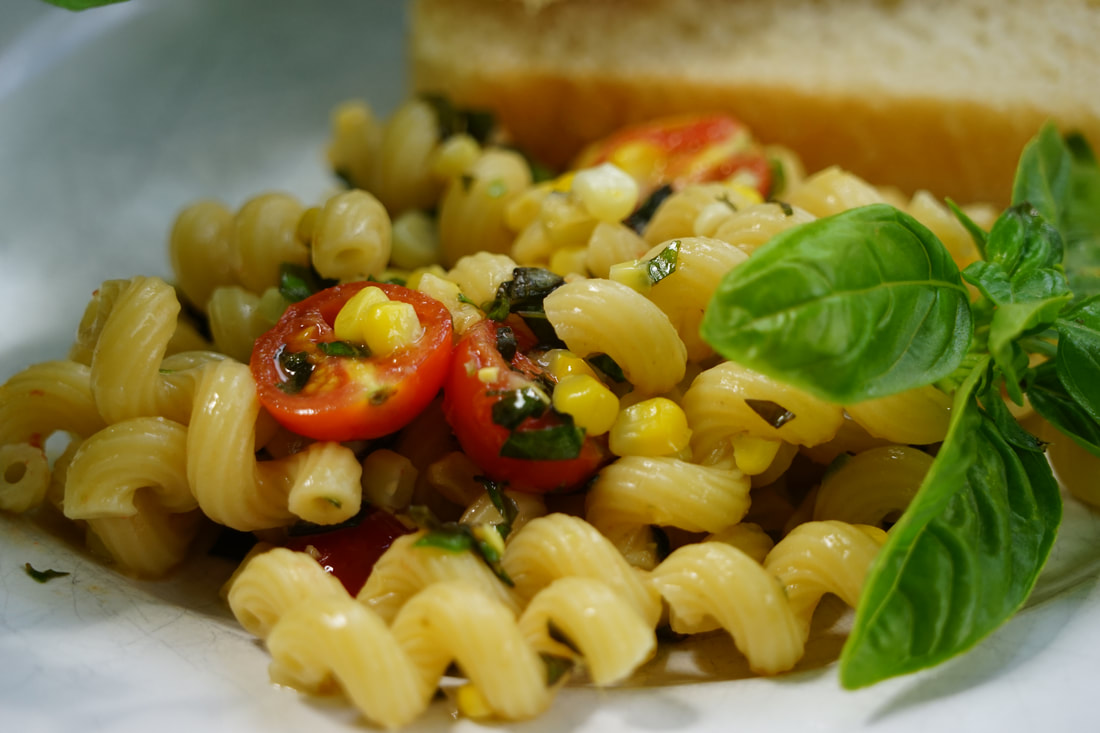 This Pasta dish is an absolutely perfect summer meal. I've got heaps of fresh basil in my garden and I couldn't think of a better way to use it than to combine it with some home grown tomatoes and perfectly ripe corn on the cob. I love this dish and I didn't even break a sweat while I was making it. 👍🏻 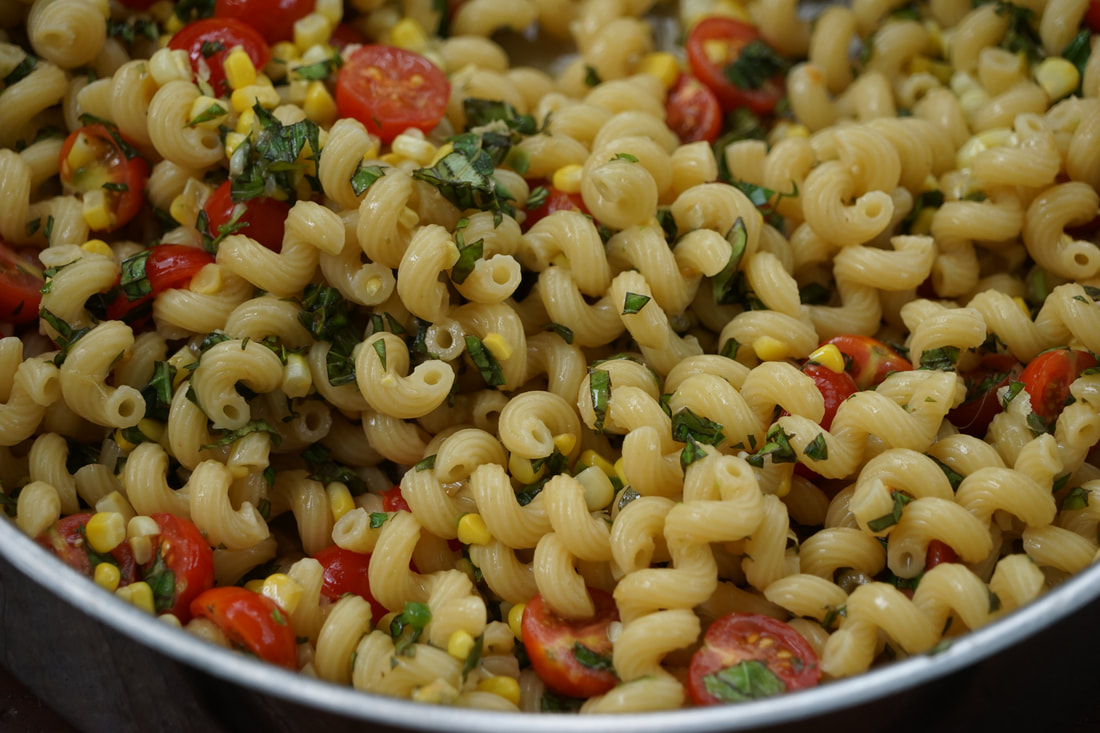 Pasta with Corn, Tomatoes and Basil 1 pint grape tomatoes, halved 3 Tablespoons salt 4 ears corn 4 Tablespoons butter 1/4 cup onion, minced 1/2 jalapeno chili, minced 12 ounces campanelle 1 cup fresh basil, sliced
 Remove from heat. Stir in 2 T. butter, basil and tomatoes. Season with salt and pepper as needed.
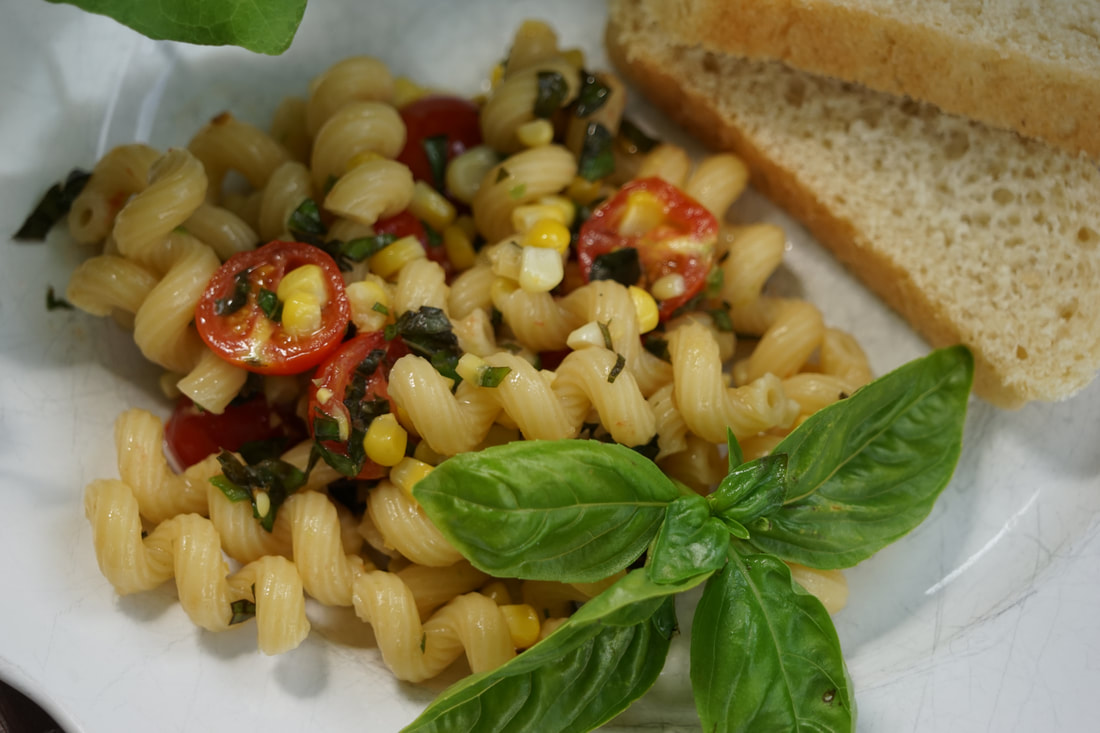 I love the kick of the pepper in this pasta. Dial it up with more jalapeno or take it out completely for a kid friendly version. Half of a seeded pepper was the perfect amount of "heat" for my family. We gobbled up this summer meal up in no time.
Ciao! |