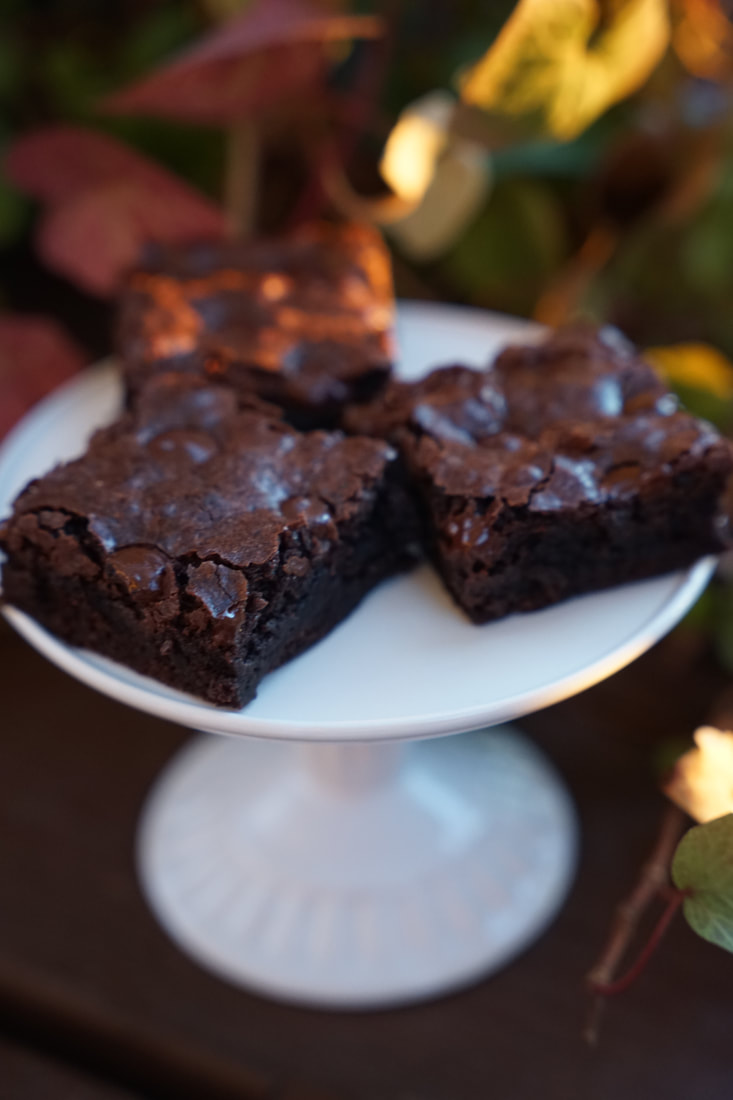
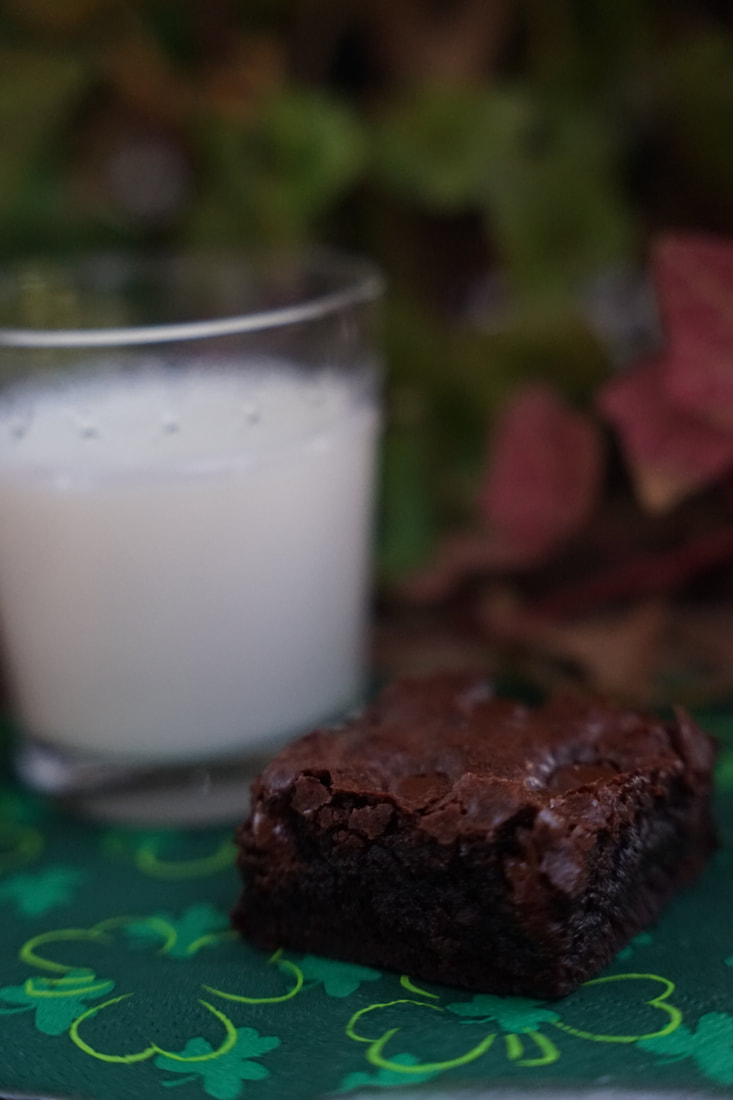
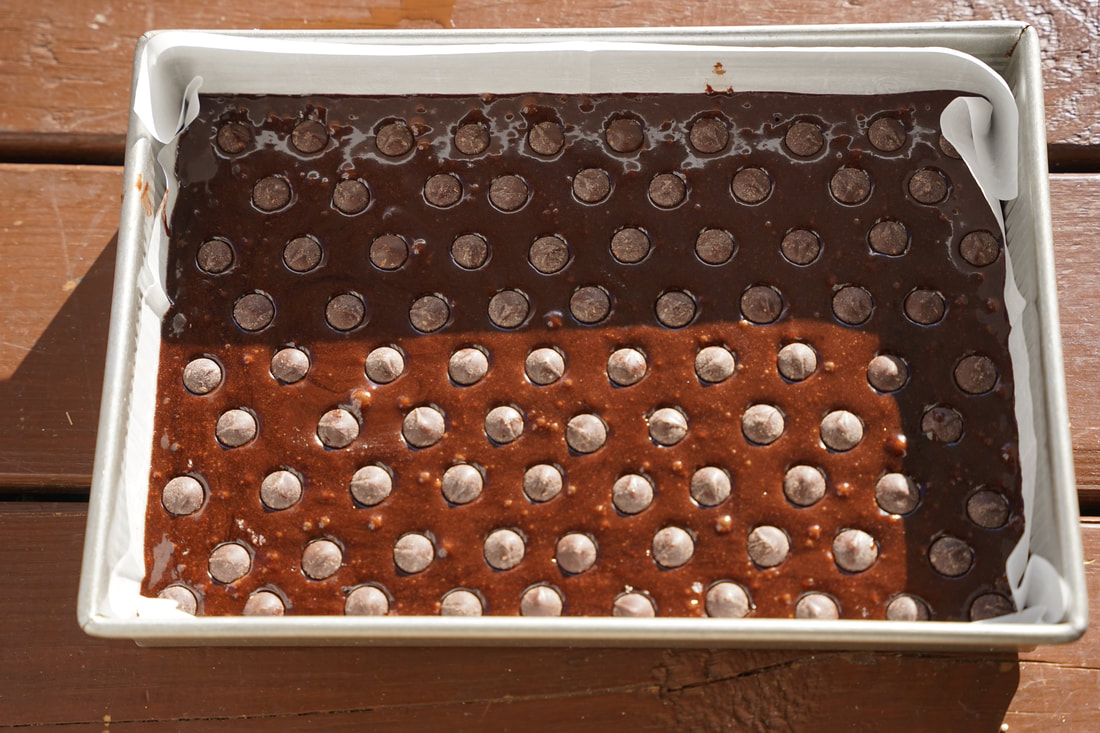
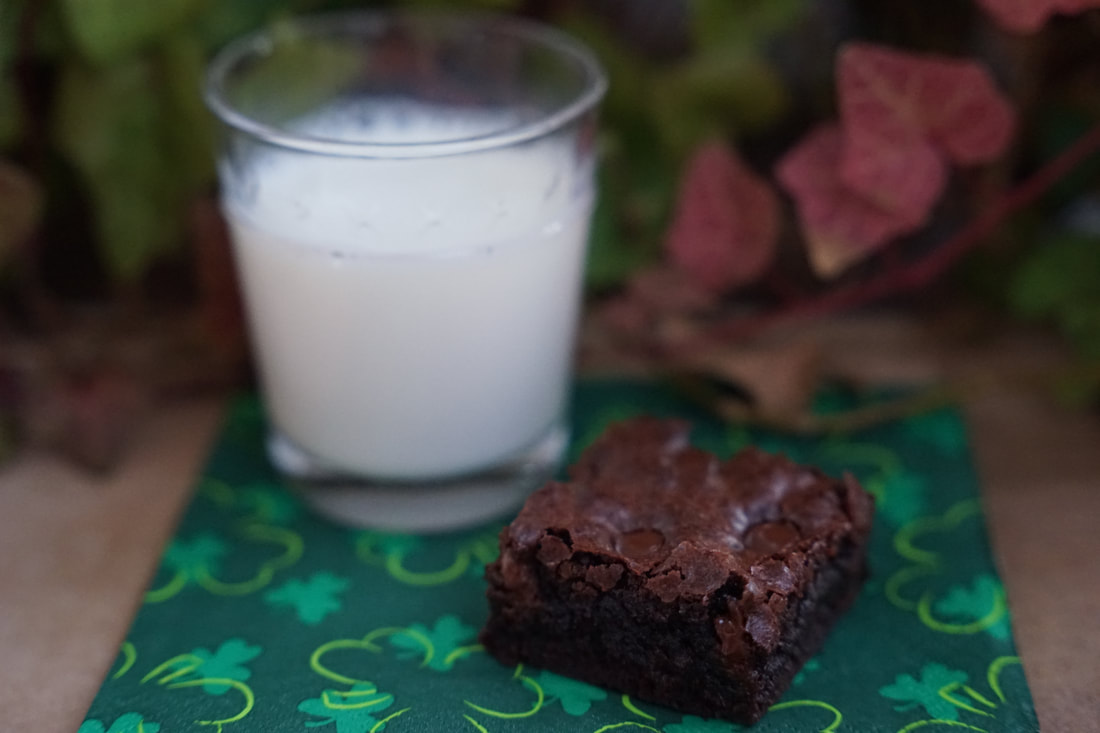
 There's a significant percentage of the population that are adamant about the fact that brownies should be as chocolatey and fudgey as possible with a crackly top and crispy edges. But, there's a whole separate group of people who have equally strong convictions that brownies need to be cake-like and with just enough chocolate to give them a decent brown hue. And then there are the people who fall somewhere in between the two extremes. 🤷🏻♀️ Just out of curiosity - Where are you on the brownie spectrum? Even though I probably should have been deterred by the diverseness of the brownie population - I recently took on the task of developing a brownie mix that would please the masses. 😬 It took quite a few trials but once I settled on a brownie mix that I deemed satisfactory, I sent it out to family and friends for feedback. #becarefulwhatyouaskfor 😅 The exact same recipe produced such conflicting reactions that it was less helpful than I had hoped. "Too chocolatey", "not enough chocolate flavor", "perfectly soft and fudgey", "too dense", "weird texture" and "too crumbly" . What's a girl to do with all those comments? 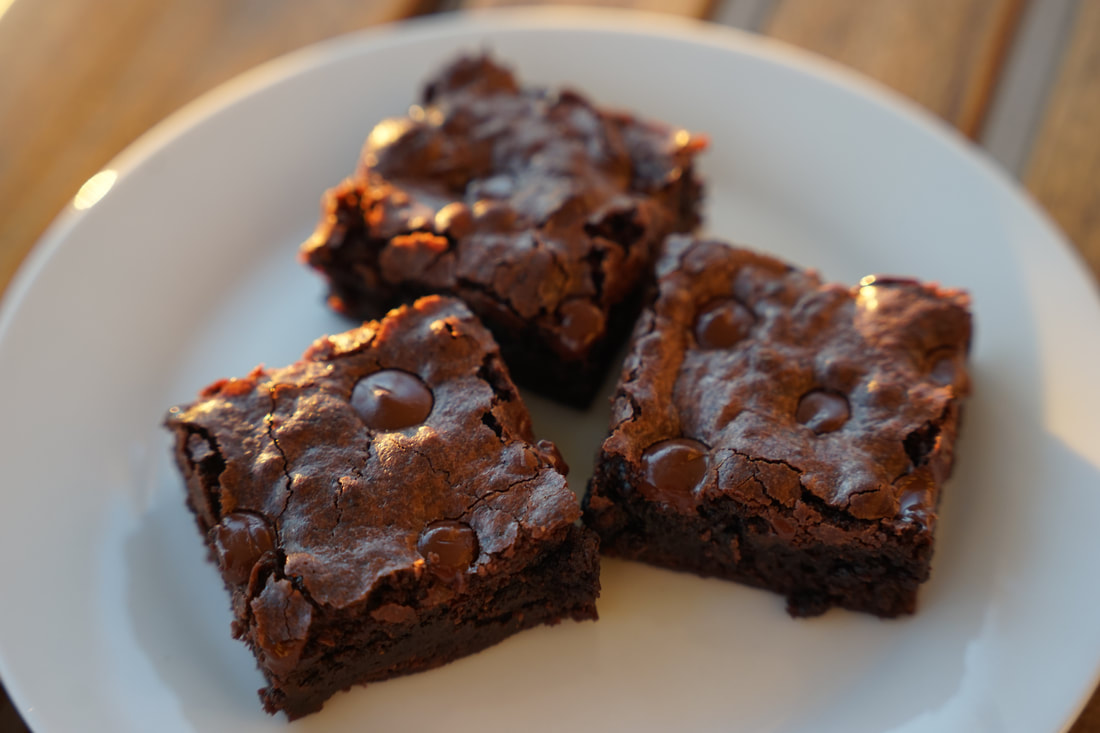 The fact that everyone has a strong opinion about what a brownie should look like, feel like and taste like makes it an almost insurmountable task to make a brownie that would please everyone. Sure, by adjusting the baking times and temperatures and the type of pan that you use for baking, you can alter the results slightly but that won't solve every brownie issue. So at the risk of offending discrete chocolate flavor, cake-like brownie lovers across the world - I'm posting my favorite brownie recipe. Moist, fudgey, ultra chocolatey with crispy edges, soft centers and crackly topped brownies.
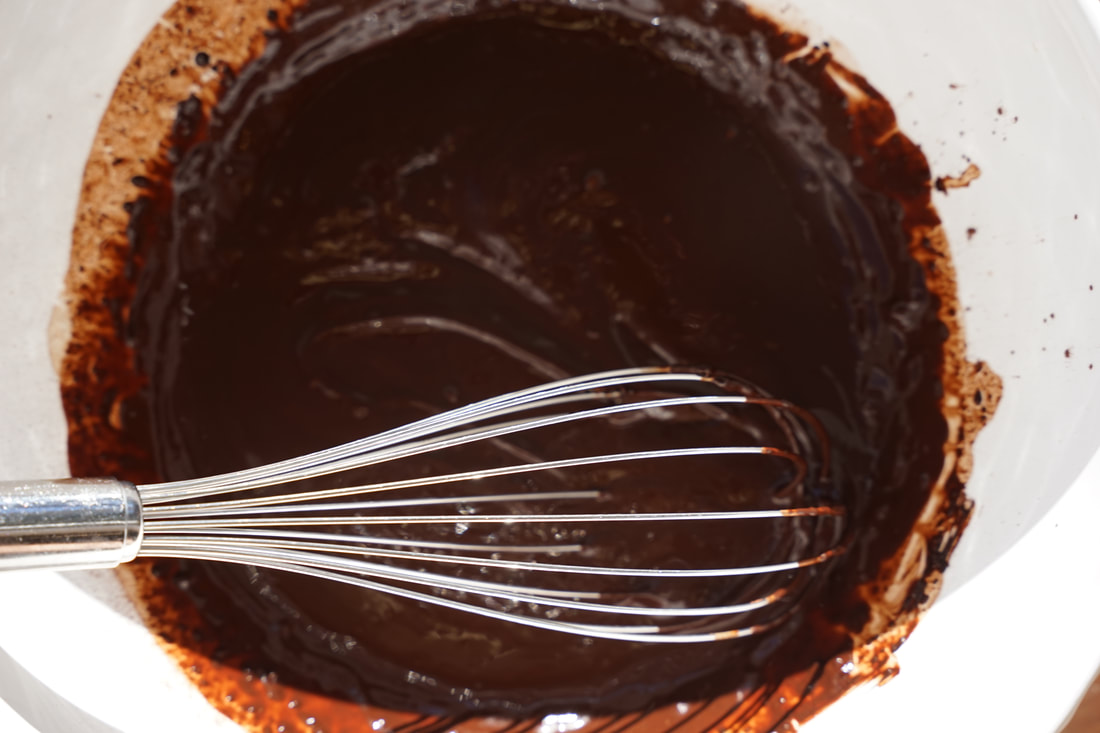
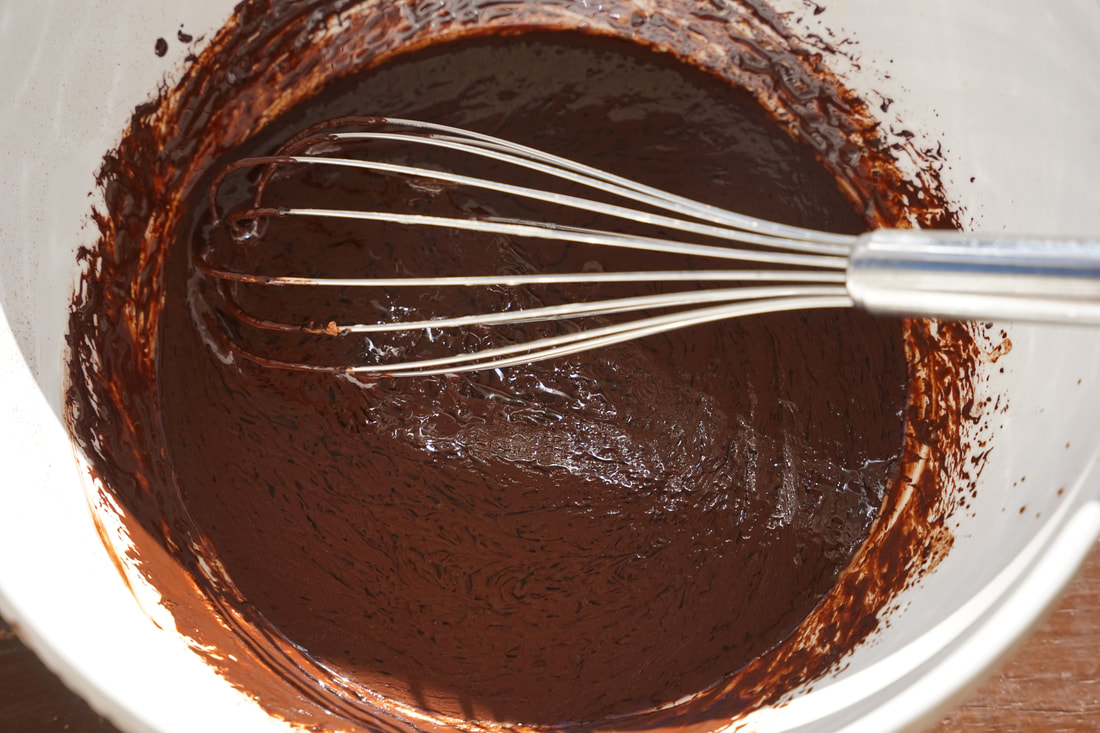
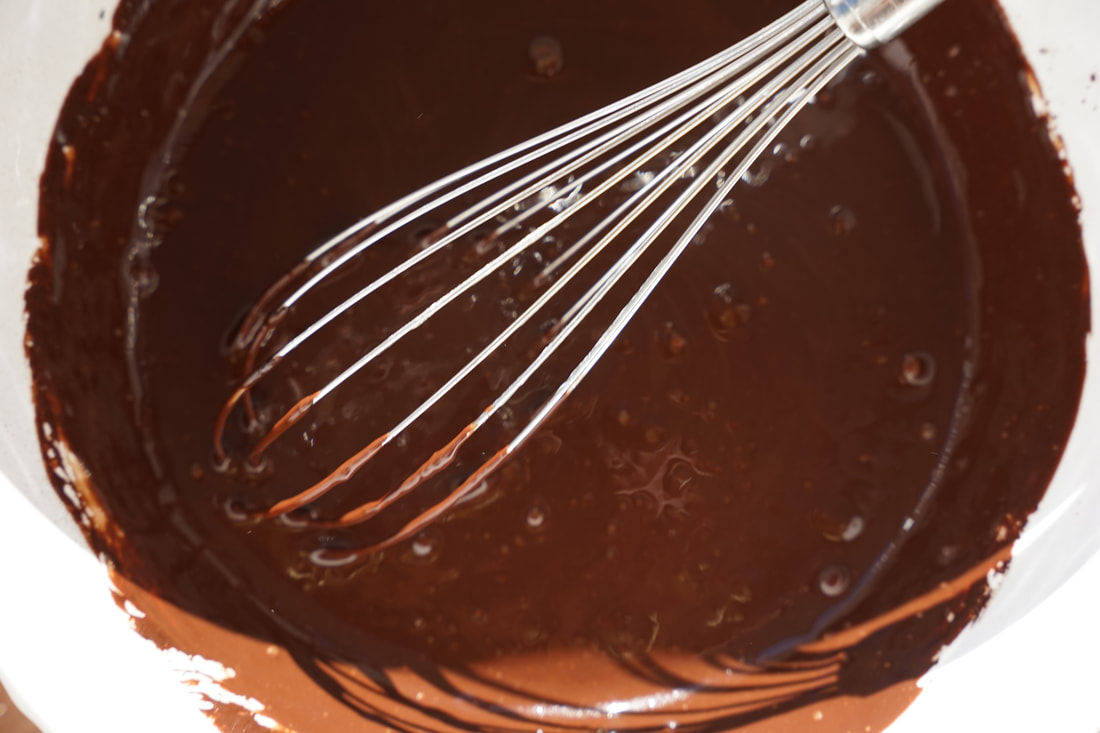
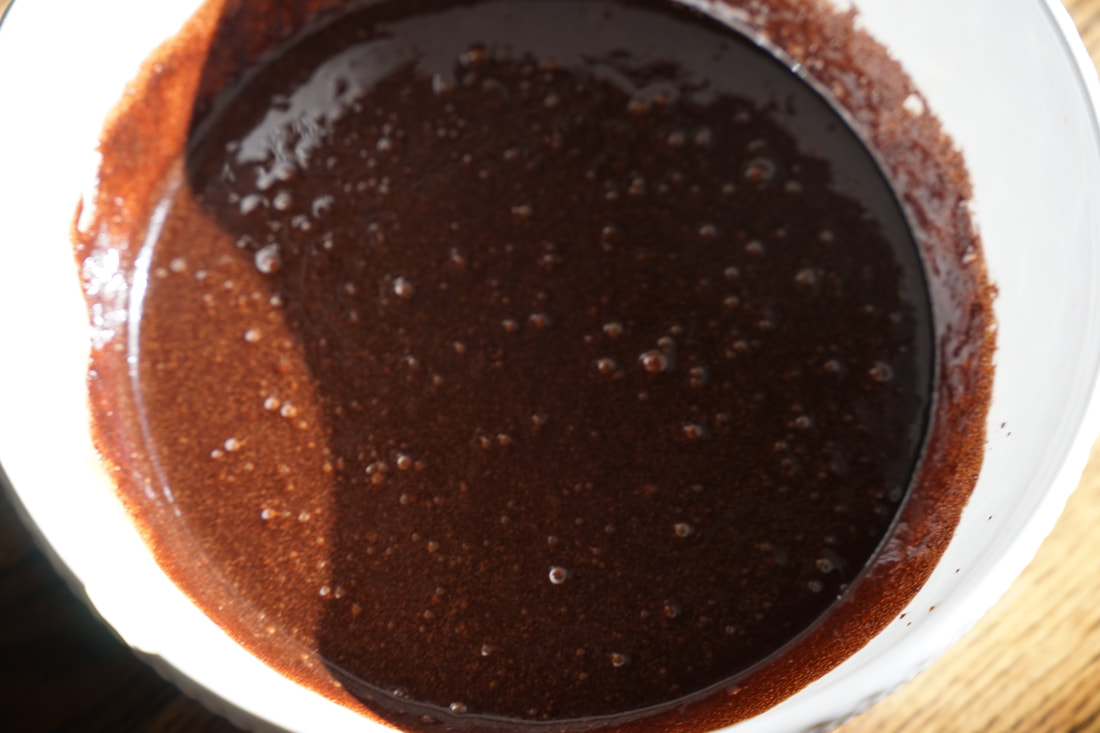
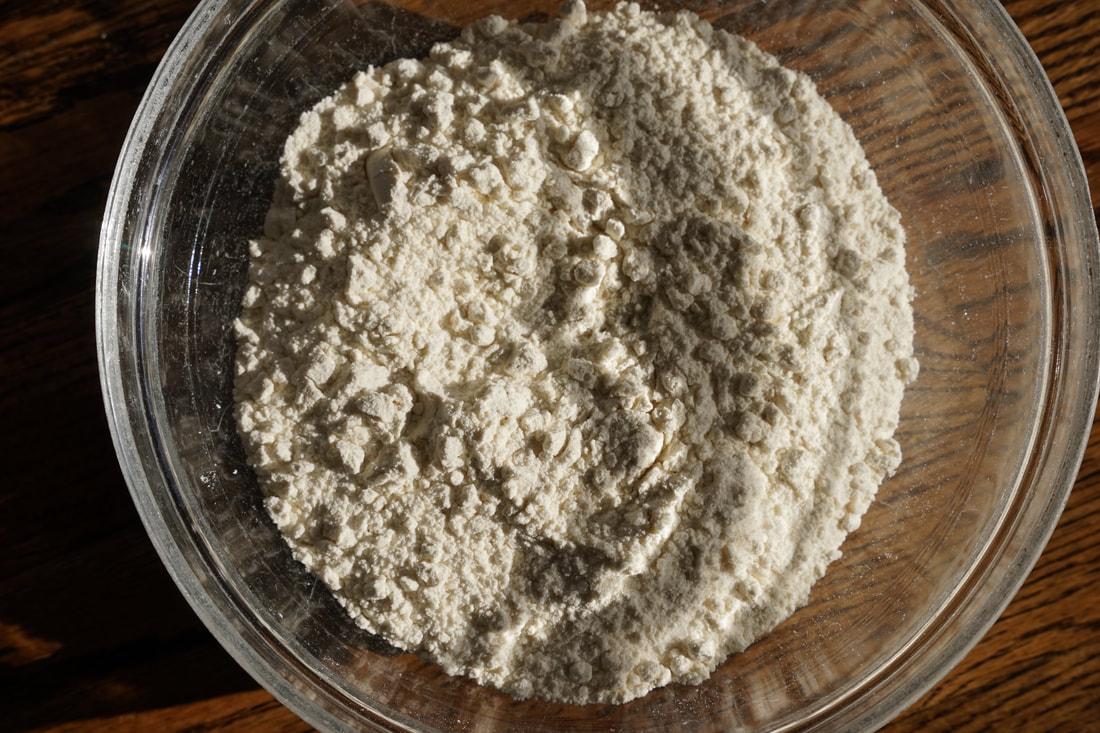
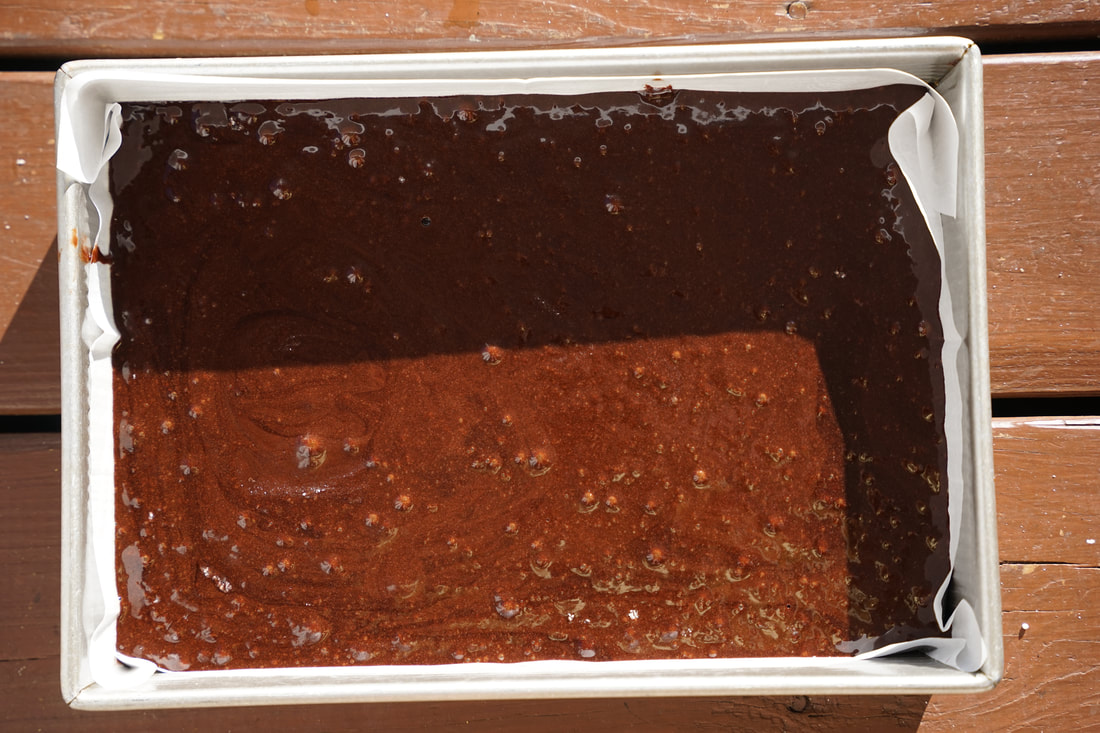
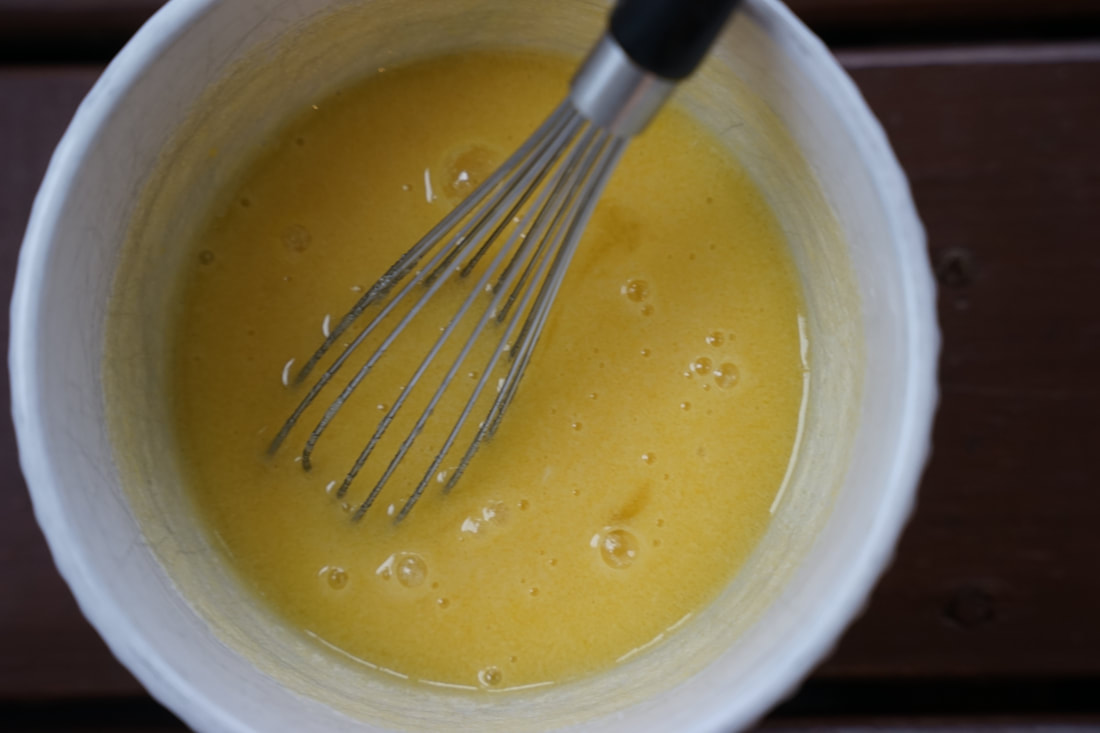
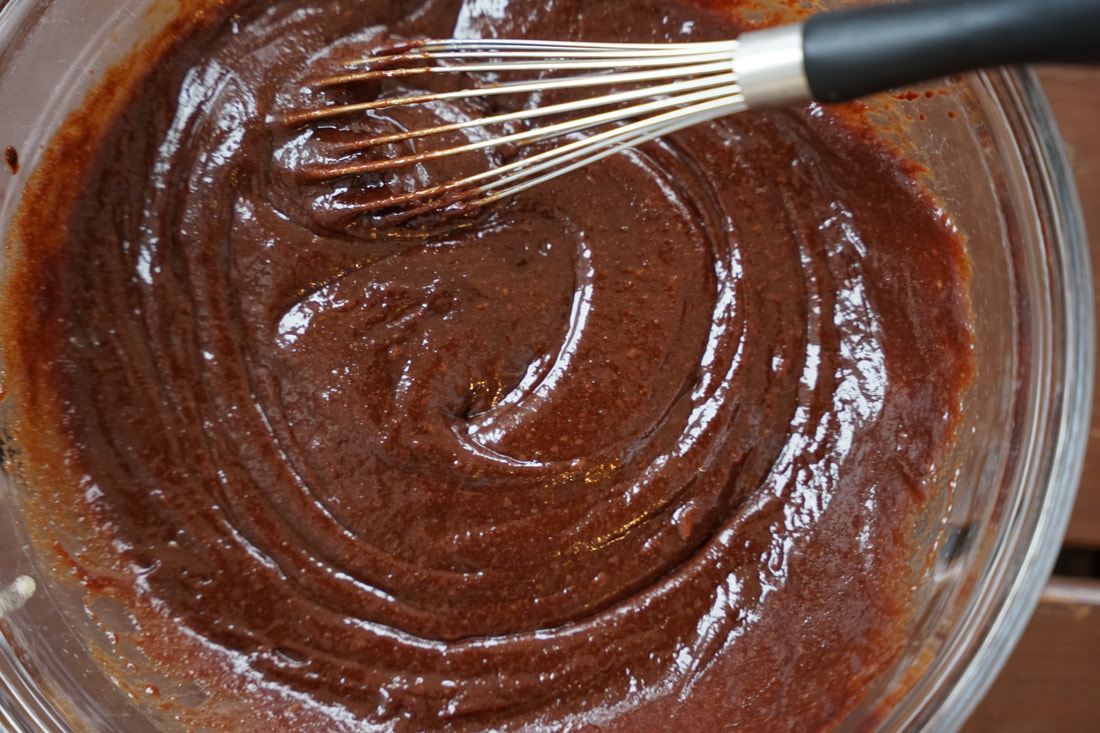
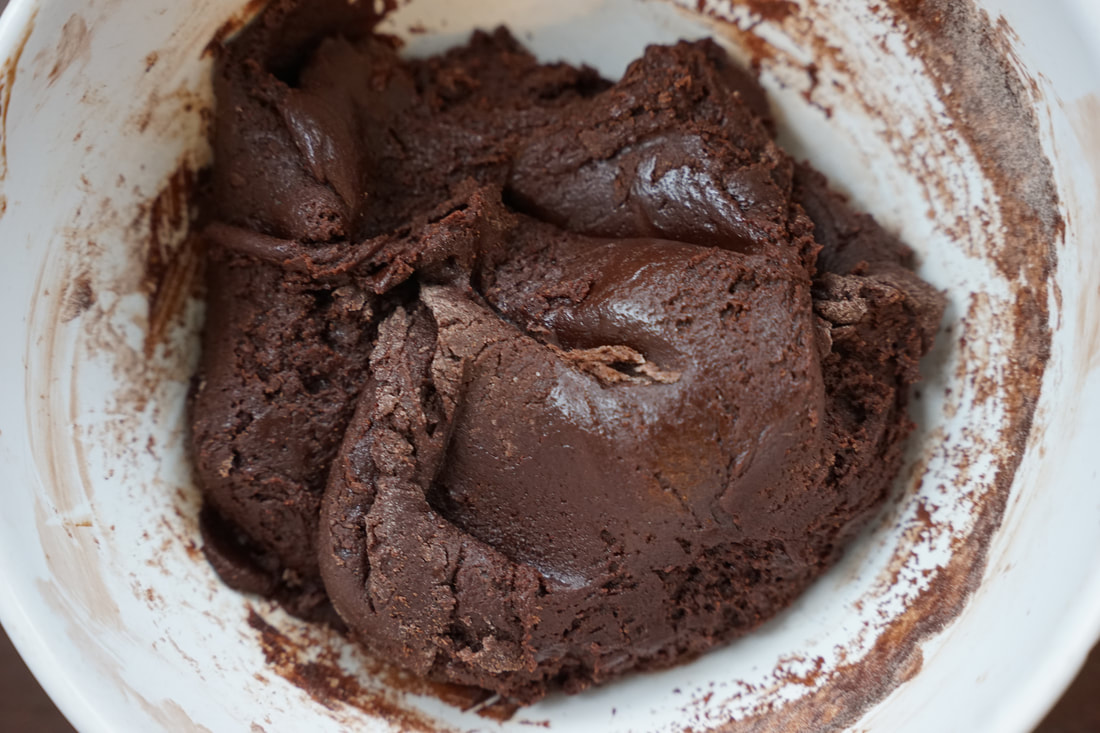
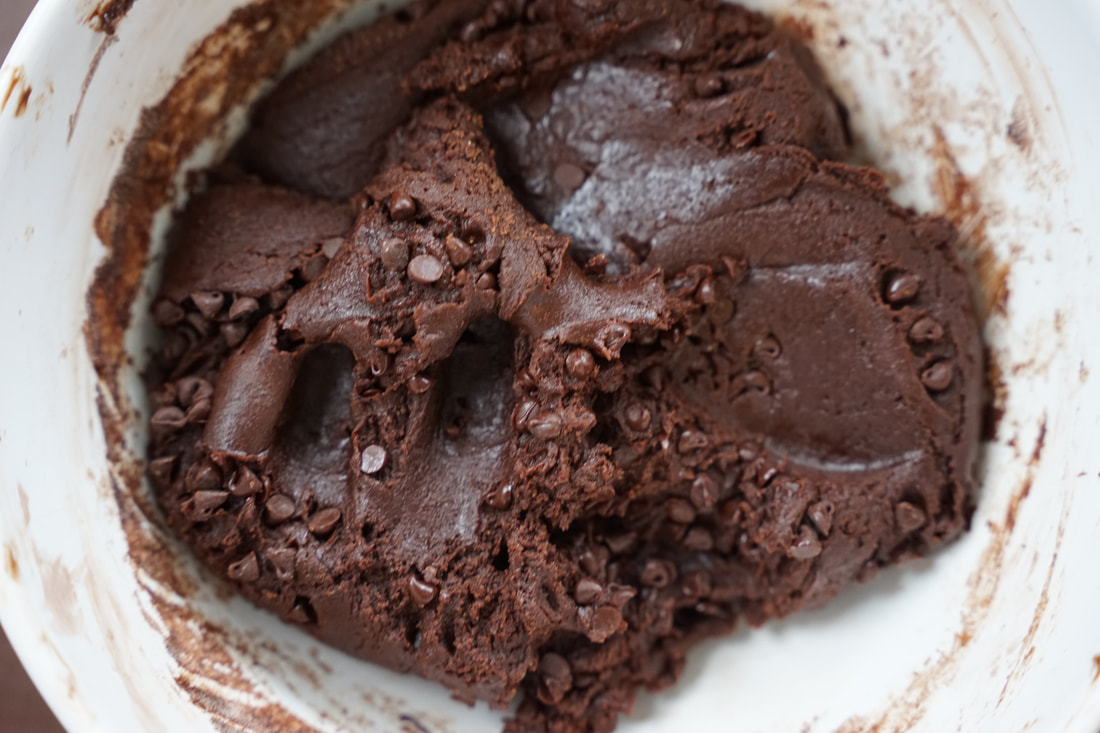
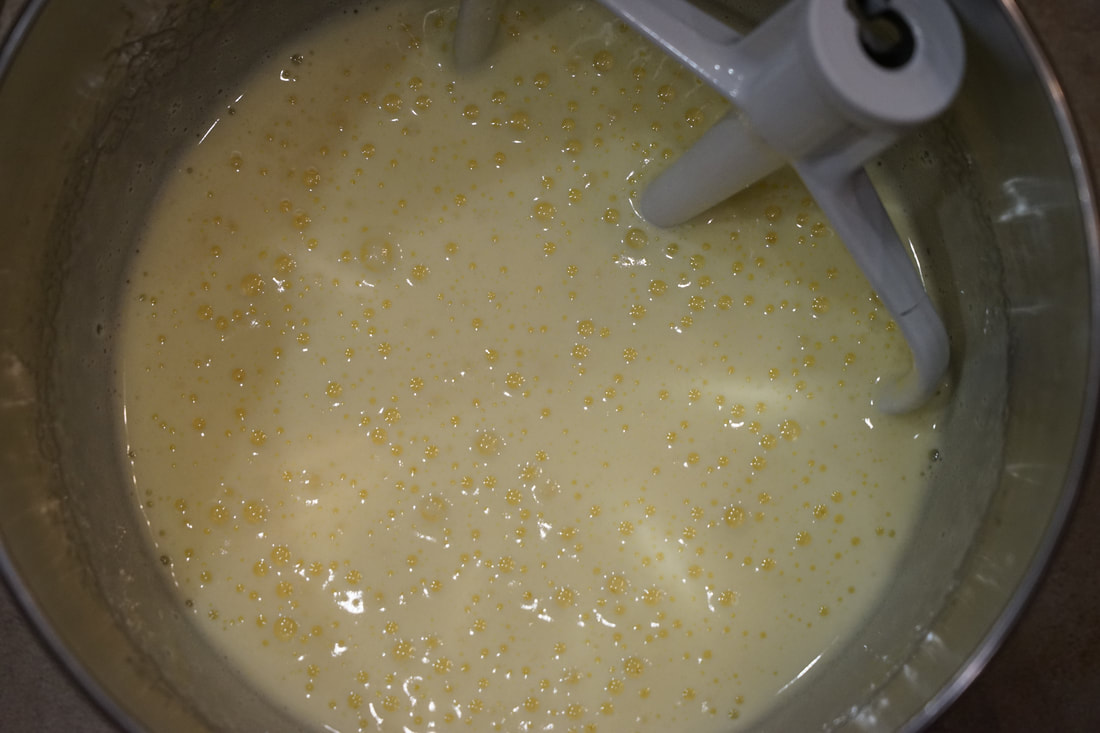
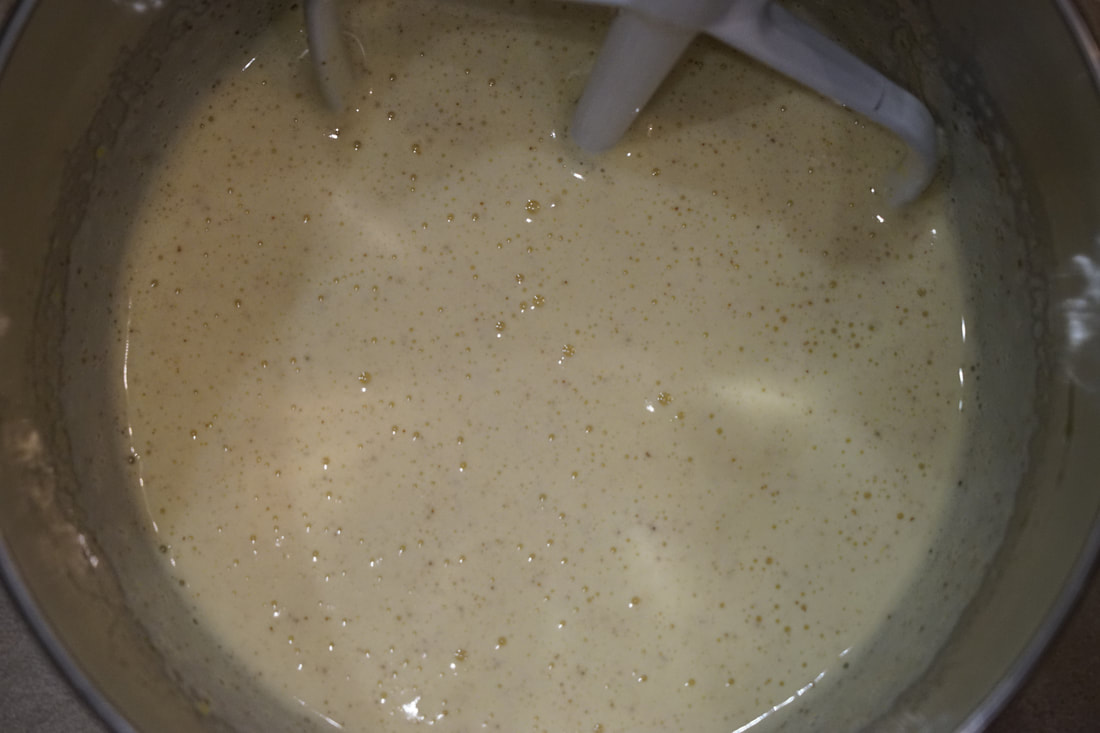
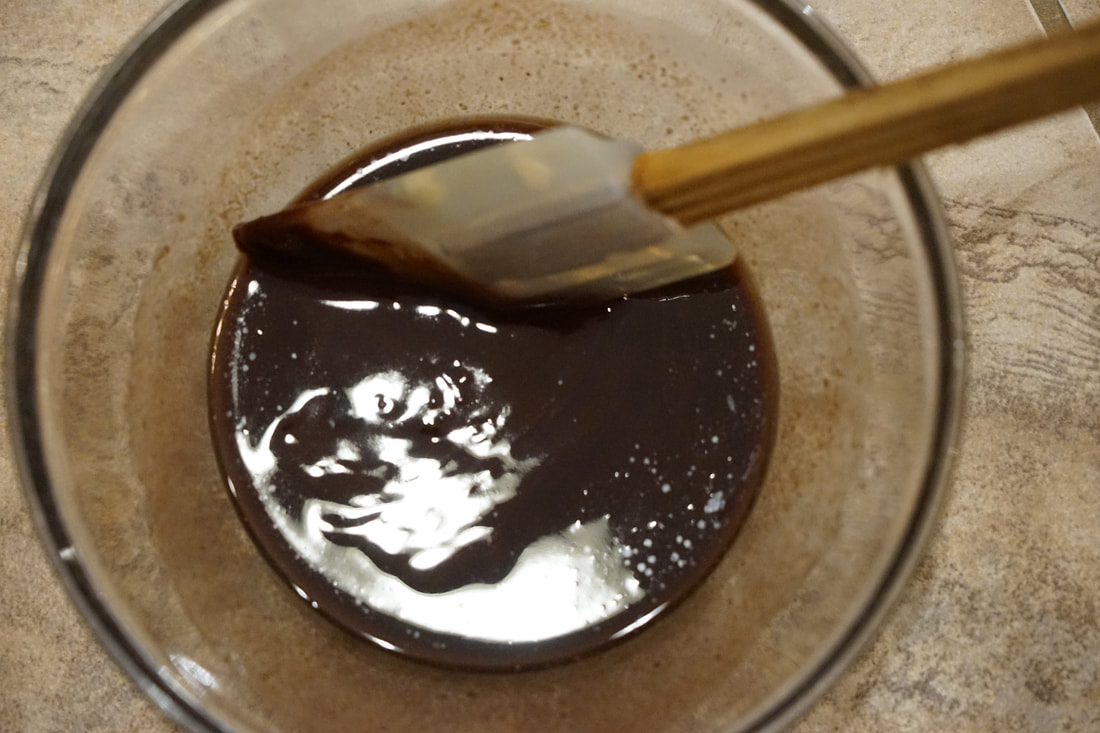
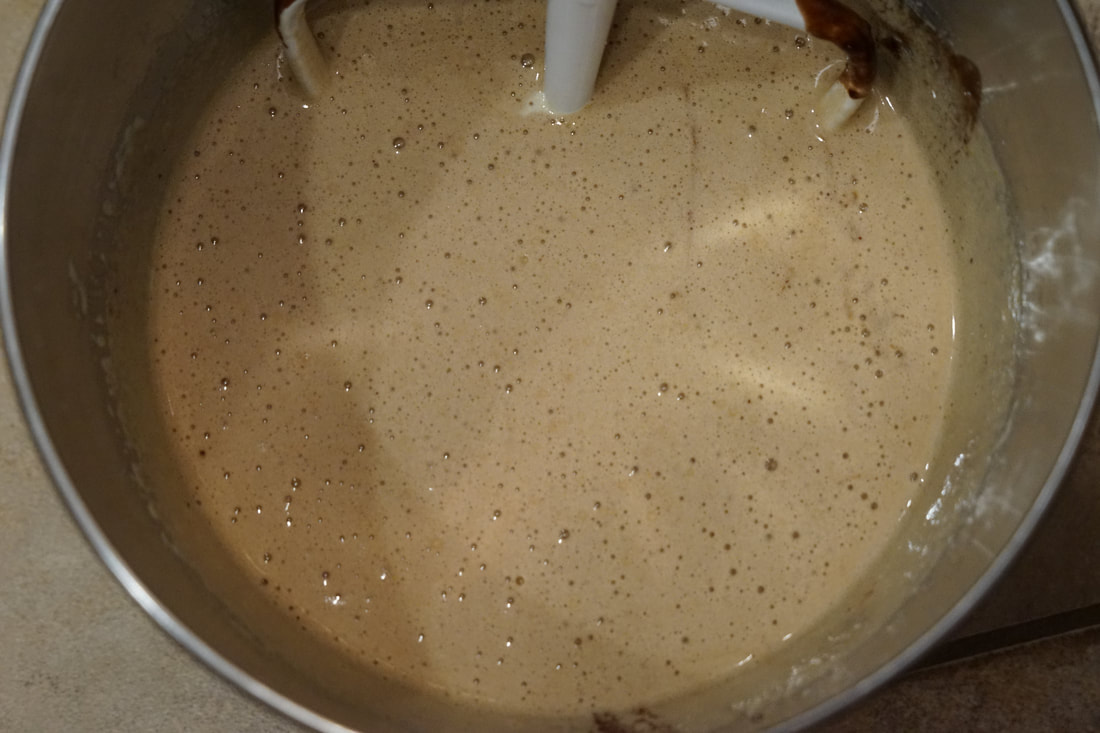
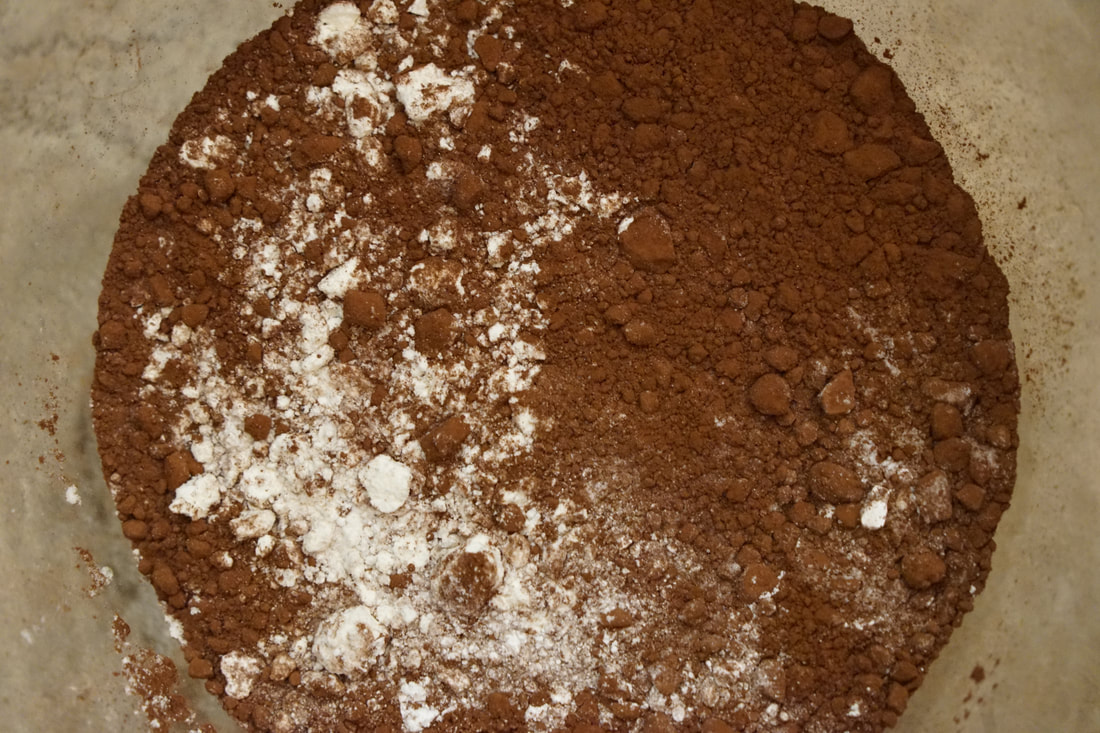
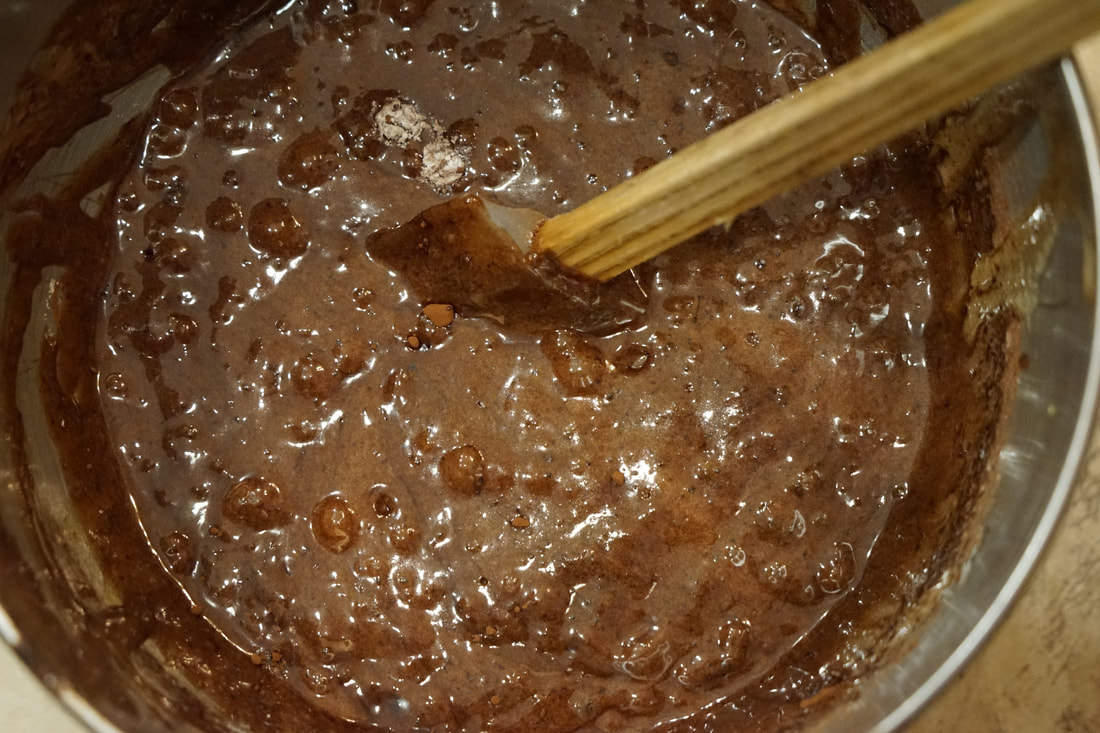
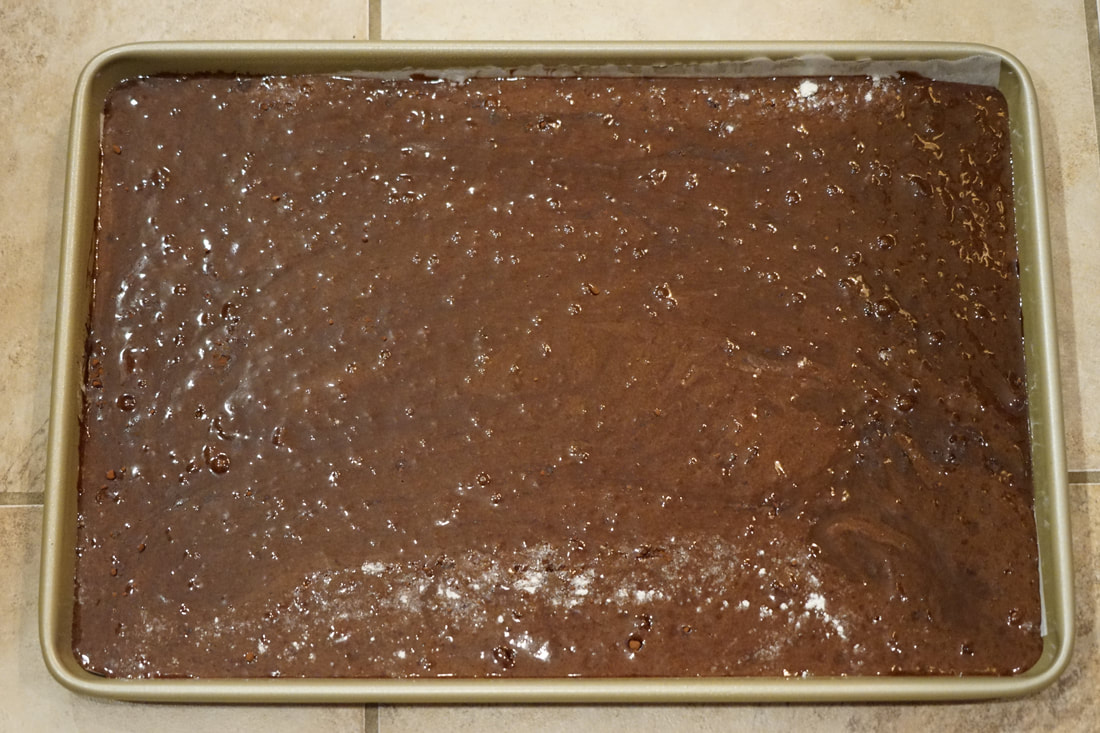
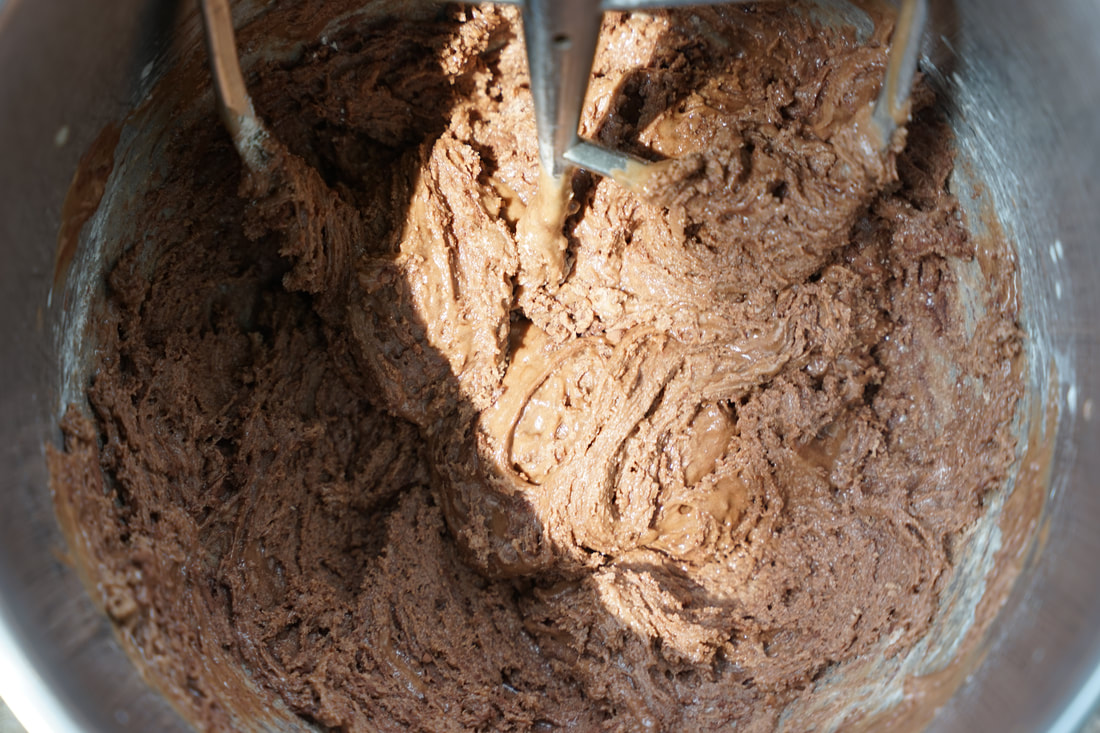
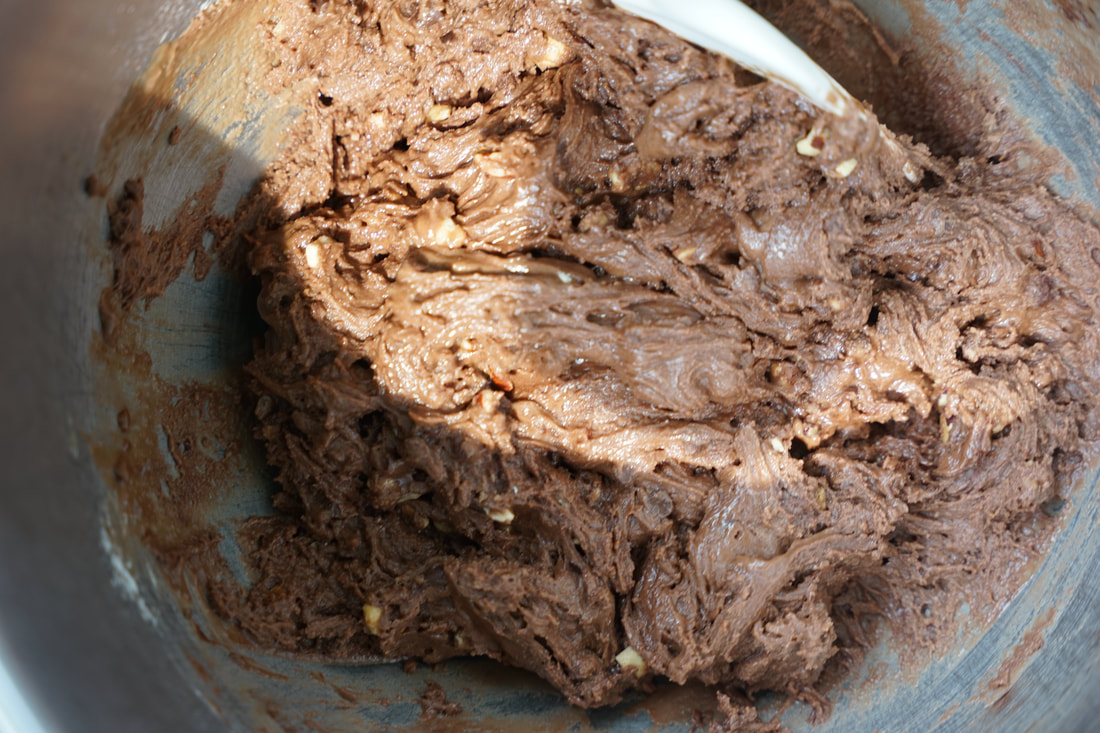
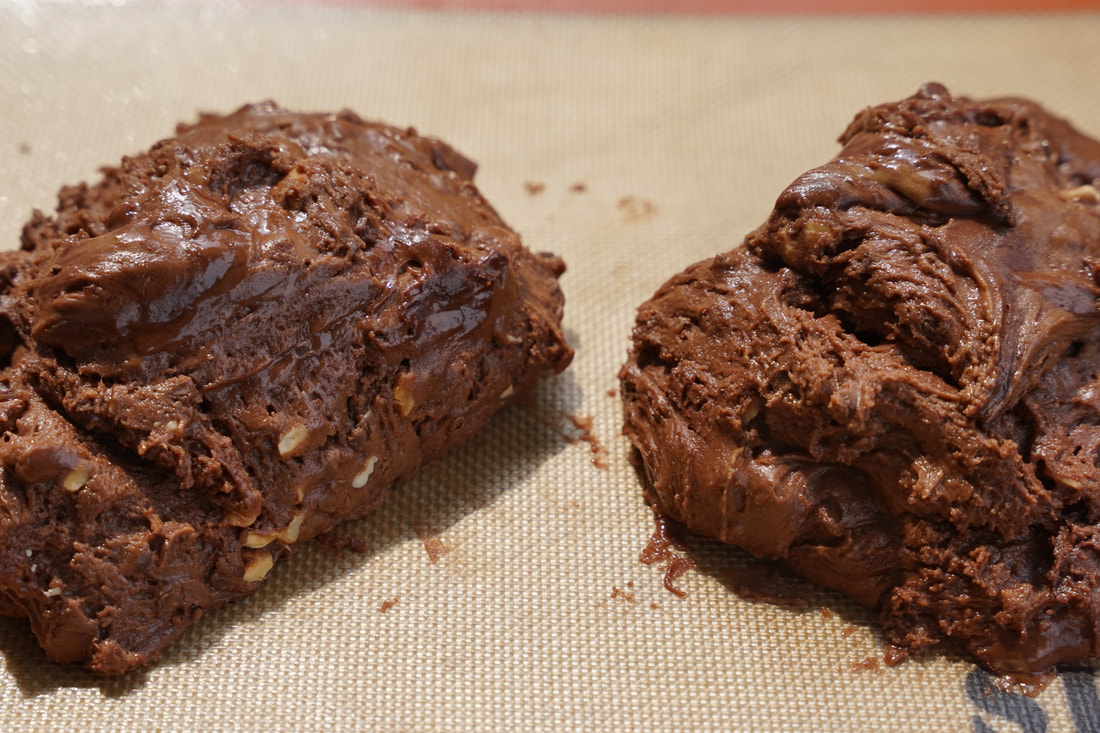
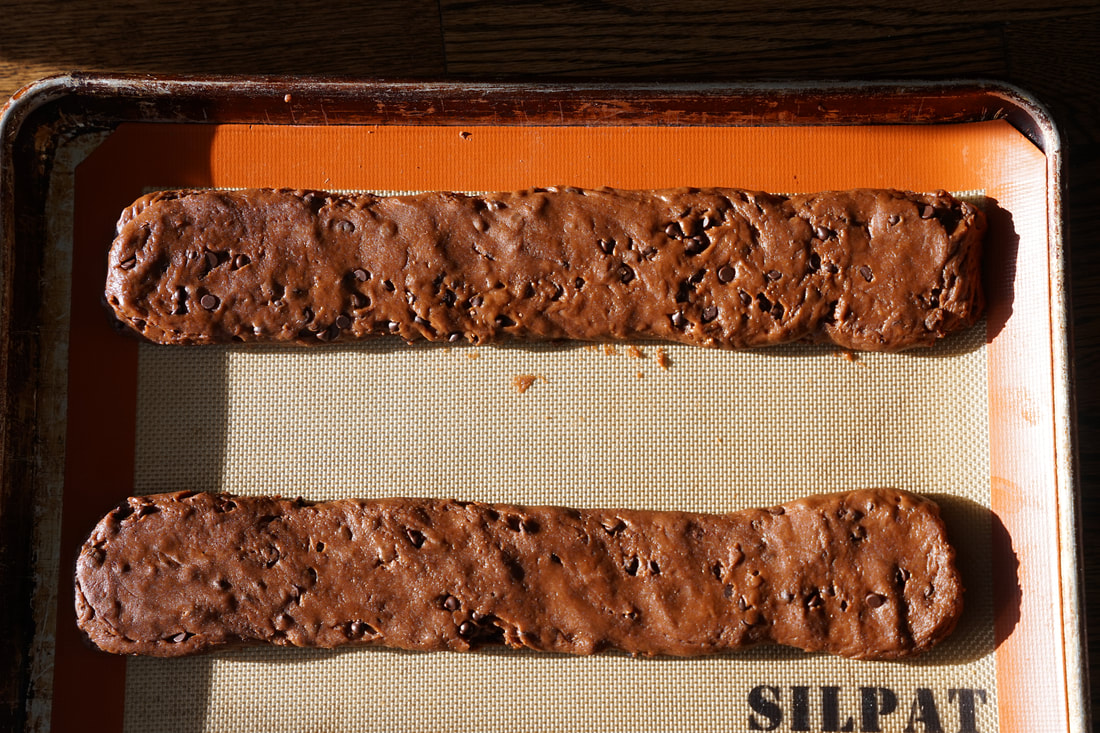
Chewy Brownies 1/3 cup cocoa powder 1 1/2 teaspoons espresso powder 1/2 cup + 2 Tablespoons boiling water 2 ounces unsweetened chocolate 1/2 cup + 2 Tablespoons oil 4 Tablespoons butter, melted 2 eggs + 2 egg yolks 2 teaspoons vanilla 2 1/2 cups sugar 1 3/4 cups flour 3/4 teaspoon salt 6 ounces dark chocolate
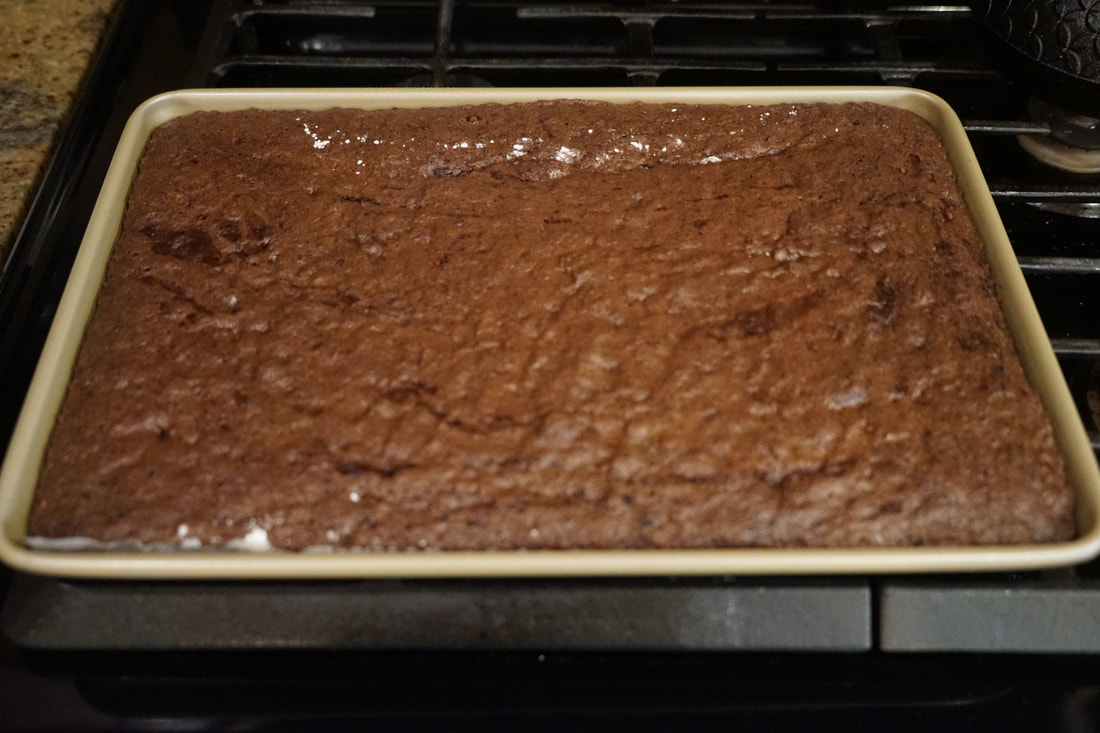
 Bake 30-35 minutes at 350. 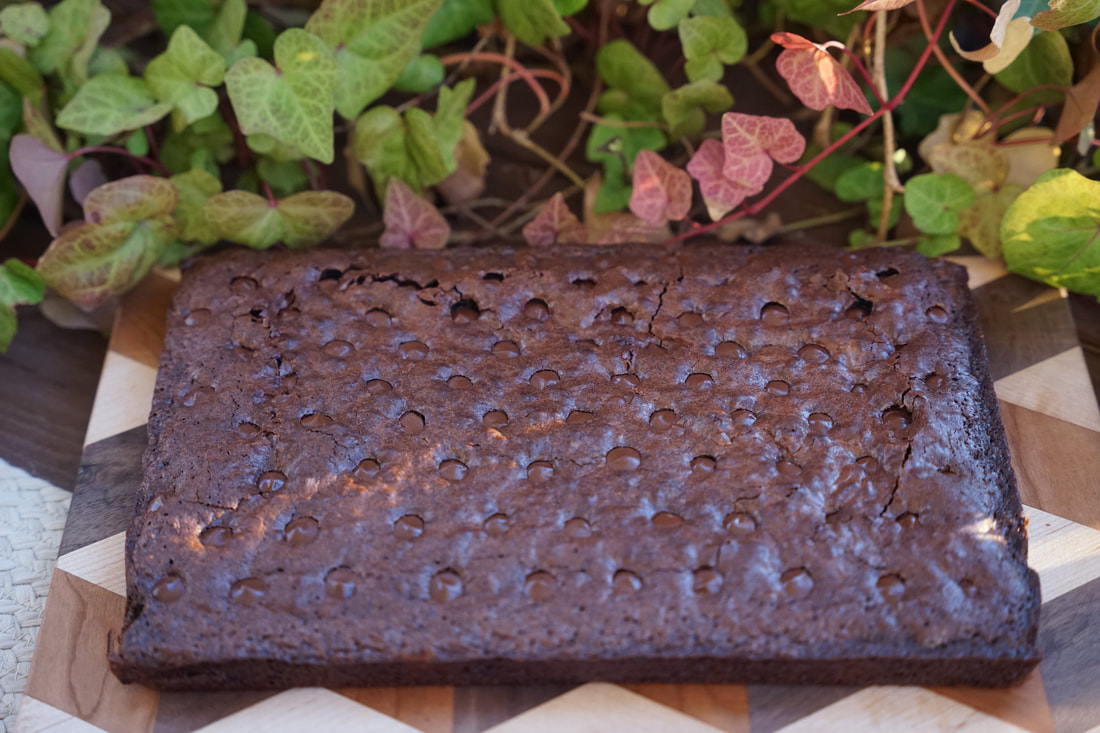 Let brownies cool 1 1/2 hours in pan before removing. 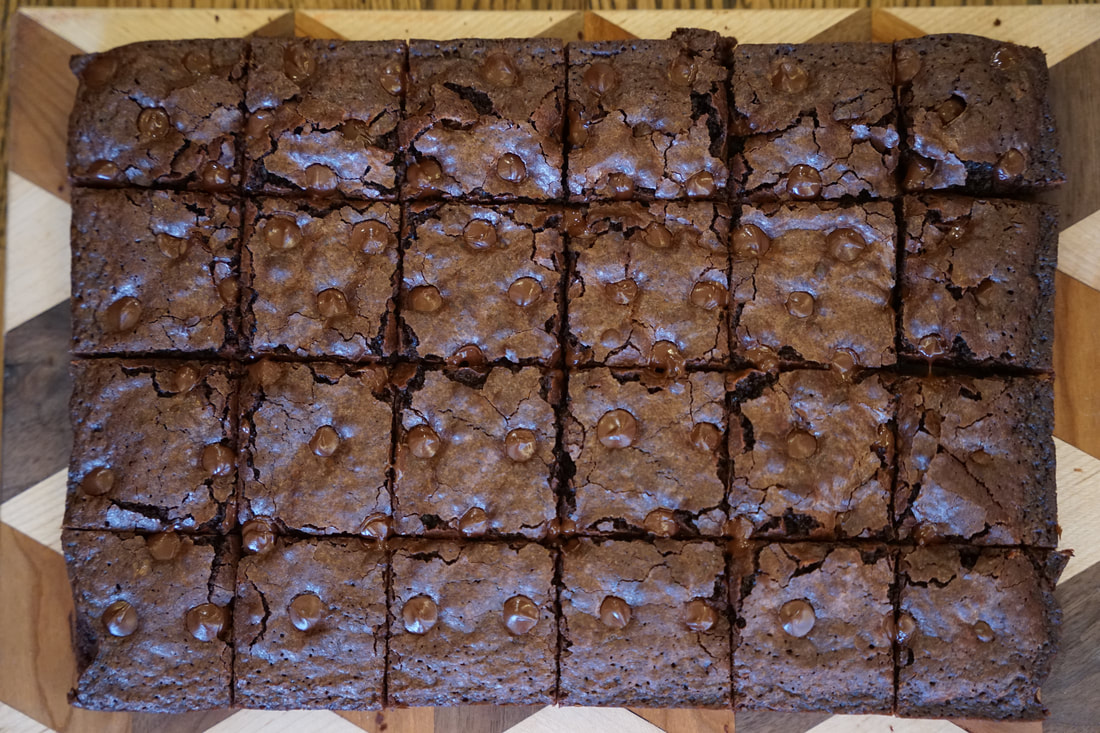 Slice.
One batch of these delicious brownies and you might never buy brownie mix from a box again. I think you'll be surprised at how easy they are to make and with only 1 bowl to wash. (bonus) Not to mention the fact that these are the most delicious brownies that you'll ever put in your mouth. Ciao!
0 Comments
 Last weekend, I traded in my trusty wheels for a new set of wheels. 🚘 I'm crazy excited about my new ride but in all honestly, it's going to take me some time to learn all the new buttons, gadgets and features on this new vehicle. I apologize in advance to all other drivers that I will inevitably flash my brights at while I look for my windshield wipers. 🤣🌧🤦🏻♀️ I'm a 50 year old with a catering business - safe to say, automotive technology isn't second nature to me. 😅 Thank goodness I have very knowledgeable (and patient) people in my life who teach me everything I need to know about my new car. (Several times in some cases.) 😂 It's not that I'm opposed to learning new things, I'm actually teaching myself a second language this year. 🤷🏻♀️ I may never figure out how to use the app to start my car remotely but I am determined to learn how to turn the air conditioner off when it's 30 degrees outside. 🥶
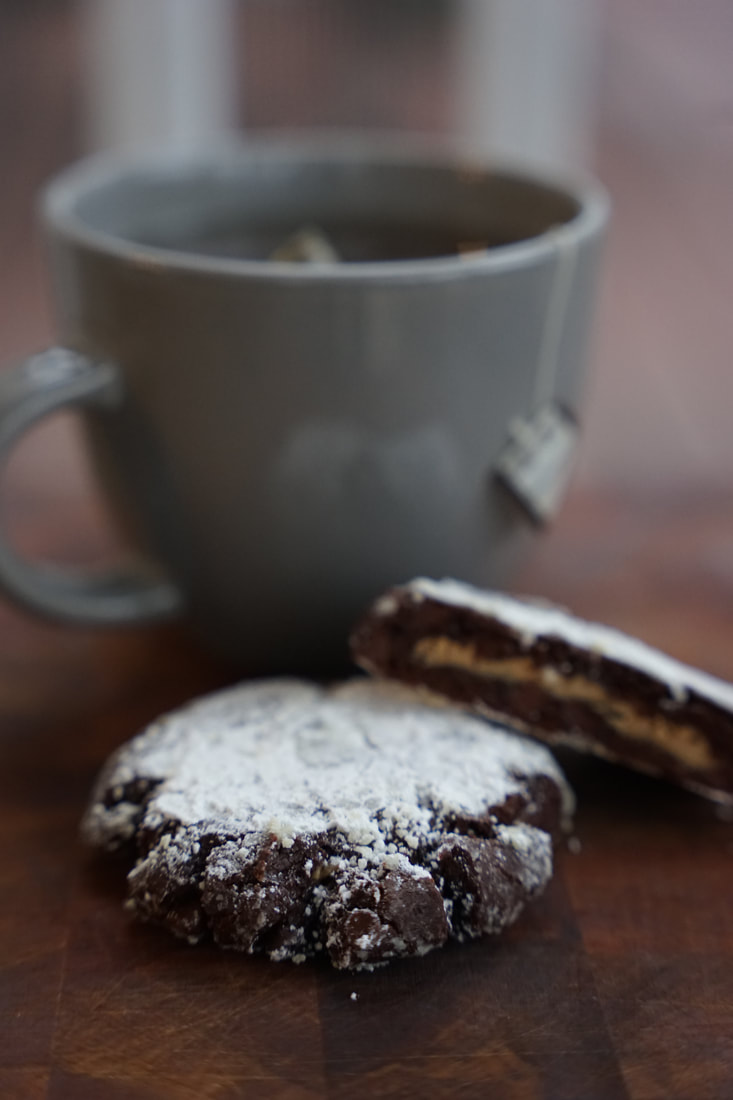
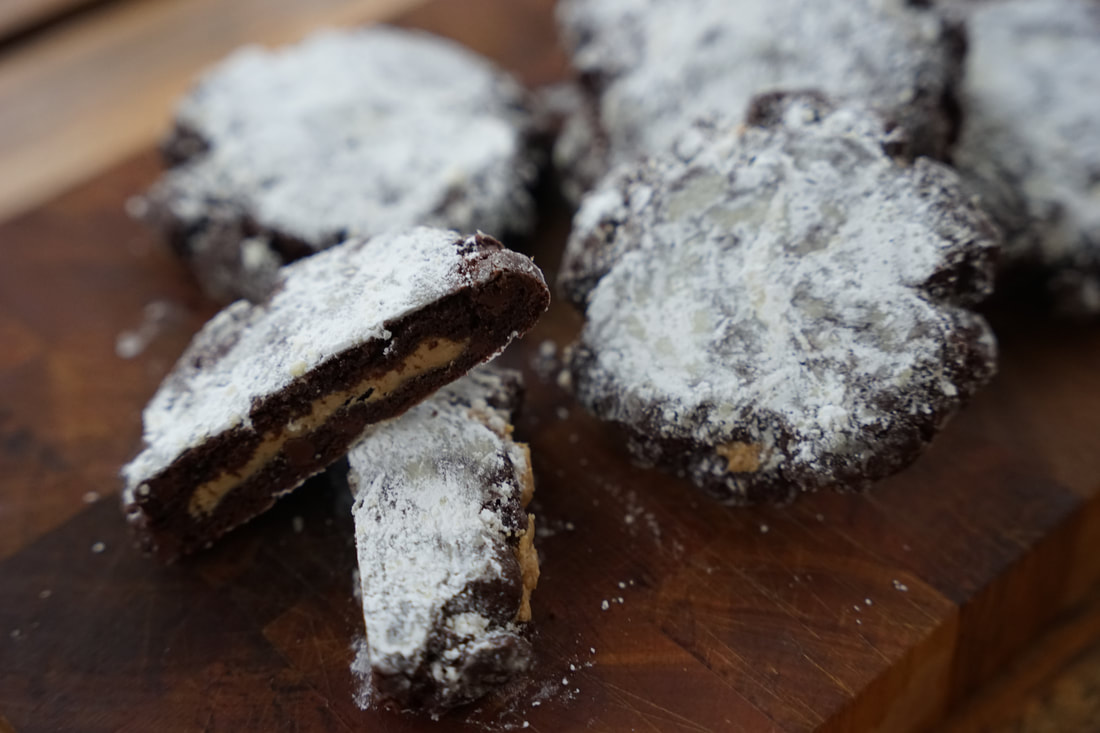
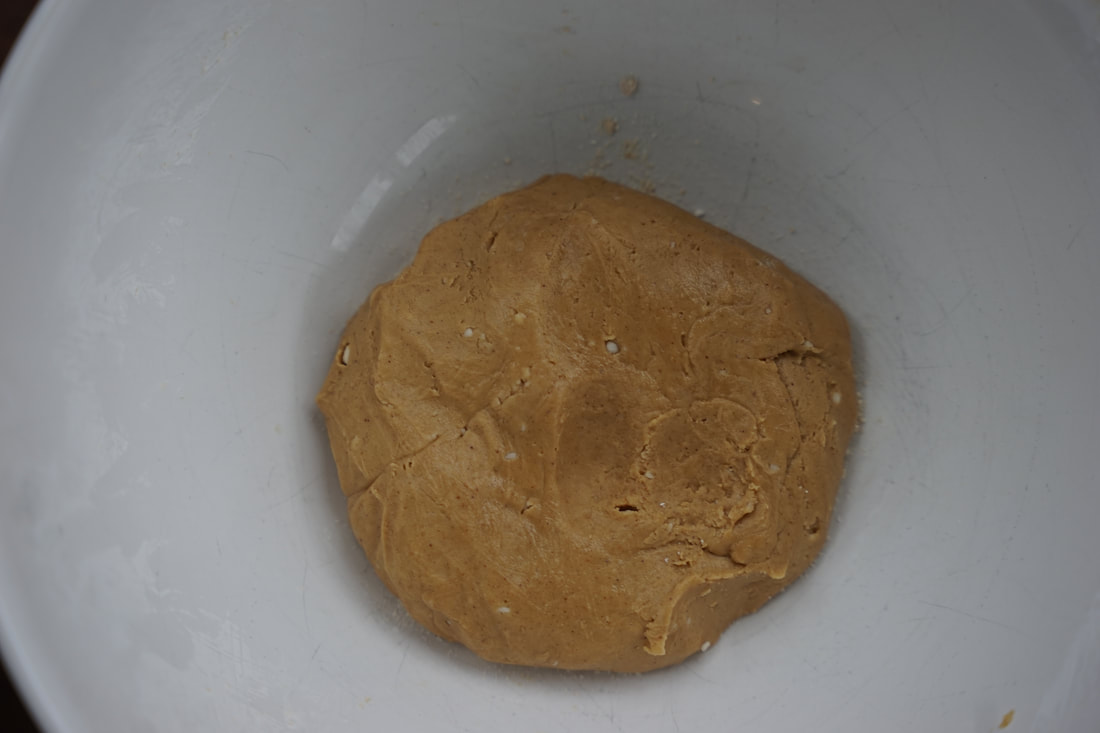
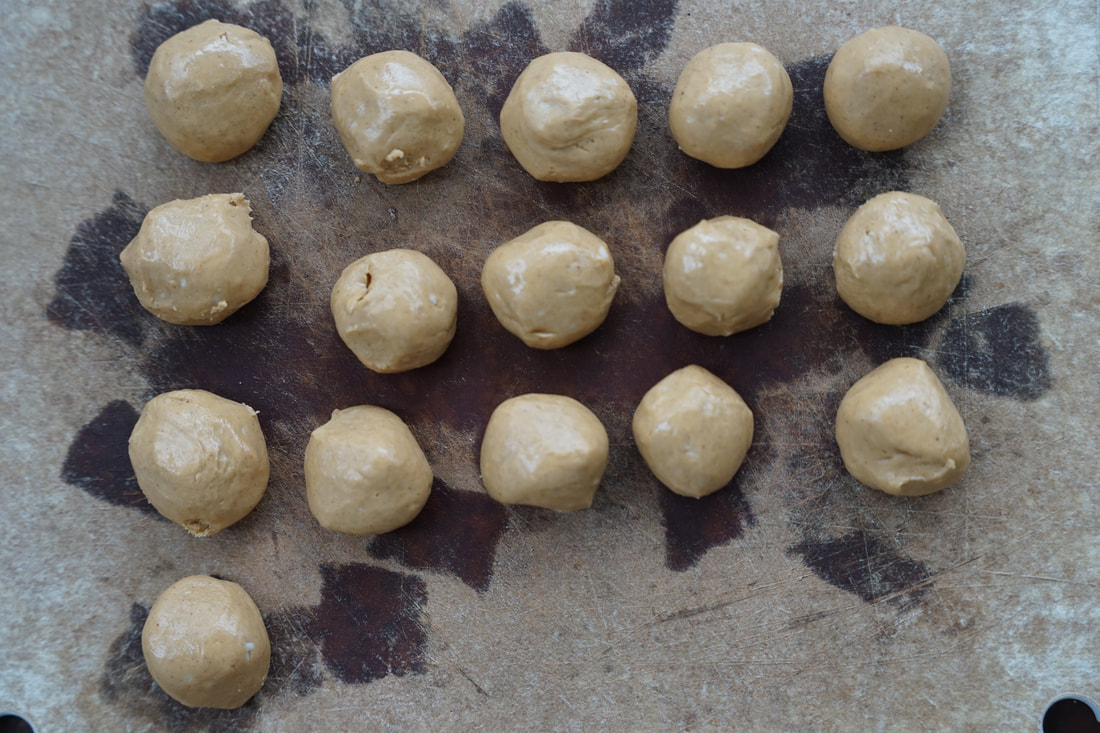
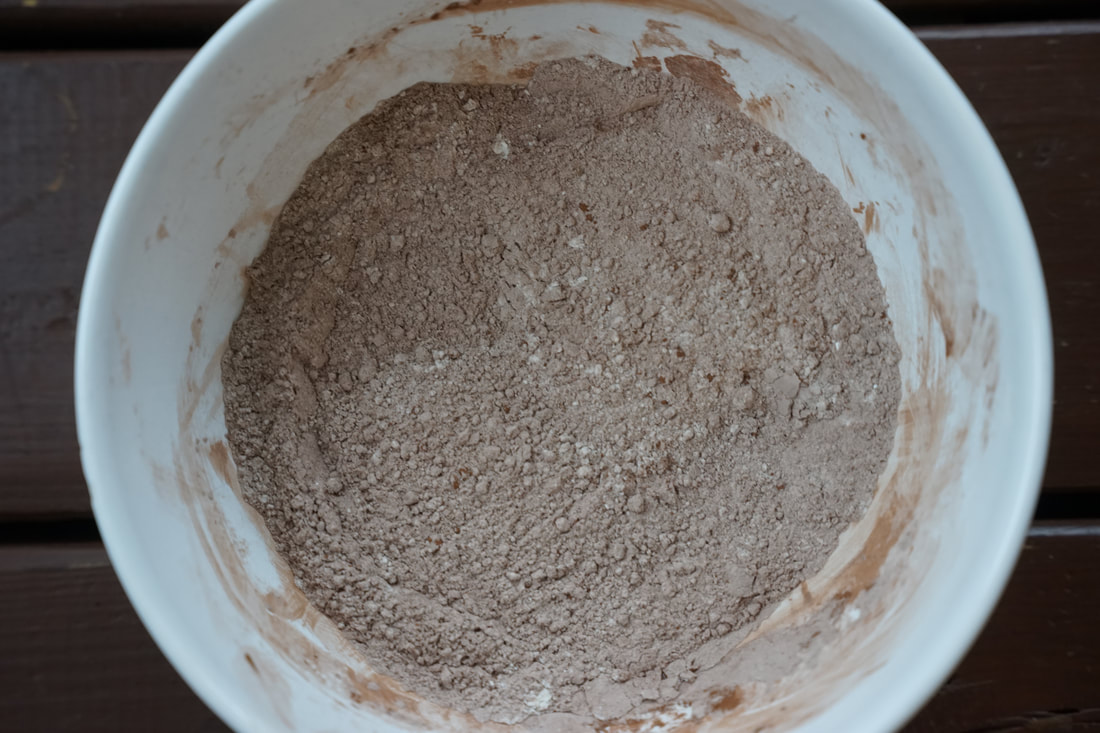
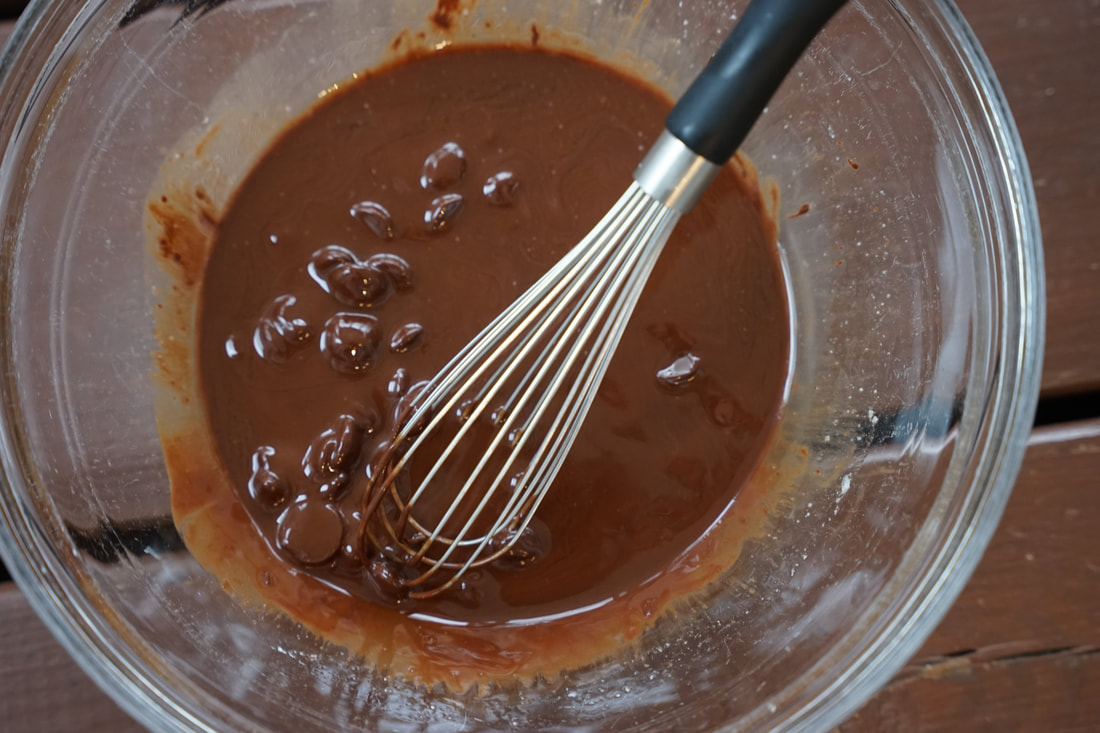
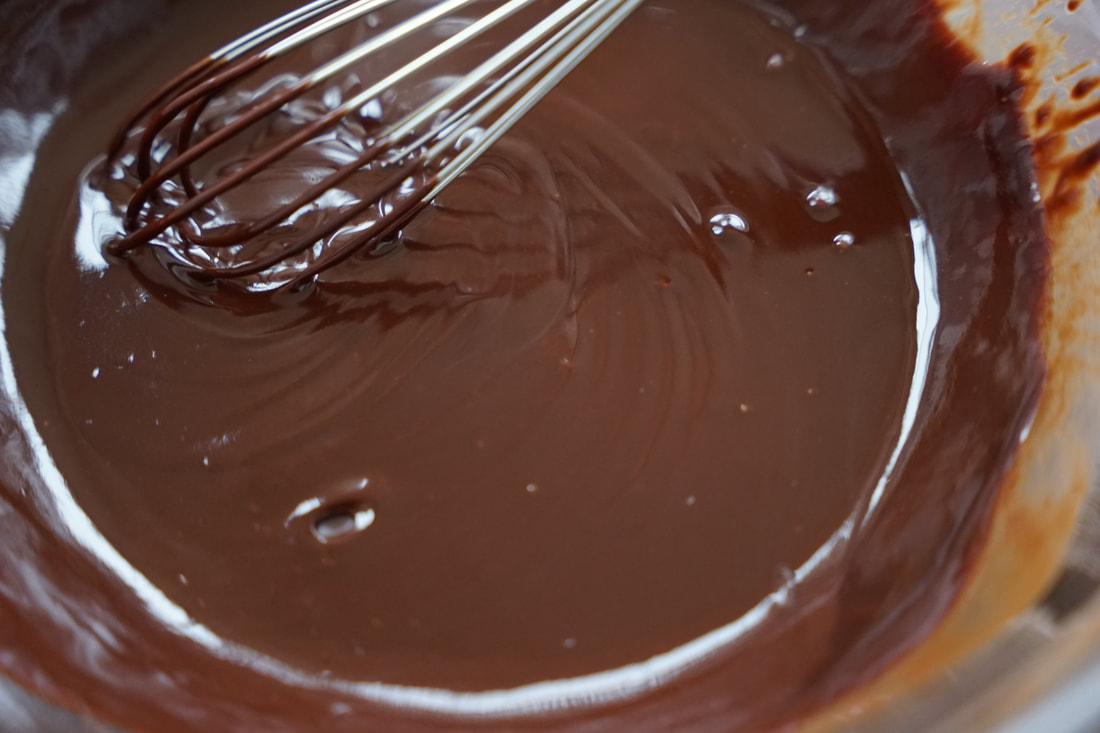
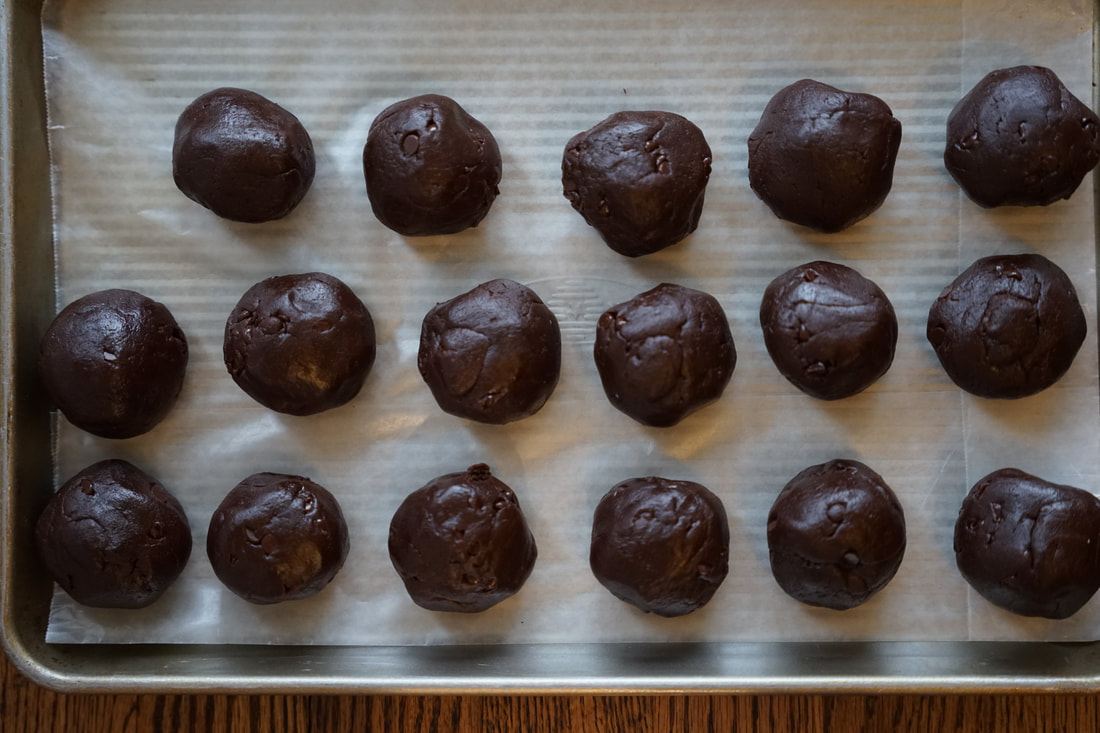
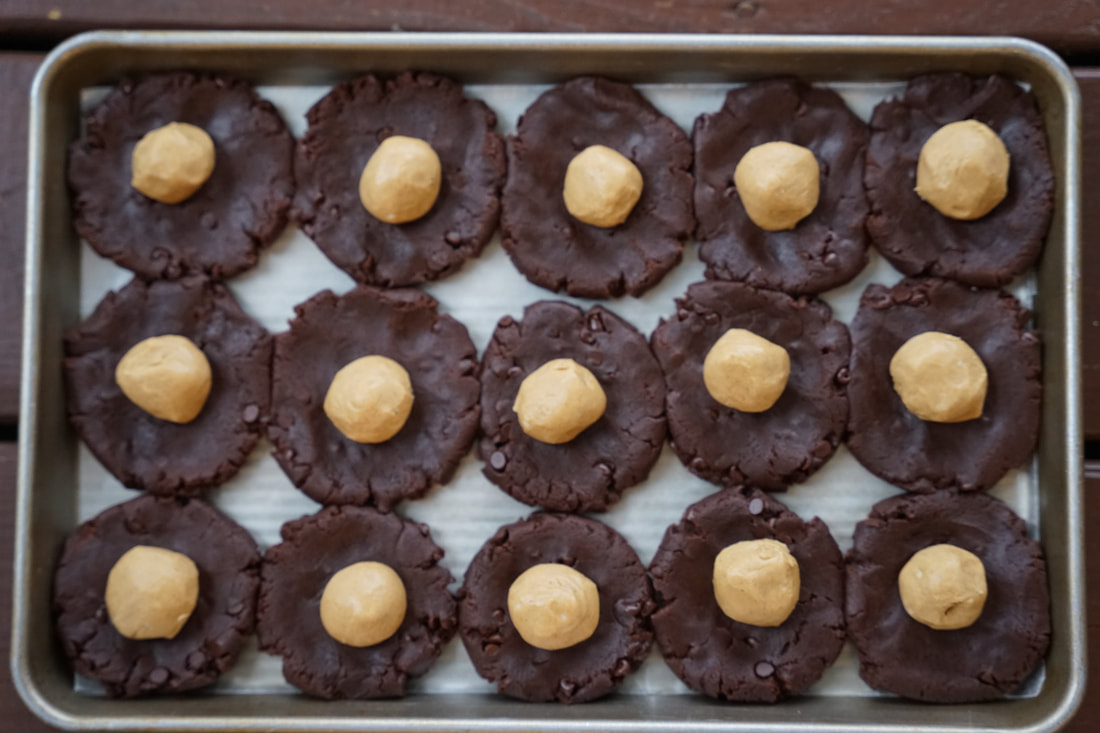
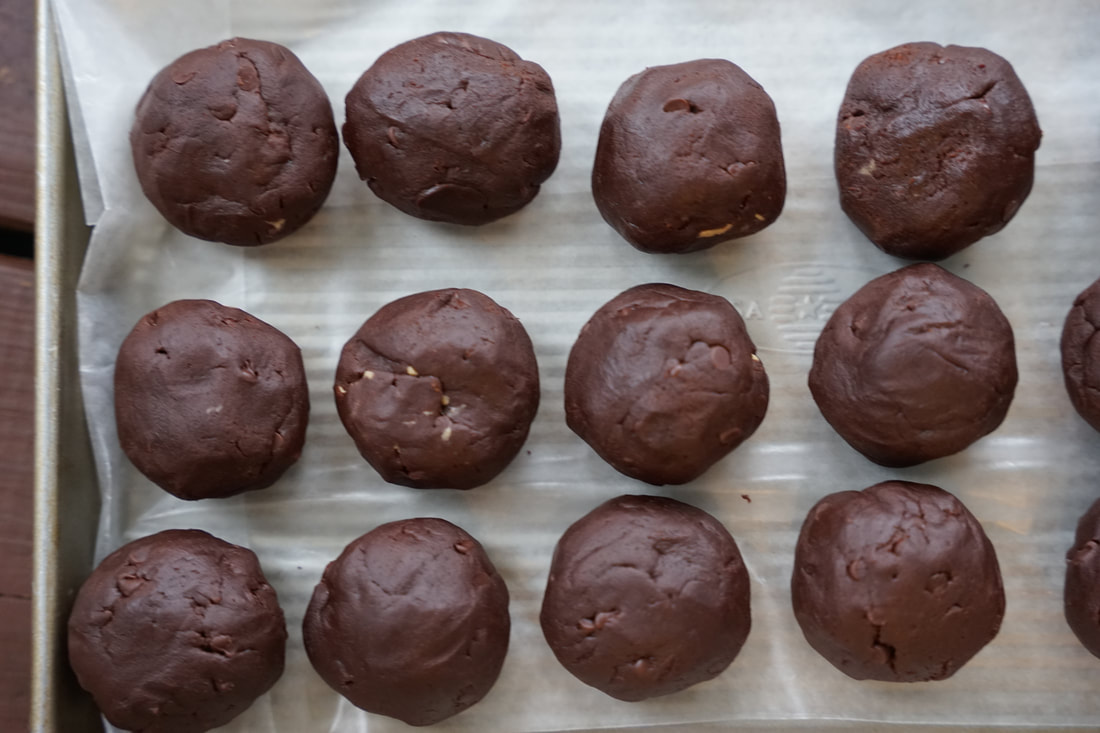
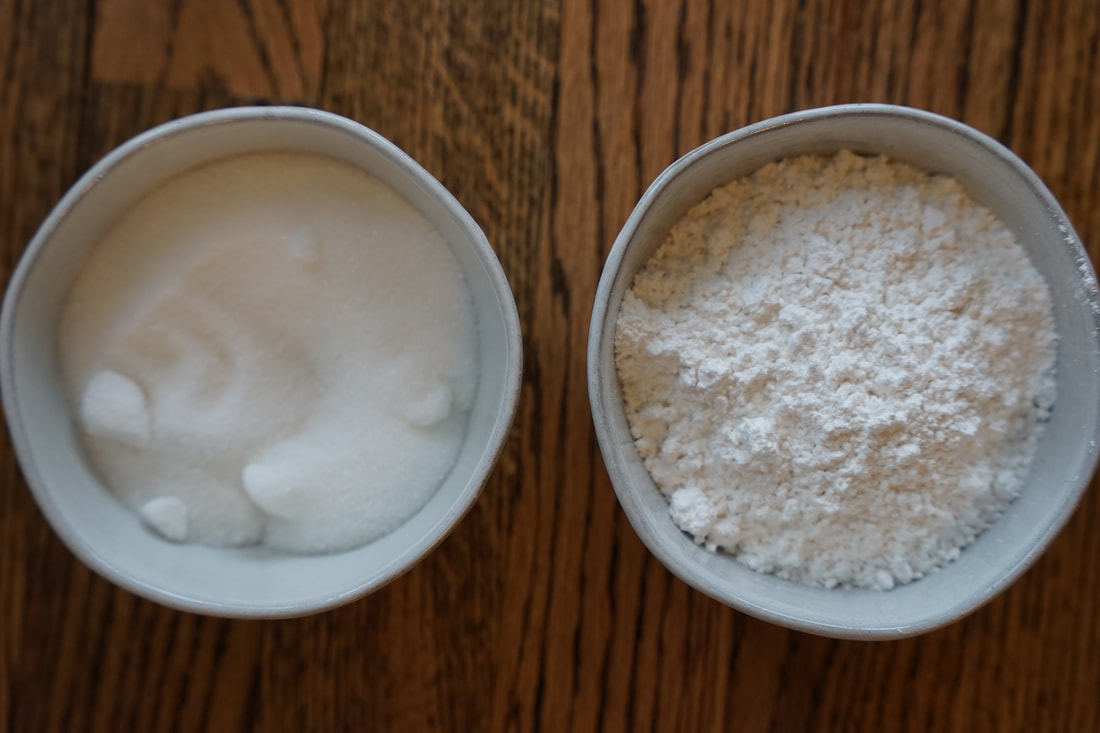
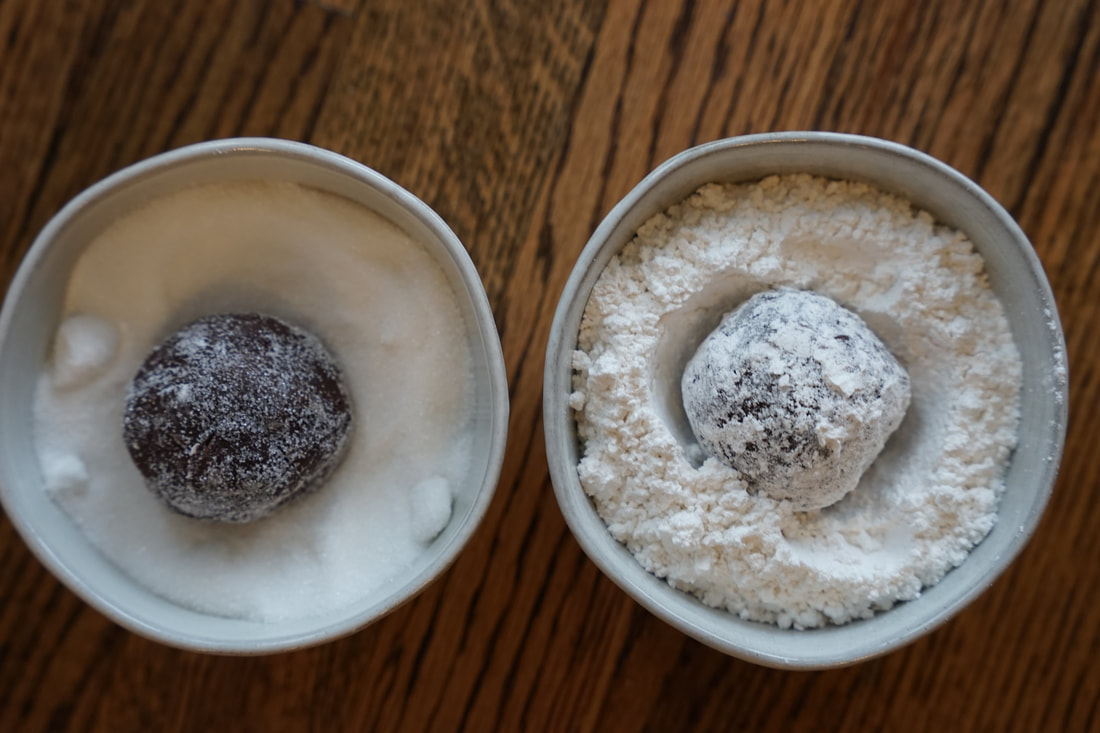
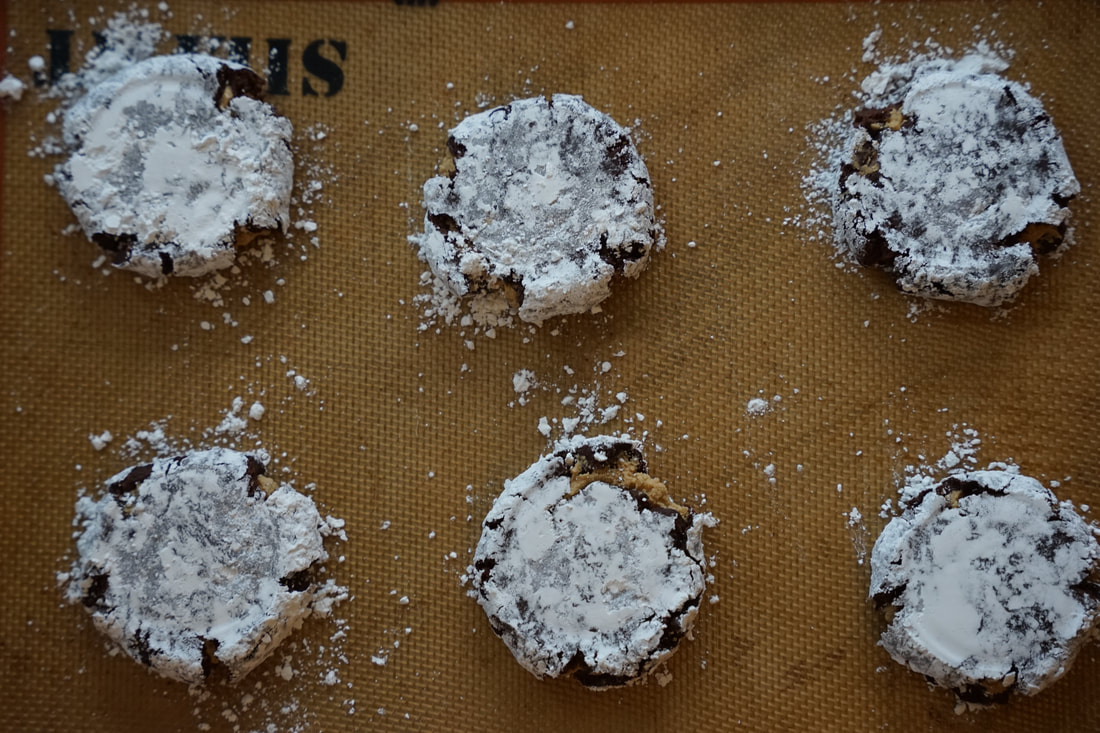
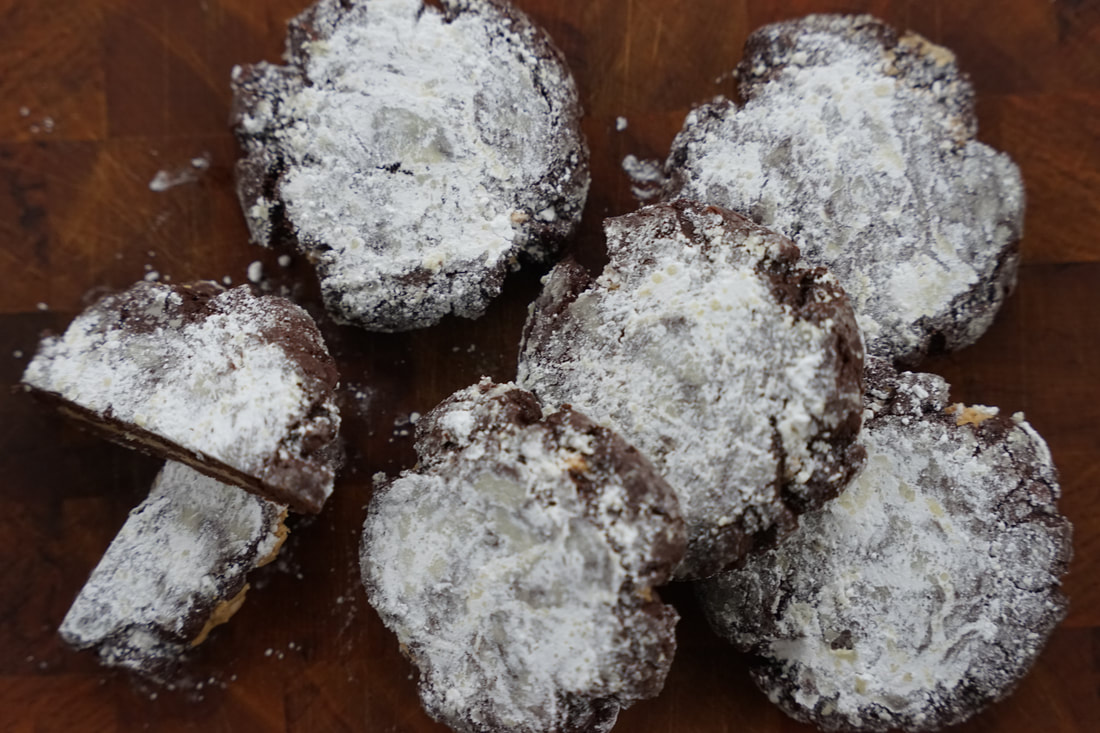
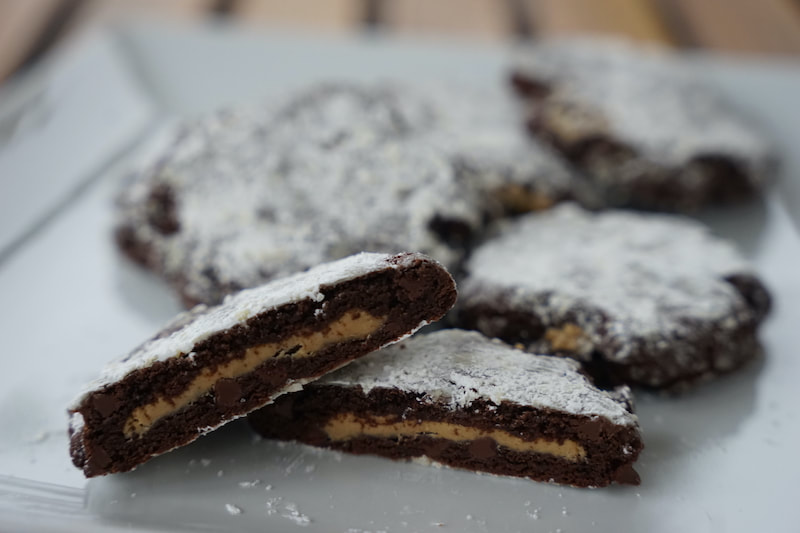
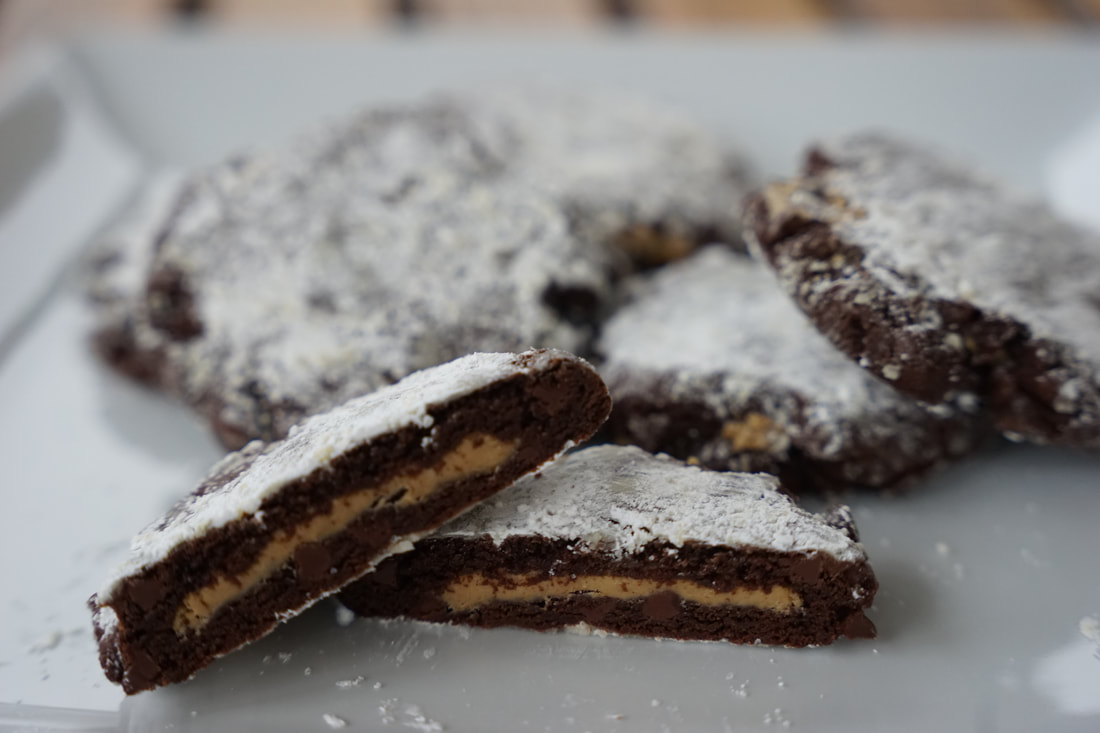
I feel like when I teach myself new things it exercises my brain muscle. And trying out a new recipe is one of my favorite ways to get in a mental workout. 💪🏻 Why not try out a delicious new cookie recipe to work my brain and give my mouth and my stomach some benefits as well? 🍪 If you're a chocolate and peanut butter lover - you need Chocolate Peanut Butter Stuffed Cookies in your life. 🍫🥜 I would describe myself as a girl who's passionate about chocolate and I really enjoy creamy, smooth peanut butter but I've never been a big fan of the chocolate peanut butter fusion. #sorryreeses I was apprehensive about this recipe and it sat in my cue for quite a while but I hung onto it because I live with people who really enjoy that chocolate peanut butter combination. And when I finally pulled out this chocolate peanut butter stuffed cookie recipe, I was pleasantly surprised. They were perfect little pillows of peanut butter goodness dusted with powdery sweetness. Maybe I actually am a chocolate and peanut butter person after all. 😅 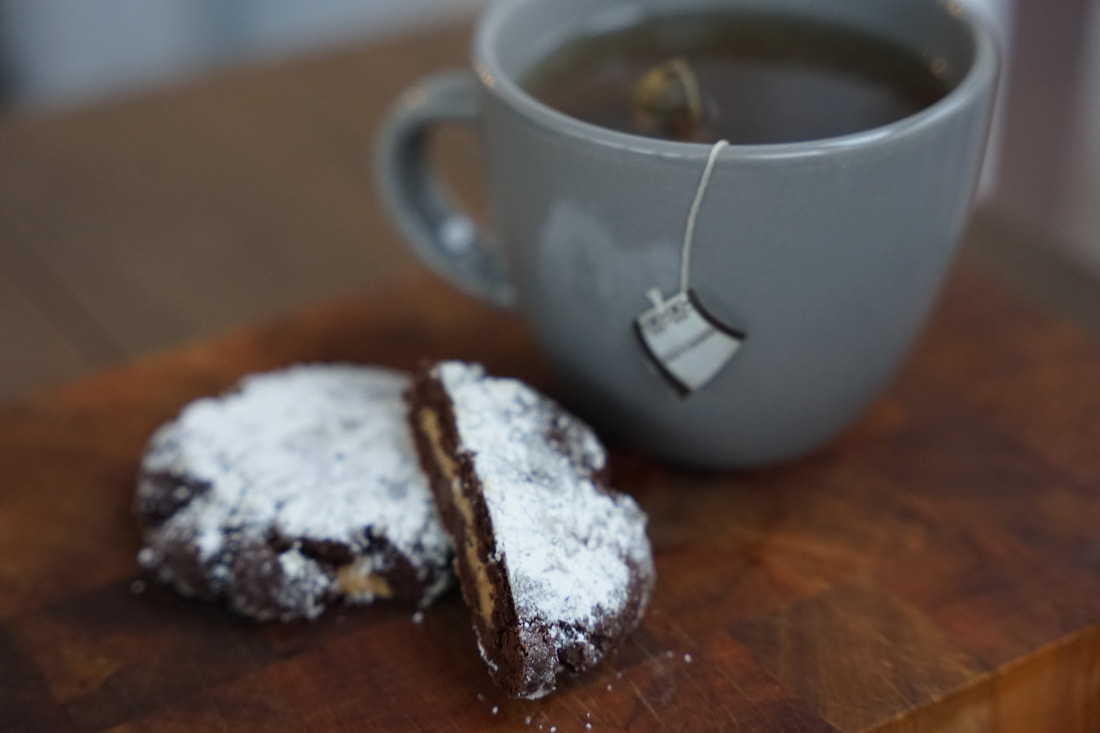 Chocolate Peanut Butter Stuffed Cookies Filling 1/2 cup creamy peanut butter 1/2 cup powdered sugar 1/4 teaspoon salt Dough 1 1/2 cups flour 1/4 cup cocoa powder 1 teaspoon baking powder 1/4 teaspoon baking soda 1/2 teaspoon salt 10 ounces bittersweet chocolate, chopped 3 Tablespoons canola oil 1 Tablespoon butter 1 Tablespoon vanilla 1 1/2 cups sugar 2 eggs 1/2 cup powdered sugar
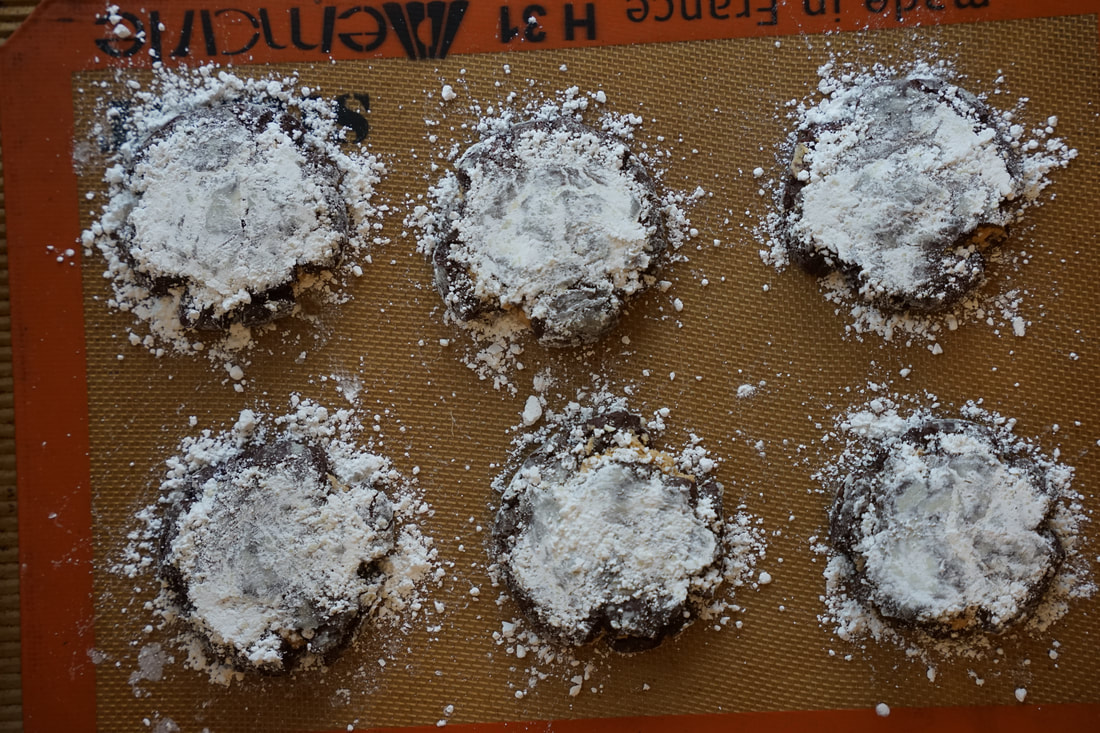 Bake cookies 22 minutes at 300. Let cool 30 minutes on baking sheet.
These cookies were amazing and I know for a fact that I alone, could have eaten the entire batch in just a few days. 😬 They were THAT good. Fortunately, I froze half the dough before it was baked which stopped me from eating them ALL.😂
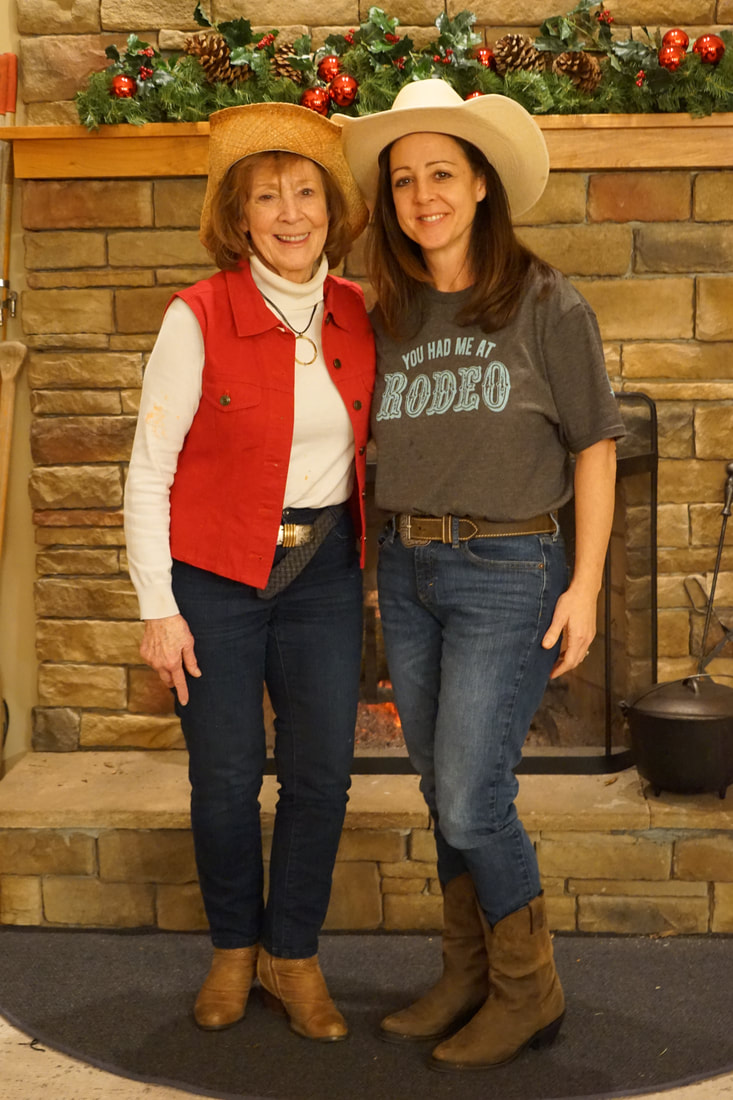
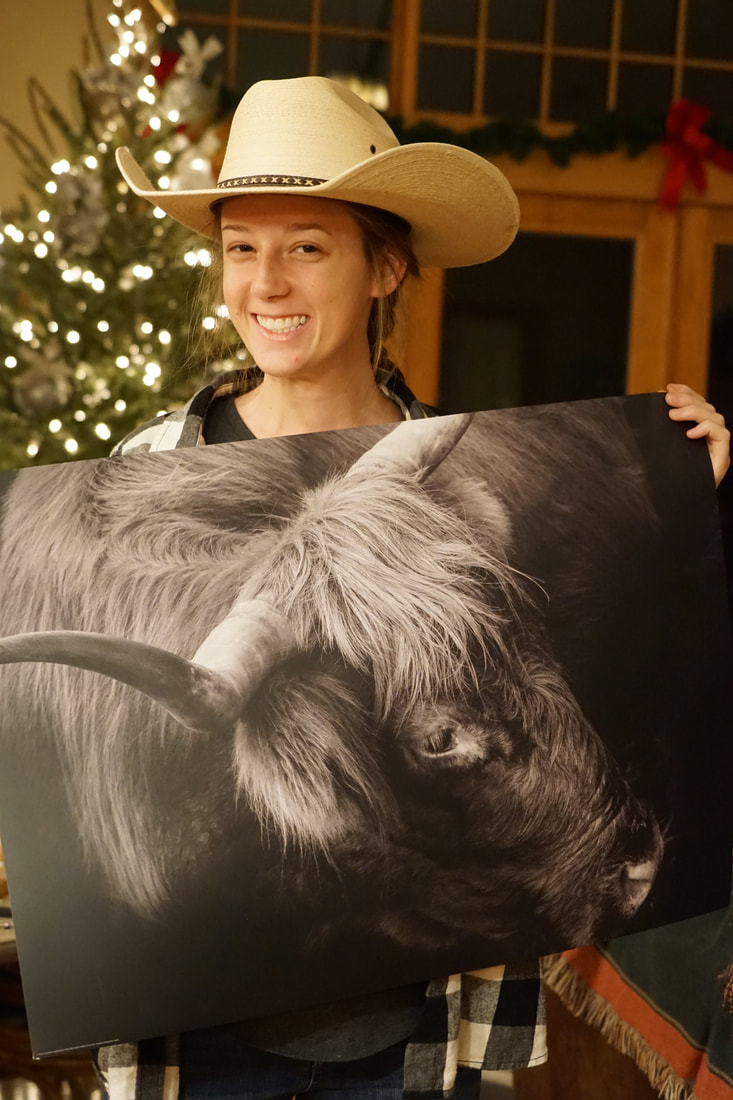
Caio! 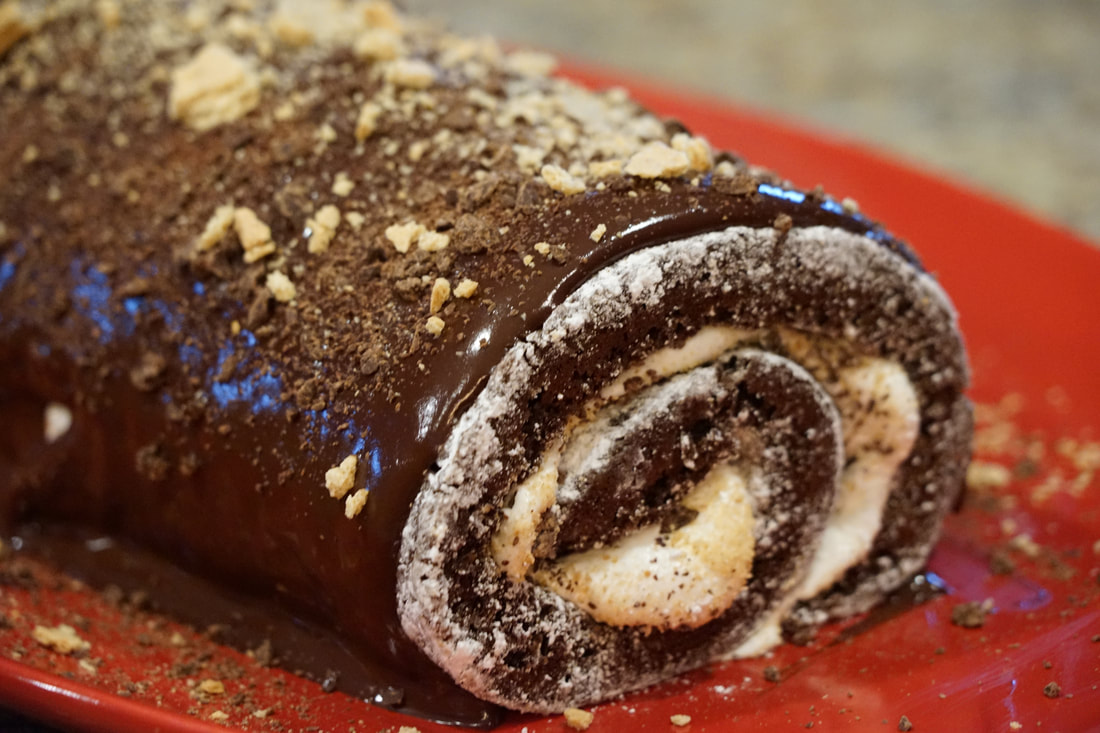 Doesn't every family celebrate the holidays with a Western theme night? 🤠🤣Complete with rodeo games, Western movies and authentic cowboy meals - we fully embraced the theme. 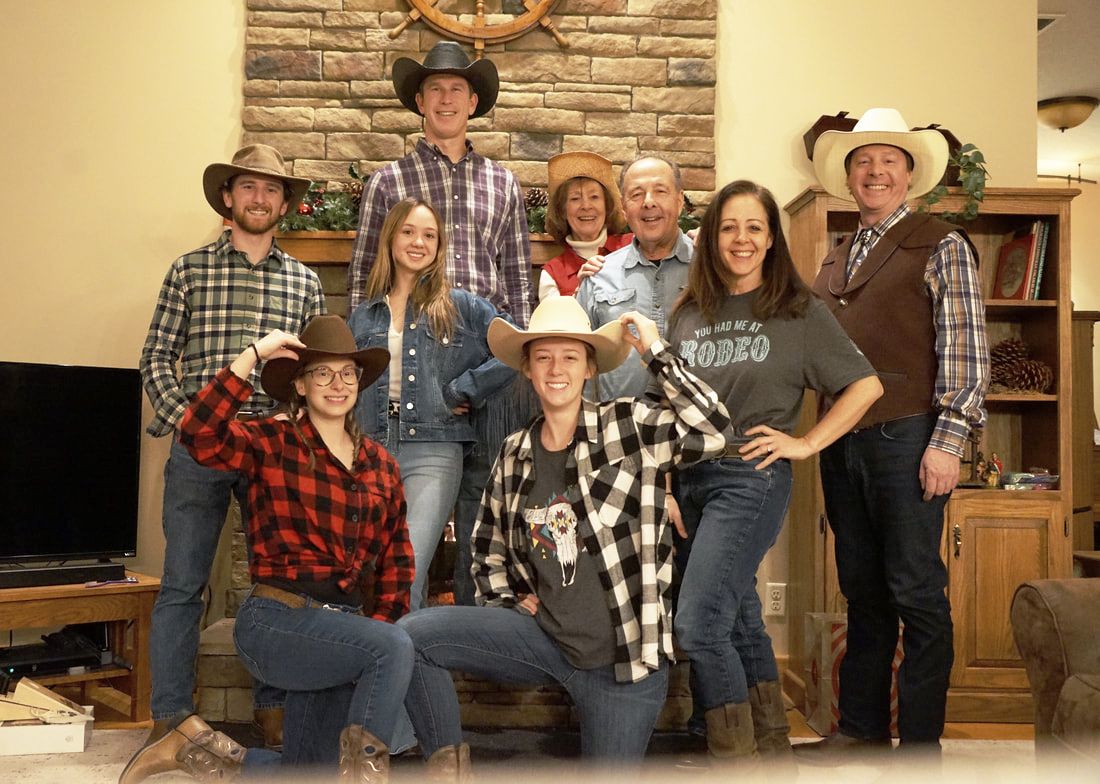
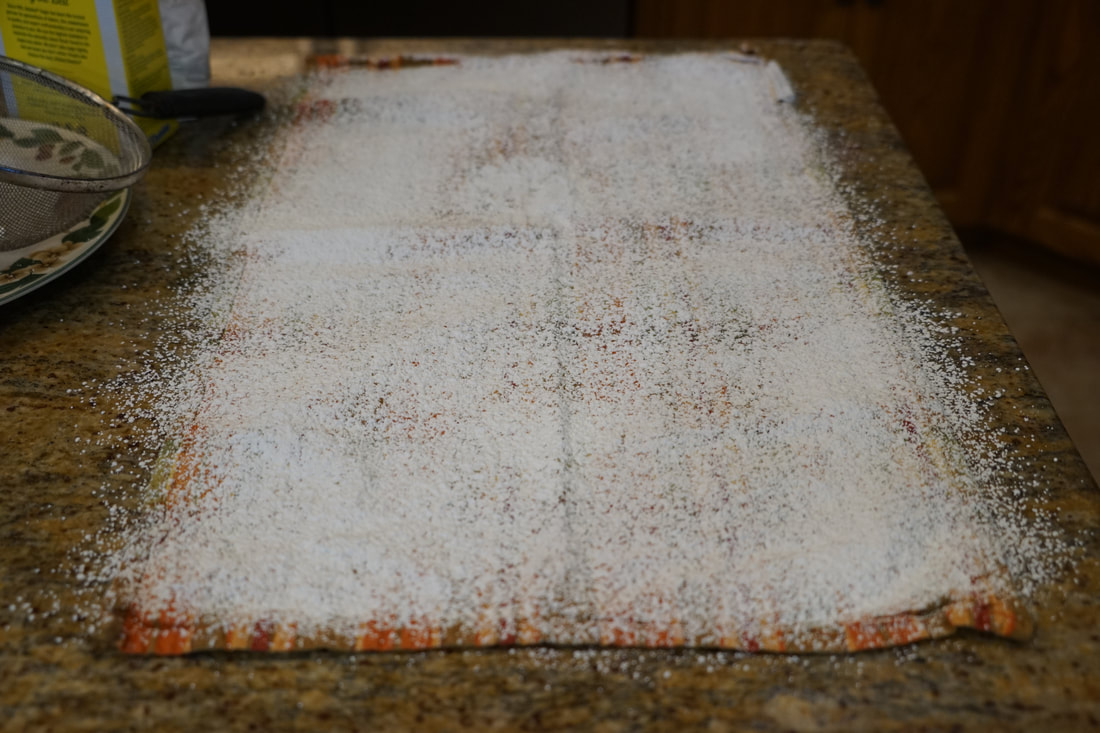
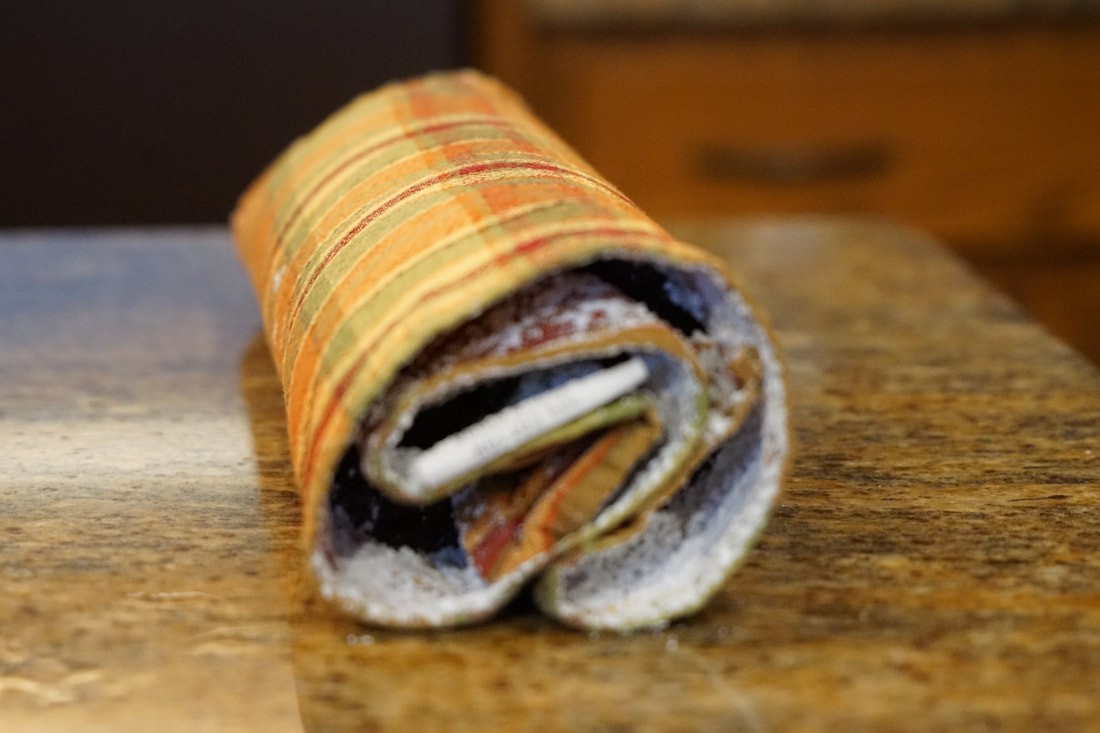
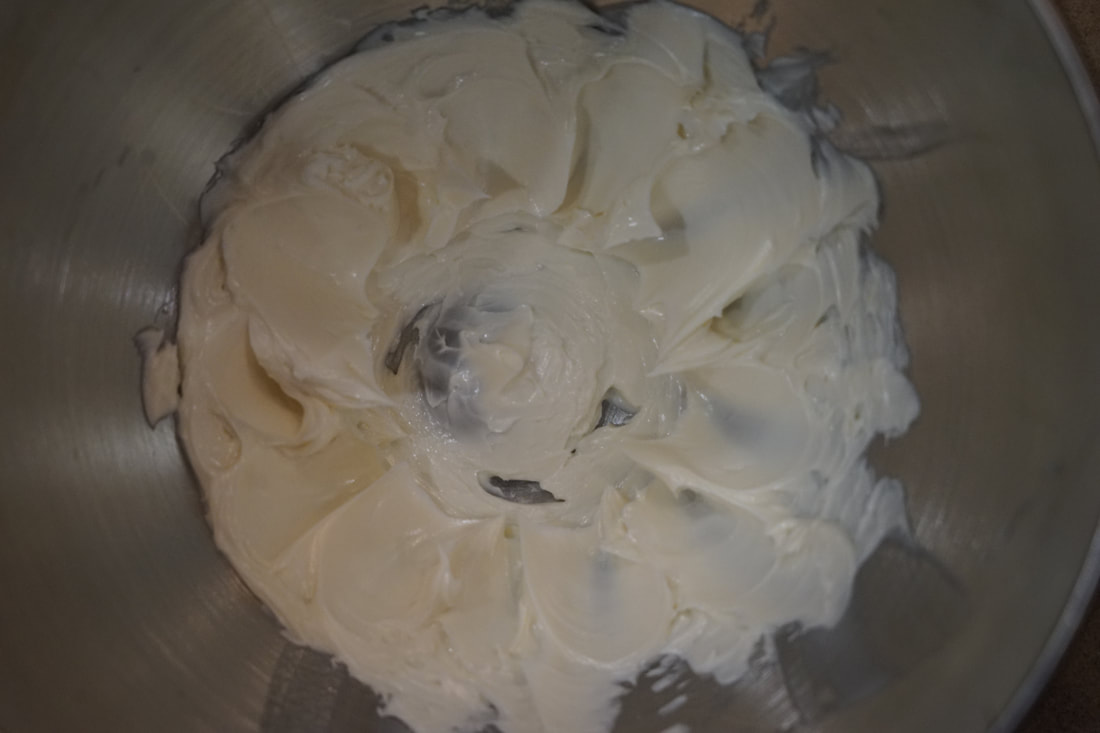
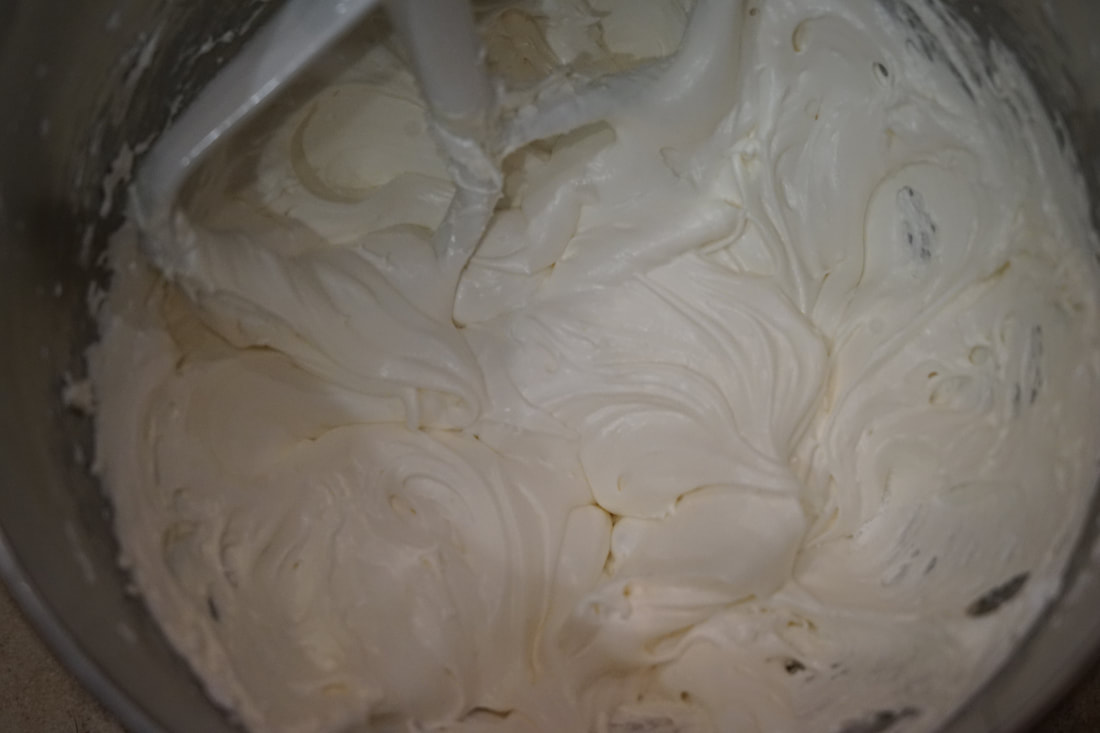
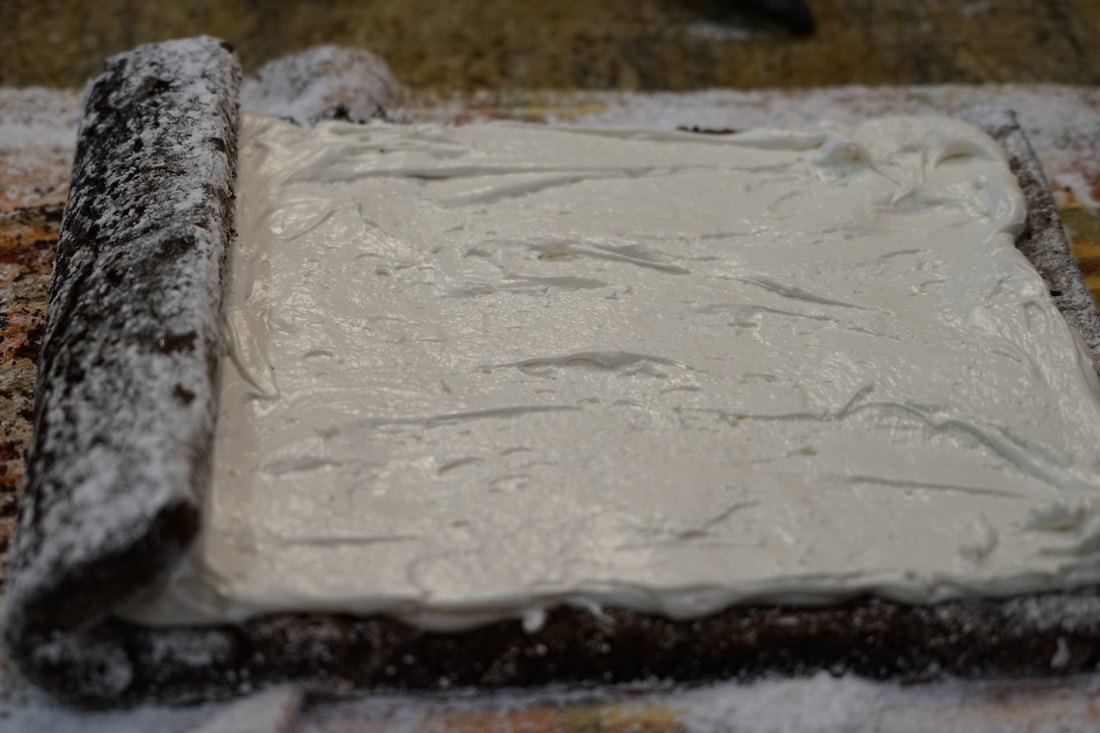
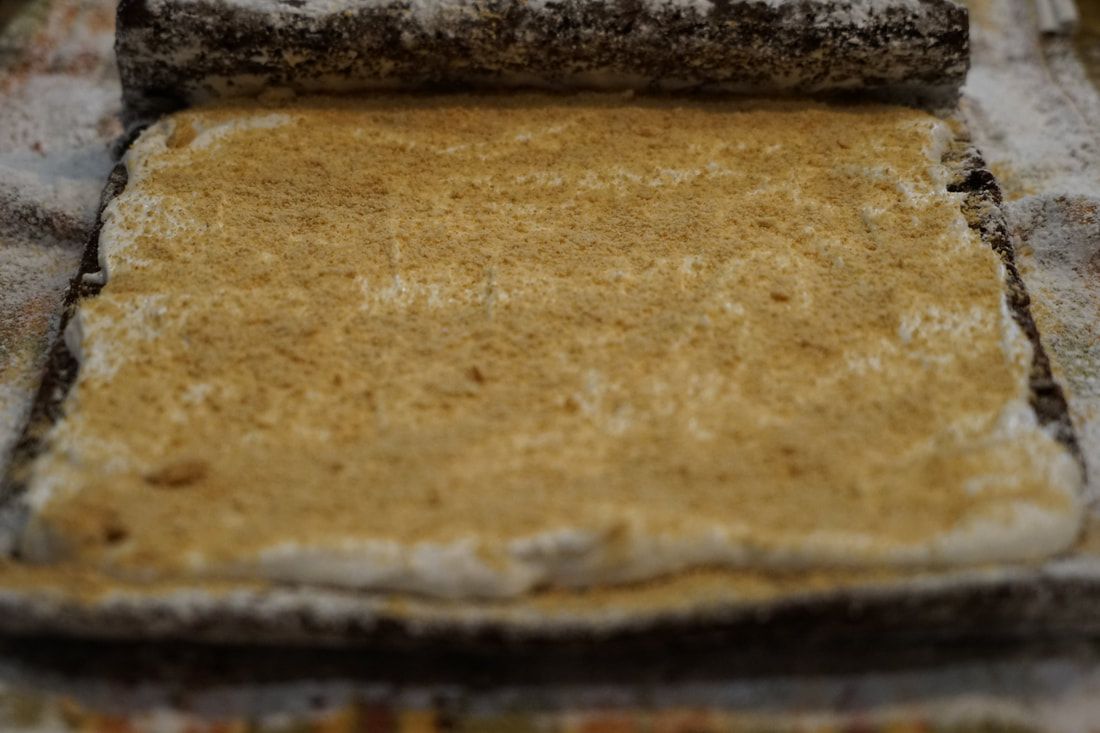
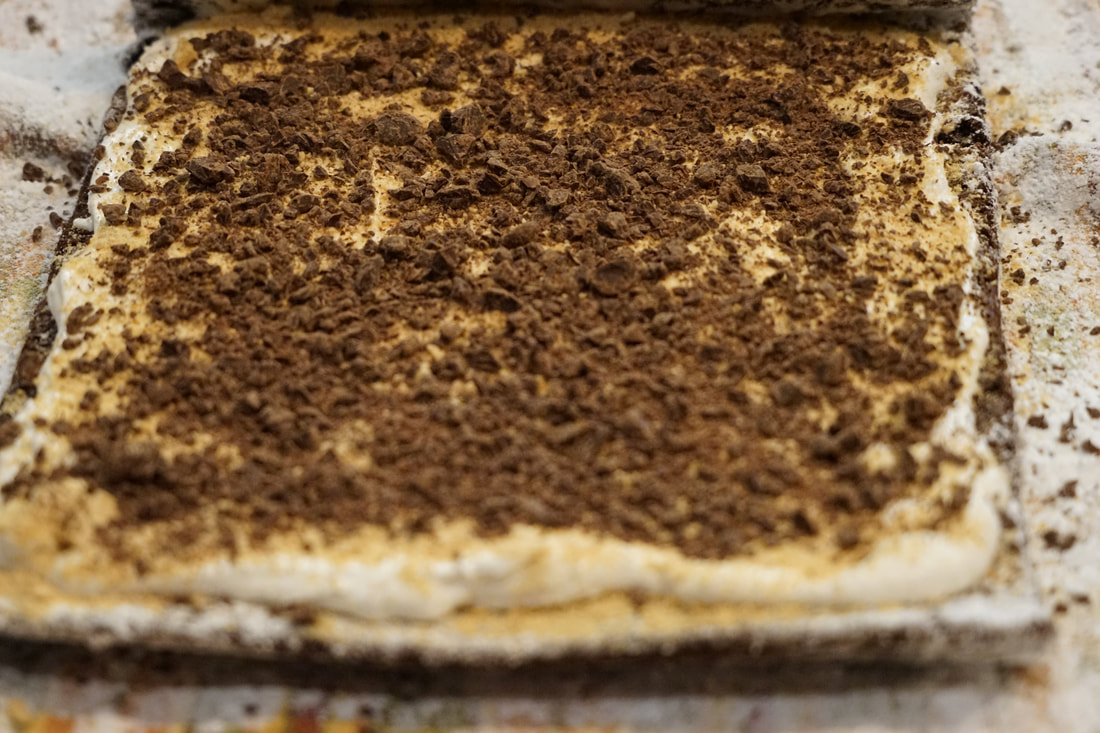
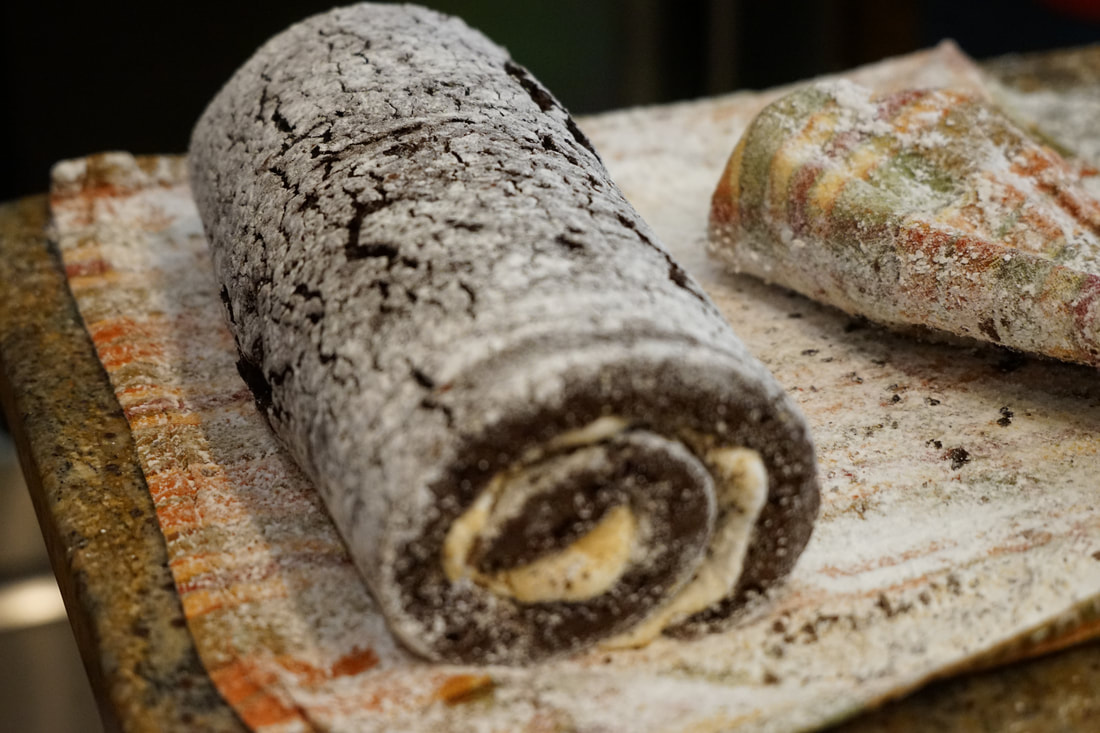
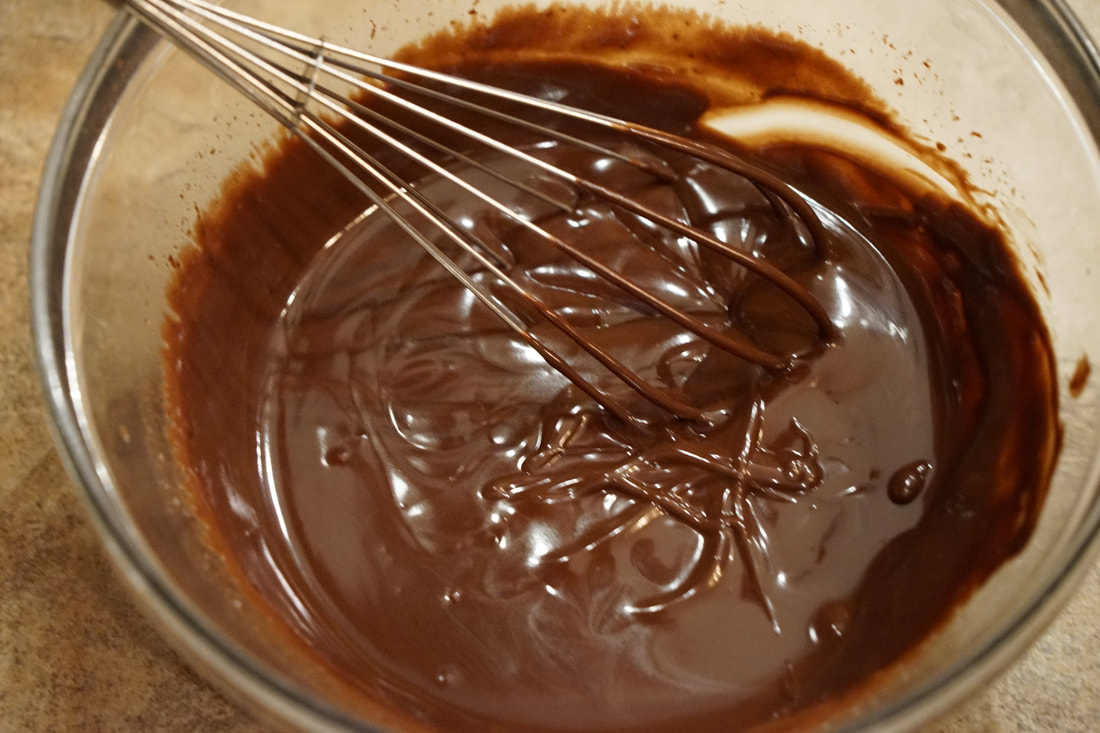
So when we decided to make a giant Swiss Roll to round out our chuck wagon style feast, we renamed our epic dessert creation - A Rodeo Roll! 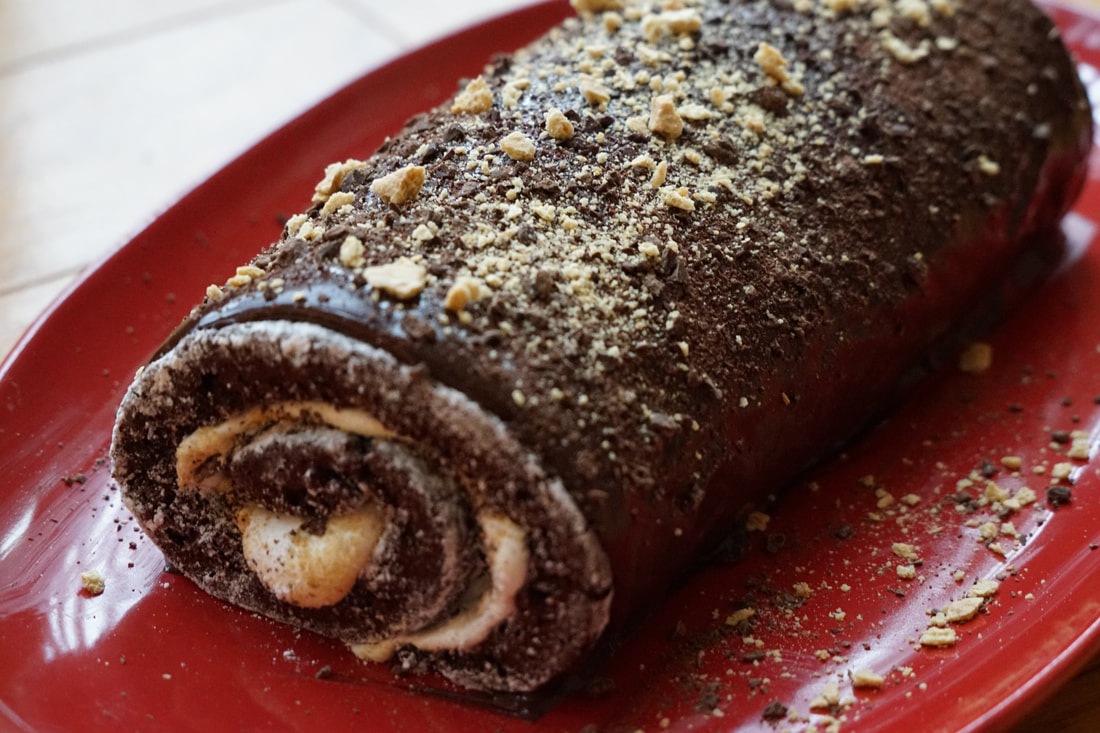 I have to give credit to my daughter in law for the inspiration for this dessert. It was her idea to make homemade Swiss rolls. I suggested turning it into one giant roll instead of tackling individual rolls and she suggested adding graham crackers and chocolate and to turn it into a s'mores roll. This is what we came up with... 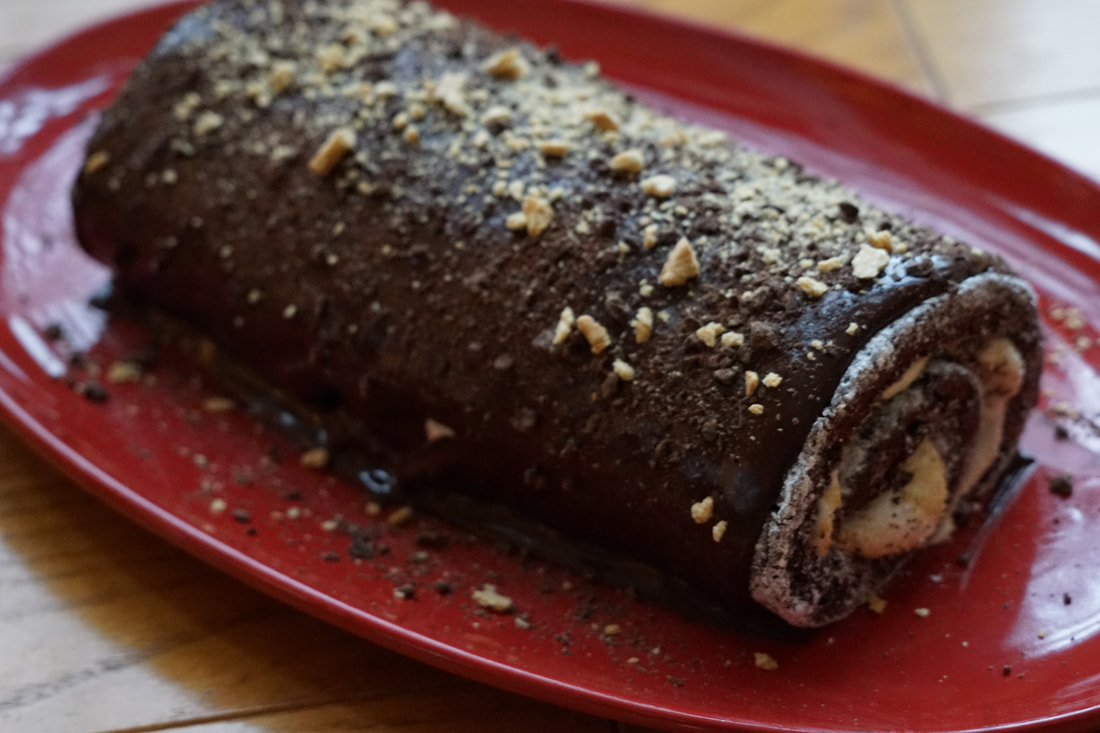 Giant S'mores Swiss Roll 3/4 cup flour 1/4 cup cocoa powder 1/2 teaspoon baking powder 1/2 teaspoon baking soda 1/2 teaspoon kosher salt 4 large eggs, room temperature 3/4 cup granulated sugar 1 teaspoon vanilla extract 1/2 teaspoon instant espresso powder 1/4 cup unsalted butter, cut into cubes 1/4 cup ounces dark chocolate, finely chopped For Filling: 6 Tablespoons unsalted butter, room temperature 2 Tablespoons vegetable shortening, room temperature 8 ounces marshmallow fluff 1 cup powdered sugar, sifted (more as needed) 1/4 cup crushed graham crackers 2 Tablespoons chopped chocolate For Glaze: 4 ounces dark chocolate, finely chopped 1/2 cup heavy cream 1 tablespoon salted butter, cut into cubes
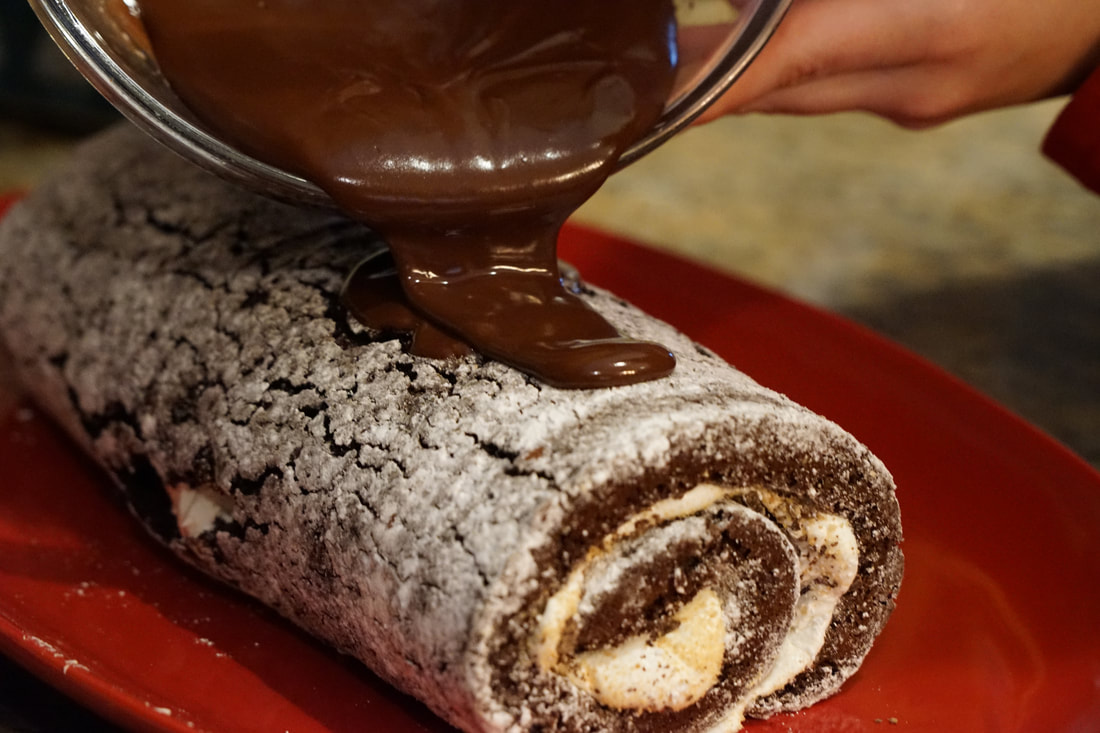 Pour over cake. 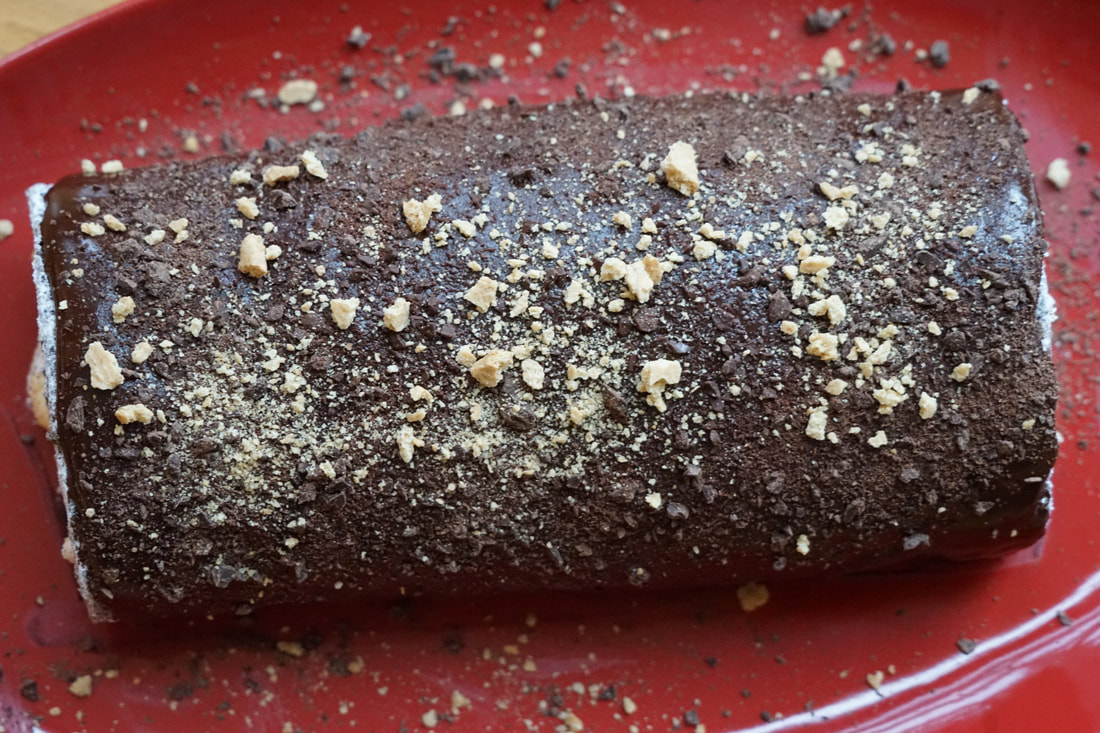 Sprinkle cake with extra graham crackers and chocolate.
You can call it a S'mores Swiss Roll, a Rodeo Roll or a Little Amy Roll - but you need to try this. It's amazing. And if you're feeling your creative juices flowing - change up the fillings to make this roll unique. Ciao! 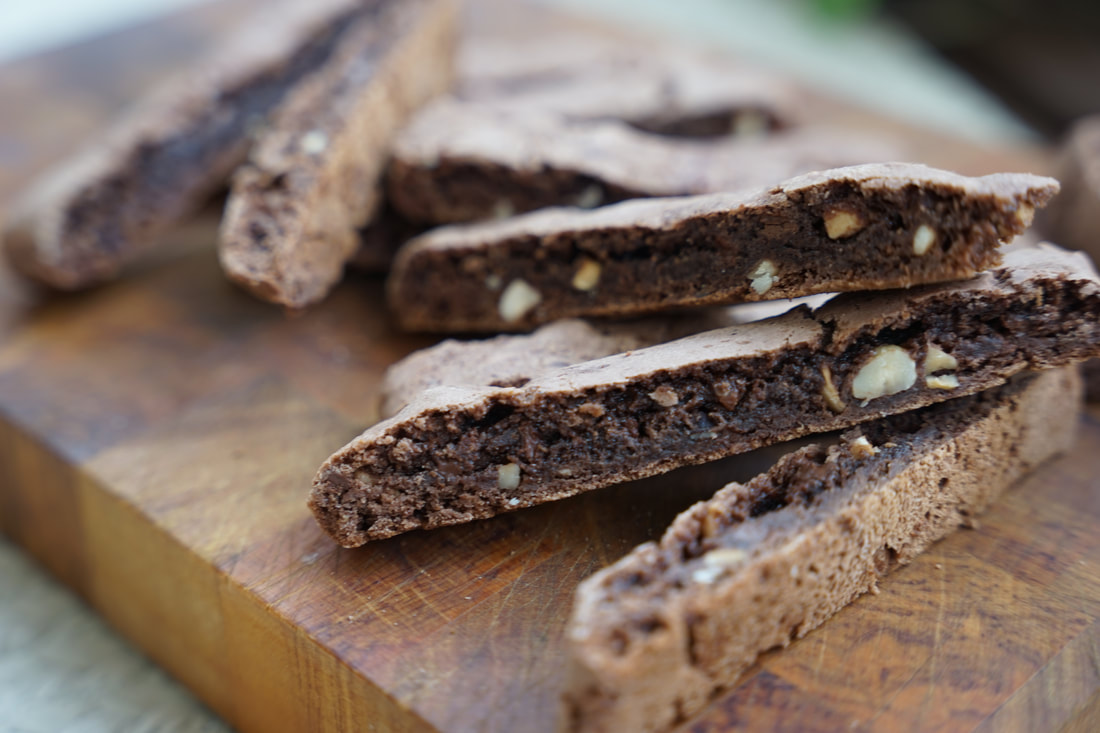 If your family is anything like mine - you have your fair share of holiday traditions. My family specializes in food-centered Christmas traditions - I think its our Italian genes. 🇮🇹😅I mean, is it really Christmas if we don't roast chestnuts or make homemade tiramisu or eat 7 fishes on Christmas eve? I also feel like every year we add to our list of special meals, festive drinks and stockpile of sweets that we need to consume in order to properly celebrate the season. 🤣🍝🌰
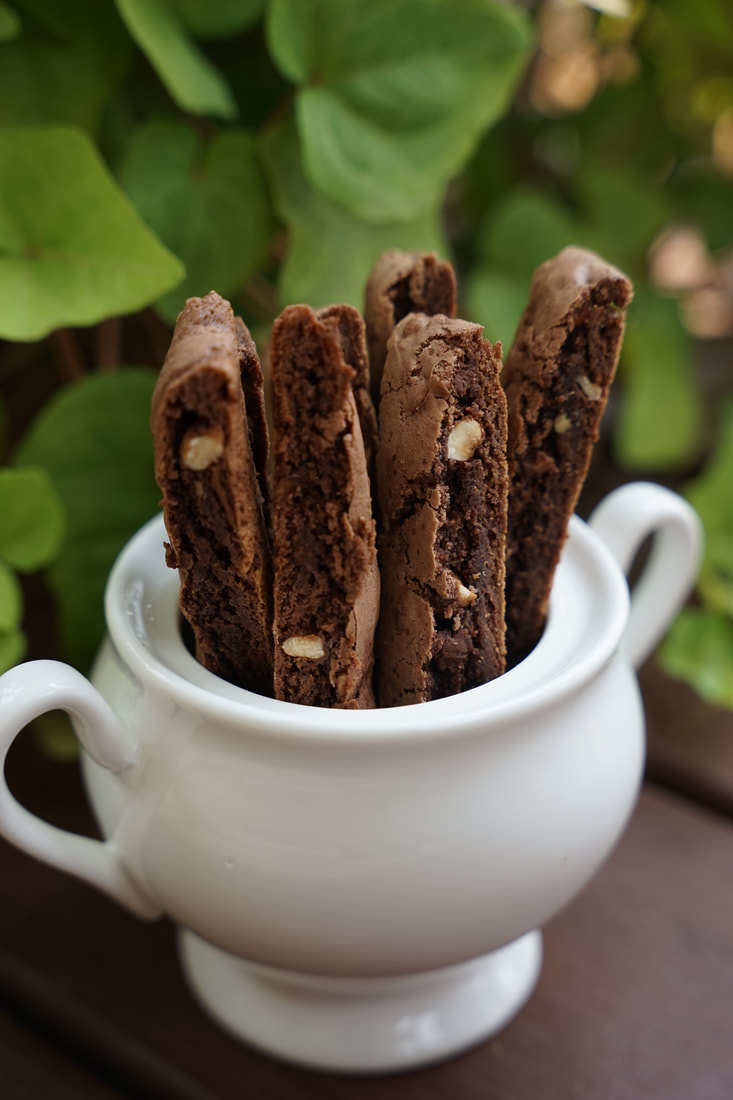
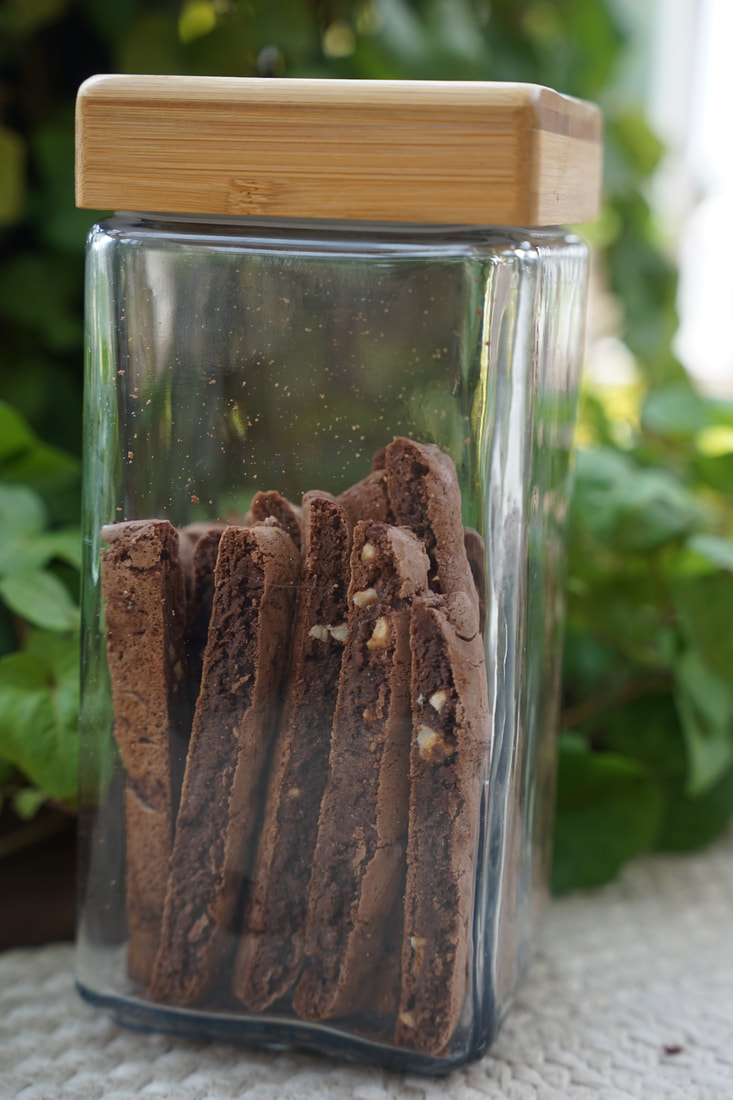
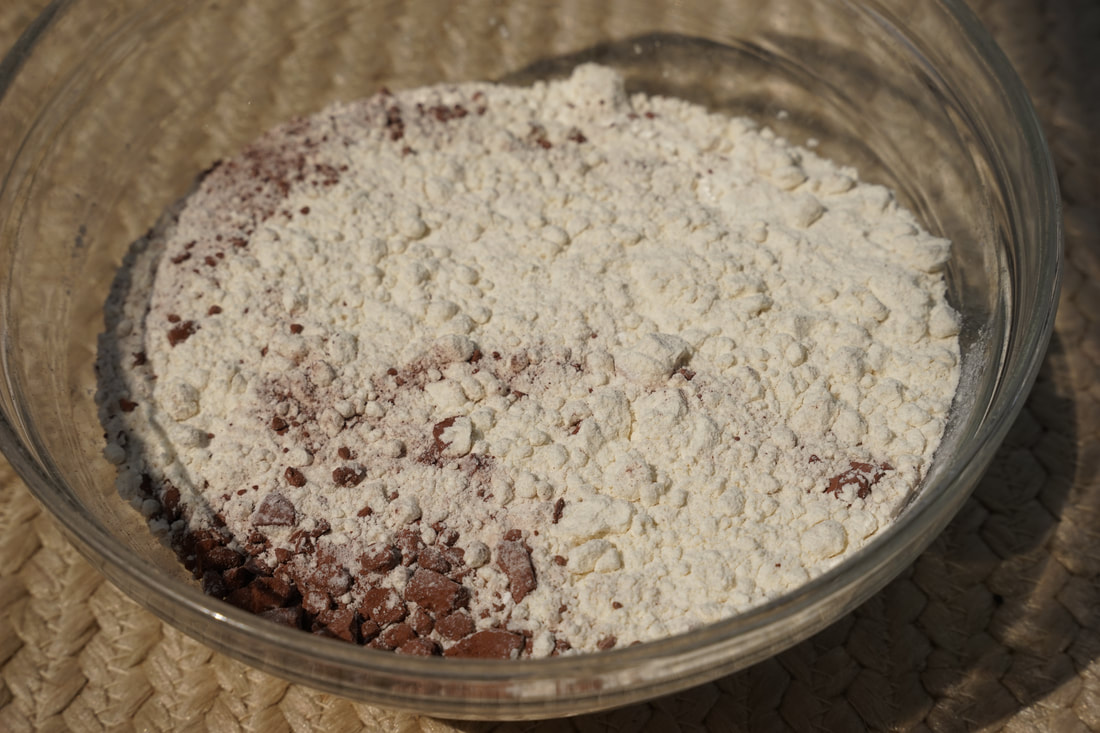
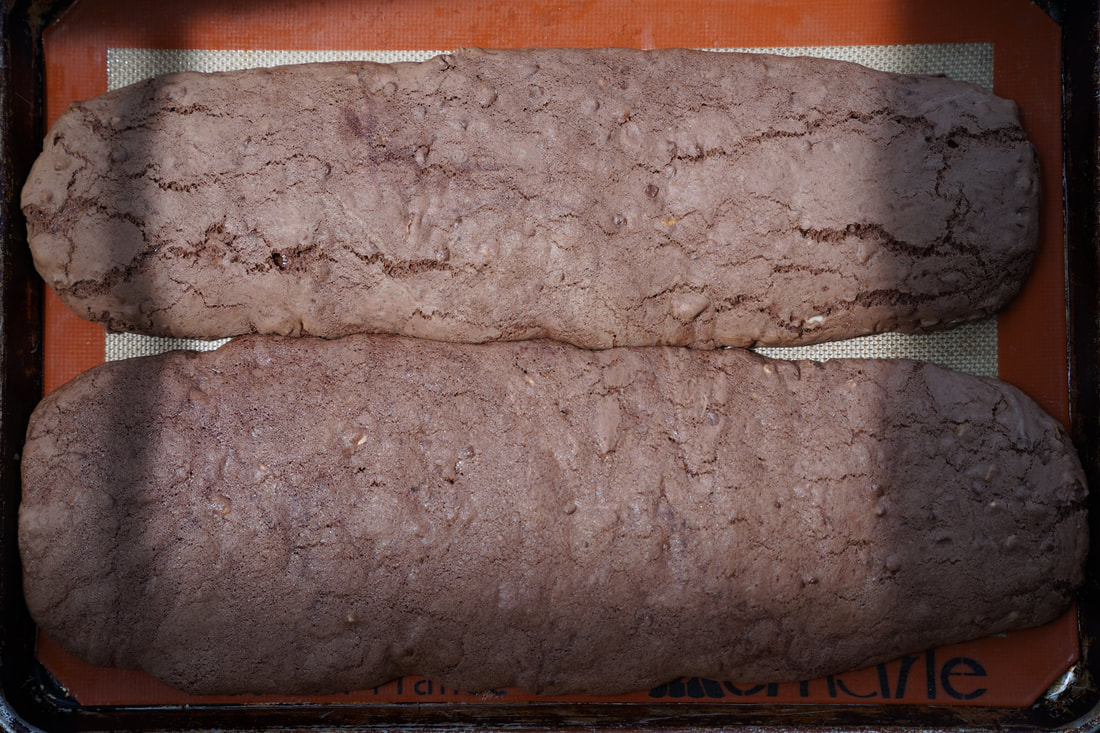
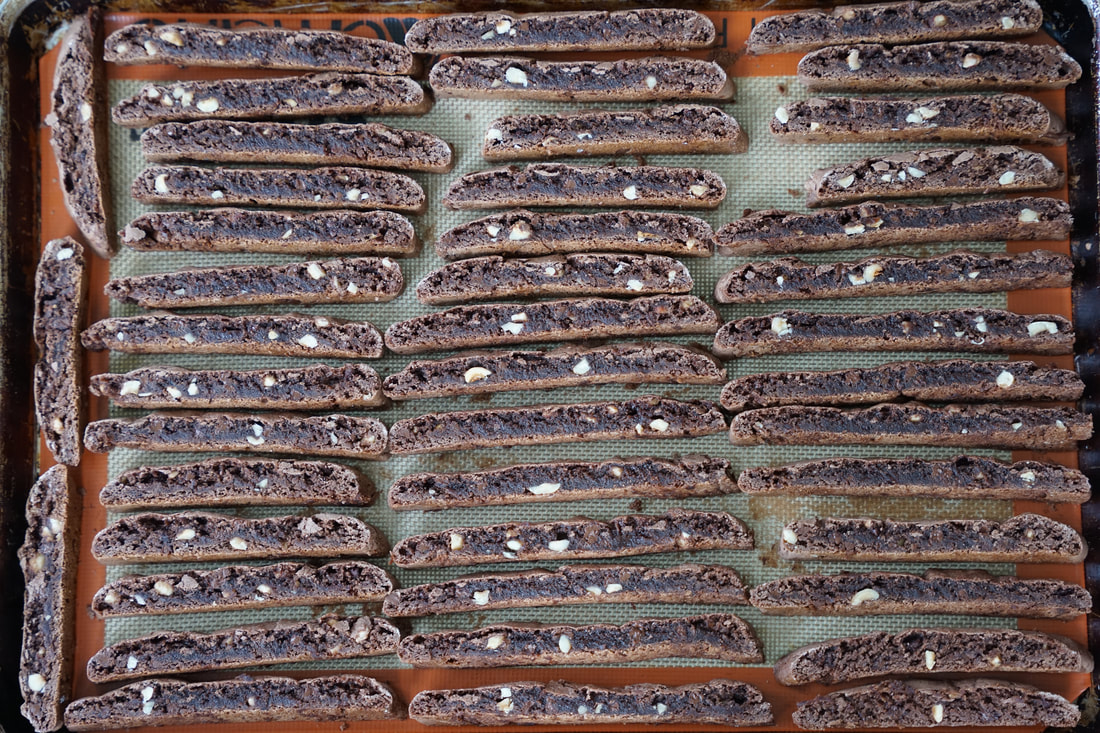
We always have biscotti on our Christmas menu and my way of shaking up our family traditions is to add a fun new biscotti flavor to our breakfast table. (Life on the wild side.😂) This year, I'm introducing my family to Nutella biscotti. 🤞🏻I feel like it's a safe bet though- who doesn't love a chocolatey hazelnut spread? 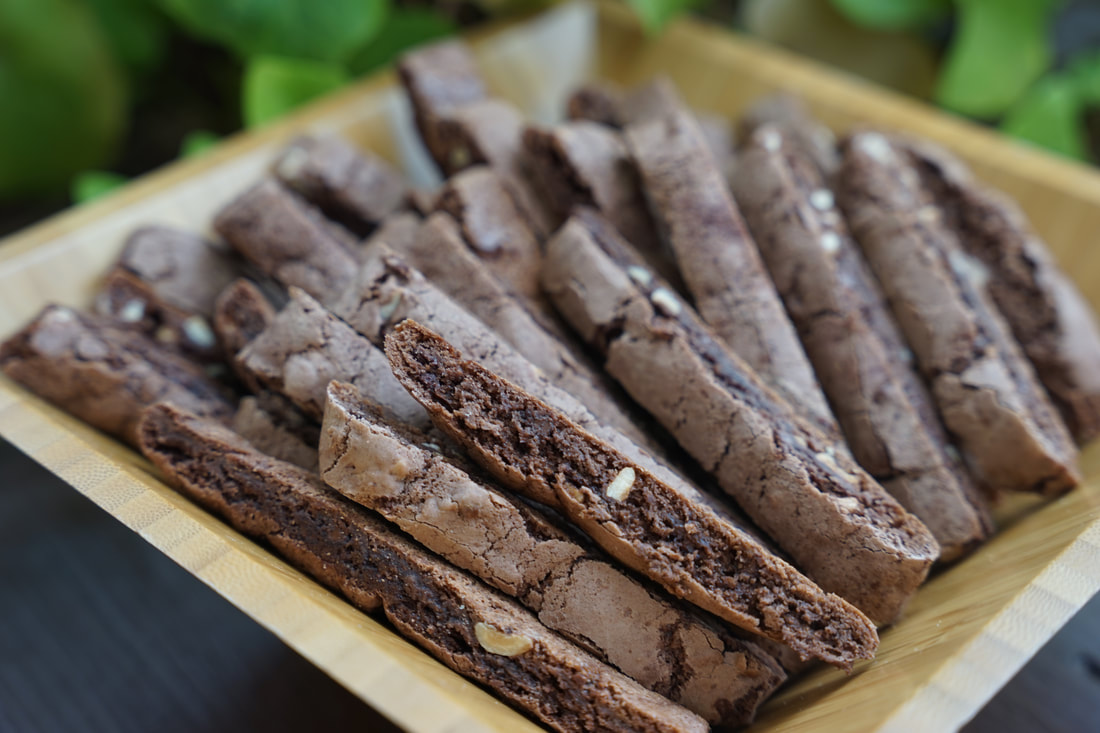 Nutella Biscotti 2 ¼ cups all purpose flour 2 tablespoons baking cocoa ½ teaspoon baking powder ½ teaspoon baking soda ½ teaspoon sea salt 3 large eggs 1 cup sugar ½ cup nutella ½ cup chocolate chips ½ cup hazelnuts, chopped
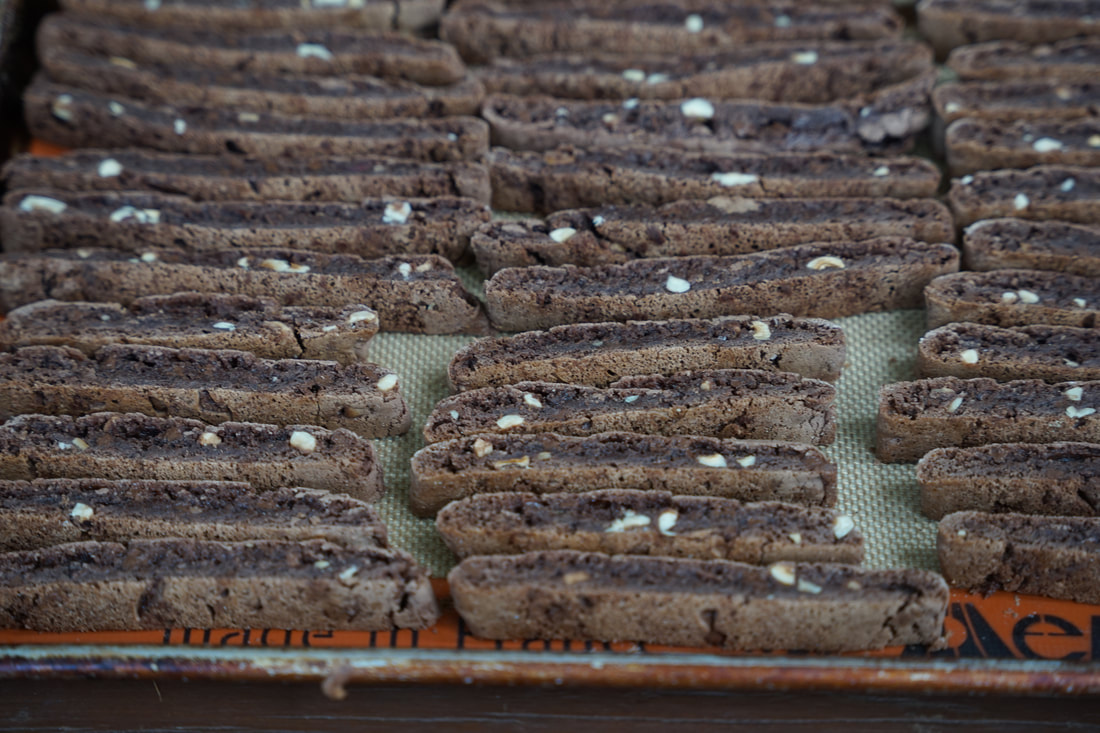 Place flat side down on baking sheet and bake 10 minutes. Flip and bake another 10 minutes. 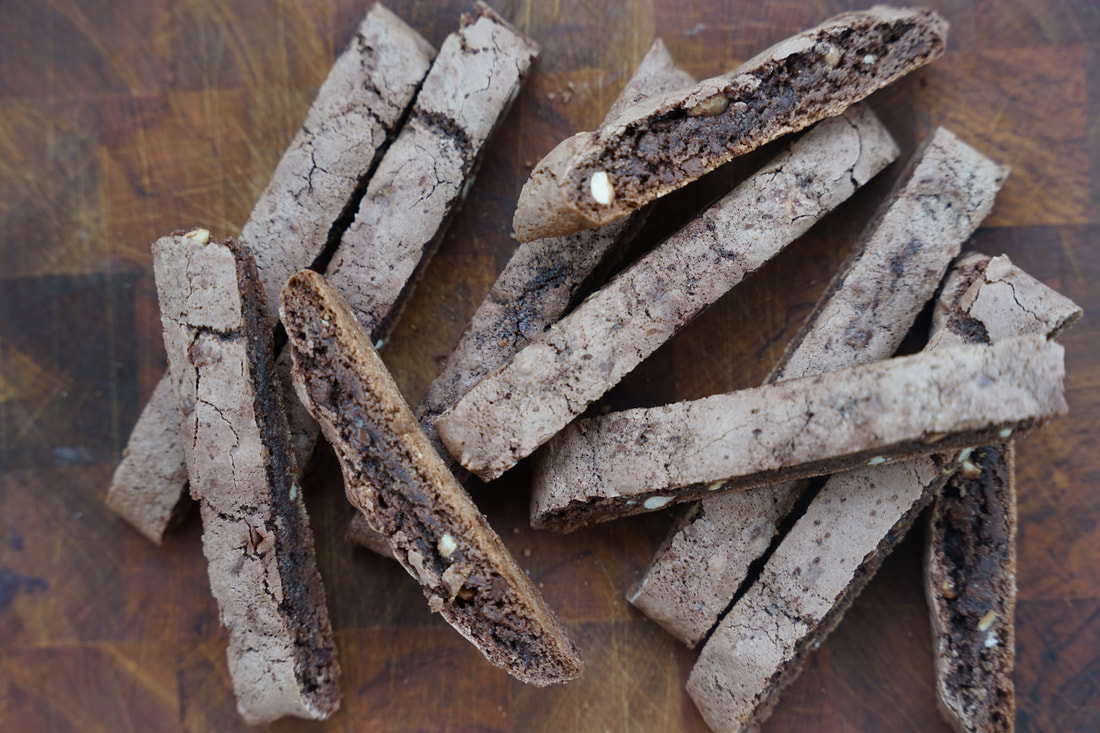 These biscotti are safely tucked away in the freezer for an official unveiling on Christmas Eve. 🤫Now that the cats out of the bag - I'm kindly asking all family members to NOT look through the freezer in search of a sample the Nutella biscotti. 😂
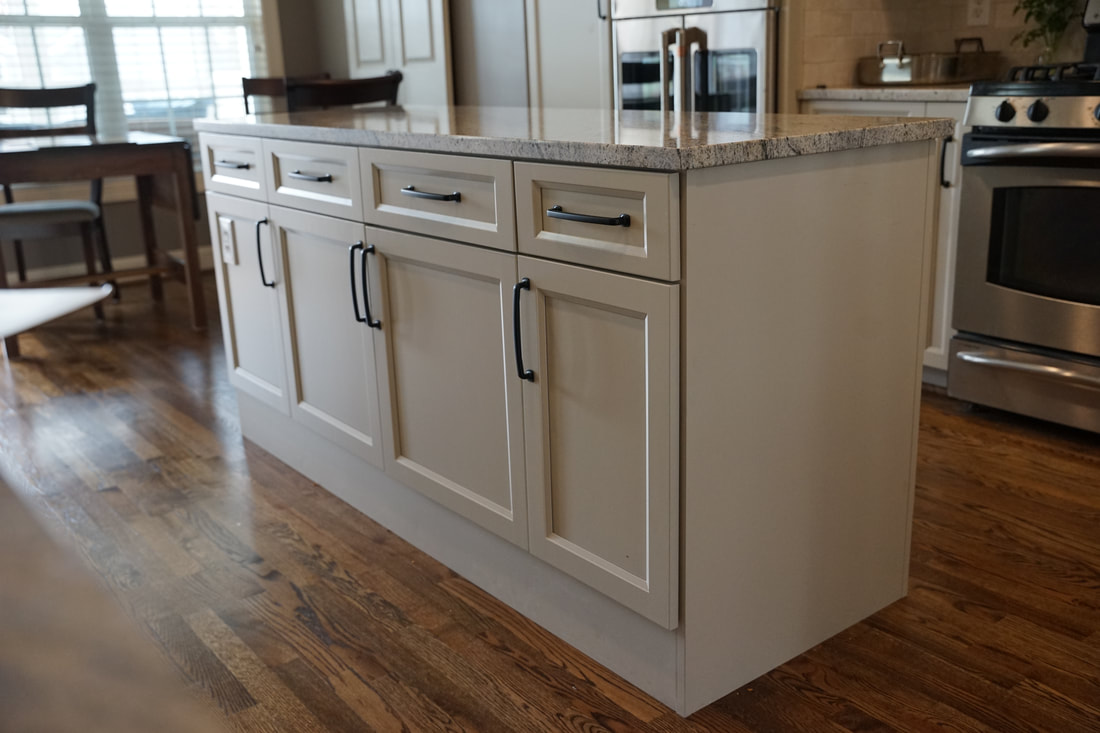
Ciao! 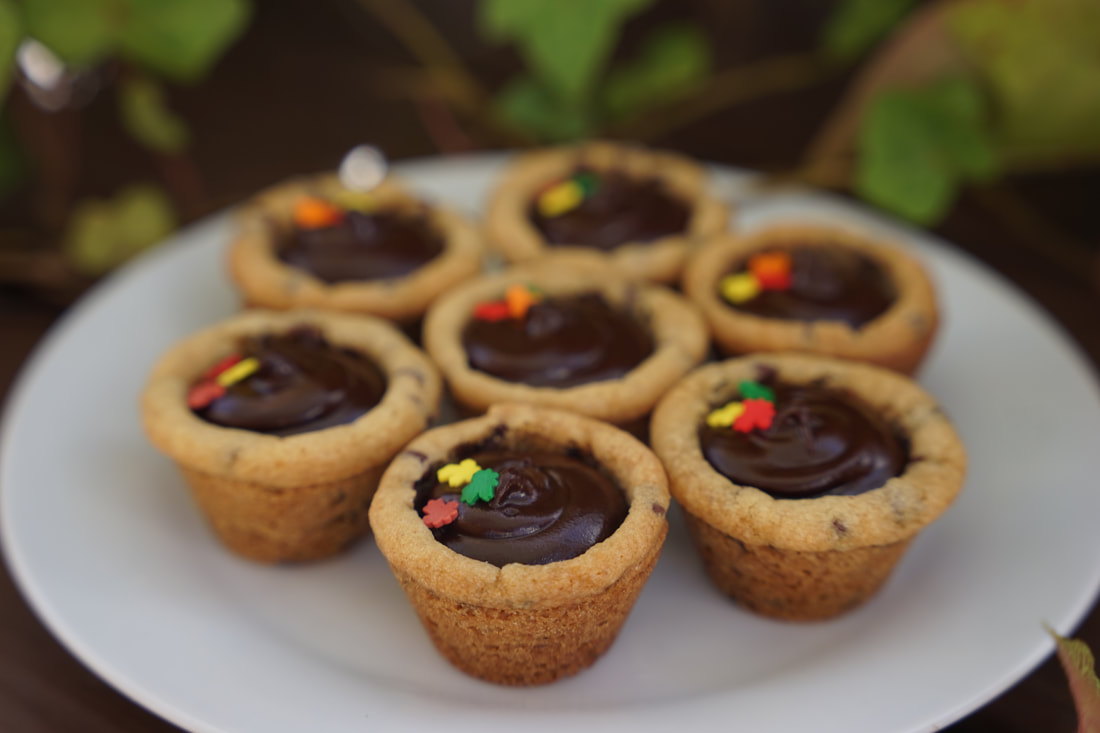 Have you heard about the super popular stand up desks that are trending now? They're designed to help ease back pain, improve mood, harness joint and muscle movement, boost productivity, increase weight loss, improve mental focus and lower the risk of heart disease. Why wouldn't I want all of those things for myself? I just got the ULTIMATE stand up desk in my kitchen. 😅 When you're in the food business and you work from home - your kitchen island IS your desk.🤷🏻♀️ My custom built desk has 32 drawers and 2 outlets. It's got places for me to store pencils, notebooks, my computer, my camera, all of my cooking utensils and ziploc bags of every shape and size. ✏️ It's a dream. 😁
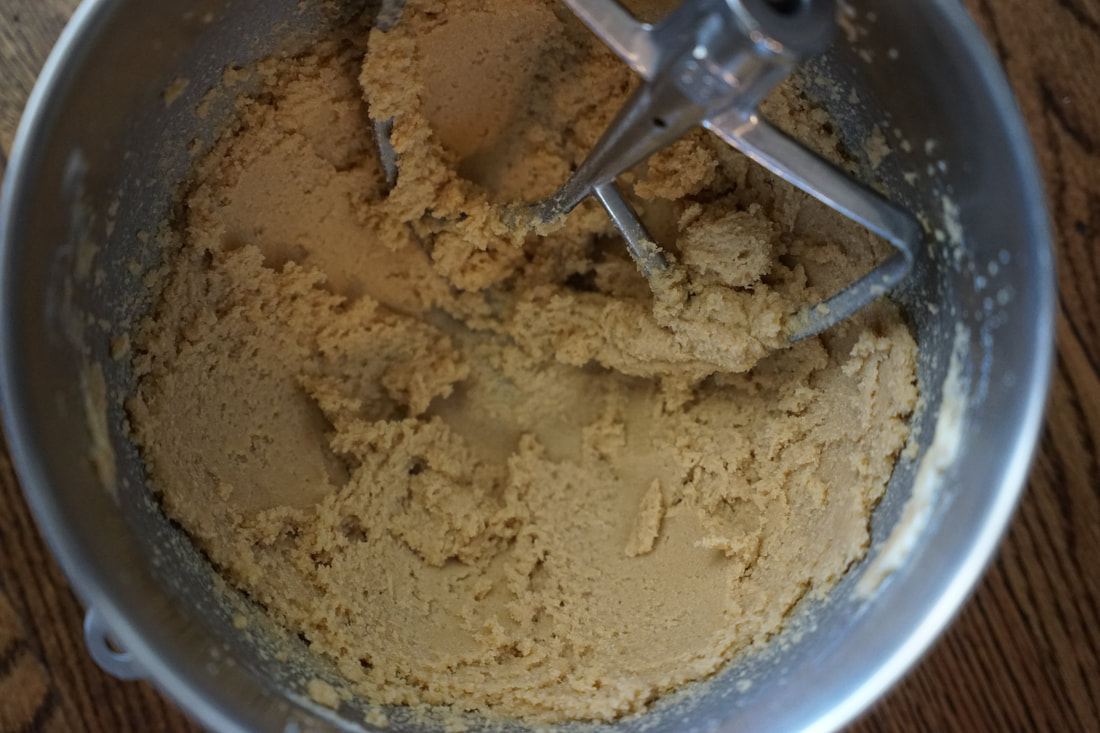
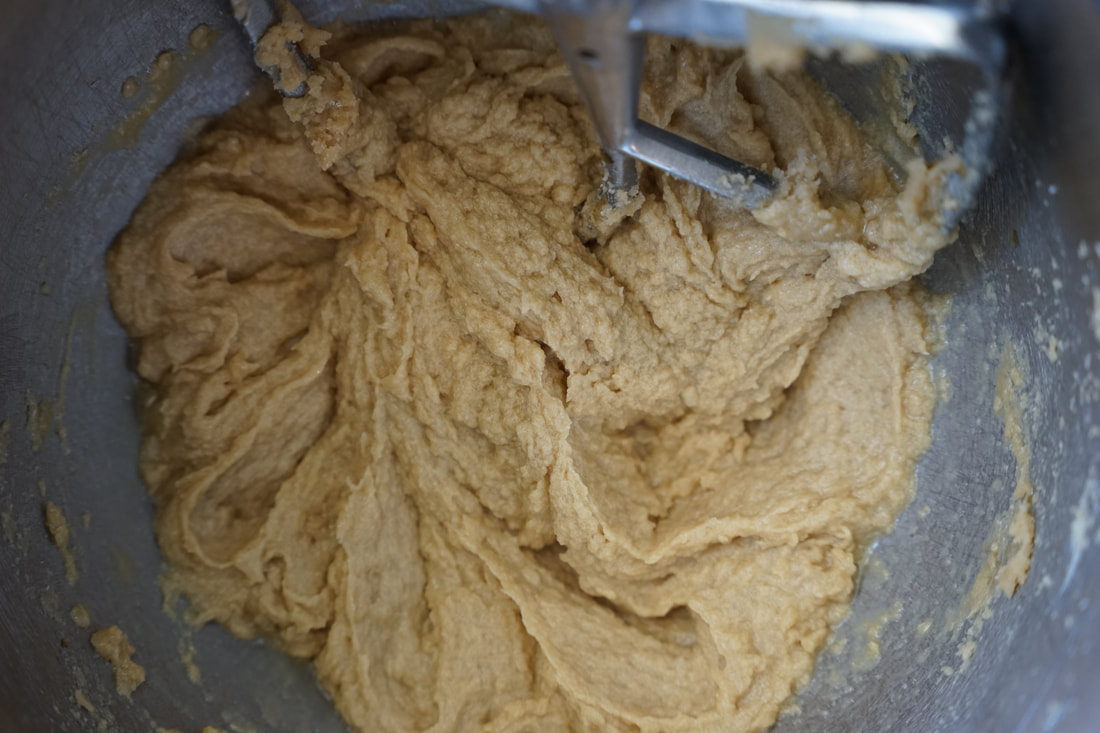
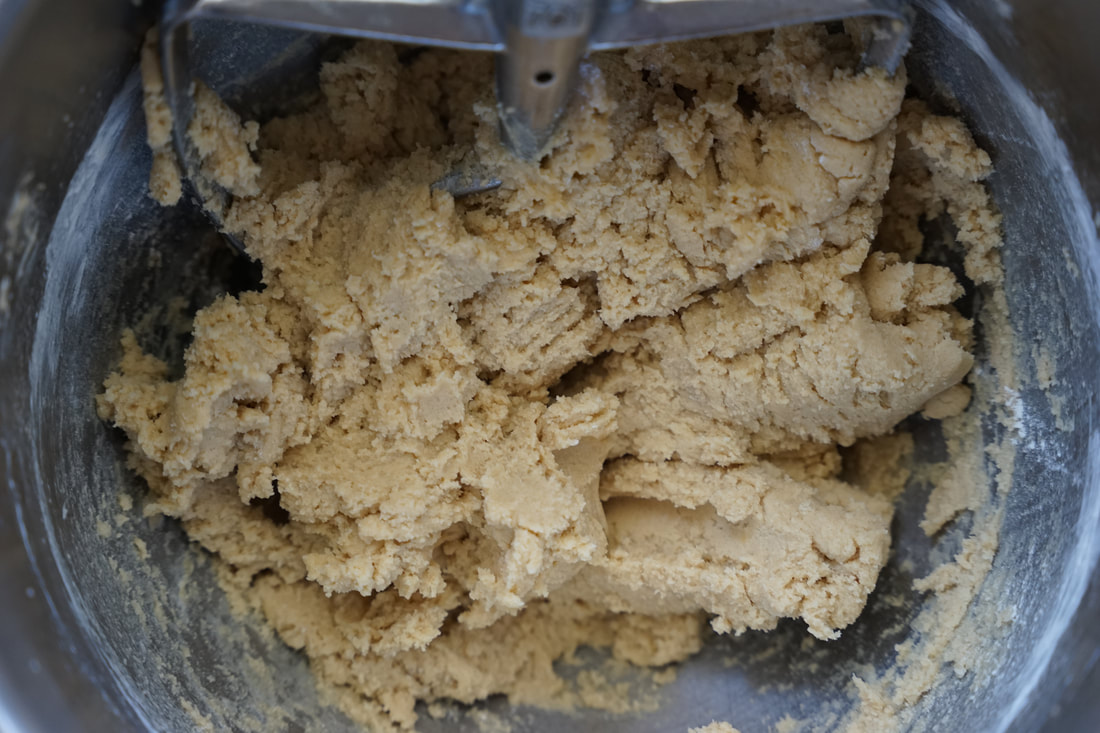
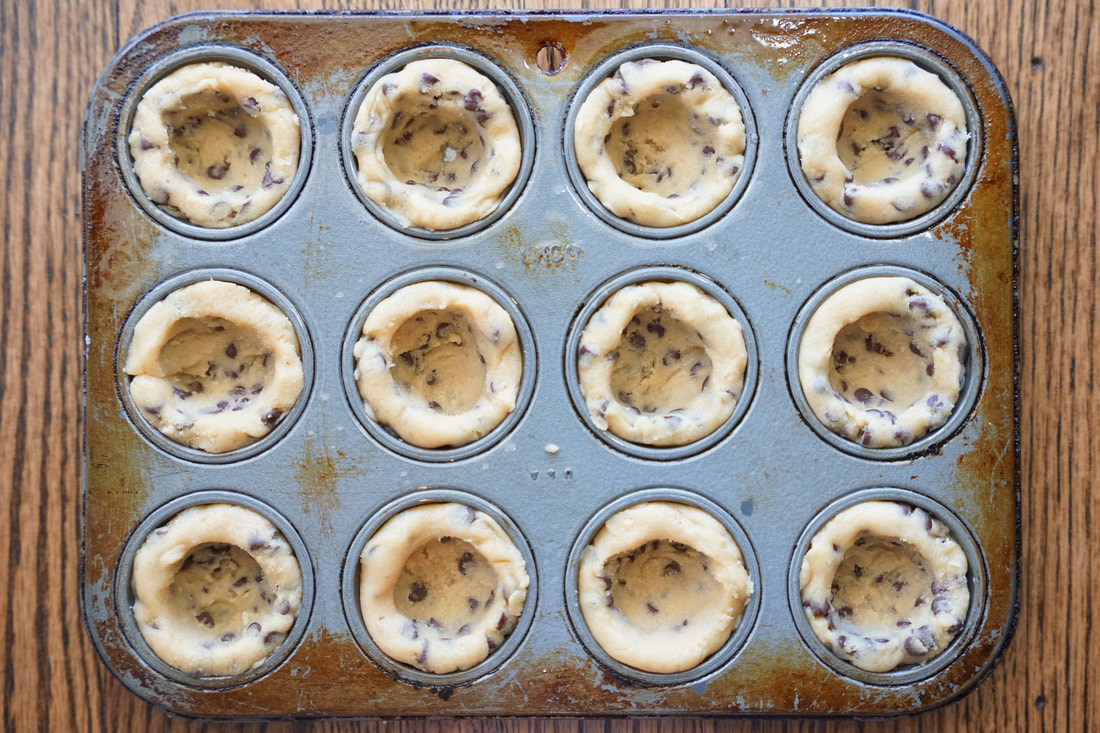
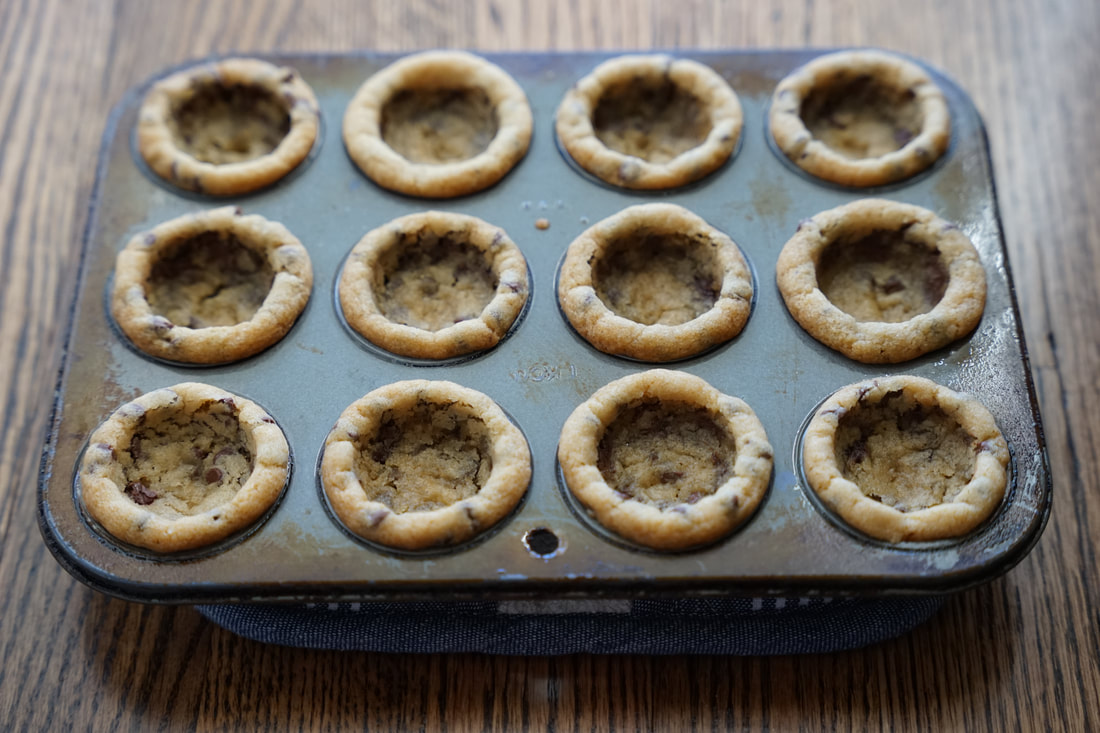
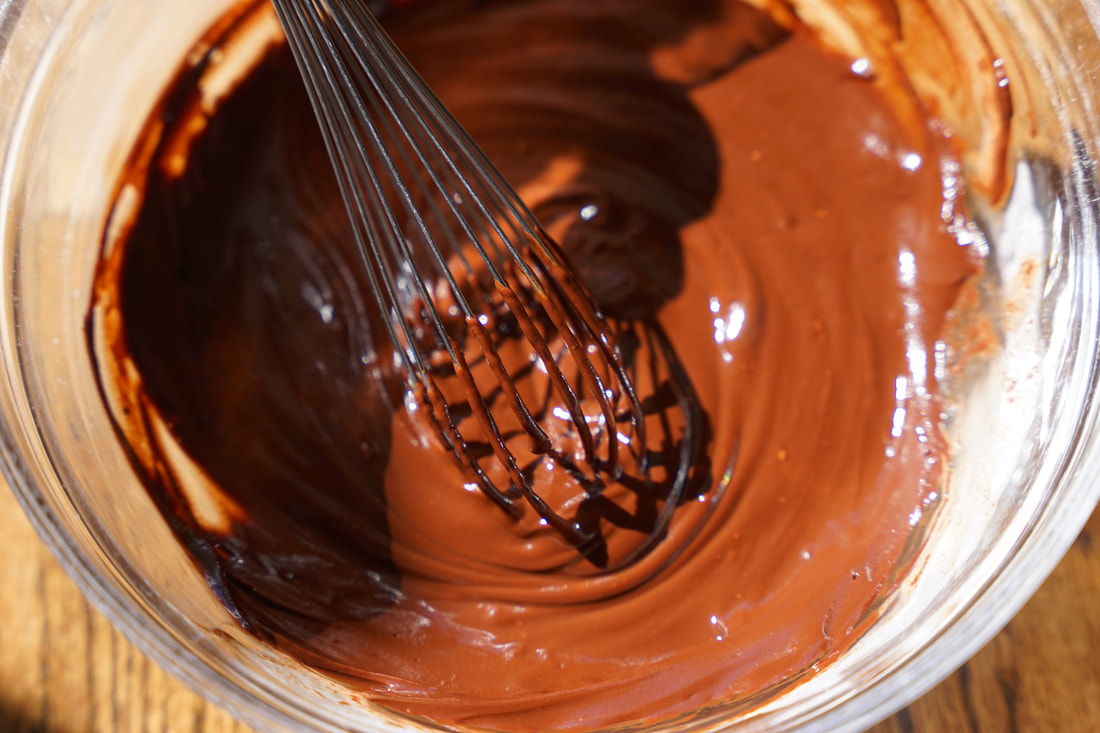
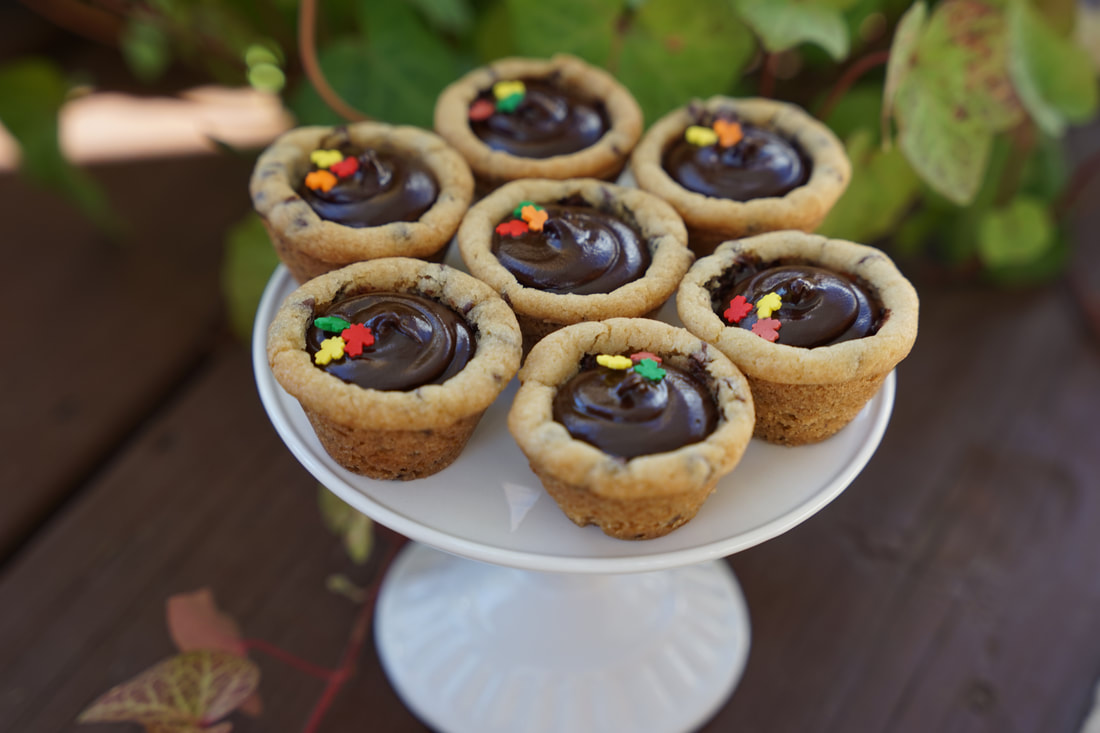
I was lucky enough to be able to design my own desk. If you could design your perfect desk, what would it look like? Would it have a cutting board drawer and a platform drawer to stand on? 😂 (If you're under 5'2" - I highly would recommend it. 😉) It goes without saying that I do most of my cooking while standing at my desk but I wanted to give myself the option to sit if I needed to. #whimpyankleissues 😬 So I asked the builder to make me a "knee space". It's the perfect little nook for a stool - or a George Castanza style nap, if need be. 🤣 So much work went into the designing and building of this island. 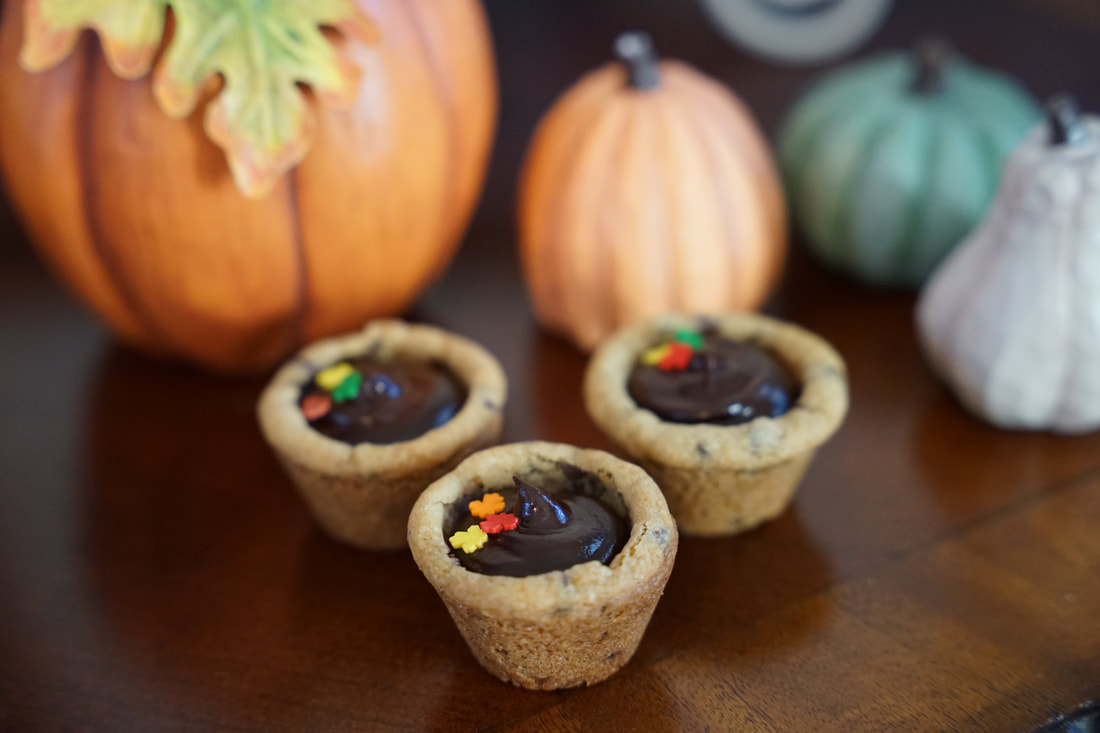 I'm still learning how to make the best use of my new desk and forever trying to remember which drawer I put my peeler in. 🤦🏻♀️ The more I use it, the more I love it though. I've only had it for a couple of weeks but it's already become the nucleus of the kitchen. It's in then literal center of the room and it contains the most essential tools for all of my cooking and baking projects. 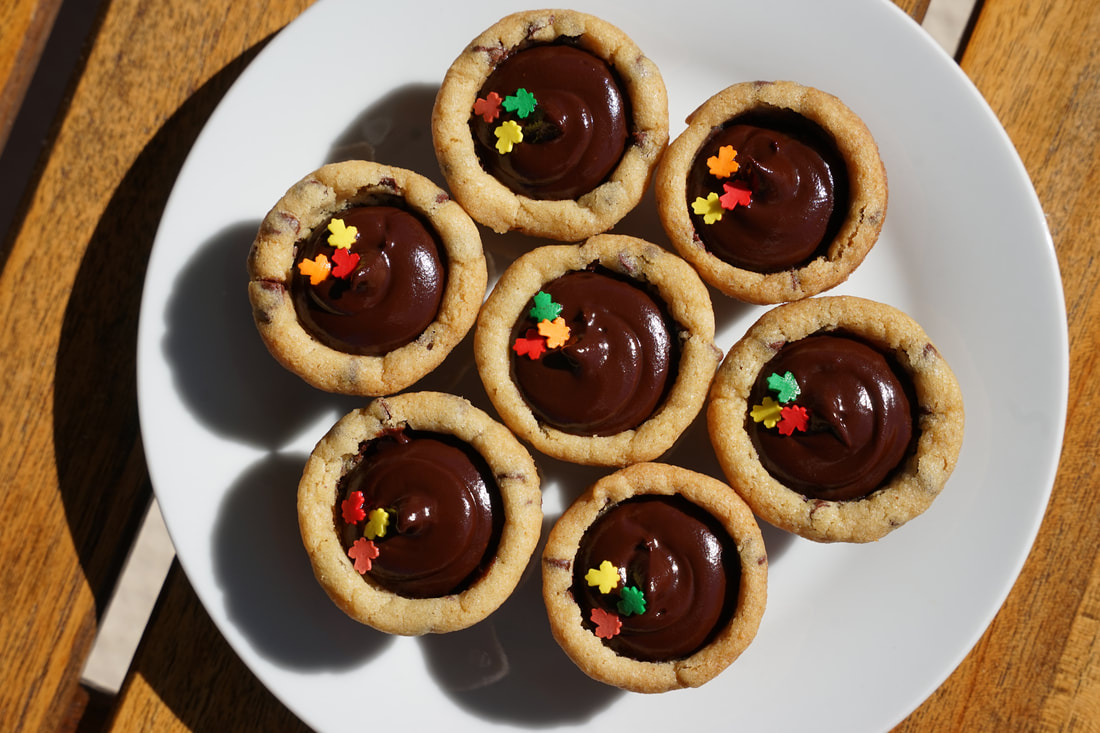 These ganache filled cookie cups were the latest creation to be made at my kitchen desk. Little chocolate chip cookie cookie cups with dark, rich chocolate ganache. 🍪🍫 Who wouldn't love these?  Ganache Filled Cookie Cups Cookie Dough 1 cup butter 1 1/2 cup brown sugar 1/3 cup sugar 2 eggs 2 teaspoons vanilla 3 cups flour 1 teaspoon baking soda 3/4 teaspoon baking powder 1/2 teaspoon salt 2 cups mini chocolate chips Ganache 1 cup chocolate chips 2 Tablespoons heavy cream
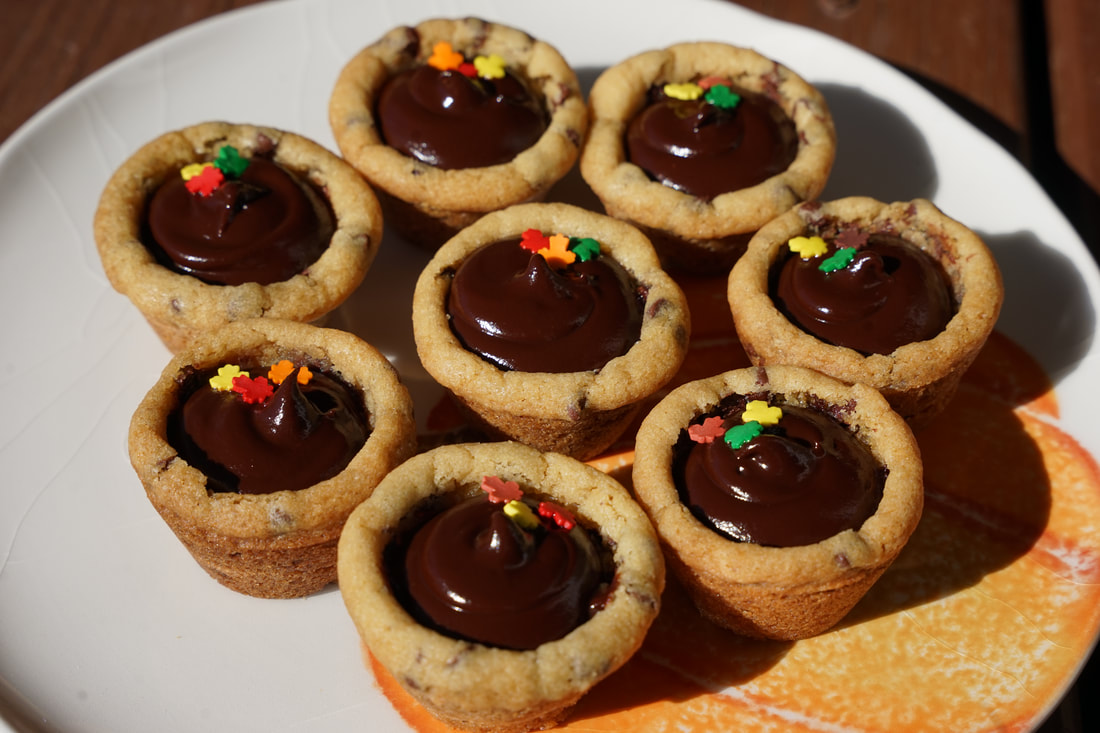 Amy's tip of the day: Make the cookie cups ahead of time and store them in ziploc bags until ready to serve. Make the ganache and fill the cups just before you're ready to serve them - they'll stay fresher that way. If you run out of time, pipe canned frosting into these tasty little, edible cups for an even quicker treat.
Ciao! |