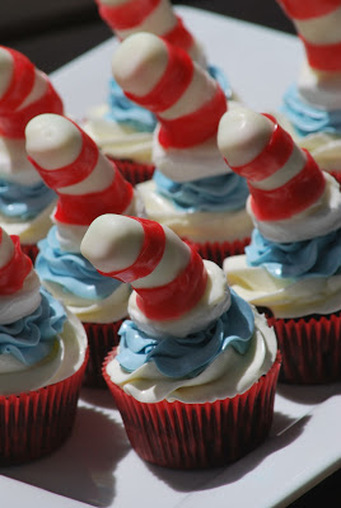
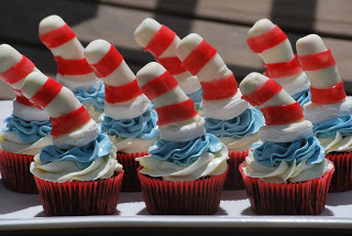
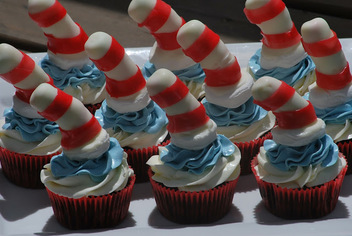
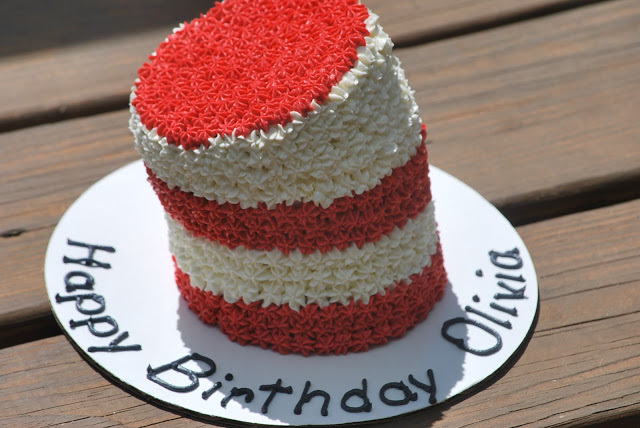
 Sometimes I get asked to make very specific cakes. Clients will email me pictures of cakes that they want me to recreate and tell me what flavors, icing and colors to use on the cake. Other times, clients give me only a general theme or color to work with and the rest is up to me. I recently received an order for a small cake and cupcakes for a Dr. Seuss party. It was up to me to choose the design of the cupcakes so I headed to the internet for inspiration. Wow. I guess it goes without saying that Dr. Seuss cupcakes were over the top - just like the books. The cupcakes were bright and colorful and playful and fun. I knew immediately that this was going to be a FUN project.
I ended up creating my own version of hat cupcakes based on the ideas that I found on the internet. To make the hat cupcakes, you will need the following supplies:
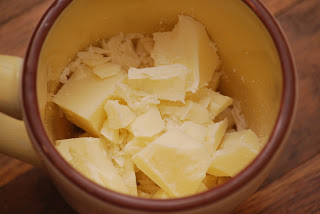
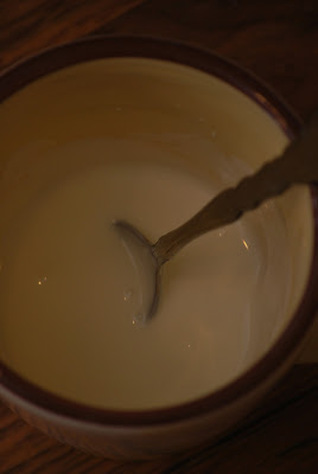
Melt chocolate in a mug.
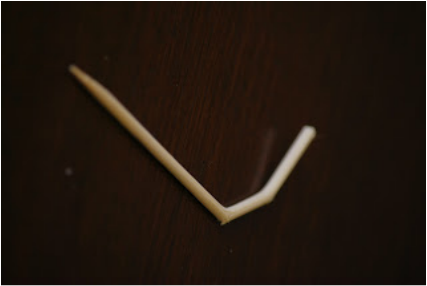
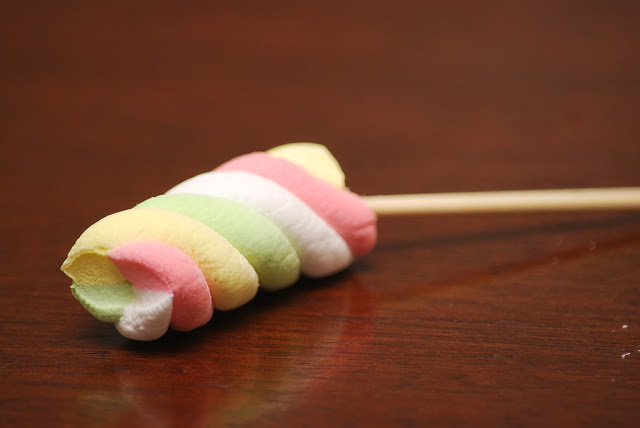
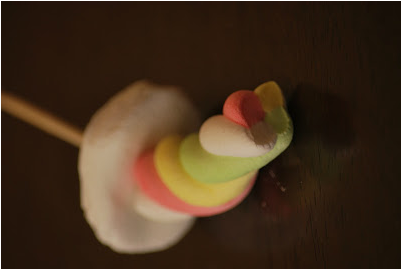
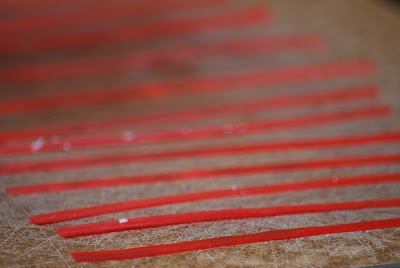
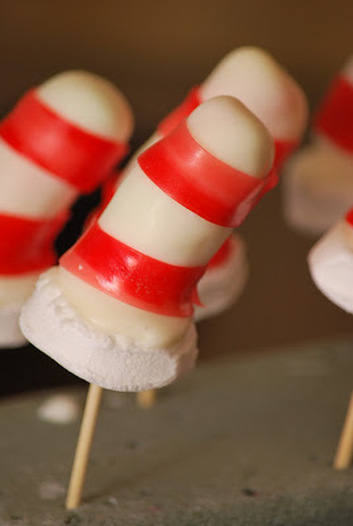
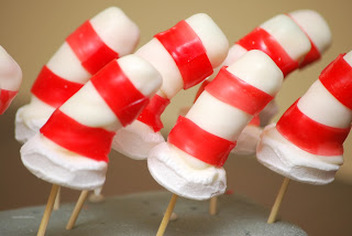
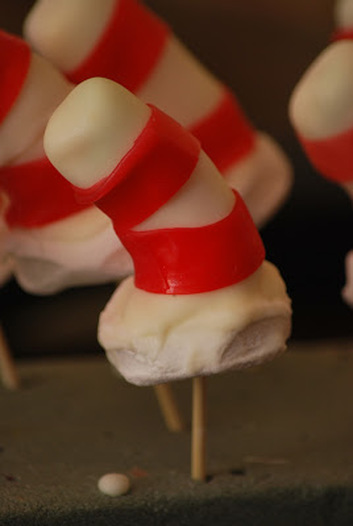
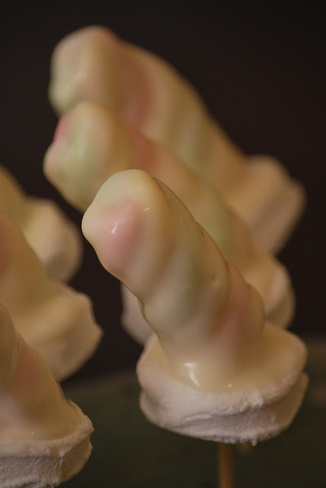 Holding end of marshmallow skewer, dip each hat into melted chocolate and then place in a styrofoam block to dry. You could still see the color through the chocolate after the first dipping so I let them dry and then dipped them again. Much better coverage the second time. Cut fruit roll ups into strips and wrap around dried chocolate.
Add hats.
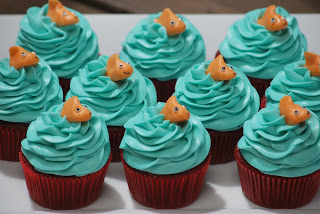
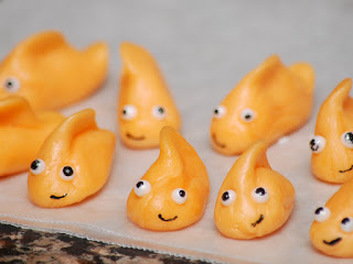
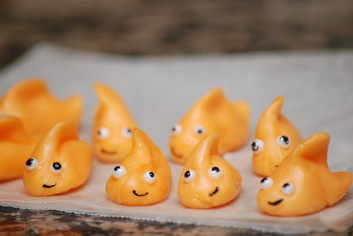
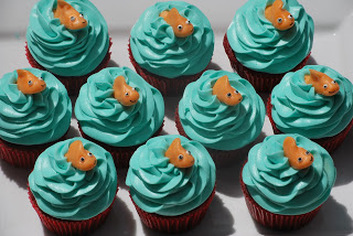
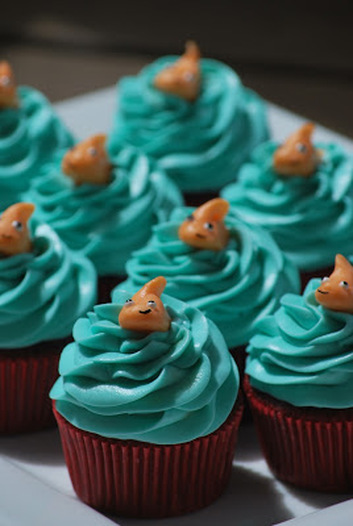
For the fish cupcakes, you will need the following supplies...
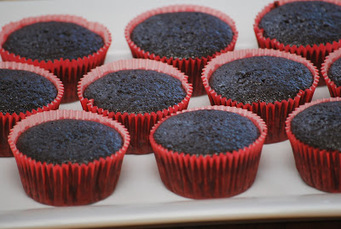
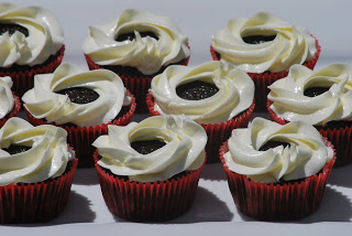
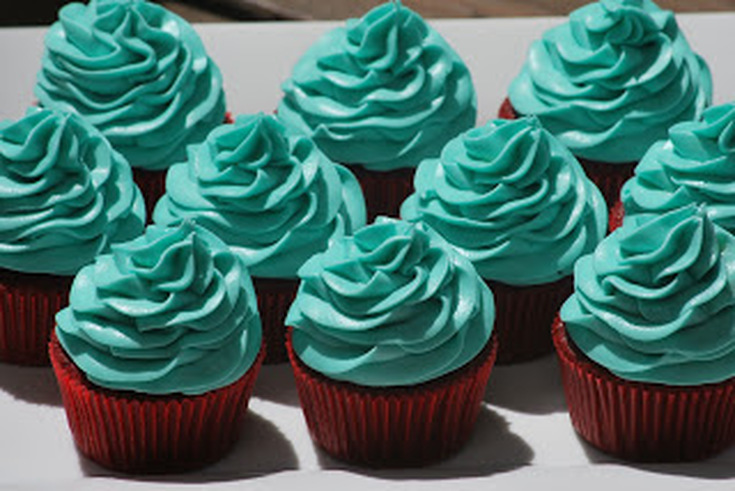
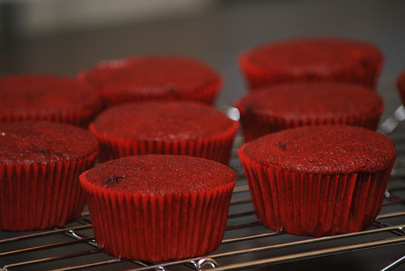 Bake a batch of red velvet cupcakes.
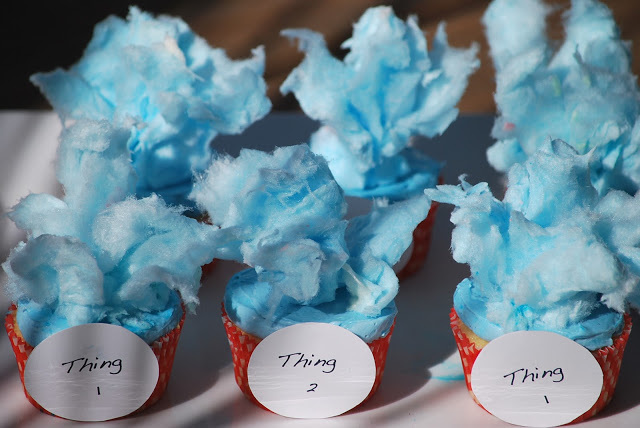
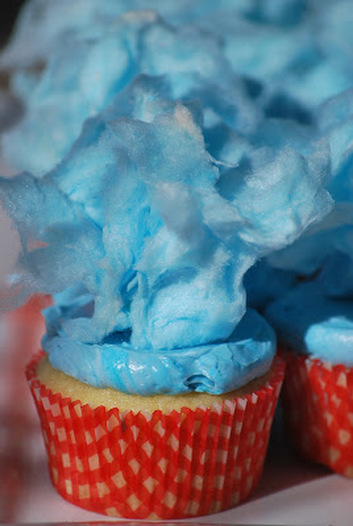
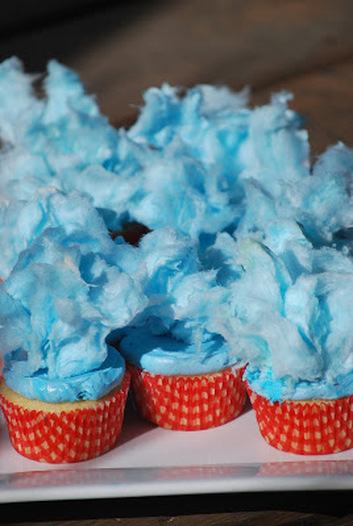
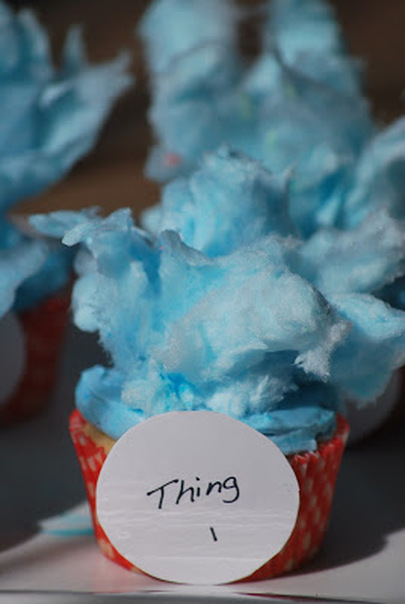
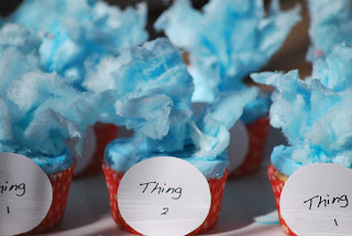
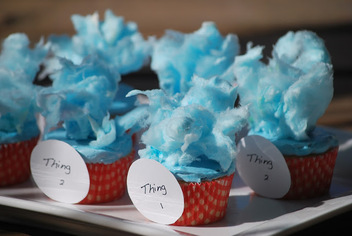
Thing 1 and thing 2 cupcake supplies: paper to print labels and blue cotton candy 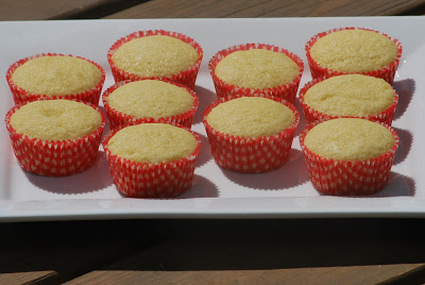 Bake a batch of vanilla cupcakes. Frost with blue buttercream. Top with cotton candy hair.
 Attach a Thing 1 or thing 2 sticker to each cupcake liner. (I printed mine on the computer, cut them out with scissors and hot glued them to the paper liner.)
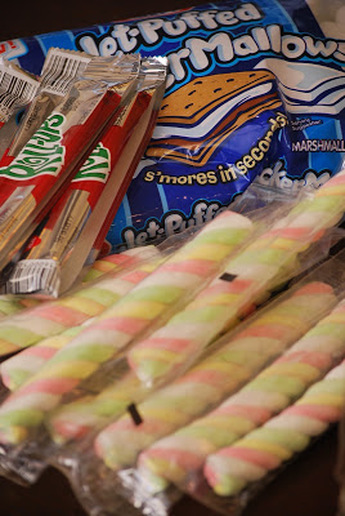
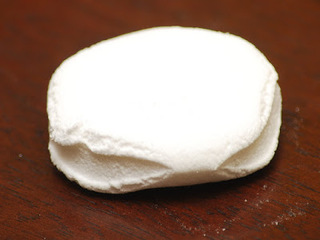
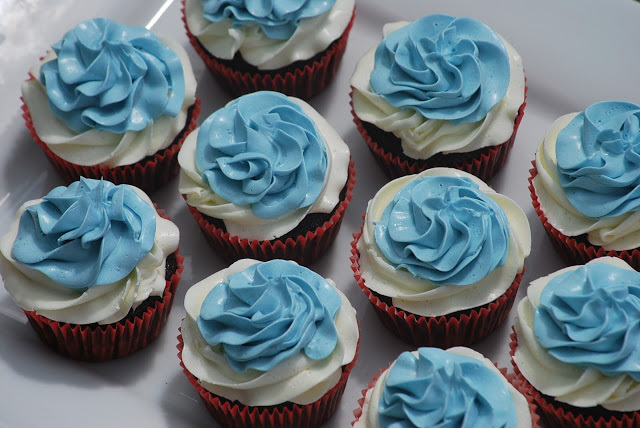
What child could resist a cupcake topped with cotton candy? My goal was to use child friendly ingredients to make the decorations. Starburst candy, marshmallow sticks, fruit by the foot, melted chocolate and cotton candy seemed like much better decoration material than fondant or gumpaste for a children's party.
Ciao!
0 Comments
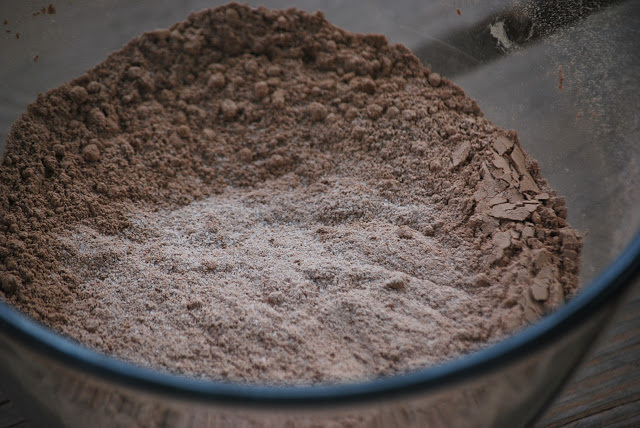
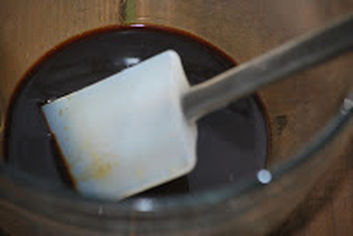
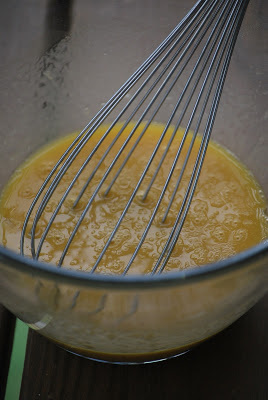
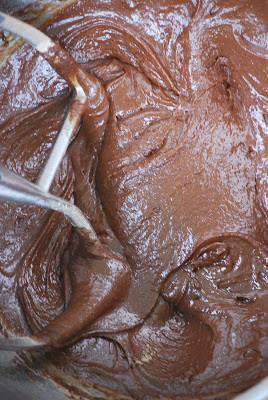
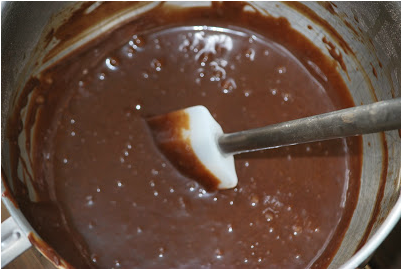
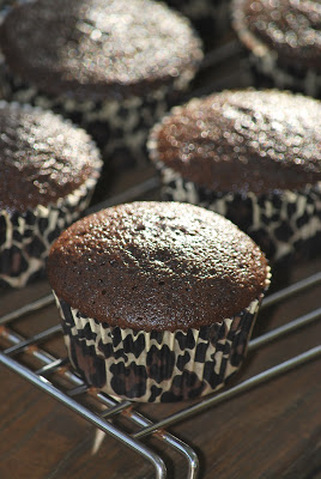
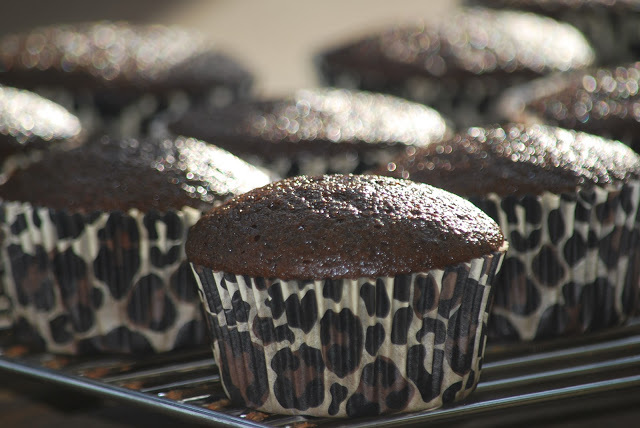
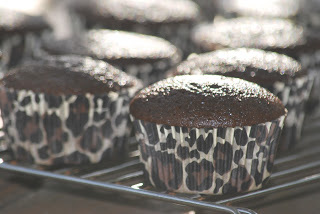
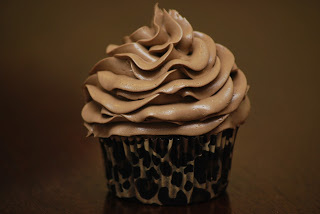
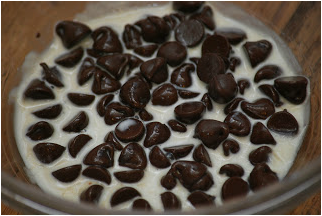
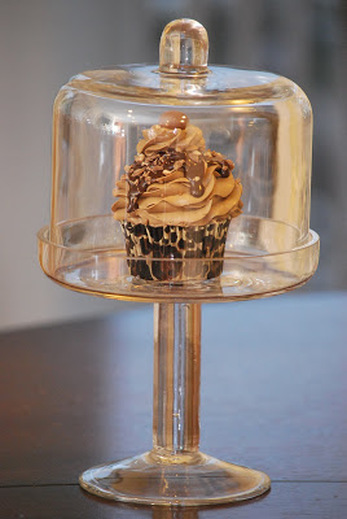
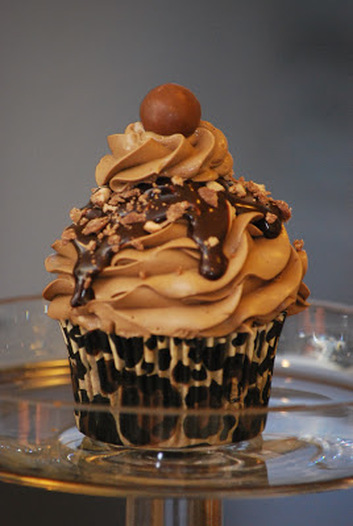
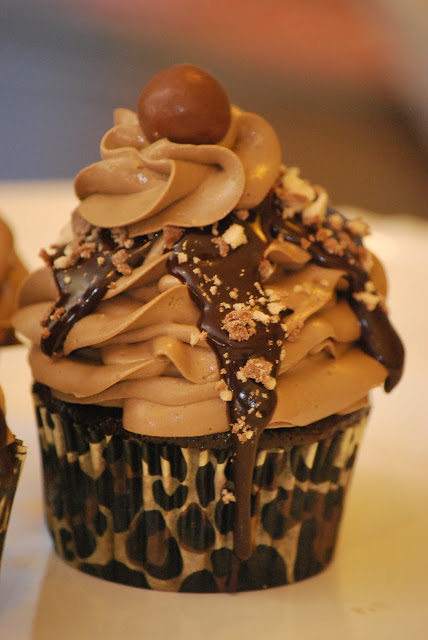
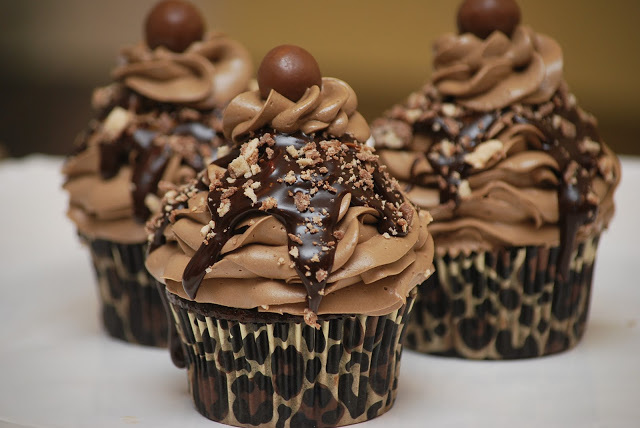 It's official - I have a new favorite chocolate cupcake. (I do feel some pangs of guilt over the dethroning of my old favorite - the dark chocolate ganache cupcake - but I'll get over it.) I ran across this recipe on bakersroyale.com. This deep, dark, rich, coffee infused cupcake is the base for her double chocolate mocha crunch cupcake, her toffee crunch cupcake, her biscoff and Kahlua cupcakes, her caramel cappuccino royalle cupcakes and several others. It is really great basic chocolate cupcake that you can transform into all sorts of great cupcake creations. (By the way, I've tried almost all of her other cupcake recipes that use this same cake recipe.) 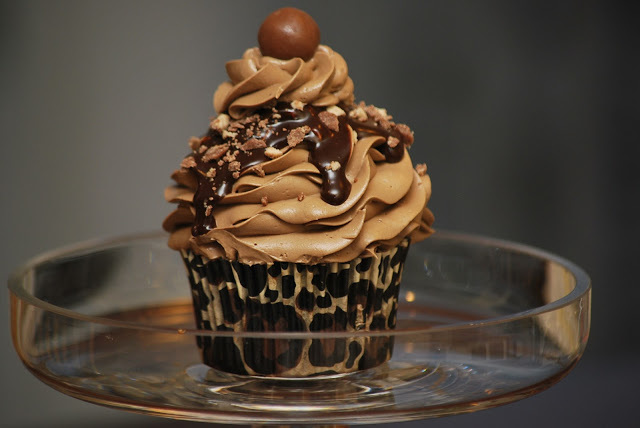 Mocha Cupcakes 1 cup flour 1 cup plus 2 Tablespoons sugar 1/3 cup plus 2 Tablespoons cocoa 1/2 teaspoon baking soda 1/4 teaspoon salt 1/2 cup butter. melted 2 eggs 1 teaspoon vanilla 2 Tablespoons instant coffee 1/2 cup hot coffee Chocolate Sauce 2/3 cup dark chocolate 2 Tablespoons heavy cream 4 Tablespoons powdered sugar 2 Tablespoons water
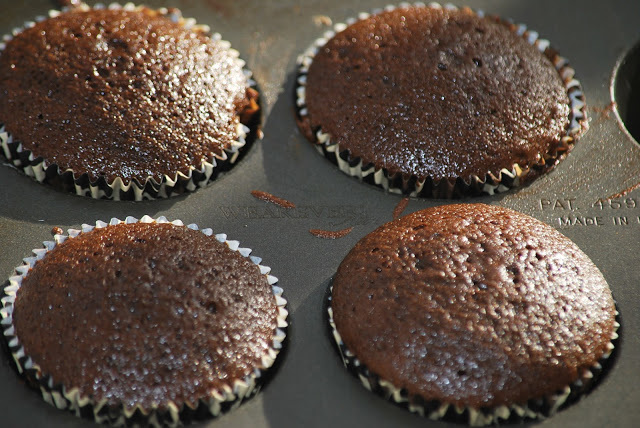 Bake 18 minutes at 350. Cool completely on wire racks.
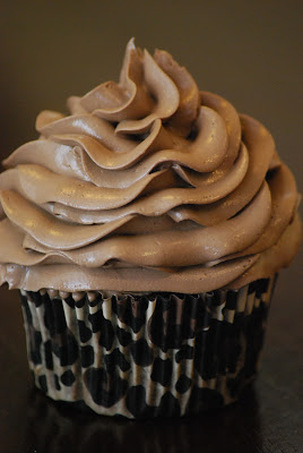
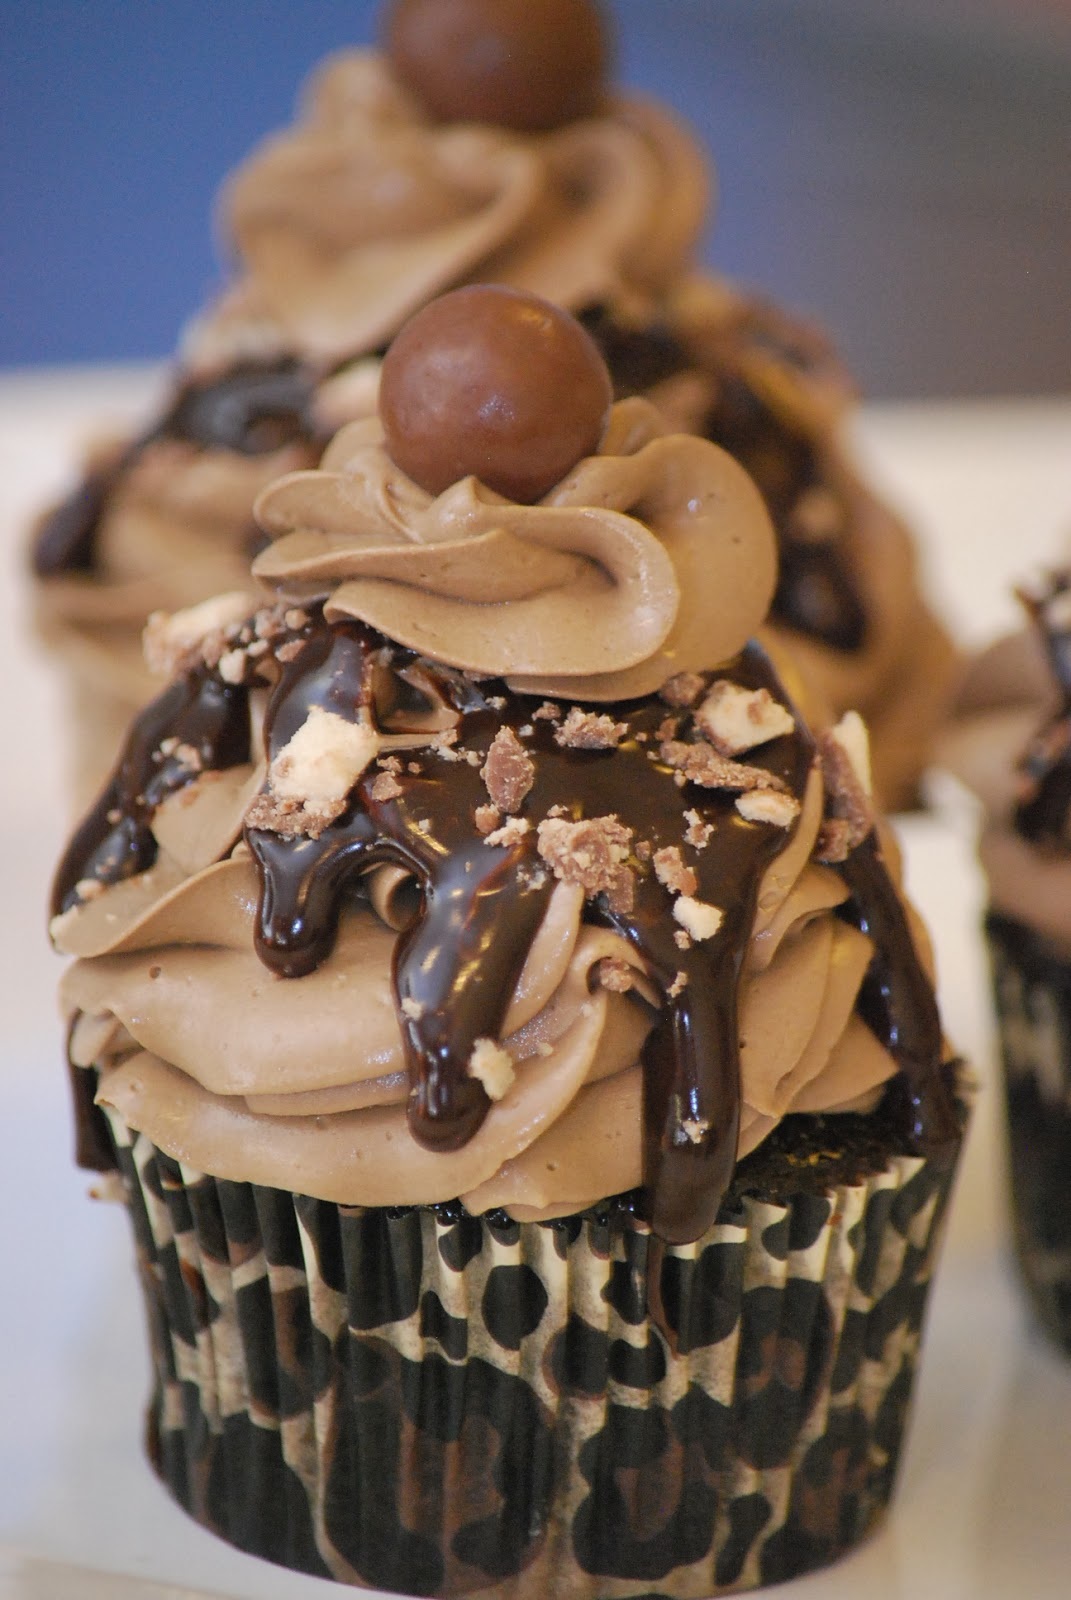
Frost with chocolate buttercream. Put in freezer for 10 minutes.
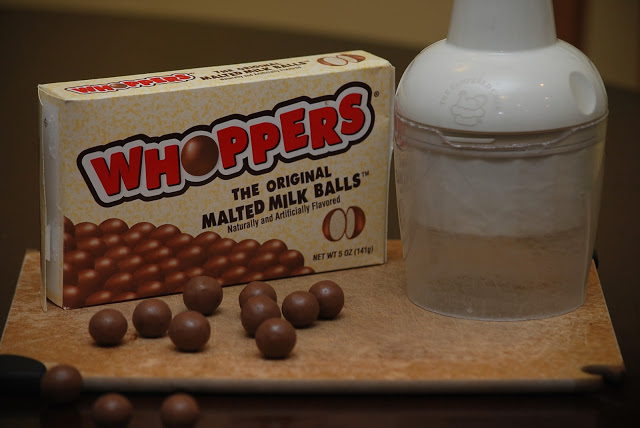
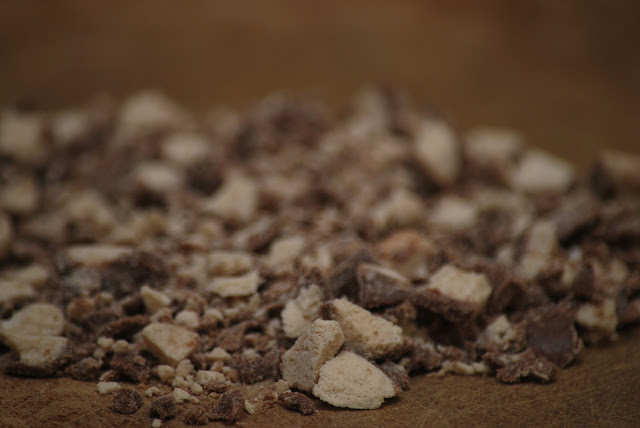
Chop whoppers, reserving 1 for the top of each cupcake.
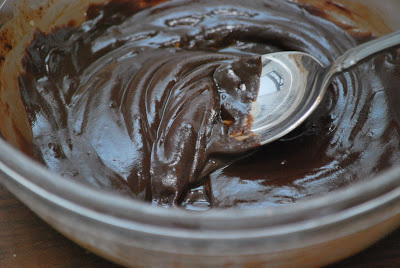
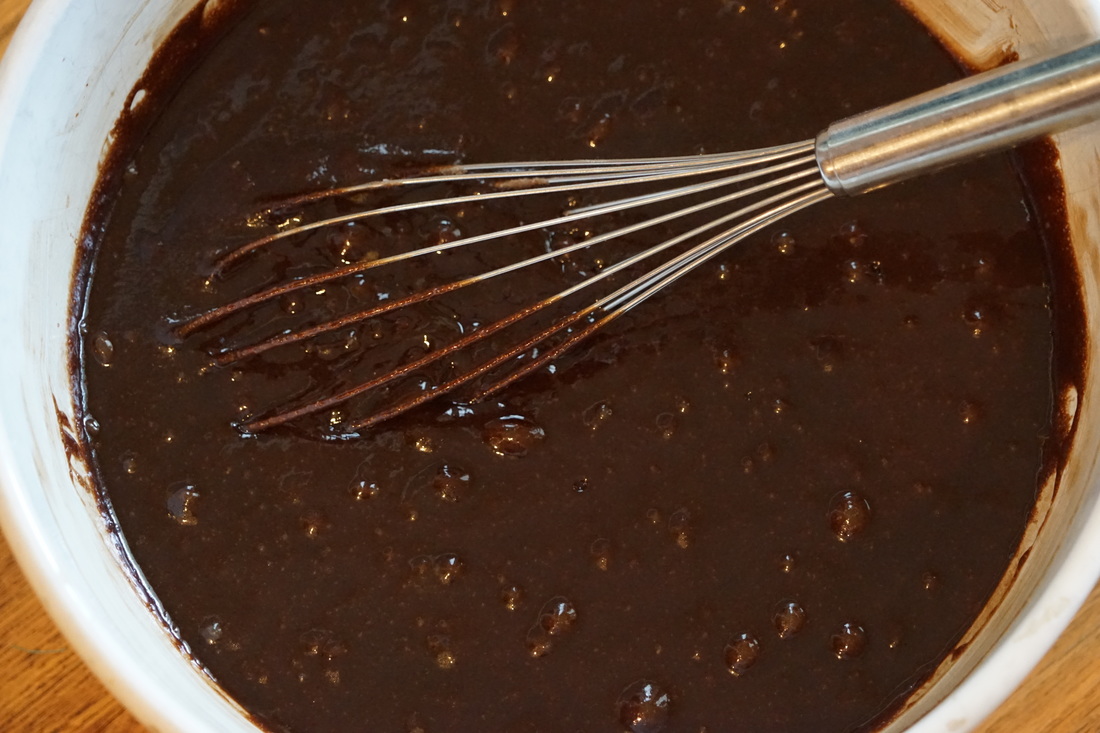
To make chocolate sauce: Heat chocolate and whipping cream in the top of a double boiler, without stirring.
Stir melted chocolate. Stir in powdered sugar.
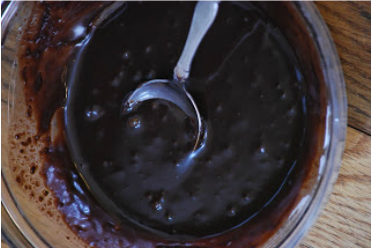 Stir in enough water to make pouring consistency. Spoon chocolate sauce over frozen buttercream. Sprinkle with chopped whoppers. 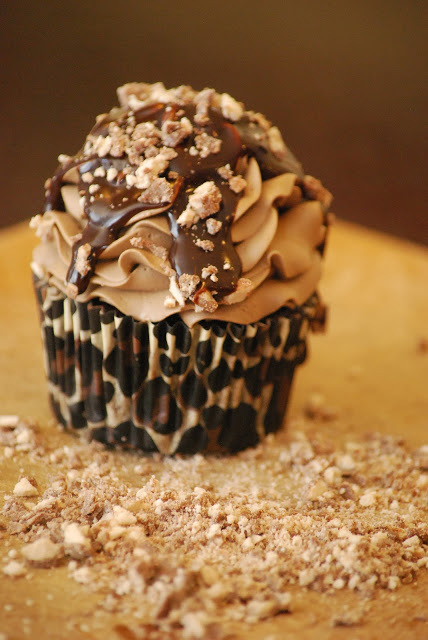 Finish with another dollop of buttercream and a whopper.
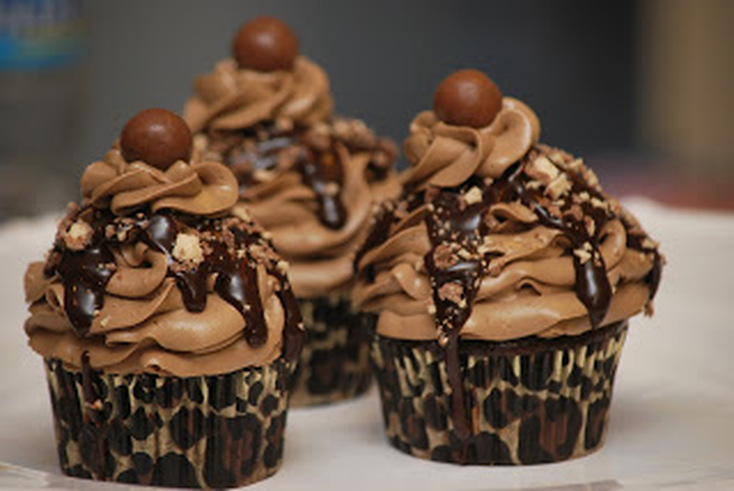
I was afraid that these cupcakes would only really be appreciated by coffee lovers but the truth is, they have universal appeal. My non coffee drinking husband, who is always willing to be a cupcake taster, thought my new cupcakes were super delicious. By the way, kids are also big fans of these yummy mocha cupcakes. (That is bad news if you wanted to save a few cupcakes for a rainy day - they are not going to last very long.)
Ciao!
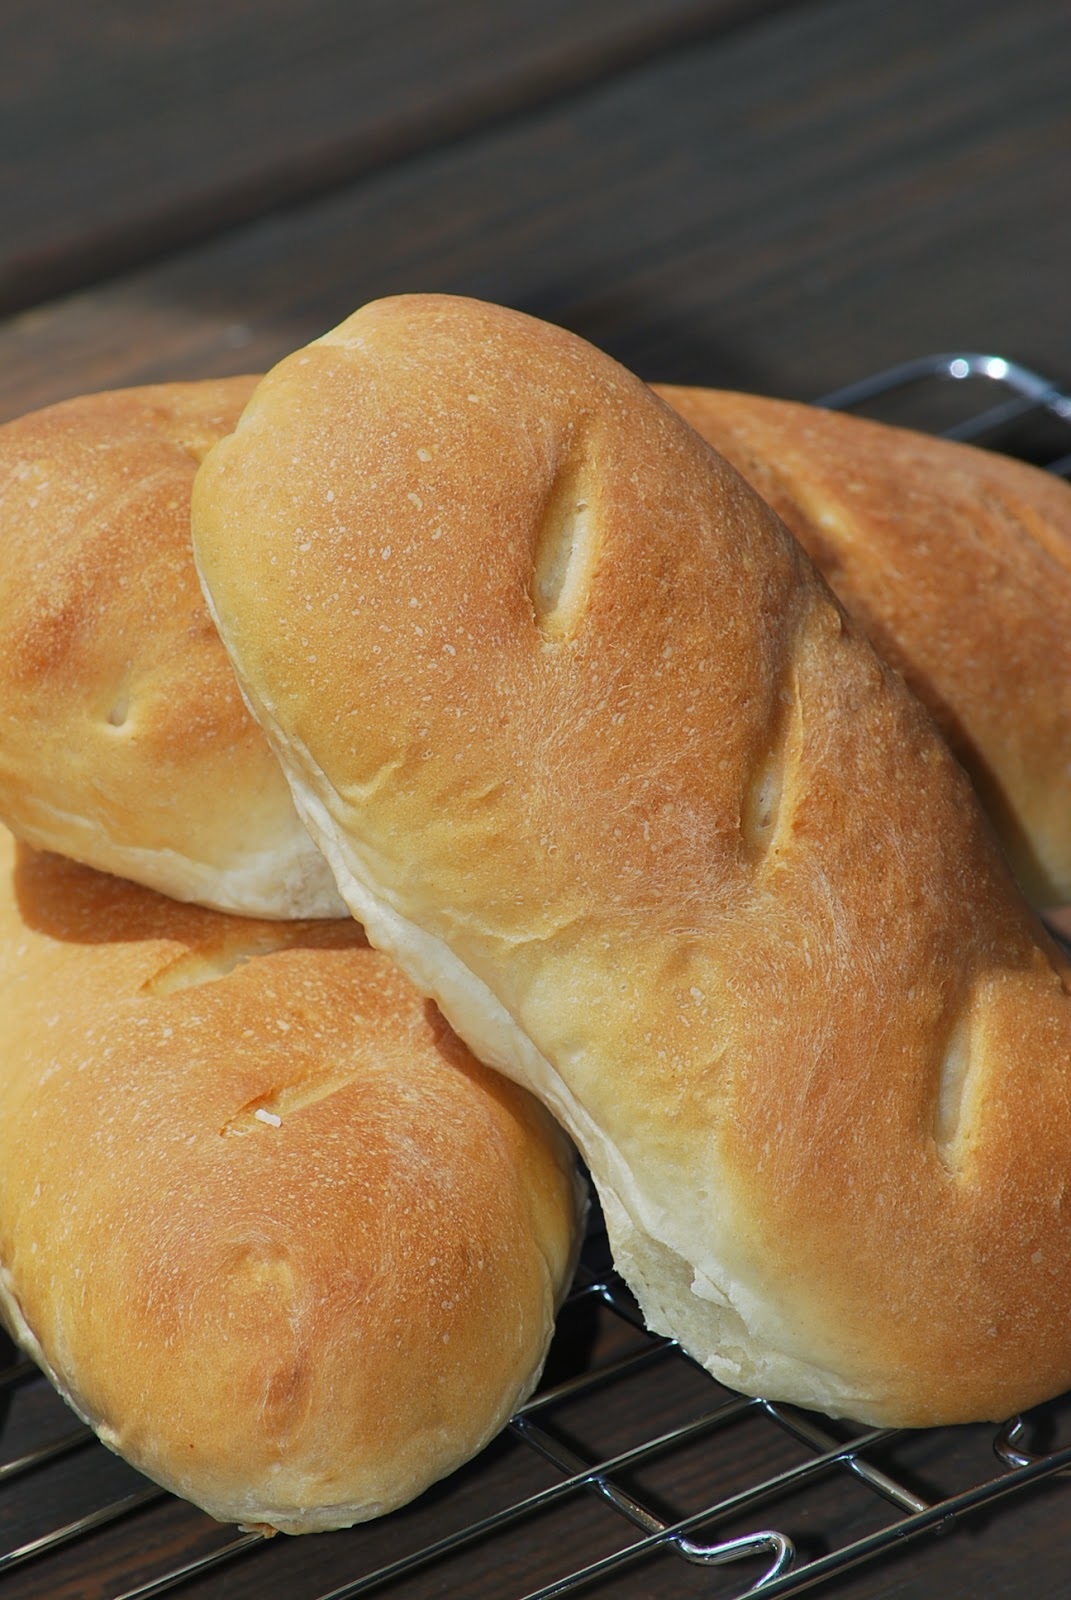
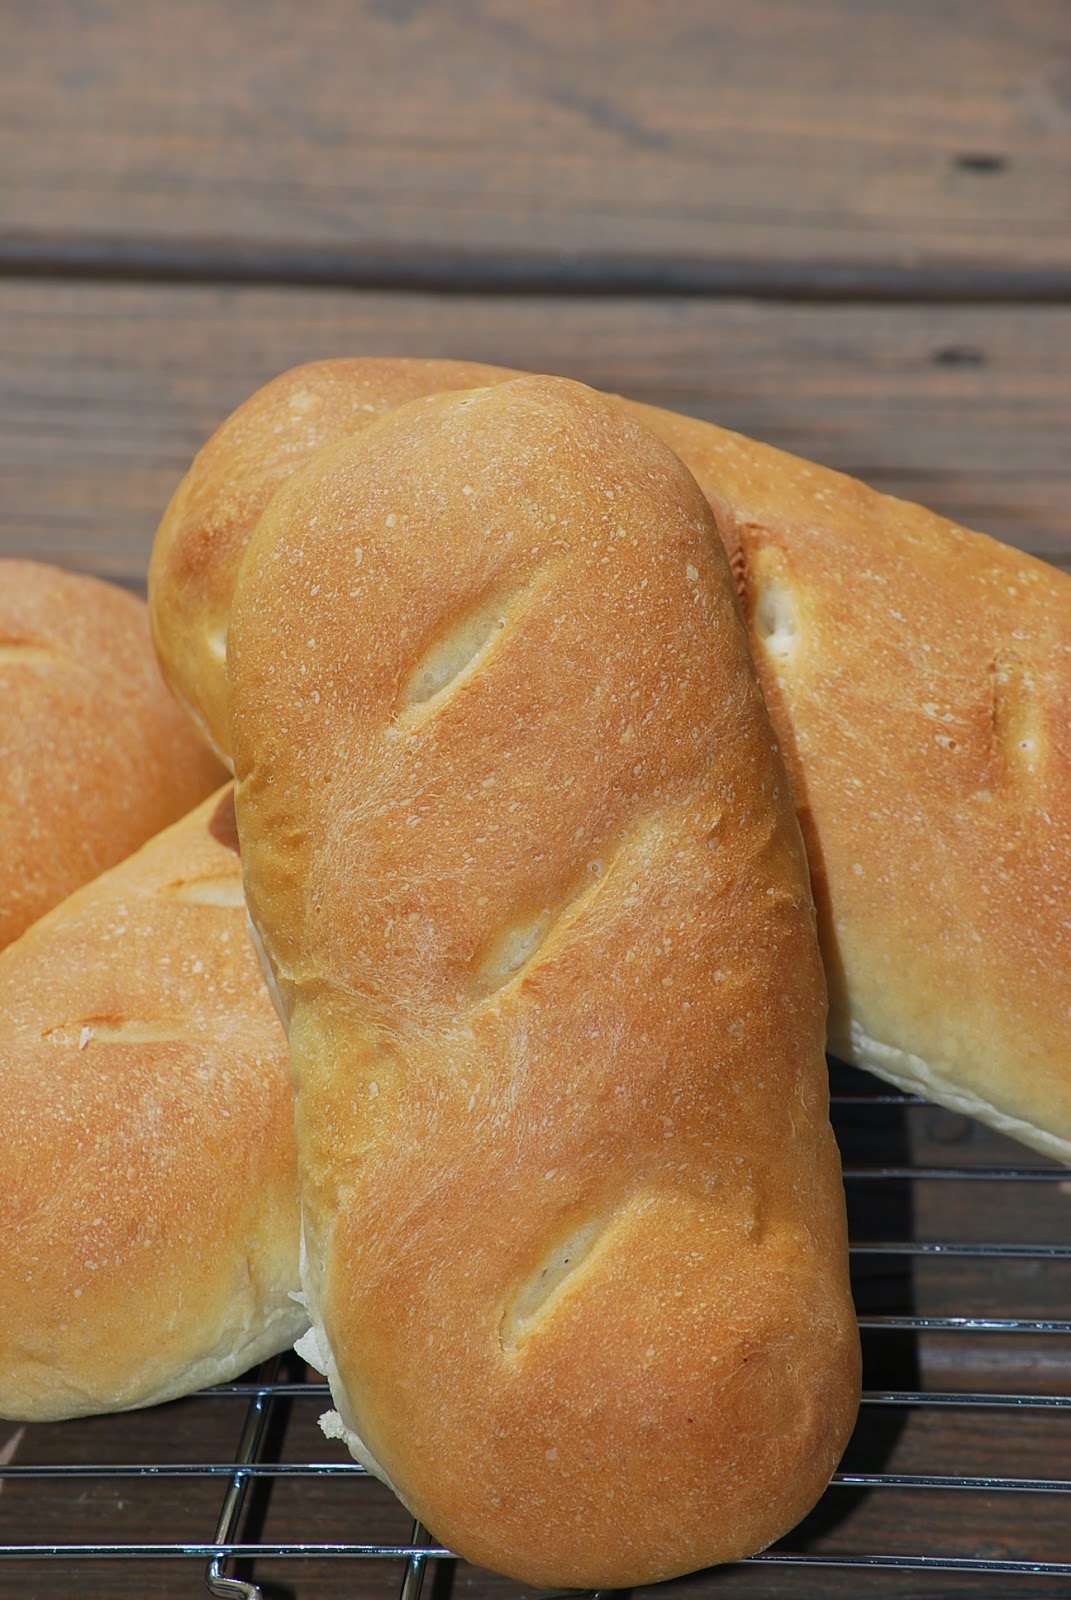
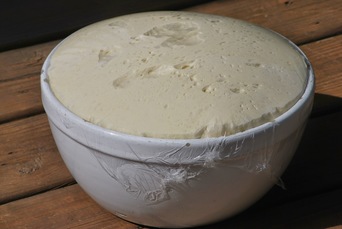
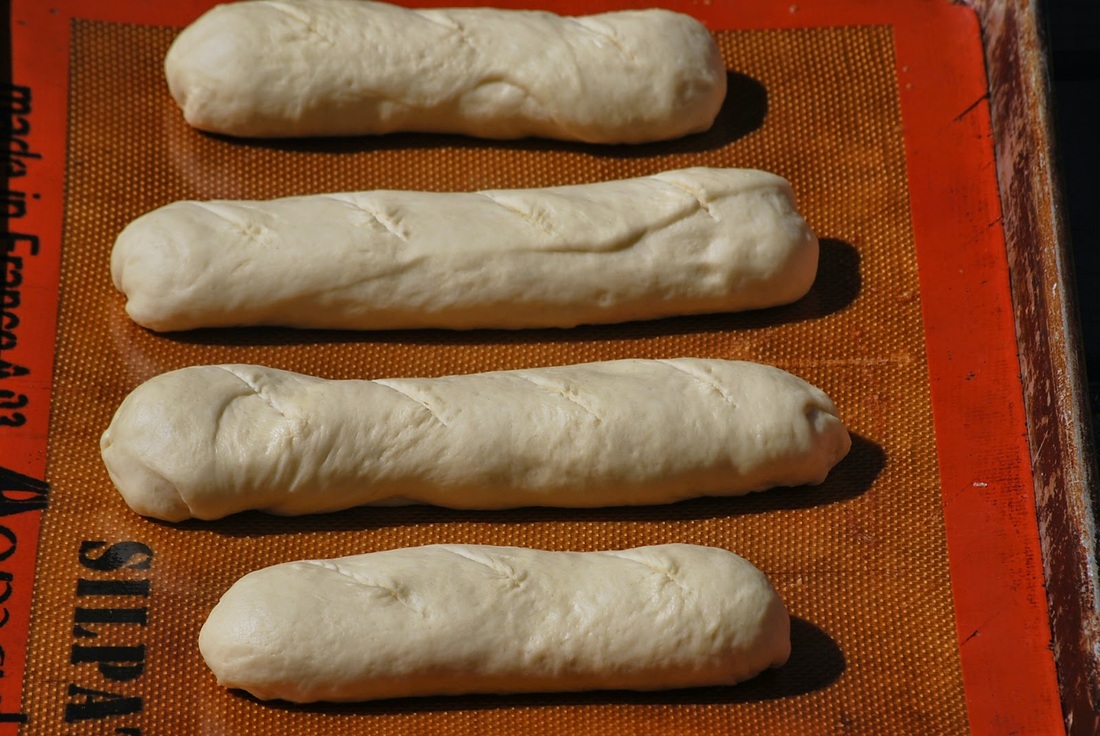
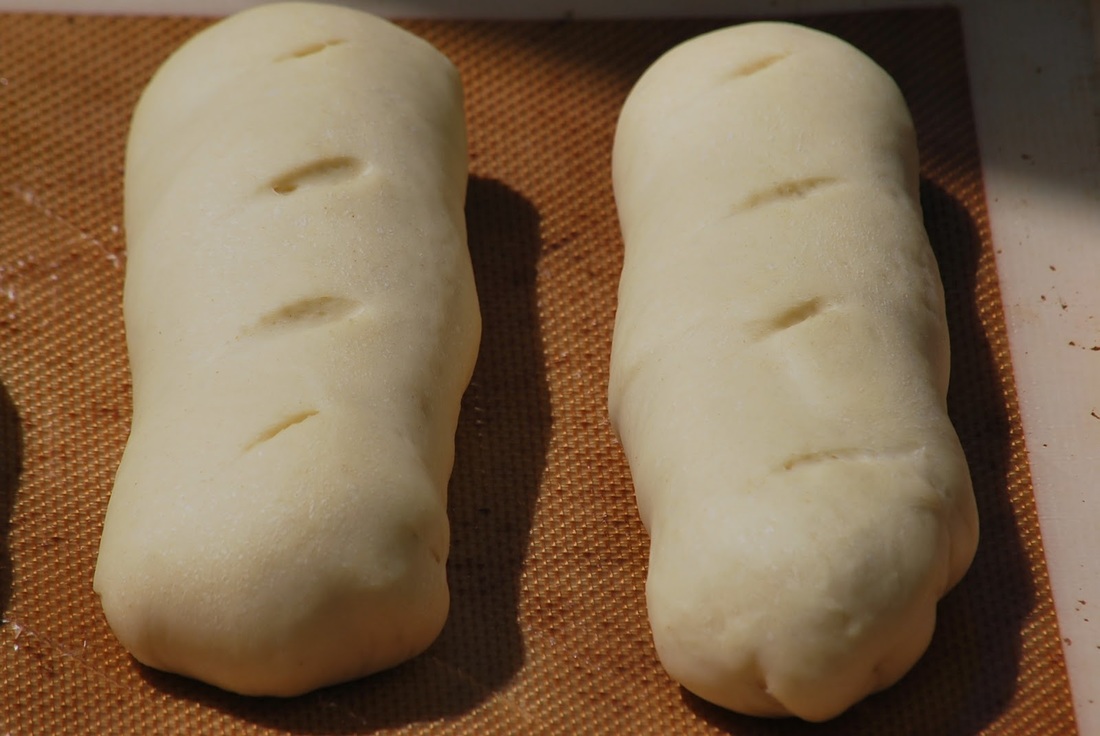
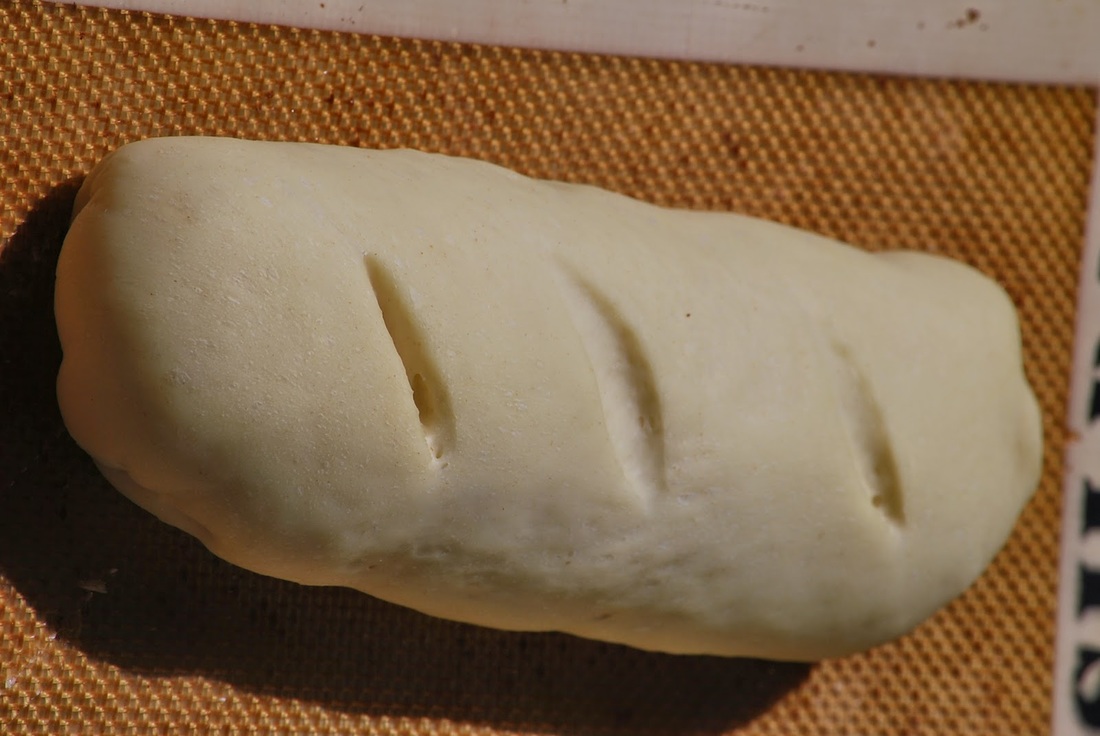
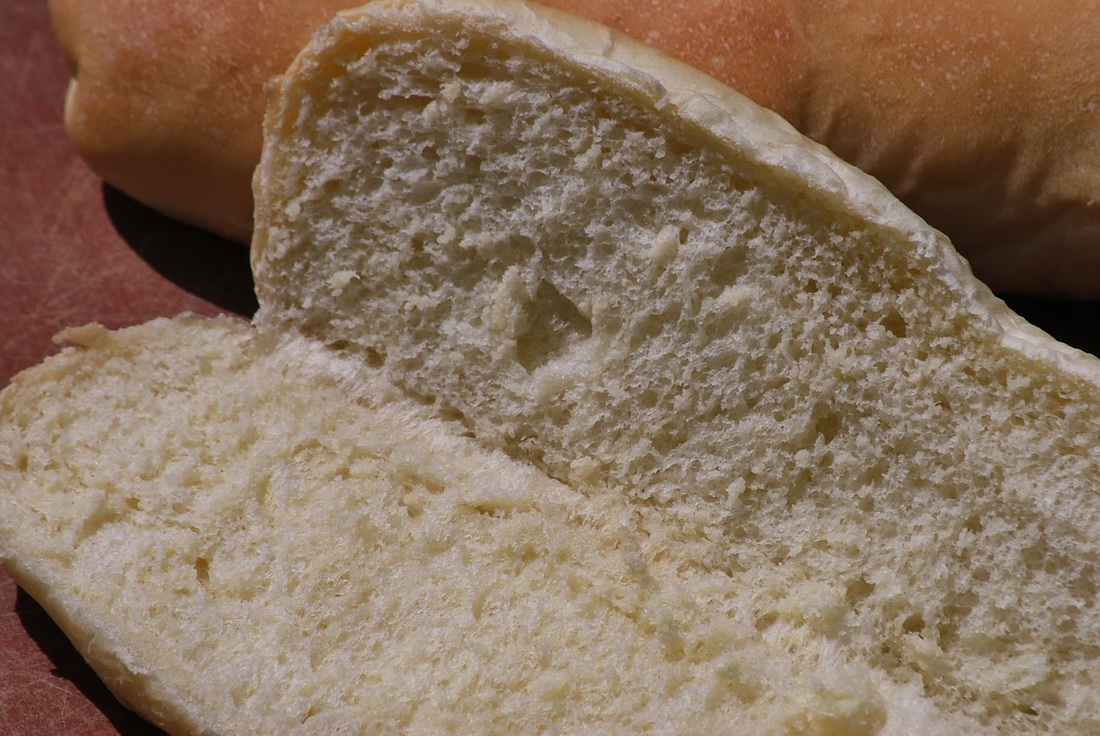
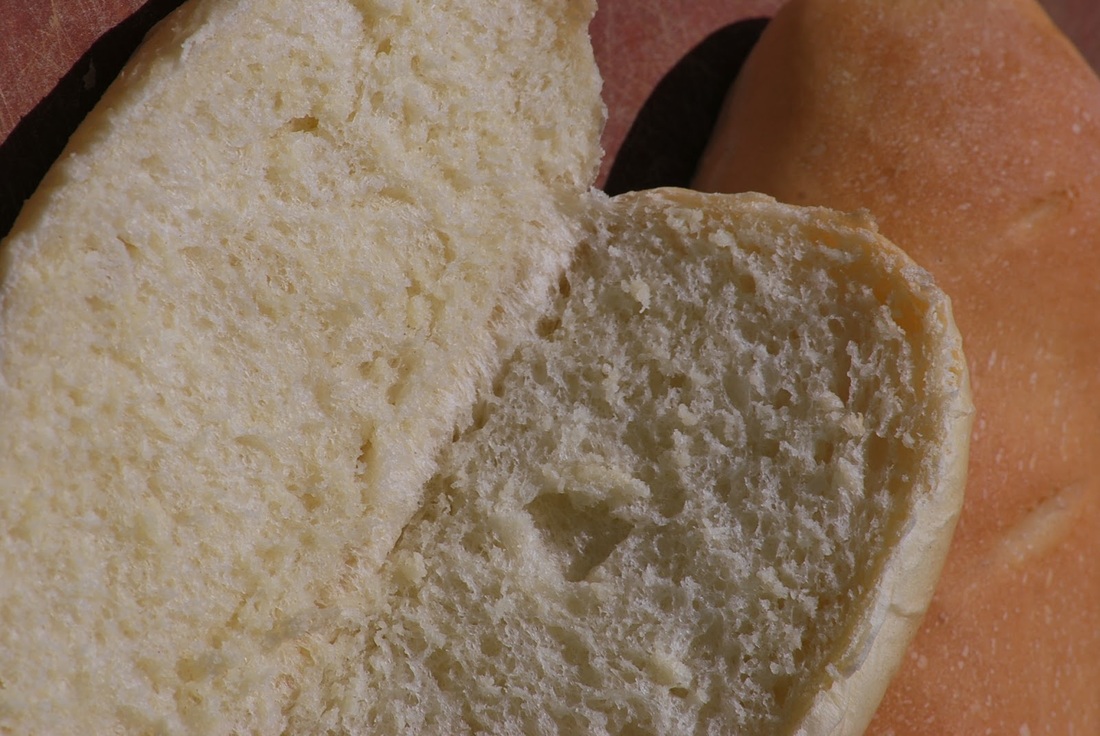
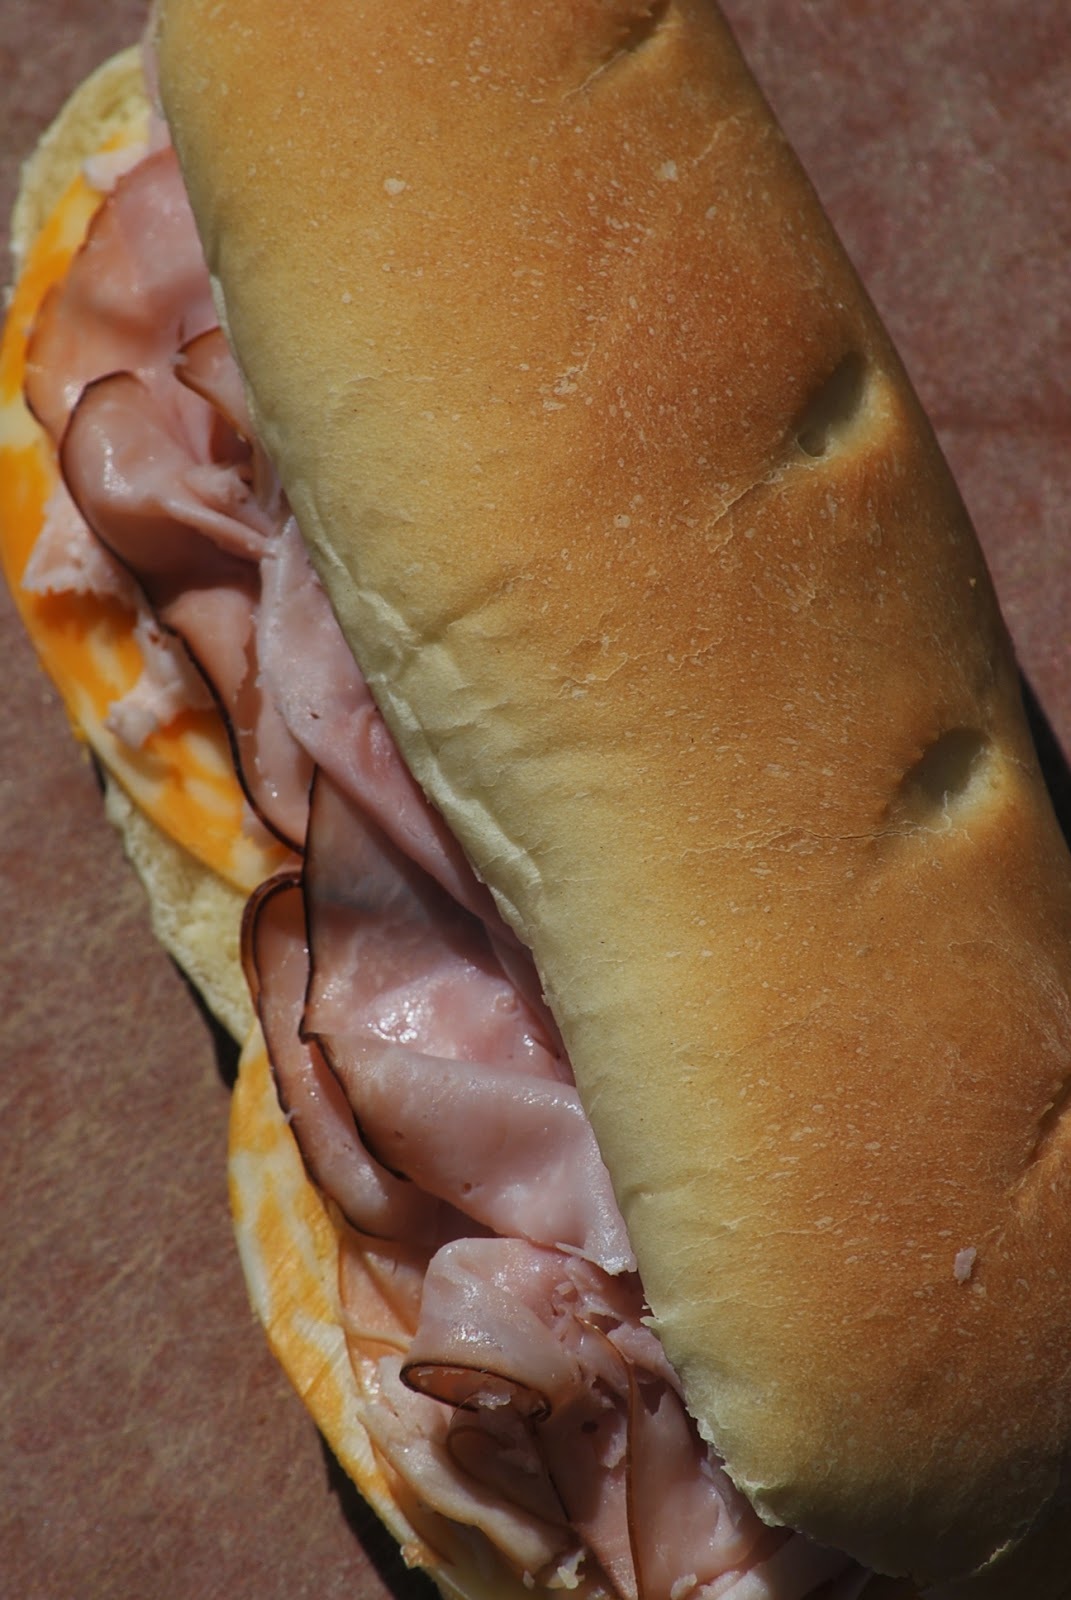
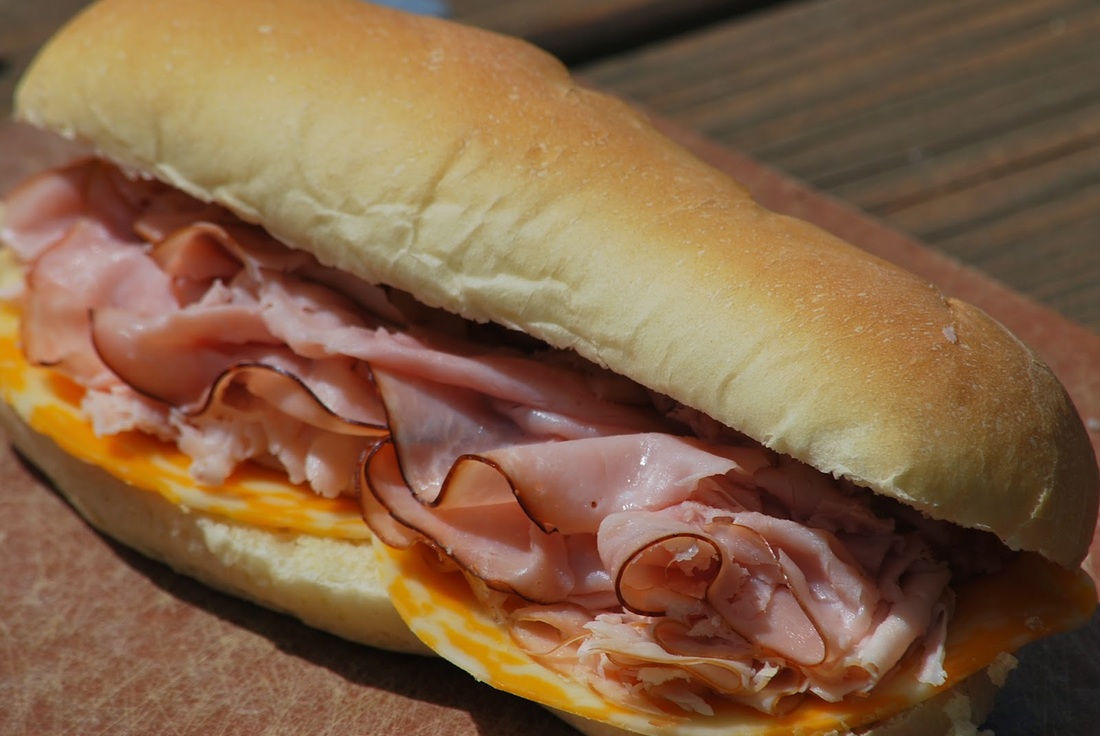
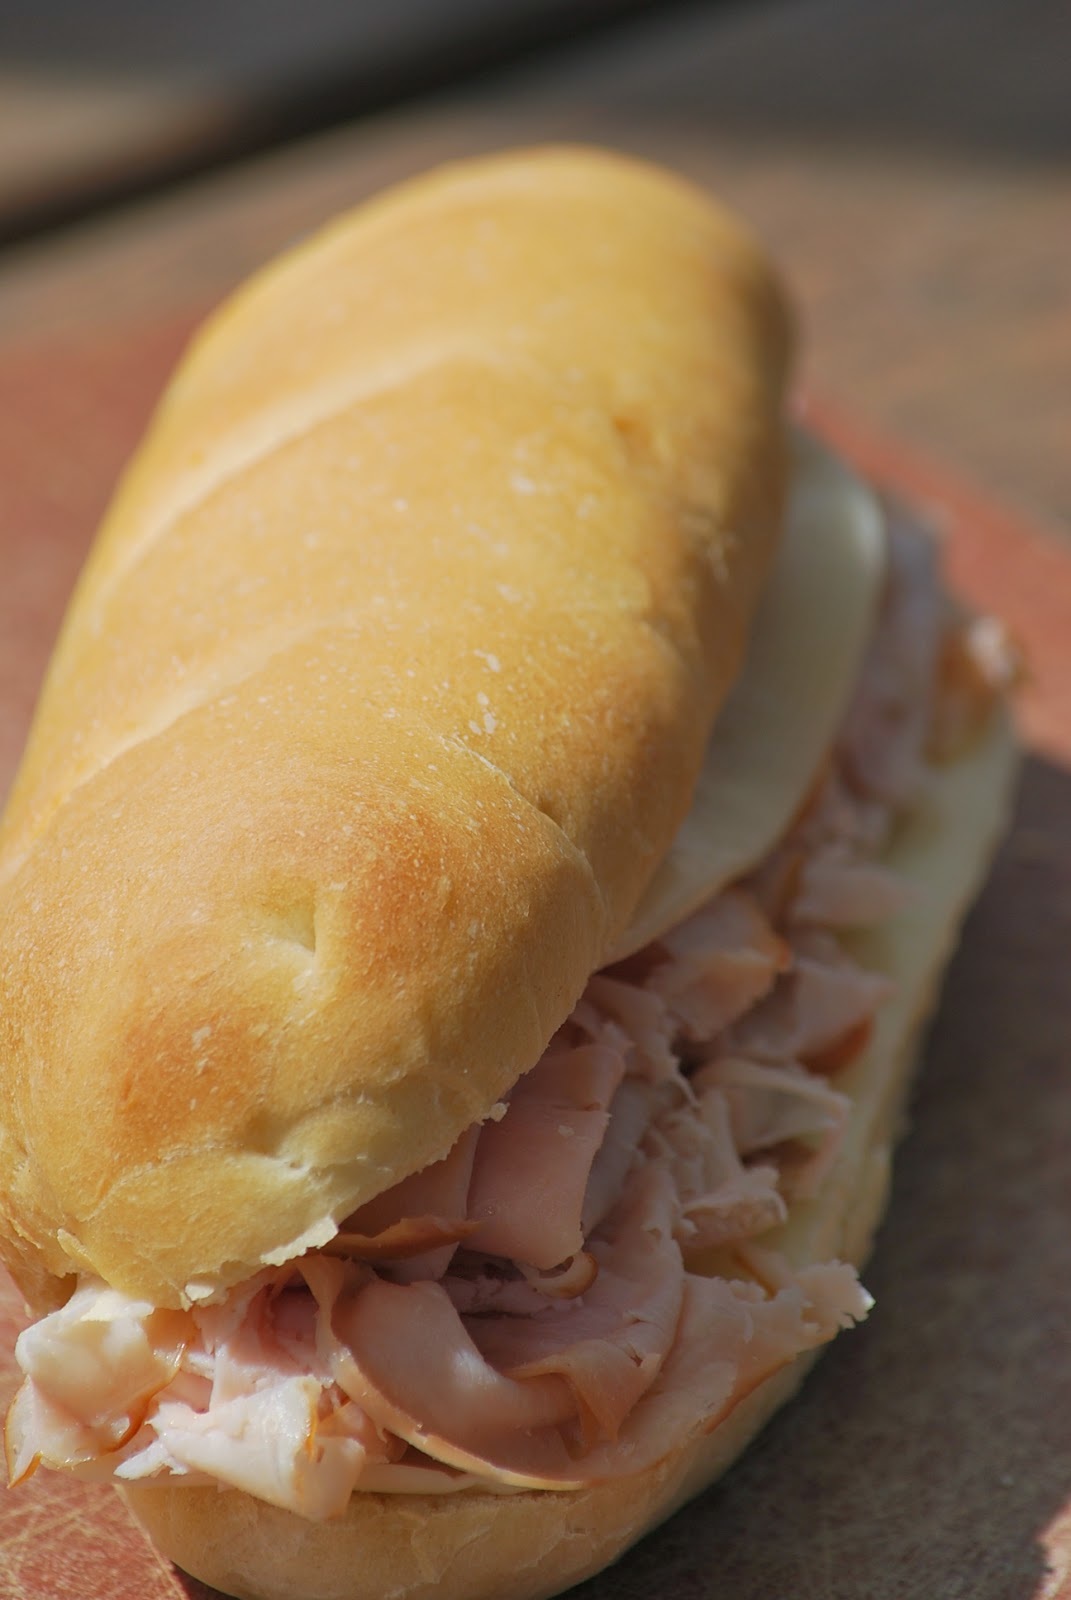
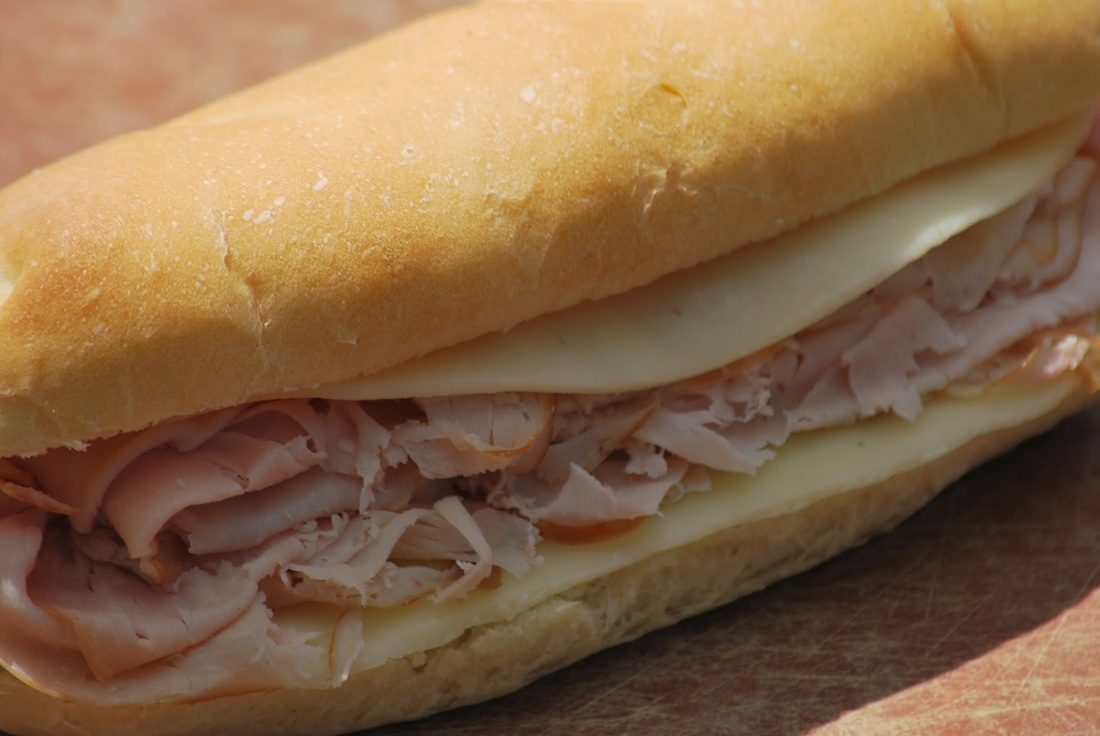
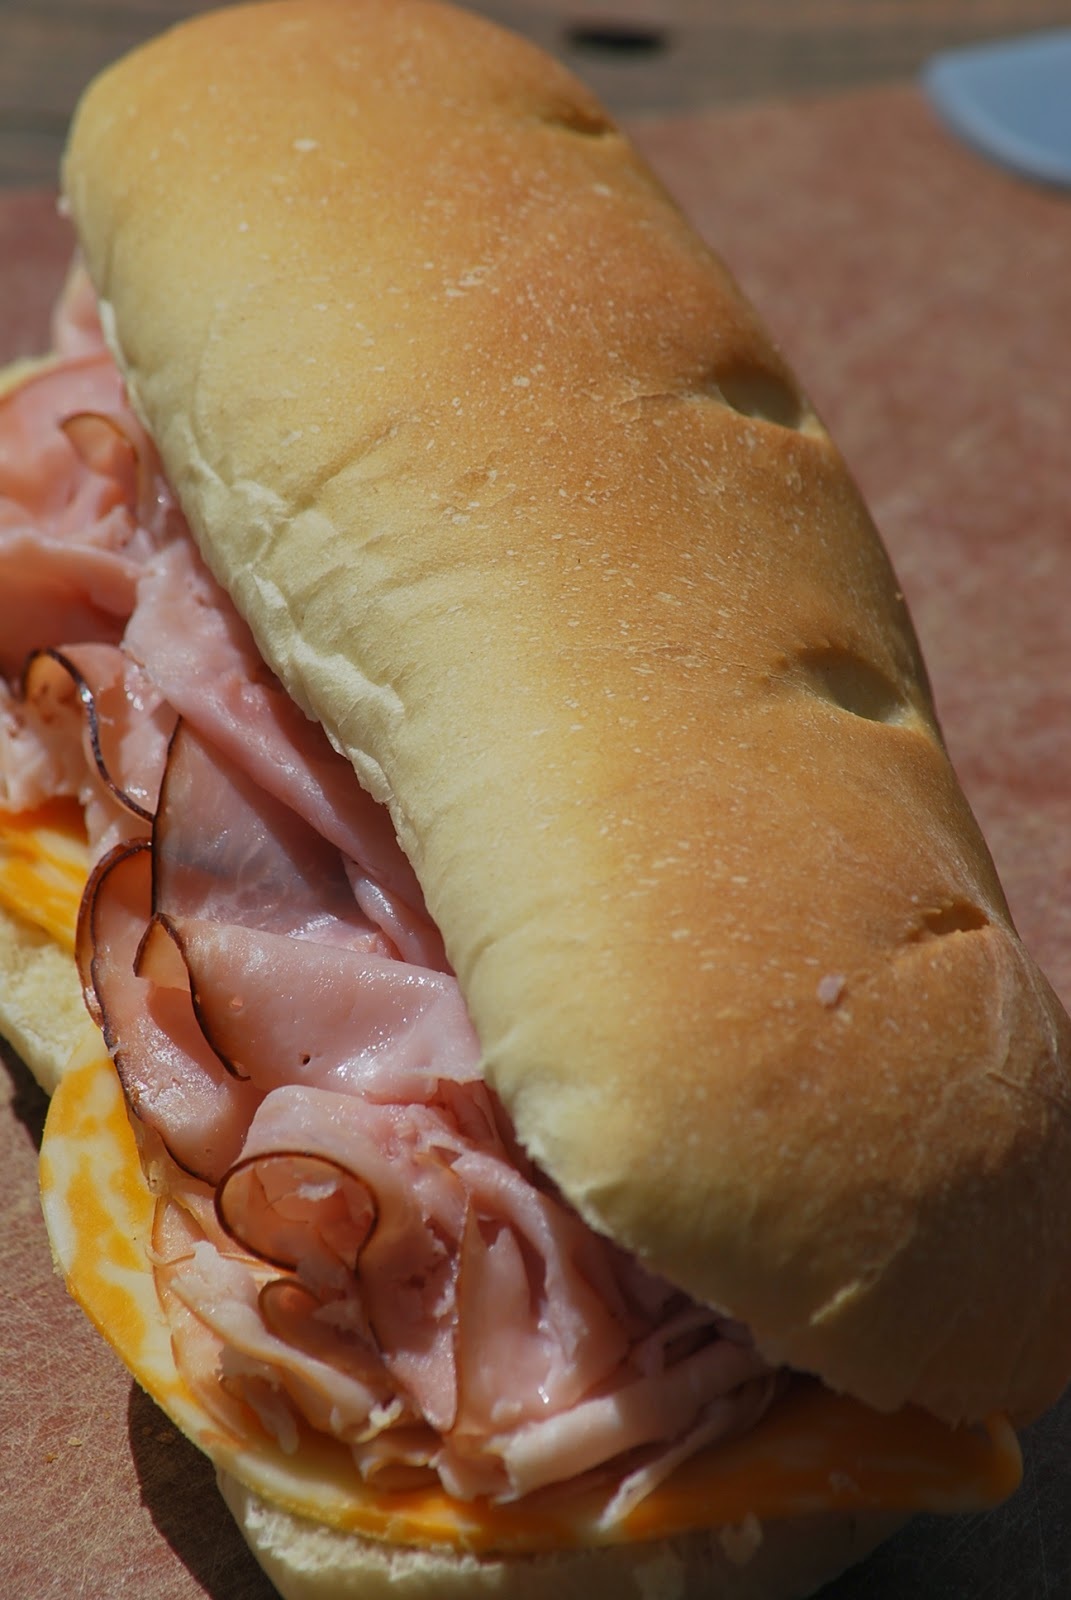
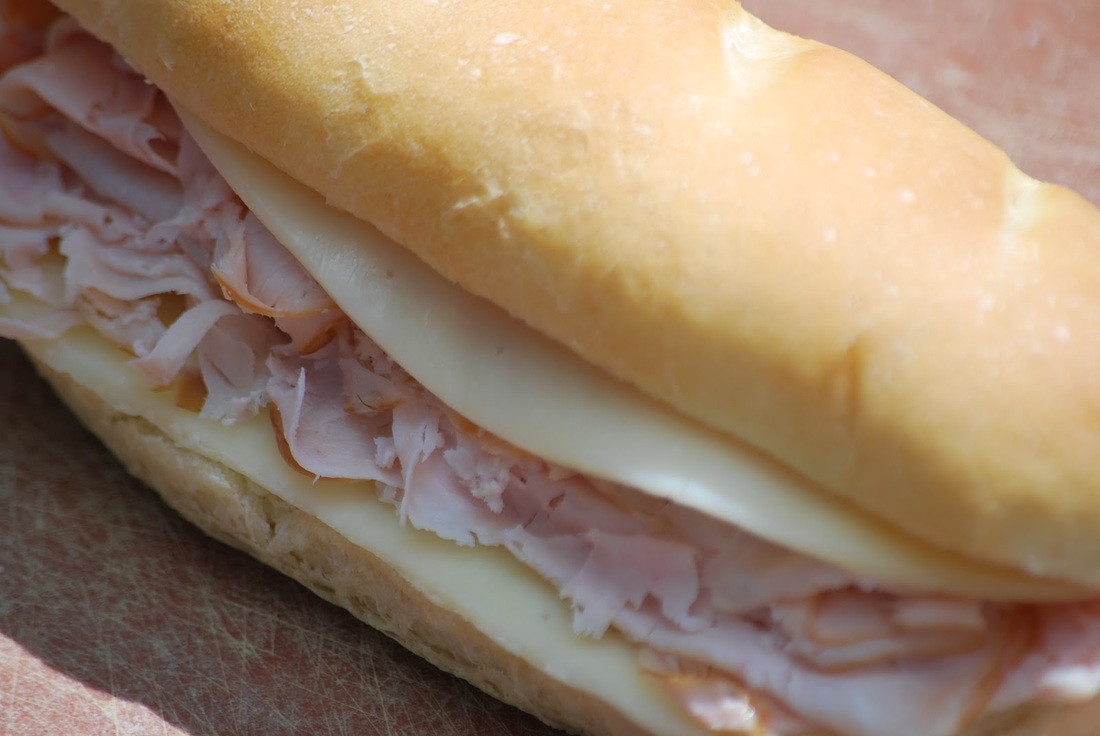
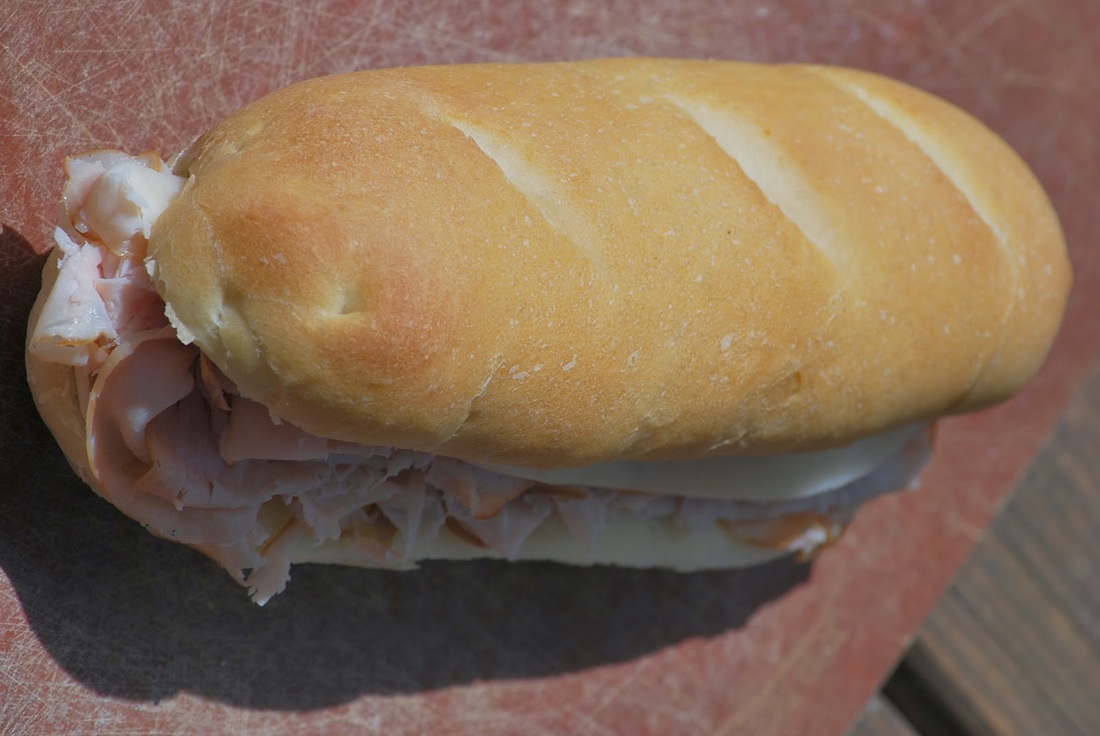
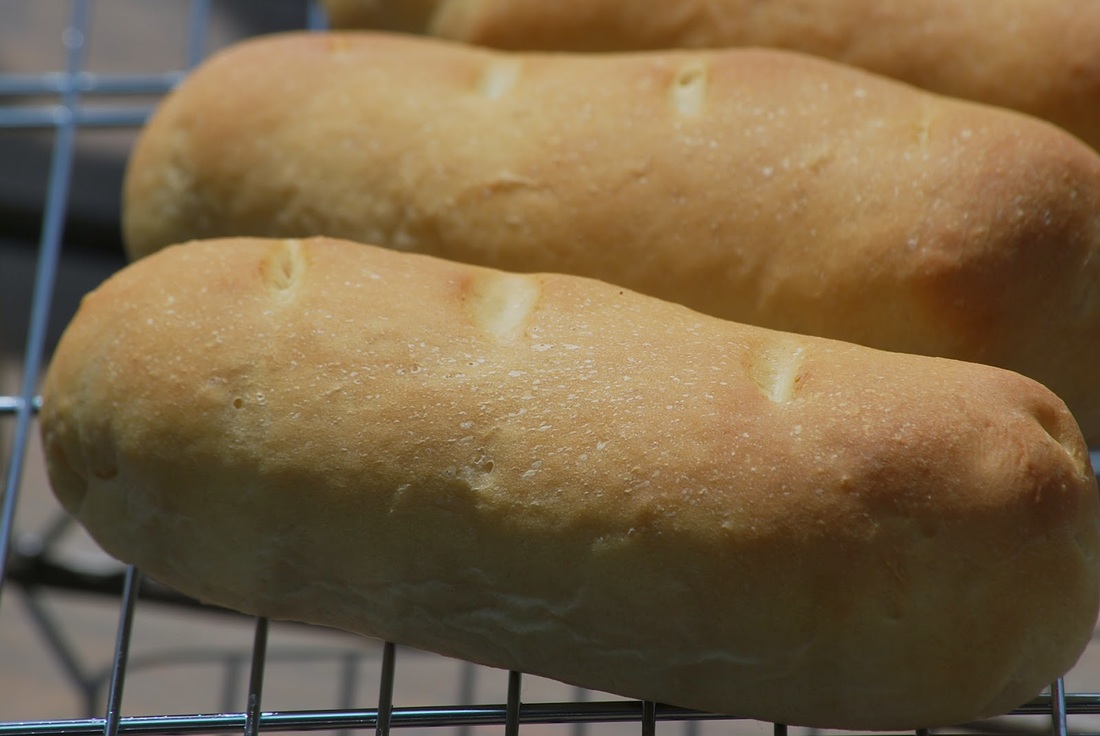
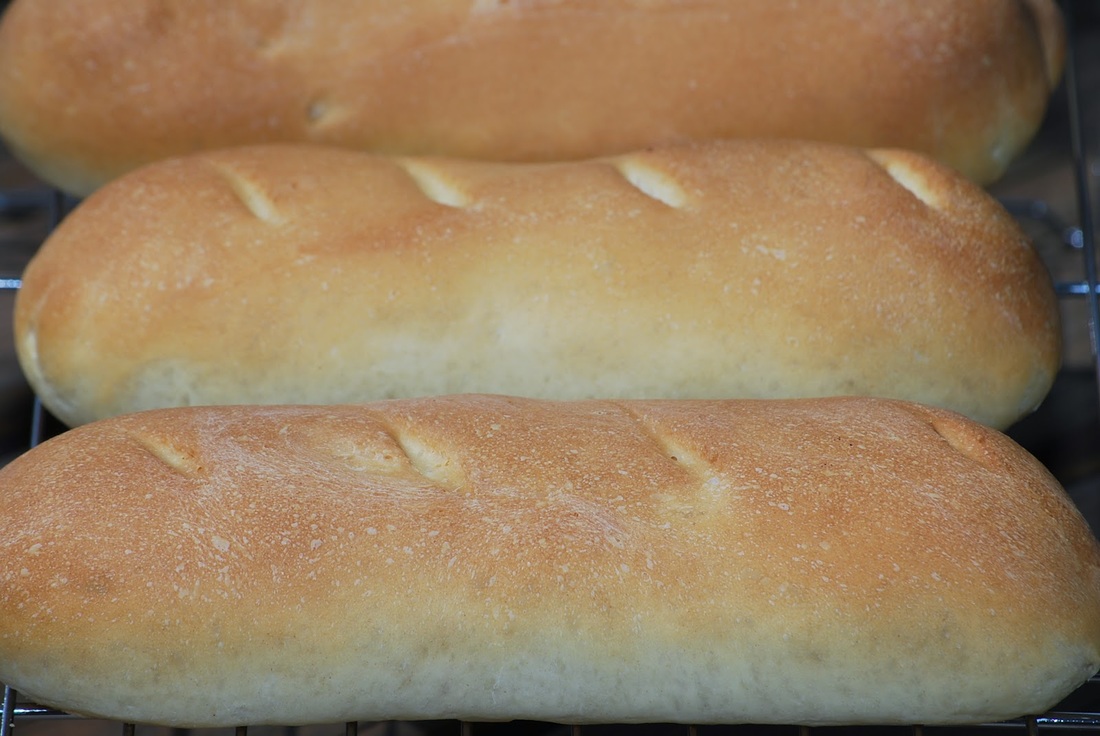
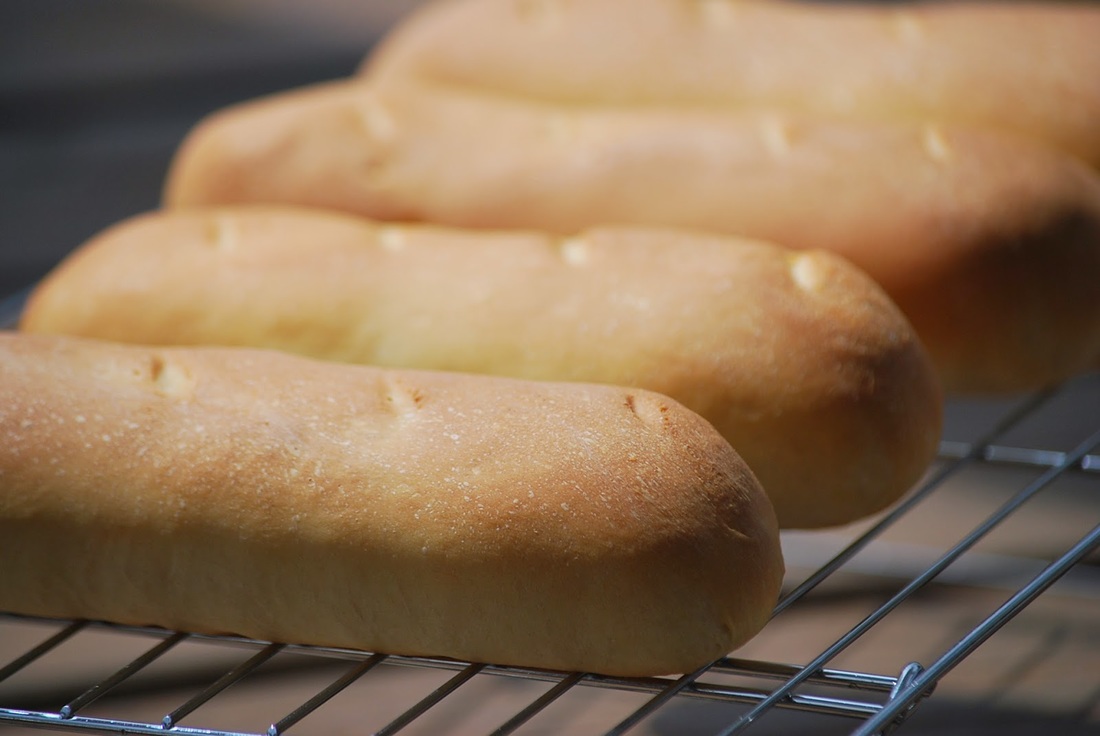
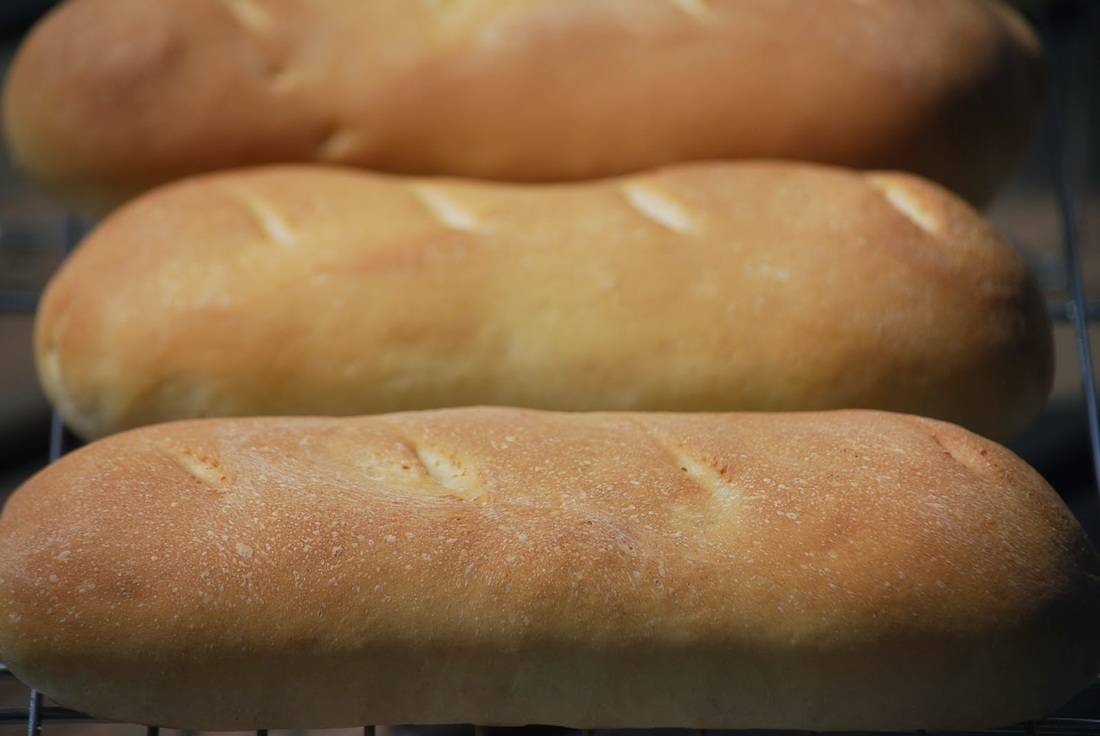 I think we can all agree that Jimmy Johns bread is the bomb. It is by far the best bread available at any of the sandwich chain restaurants. The lightly browned crust and chewy, bagel-like interior is just sandwich bread perfection. It almost seems a shame to add lunch meat and toppings to such a delicious piece of bread. I have attempted to recreate this yummy bread at home and to make a long story short - it was kind of a disaster. It came out flat and nothing at all like the bread that you get at Jimmy Johns. After a LOT of suggestions, tips, comments and encouragement from my faithful followers, I decided to revisit my Jimmy Johns recipe with the advice from my readers. This time around, it was MUCH better. Thank you to everyone who sent a comment or word of encouragement to inspire me to not give up on my dream of creating Jimmy Johns bread at home.
 Jimmy Johns Bread 1 Tablespoon sugar 2 Tablespoons yeast 1/2 cup warm water 1/3 cup oil 3 cups all purpose flour 3 cups bread flour 3 Tablespoons sugar 2 teaspoons salt 1 1/2 cups warm water
Place on silpat lined baking sheet and let rise 45 minutes. Score with a sharp knife.
Bake 18 minutes at 400. 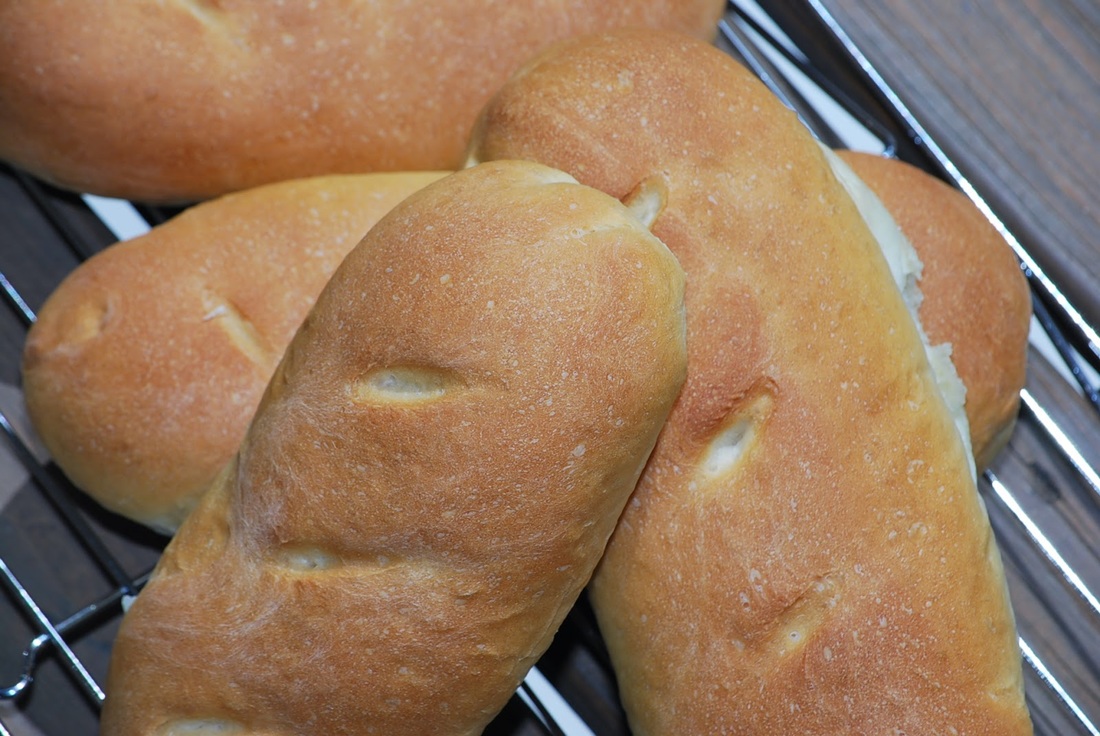
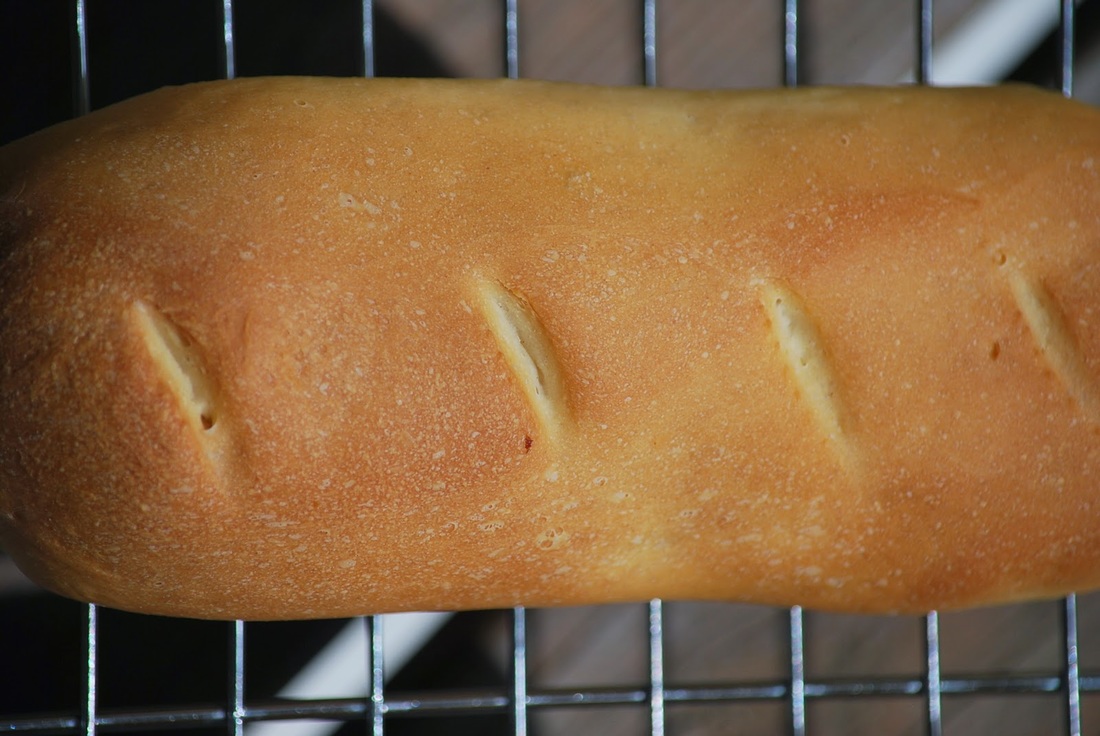
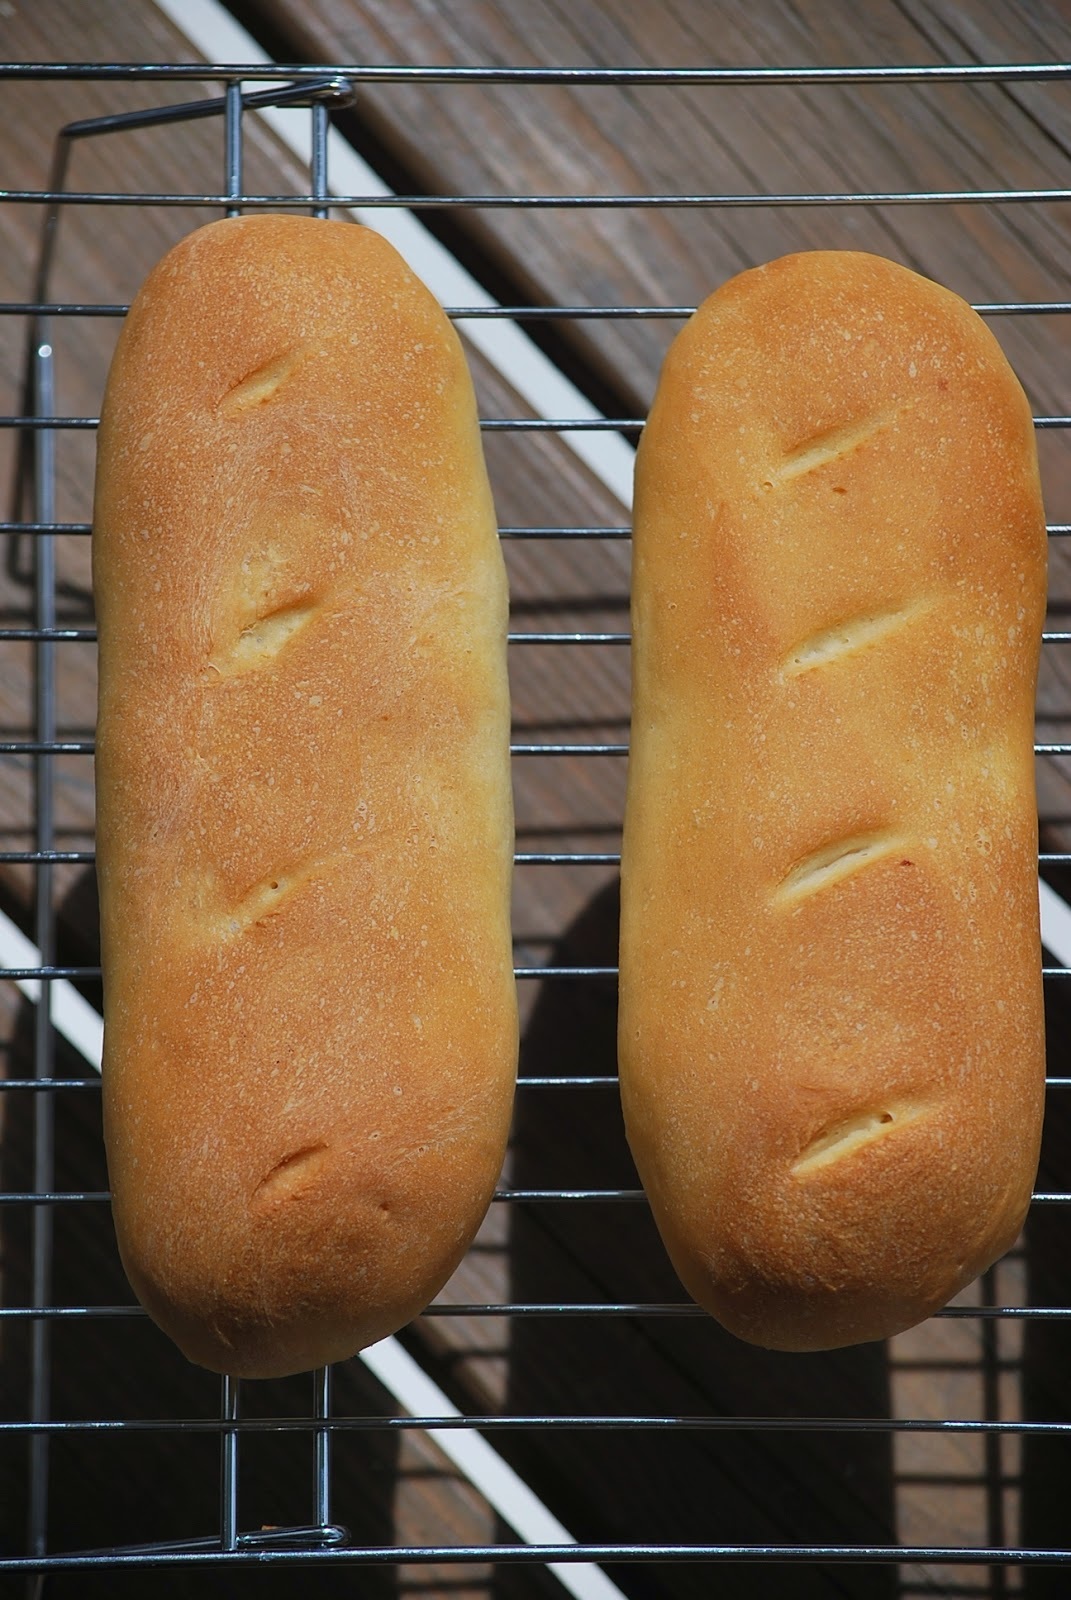
  Check out the inside...
It's entirely possible that I have more pictures of this beautiful bread than I do of my second child.
Thank you Jimmy Johns for this delicious bread. And don't worry - I'll still eat at your restaurant. (Truth is - I don't always have 6 hours to bake my own bread.)
Ciao!
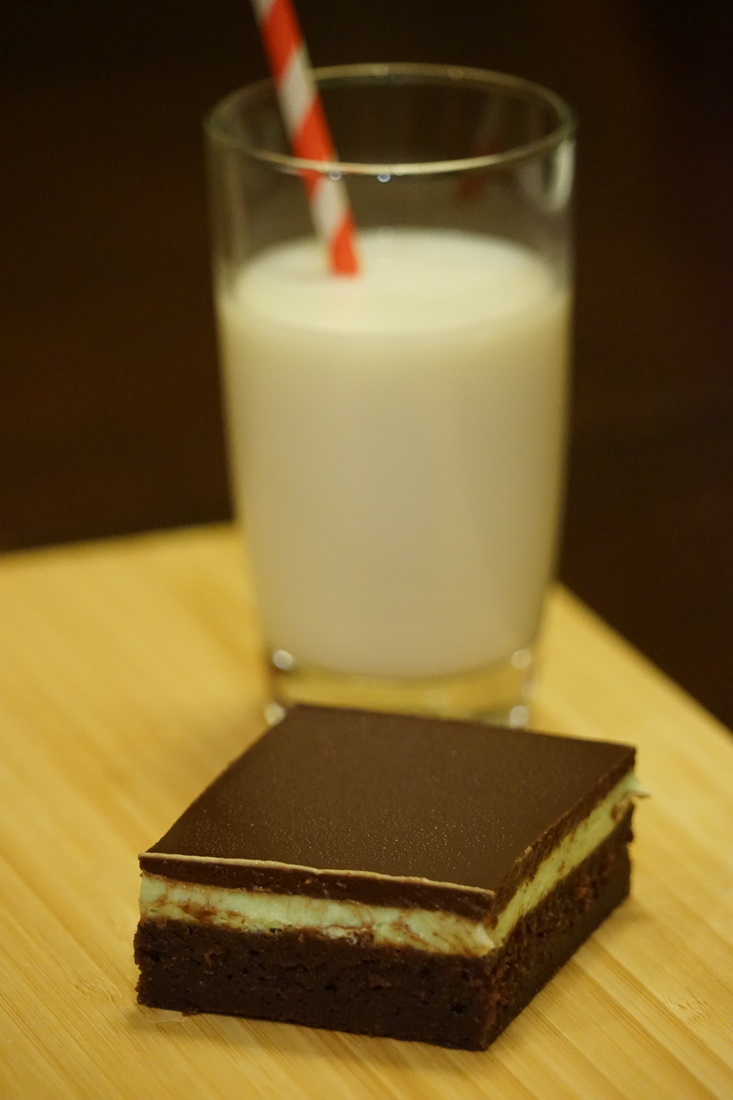
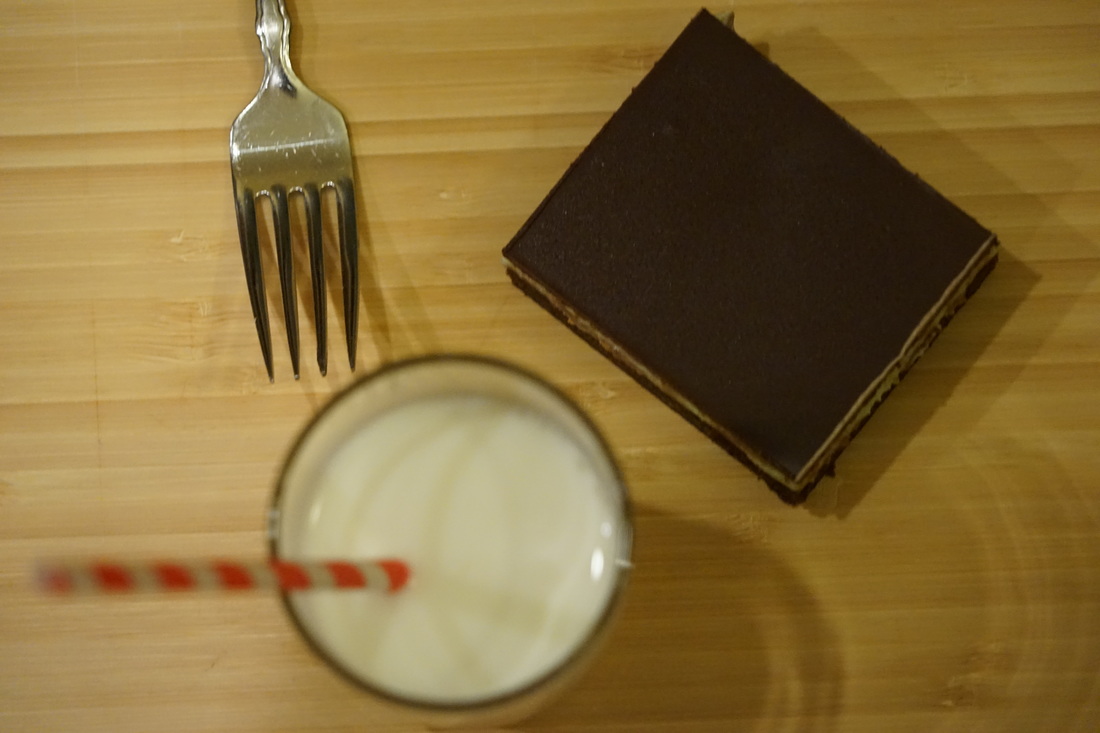
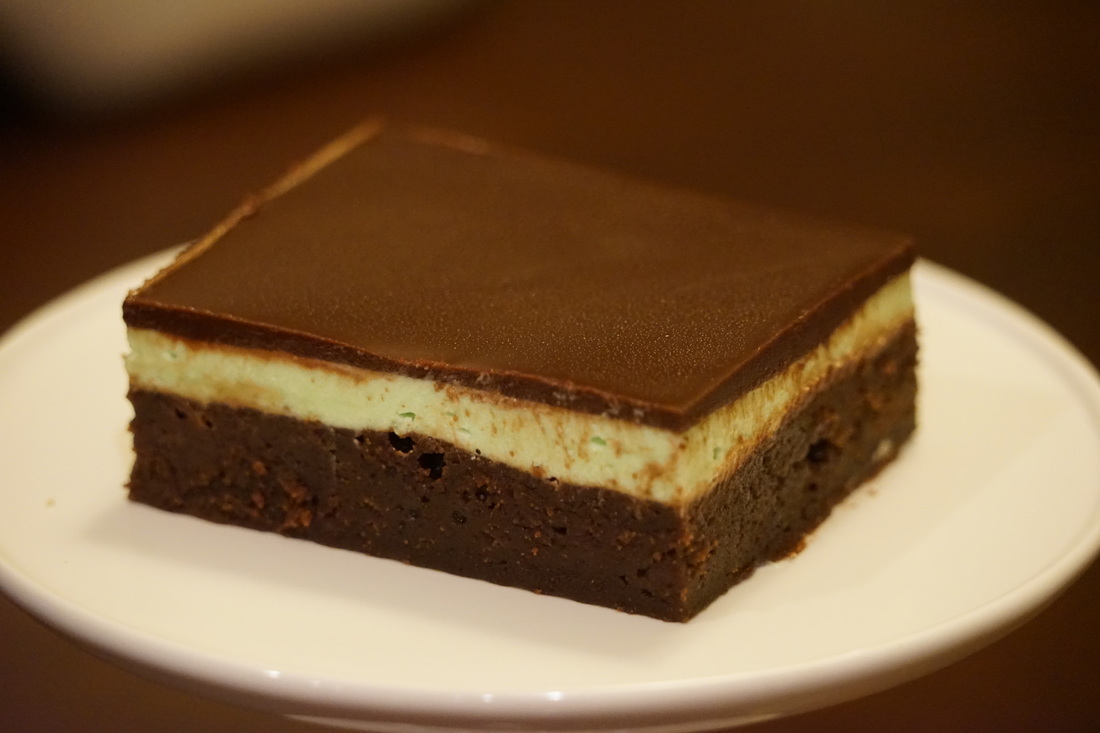
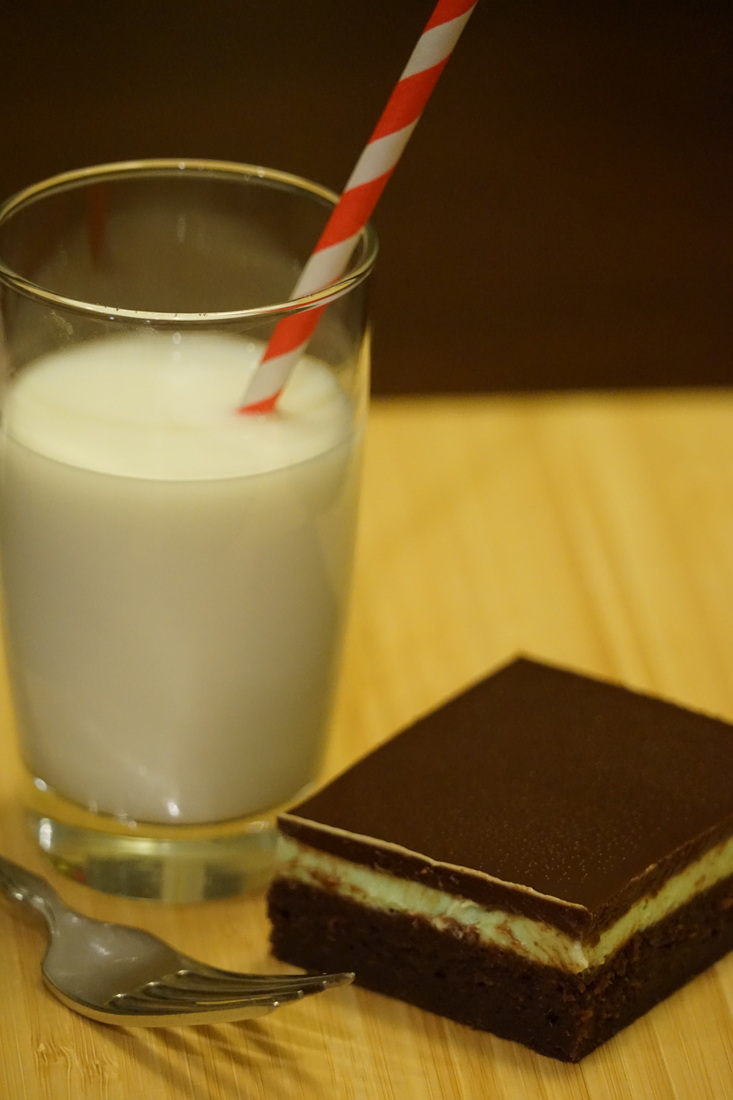
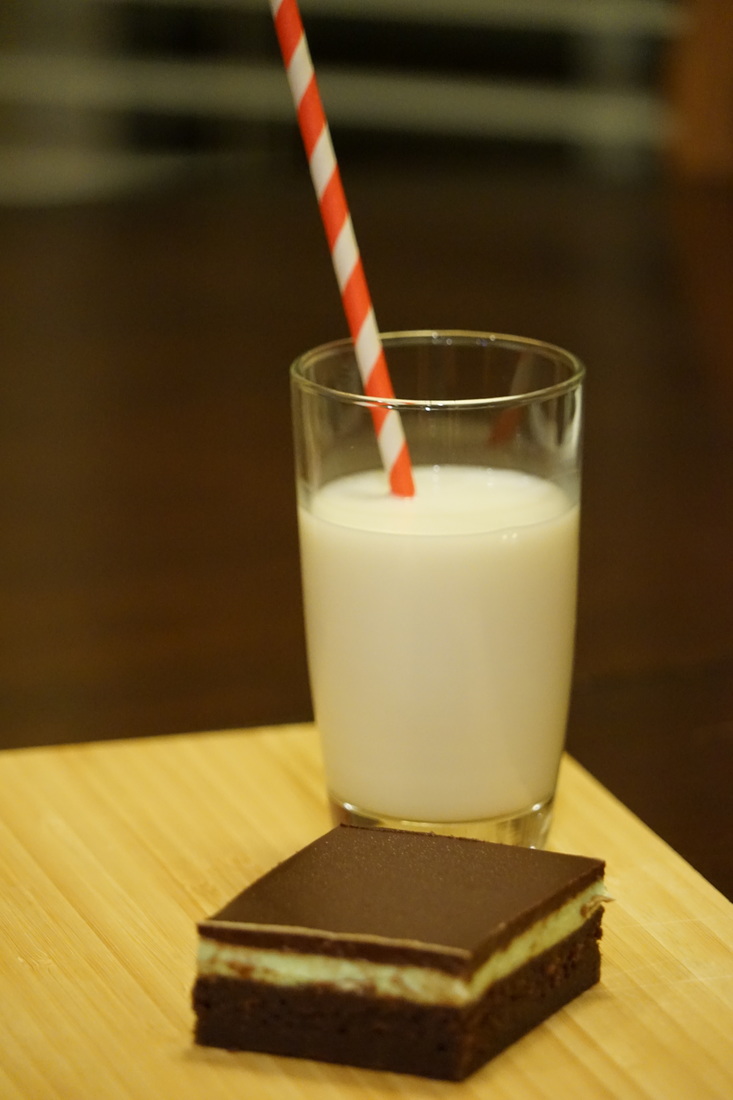
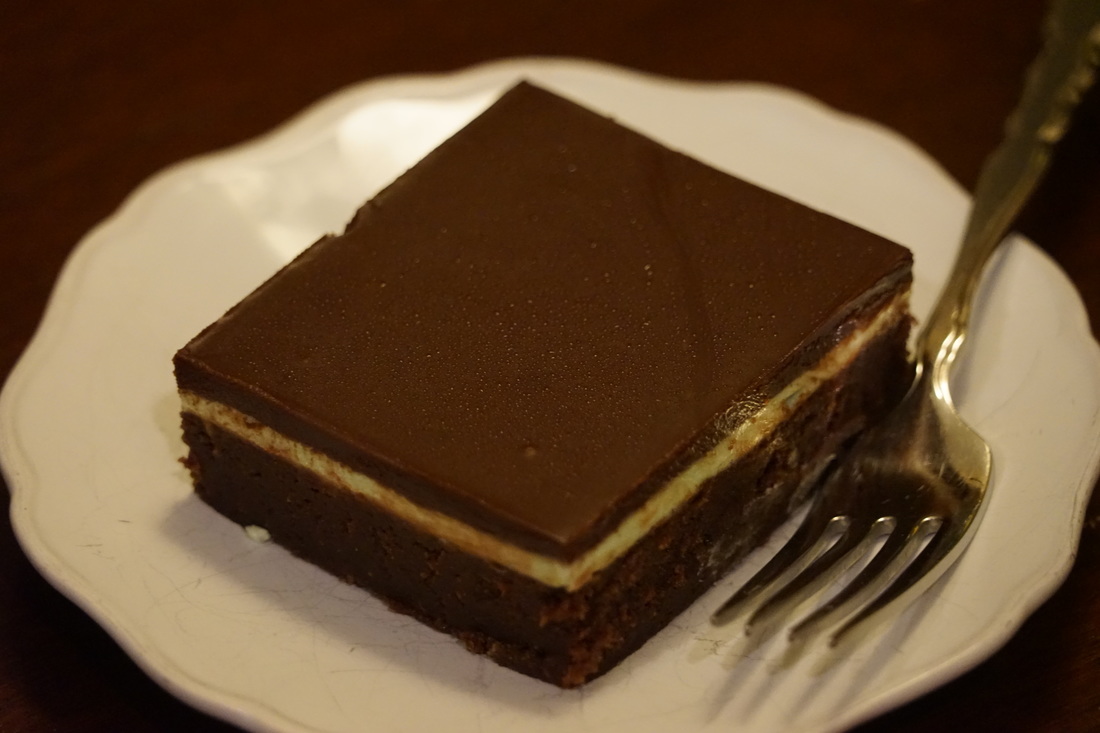
I LOVE anything mint chocolate. Seriously - ice cream, cookies, cake, cupcakes, truffles - I love them all. I actually think that I could eat a grasshopper if it were dipped in minty dark chocolate. (Maybe) 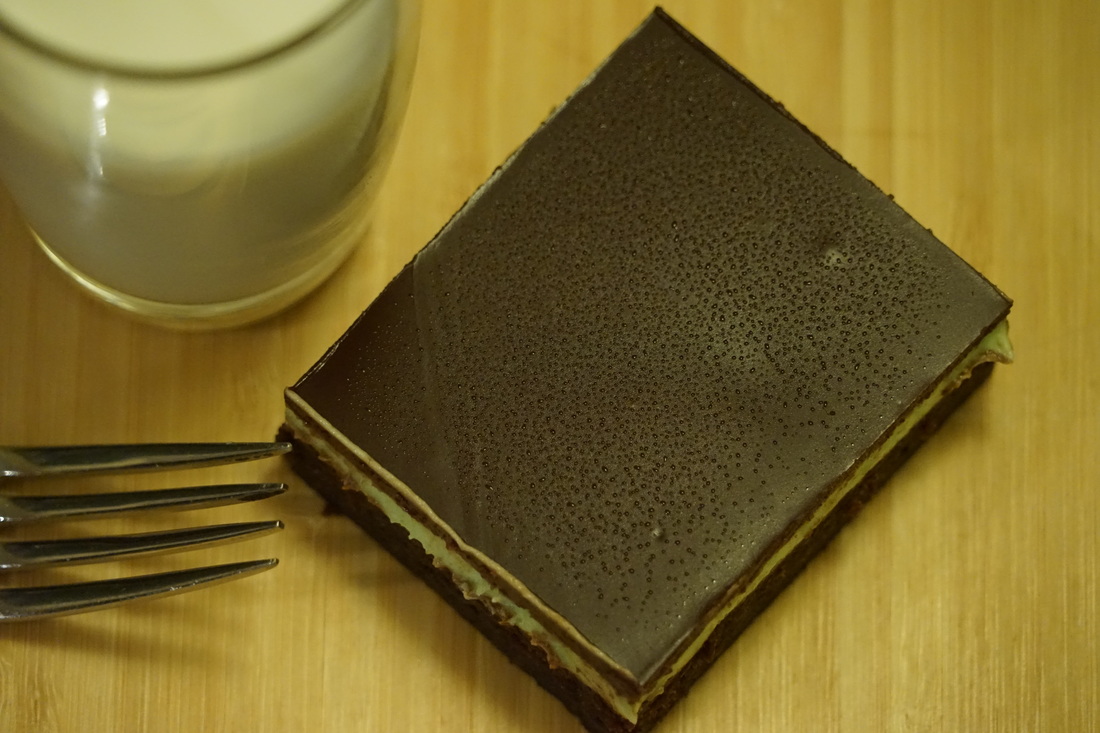 If you are a member of the mint chocolate fan club like me (there really should be a support group) then I have the PERFECT recipe for you - Mint Chocolate Brownies. Yup - I just went there. Fudgey, moist chocolate brownies covered in a layer of cool, creamy mint frosting and topped with a final layer of dark, chocolate ganache.
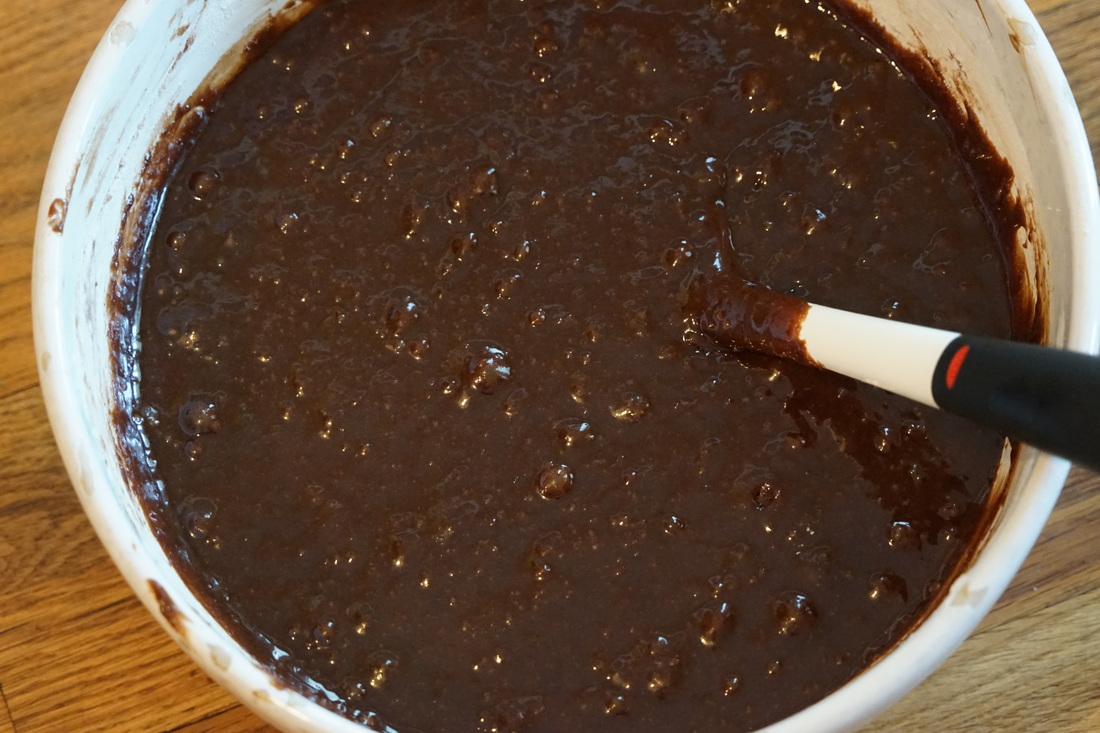
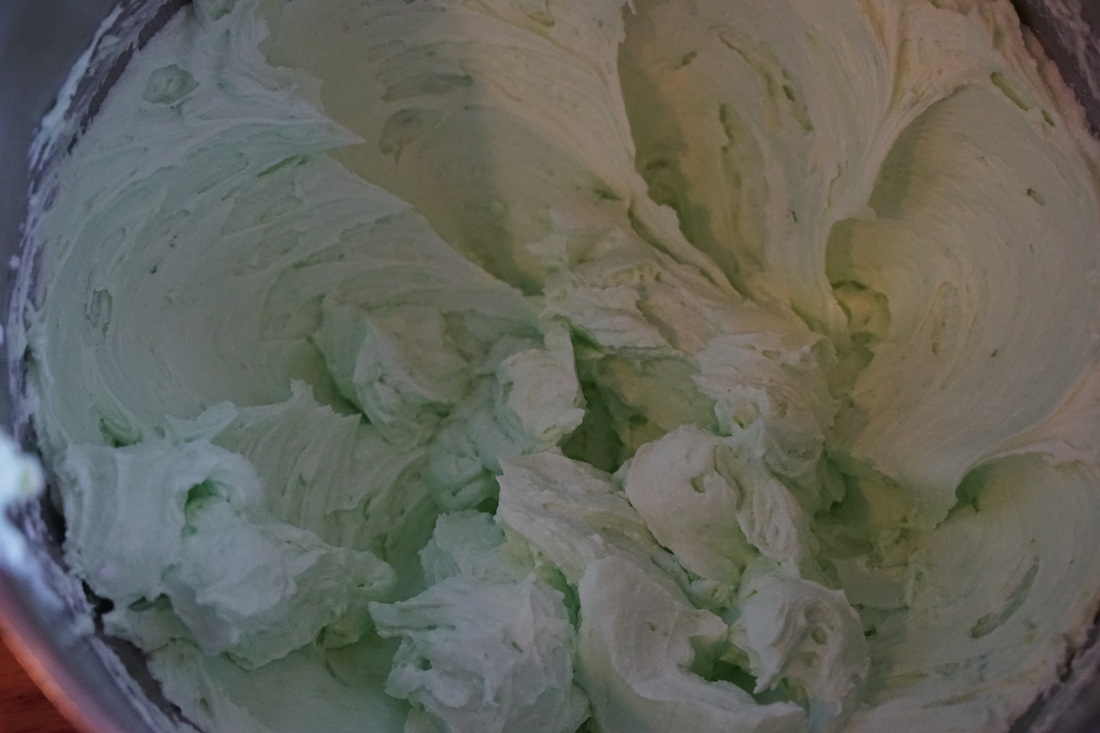
Mint Chocolate Brownies Brownies 2 cups butter 8 ounces unsweetened chocolate 4 cups sugar 8 eggs 2 1/2 cups flour Frosting 1 cup butter 4 cups powdered sugar 4 Tablespoons milk 2 teaspoons peppermint extract drop of green food coloring Ganache 1 cup butter 2 cups dark chocolate chips
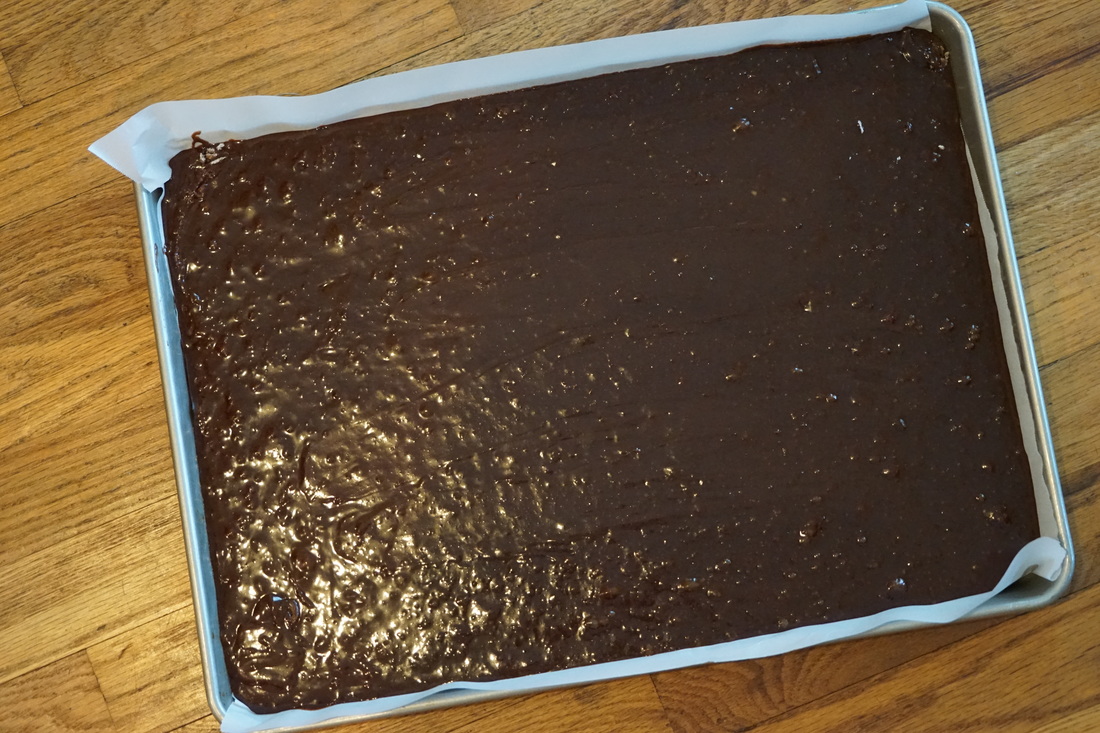
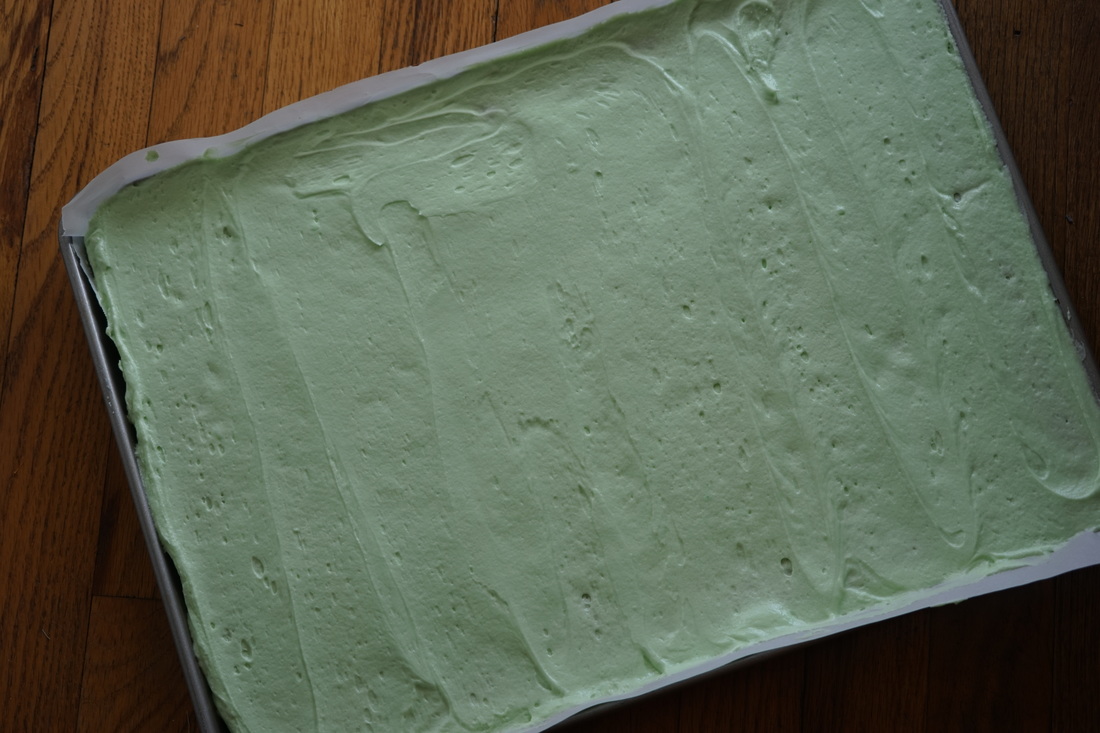
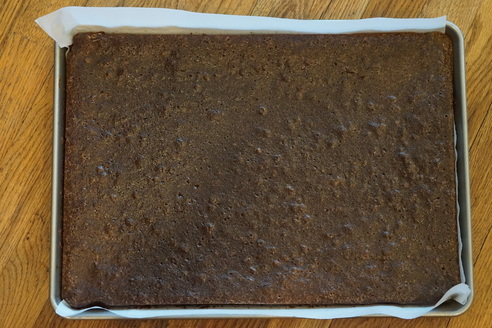 Put in a cold oven and set heat to 300 degrees. Bake 40 minutes. Combine frosting ingredients in bowl of standing mixer. Beat with flat beater until smooth and creamy. Spread over cooled brownies.
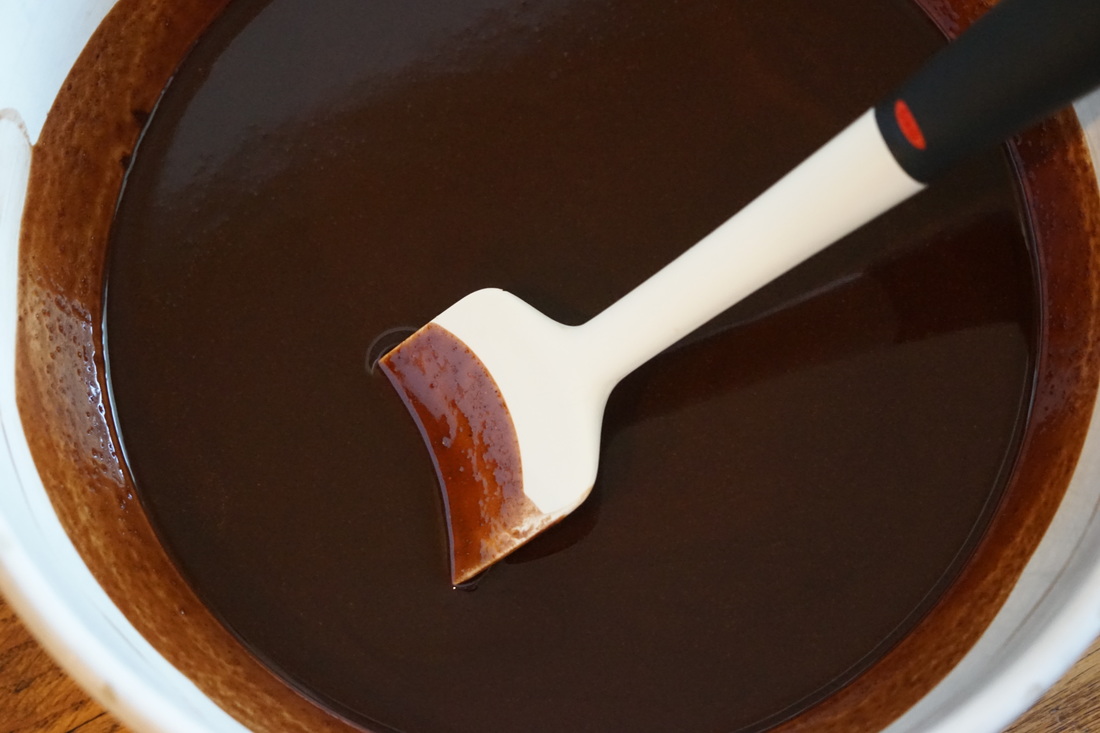
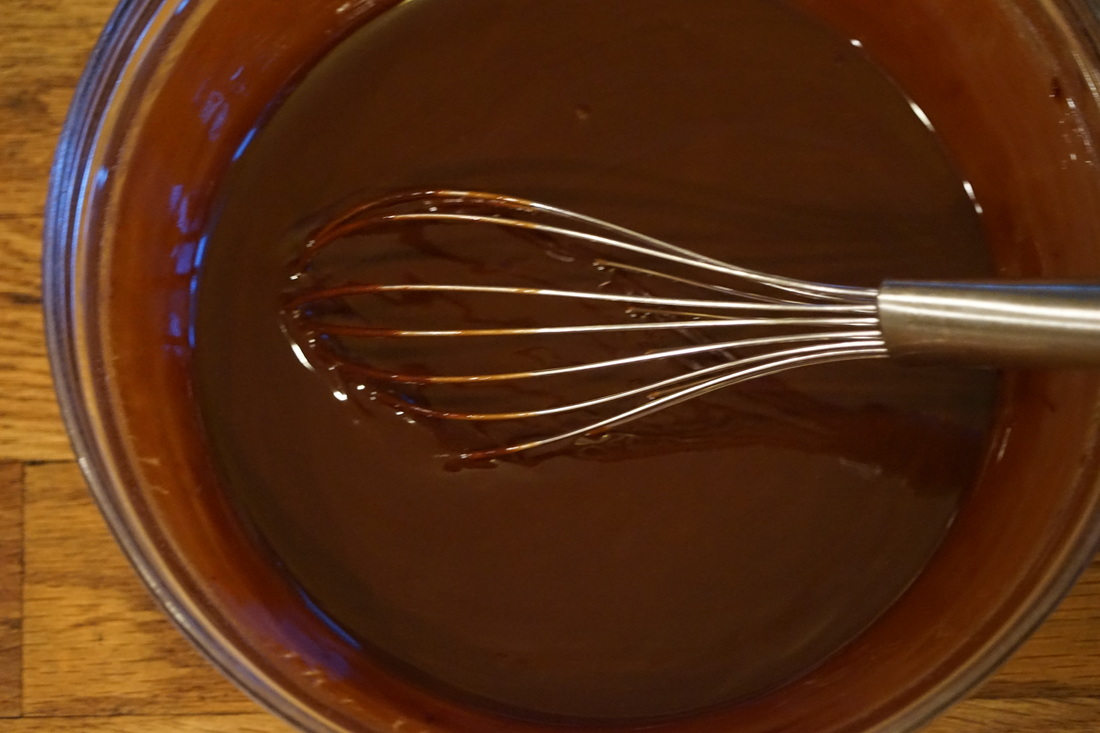
For ganache: Melt chocolate and butter in microwave.
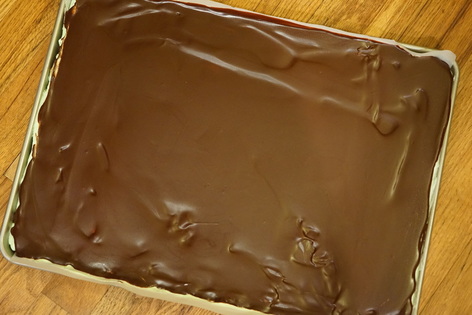 Spread over mint frosting layer. Allow chocolate to set then slice into squares. (This is trickier than you might think. Wipe your knife off on a paper towels after each cut for the cleanest slices.) 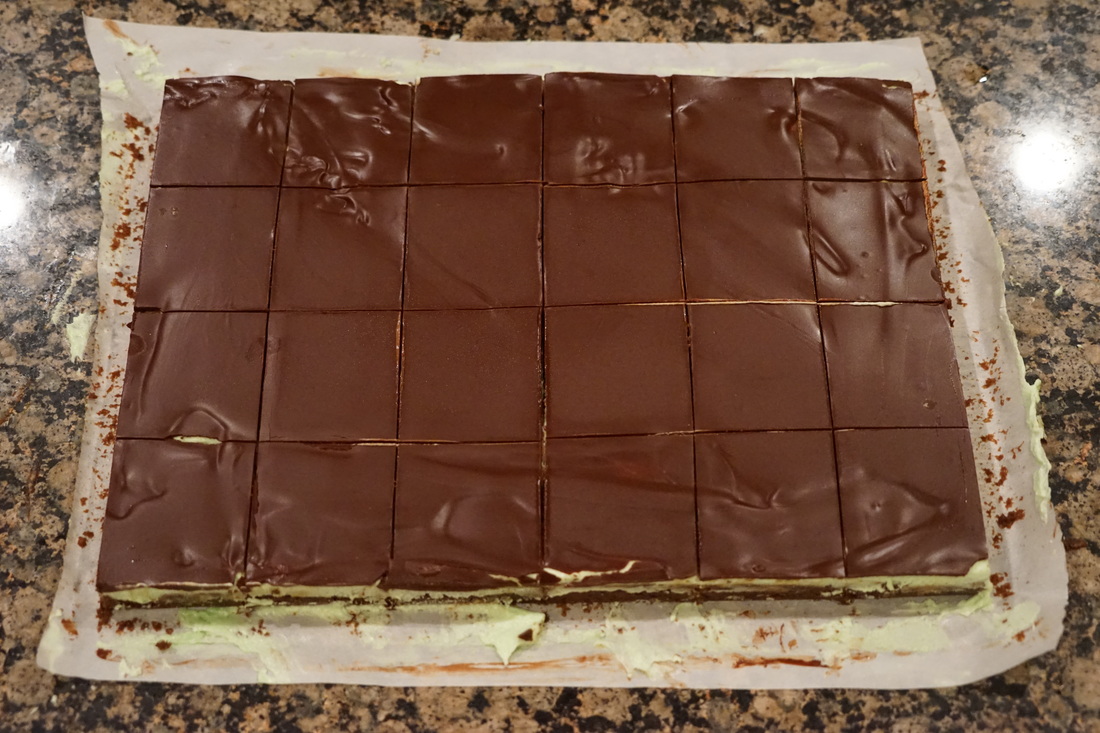 Trim off any jagged edges and voila - mint chocolate brownies!!!
These brownies are seriously delicious - and I'm not just saying that because I'm obsessed with mint and chocolate. They really are yummy - trust me.
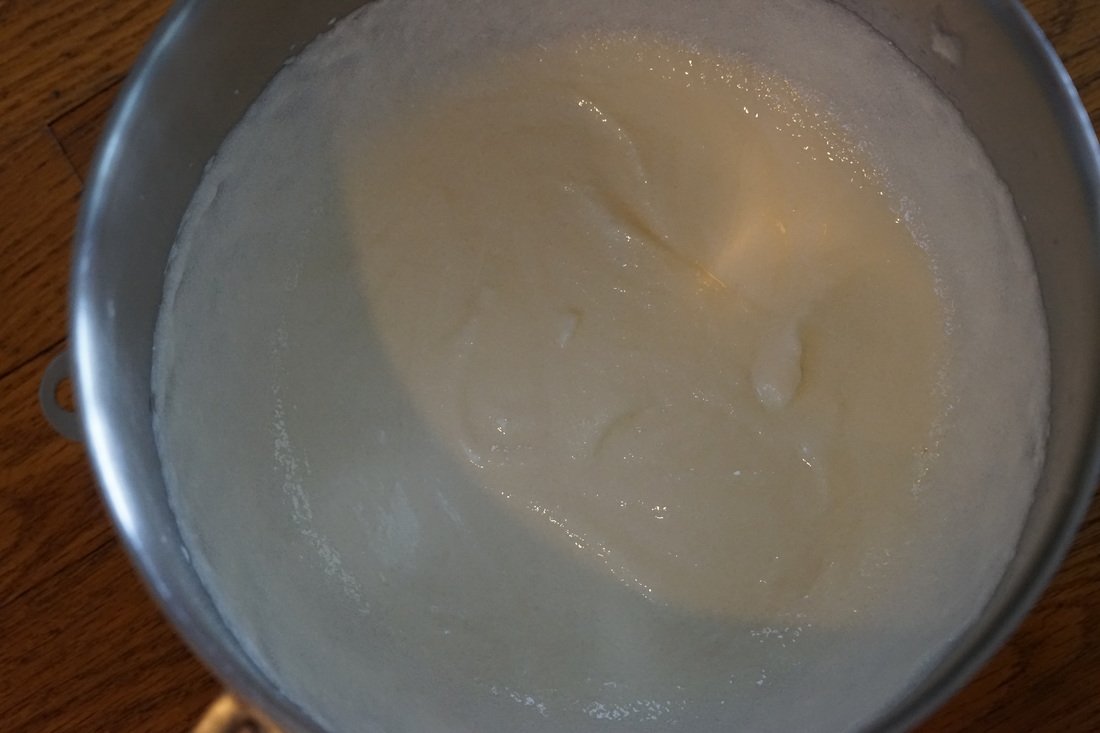
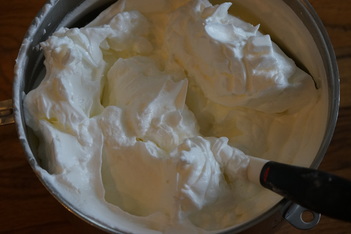
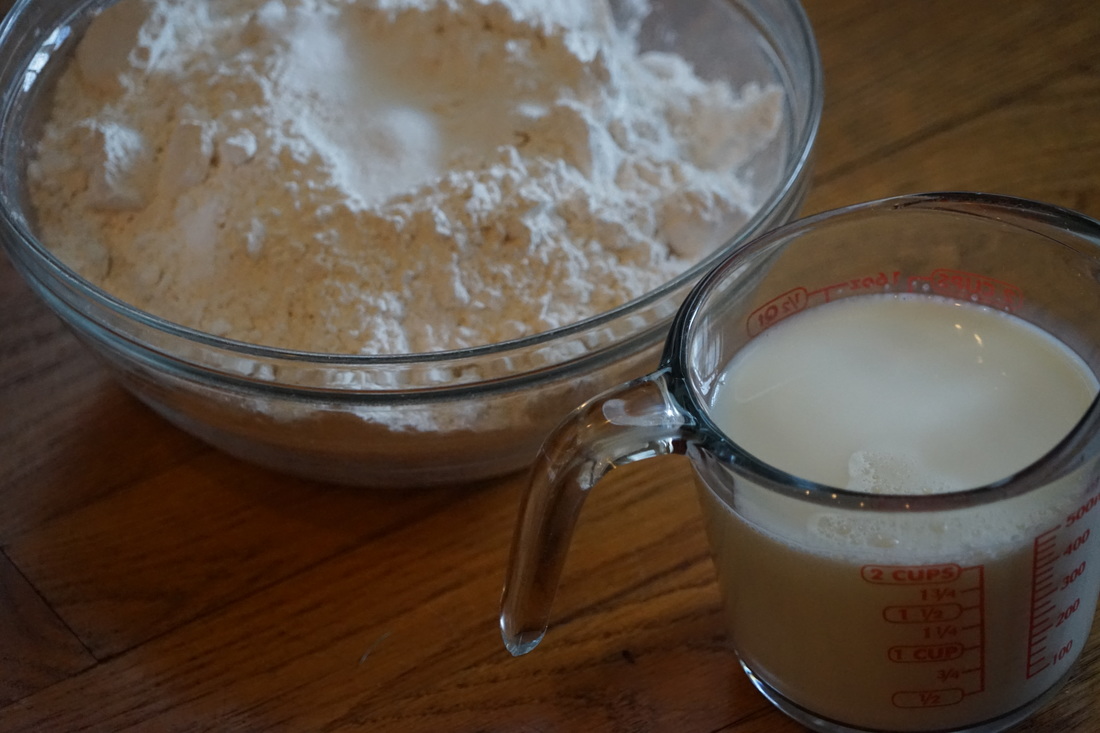
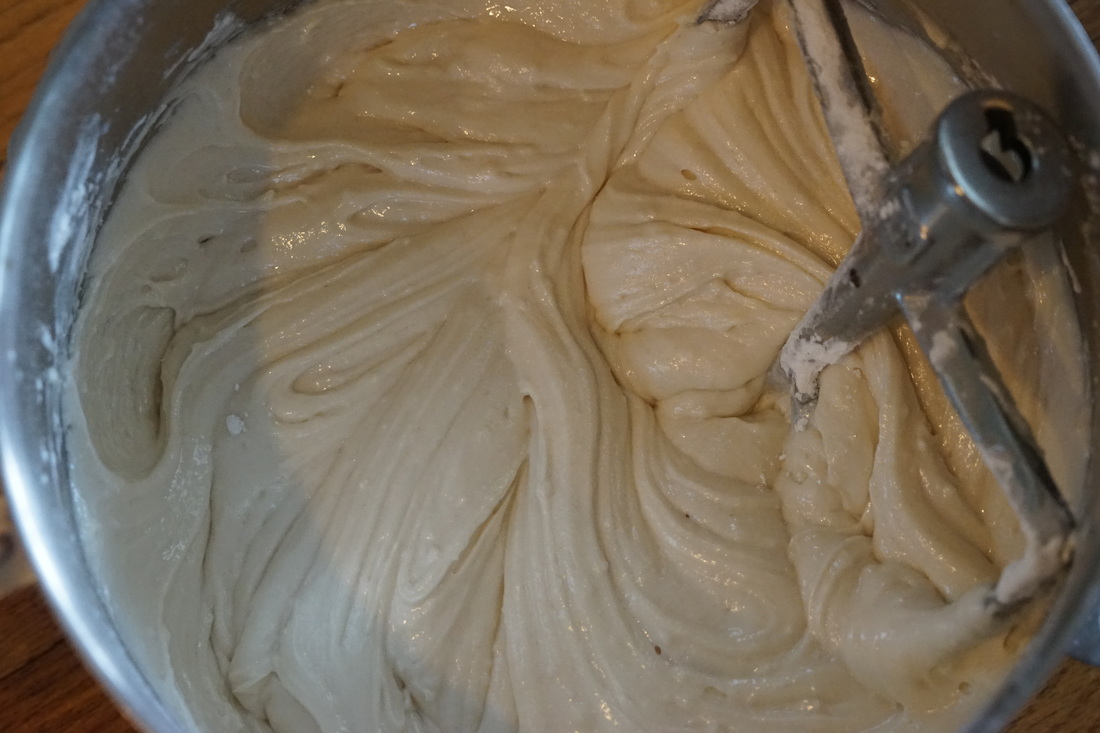
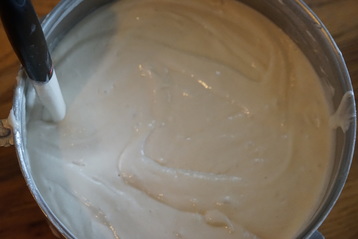
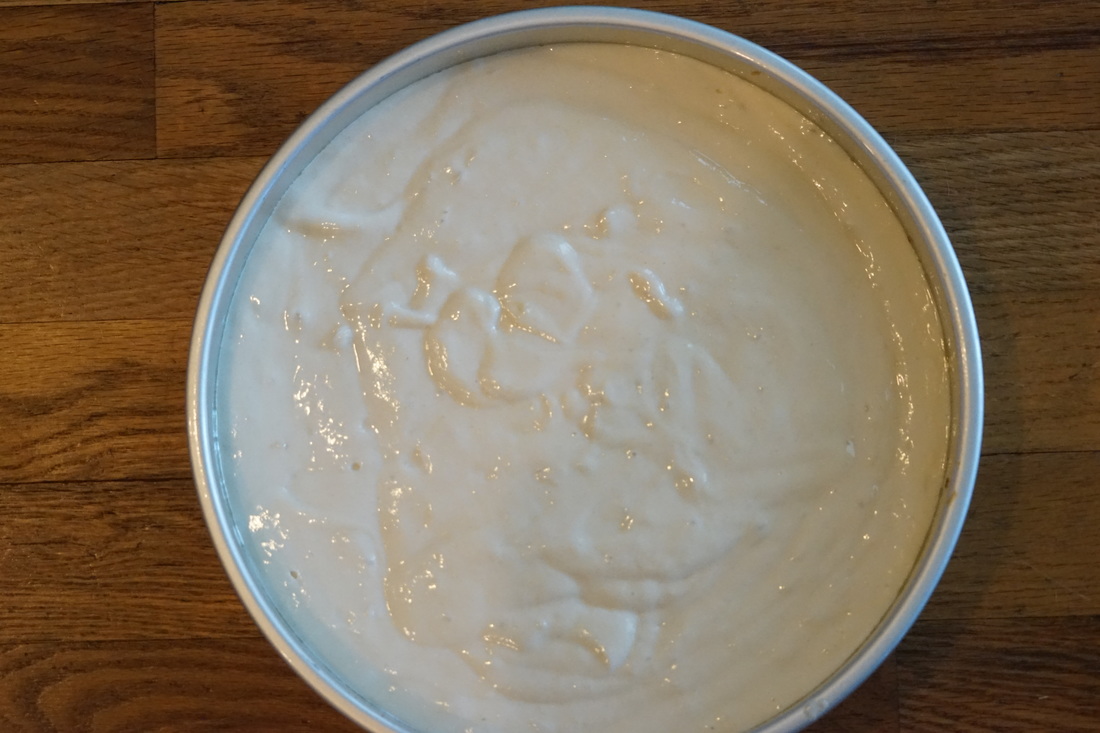
Ciao! 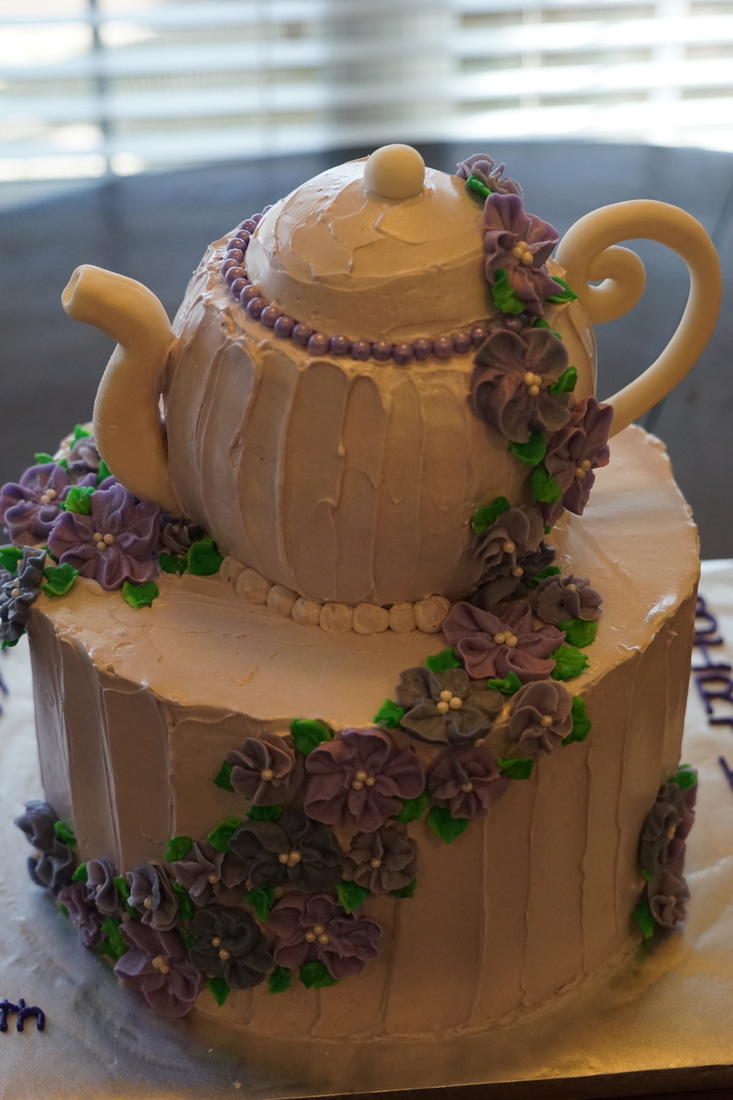 White cake is probably the most requested cake flavor that I get as a baker. It's just so versatile and it can be transformed into so many things - like a teapot cake for example... 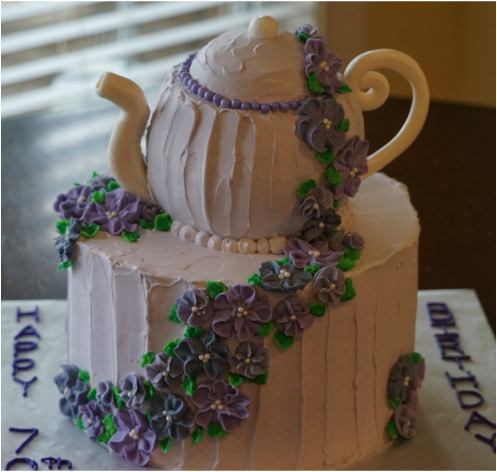 Just in case you're curious - and I know you are - white cake is made by whipping egg whites until stiff and then folding them into the batter. The white color comes from the absence of egg yolks as opposed to a yellow cake which contains whole eggs. A white cake can be flavored with any sort of flavoring - lemon, almond, vanilla, etc. I have been playing around with some new vanilla flavored white cakes and I stumbled on this particular recipe. It is really basic but sometimes, simpler is better. I've used this recipe for wedding cakes and birthday cakes and even for cupcakes - turns out great every single time. White Cake 6 Tablespoons butter 6 Tablespoons canola oil 1 1/3 cups sugar 2 teaspoons vanilla 3 cups cake flour 1 Tablespoon baking powder 1/2 teaspoon salt 1 cup milk, room temperature 6 egg whites
Combine flour, baking powder and salt. Add to batter, alternating with milk.
Bake 30-35 minutes at 350. Cool cakes on wire racks. 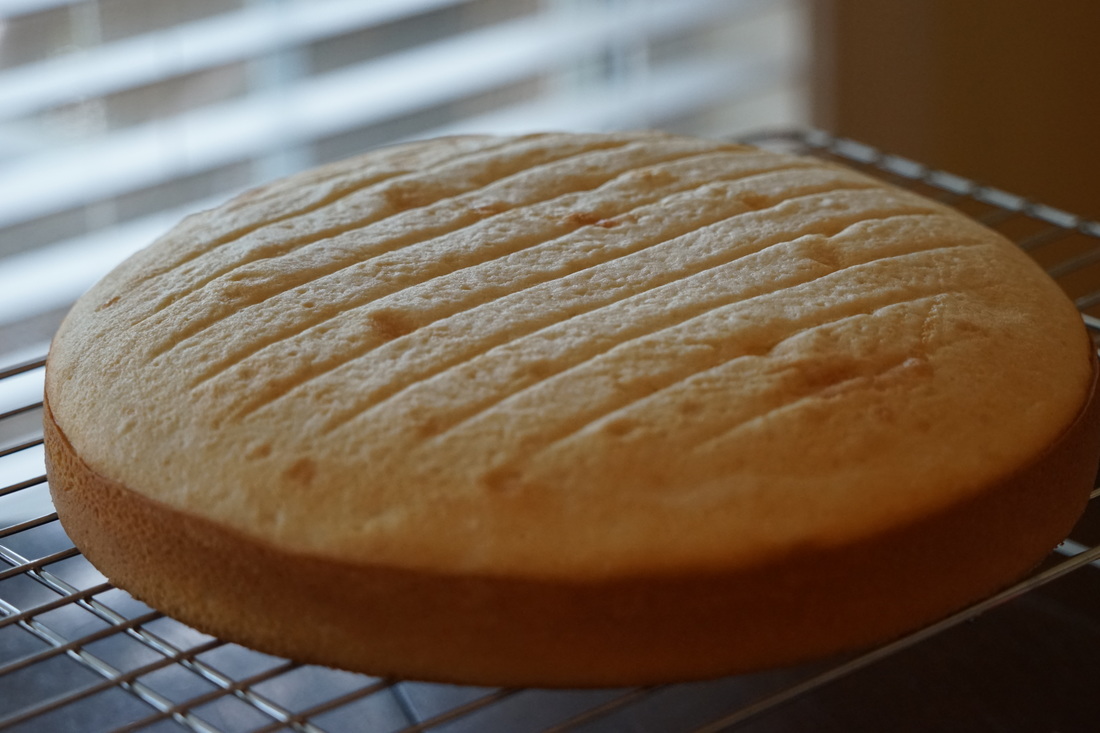 Stack cakes with a layer of buttercream in between layers. Spread a thin coat of buttercream on the outside of the cake to conceal any loose cake crumbs. Refrigerate until buttercream is firm. 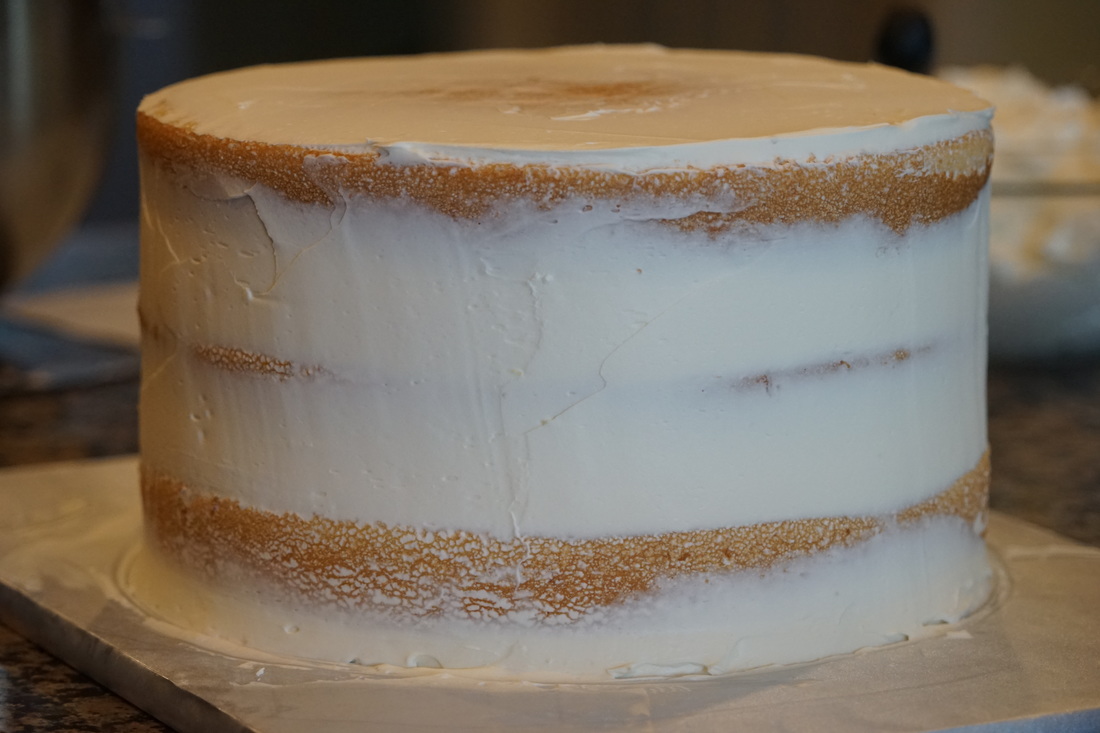 Continue to frost as desired. 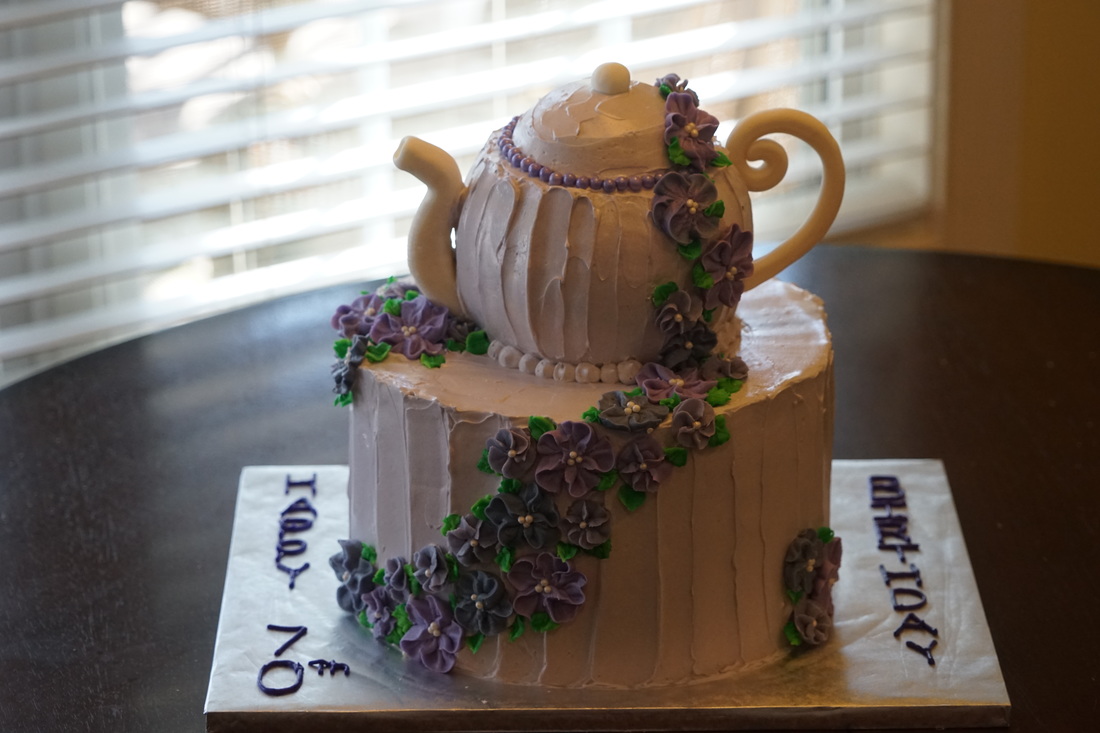 This particular cake was delivered to a surprise 70th Birthday party. It was a big hit.
Ciao! |