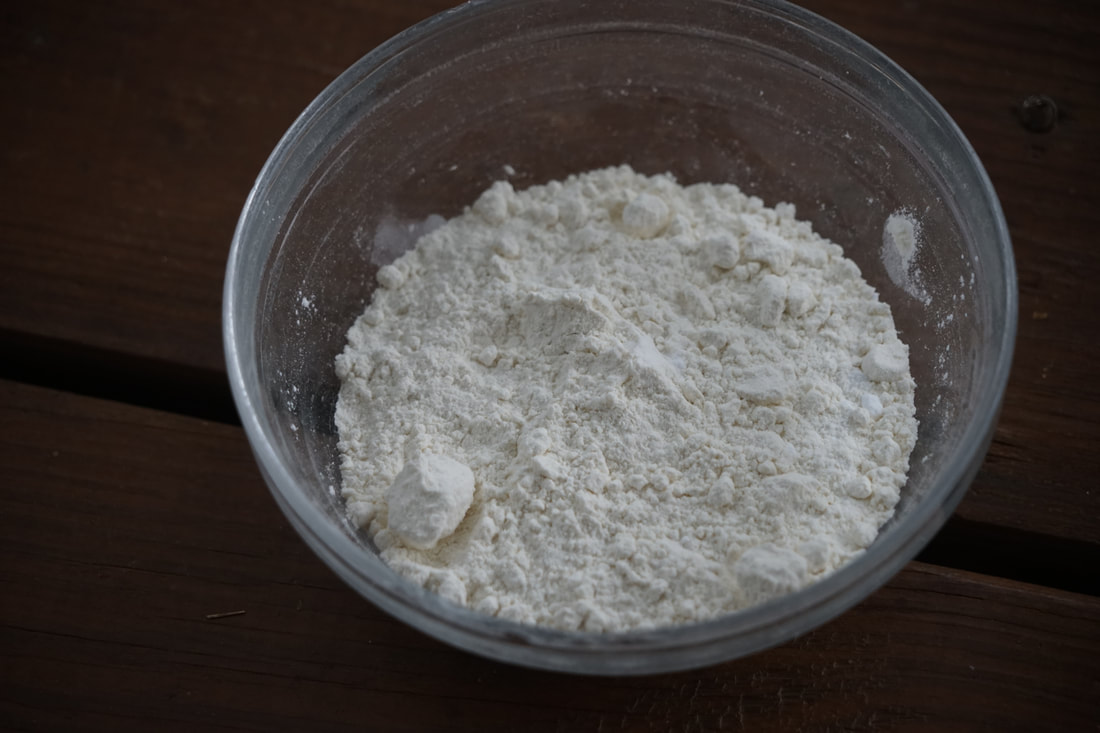
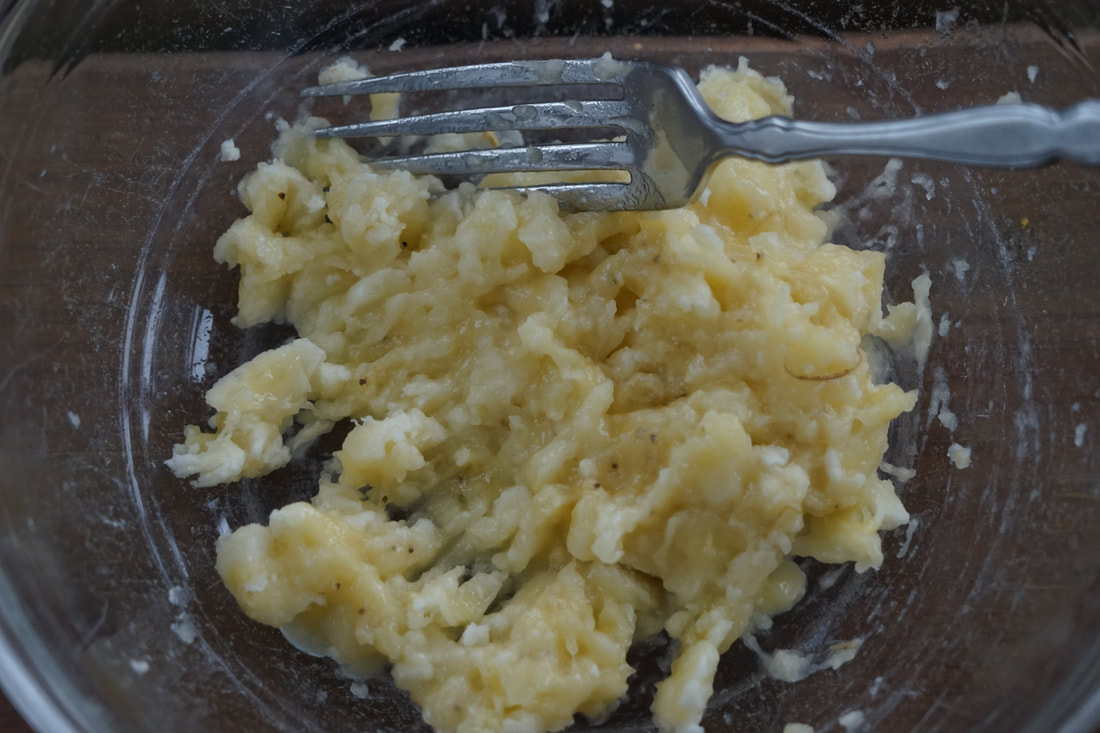
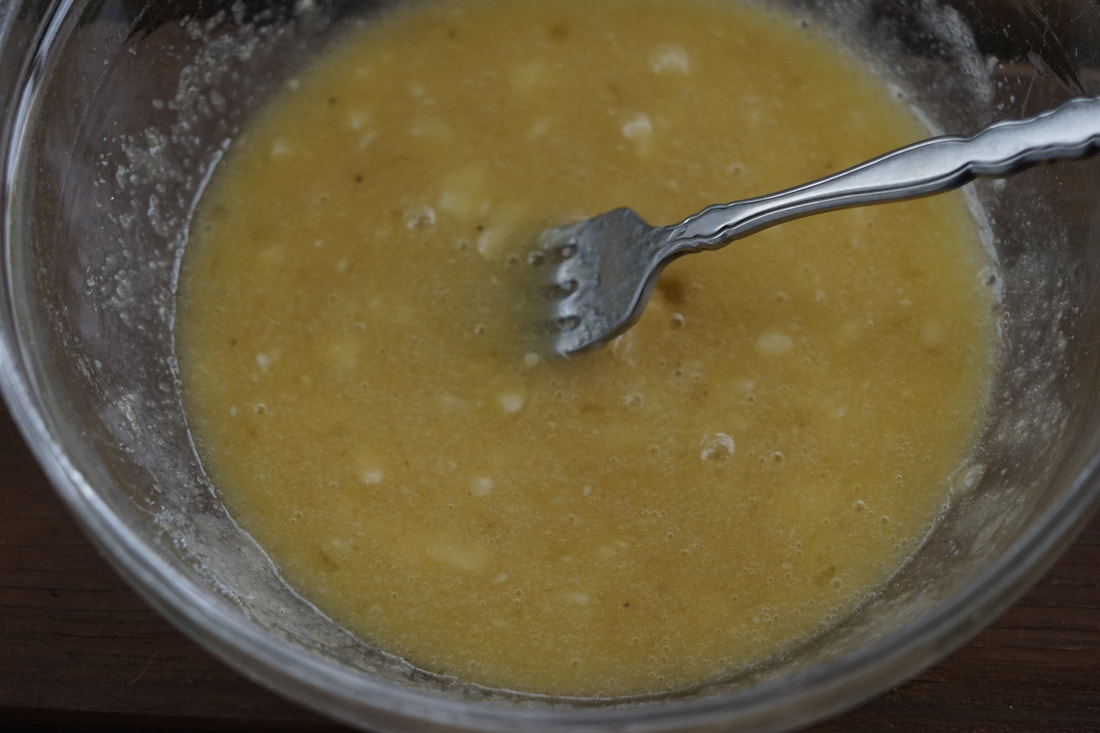
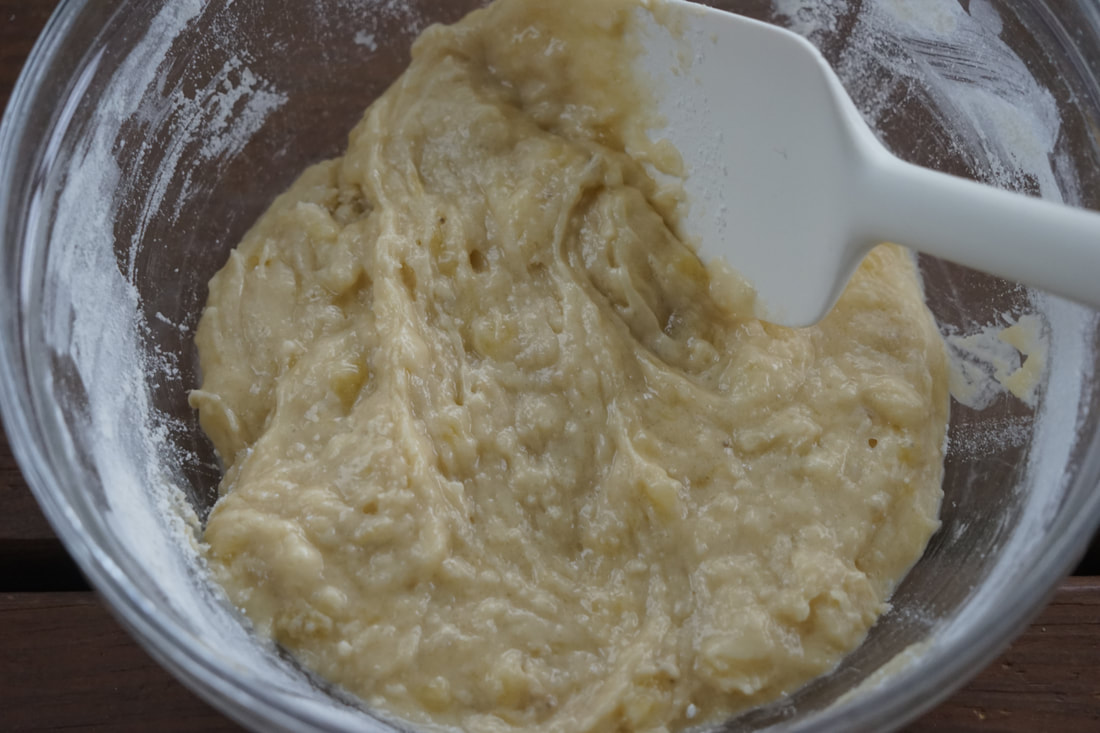
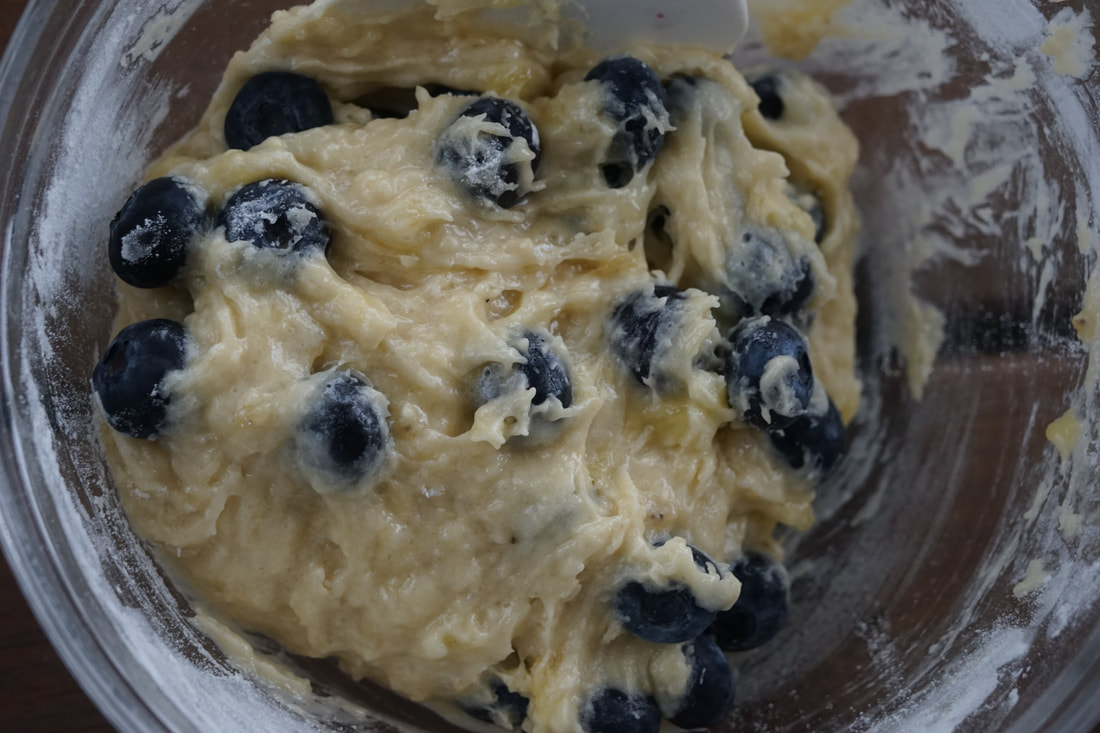
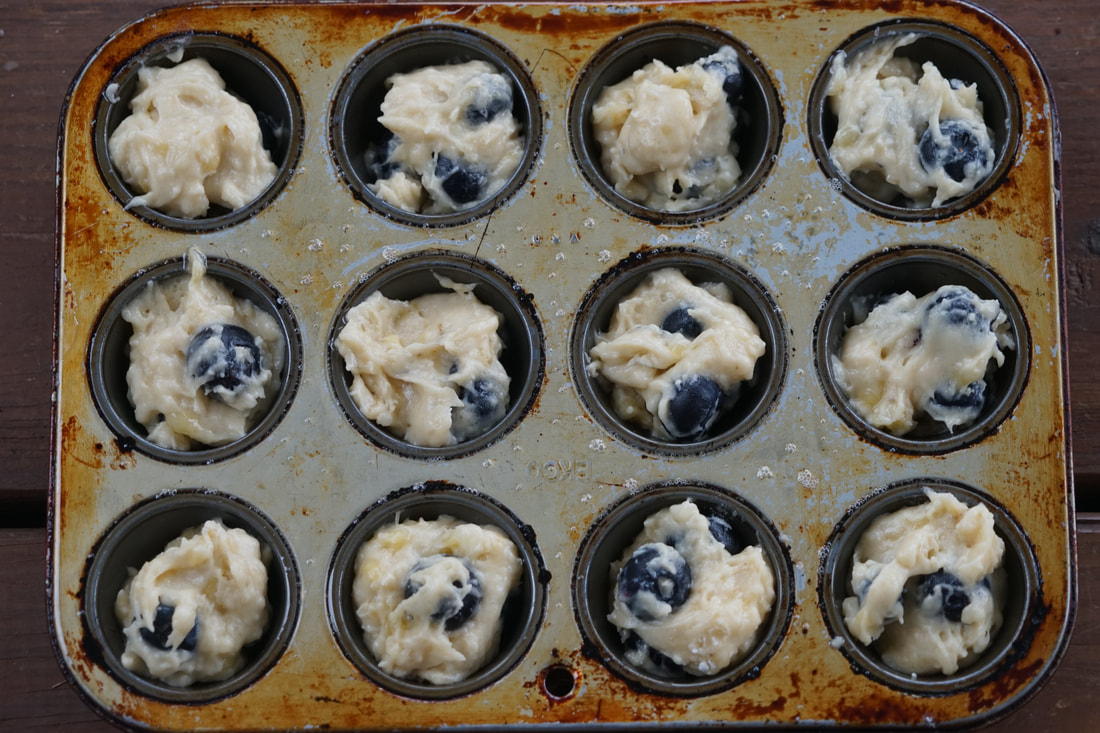
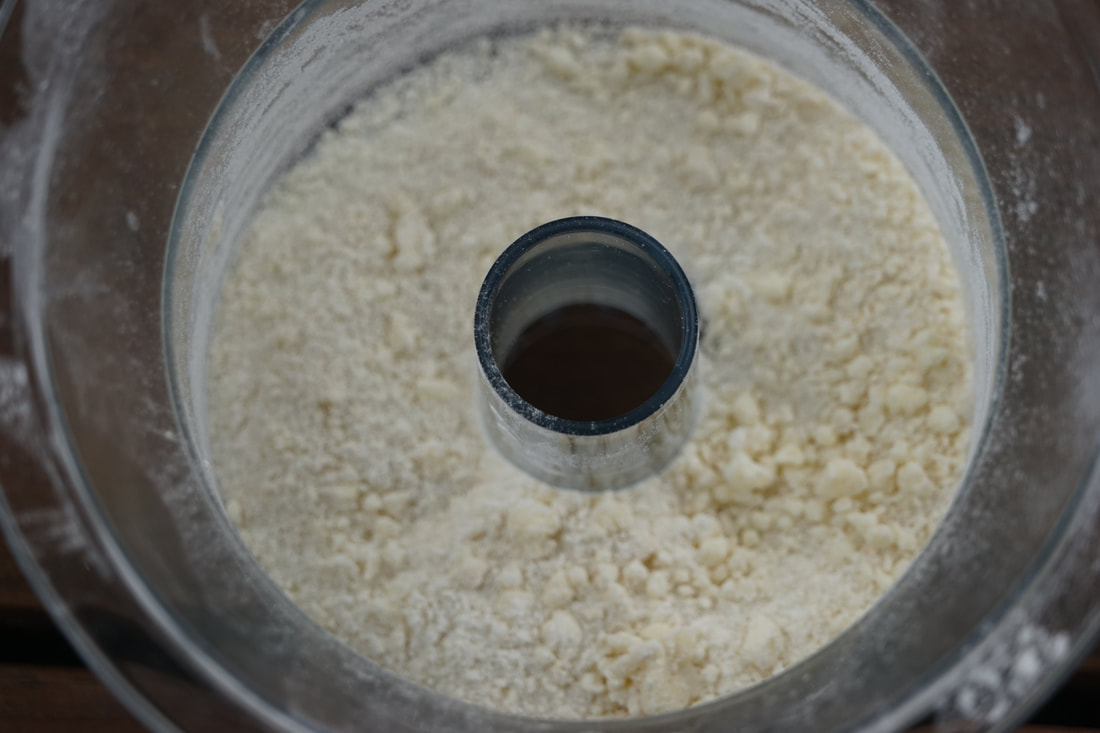
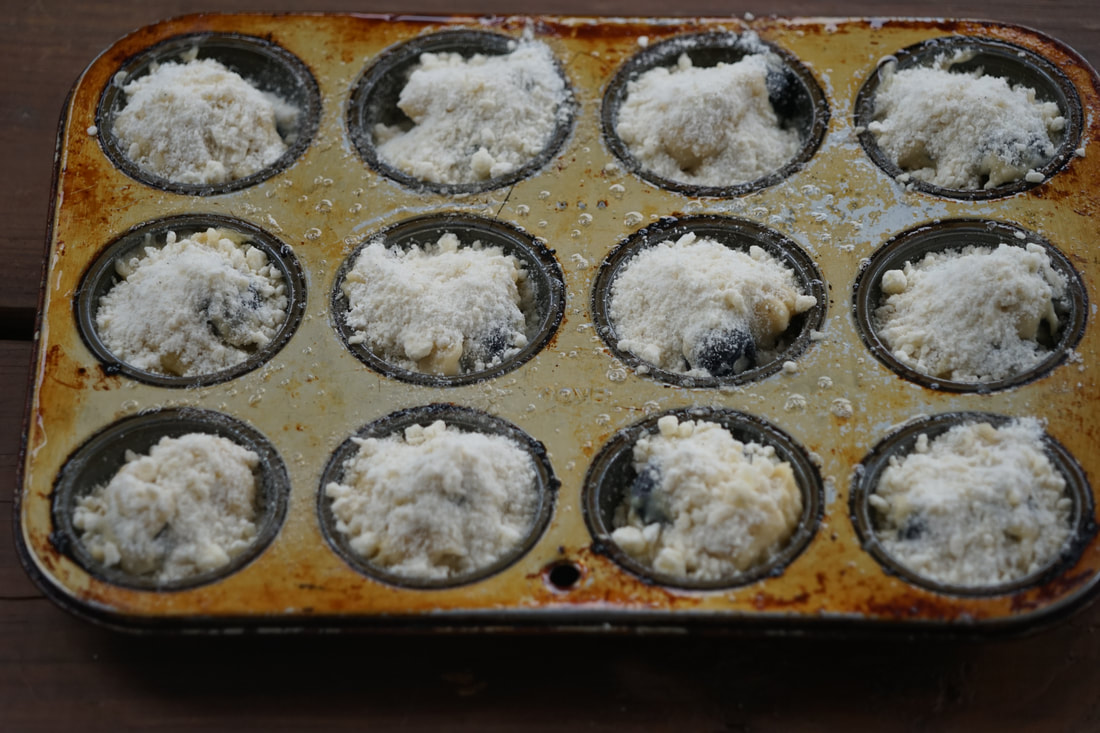
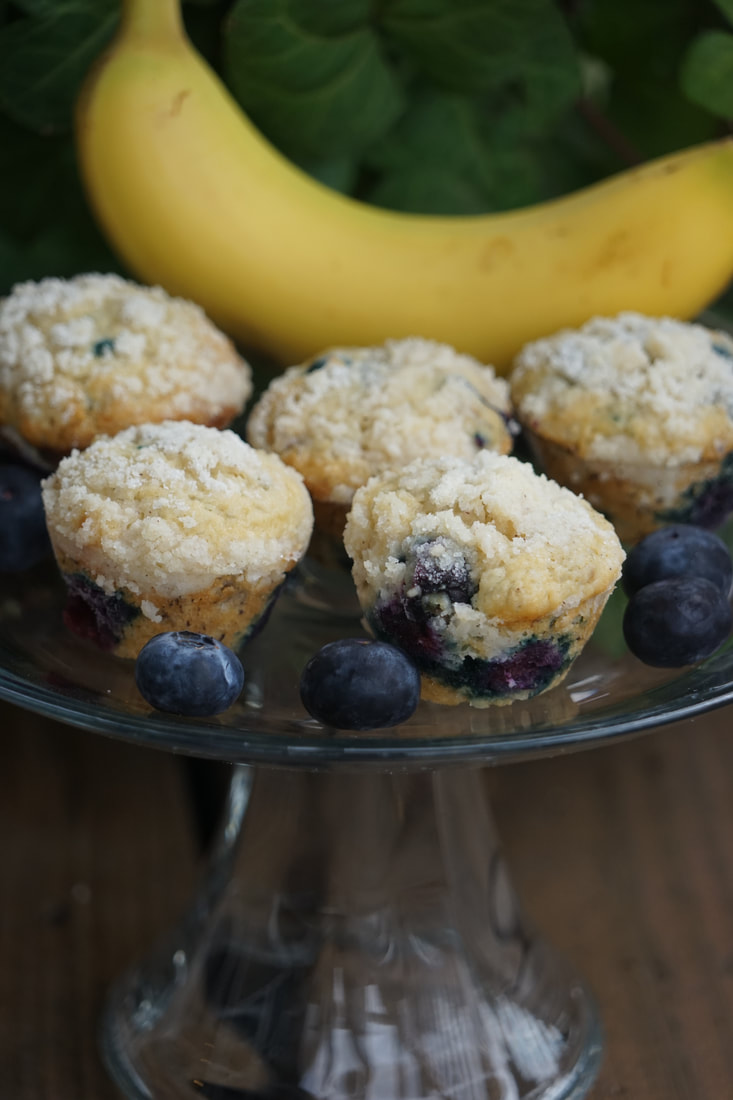
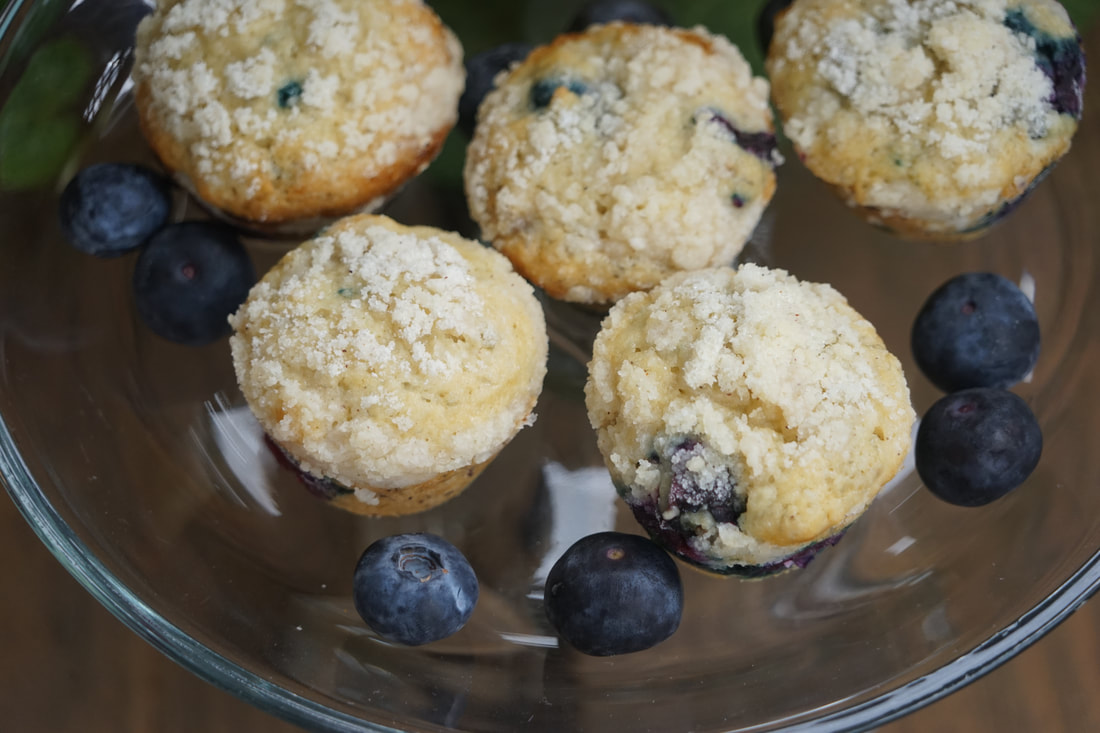
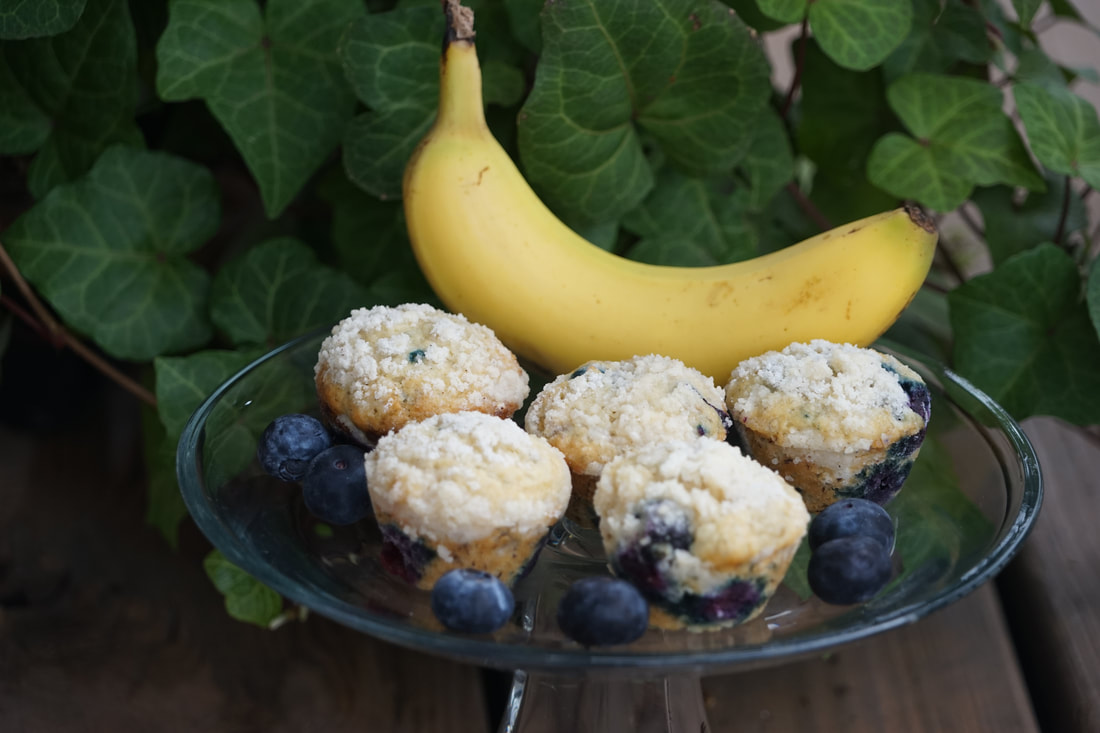
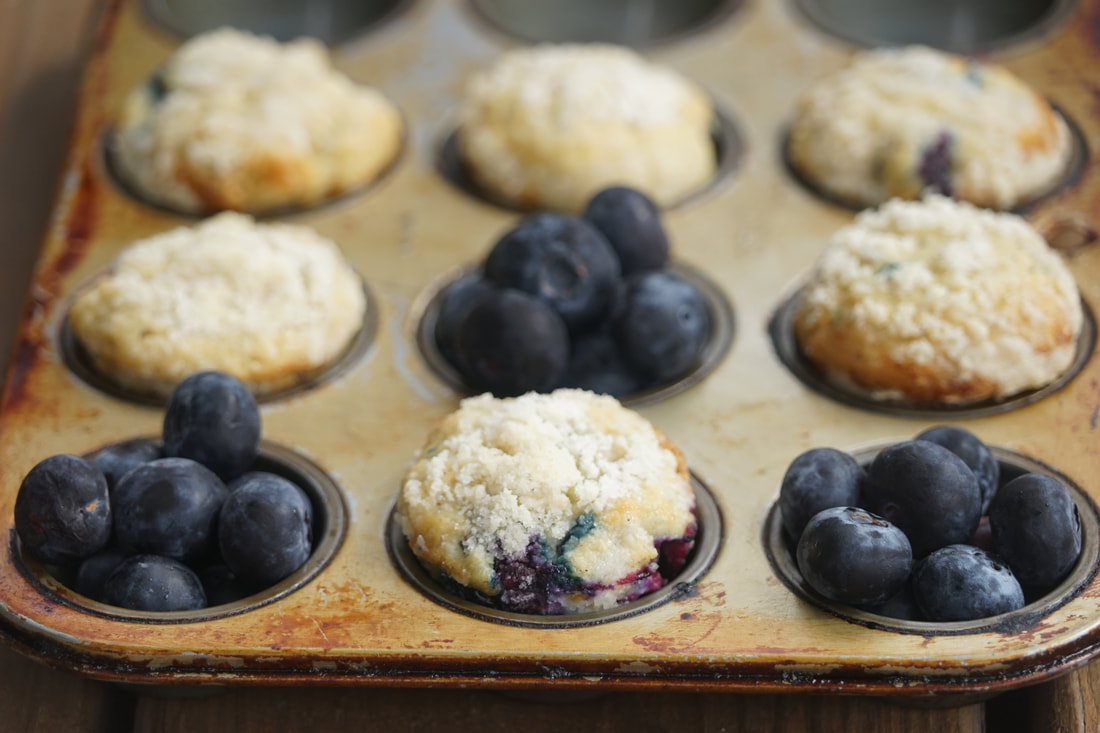
 There are so many people on reduced sugar diets today, either out of necessity or choice, and luckily there are more options available now than ever before. Whether you're a fan of sugar substitutes, like Splenda or stevia or you prefer more natural sweeteners, like fruit and maple syrup, you've got great choices for making sugar free and reduced sugar baked goods. When I'm baking for my own family, I like to use bananas, applesauce and dates as sweetener in my baked goods whenever possible. If I need to sweeten something even more, I opt for a less processed sweetener like honey, molasses, maple syrup or agave nectar. As a last resort, I use stevia or brown sugar to make my baked goods sweet. And then there are times when I use a combination of all my favorite sweeteners. My homemade Fig Newtons for example, have a blend of dates, apple juice, applesauce and brown sugar all to create the perfect blend of fruity sweetness. 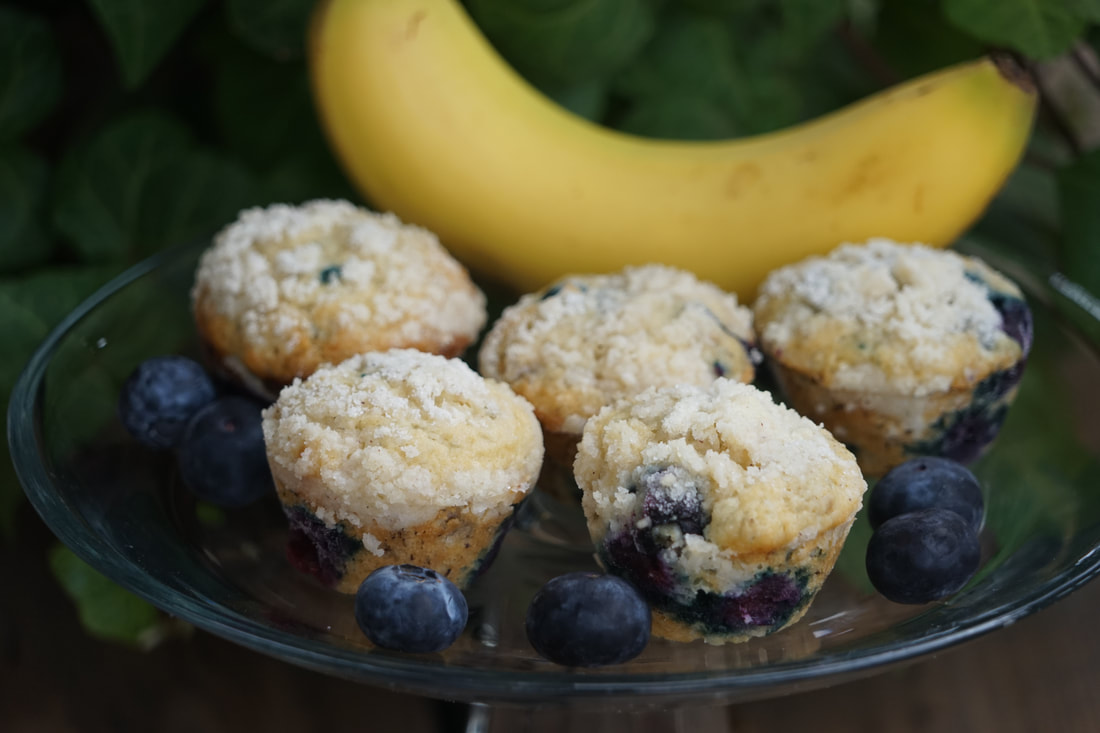 Because I have a baking business, I probably use more sugar in a week than most people use in a year so I'm certainly not opposed to baking with sugar. I've actually considered buying sugar in 50 pound bags because I go through it so quickly. 😂 I crave sugar and it takes a whole lot of will power to NOT eat all of the desserts that are baked in my kitchen everyday. Even though I COULD consume every leftover brownie and imperfect cupcake or cookie that I make, believe it or not, I TRY and show some restraint when it comes to sugar consumption. I substitute fruit or more natural sweeteners for white sugar whenever possible. These Blueberry Banana Muffins have a natural sweetness from the banana and some added stevia to boost the sweetness. I think you will agree that these muffins are pretty SWEET. 😆 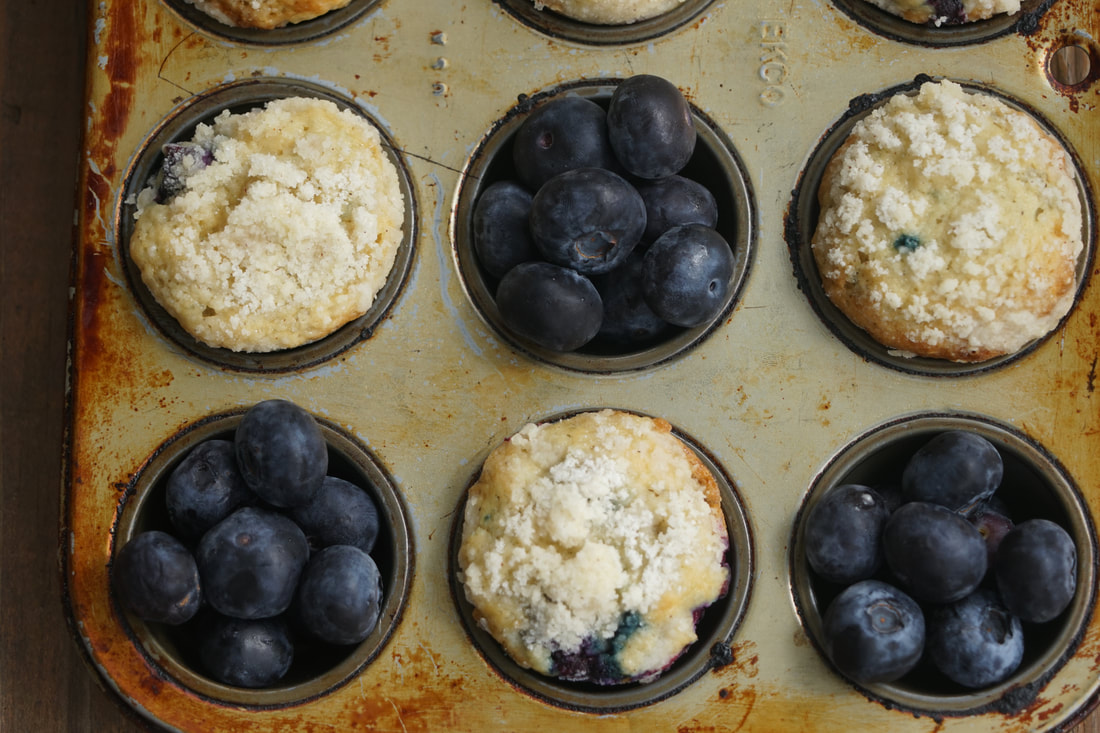 Blueberry Banana Muffins 1 1/2 cups flour 1 teaspoon baking powder 1 teaspoon baking soda 1/2 teaspoon salt 3 mashed bananas 3/4 cup stevia sweetener or sugar 1 egg 1/3 cup butter, melted 1 teaspoon vanilla 1 cup blueberries Streusel 2 Tablespoons stevia sweetener or sugar 2 Tablespoons flour 1/2 teaspoon cinnamon 1 Tablespoon butter
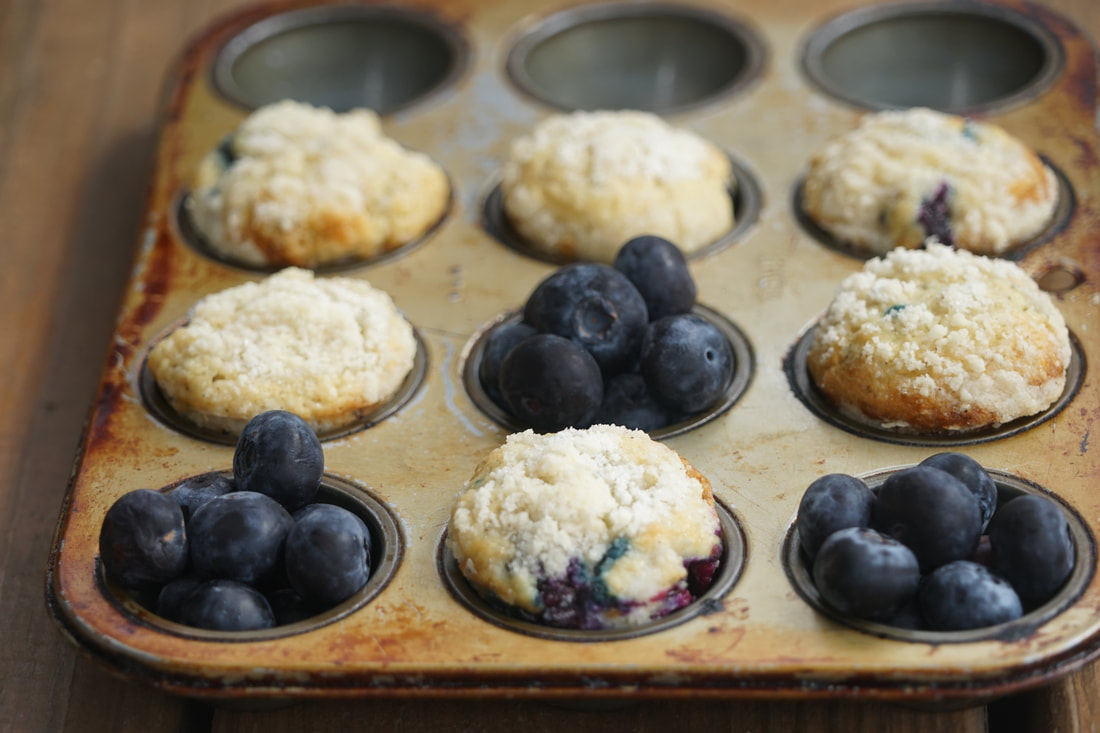 Bake 14 minutes at 350 for mini muffins.
I've had really great luck substituting stevia for sugar in my recipes. I use Truvia in a one to one substitution for the sugar in my recipes and it doesn't affect the texture or quality of the end result. Just in case you want to give it a try - brownies sweetened with stevia are amazing.
Ciao!
5 Comments
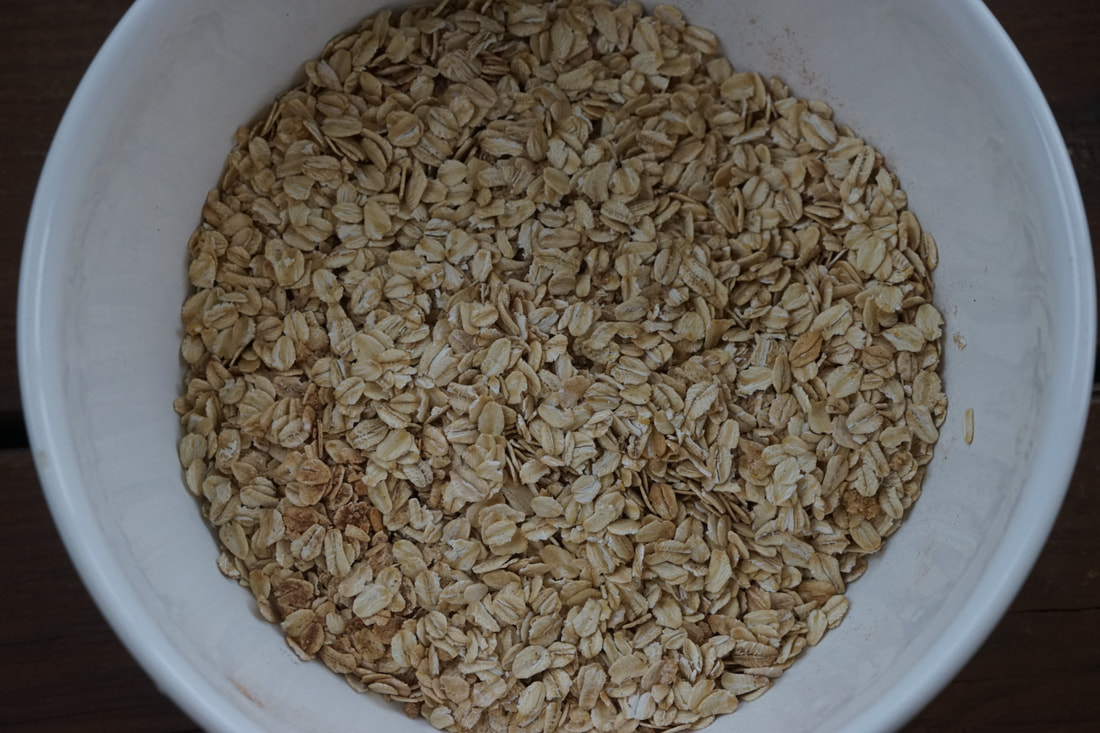
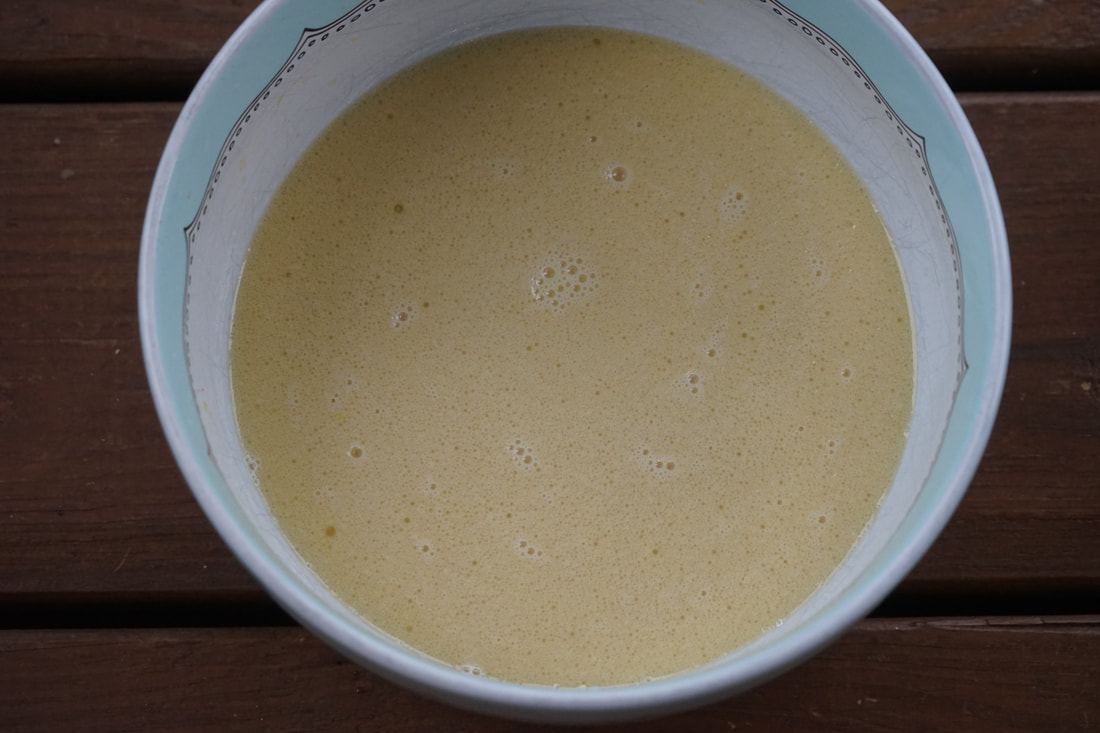
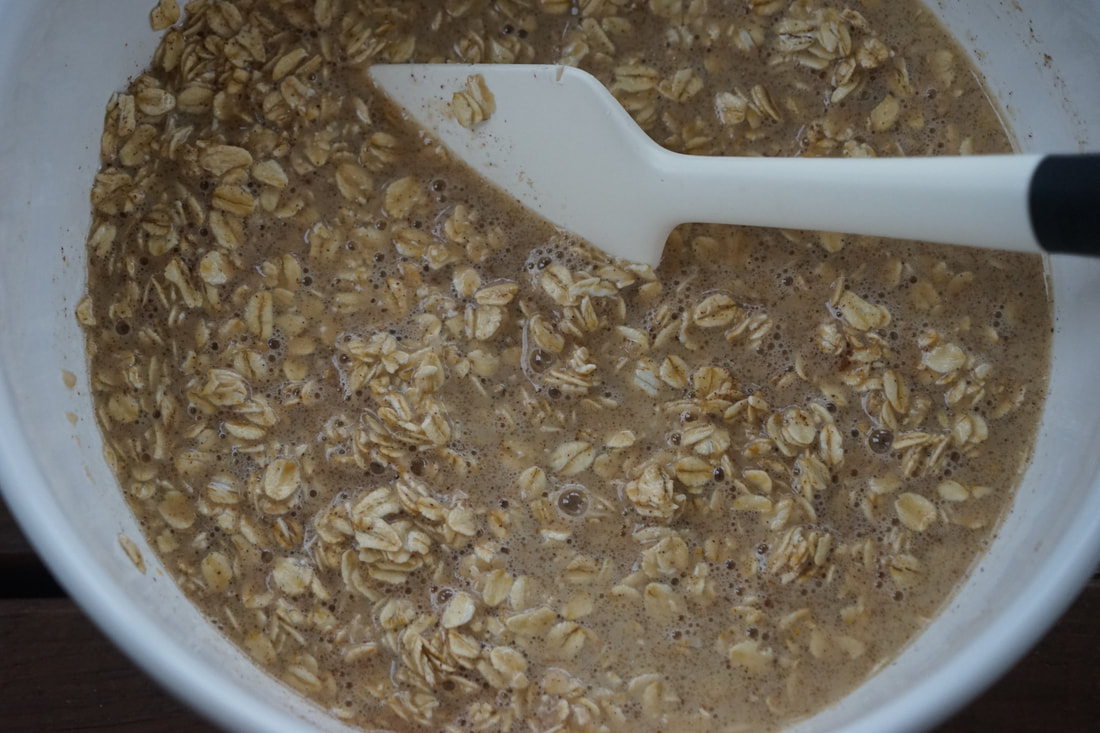
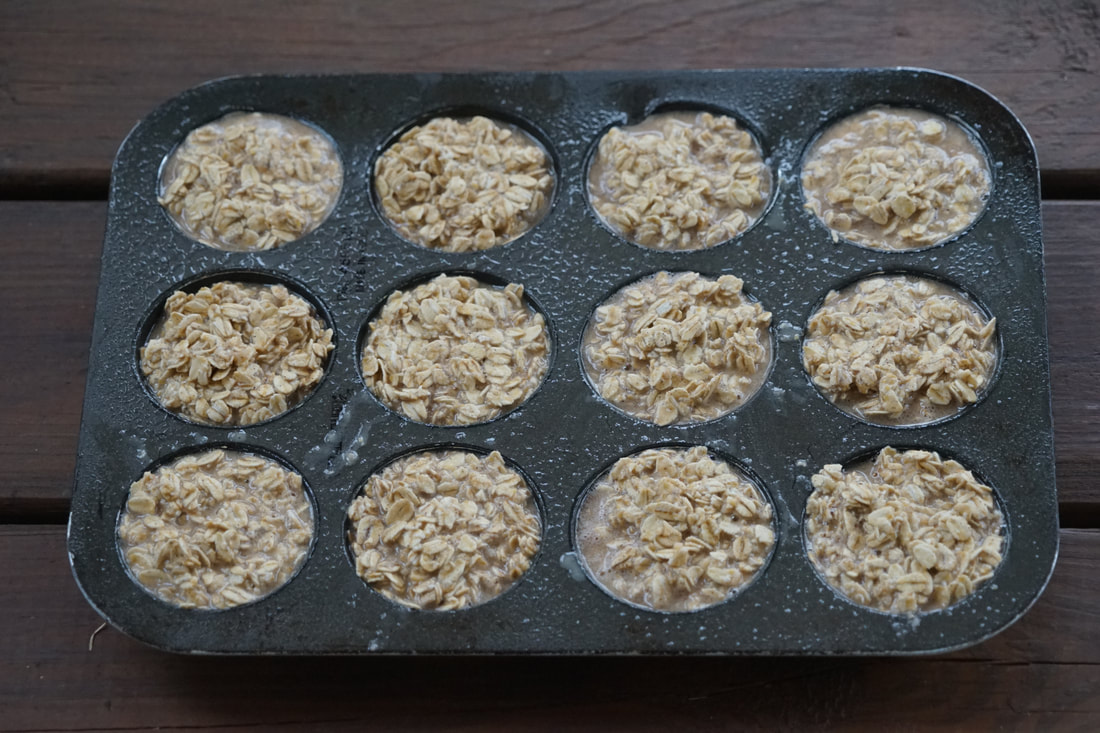
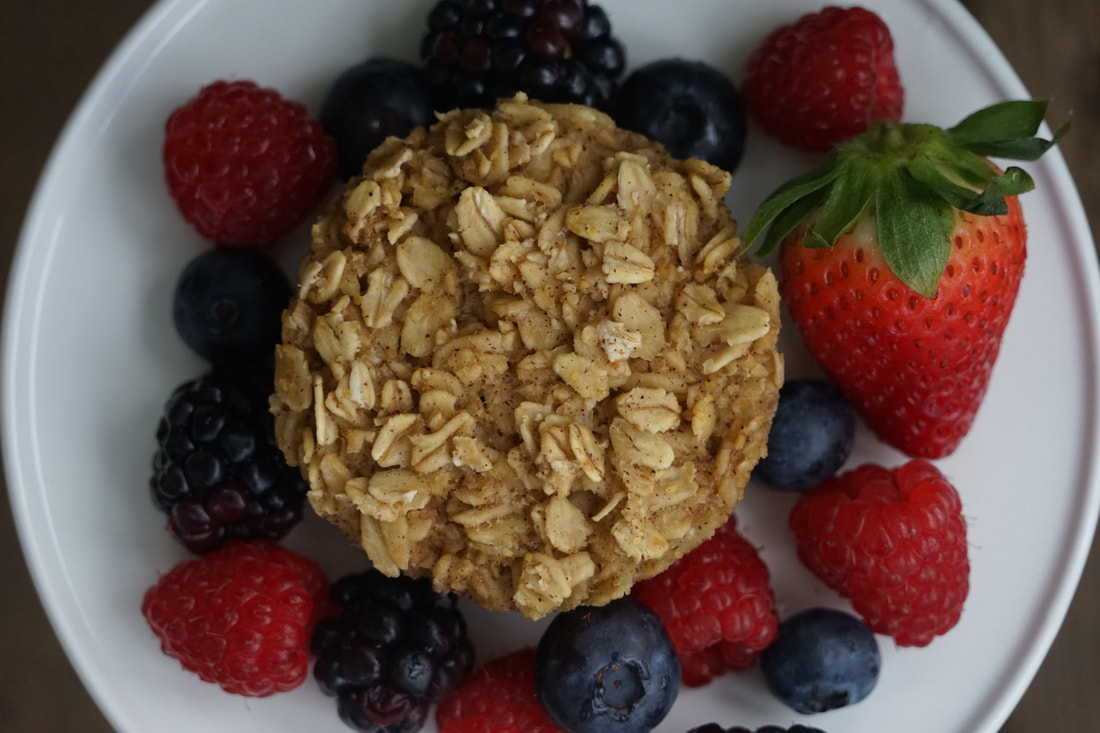 I am over-the-moon excited about the upcoming wedding of my son and his soul mate. There are still some wedding plans to be made and details to be ironed out but that all pales in comparison to the joy that I feel that these kindred spirits will be united in marriage in just a few short months. We're having a wedding!!! Despite my extensive and exhaustive mother-of-the-groom dress search that has consumed most of my free time over the last 6 months, the wedding didn't really seem real until I attended their first bridal shower a couple of weekends ago. To say that it was momentous would be an understatement. The day of the shower was a day that I will not soon forget. So many of the people that have had an influence on the life of my first born were in attendance. The people that impacted his life when he was a young, rambunctious child and those that knew him as an enthusiastic teenager gathered together to bless this precious couple. I feel so lucky that the people that I consider my dearest friends, love my children so well.  Two of my very sweet friends hosted the shower just down the street from me so my house became the staging area for the out-of-town shower guests who arrived prior to the afternoon shower. We nibbled on breakfast snacks and caught up with friends while we eagerly awaited the big event. I was under strict instructions NOT to overfeed anyone before the shower because the hosts wanted hungry guests that would eat up all of the delicious food that they had prepared. 😂 I've declared my love for make ahead breakfast treats before but on days when I have breakfast guests, they are absolutely imperative. I made these Baked Oatmeal Cups a couple of days before the day of the shower and I put them in my freezer so there was minimal preparation time on the day of the big celebration. These granola cups freeze beautifully and they are perfect to serve to guests because they can be customized. I served my Baked Oatmeal Cups alongside bowls of fruit, chocolate chips, coconut, fresh berries and almonds. Healthier than a waffle bar but it was just as much fun to see what kind of creations people make out of their baked granola cup. 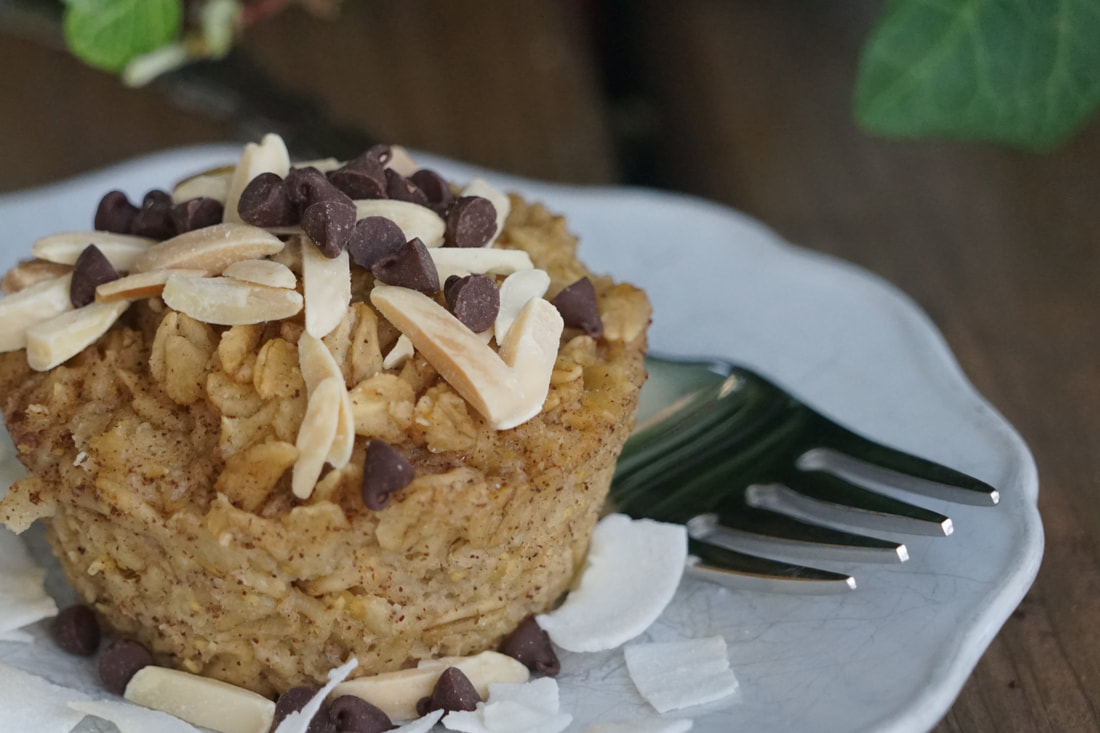 Baked Oatmeal Cups 3 cups old fashioned oats 1 teaspoon baking powder 1 teaspoon ground cinnamon 1/4 cup packed light brown sugar 1/2 cup applesauce 1 1/2 cups milk 2 large eggs 2 Tablespoons unsalted butter, melted 1 Tablespoon vanilla extract
 Cover pan with plastic wrap and let sit overnight in the refrigerator. Bake 25-30 minutes at 350. 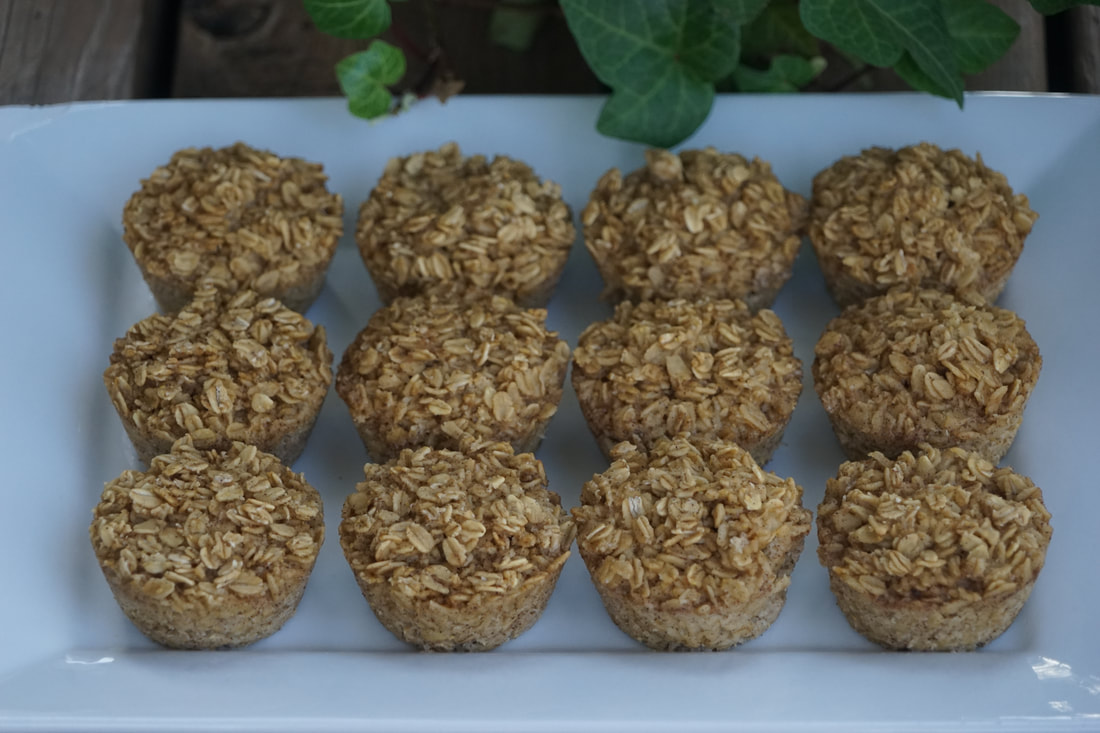 Let cool in the pan 5 minutes before removing. 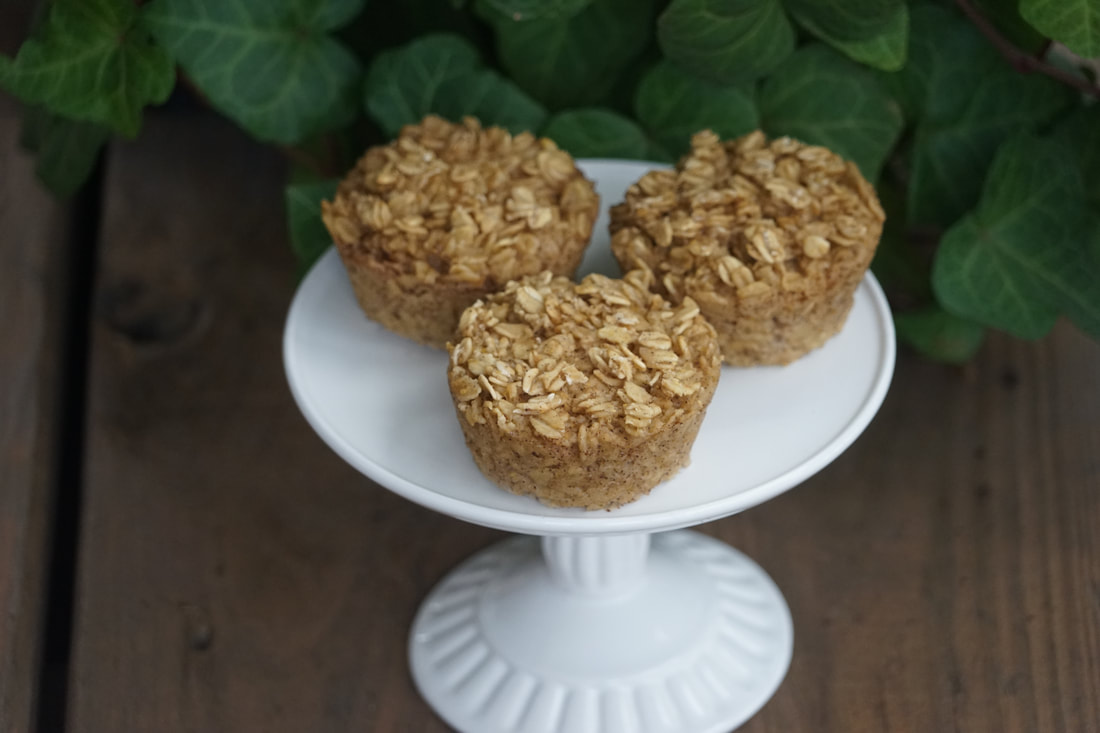 Top with your favorite toppings. (fruit, chocolate chips, coconut, syrup) 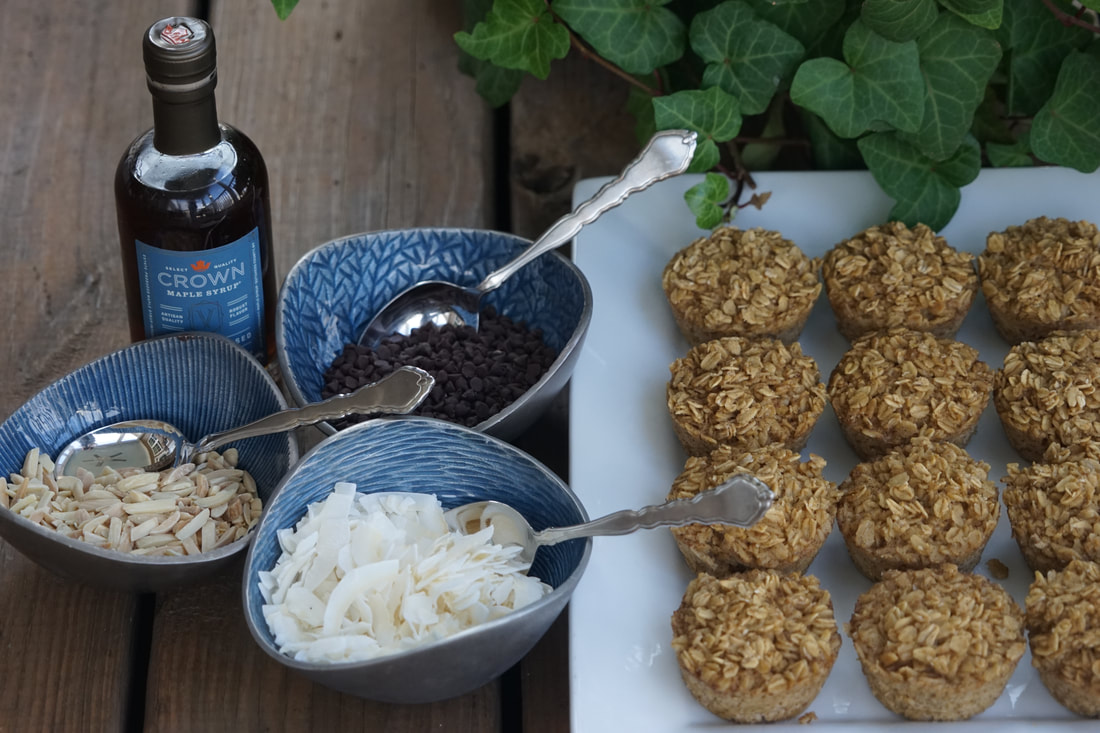  I don't quite know how to thank my dear friends for hosting such a beautiful shower and everyone who took the time to come and celebrate with us. Just know that you are all loved and I deeply appreciate the influence that each and every one of you has had on the lives of this couple.  Ciao!
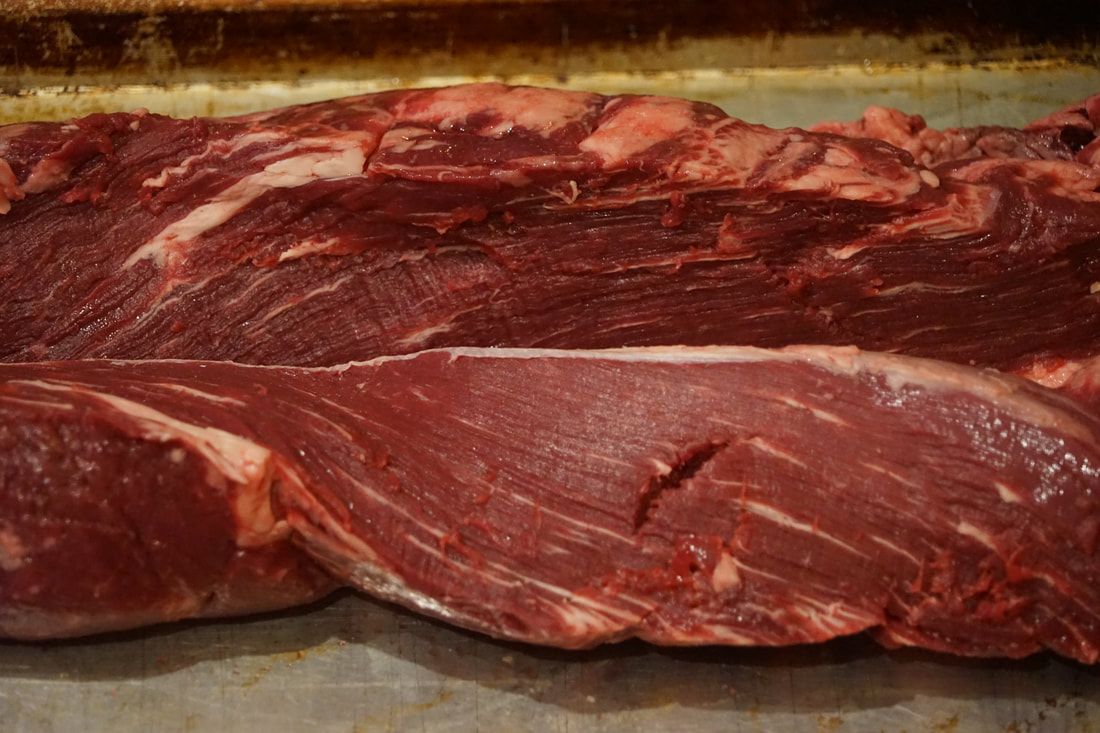
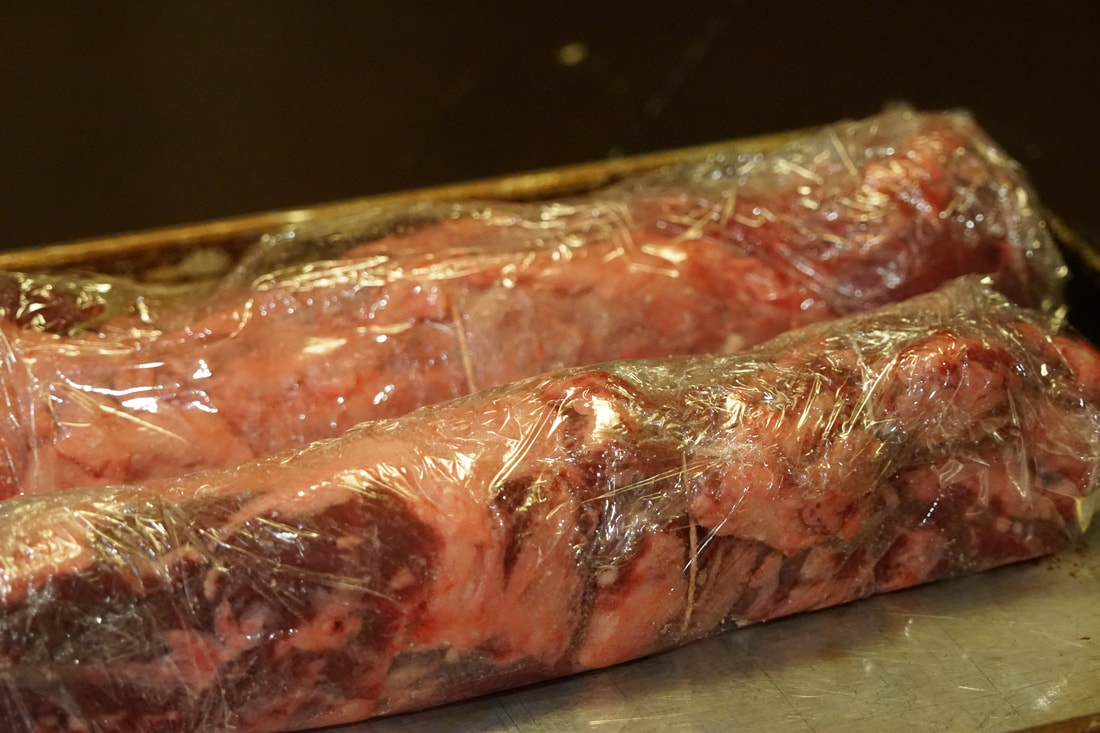
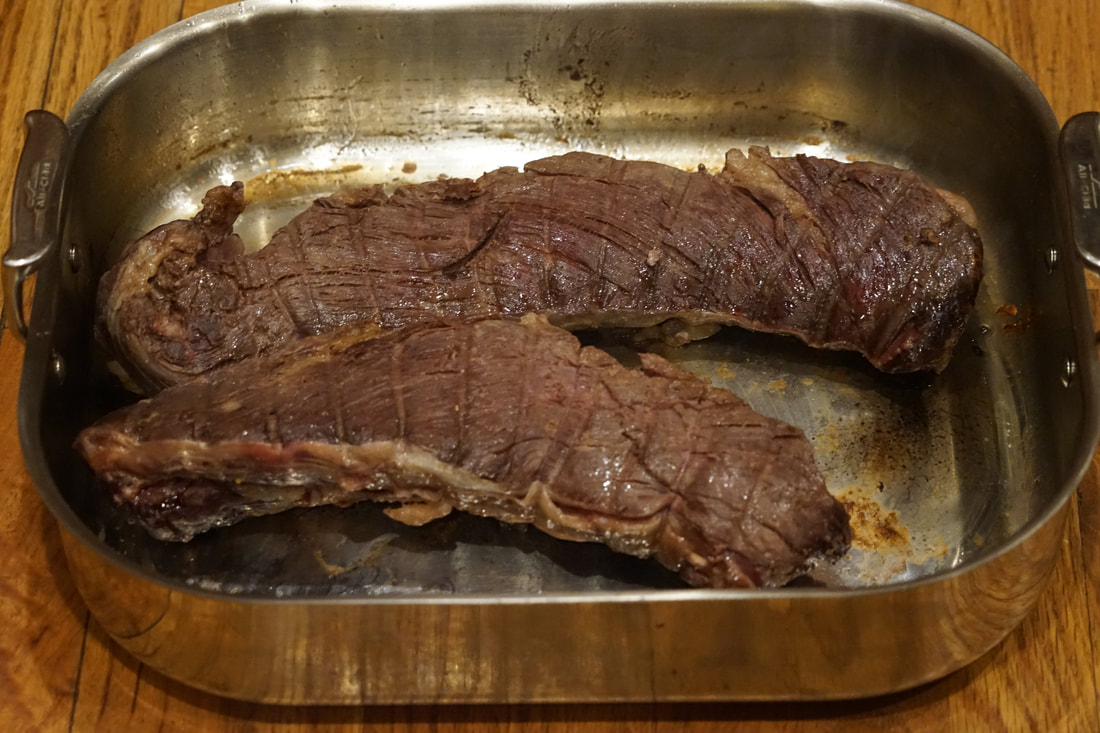
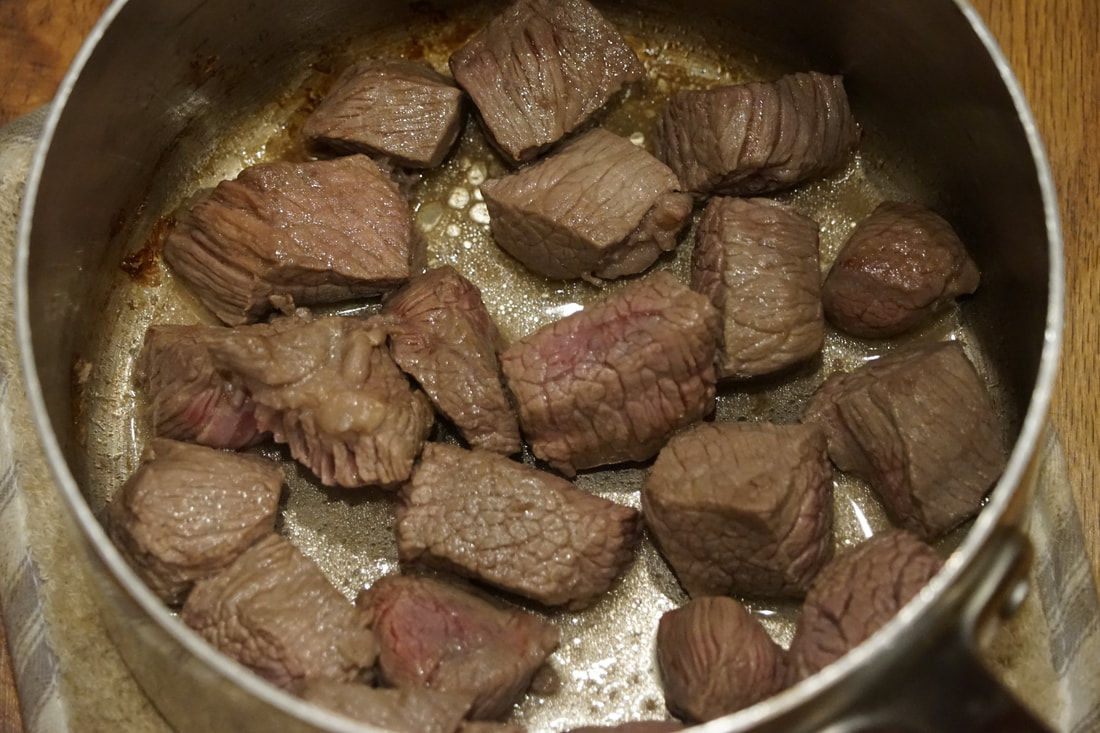
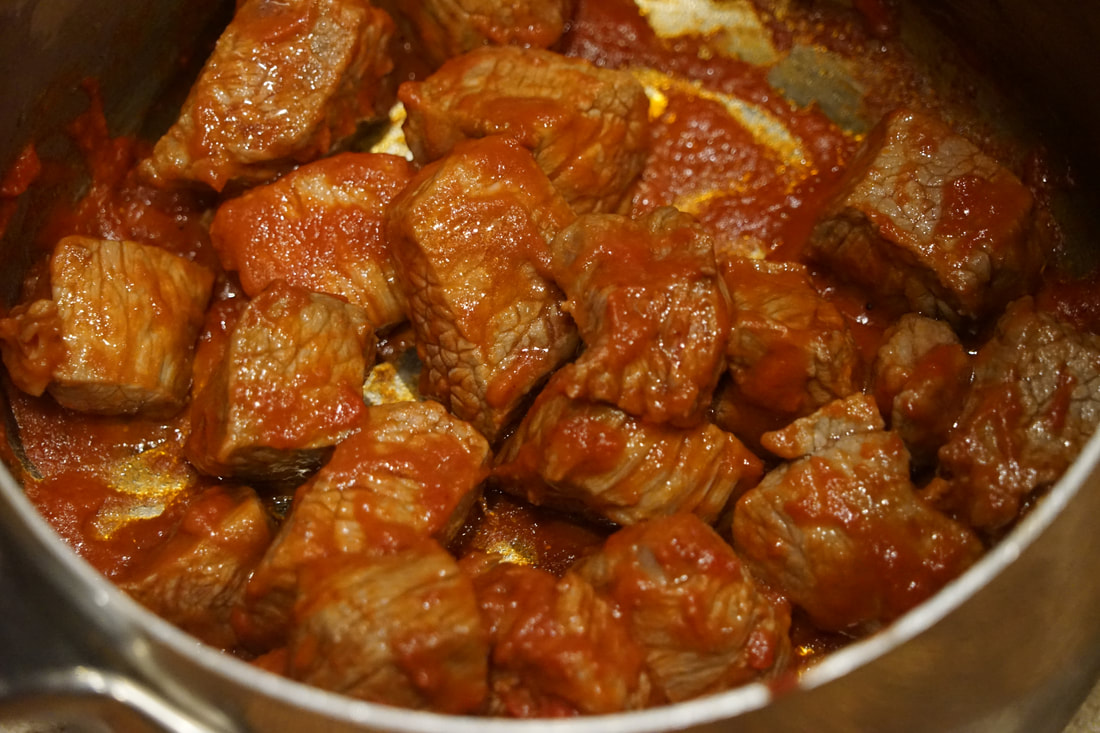
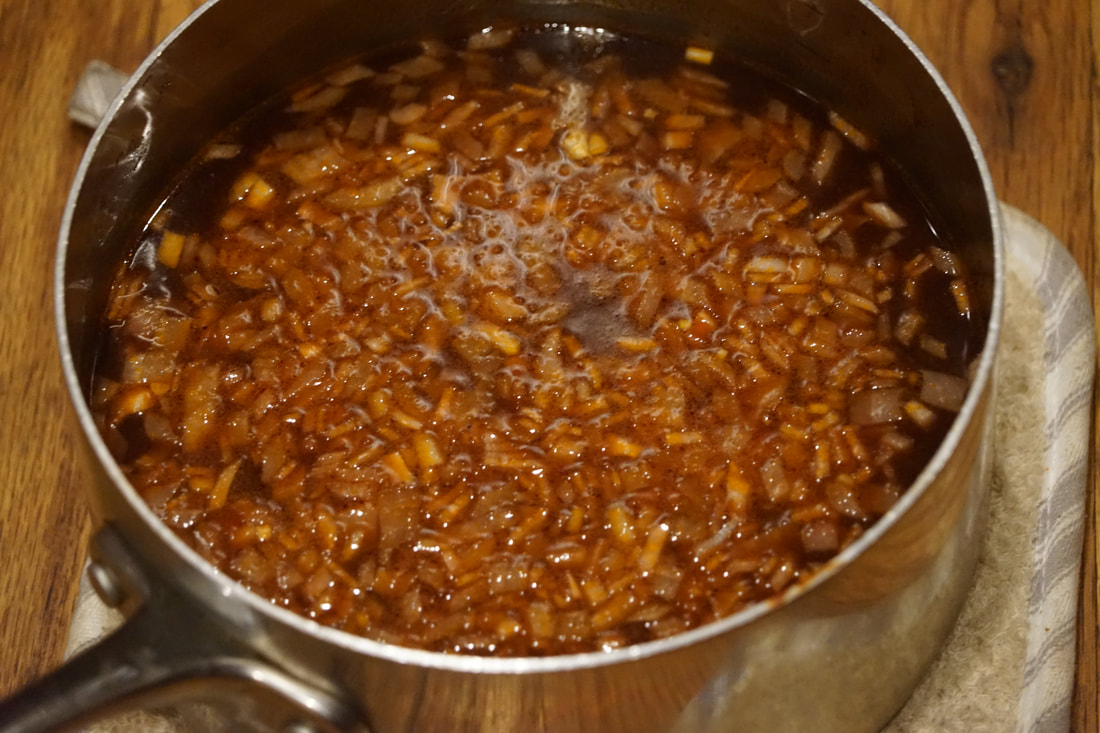
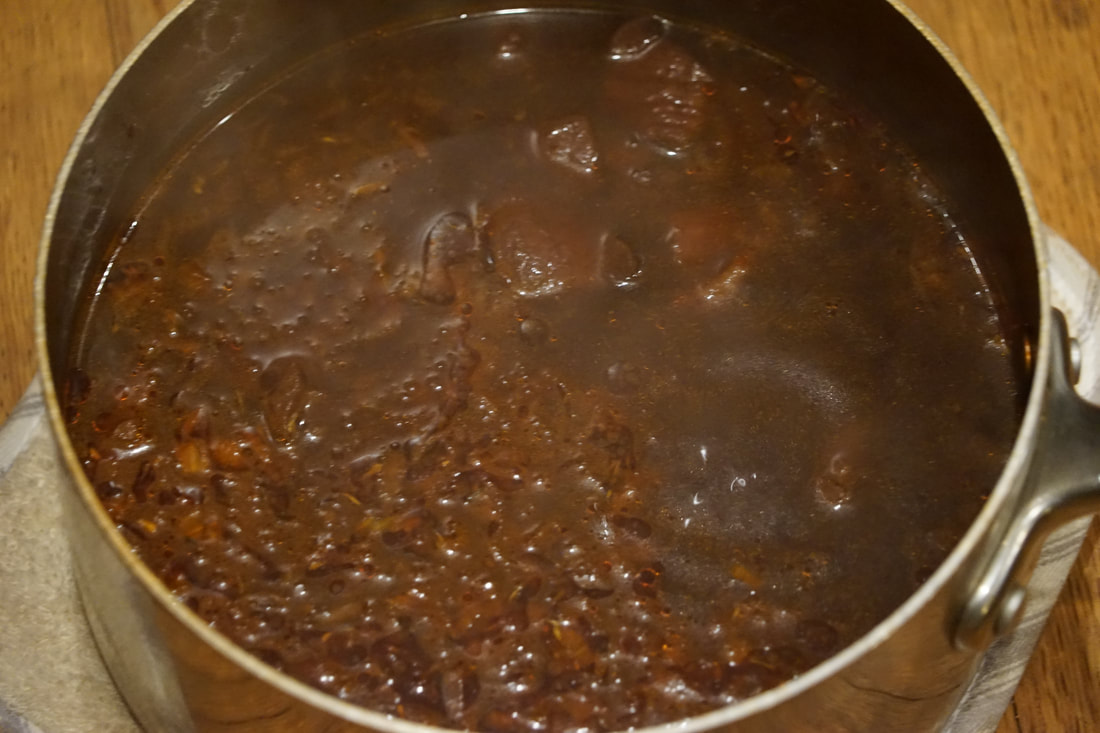
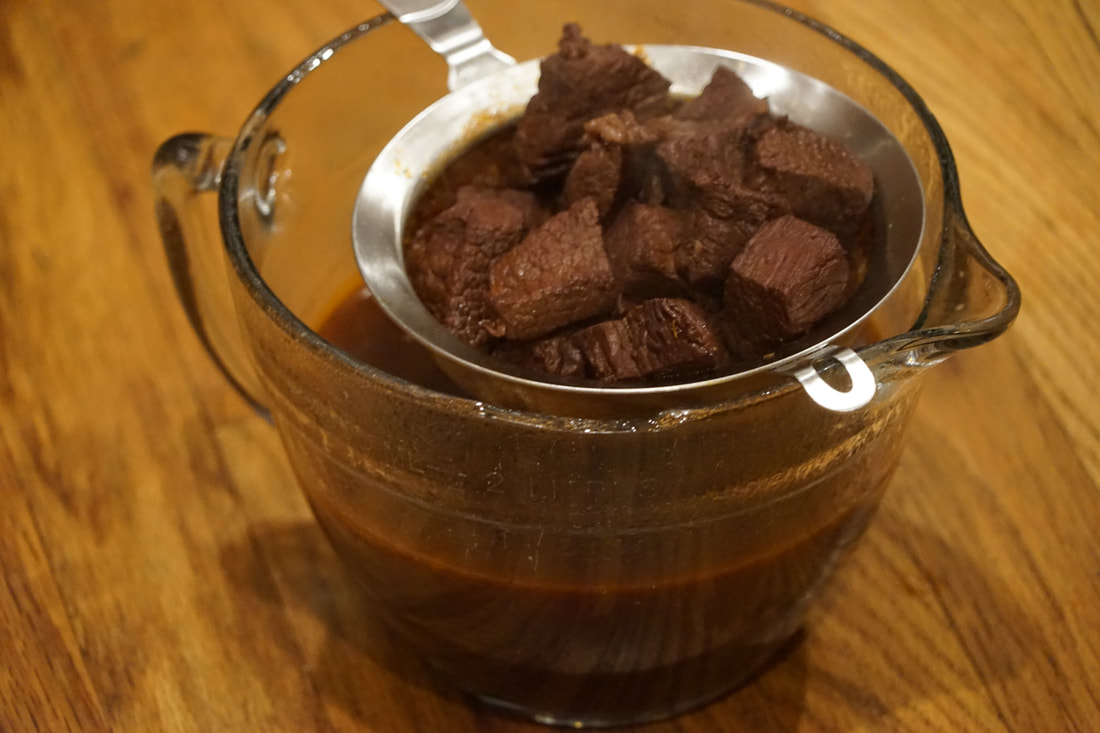
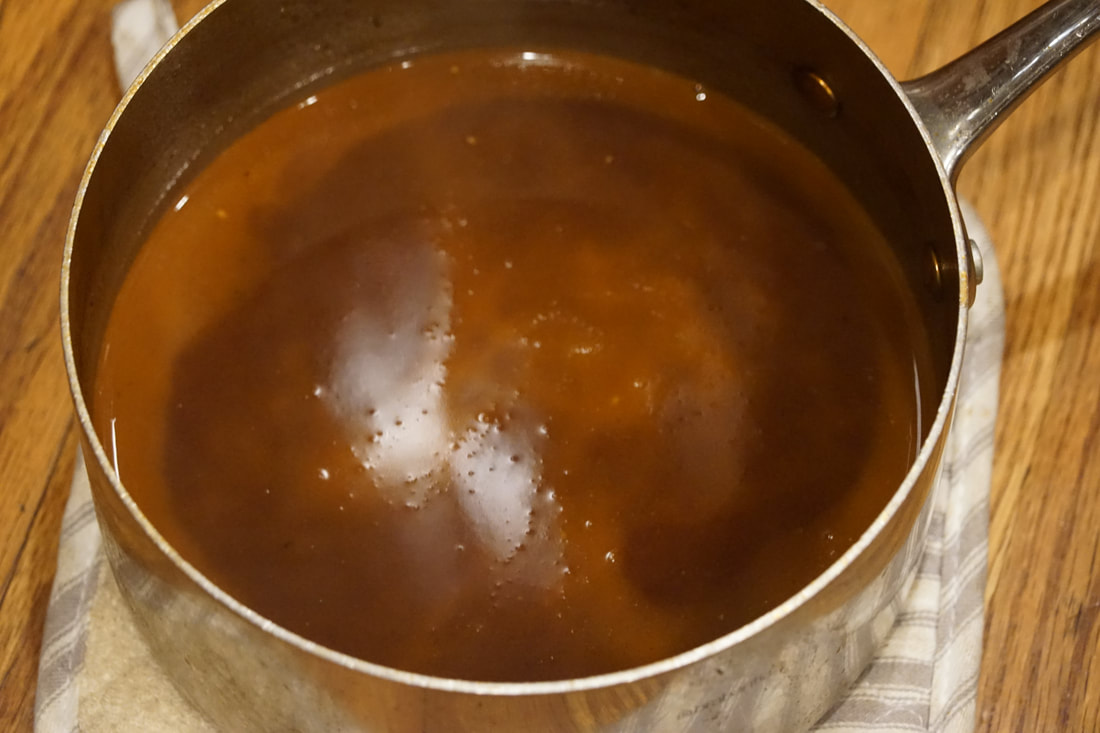
 I feel the need to go on record and say I am a food blogger and NOT a food scientist or a culinary inventor. I borrow recipe ideas and inspiration from all kinds of sources. I frequently make recipes from my America's Test Kitchen magazines, from my websites and recipes passed down from my family and friends. I add my own twist to each recipe and "Amy-fy" them and I usually change up the ingredient list based on what I have on hand in my pantry. I tend to simplify recipes so they're easier and quicker to prepare. It seems to me that throughout history, people have been sharing, copying, reusing and passing down recipes from generation to generation. My feeling is that if someone hands me a recipe or publishes a recipe either in print or through social media, they actually WANT people to use and recreate it. In case there was any doubt in your mind - I hope that everyone who reads my blog will make MY recipes and share them with everyone they know. 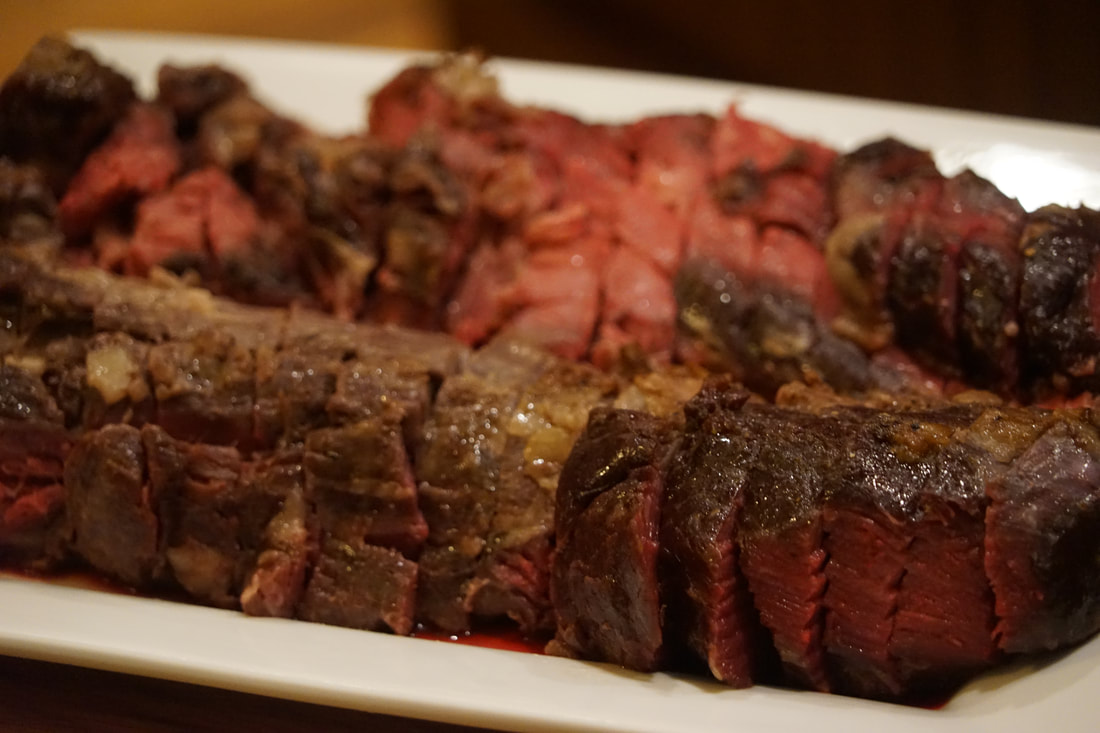 Recipes are not owned and they can't be copyrighted. They're simply a list of ingredients, facts and formulas. I don't want to deceive anyone into thinking that I spend days researching, experimenting, measuring, documenting and testing recipe ideas for my blog. Again - I am NOT a food scientist. Most of my recipe ideas are inspired by masterful cooks and culinary experts much smarter than I. I don't always remember to post the recipe inspiration for each recipe but if you're ever curious about the origin of a particular recipe - send me a comment. I'm always happy to share. The vision for this Roast Beef Tenderloin with Red Wine Sauce came from my Cooks Country magazine. (December/January 2018 edition) I changed up the recipe slightly and I think the results were outstanding. I served this delicious meal last weekend to some guests and everyone loved it. 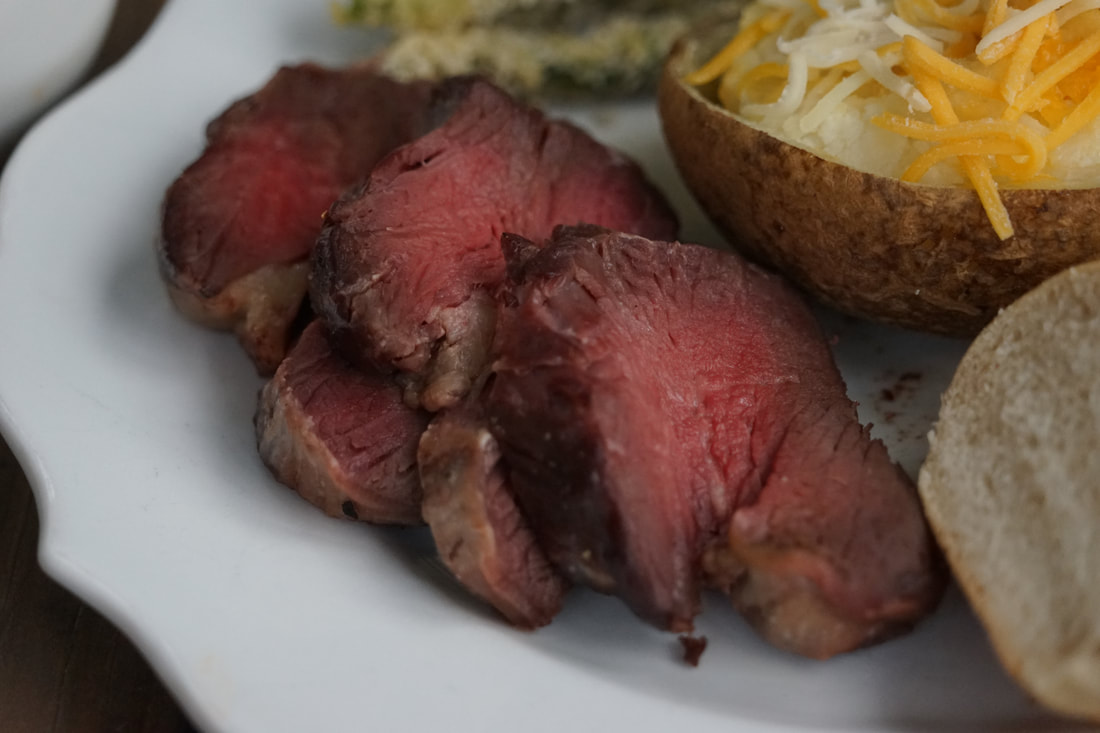 Roast Beef Tenderloin with Red Wine Sauce 5 pound trimmed whole beef tenderloin kosher salt and pepper 2 Tablespoons vegetable oil Red Wine Sauce 5 Tablespoons butter 12 ounces stew meat, cut into 1" pieces 2 Tablespoons tomato paste 2 cups red wine (Pinot Noir) 2 cups beef broth 2 Tablespoons soy sauce 1 1/2 Tablespoons sugar 6 sprigs fresh thyme 2 1/2 teaspoons cornstarch 1 Tablespoon cold water salt and pepper
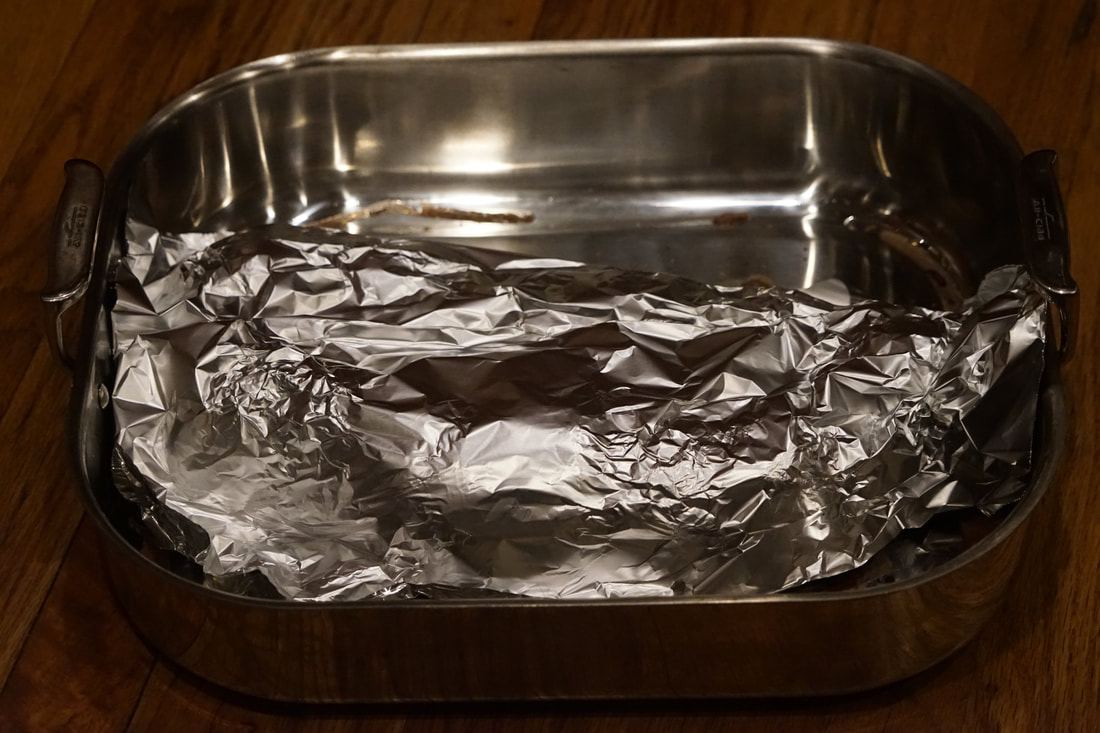
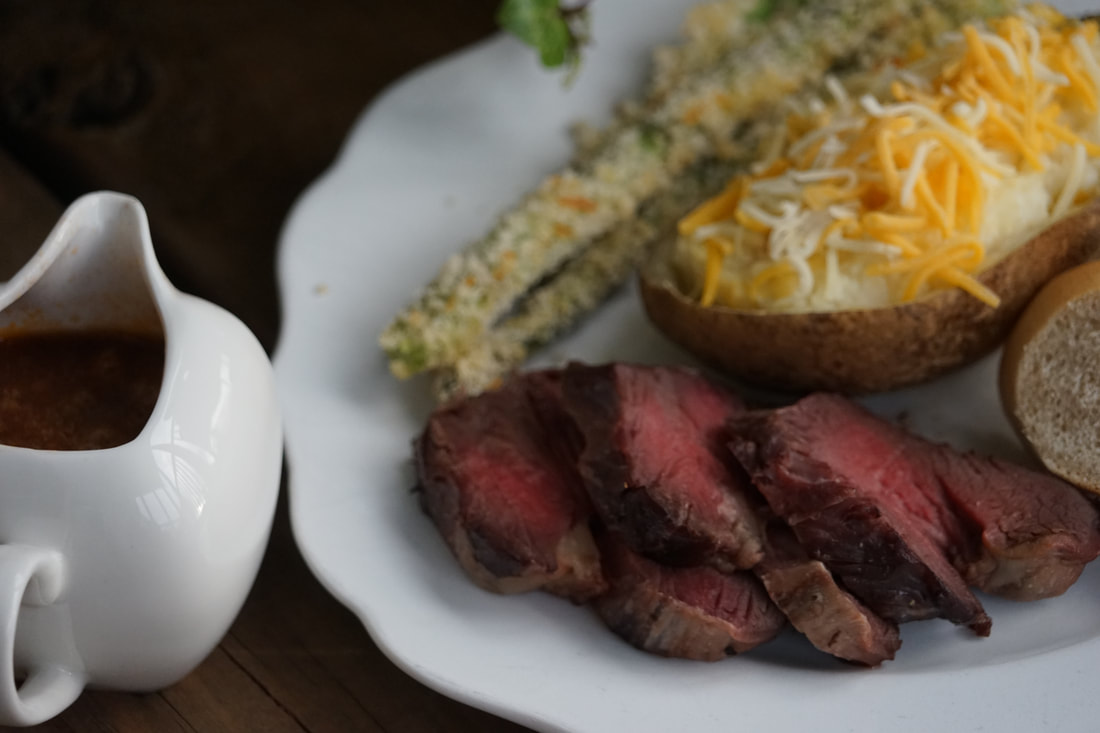 Preparing a beef tenderloin can seem overwhelming but it's actually a relatively easy process. It does take a considerable commitment in time but most if it is hands-off time leaving me free to get the rest of the meal ready. Before you begin, make sure that you have a meat thermometer handy to ensure you don't overcook your tenderloin.
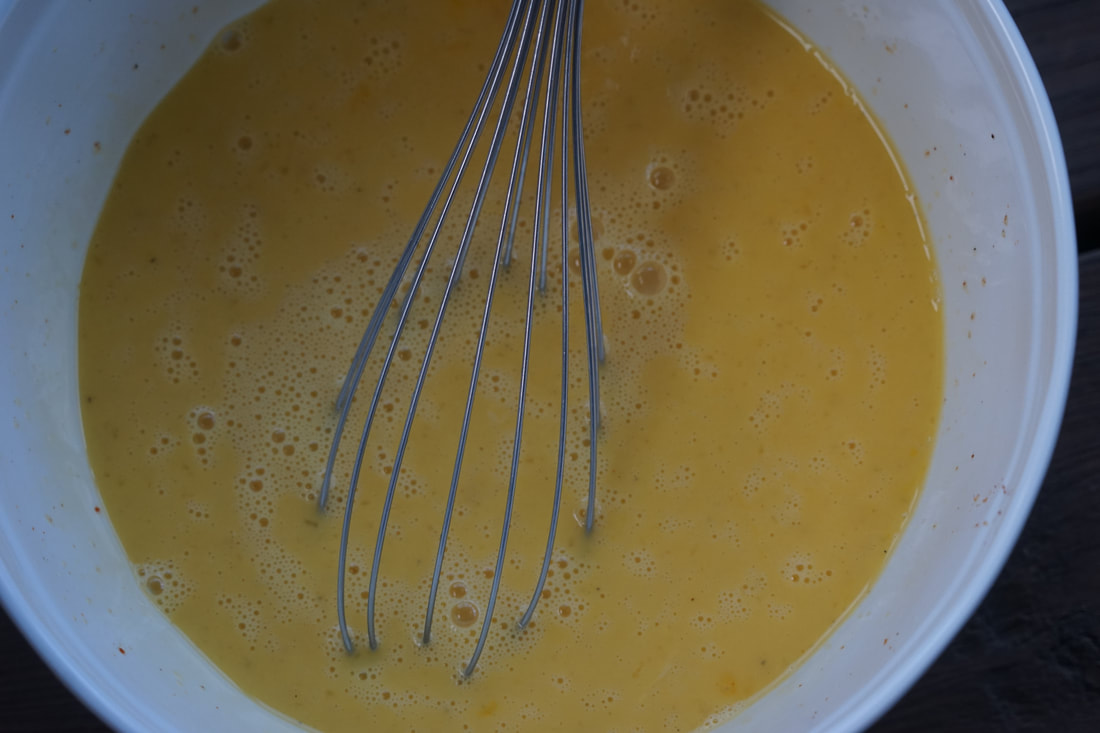
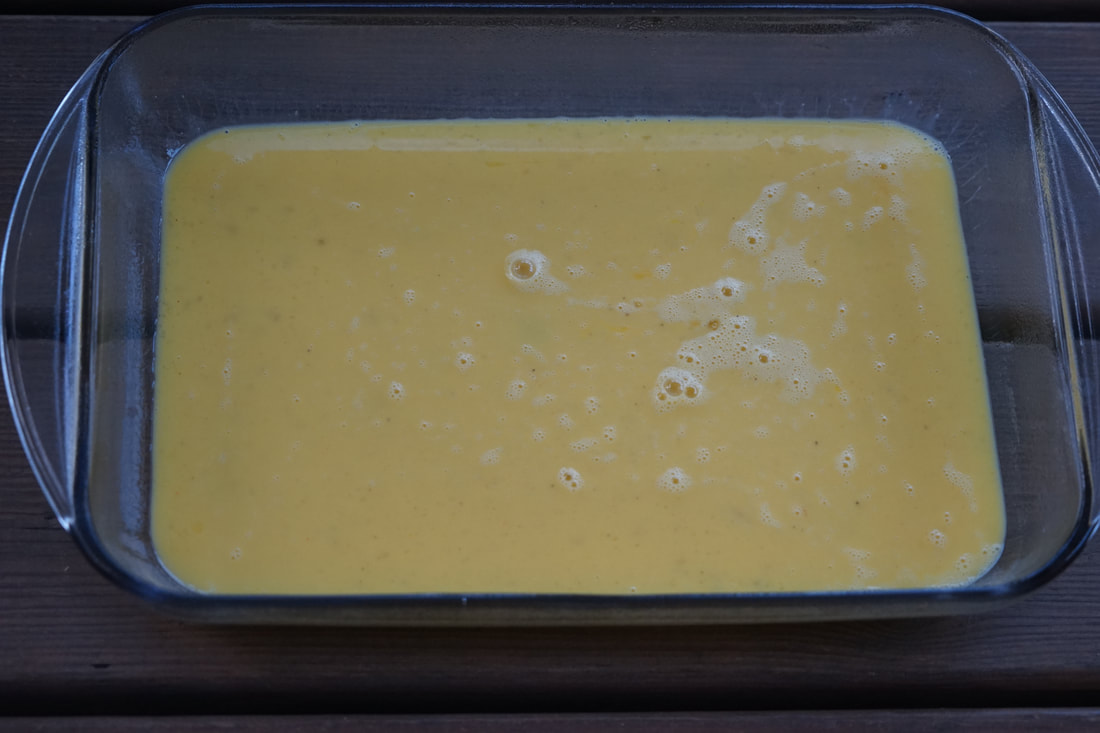
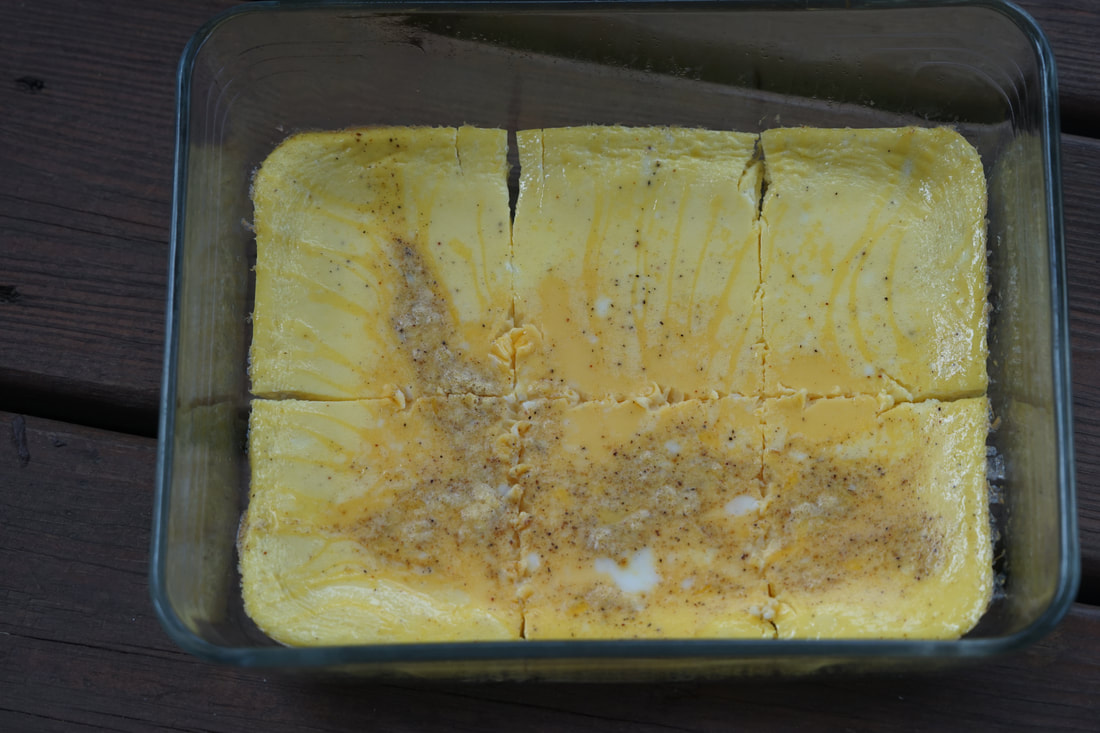
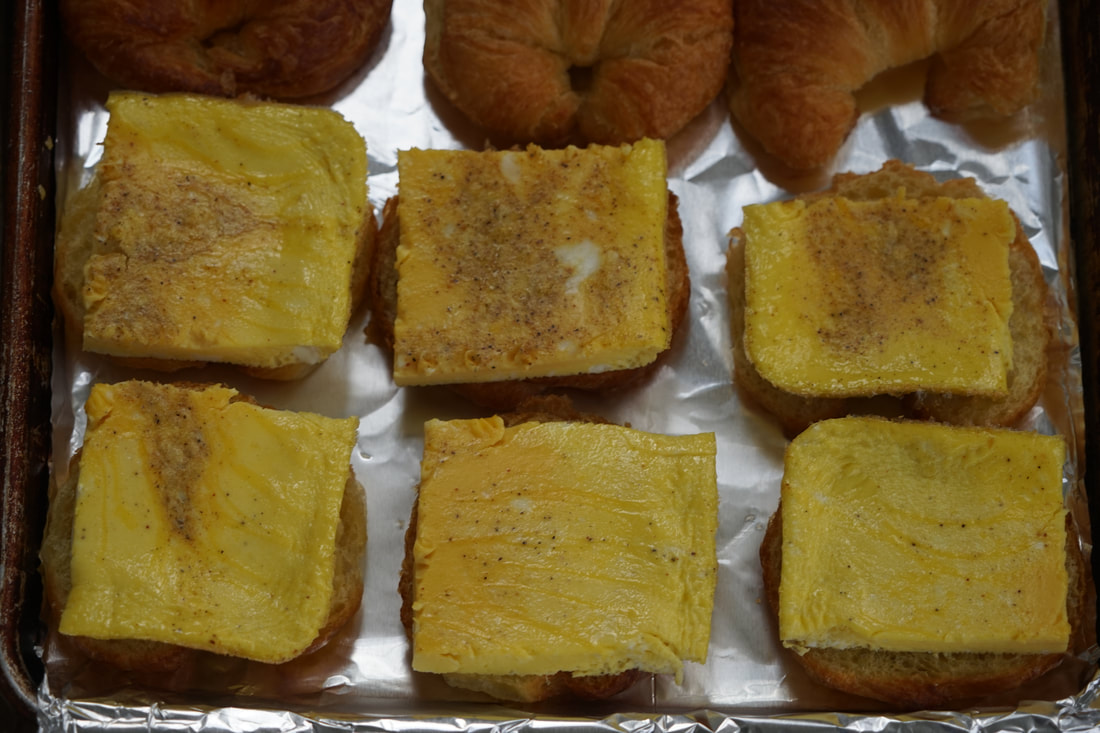
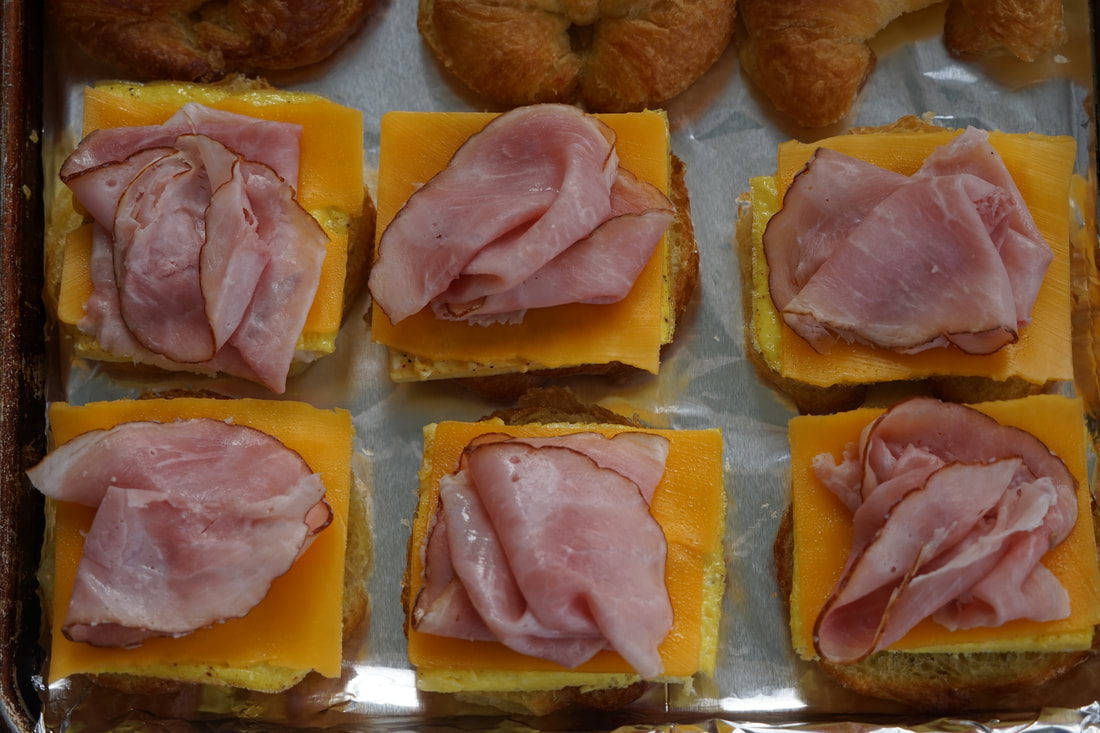
Ciao! 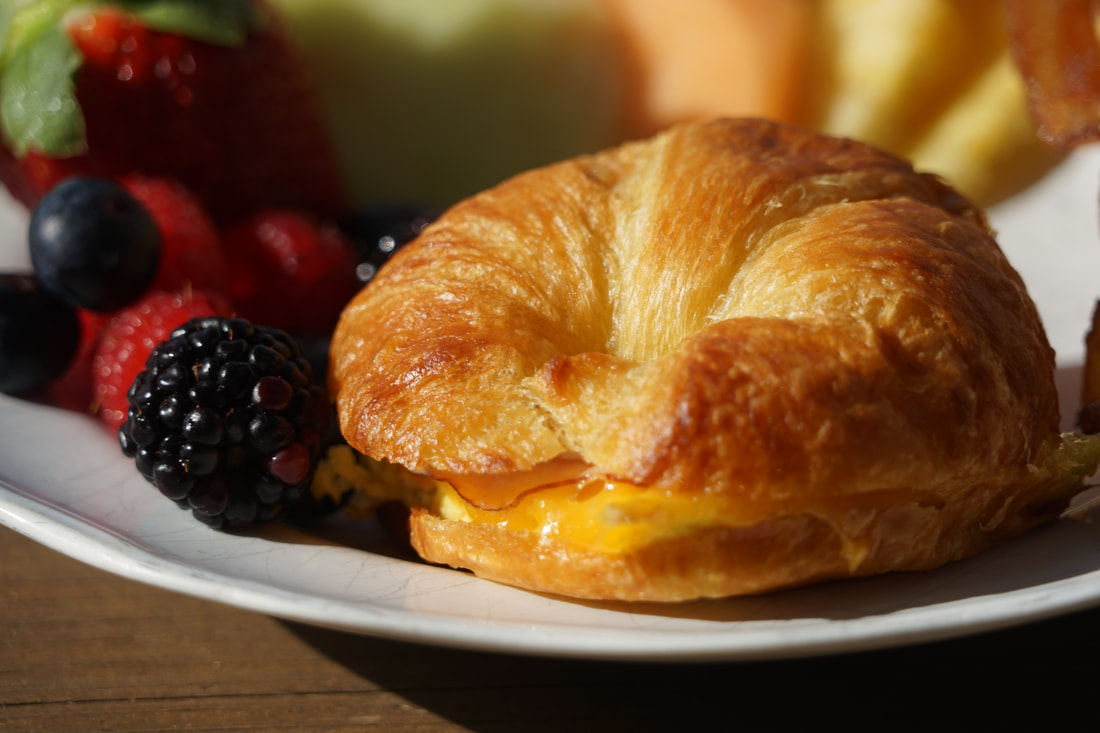 Ben and I finally got our act together last month and made our way to this super trendy little breakfast spot in Athens that we'd been talking about for months. By the time we finally dragged ourselves out of bed and made the 40 minute drive to this popular restaurant, it was approaching 10:00 and to say that I was hungry, would be an understatement. When we walked through the door, an absurdly polite host greeted us with an infectious smile and informed us that there was a 45 minute wait for a table for 2! Did I mention yet, how hungry I was? I have to admit that in a moment of weakness, our hunger took over and we considered ditching the whole idea of a swanky breakfast and fleeing to the nearest Waffle House and stuffing our bellies full of mediocre waffles. I couldn't help but wonder how much better these eggs must be if all these people were willing to wait for nearly an hour for their breakfast though. In the end - our curiosity got the best of us and we decided to join the hungry masses and wait it out to see just how great this restaurant really was. 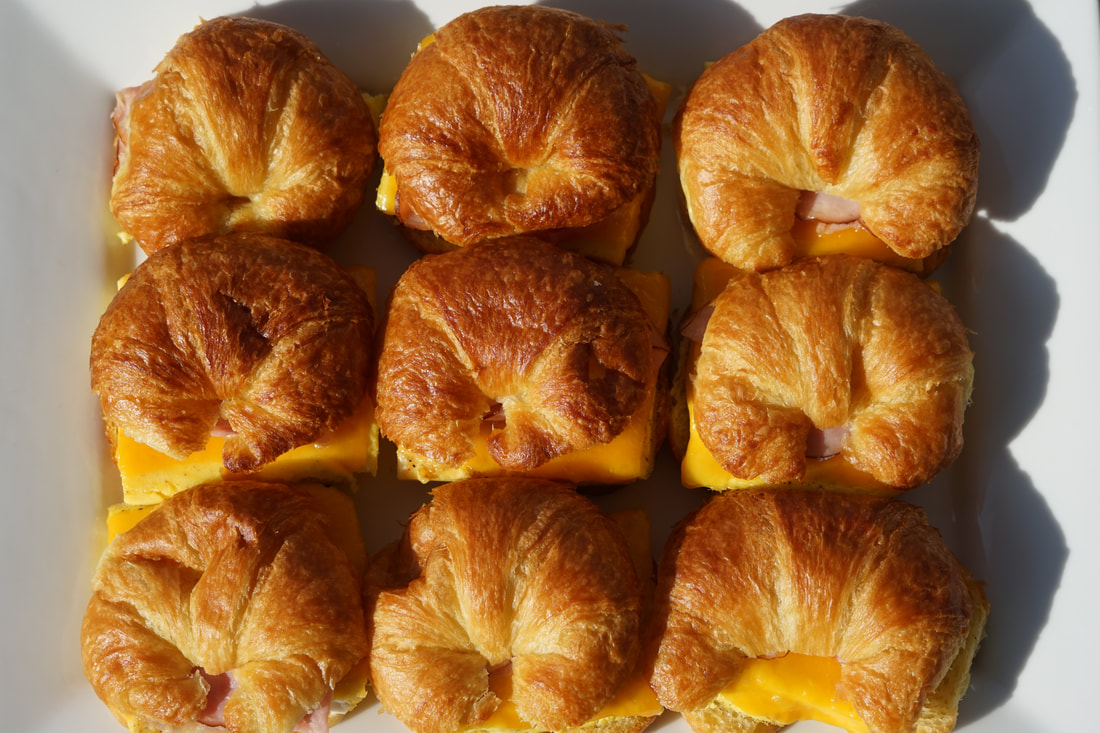 I know you're dying to know what we thought of our long awaited breakfast so without further ado - here goes. Without going into details - we thought it was a good breakfast but ... probably not worth the 45 minute wait. Admittedly, the assessment of my breakfast was probably skewed by the fact that I was completely hangry by the time I was finally eating my food. It was a descent breakfast but probably similar to what I would have made for myself at home. Despite the fact that I was uninspired by my long awaited breakfast, I would still probably go back and give this little restaurant another try. (Next time, I'll bring snacks.) 🤪 What about you? Would you wait 45 minutes for a table at a restaurant to eat breakfast? I'm always up for trying new restaurants - even breakfast spots - but 45 minutes seems a little excessive even for the fluffiest of pancakes. As for now, we're back to making breakfast at home on Saturday morning. These Croissant Breakfast Sandwiches are really good and certainly worthy of staying in bed for an extra 45 minutes. I can get up and make these tasty little breakfast sandwiches in the time that it took us to drive to the popular little breakfast joint. Delicious croissant breakfast sandwiches + more sleep = happy Amy.  Croissant Breakfast Sandwiches 14 eggs 2 Tablespoons milk 1/2 teaspoon seasoned salt salt and pepper 12 small croissant rolls 1 (6 ounce) package sharp cheddar cheese slices 1 (9 ounce) package deli ham
Place sandwiches in a greased 9x13" pan. Cover with foil. Bake 15 minutes. 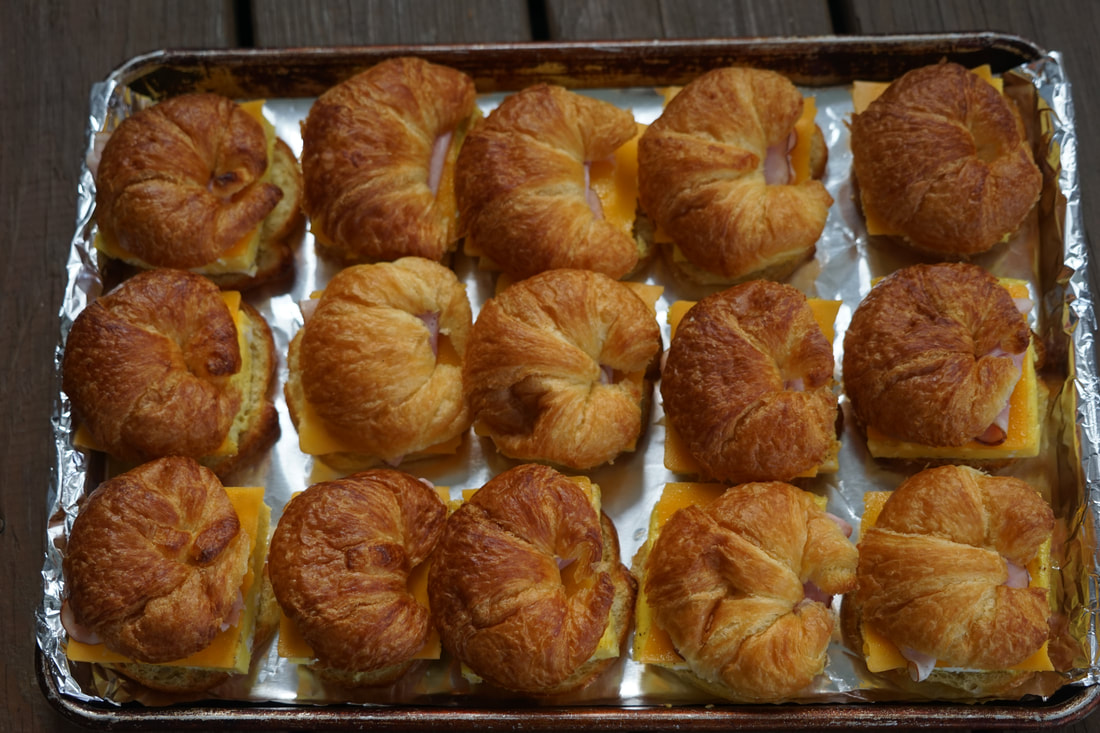 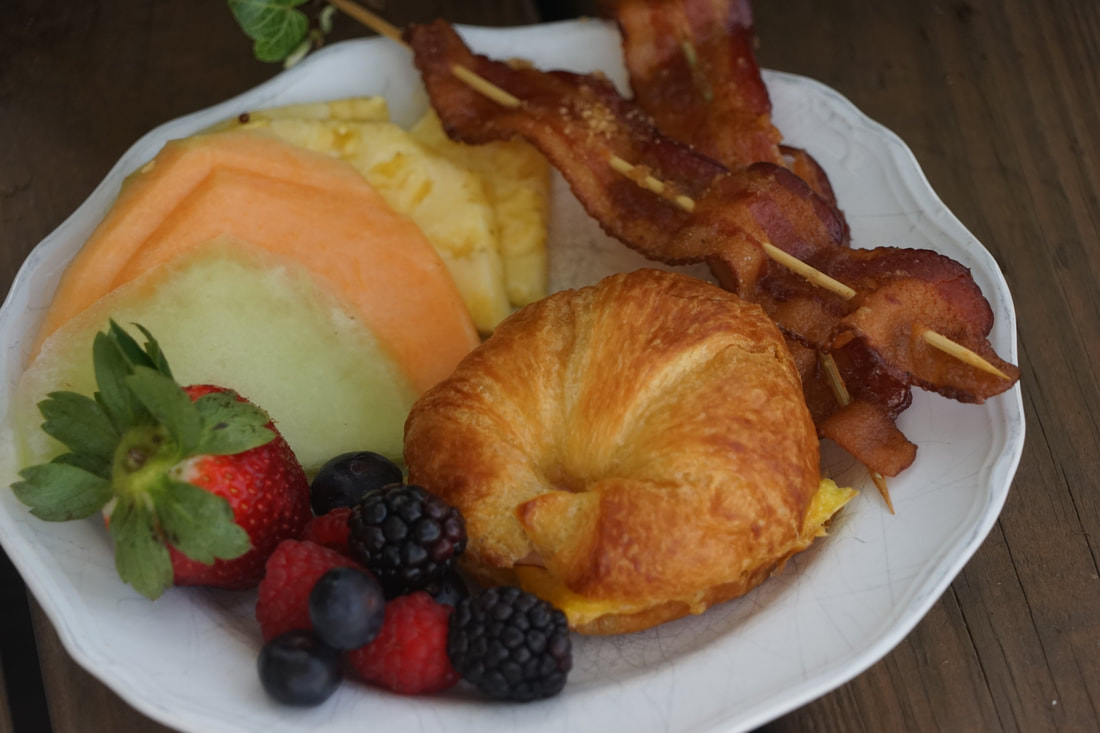 So the funniest part of the whole weekend breakfast ordeal was the fact that after we waiting the full 45 minutes to be seated at our table and another 5 minutes for a server to approach our table, my patient husband still hadn't decided what he wanted to eat. He literally sent the server away for another 10 minutes while he looked over the menu. 😂 45 minutes of standing in the waiting area of the restaurant and he never even thought about glancing at the menu to decide what he might want to order when we finally got a table. Clearly - he wasn't as hungry as I was. 🤣
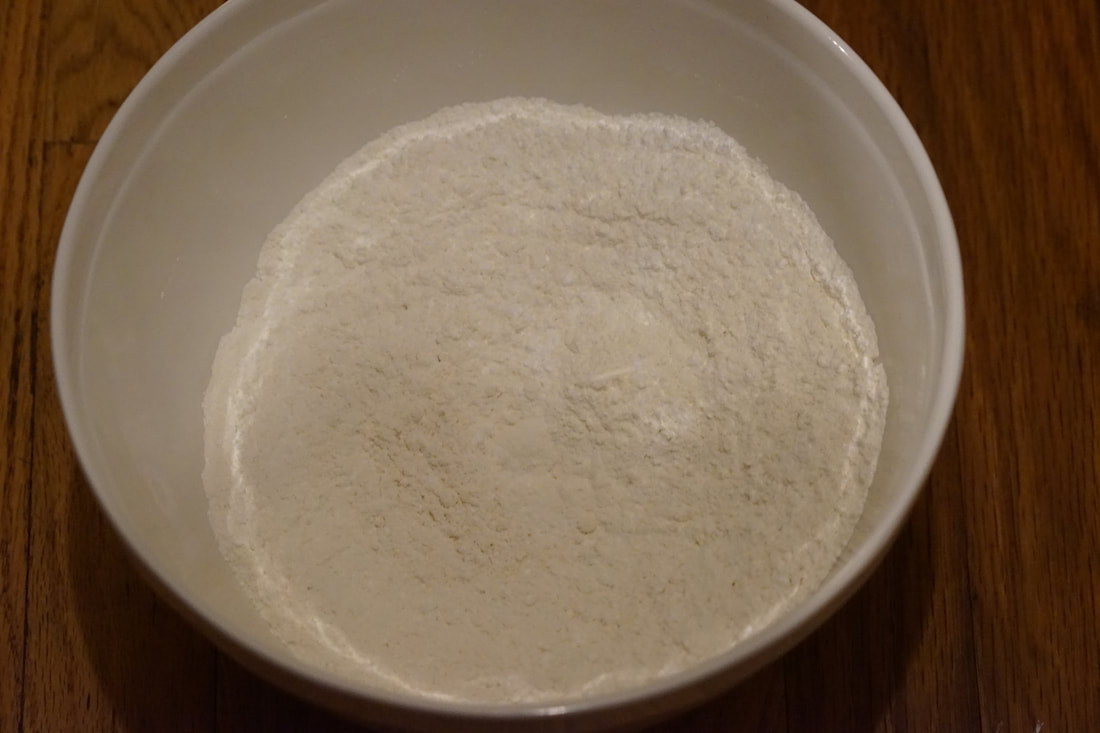
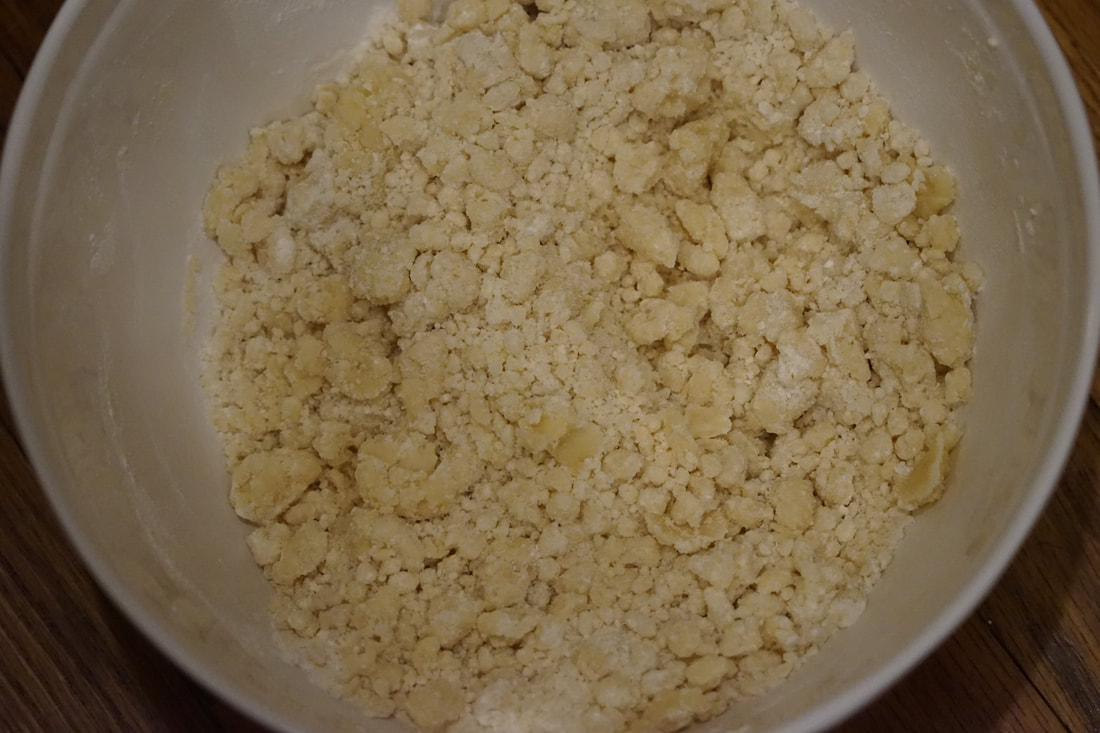
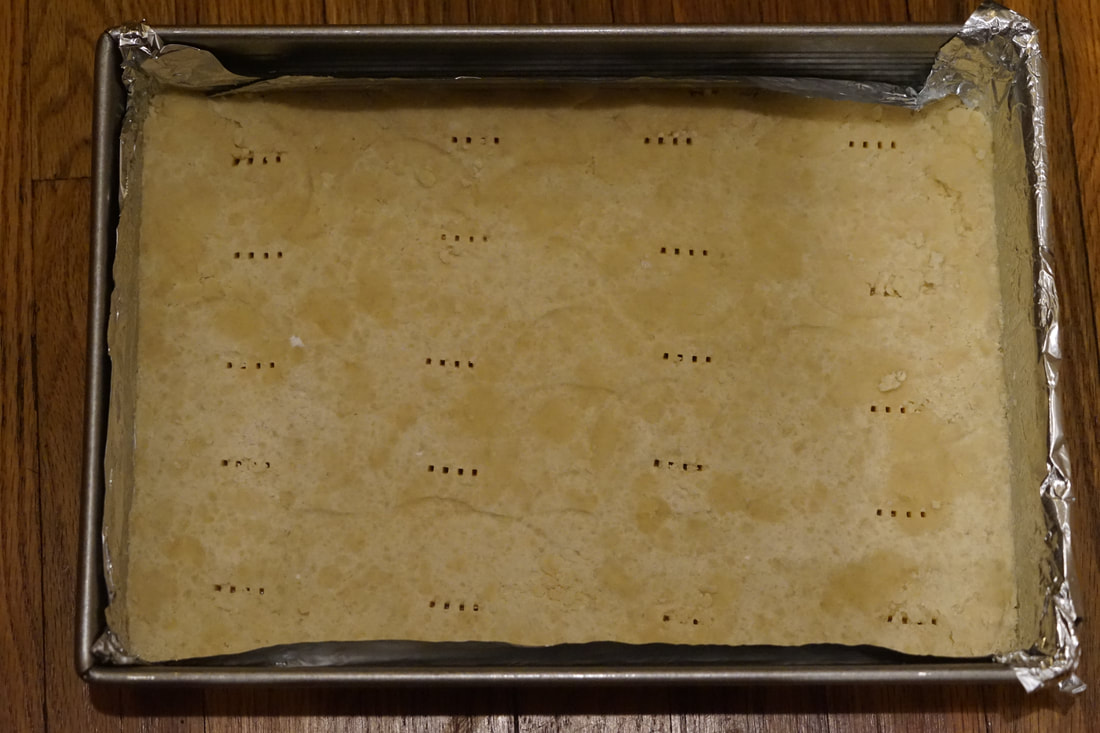
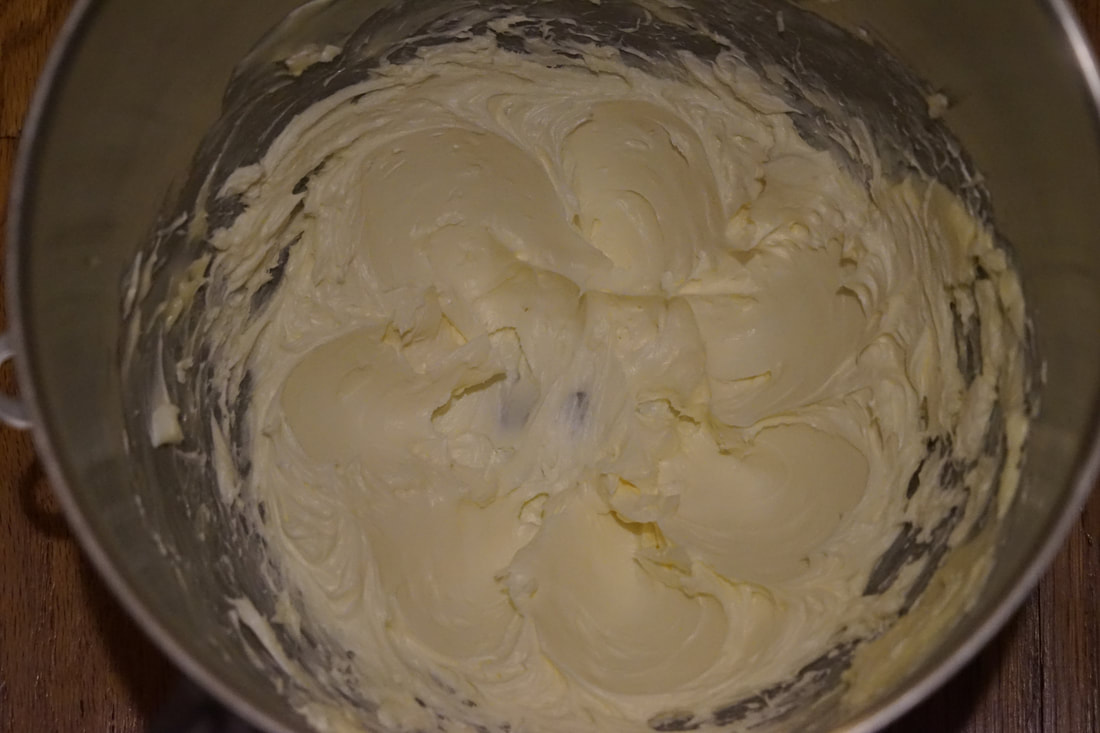
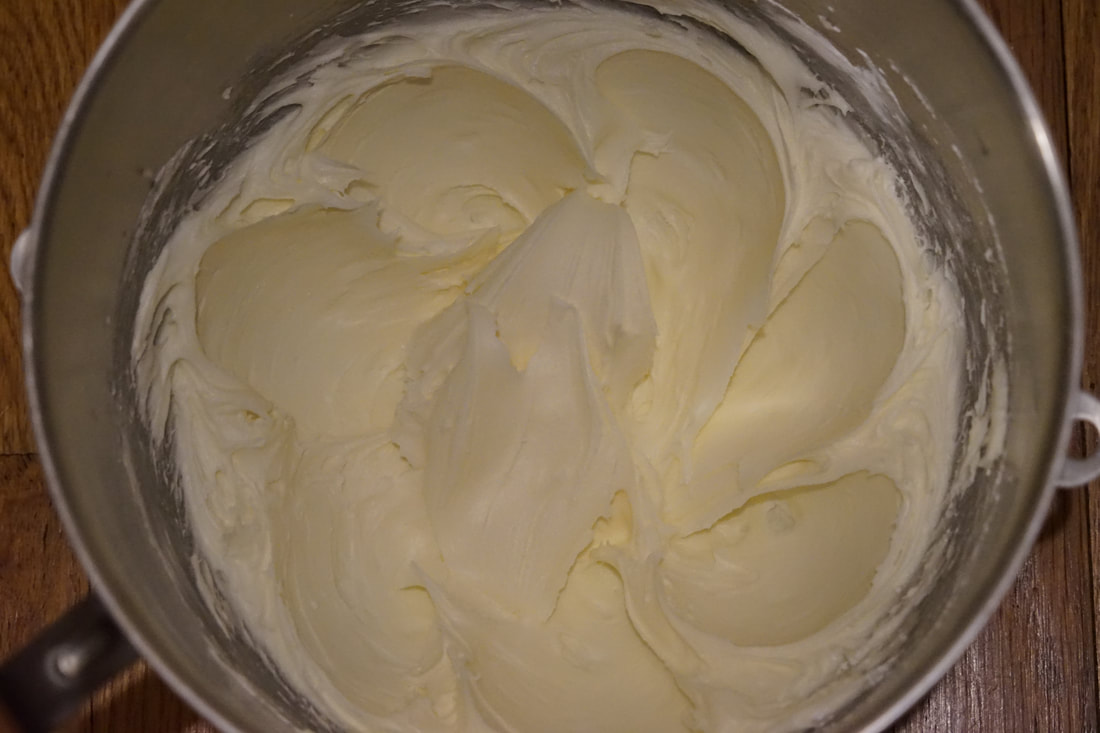
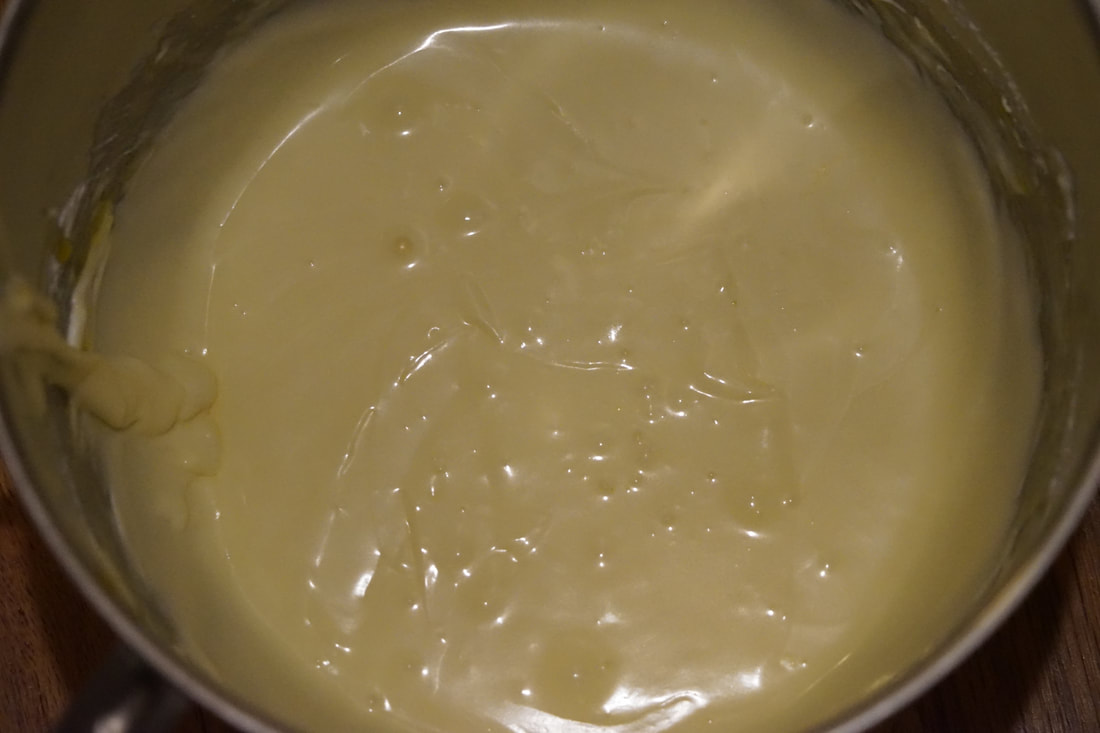
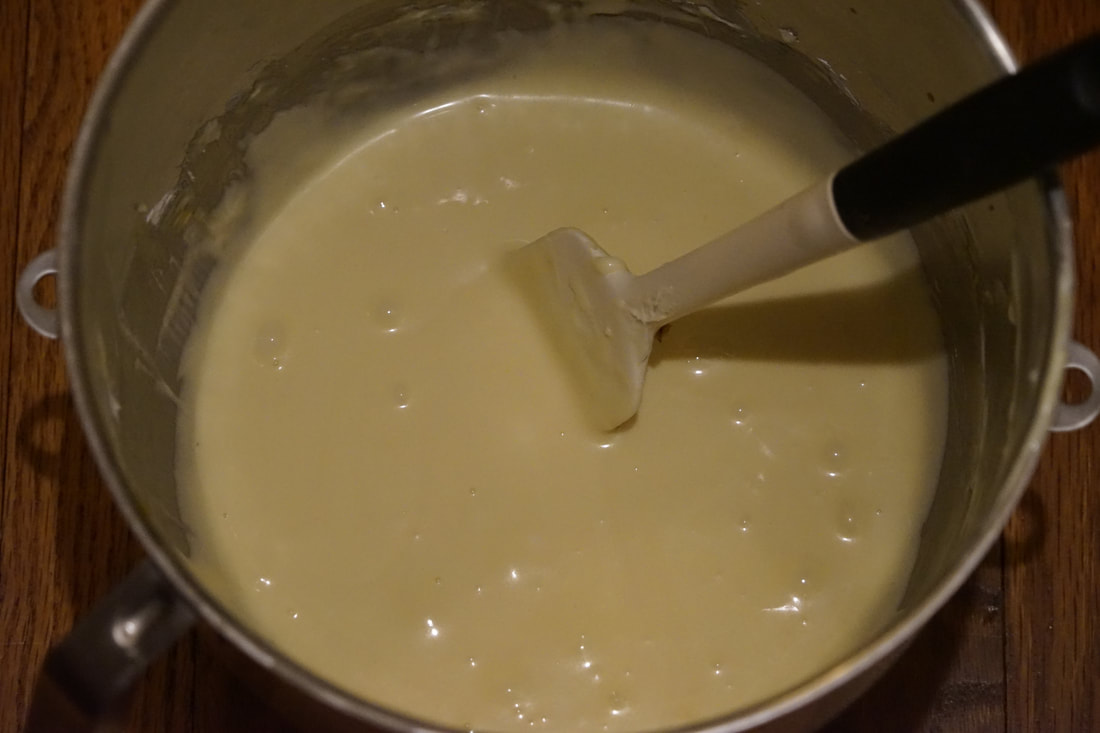
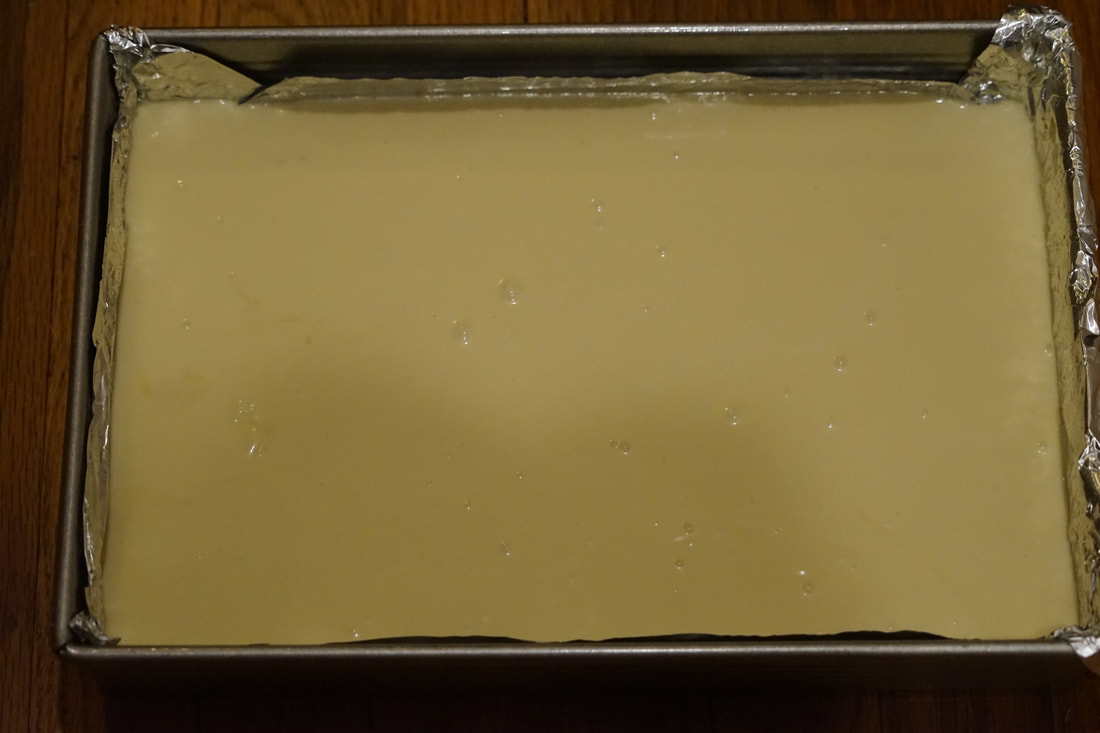
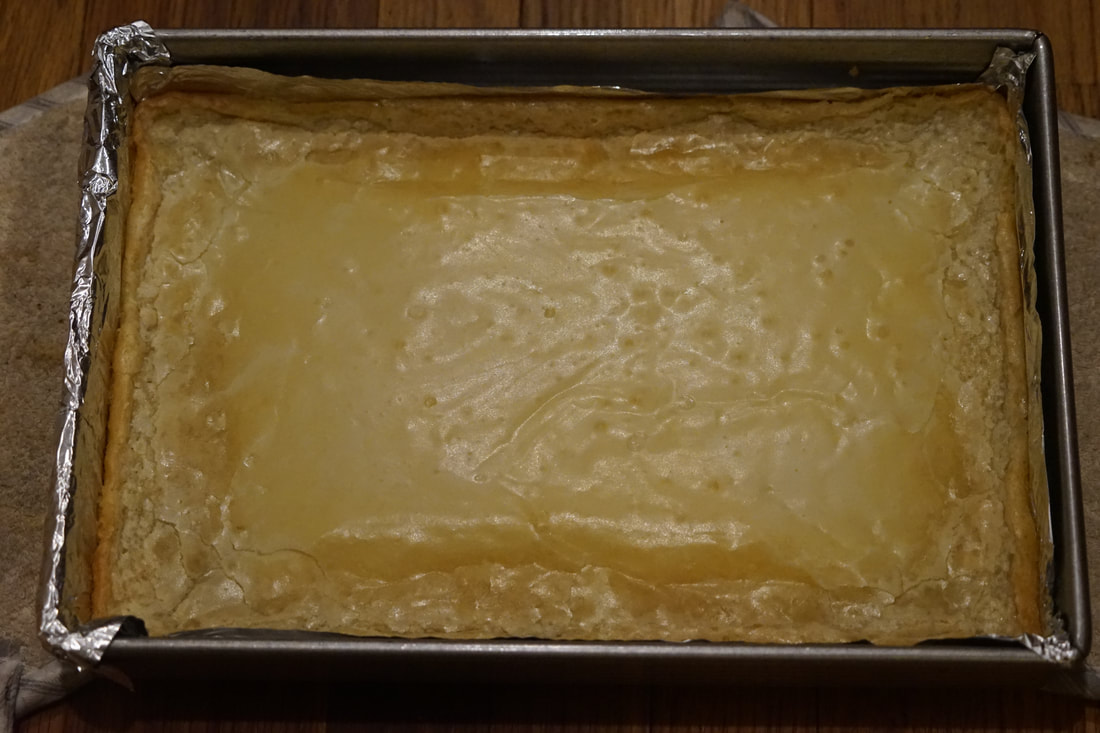
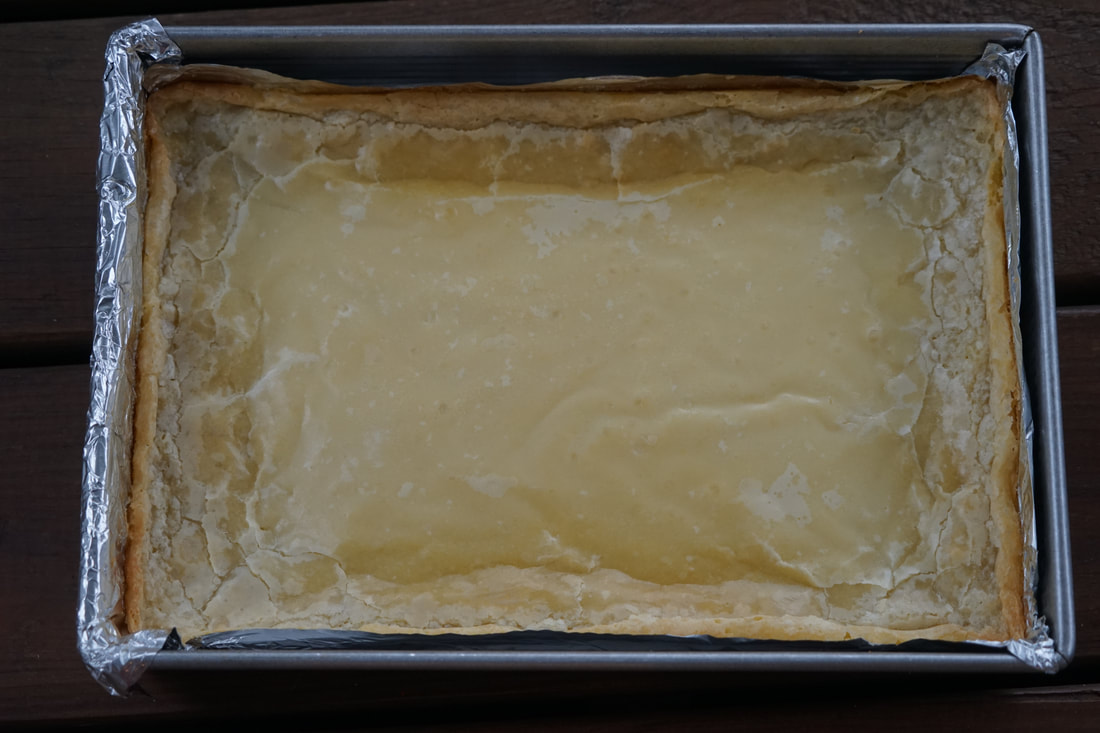
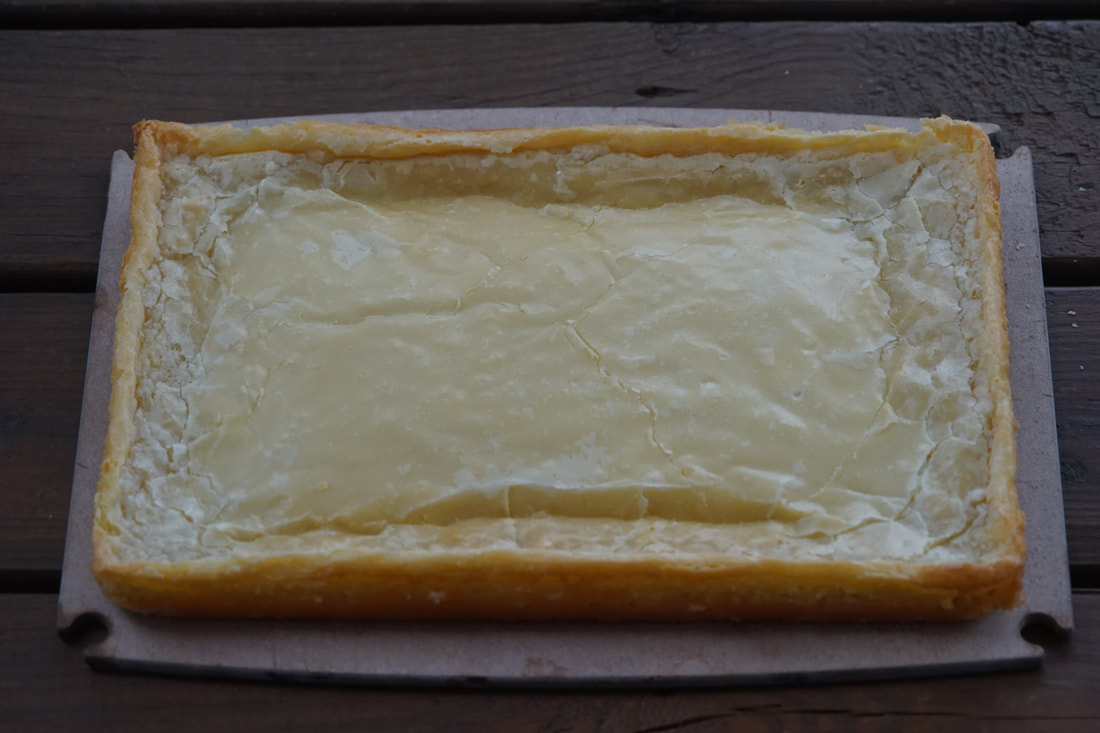
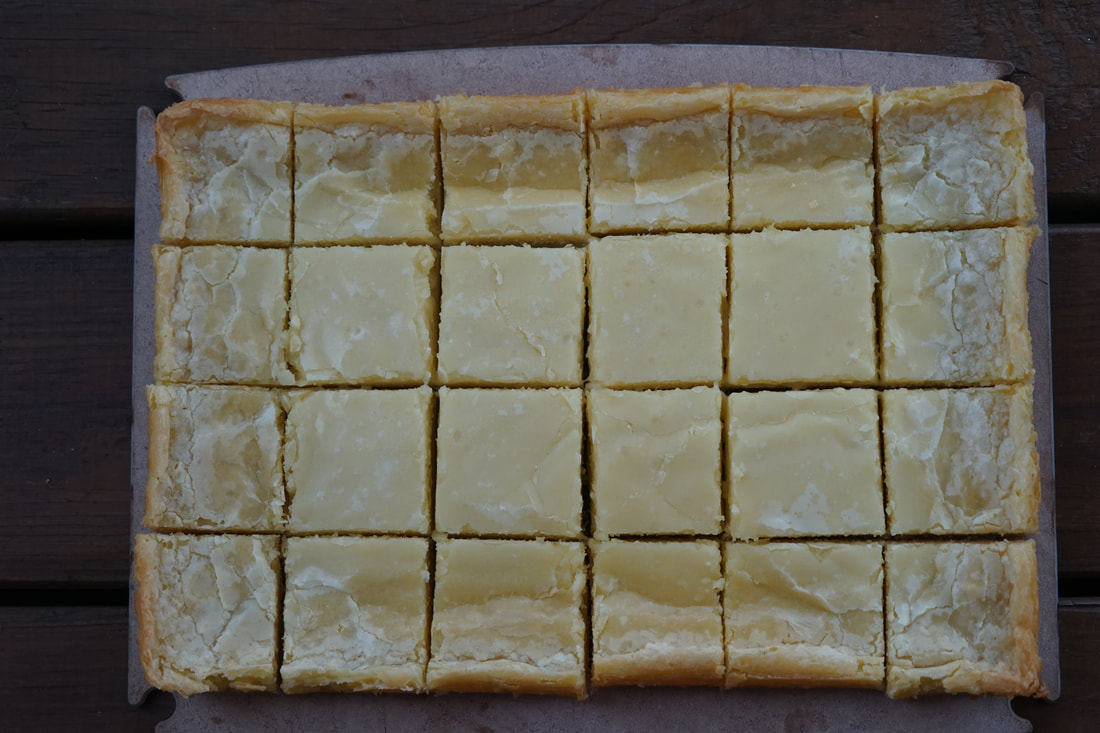
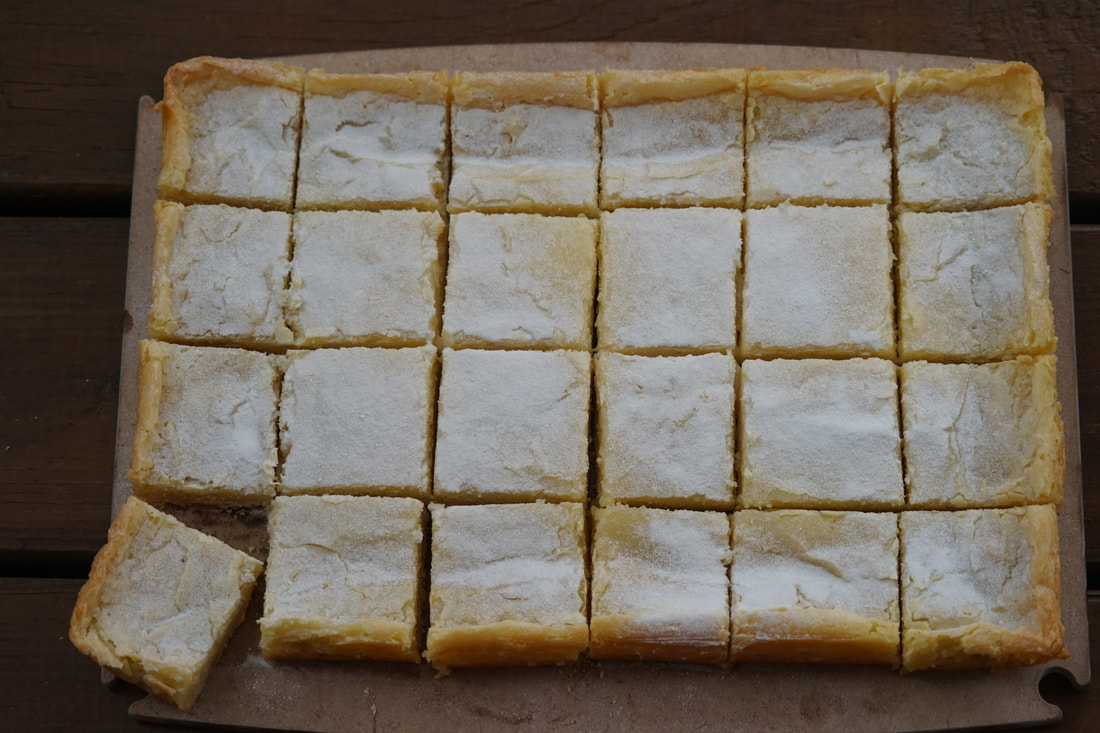
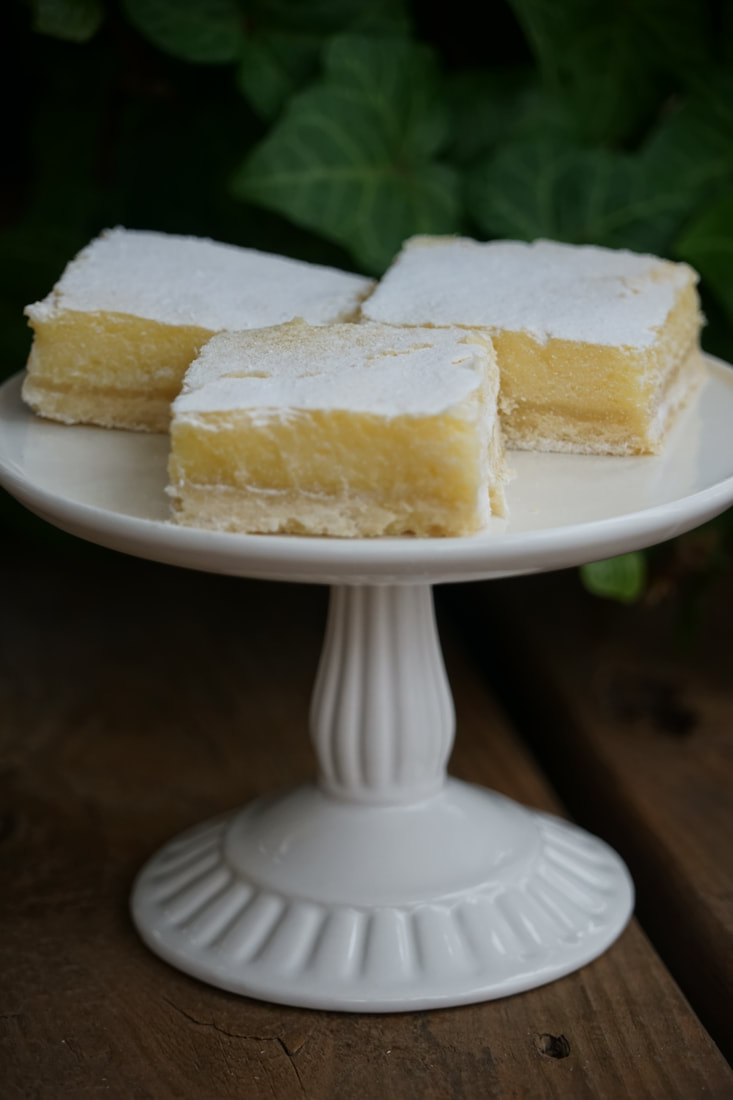
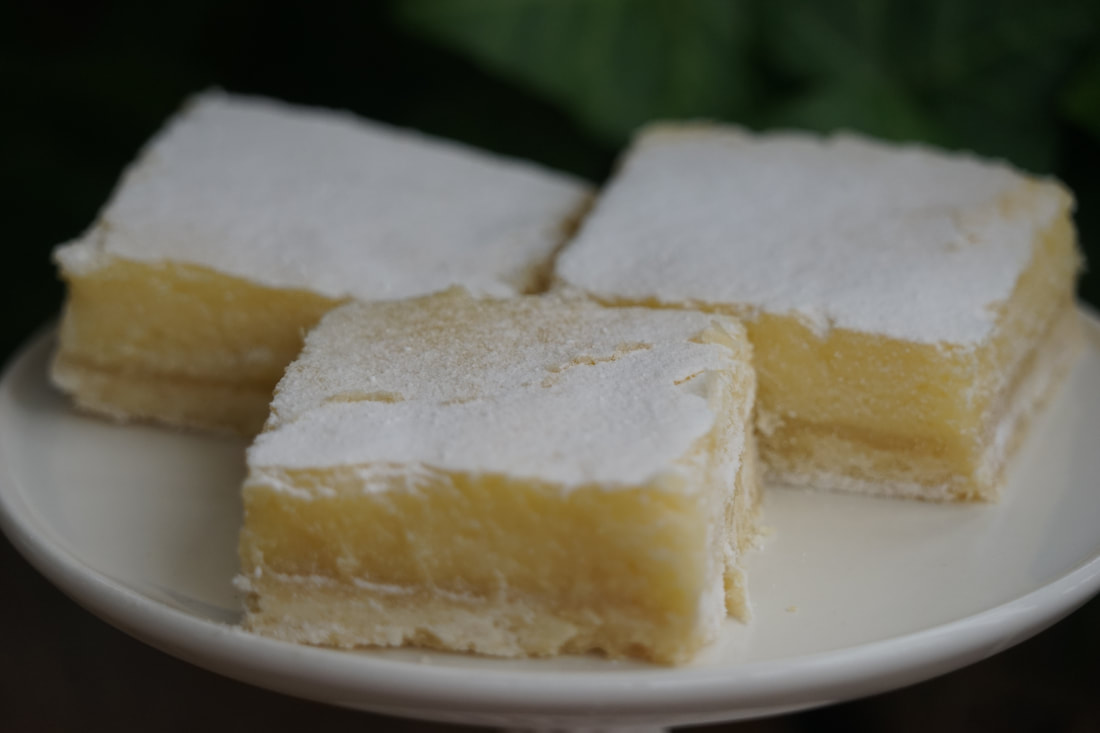
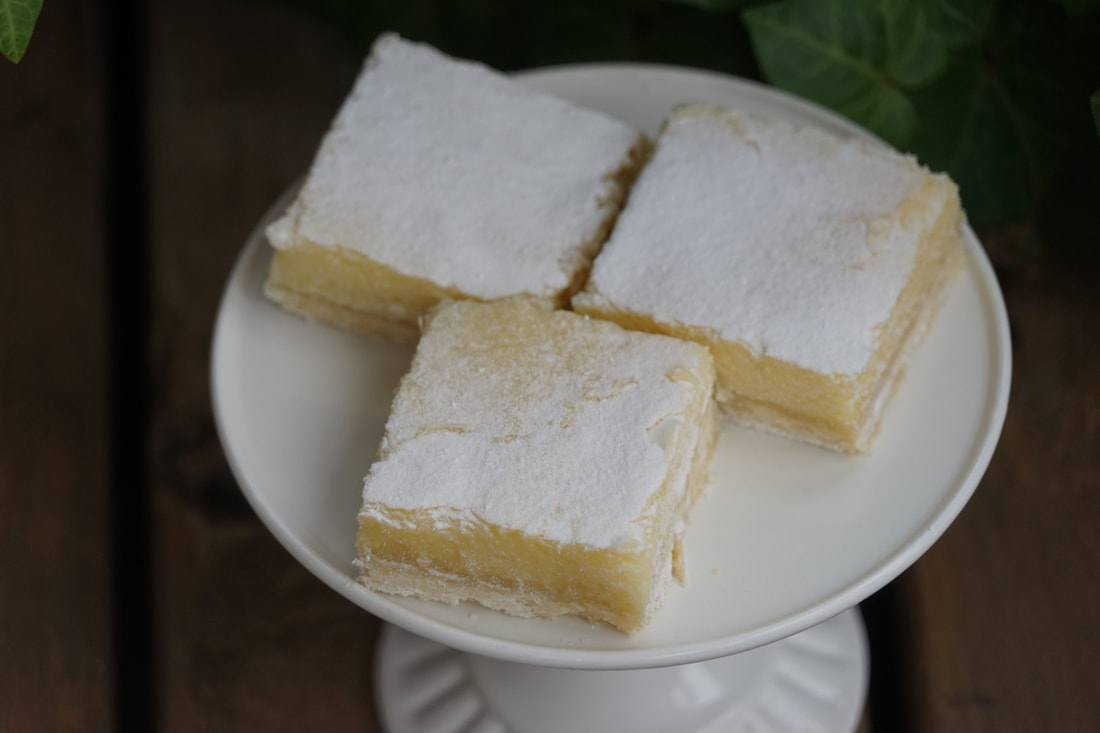
Ciao! 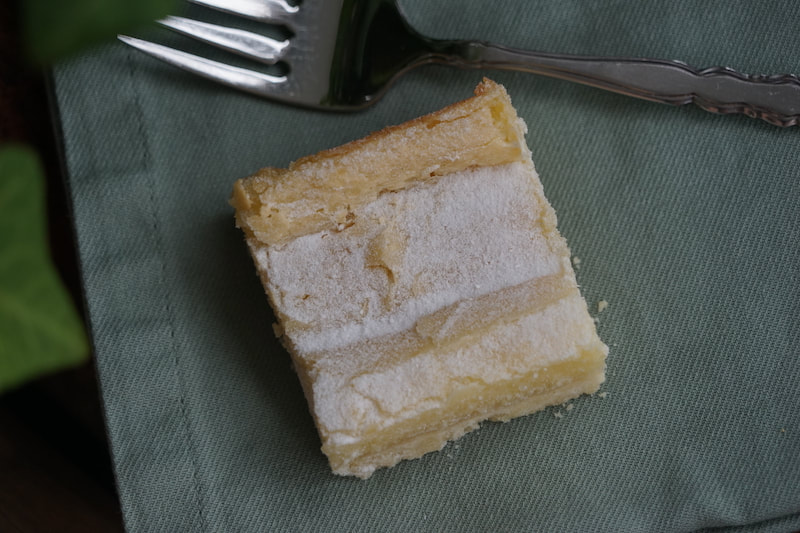 Butter Bars are notoriously simple to make. A boxed cake mix, a couple of eggs, a stick of butter and a block of cream cheese and 10 minutes of free time is all it takes to whip up a batch of these rich and decadent dessert bars. What could be easier? I know what you're thinking - "Why in the world would I take such a simple recipe and make it more complicated?" The answer is simple - I'm a total cake snob and I don't like to bake with boxed cake mixes. I'm just not a fan of the chemical taste. Maybe I'm uber sensitive to the artificial taste in boxed cake mix because I make so many cakes from scratch but I really do prefer the taste of homemade cake to boxed mix cakes. Like I said - I'm a cake snob. I know it.  The fact is that just like cakes made from scratch, the homemade butter bars aren't really all that much more difficult to make than the boxed mix versions. It does require a few extra minutes to put together but honestly, it's totally worth the extra effort. If you don't believe me, make a batch of my Butter Bars and a batch of the boxed mix butter bars and let your family decide which is better. 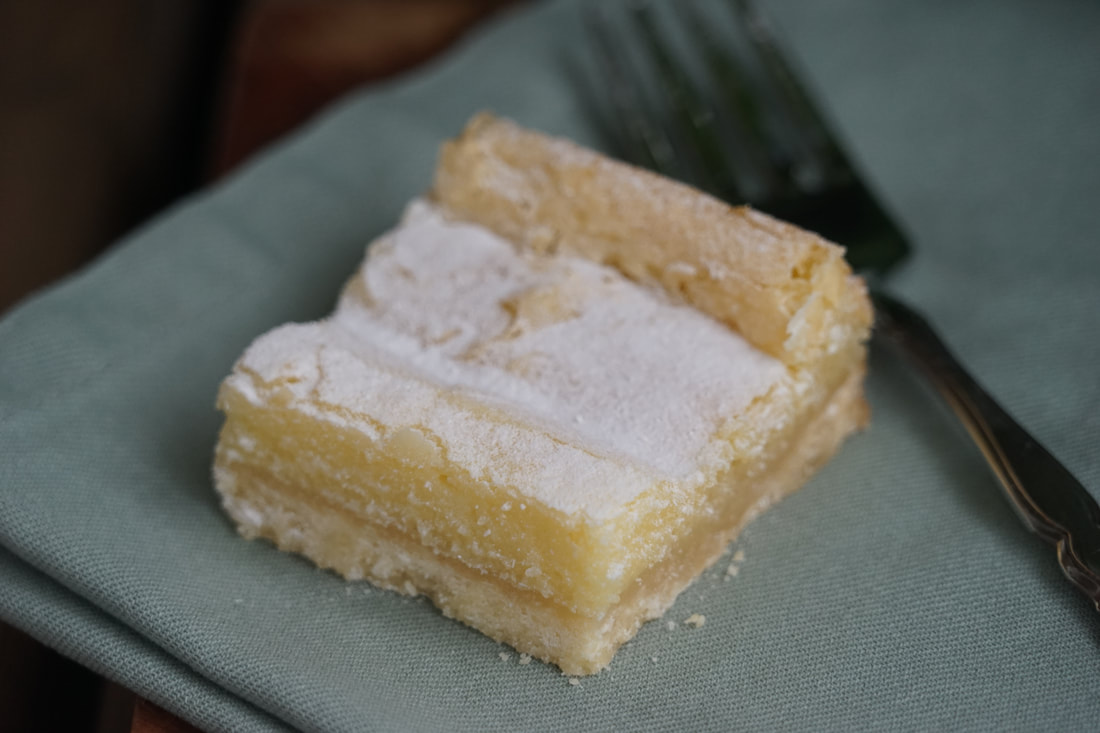 Butter Bars Crust 2 1/2 cups flour 3/4 cup powdered sugar 3/4 teaspoon salt 12 Tablespoons butter Filling 8 ounces cream cheese 8 Tablespoons butter 4 cups powdered sugar 2 eggs plus 2 egg yolks 2 Tablespoons vanilla 1/4 teaspoon salt
You know you've had a good day when the hardest thing you have to do all day is wait for the butter bars to cool completely before you cut them. 🤪 I love my job and it certainly isn't without it's difficulties and stresses but on days like today when I get to make Gooey Butter Bars - IT'S ALL WORTH IT.
Ciao! |