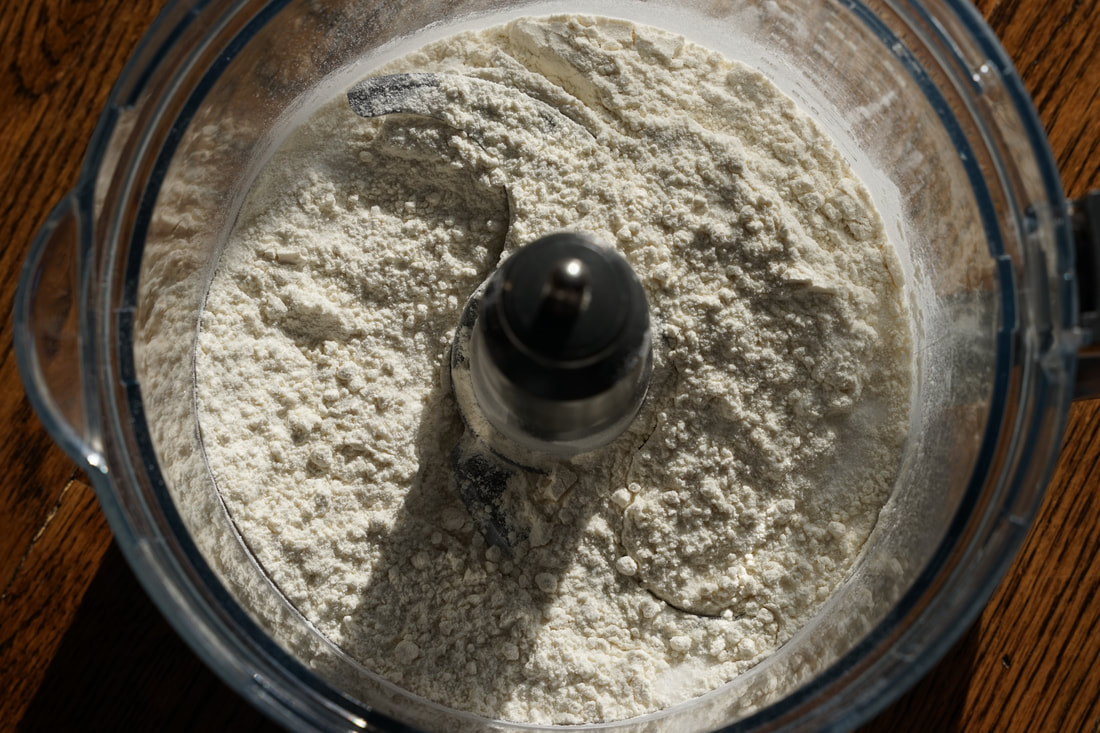
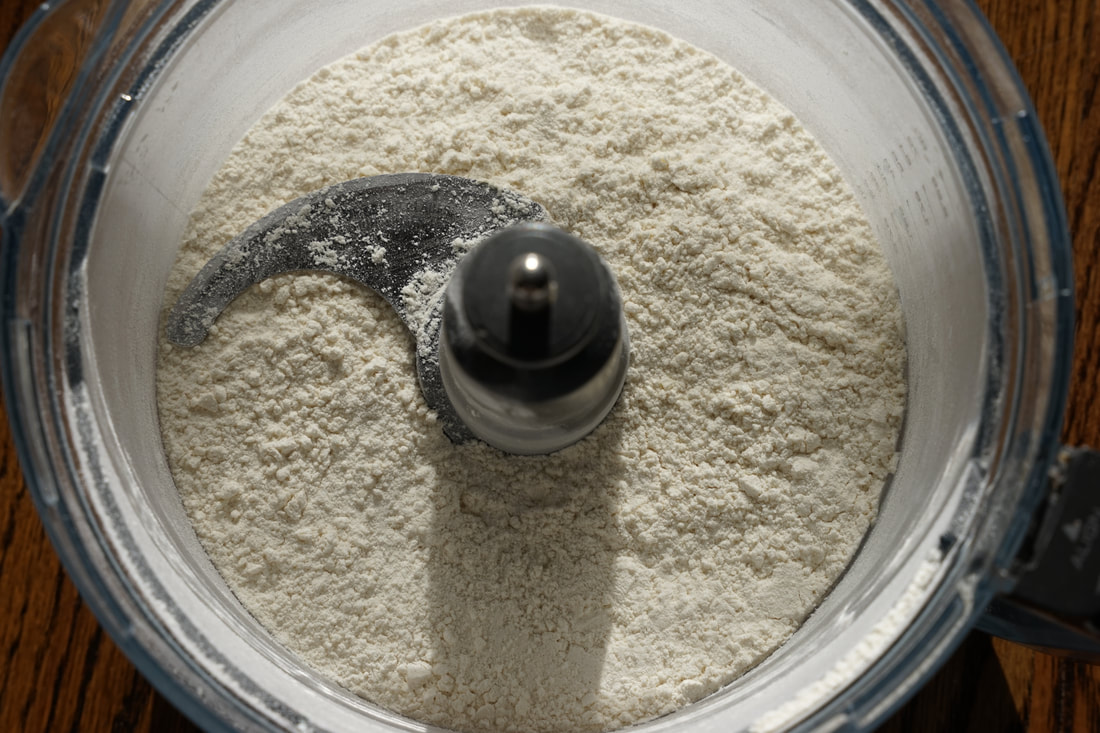
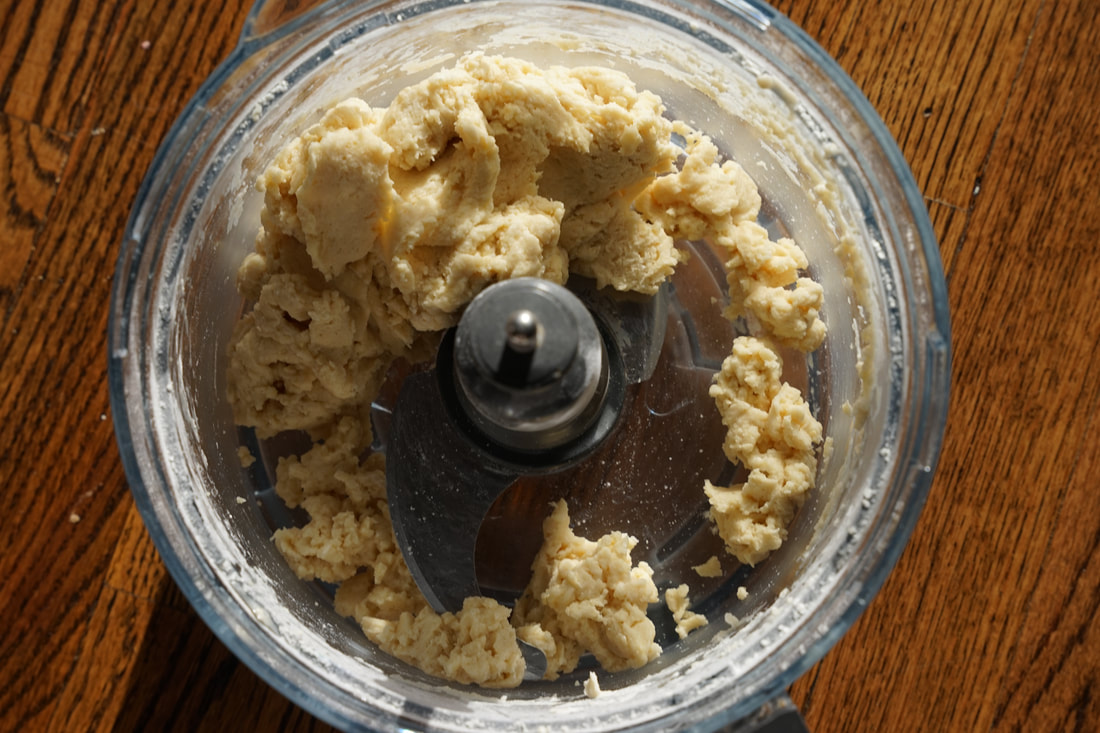
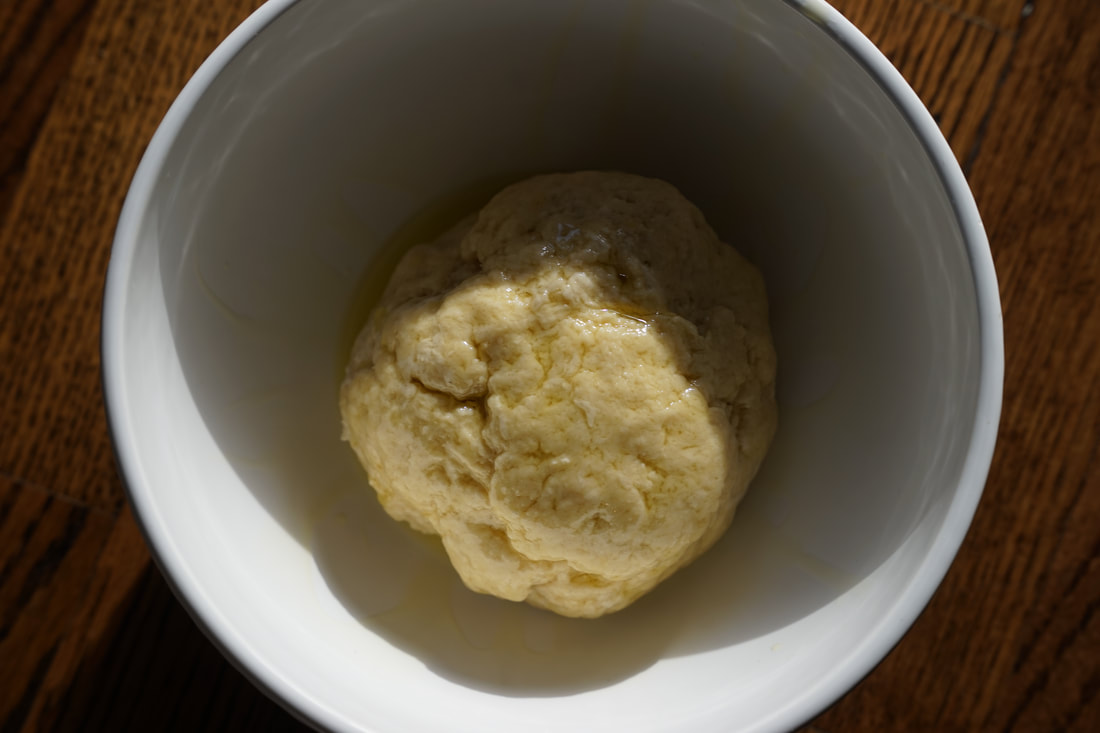
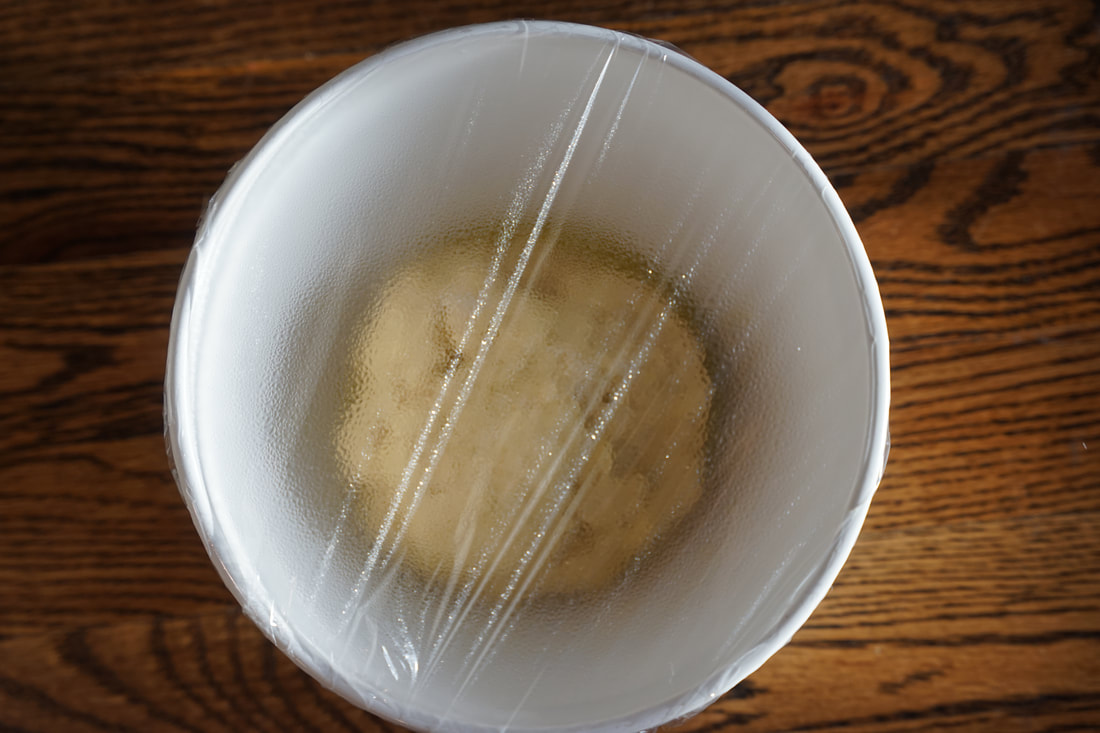
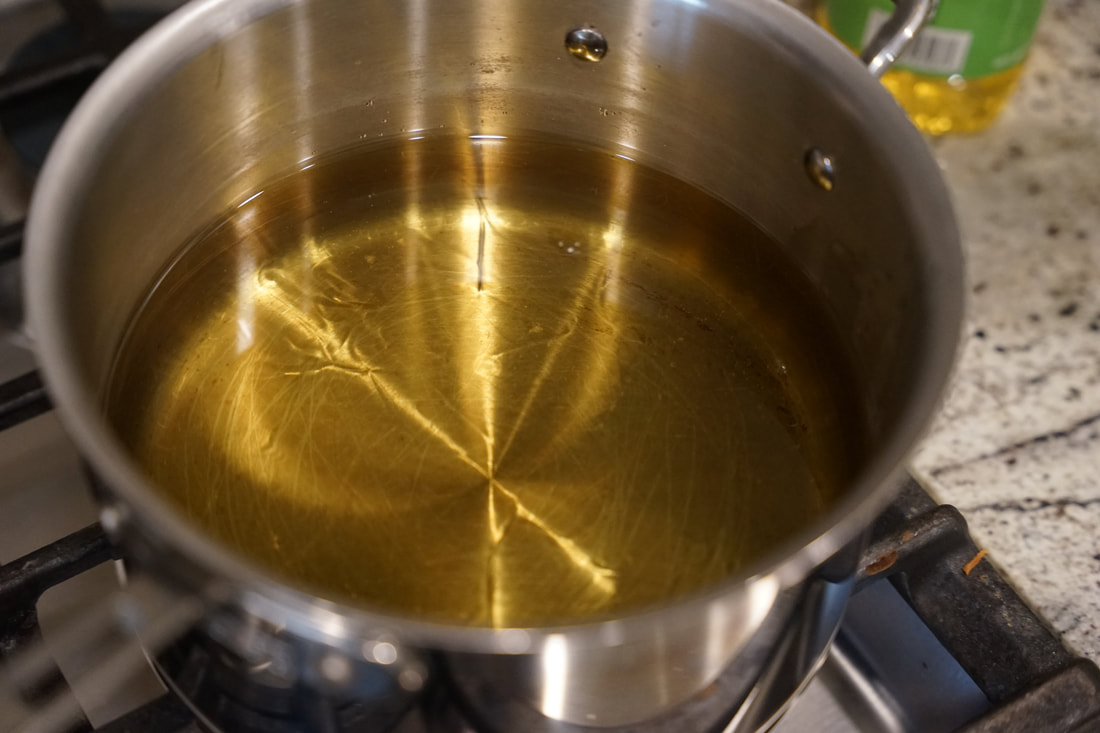
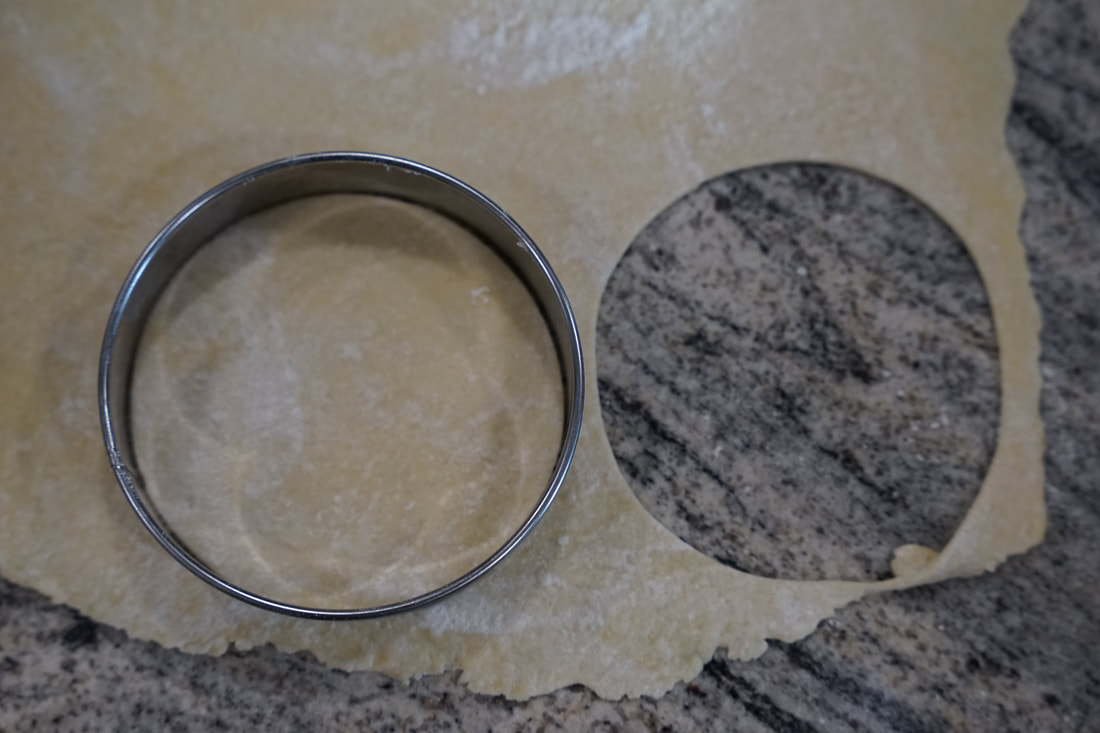
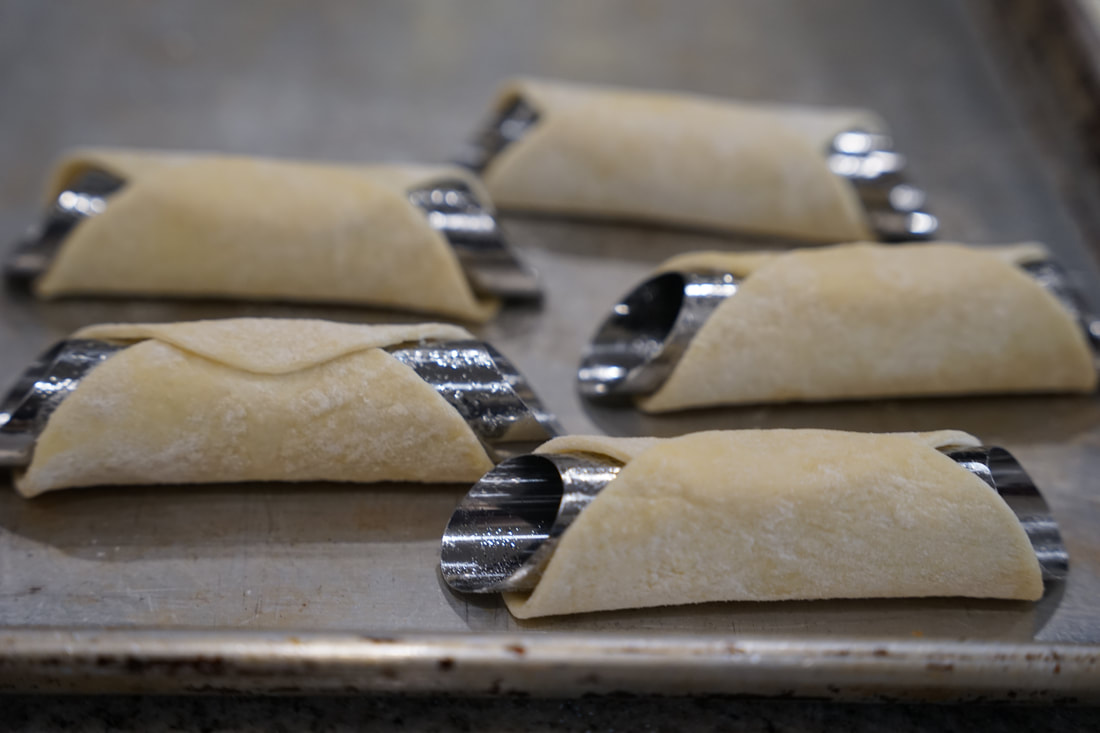
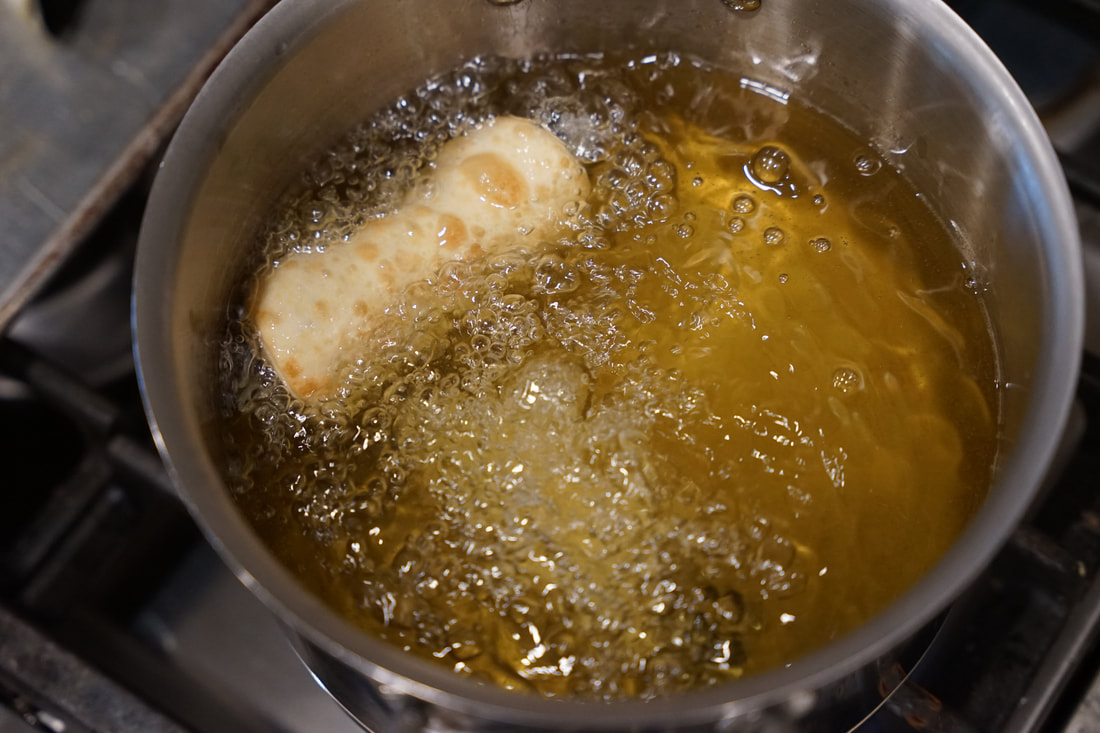
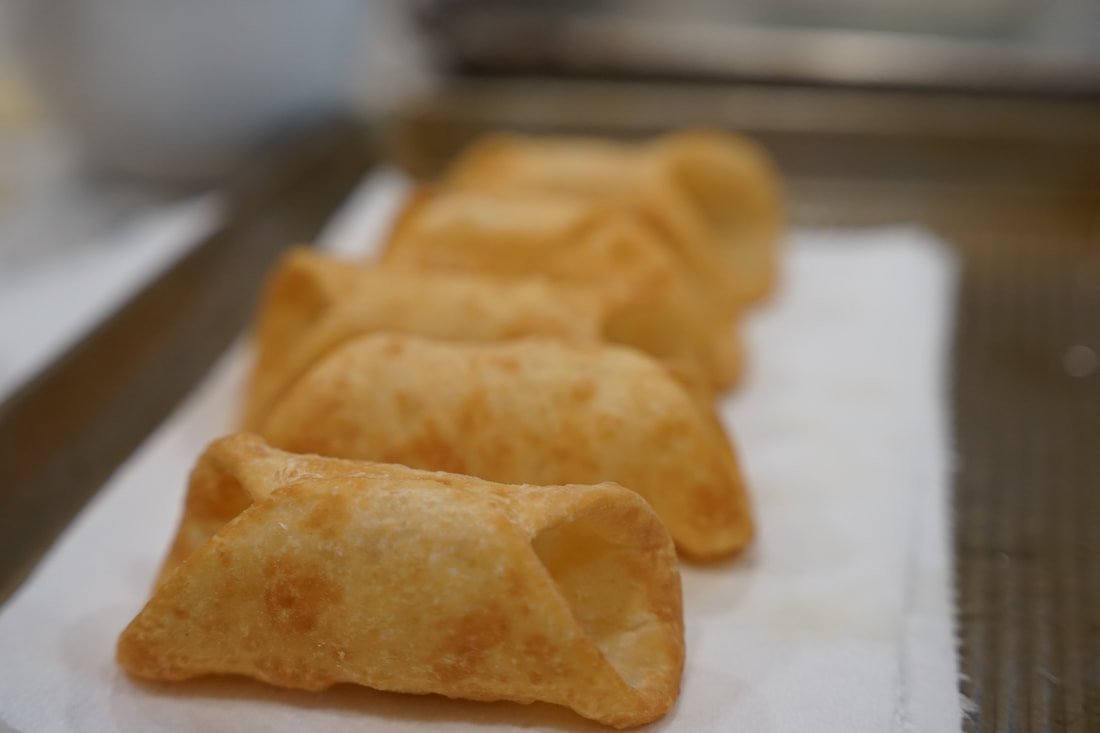
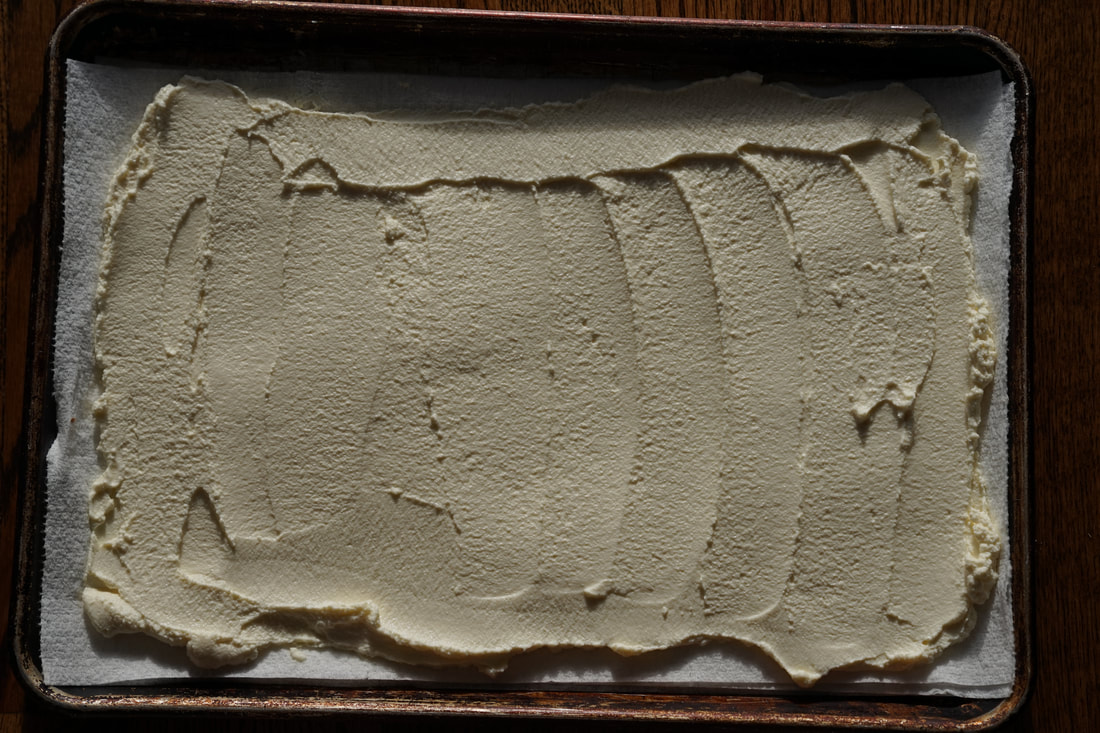
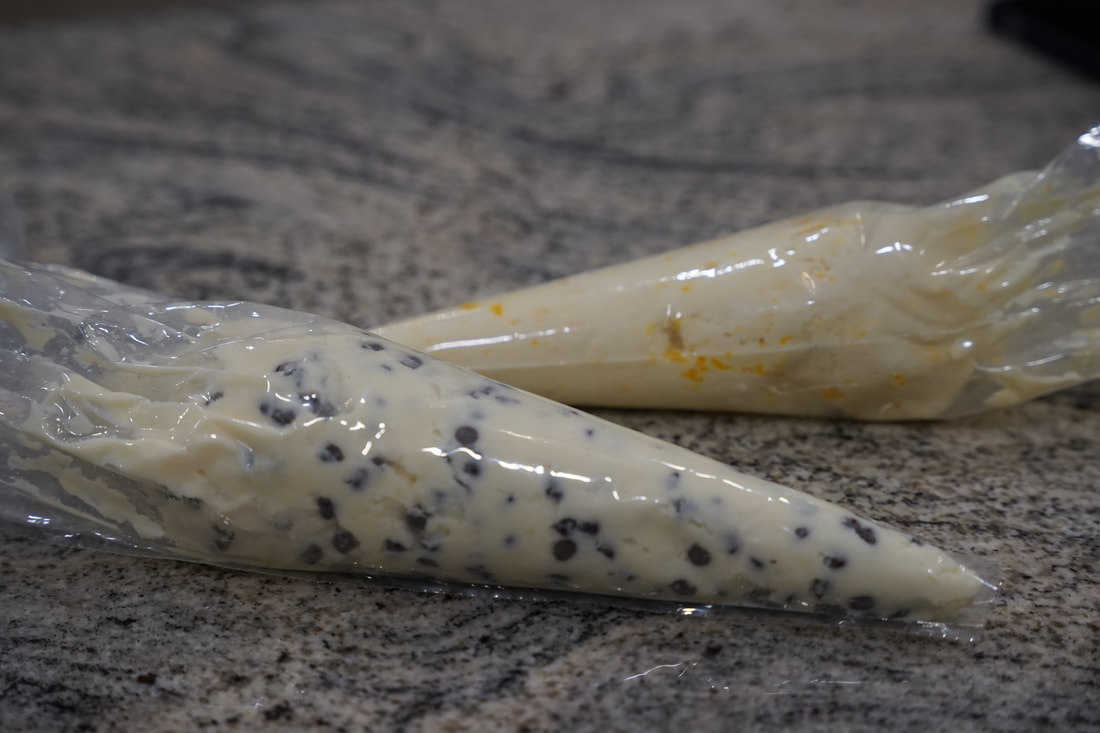
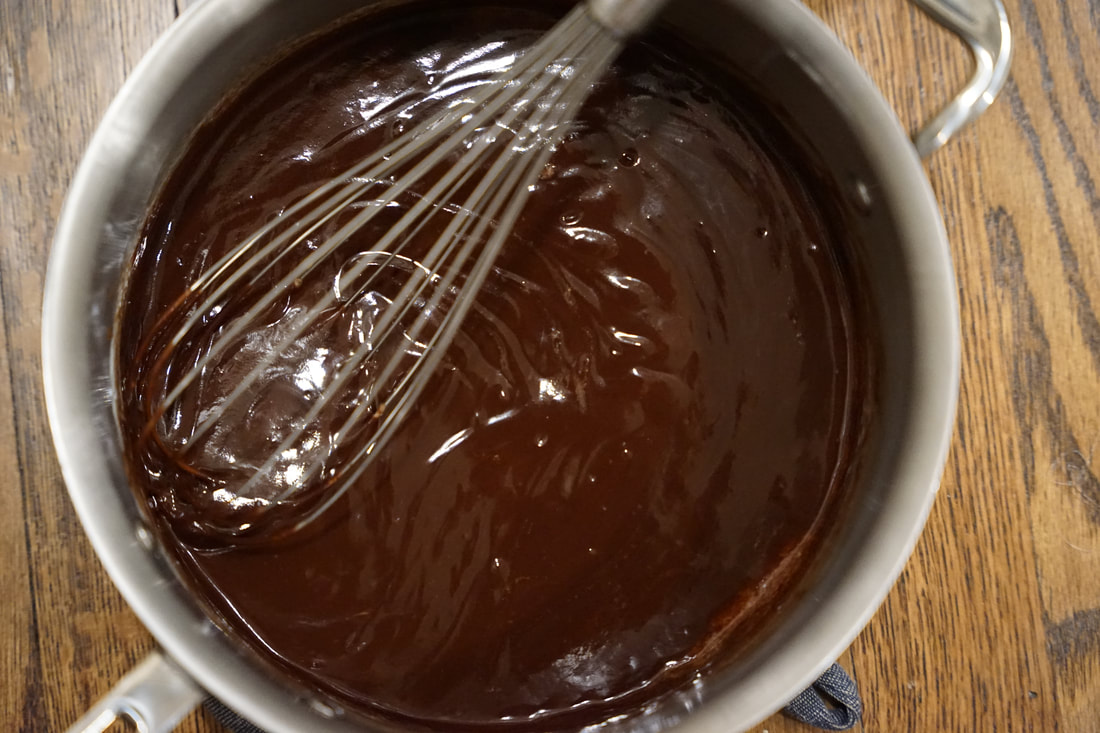
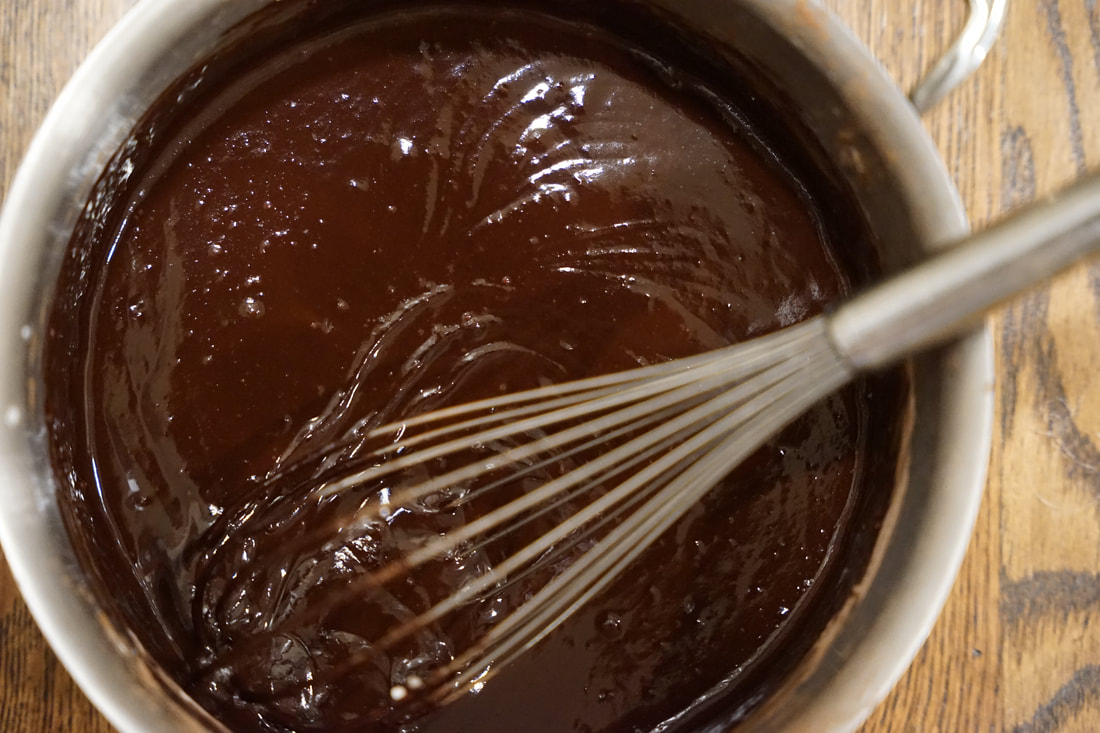
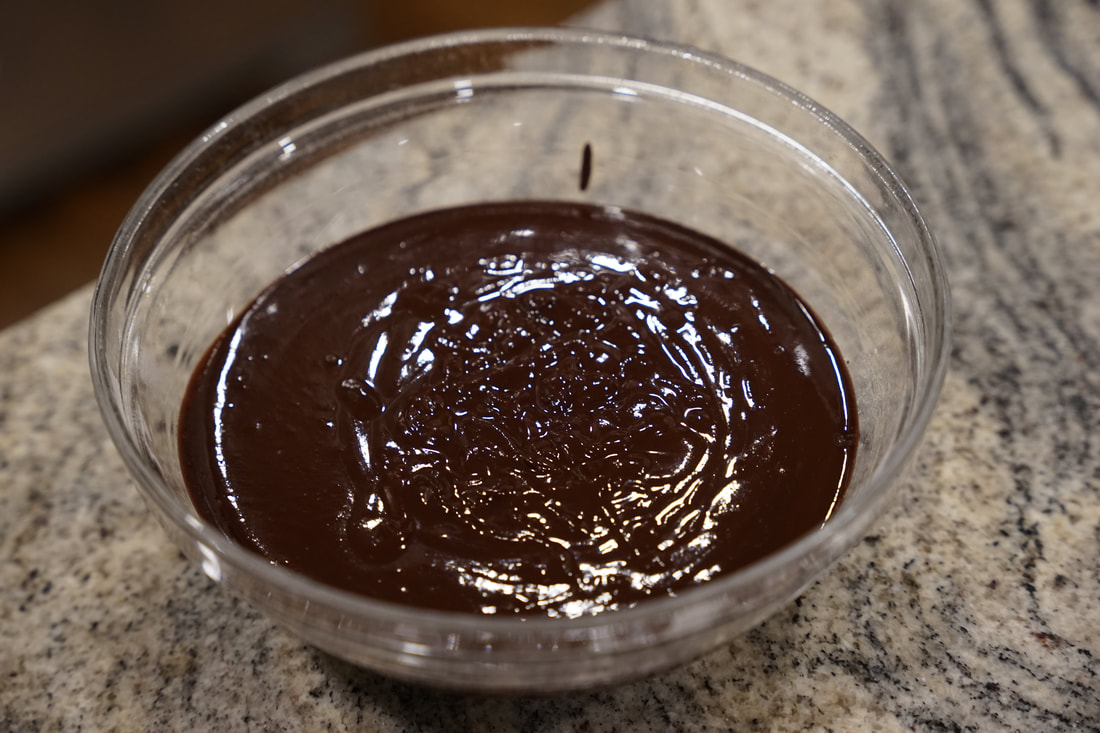
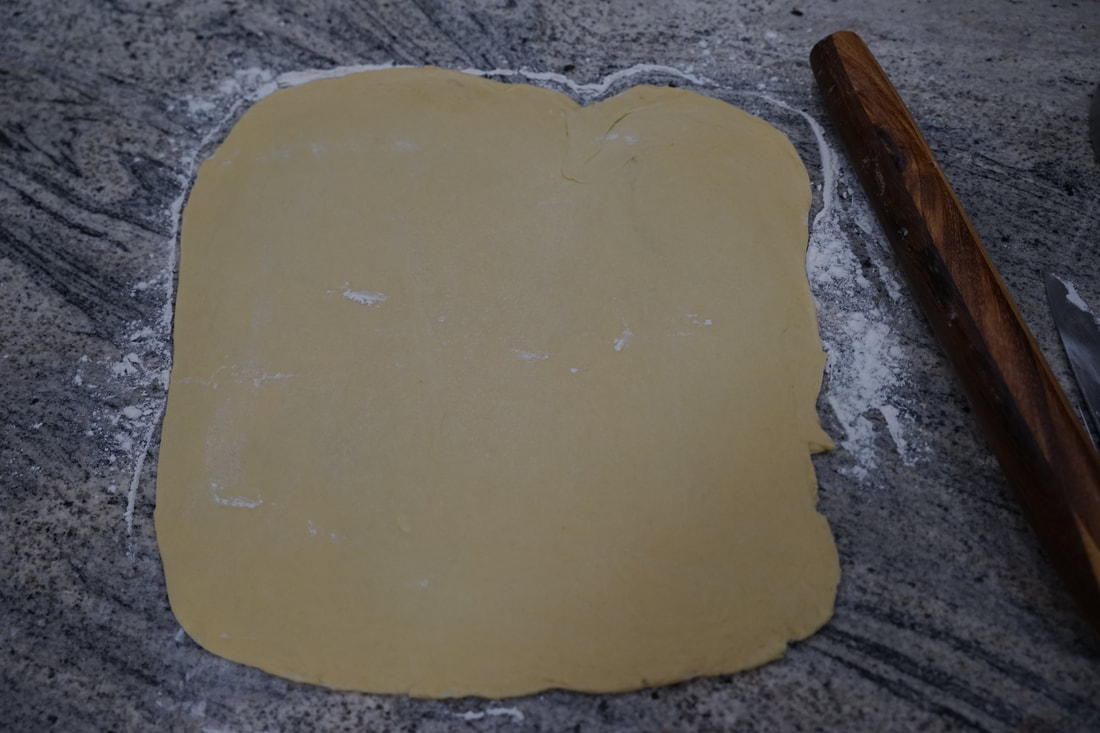
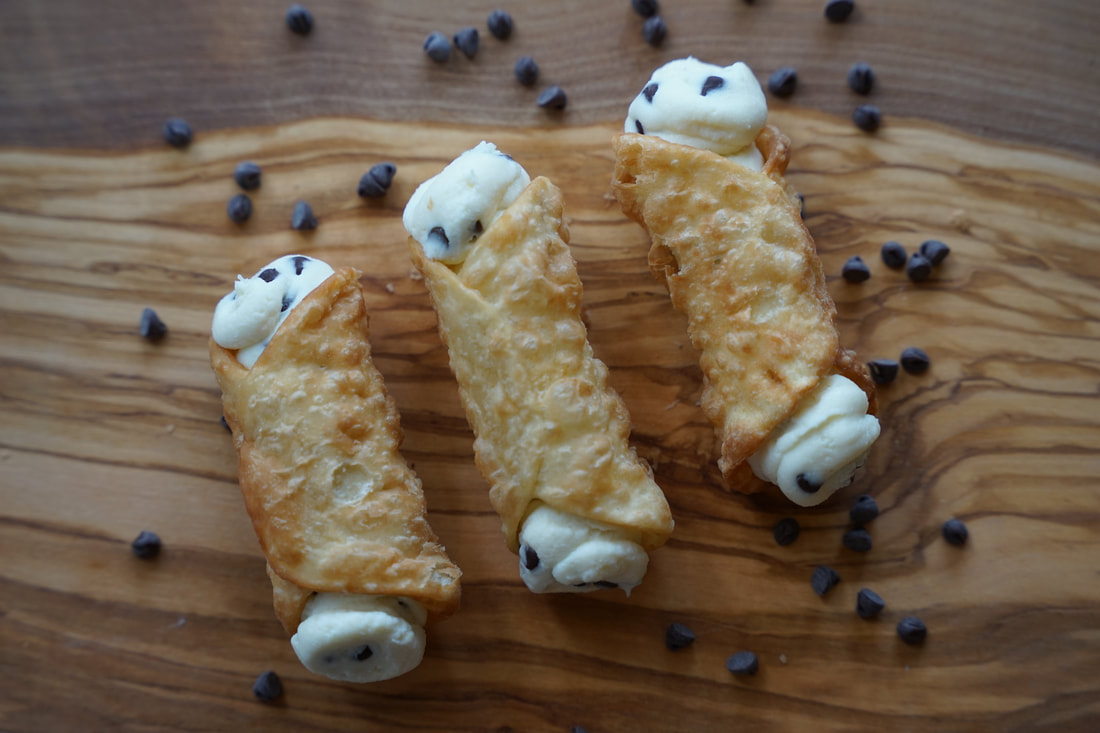
 It's Holy week and Easter might just be my favorite holiday of all. ✝️ It doesn't matter that my kids are adults now - the Easter bunny will always make a stop at our house to hide eggs and put together themed baskets.🐰 I think that the reason that I love Easter so much is because it's not about the baskets or the chocolate - it's about the reason for the holiday. What better reason is there to celebrate than the resurrection of Jesus? Holidays are also great excuses to gather family and friends together for a big feast. Whether it's brunch, lunch or dinner for 2 or 32 - Easter feasts are always special. My family prefers the traditional Easter ham and my daughter can't seem to let the day pass without a plate of deviled eggs but I'm more of an Easter brunch kind of girl. Waffles, chocolate croissants, fruit skewers and homemade sticky buns - you get the idea. The kind of recipes that I only make on special occasions. 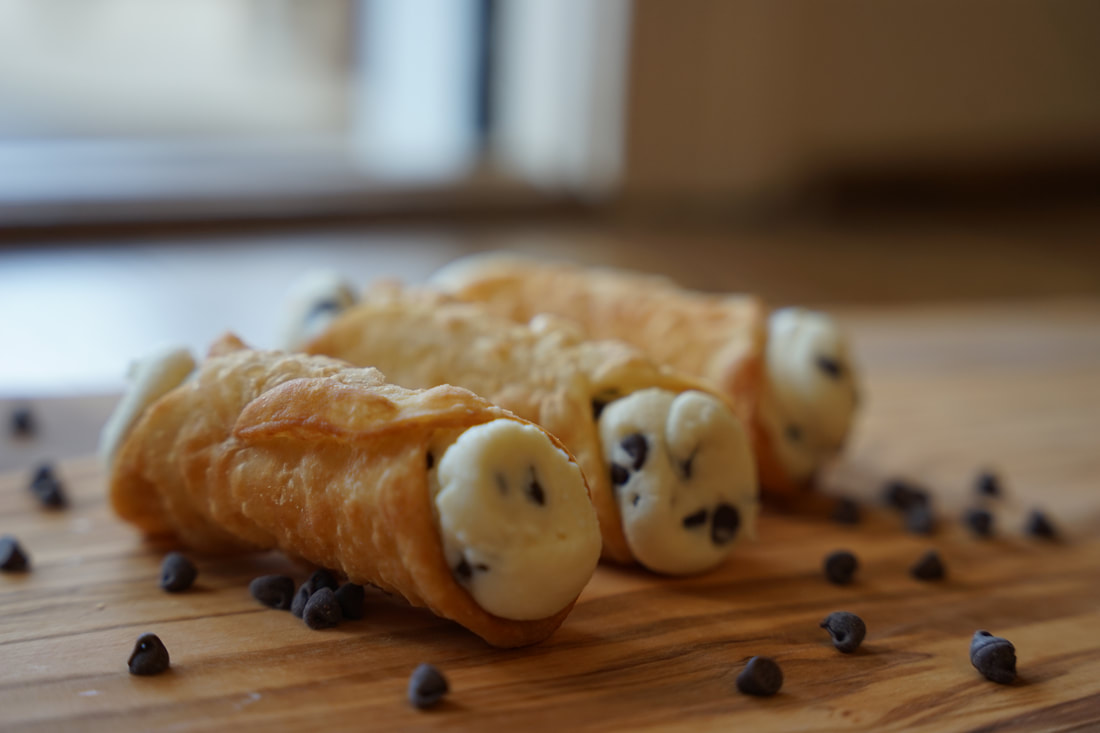 Surely I'm not the only person who has a collection of recipes that they make exclusively for "company" or on special holidays. My special occasion recipes land in this category for one of two reasons. The first is because they take an excessively long time to make. The second, and more common reason, is that they're foods that I don't feel like my family has given the appropriate amount of recognition to.😅 Do you think it's too much to ask that the recipient of a special recipe should "oooh and ahhh" for a minimum of 10 minutes after consuming something that takes over an hour to prepare? 😂 Cannolis ended up in my special food category for both reasons.🤣 Cannolis were always a special treat that our parents let us pick out from the bakery or the Italian grocery when we were kids and not something that we ever attempted to make at home. If I'm being honest, I had some serious hesitations about tackling such an iconic Italian dessert but since I don't have access to a great cannoli source where I currently live, I had to figure out to make them for myself.😅 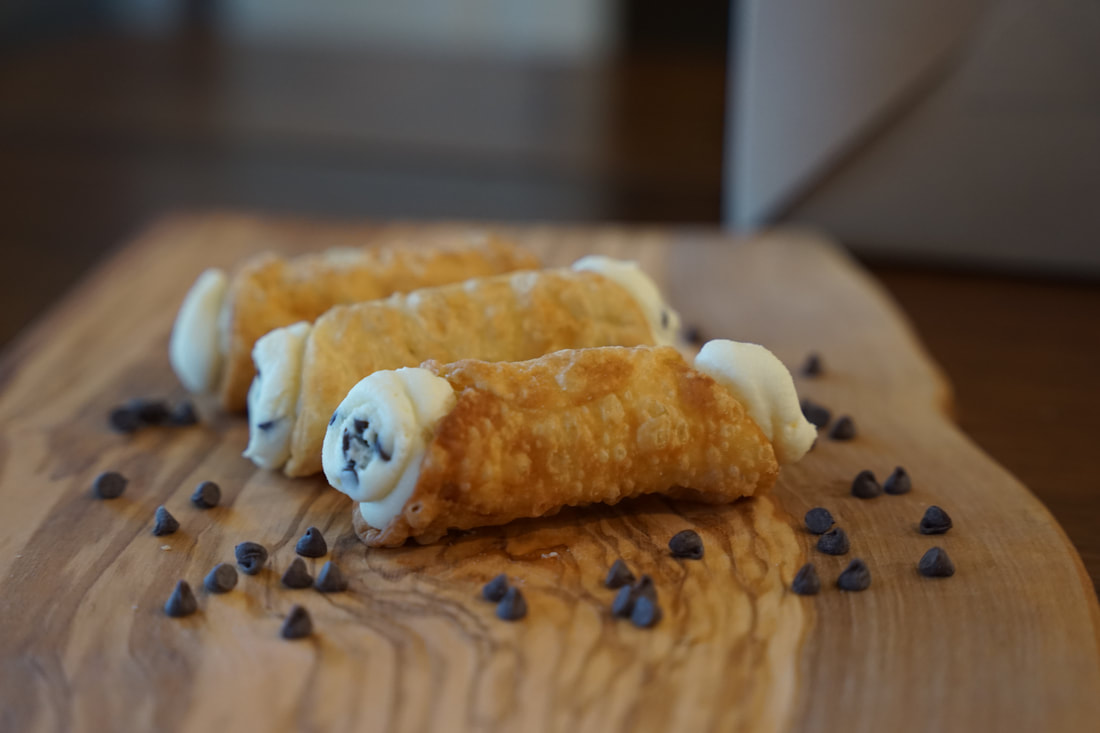 Cannolis Shells 1 3/4 cups flour 1 1/2 Tablespoons sugar 1/4 teaspoon salt 3 Tablespoons butter 1/3 cup marsala wine 1 egg 1 egg white vegetable oil for frying Filling 32 ounces whole milk ricotta 1 1/2 cups powdered sugar 3/4 cup mini chocolate chips 1/4 teaspoon cinnamon
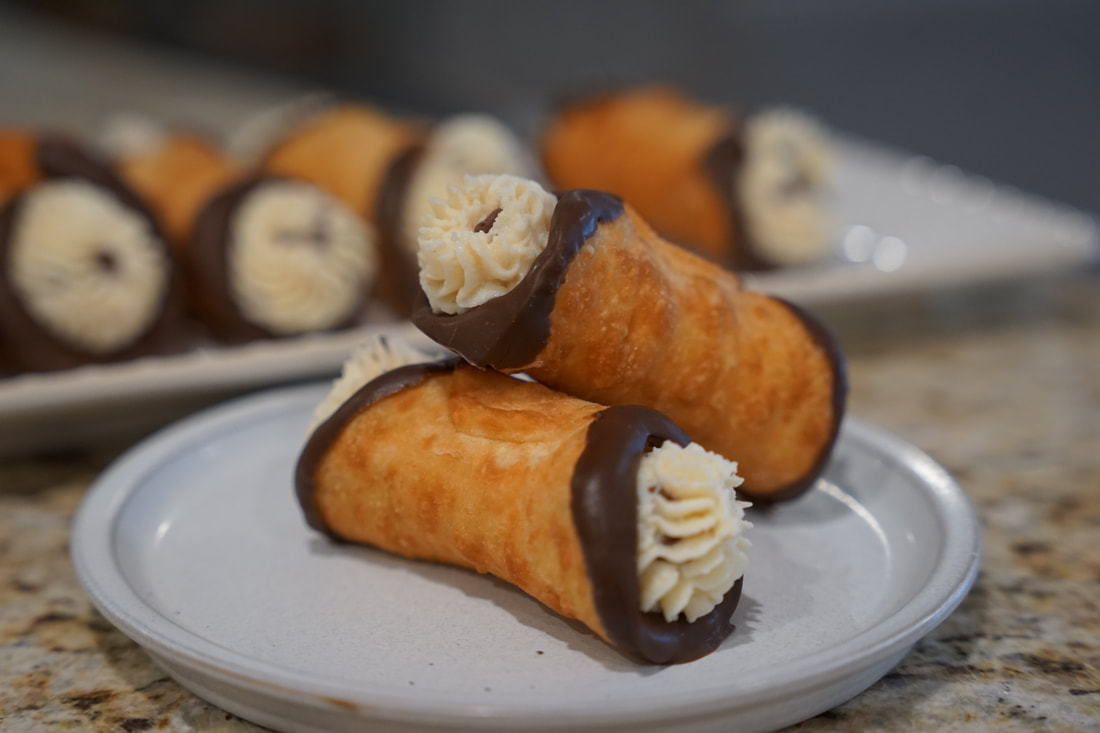
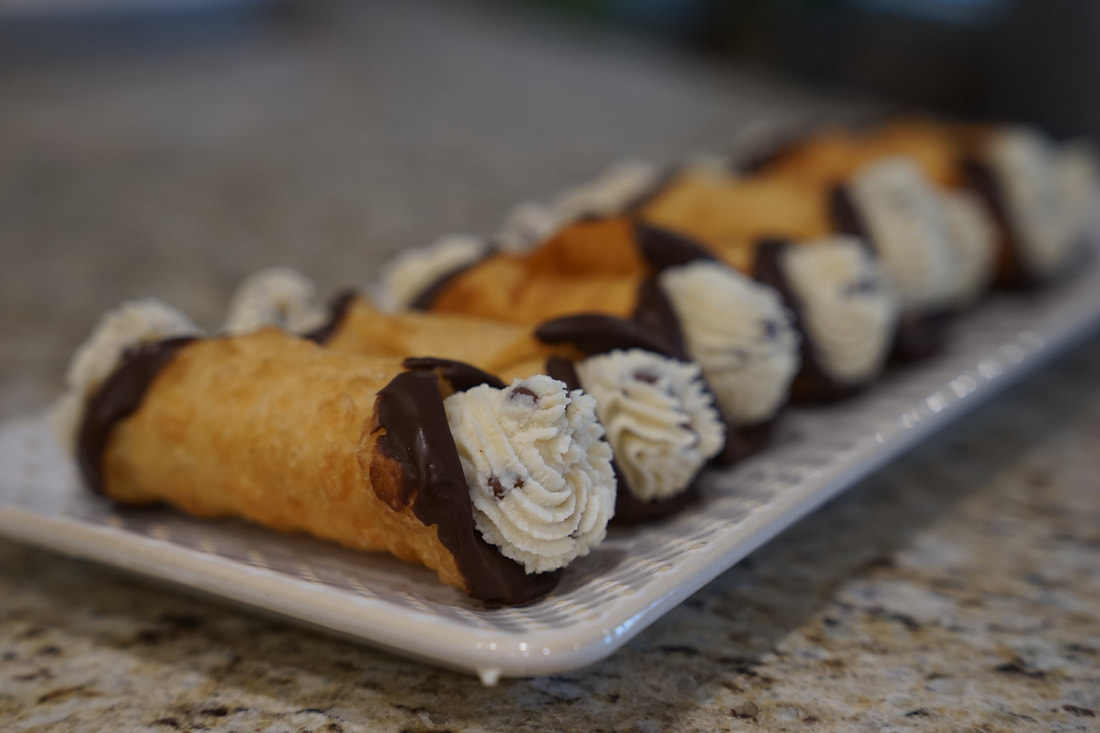
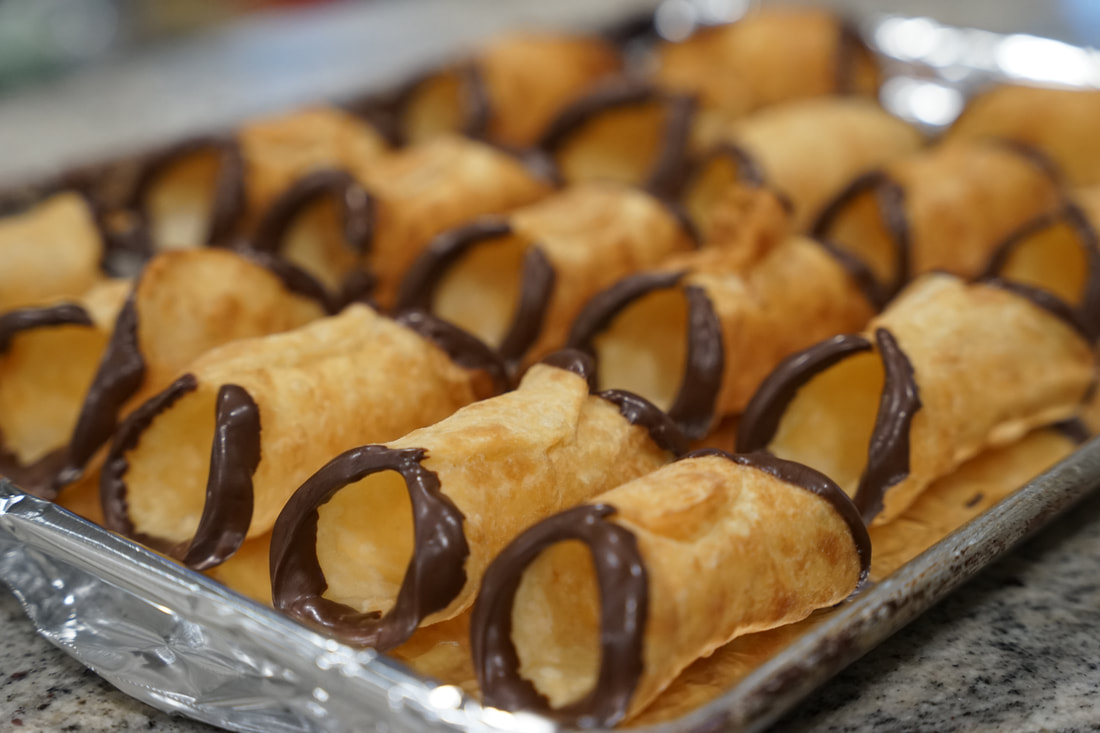 Dip ends in chocolate if desired.
I also experimented with an orange almond filling. 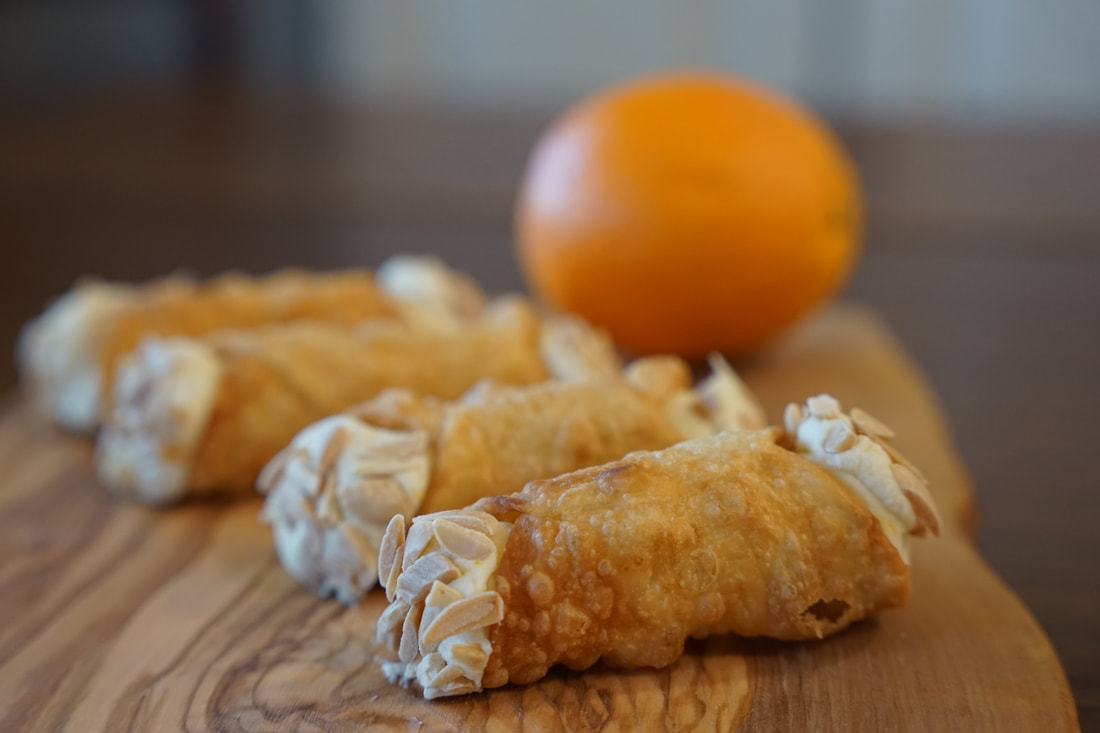 Ciao!
1 Comment
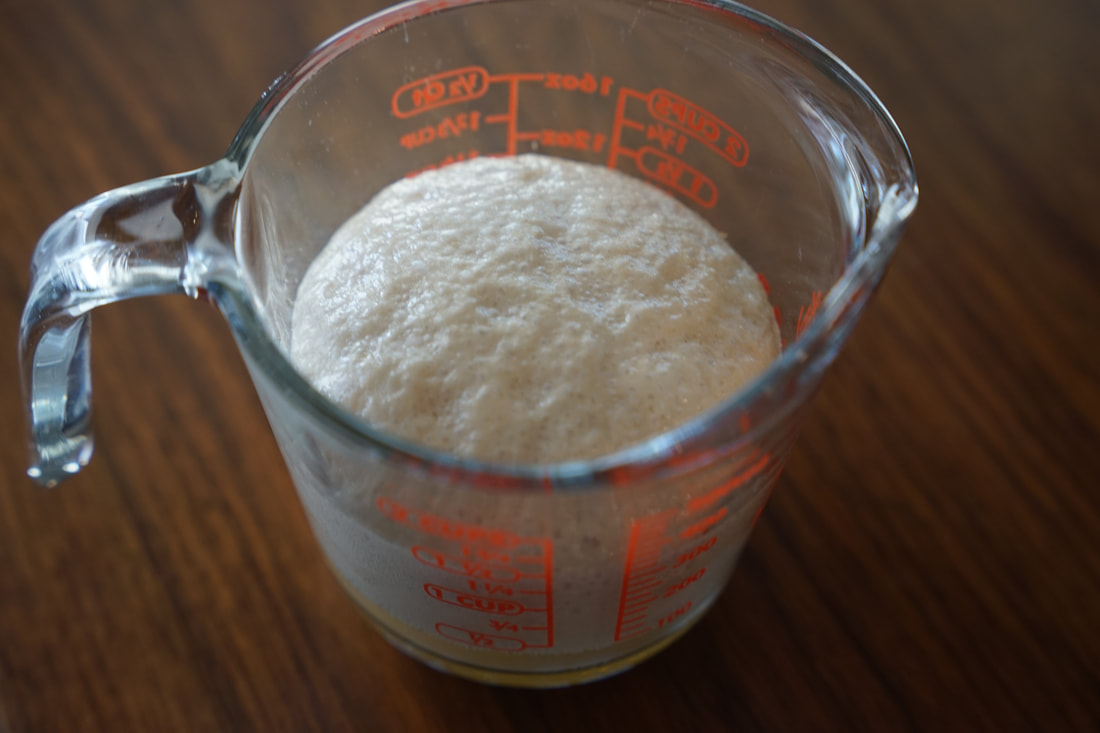
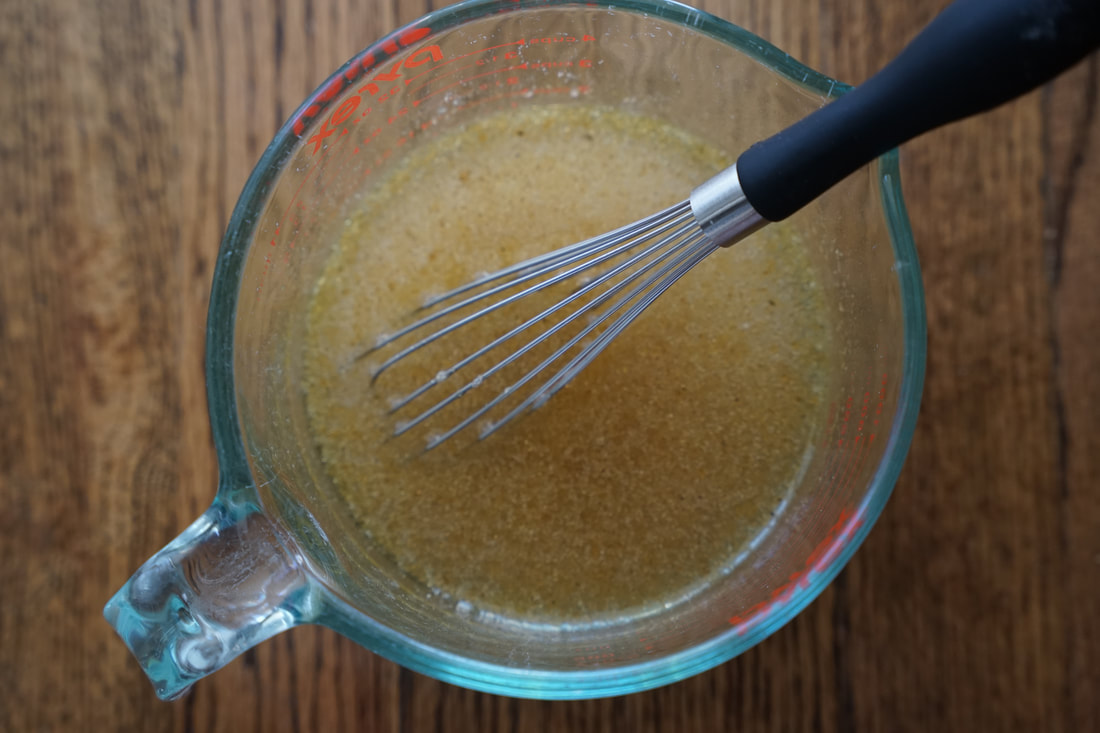
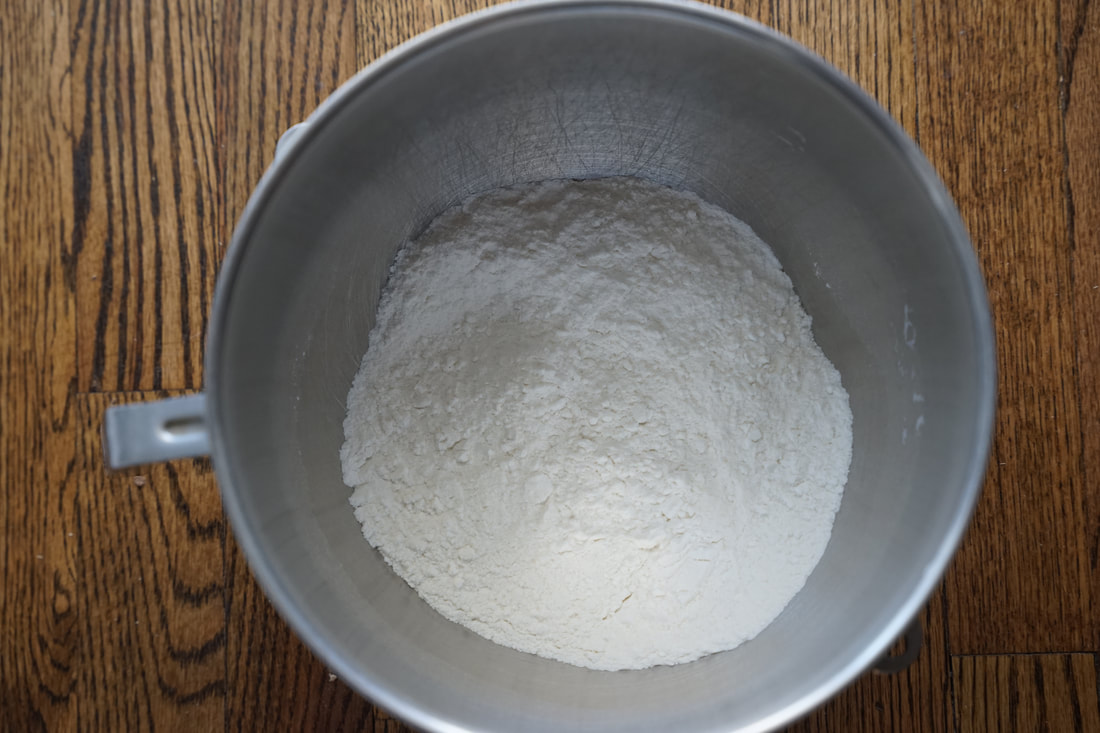
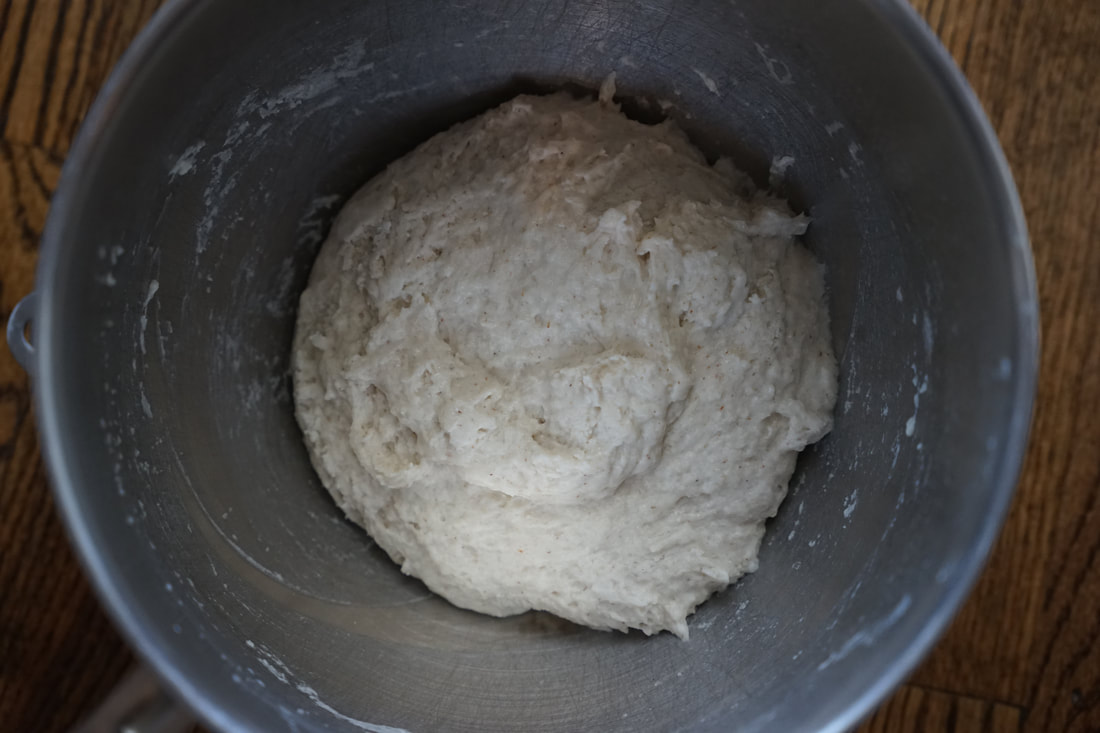
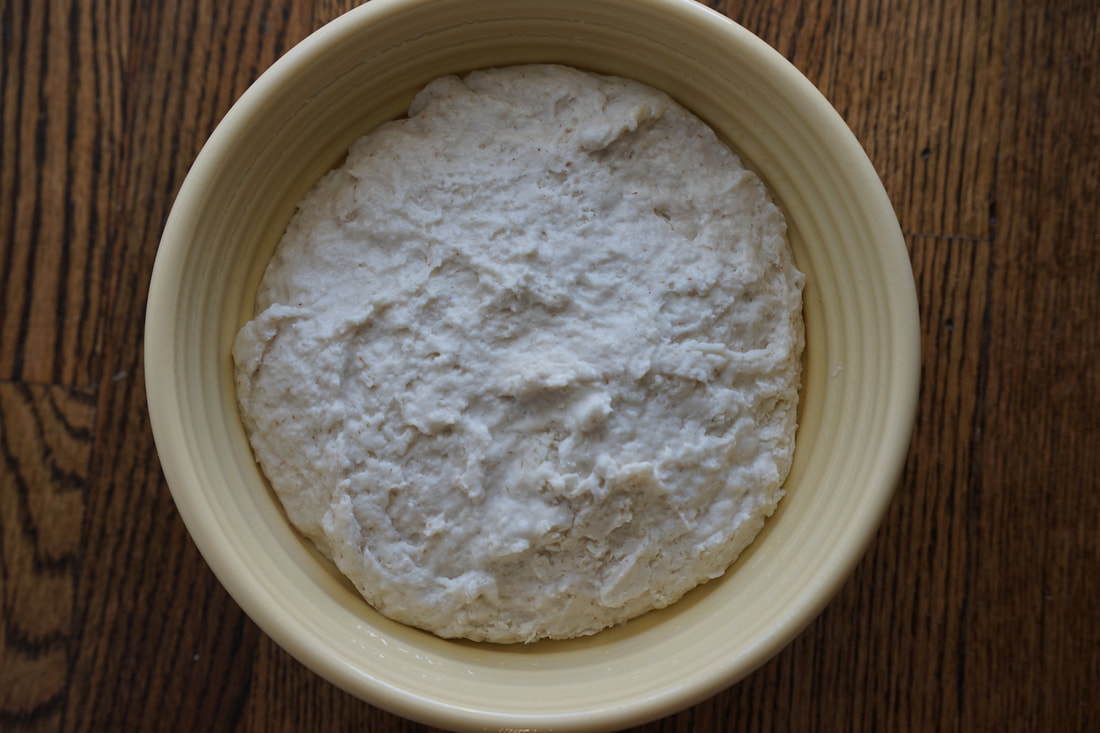
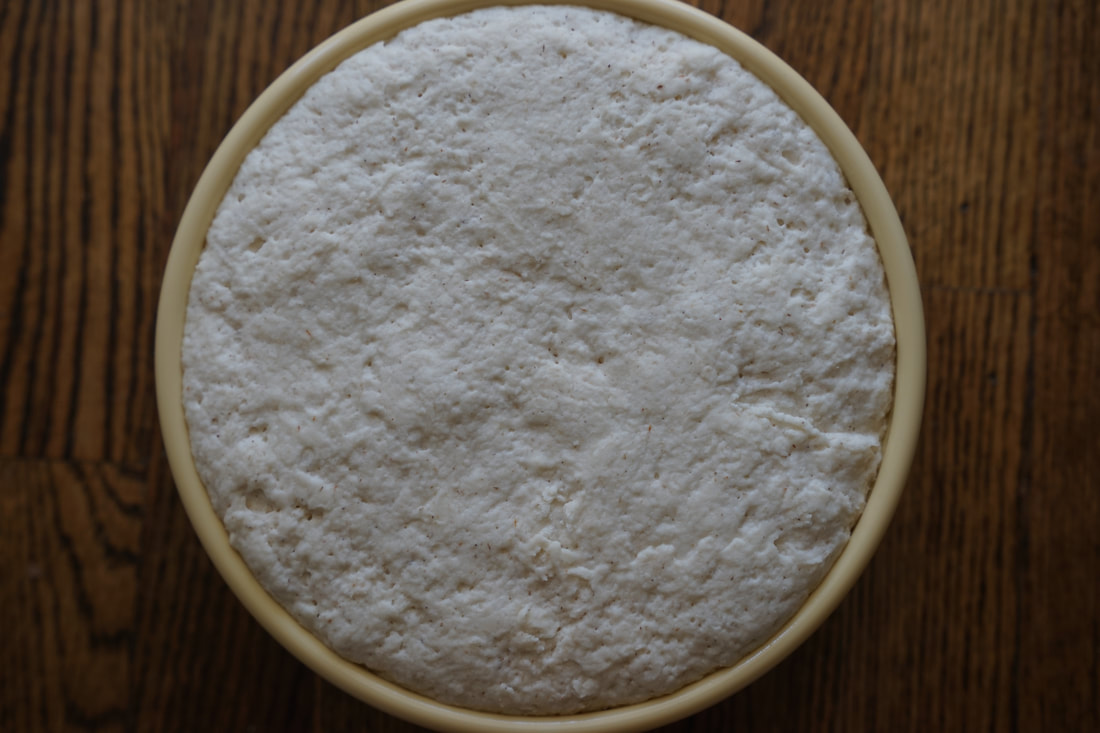
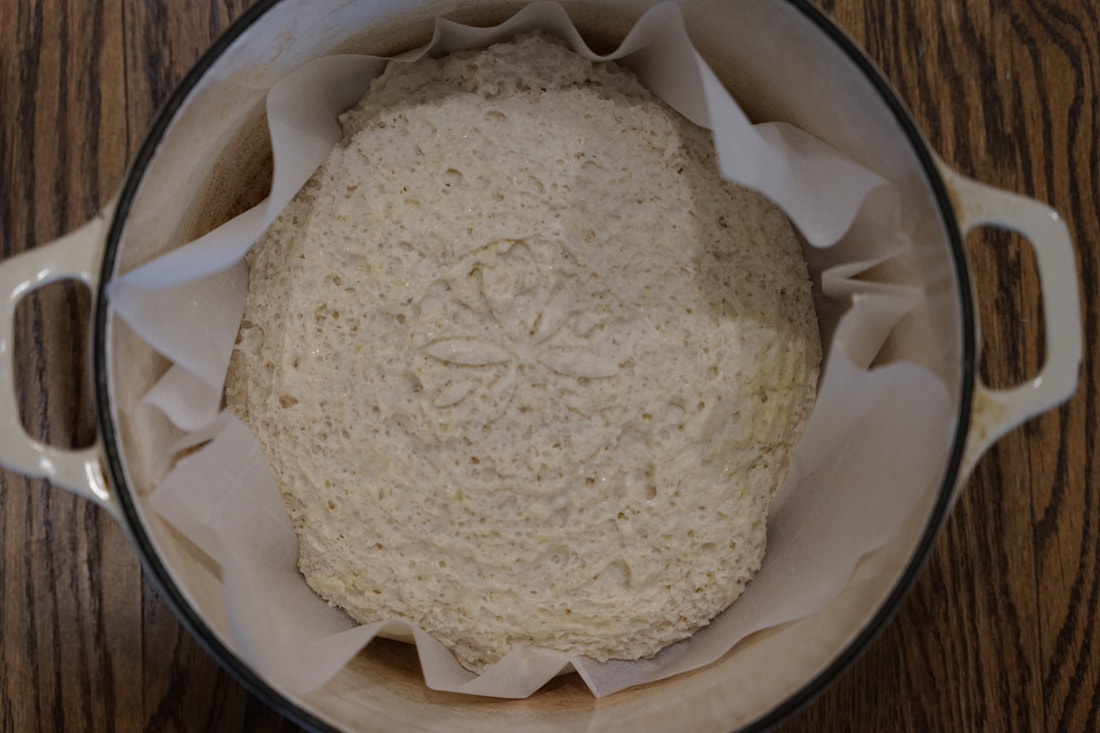
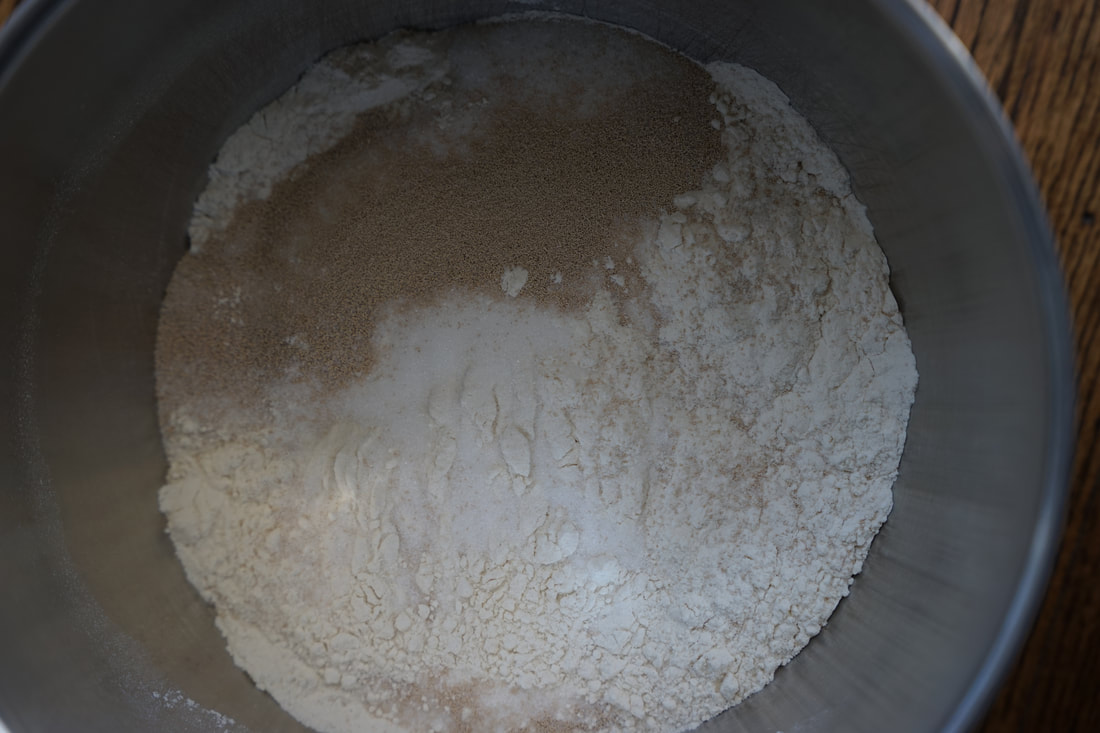
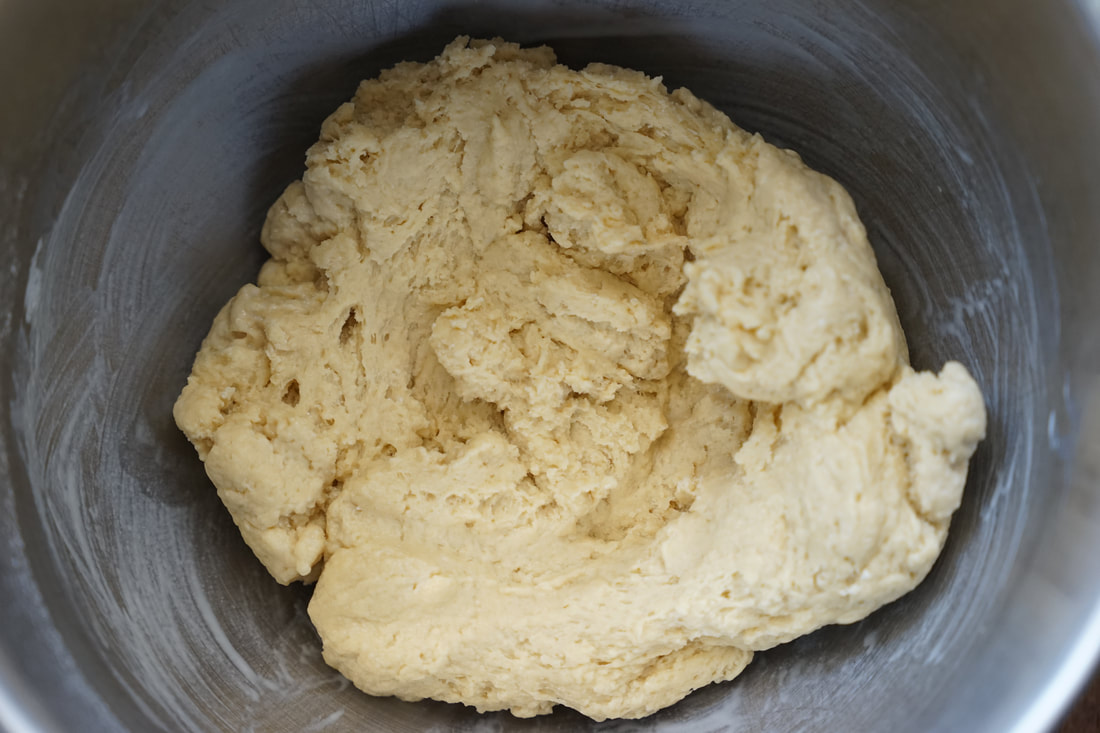
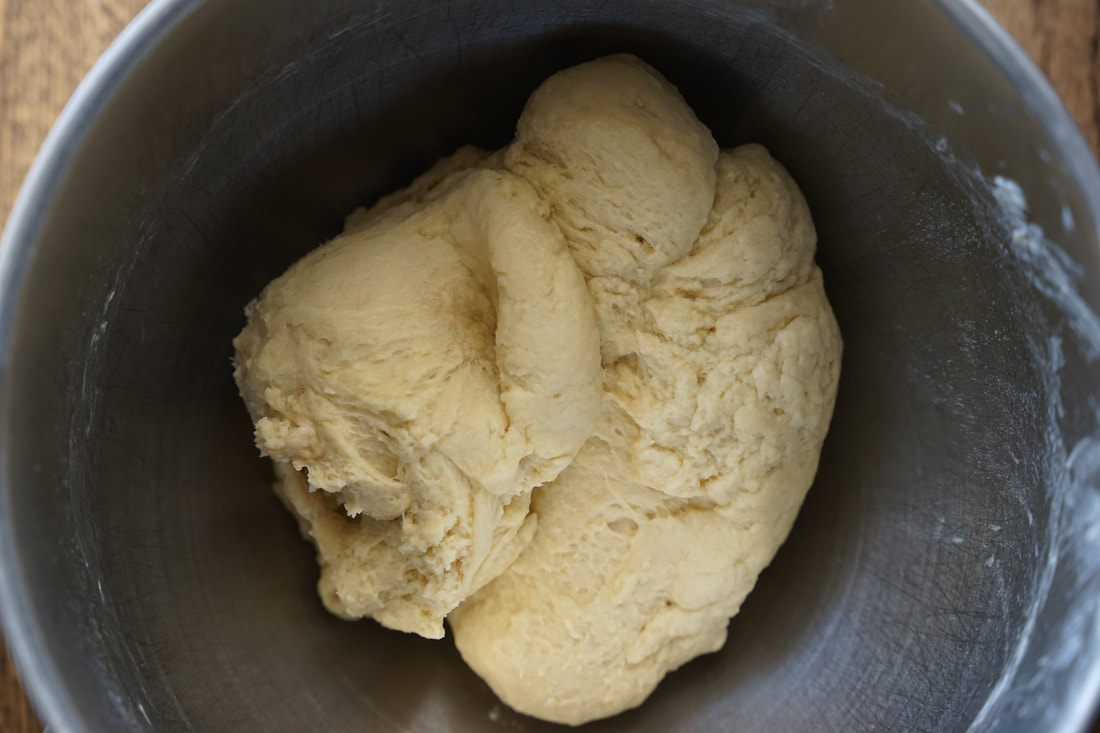
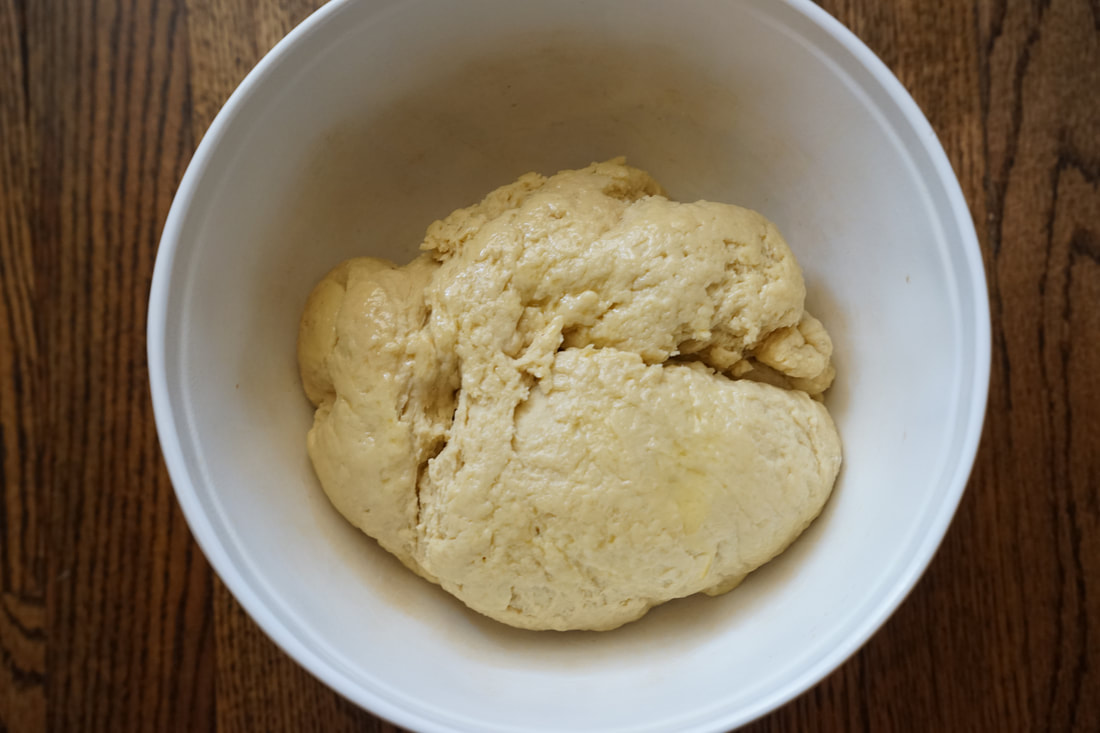
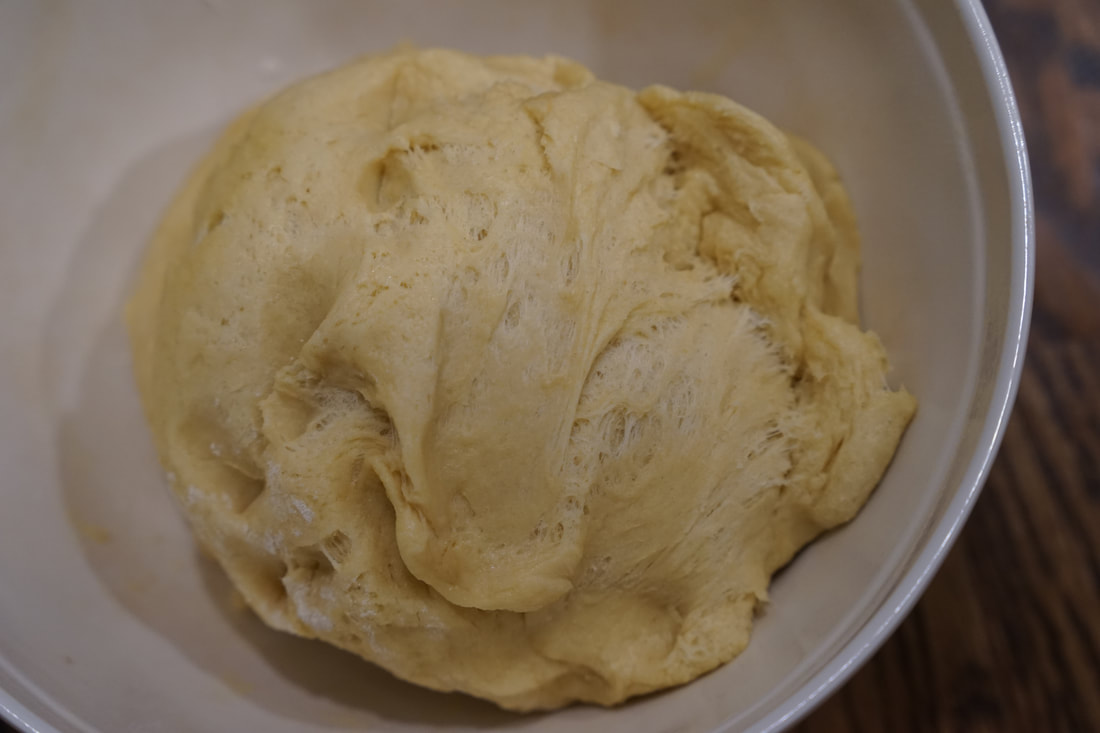
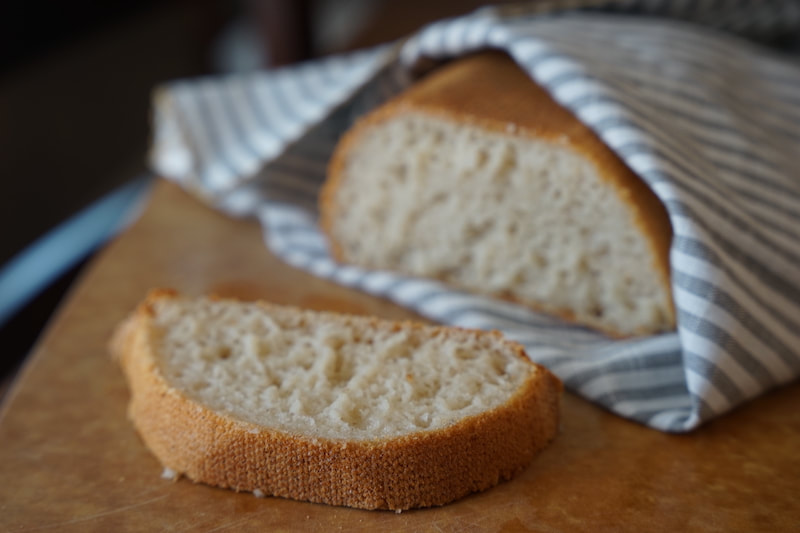 I first heard about Gary Chapman's book The 5 Love Languages from a pastor during our premarital counseling. I feel like there's a lot of truth to his theory but I also feel like he's made a glaring omission. Anyone else feel like food is the 6th love language that suspiciously got left out?🤷🏻♀️ I suspect that there is a large percentage of the population who feels love... through food (and coffee.) 😅 There's a special kind of love that comes from a crafting a loaf of freshly baked bread from scratch.🥖 Carefully measuring out ingredients, waiting patiently while it rises and then breathing in the amazing aroma that fills the house while it bakes. And that all happens before that first bite of chewy, warm bread - heavenly is the only way to describe it. 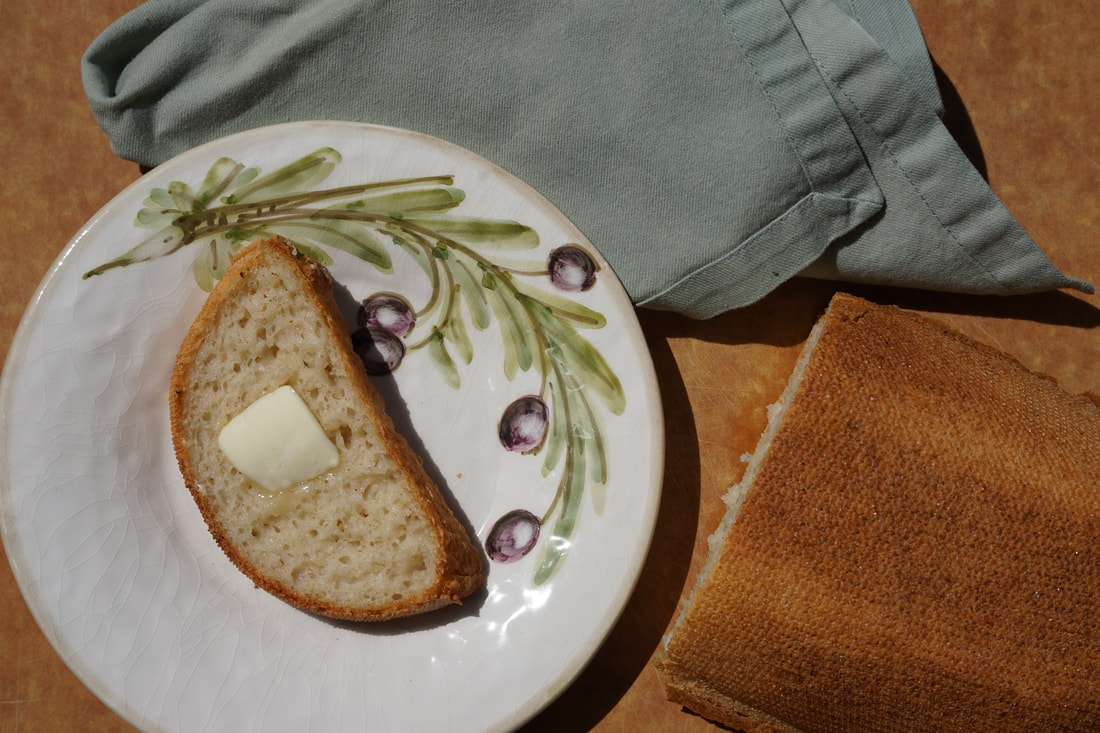 I grew up eating fresh Italian bread so I feel like the roots of my bread love run deep. I enjoy the process of making bread almost as much as I enjoy eating bread and I've experimented with making all kinds of different kinds of breads. Sourdough, French, Italian, Cuban, bagels, brioche, challah, panetone, flatbreads, focaccia, pita, baguettes, babka, cinnamon swirl, English muffins, dinner rolls, hot cross buns, soft pretzels, crescent rolls and croissants. I actually have 68 different yeast bread recipes on my blog! 😳😂 Safe to say - bread is my love language. The one thing that was missing in my recipe index was a Gluten Free Bread recipe. I'm not a Gluten Free eater so I needed a good excuse to come up with a great recipe for my fellow bread lovers who can't tolerate gluten in their diets. That reason came this week with a dinner invitation from a Gluten Free friend. What better thing to bring to a dinner party hosted by a friend with celiac than a loaf of homemade gluten free bread?🍞 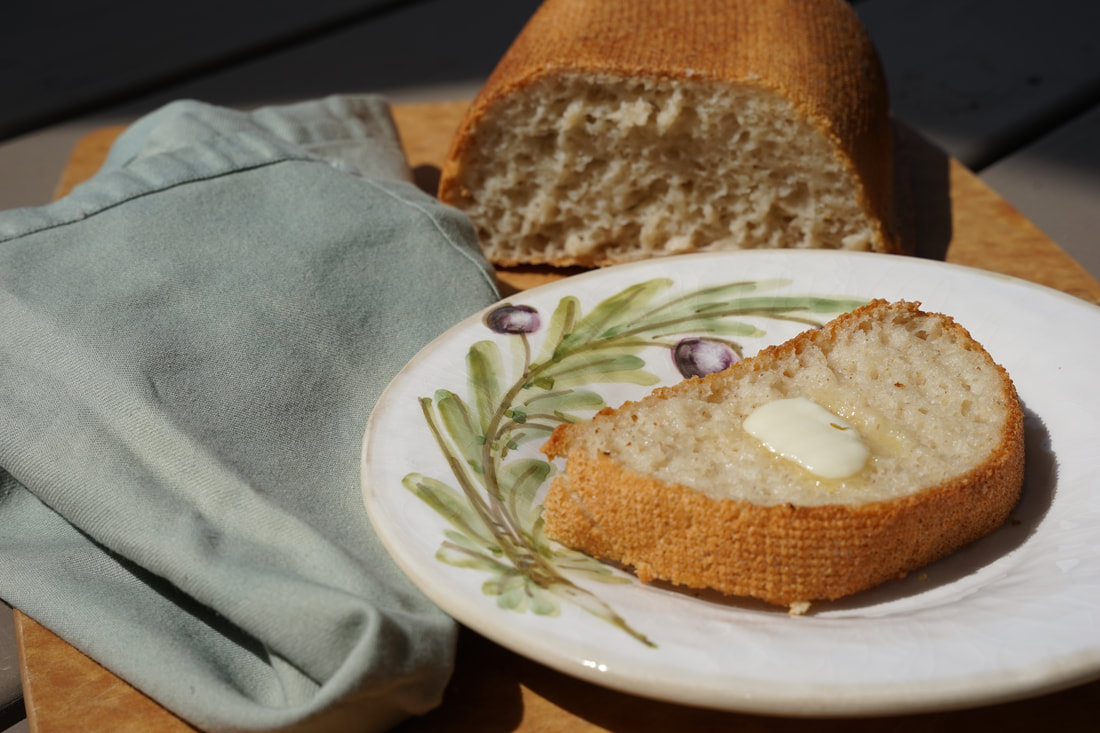 Gluten Free Bread Gluten Free Flour Blend 24 ounces white rice flour 7.5 ounces brown rice flour 7 ounces potato starch 3 ounces tapioca starch 3 Tablespoons nonfat milk powder Bread 100 grams warm water 20 grams honey 2 1/2 teaspoons yeast 20 grams psyllium husks 375 grams water 15 grams olive oil 480 grams gluten free flour 12 grams salt
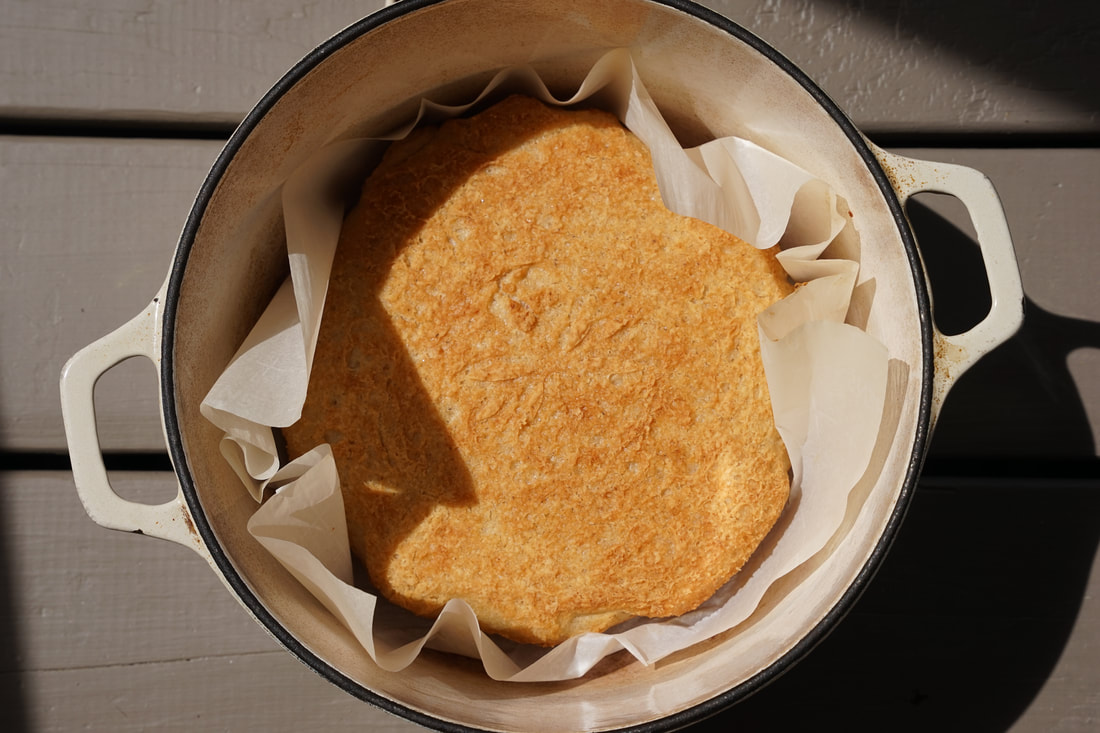 Bake 1 hour at 425. Remove lid and bake another 15 minutes. 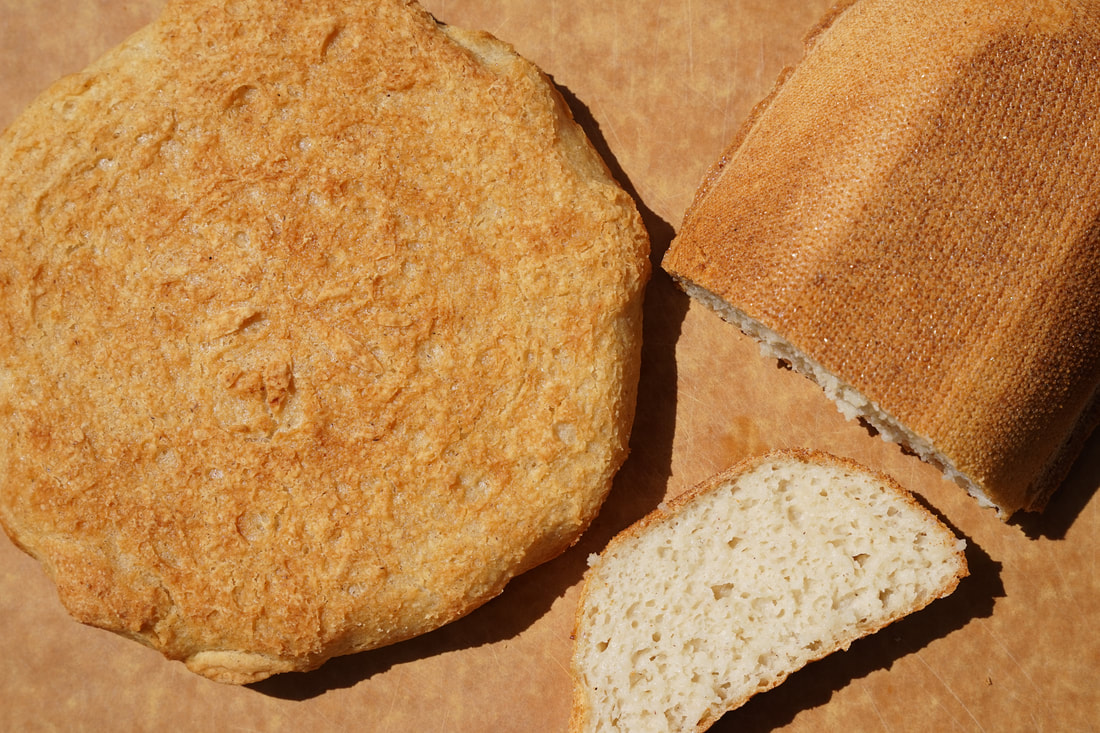 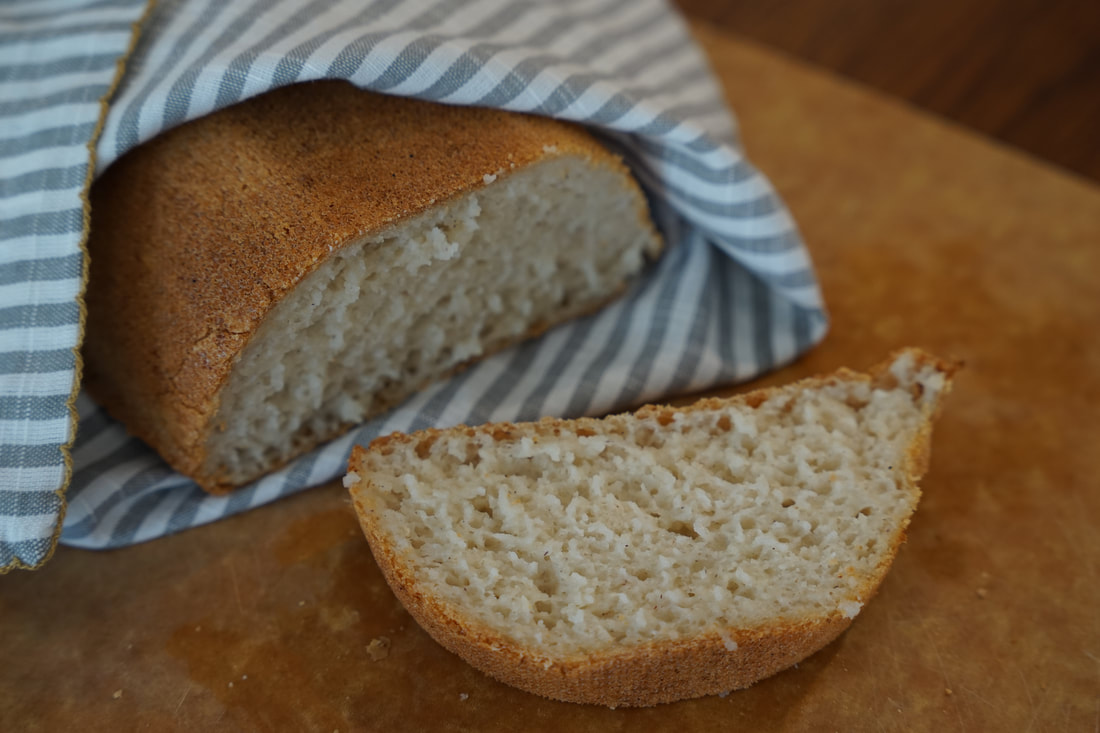 Have I mentioned recently how I'm thankful for friends who are willing to be guinea pigs while I perfect my recipes?🤣 I have no idea why my loaf came out of the oven so flat. It was nice and rounded going in and then - splat - it flattened like a pancake.🤷🏻♀️ Anyone with answers or better yet ... solutions to my flat bread issue - feel free to reach out to me. Thanks.
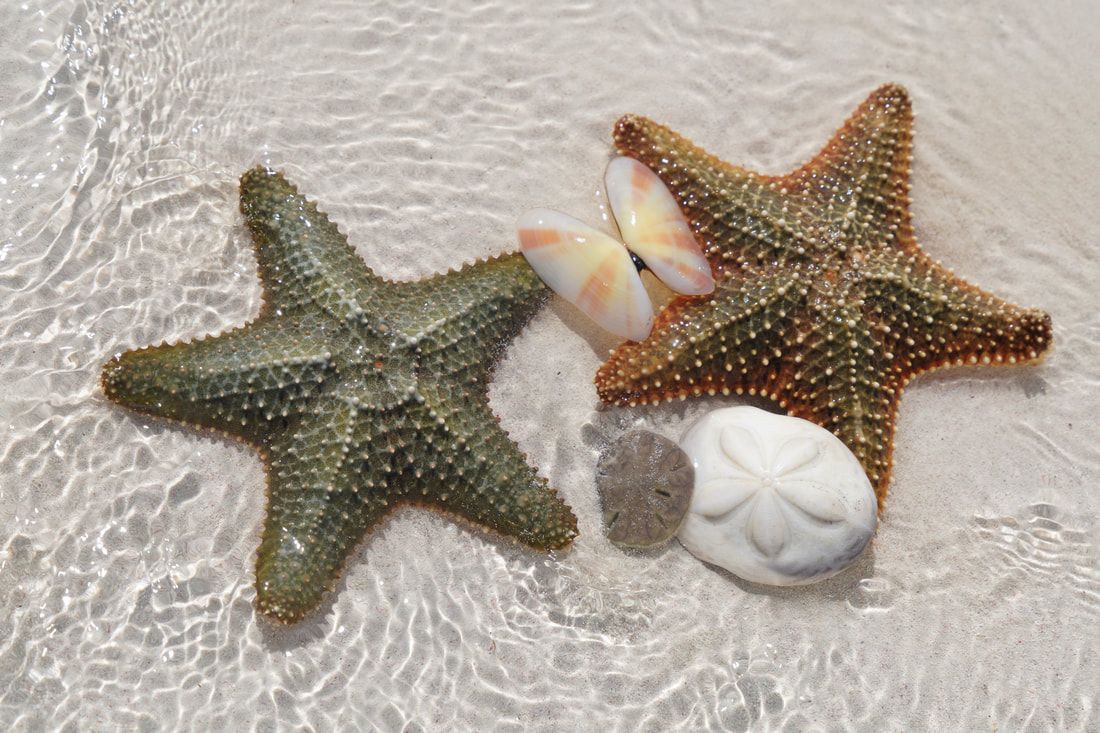
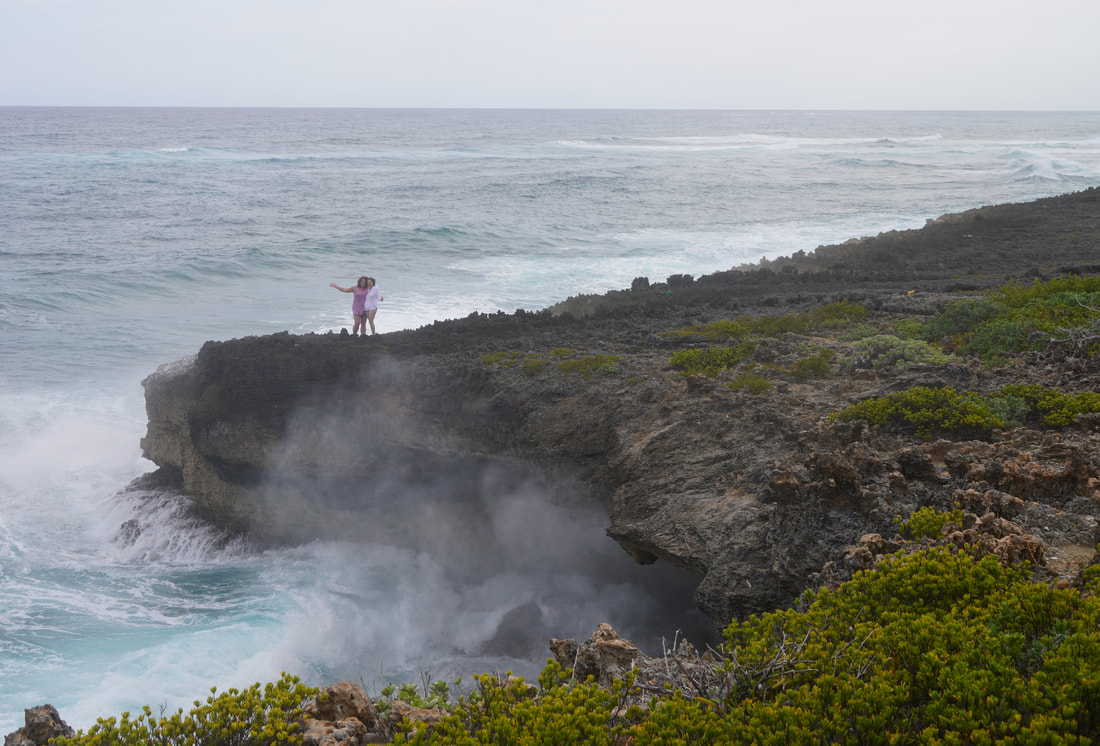
Ciao! 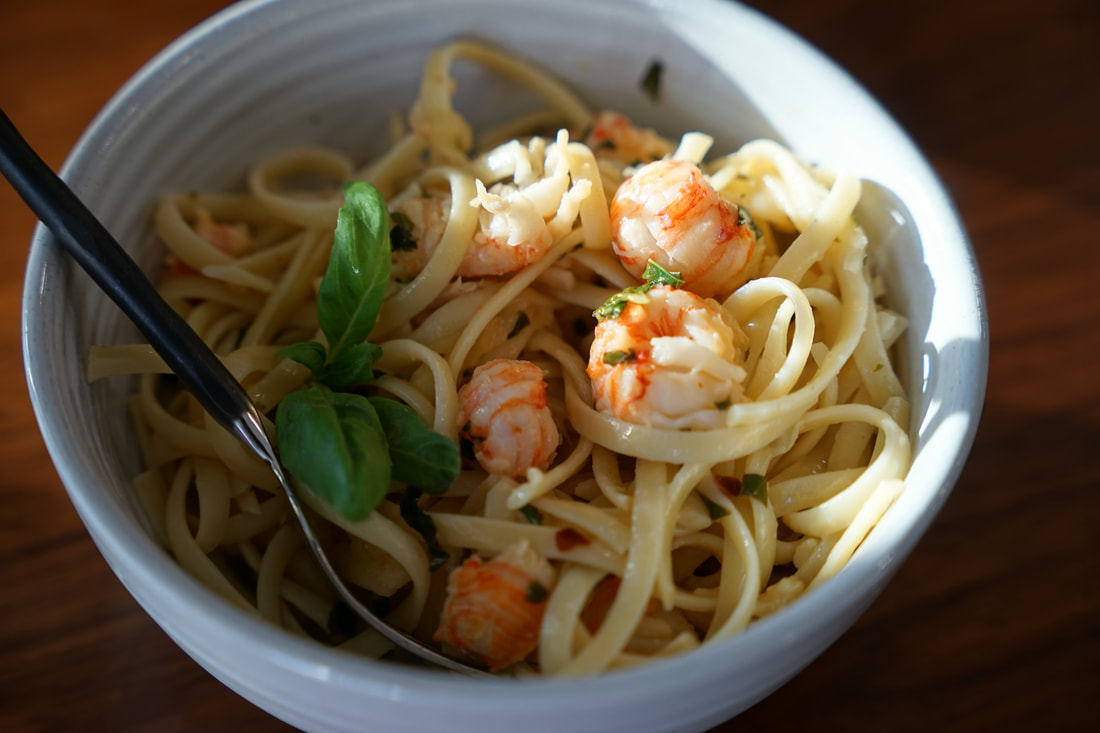 I took another little blogging hiatus but I had a good reason this time - I was soaking in the sun in the Bahamas. 😎🏖️ It wasn't my first trip to the Bahamas but it was my first time in Marsh Harbor. If you've never been before and you have the opportunity - I highly recommend a visit. The beaches, the water, the food, the PIGS! 🤣🐷 The trip was even more special because I got to share my Bahama experience with my husband, my parents and some very special friends. Friends who also happen to spend a considerable amount of time working on the island. They were the most amazing hosts and tour guides that we could have asked for. 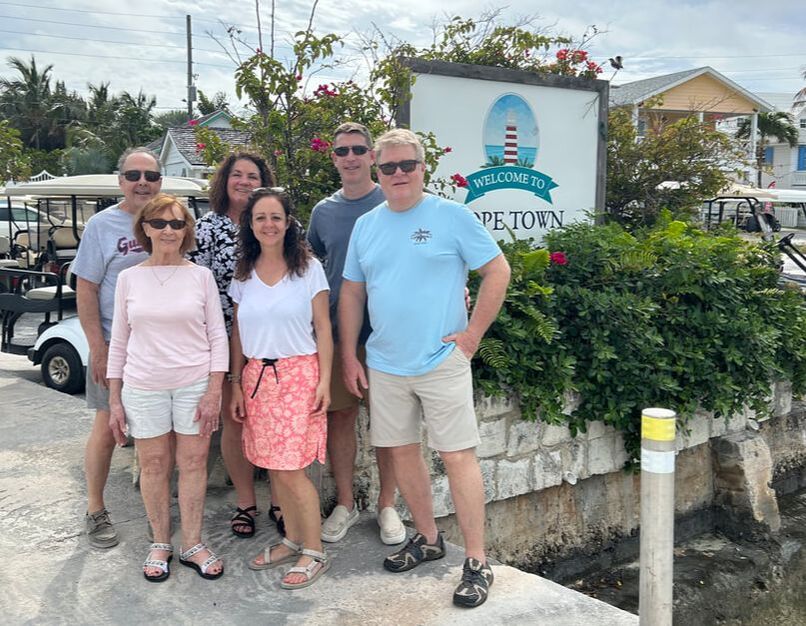 I'll attach some more of our Marsh Harbor pictures at the bottom of this post but for now - I'll just share my favorite food picture from the trip - grilled lobster salad. 🦞😋 
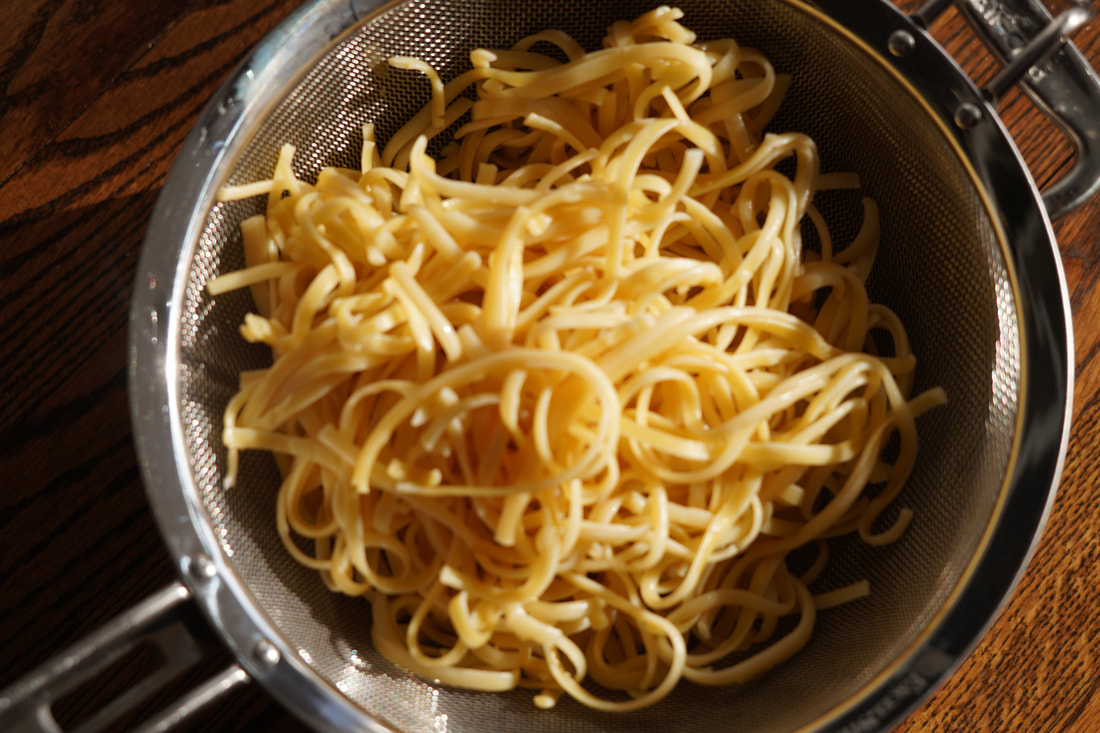
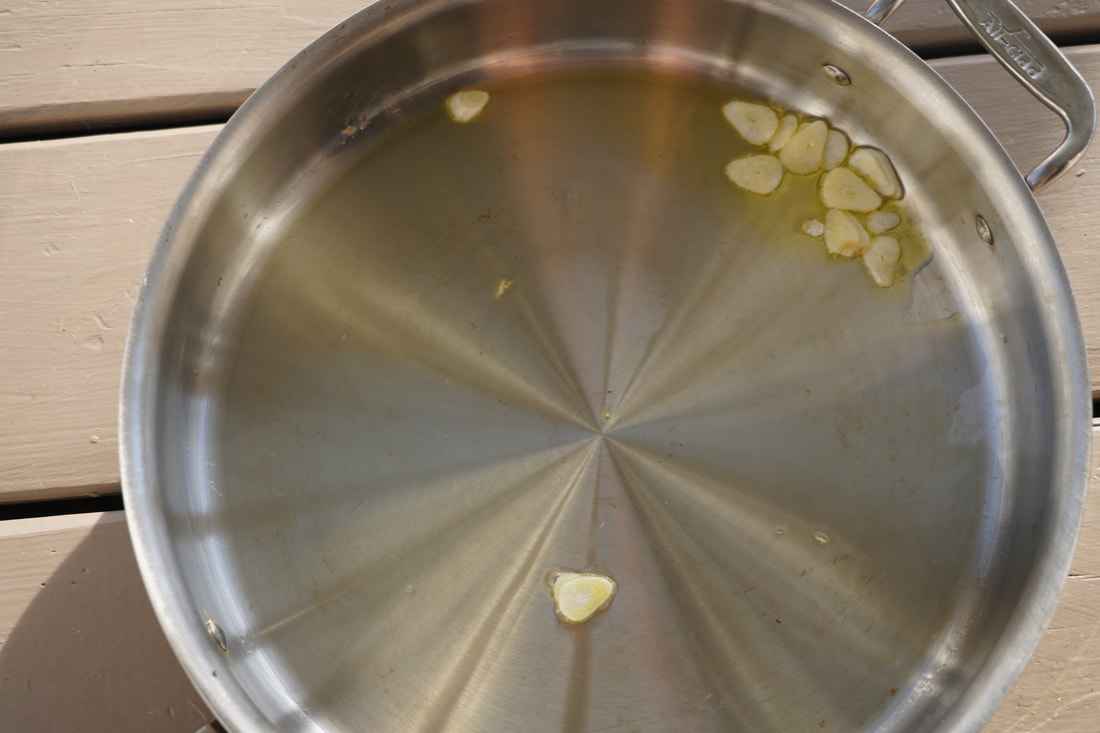
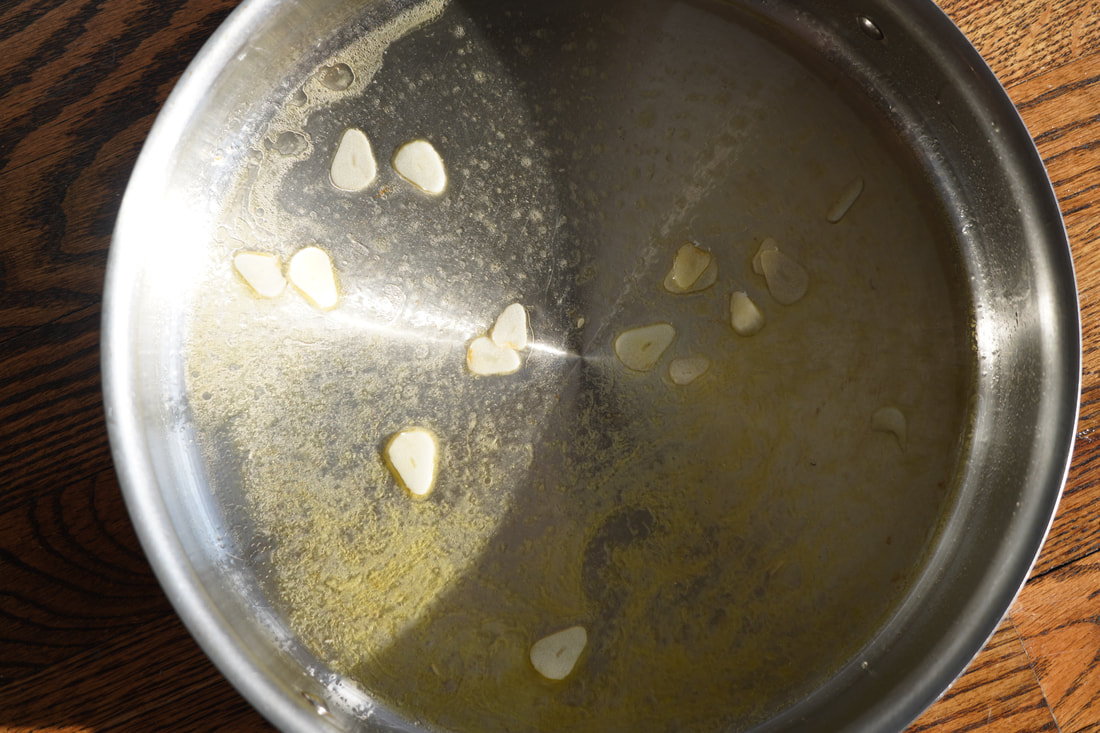
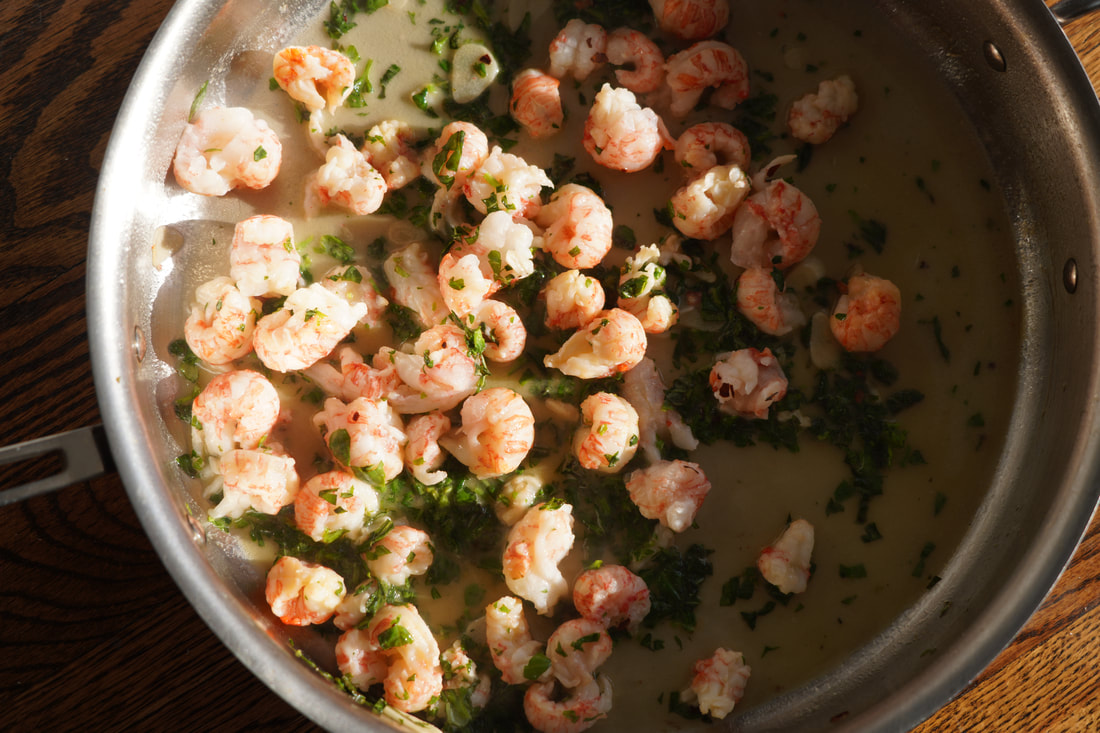
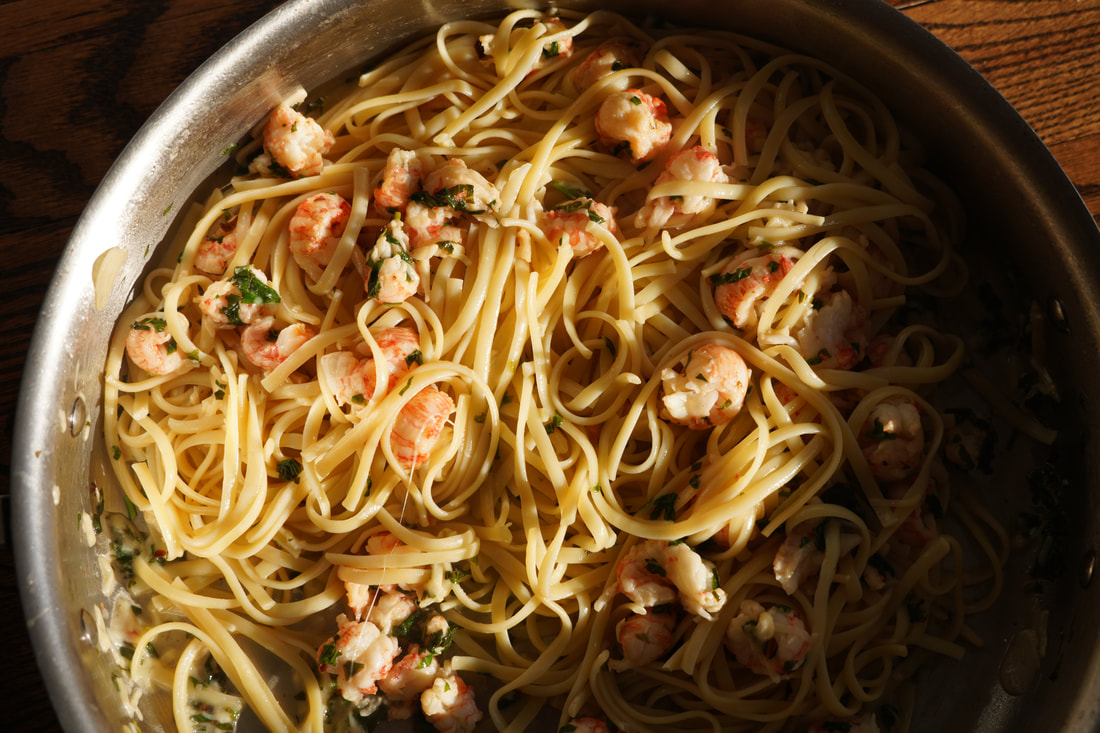
Needless to say, after a week of dining on fresh grouper, mahi, shrimp, conch fritters and Caribbean lobsters our dinners back in Georgia this week have been a bit of a letdown.🙄 Coming home to an empty refrigerator didn't help either.😅 I don't know if I've ever been so thankful to see a bag of Lagonstino tails in my freezer as I was this week. With lobster on my mind, this quick and easy Langostino Pasta dinner was just what I needed to help me reaclimate to this landlocked town that we call home. 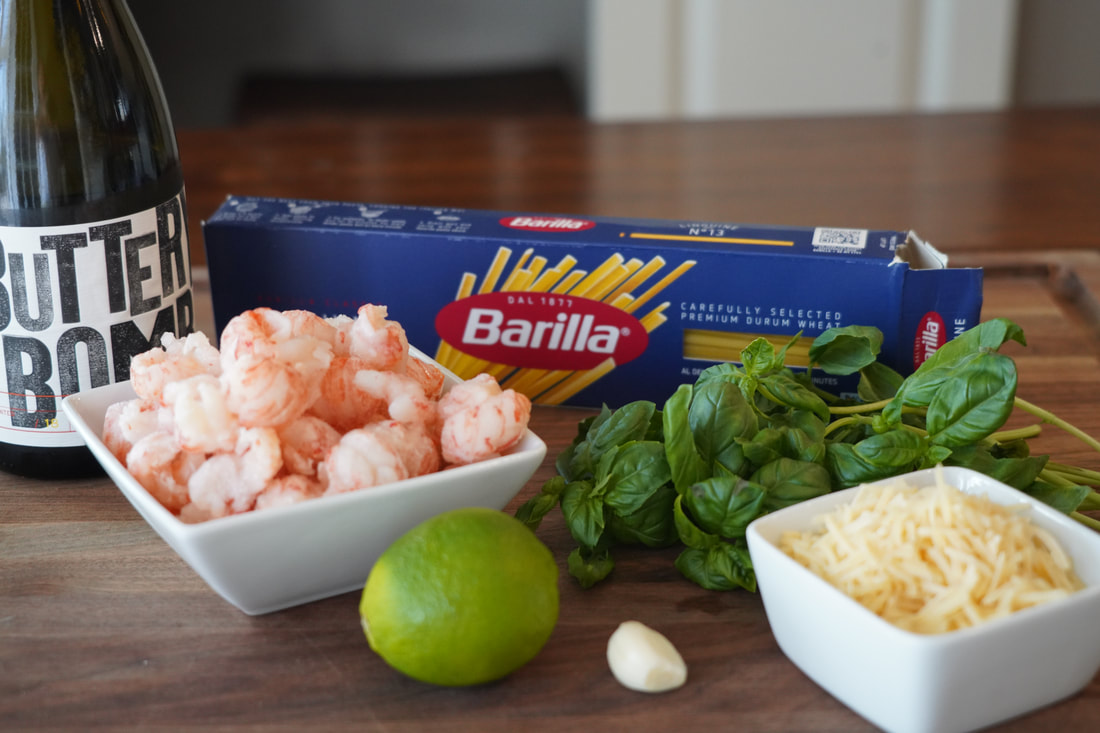 Langostino is a particular type of crustacean that looks like a small lobster. It's not the same species as lobster but they have a very similar texture and taste. I got my Langostino at Trader Joes but I've also seen it in the frozen seafood section at my local grocery store. If you enjoy the taste of shrimp and lobster, you'll probably enjoy Lagostino tails. They're sold fully cooked which makes them super easy to add to salads, pasta dishes, soups and casseroles. This yummy lagostino pasta tossed a white wine and lime sauce and a sprinkle of fresh basil and red pepper flakes is one of my favorite ways to enjoy these delicious crustaceans. 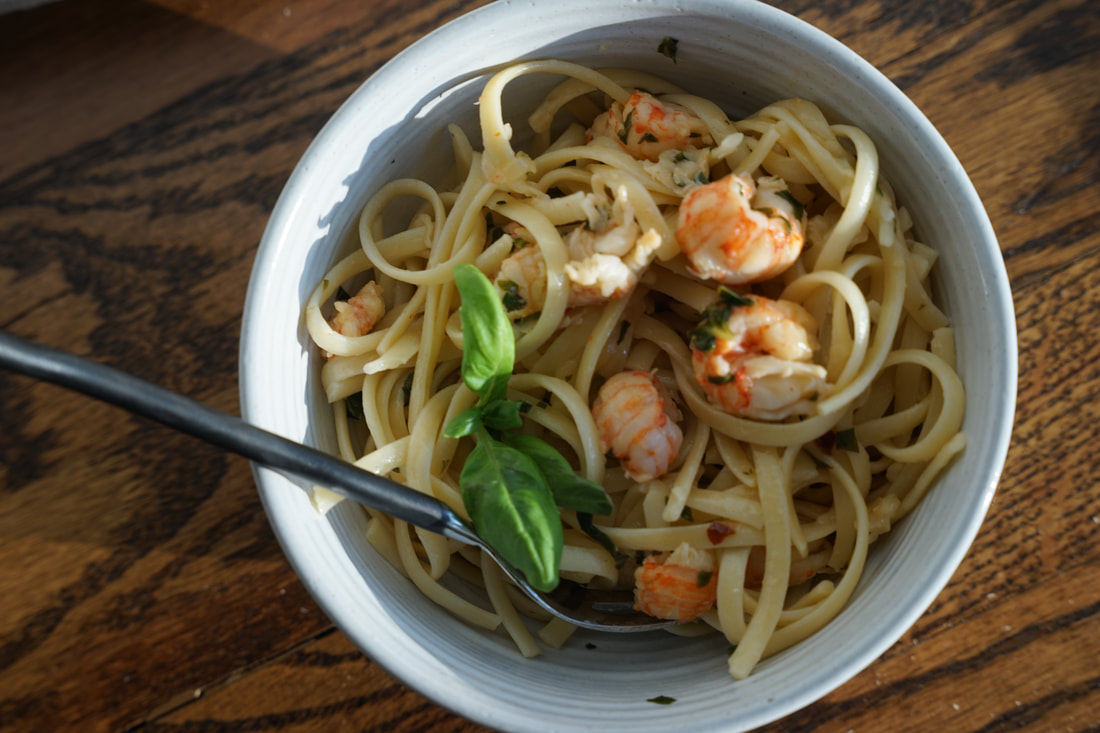 Langostino Pasta with Fresh Basil 1/2 pound pasta 1 Tablespoon olive oil 1 garlic clove, minced 1 cup dry white wine 1 lime 1/2 cup fresh basil, chopped 1/2 teaspoon red pepper flakes 1/2 pound langostino tails, cooked 1 Tablespoon butter salt and pepper 1 cup parmesan cheese, shredded
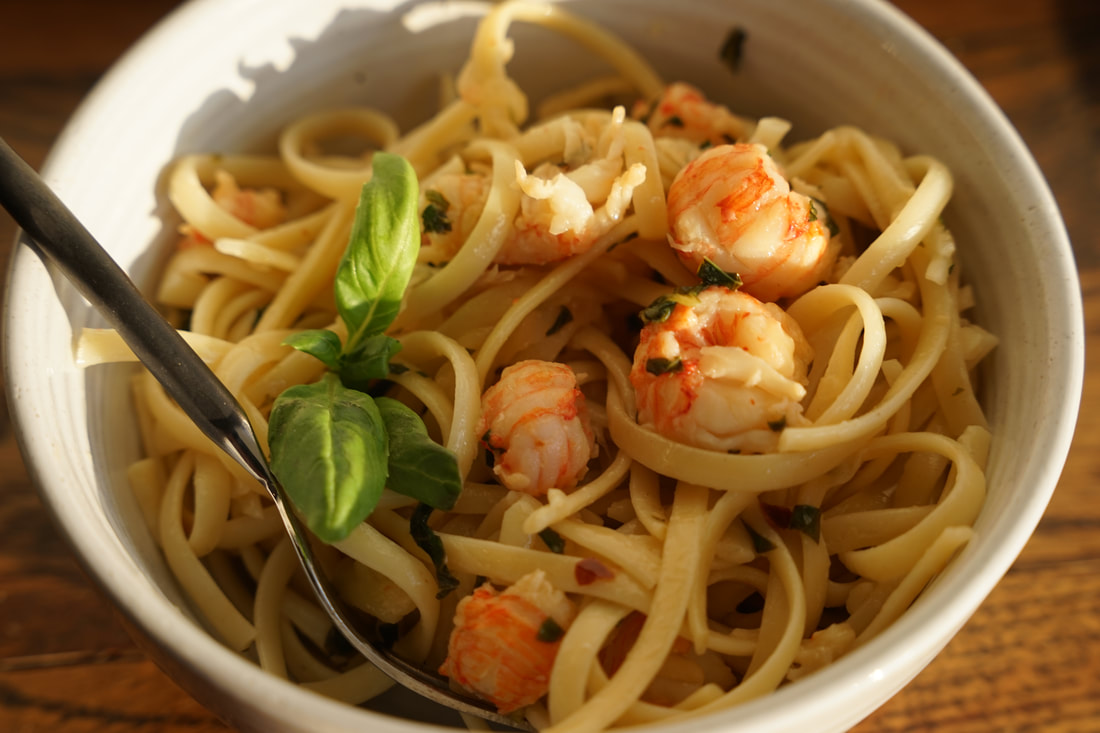 Spoon into bowls and sprinkle with additional parmesan cheese. Granted, it's not grilled lobster salad on the beach but there's something almost as special about a sitting at my own kitchen table, across from the love of my life, eating my favorite lagostino pasta. 😆 And for those of you interested, the aforementioned photos from our trip.
Ciao!
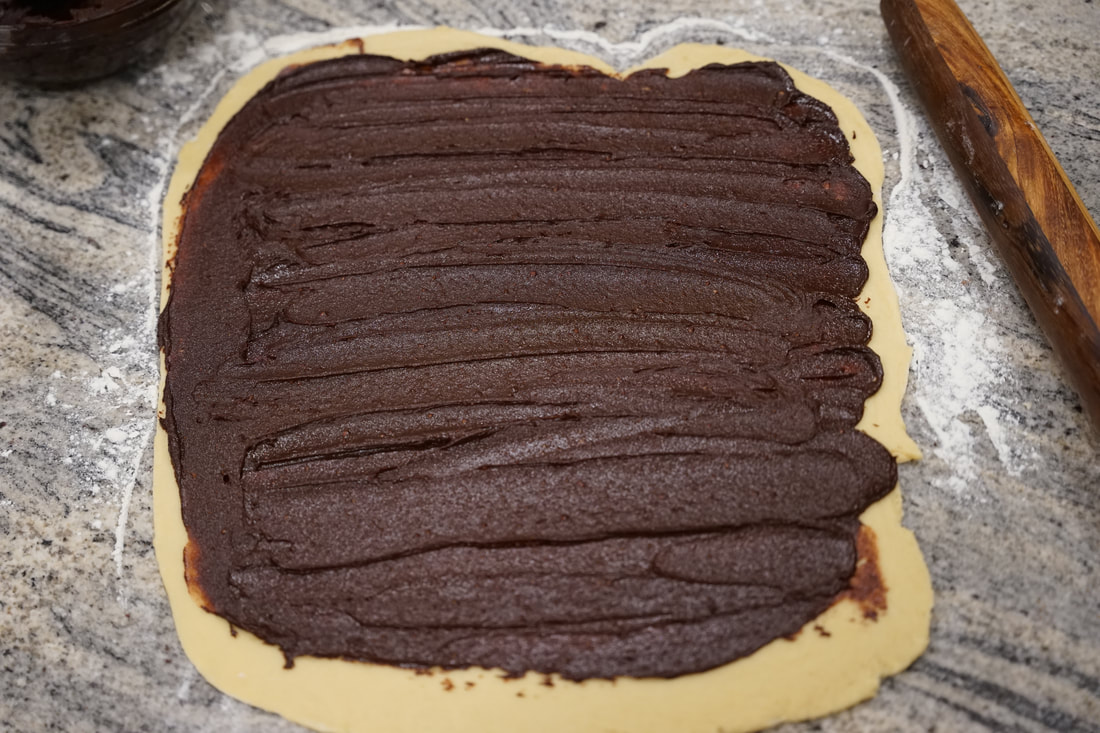
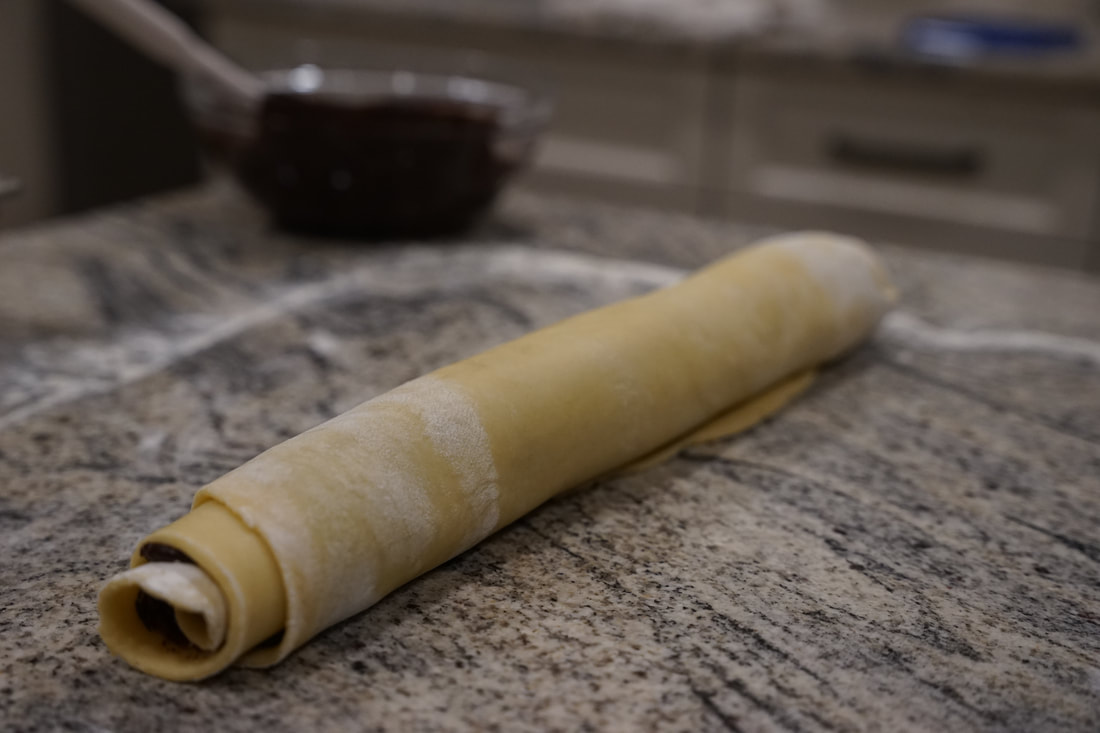
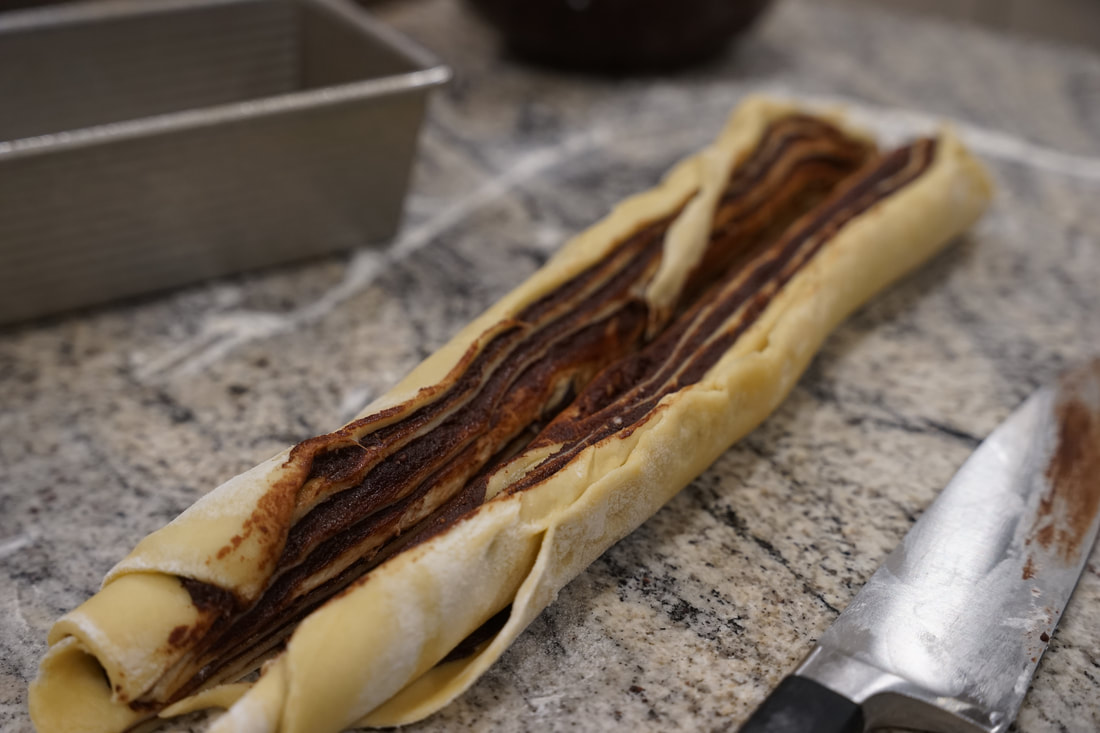
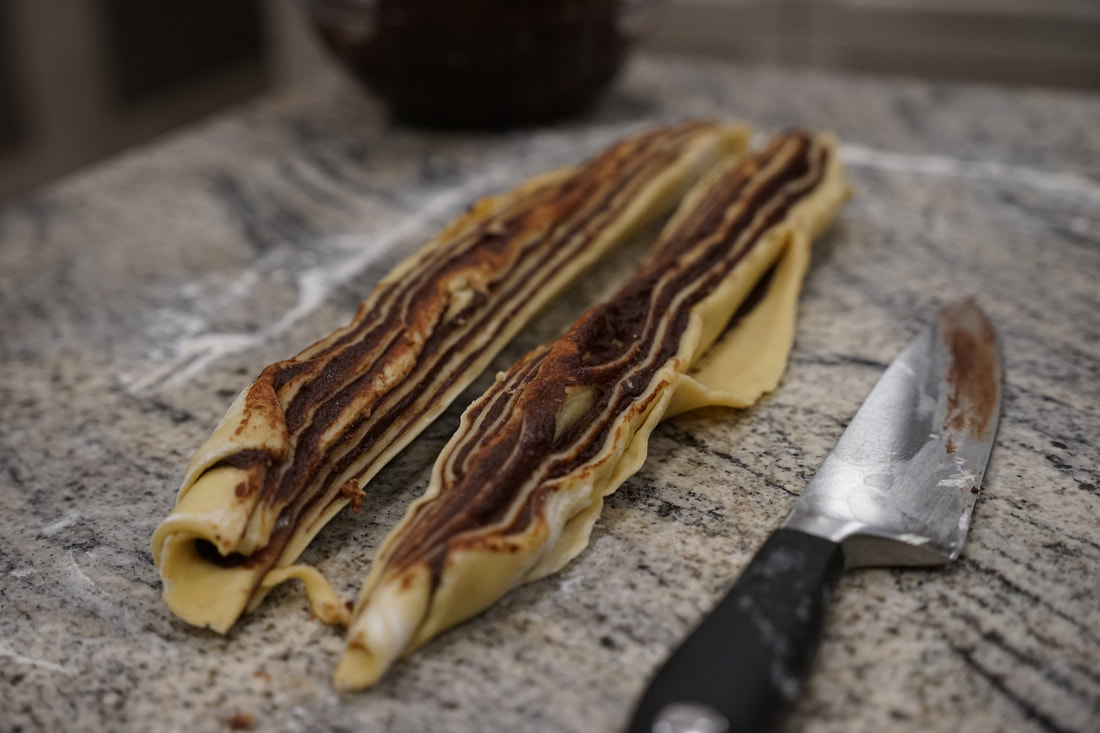
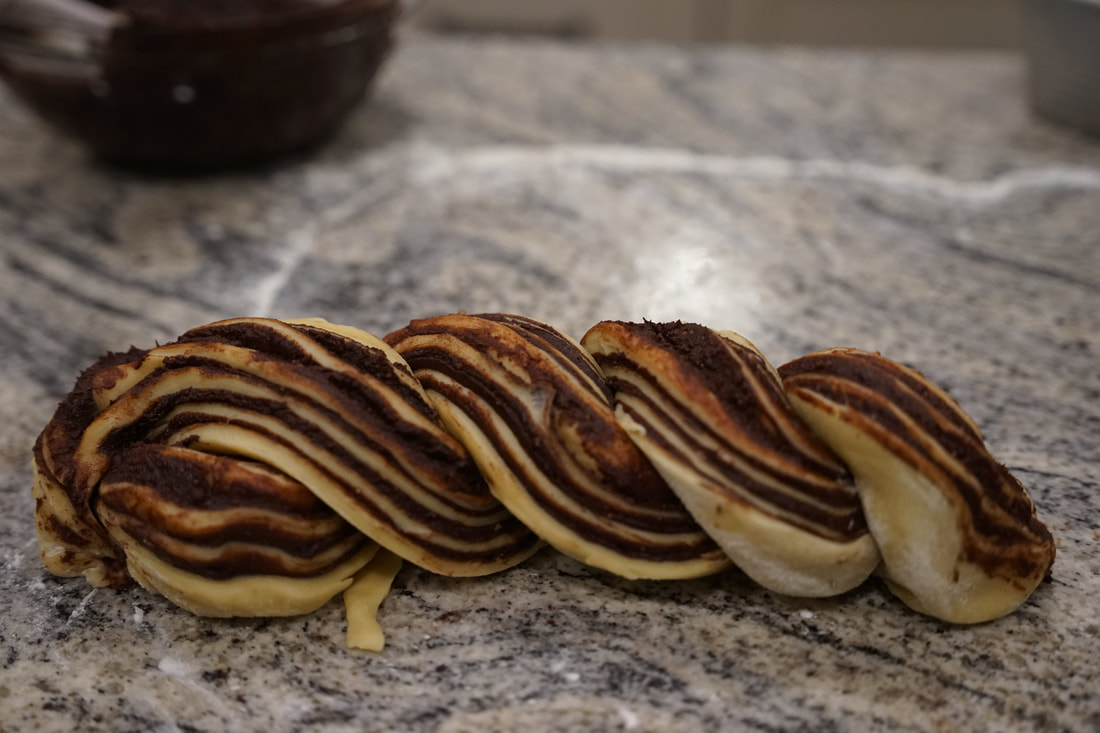
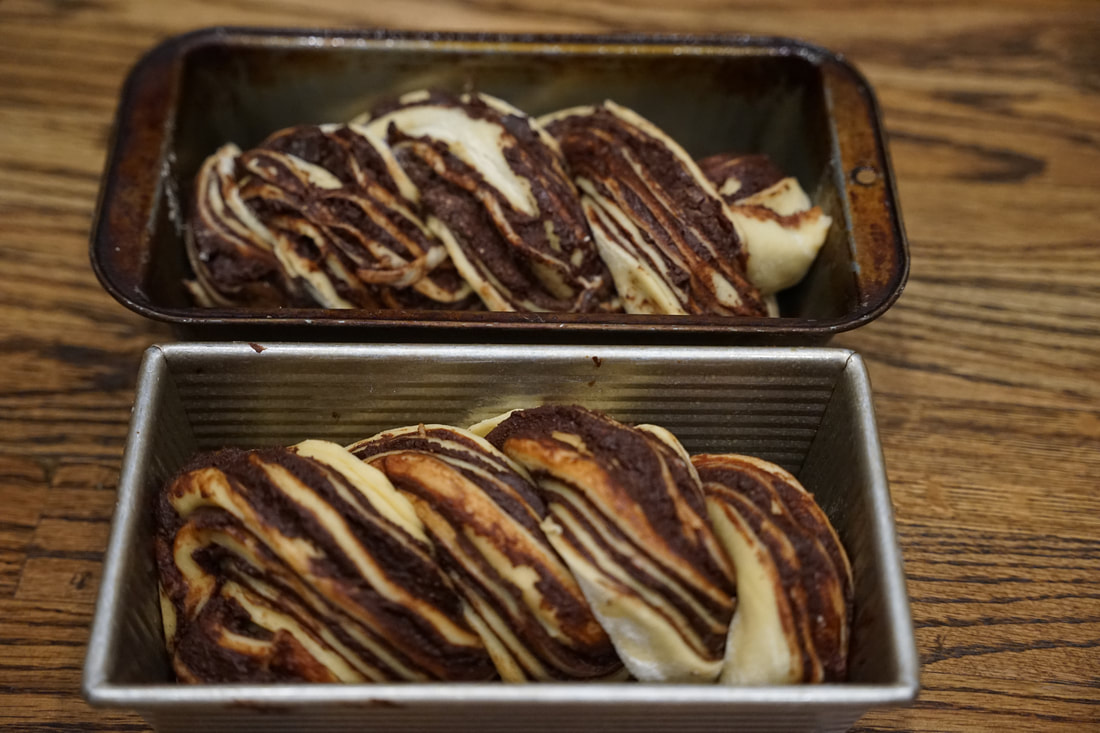
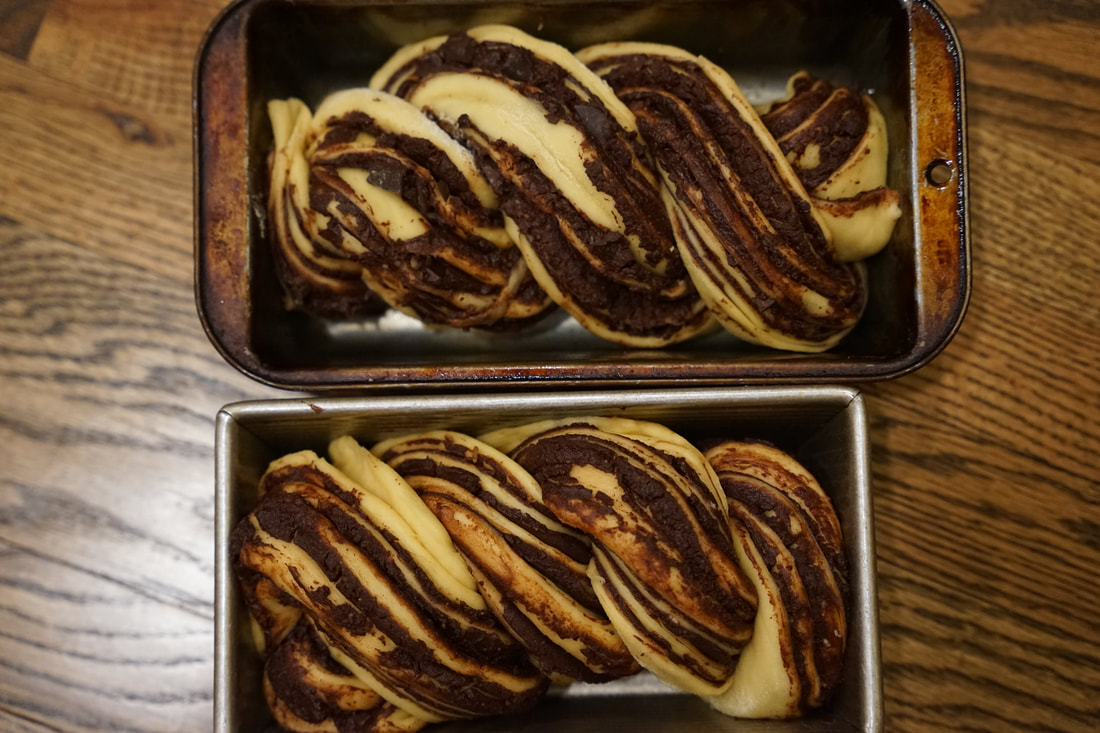
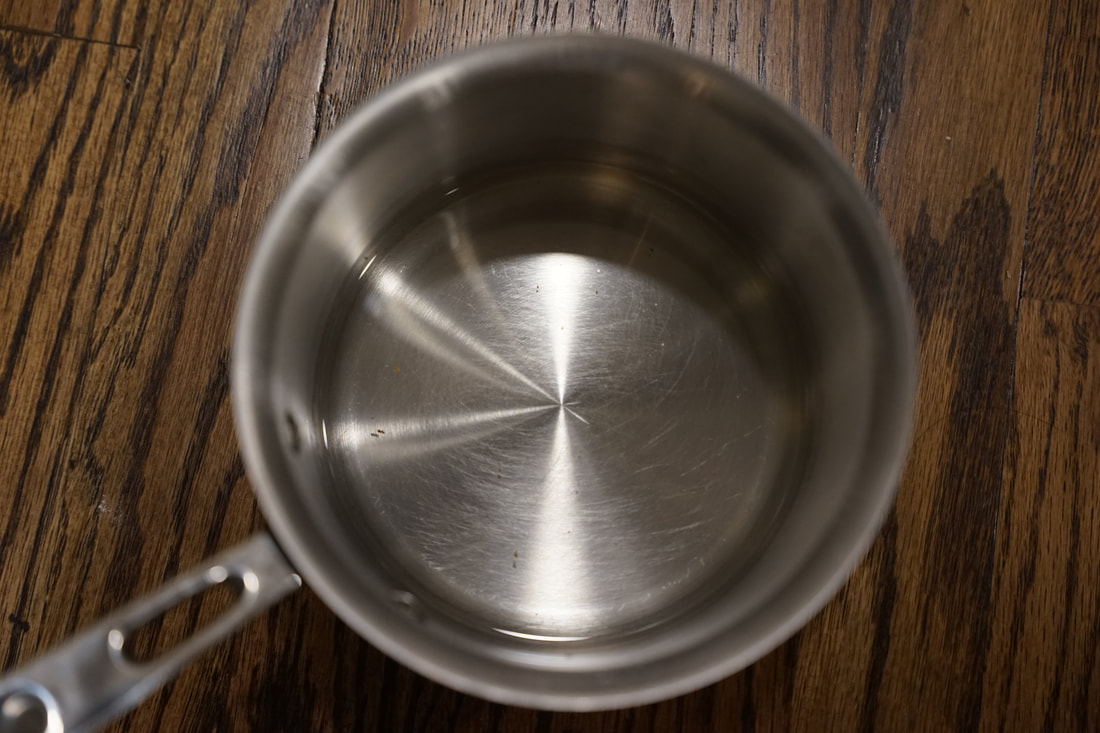
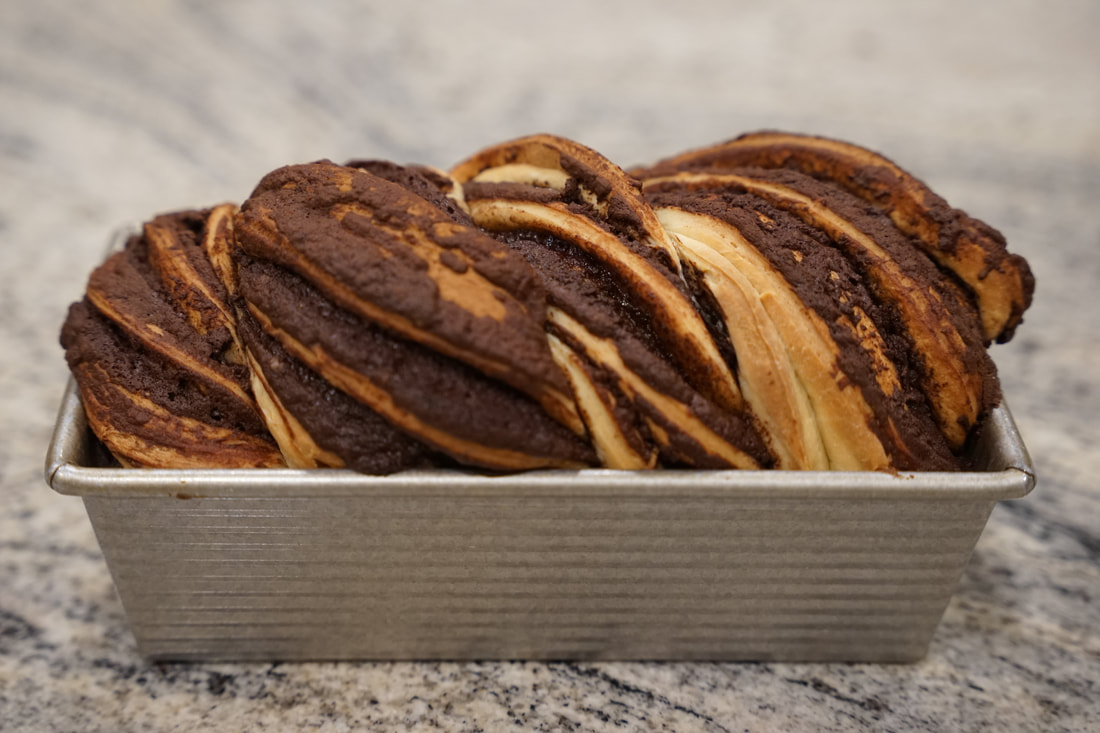
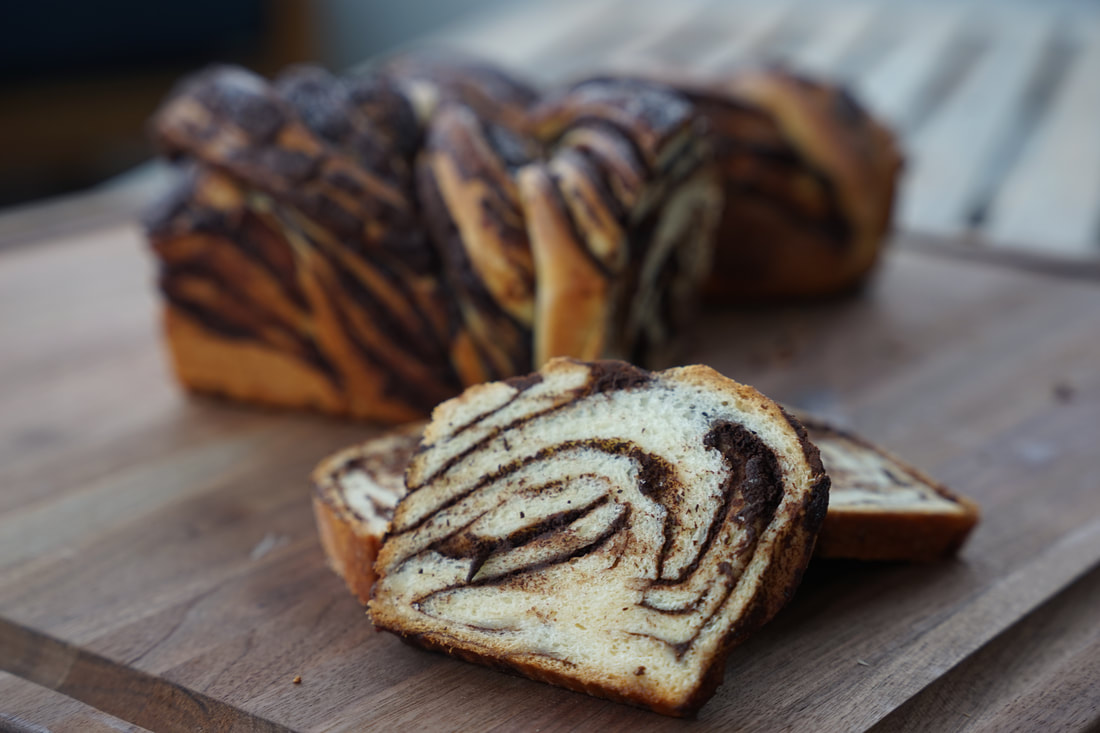 Is there anything better than a freshly baked loaf of artisan bread swirled with a rich, dark, decadent chocolate ribbon?😋 I love this bread so much that I've become an expert at coming up with excuses to eat more of it.🍞🍫 I toast it so it becomes a perfectly acceptable breakfast food. If I happen to have extra cream cheese in my refrigerator - I spread a little over a thick slice and it becomes a delicious snack to use up leftovers. Chocolate Babka is the perfect compliment to any brunch, lunch or dessert table. 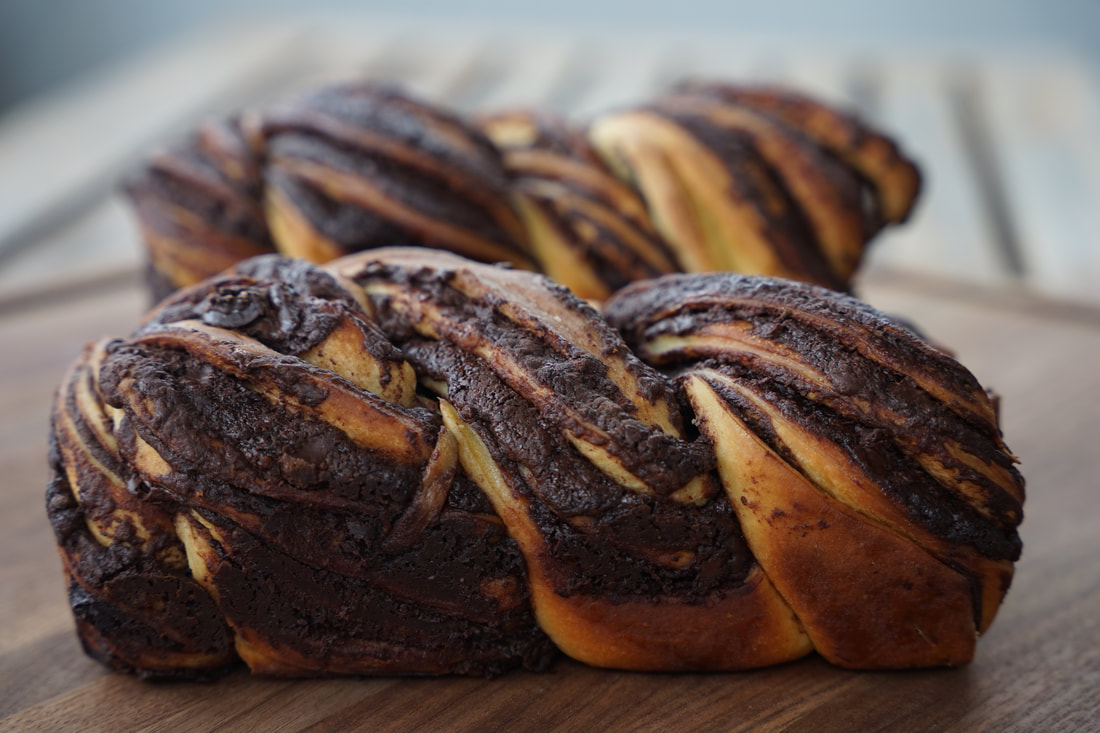 Don't let the length of this homemade bread recipe intimidate you. It can easily be divided into a 2 day project instead of 1 long marathon bread baking session. I like to make the dough on the first day and then let it (and me) rest overnight.😴 The following day, I make the filling, assemble and bake the delicious, chocolate filled loaf. Honestly the hardest part of the whole process is waiting for the bread to cool enough before I can cut a slice. 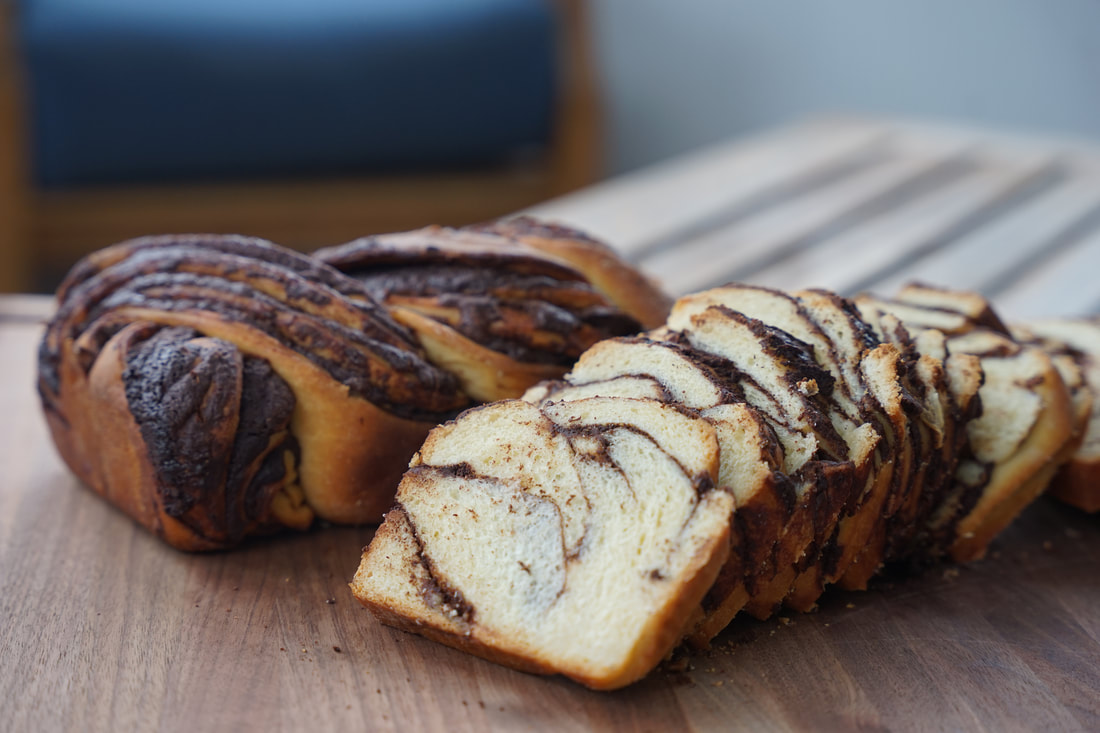 Chocolate Babka 4½ cups flour ½ cup sugar 2¼ teaspoons instant yeast 4 eggs, room temperature ½ cup whole milk, room temperature 1½ teaspoons salt 10 Tablespoons butter, room temperature For the Filling: ½ cup butter ½ cup heavy cream 8 ounces chopped dark chocolate ¾ cup powdered sugar ⅓ cup cocoa powder For the Syrup: ⅓ cup granulated sugar ⅓ cup water
 Bake 40 minutes at 350.
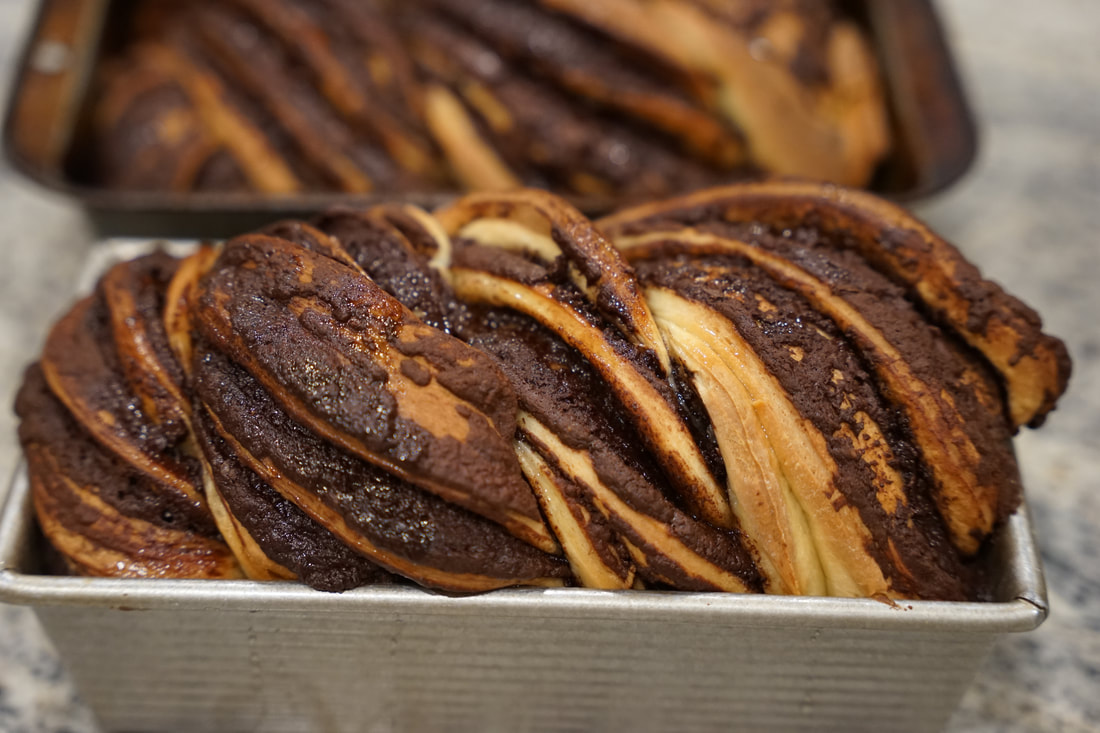 As soon as loaves come out of the oven, brush with syrup. 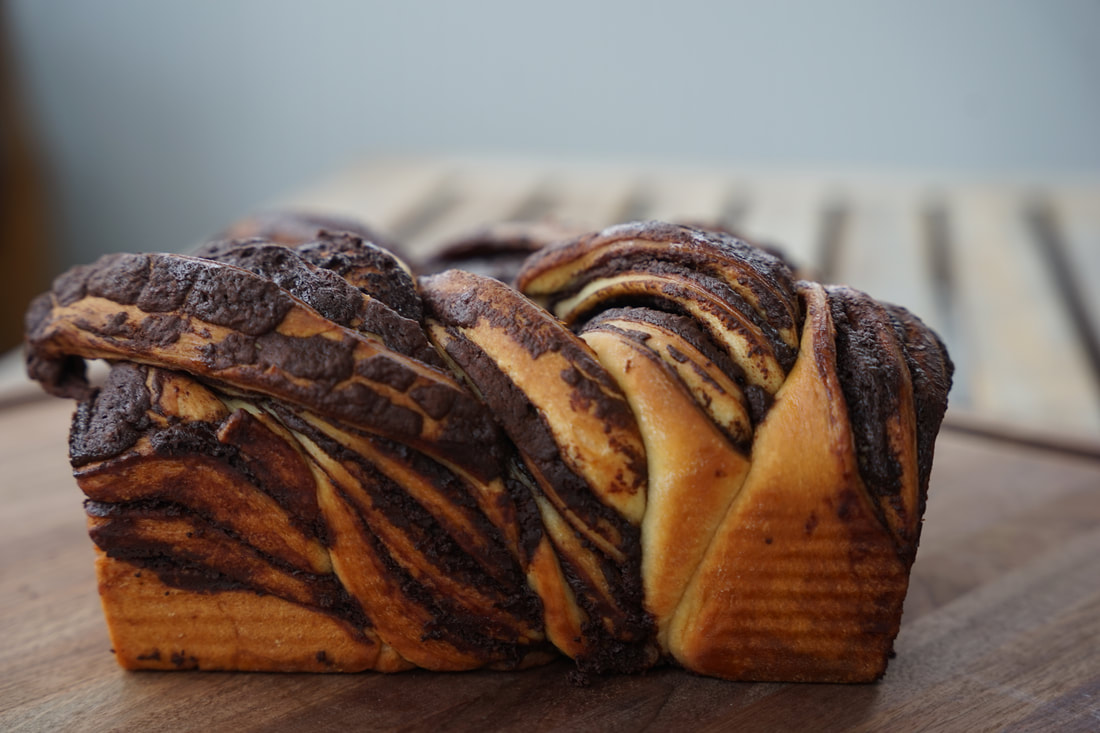 Let the babkas cool for 30 minutes in the pans before removing. 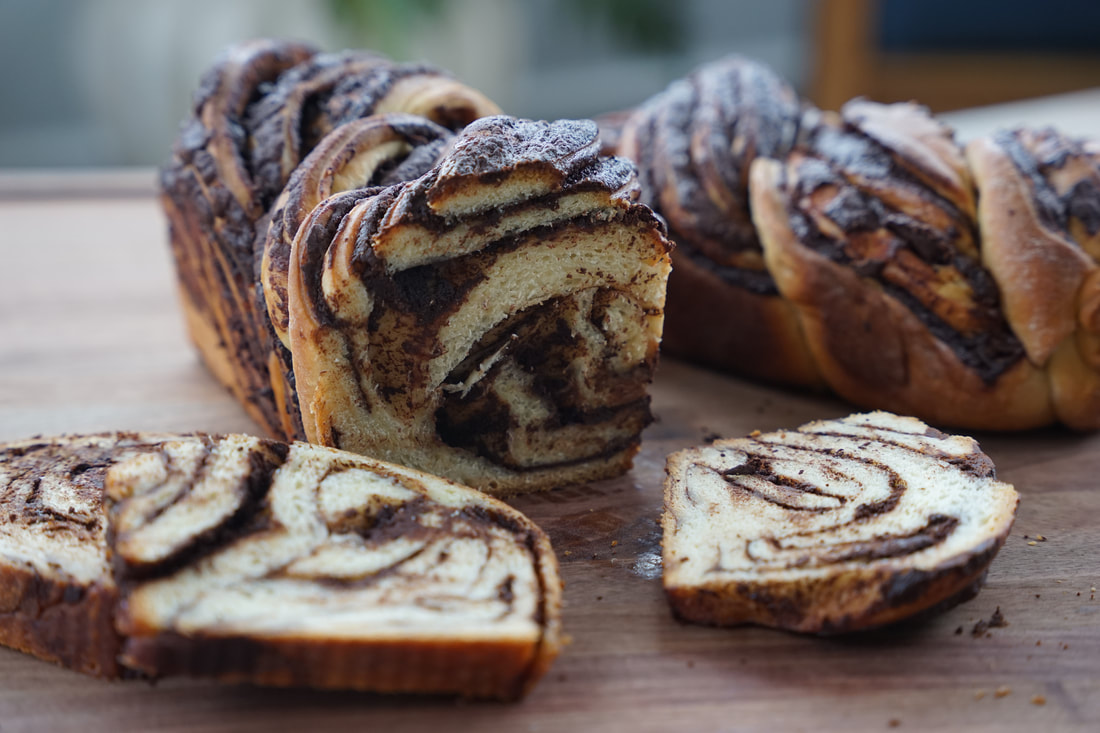 Ciao!
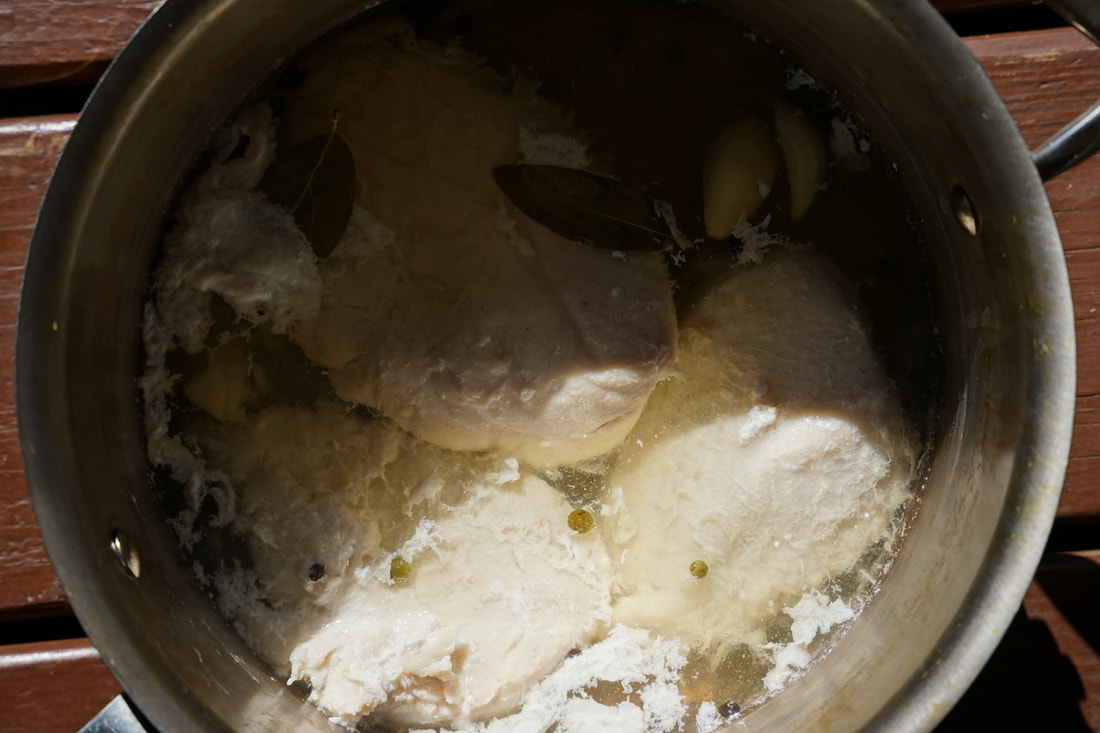
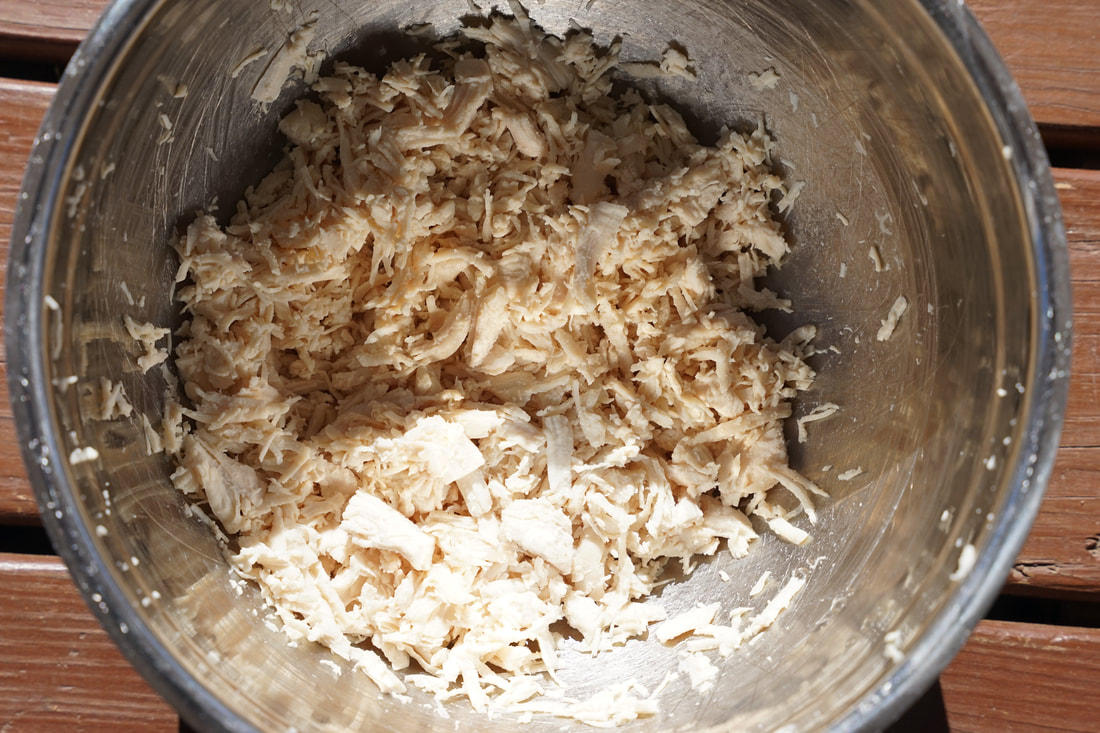
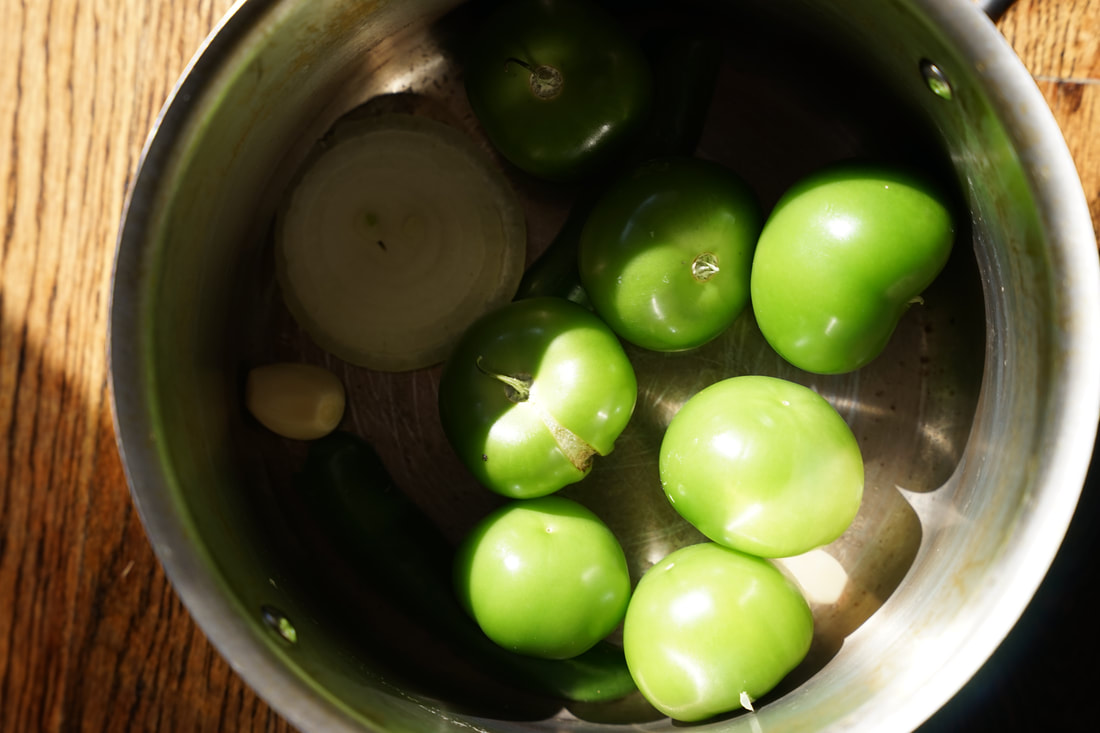
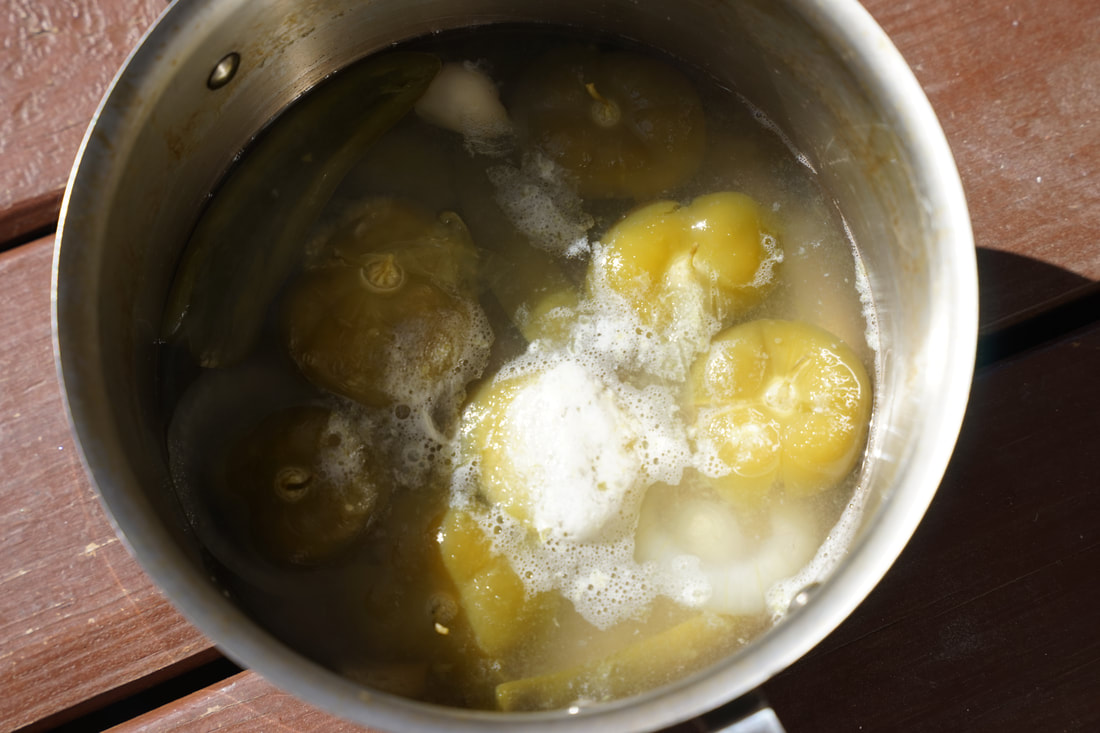
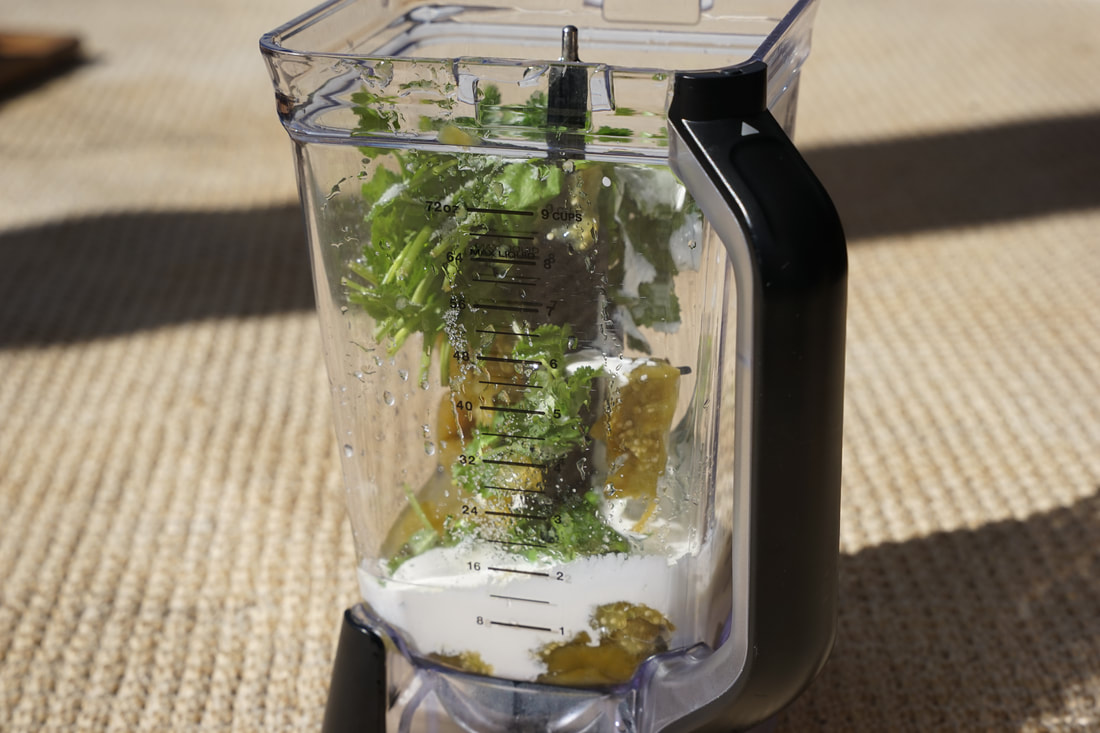
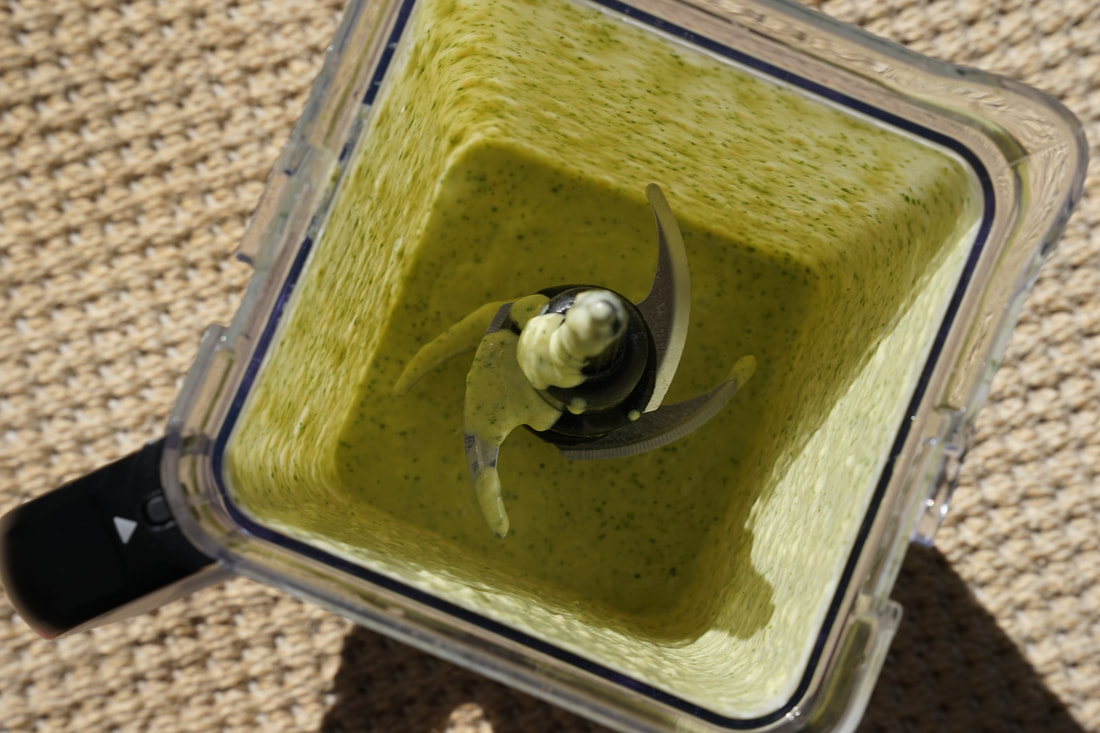
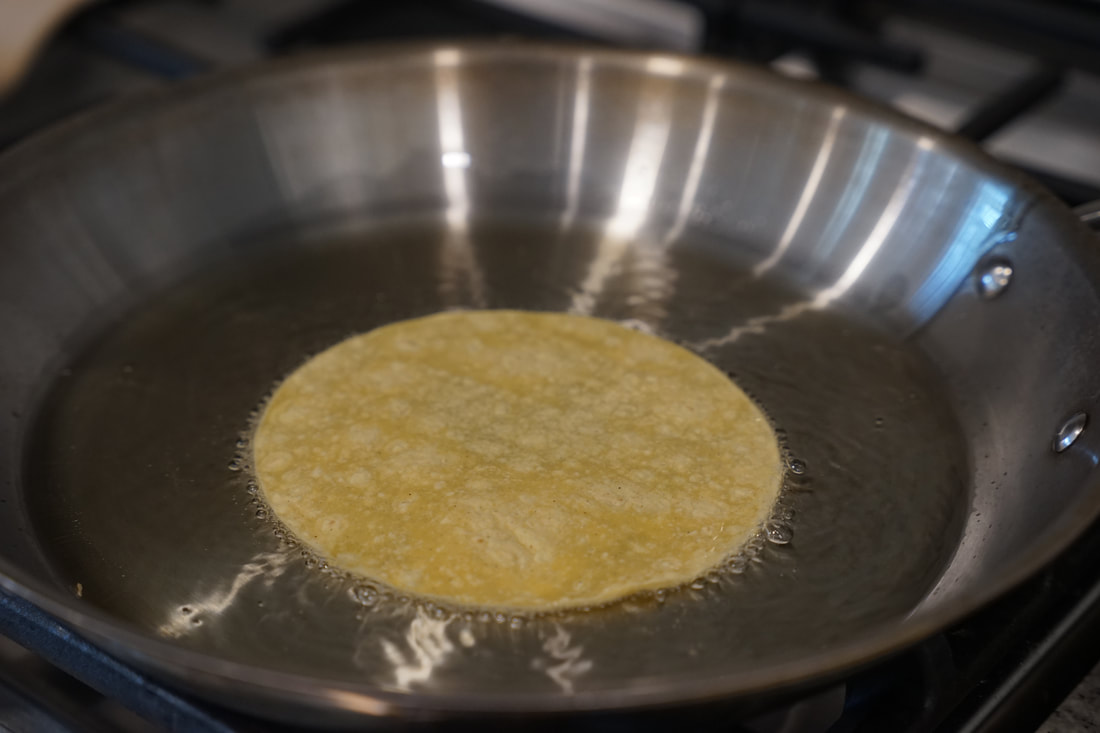
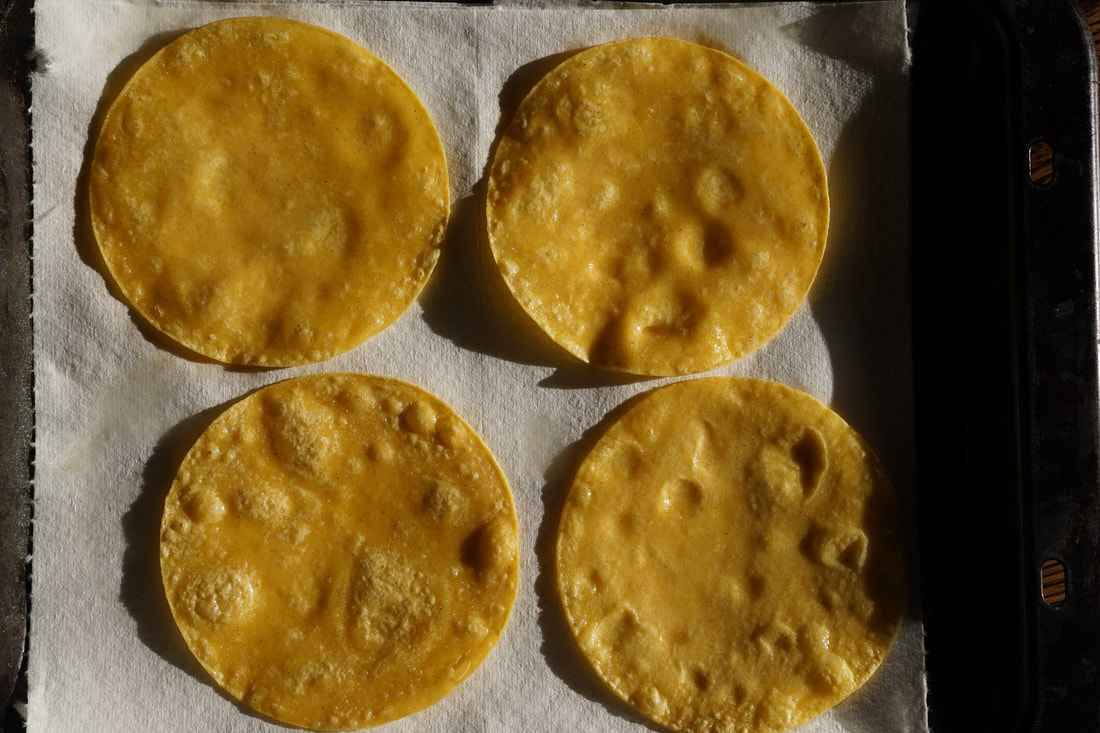
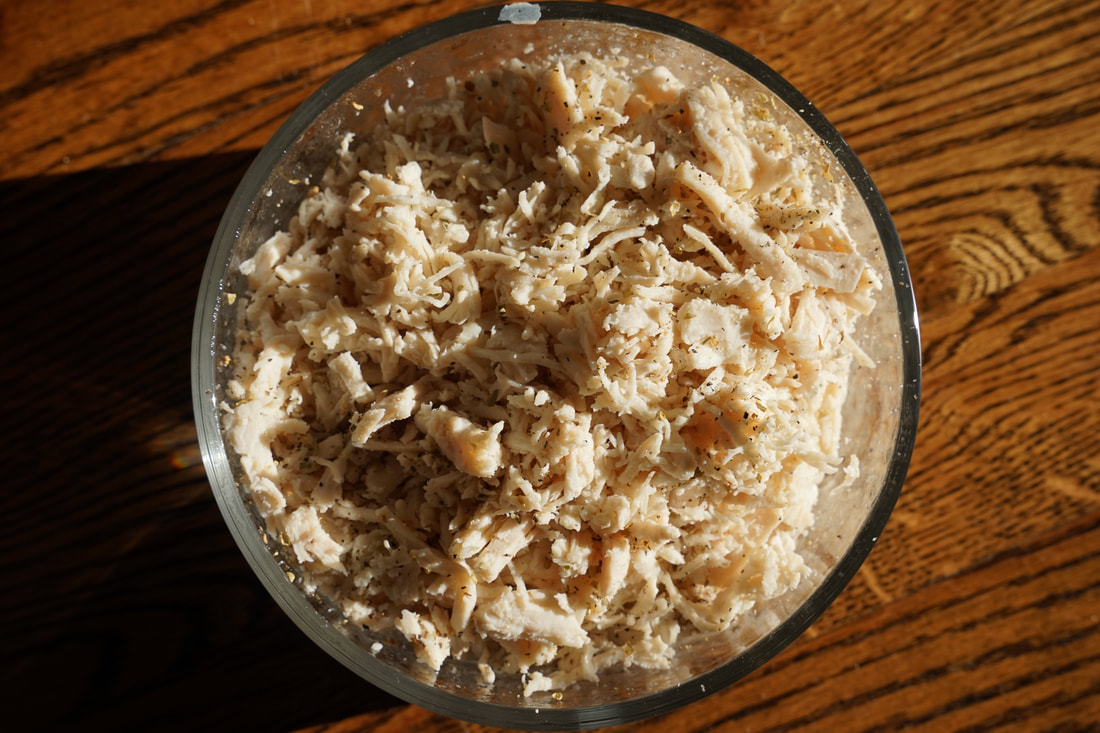
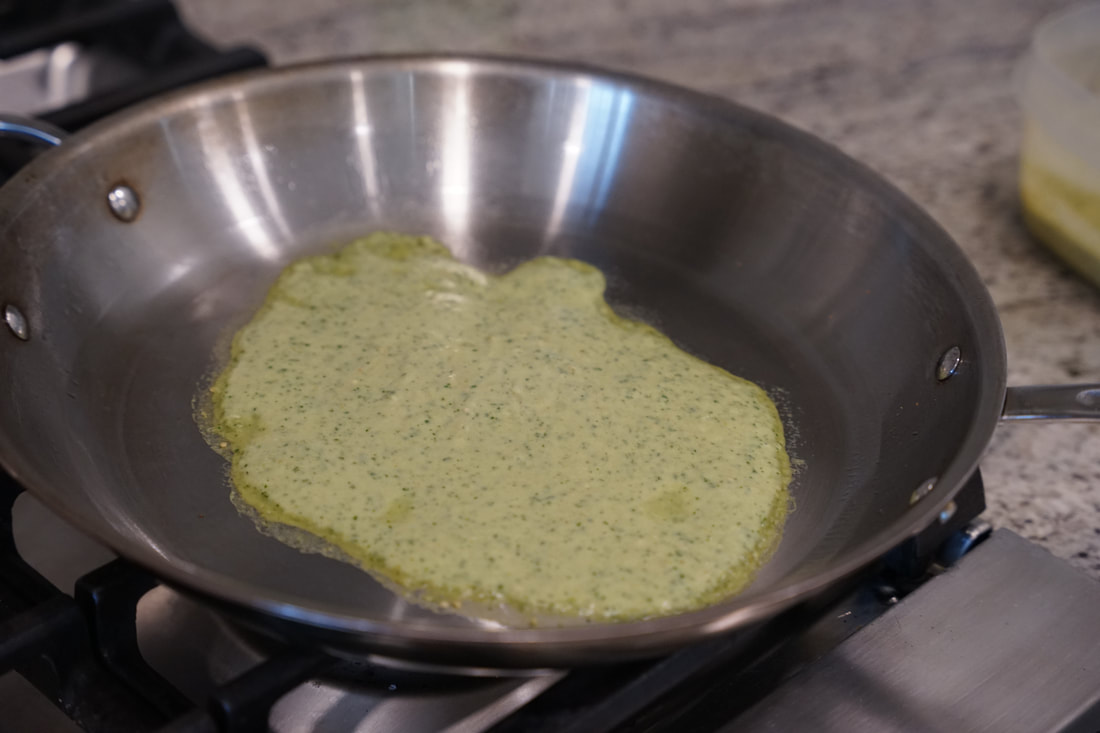
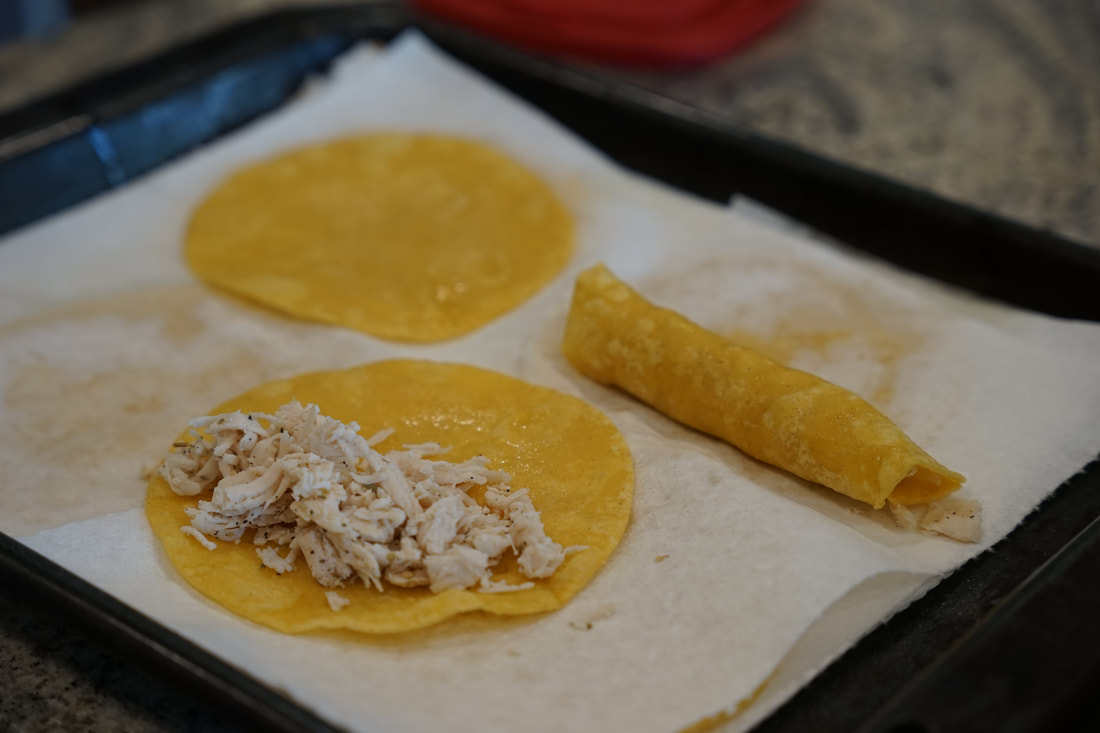
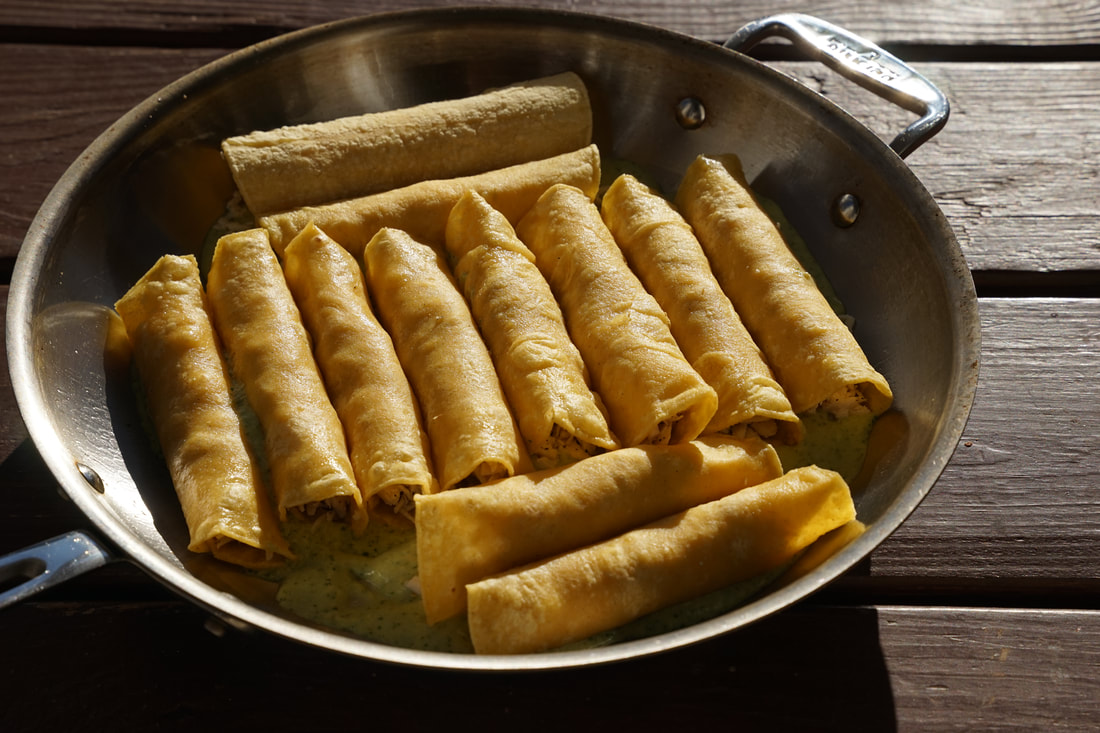
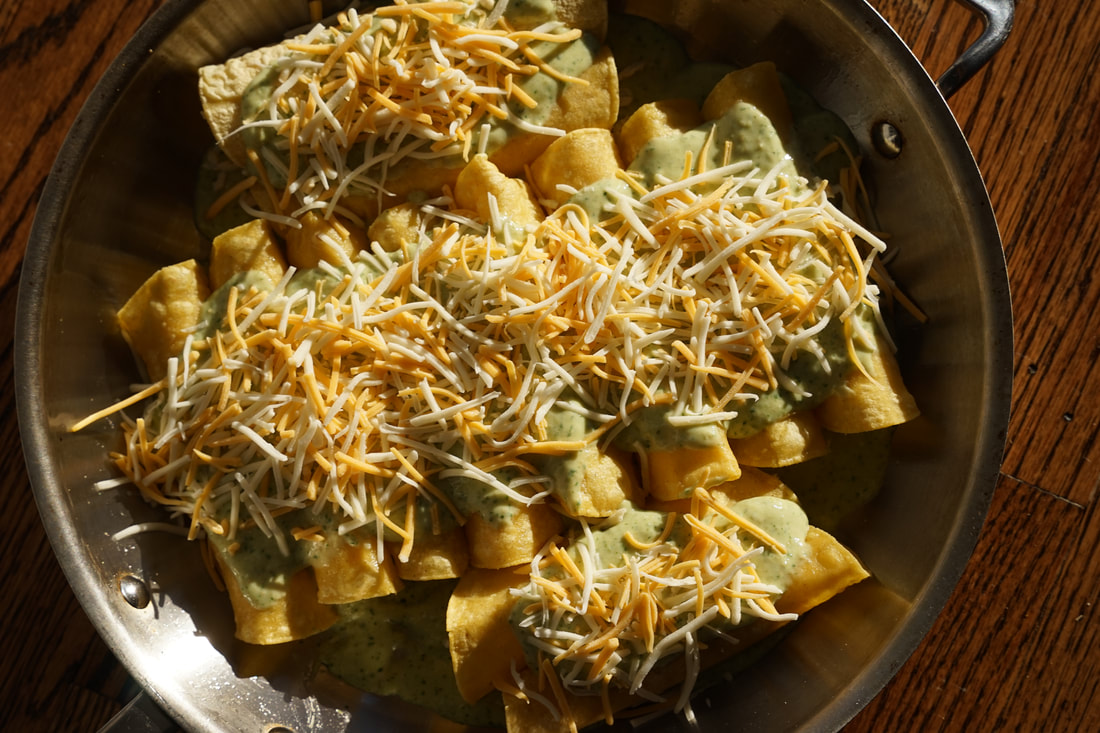
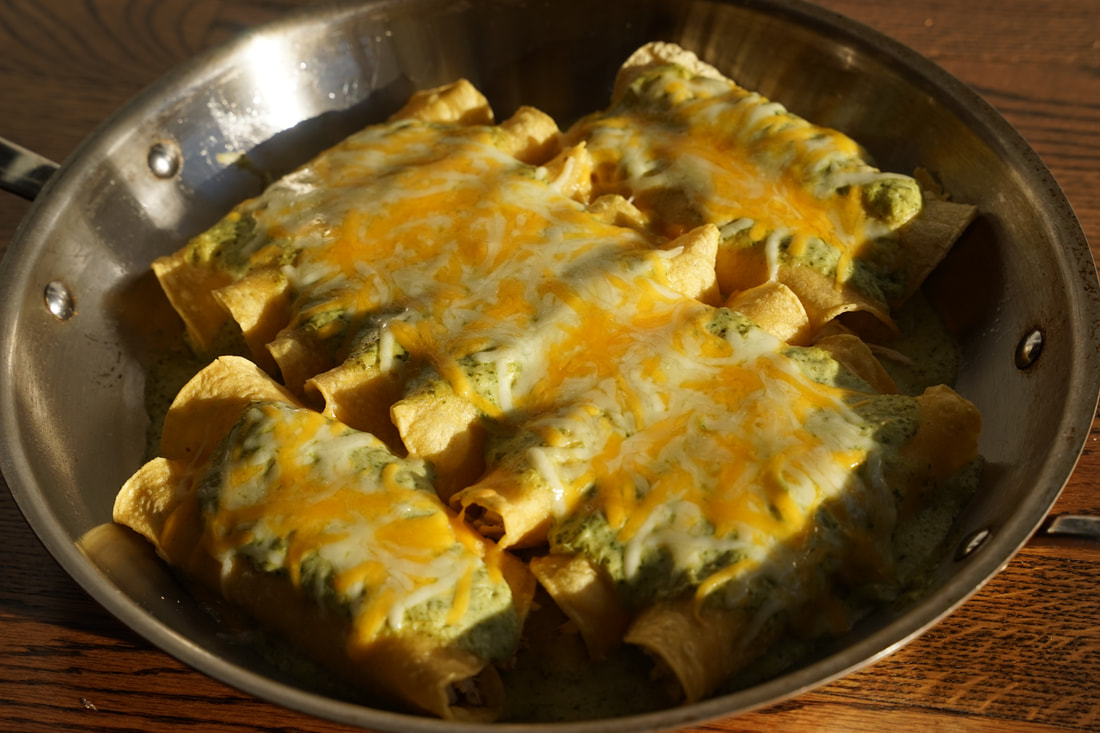
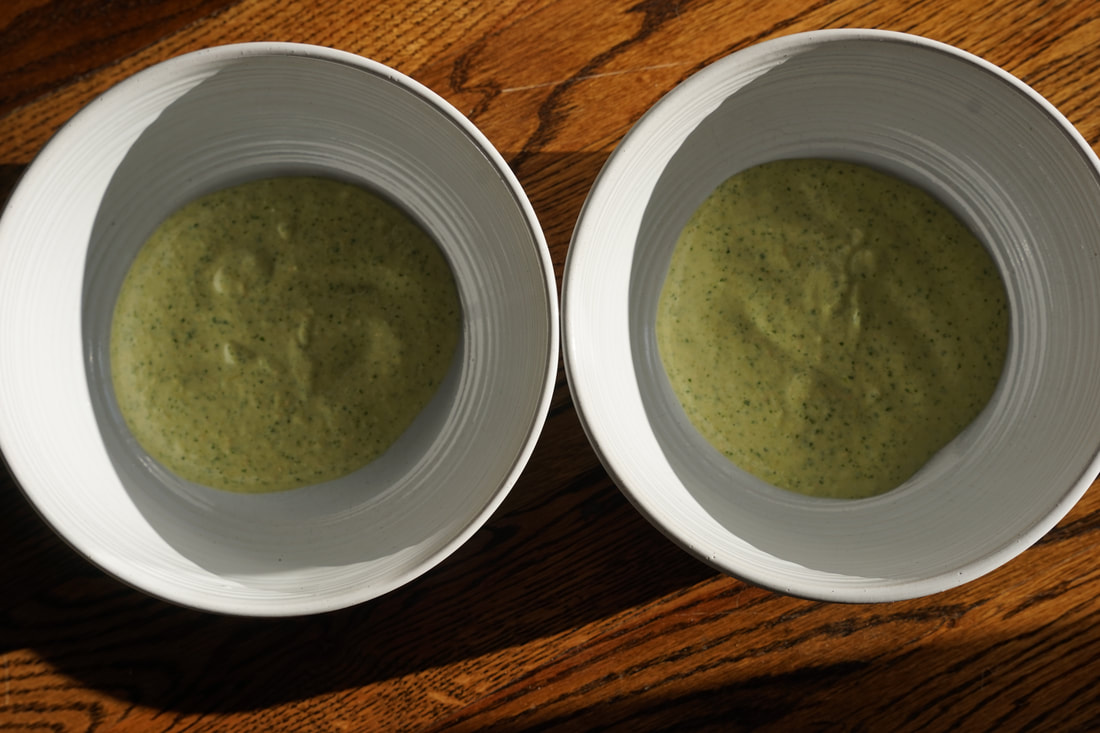
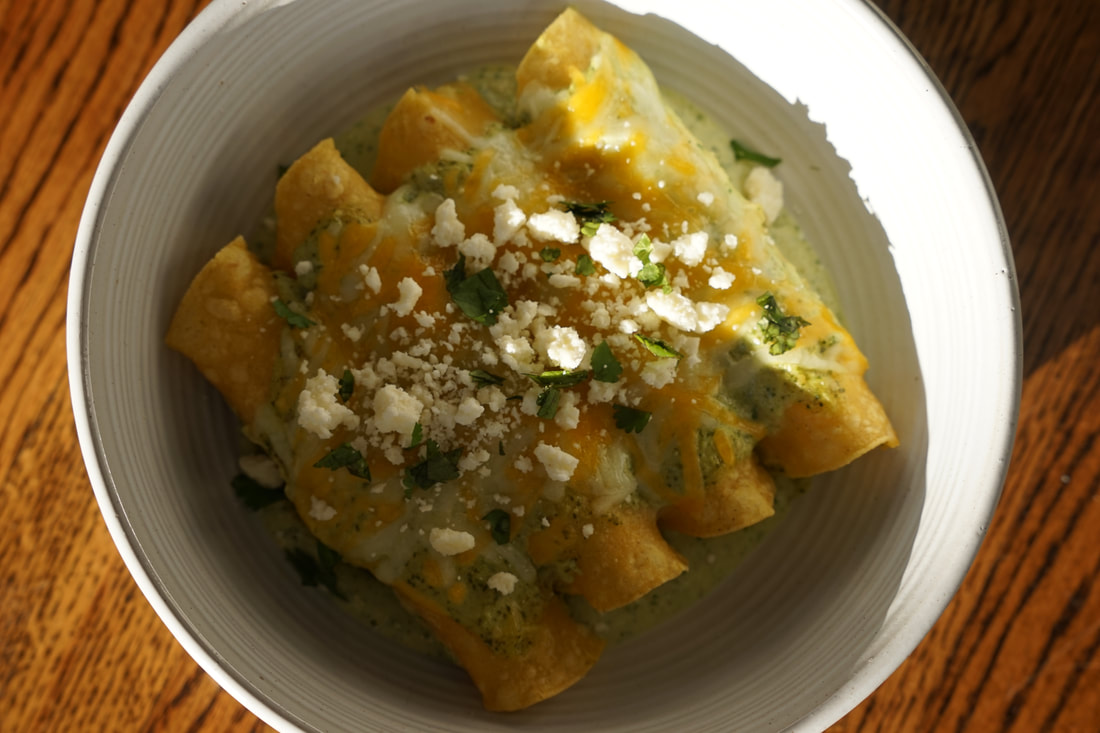 I'm an Italian girl living in central Georgia so naturally ... I'm sharing one of my favorite Mexican recipes with you on the blog today. 😂🇲🇽 I feel like everyone loves good Mexican food though ... even Italians. I've been blessed to have had some amazing people in my life who have spent time in Mexico and selflessly invested their time to teach me how to prepare truly authentic Mexican dishes.🌮 That in no way makes me an expert but I'll forever be grateful for all of the lessons I've learned from my Mexican friends. I may never master homemade tortillas or a chili stuffed turkey but I feel confident enough in my skills to tackle fresh tomatillos for the verde sauce for enchiladas suizas. The name alone "Enchiladas Suizas" loosely translates to Swiss Enchiladas. I will admit that I did a deep dive on google today to find the origin of these enchiladas that may or may not have taken an hour out of my day - totally worth it though.🤣 Turns out, there are several theories about how these chicken stuffed enchiladas came to get it's unique name. The most basic theory is that the cheese on top resembles the Swiss Alps.🗻 The more believable theory, in my opinion, is that they were invented by a Swiss chef from Zurich who was living in Mexico.🇨🇭 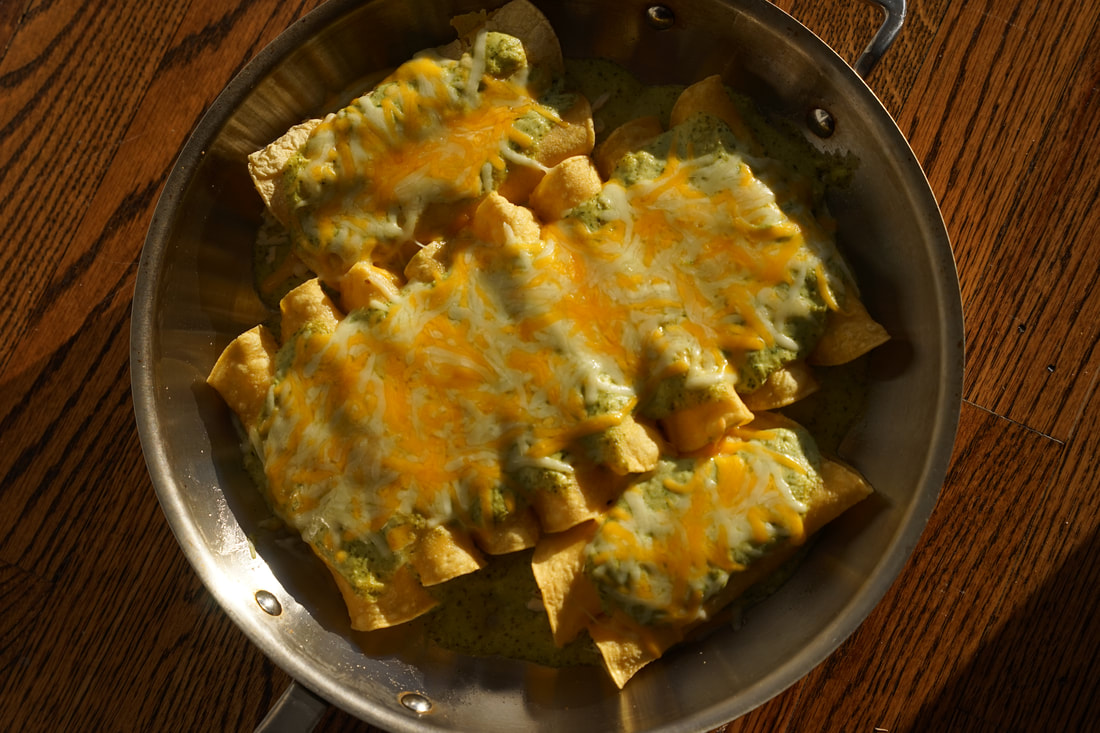 I found a version of this recipe in a Cook's Illustrated magazine and it peaked my interest immediately. Maybe it was because I had a half container of Mexican crema and some leftover cojita cheese in my refrigerator that needed to be used up or maybe it was the rich and creamy green sauce that drew me to it. Either way - I'm so glad that I made these Enchiladas Suizas because they are AMAZING!! 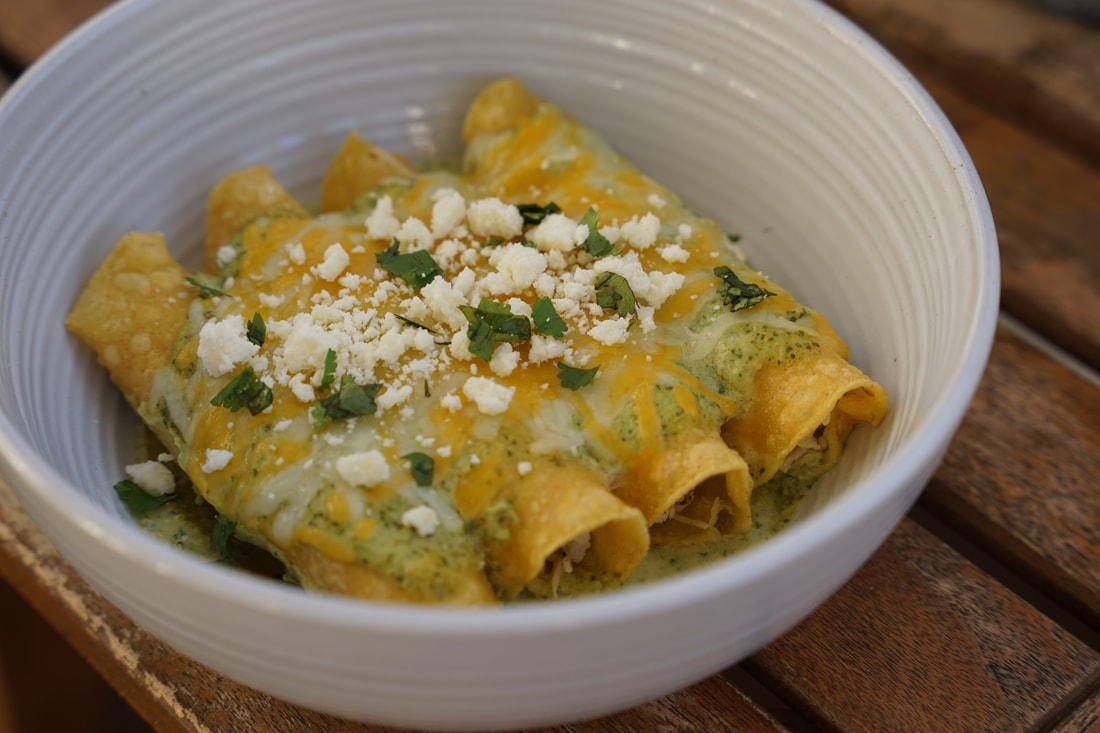 Enchiladas Suizas Chicken 1 pound boneless, skinless chicken breasts 2 garlic cloves, smashed 2 bay leaves 3/4 teaspoon salt 1/4 teaspoon black peppercorns Sauce 3 serrano chilies 1 white onion, havled 1 pound tomatillos, husks and skins removed 2 garlic cloves 1/2 cup cilantro, chopped 3/4 teaspoon sugar 1/2 teaspoon salt 1/2 cup Mexican crema Enchiladas 1/3 cup canola oil 8 (6 inch) corn tortillas 1/4 teaspoon oregano 1 cup Monterrey Jack cheese, shredded 1 cup crumbled cojita cheese
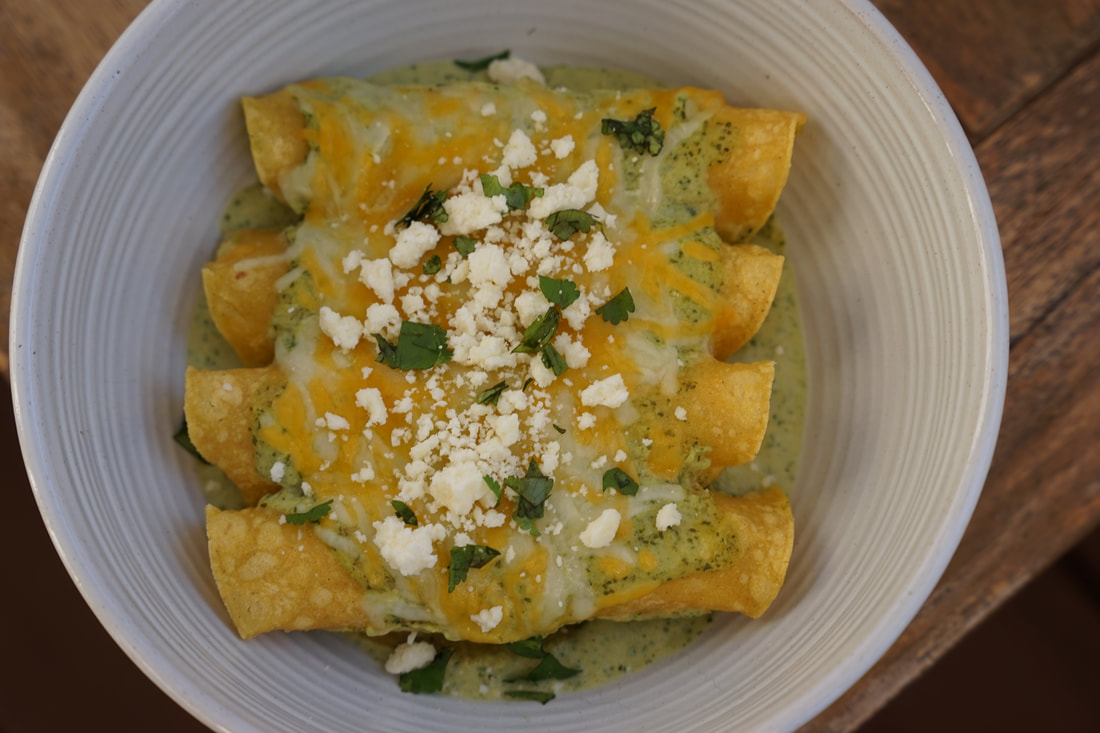 Arrange 4 enchiladas over each bowl of sauce. Garnish with cilantro, cojita and chopped onion.
Ciao! |