My Story in Recipes
  • Recipe Index
  • Blog Posts
  • My Story
  • Connect

Chocolate Chip Muffins

1/26/2012

0 Comments

 
Picture
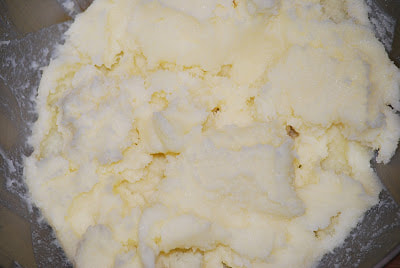
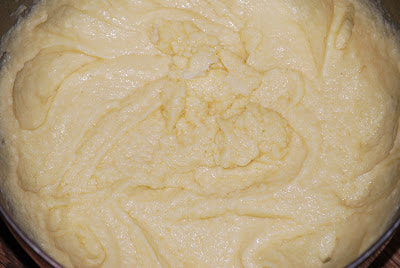
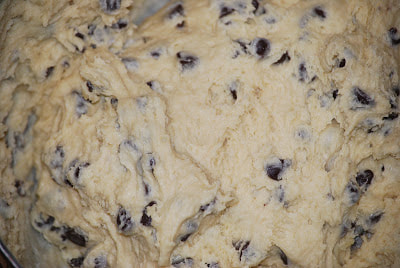
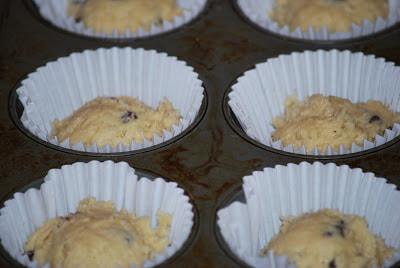
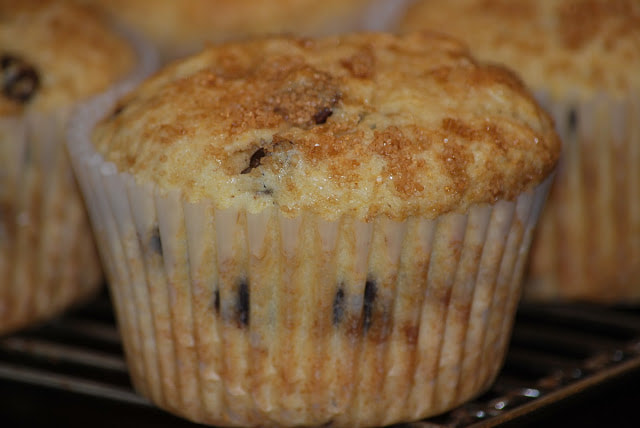
​People have been telling me about pinterest for months and I've never really taken the time to go on the site and see for myself what it's all about.  (I spend a lot of time sitting at my computer already so I'm hesitant of internet sites that can drain even more time out of my day.)  I was curious enough to check out pinterest anyway and I was pleasantly surprised.  It was really interesting and I found tons of recipes!  I posted a bunch of my recipes onto my boards and it was really quick and easy.  I am not the computer savvy person that my husband is, so I felt really accomplished having navigated this site independently.  (I like to take the credit but it wasn't really me but the fact that pinterest makes it really easy.)  After an hour on pinterest, I was completely sucked in.  It was fun to watch as people "repinned" or "liked" one of my recipes.   I posted this Chocolate Chip Muffin recipe on my muffin board today.       
Picture
Chocolate Chip Muffins
2 ½ cups flour                                         1 cup + 1 Tablespoon sugar
3 ½ teaspoons baking powder            2 eggs
½ teaspoon salt                                       1 ½ teaspoons vanilla
¾ cup butter                                            ¾ cup milk
1 cup chocolate chips
Beat butter and 1 c. sugar for 2 minutes.  
​Add eggs and vanilla.
Picture
Picture
​Blend in flour mixture alternating with milk.
Picture
Picture
​Stir in chocolate chips.
​Fill six jumbo muffin cups with batter and sprinkle with 1 T. sugar.
Picture
Picture
​Bake 21-23 minutes at 350.  Cool in pan for 10 minutes and then move to a wire rack to cool completely. 
Picture
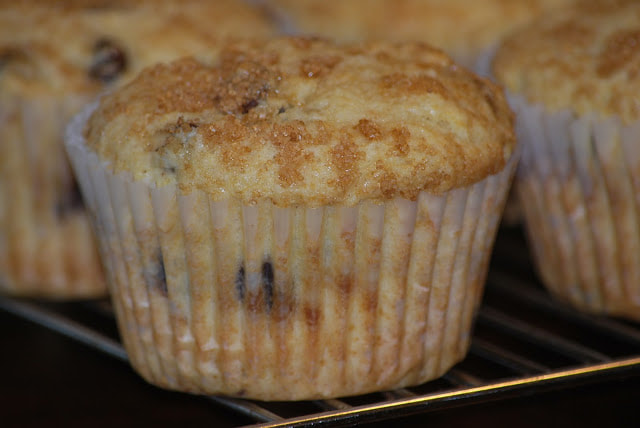
​If you're a pinterest fan - check out my muffin board.  

Ciao!
Click here for a printable version of this recipe
0 Comments

Multigrain Bread

1/24/2012

0 Comments

 
Picture
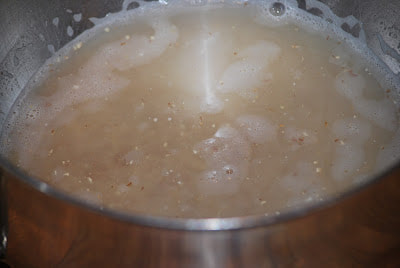
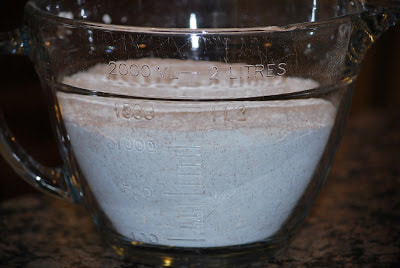
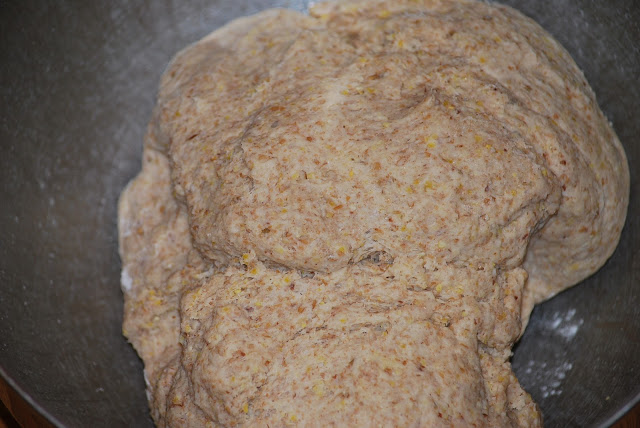
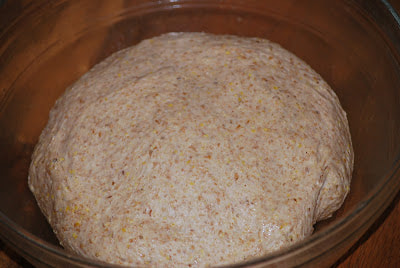
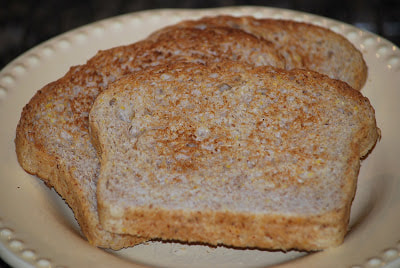
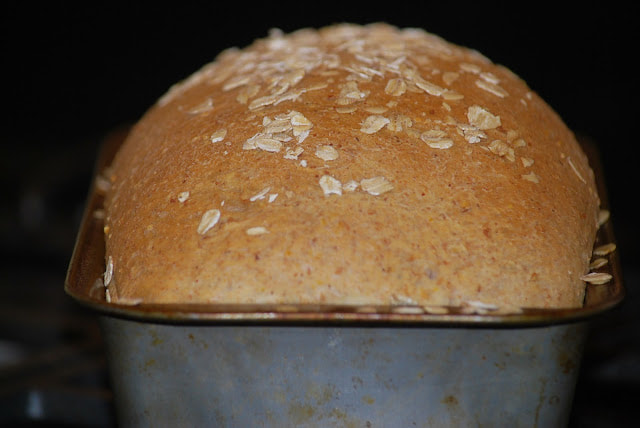
​I have been craving this multigrain bread for a couple of weeks now and I just didn't take the time to make it until last weekend.  It is really good and totally worth the effort that goes into baking it.
Picture
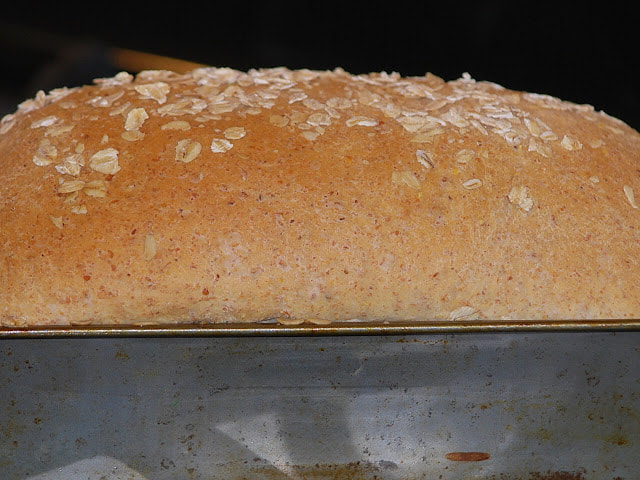
Multigrain Bread
1 ¼ cups 10 grain cereal                           4 Tablespoons honey
2 ½ cups boiling water                              4 Tablespoons butter
3 cups bread flour                                      2 ½ teaspoons yeast
1 ½ cups whole wheat flour                     1 Tablespoon salt
​Place cereal in mixer bowl and pour boiling water over it.
​Cool for an hour – stirring occasionally.  
Picture
Picture
​Add honey, melted butter and yeast.
Combine flours.
Picture
Picture
​Add ½ cup of flour at a time while mixing on low.  Knead until dough forms a ball. 
​Cover bowl with plastic wrap and let rest for 20 minutes.
Picture
Picture
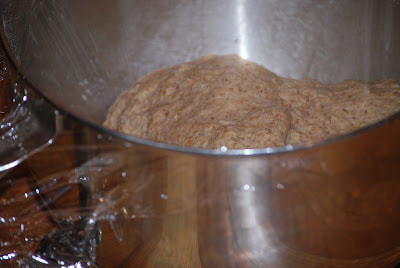
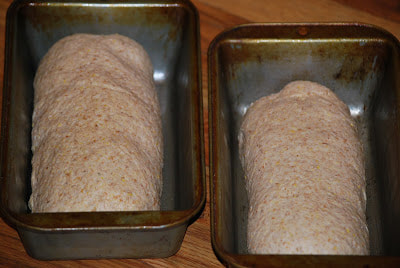
​Add salt and knead for 10 minutes.  Transfer dough to a greased bowl, cover and let rise for 45 minutes to 1 hour. 
Picture
Picture
​Spray two loaf pans and divide dough in half.  Shape each into a loaf and put in loaf pan.  Cover with plastic wrap and let rise 30-40 minutes.
​Spray the top with pam and sprinkle the top with oatmeal.
Picture
Picture
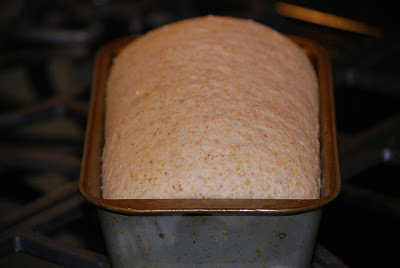
​Bake 25-30 minutes at 375.
Picture
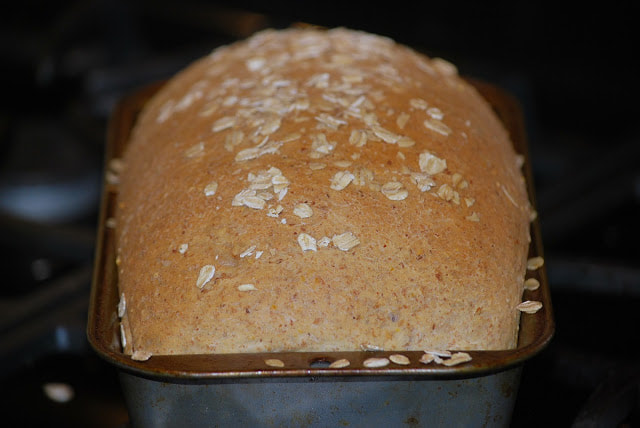
​The smell of this brad baking in the oven was incredible.   Luckily for me, I was pretty tired so I resisted the urge to slice into the piping hot loaf.   I put the loaves on wire racks to cool and went to bed instead. 
Picture
​I think I had dreams about the delicious bread cooling in the kitchen.  Of course I sliced a big piece for my breakfast.
​It was so good that I cut another slice and toasted it.  (I shared with my family too.)
Picture
Picture
​I put the second loaf of bread in the freezer to save for later.  I wrapped it in plastic wrap and then in foil.
Picture
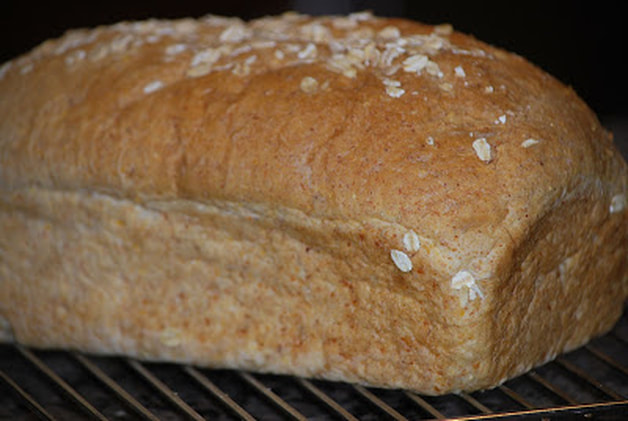
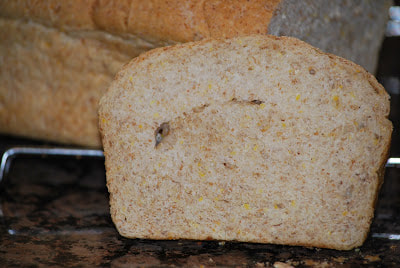
It will take some time to put this bread together but it is so worth it.  It's really good - this one's going under my favorites category.
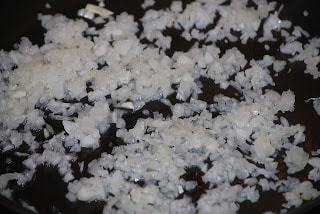
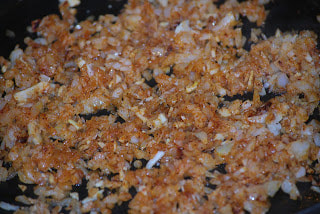
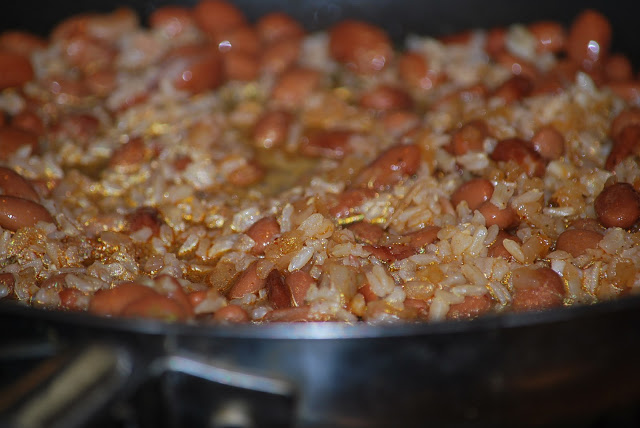
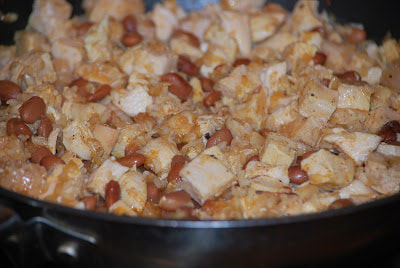
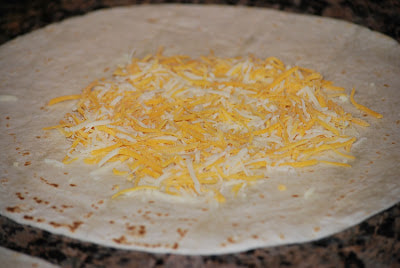
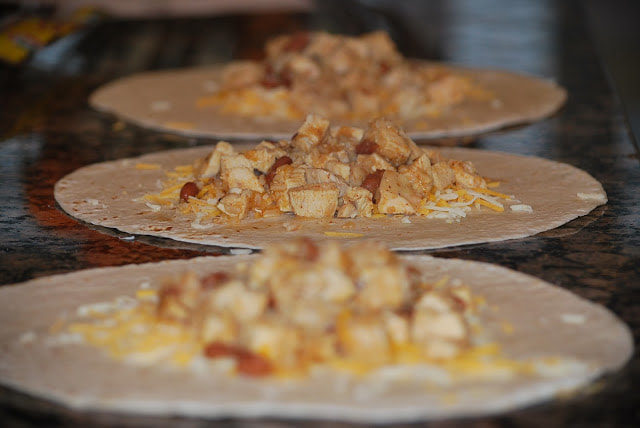
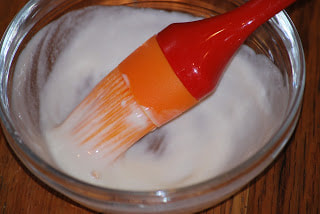
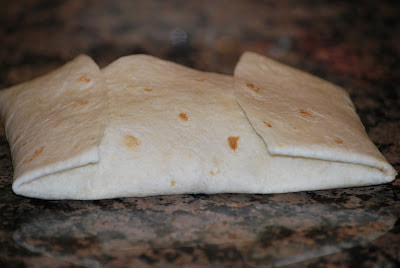
​Ciao!
Click here for a printable version of this recipe
0 Comments

Chicken Chimichangas

1/23/2012

0 Comments

 
Picture
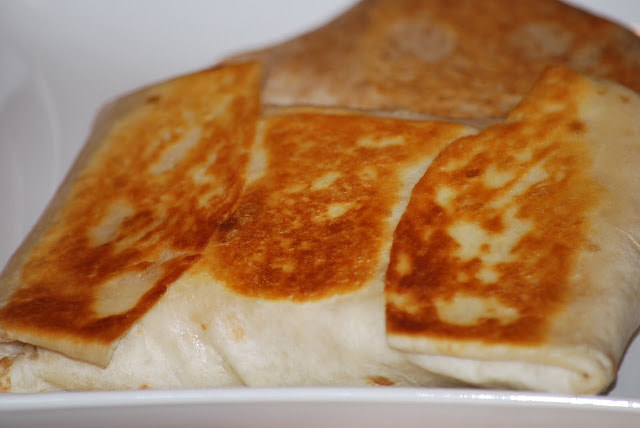
It was dinner "to go" again last Friday night as we dashed off to another wrestling tournament.  I planned to pack up some chicken chimichangas to take with us to the tournament so I cooked extra chicken thighs with my Chicken Bonne Femme.  Too bad they were so good that we ended up eating the "extras" - oops.  So after a trip to the grocery store to buy more chicken, I got started on my chimichangas.
Chicken Chimichangas
3/4 cup chicken broth
1 cup whole grain brown rice, cooked
3 boneless chicken breasts
1 Tablespoon oil
1 onion, chopped
2 cloves garlic, minced
1 teaspoon chili powder
1/2 teaspoon cumin
1 can pinto beans, drained and rinsed
6 ounces cheddar cheese
1 Tablespoon flour
1 Tablespoon water
6 flour tortillas - I like to use large burrito sized tortillas for chimichangas
​Season chicken breasts with salt and pepper and place on a baking sheet.  Poke holes in breasts with a fork and bake 30 minutes at 350.  Dice chicken when cool. 
Picture
Picture
​Heat oil in skillet, add onion and cook until softened.
​Stir in garlic, chili powder and cumin and cook 30 seconds.
Picture
Picture
​Add broth, rice and beans and bring to a boil.
​Reduce heat, add chicken and cook 10 minutes.
Picture
Picture
​Lay tortillas on counter and top each with an ounce of cheese.
​Scoop 3/4 cup filling in the center of each tortilla.
Picture
Picture
​Combine flour and water and brush mixture on the edges of each tortilla.
Fold 2 tortilla sides to center, overlapping.  Fold up ends of tortilla.
Picture
Picture
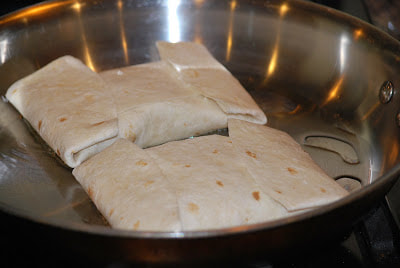
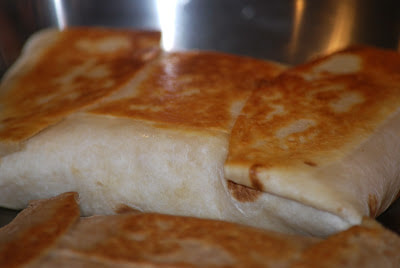
​Heat a small amount of oil (I used olive oil) in a skillet and cook 2 chimichangas at a time in hot oil.  Turn once.  
Picture
Picture
Drain on paper towels and serve.  (or in my case - pack them up to go)
Picture
​I adapted this recipe from a Cook's County magazine.  You could easily adapt this to a vegetarian recipe by replacing the chicken broth with vegetable stock and eliminating the chicken breasts.  I made a slightly healthier version of the chimichanga by making mine on a whole wheat tortilla and eliminating the cheese.  You can also bake the chimichangas instead of frying them to make them even crispier.  
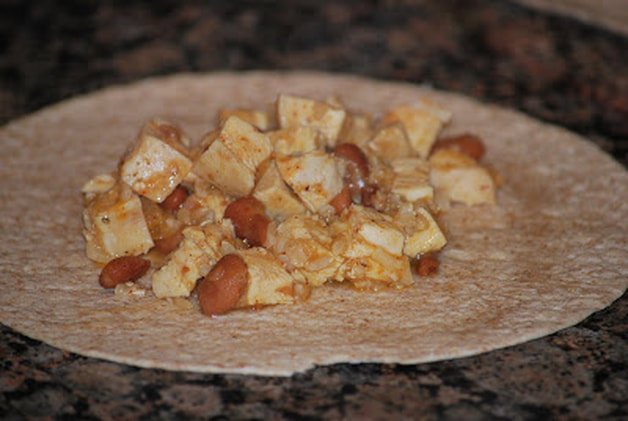
Picture
Ciao!
Click here for a printable version of this recipe
0 Comments

Chicken Bonne Femme

1/22/2012

0 Comments

 
Picture
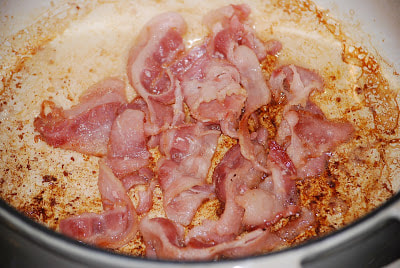
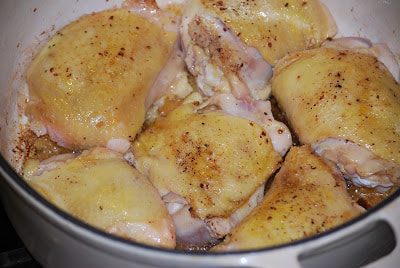
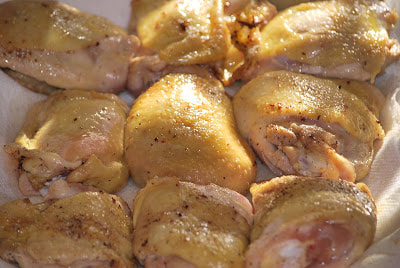
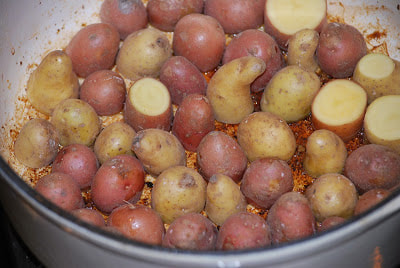
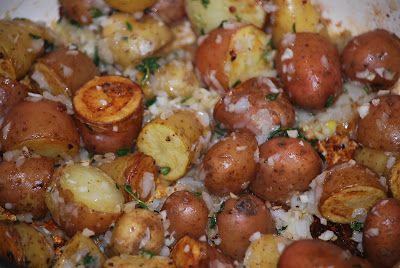
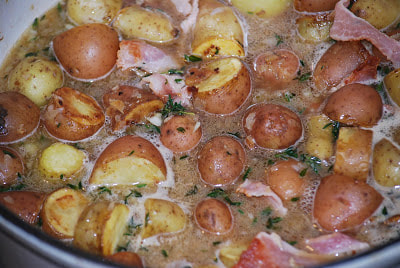
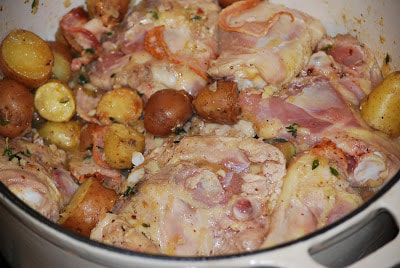
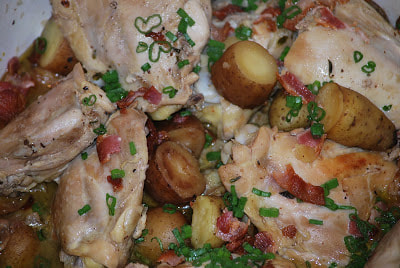
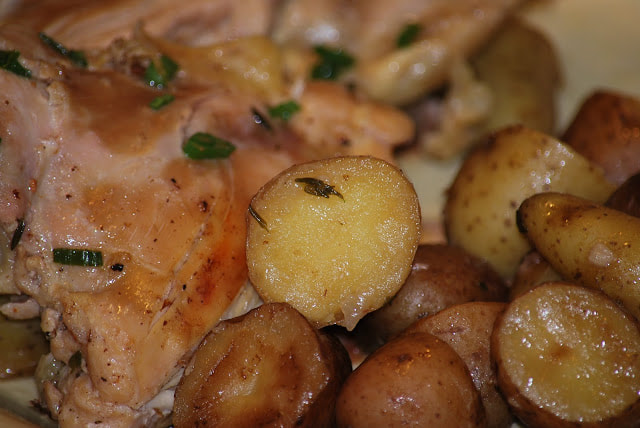
When the weather turns cold, it's time to get out my dutch oven and make a hearty winter dinner.  This winter hasn't given us too many cold days in Georgia so I have to take advantage of them when I can.  Last week we had one cold, windy day so I pulled a recipe out of my Cook's Country magazine for Chicken Bonne Femme - a perfect cold weather meal.  According to the article in the magazine it was originally a Creole dish. I wouldn't say that I'm a huge fan of Creole cuisine but this chicken dish flavored with bacon and wine and fresh herbs sounded too good to pass up.
Picture
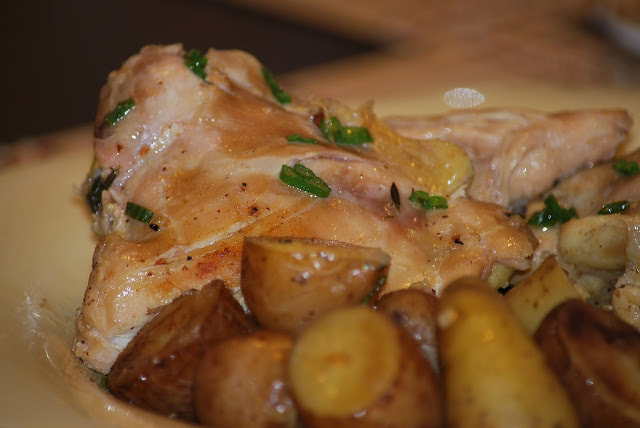
Chicken Bonne Femme
3 pounds bone-in, skin-on chicken thighs
5 slices of bacon
1 1/2 pounds fingerling potatoes, cut in half
1 onion, chopped fine
4 garlic cloves, minced
2 teaspoons fresh thyme
3/4 cup white wine
1/2 cup chicken broth
1 teaspoon hot sauce
3 scallions
​Cook bacon in dutch oven until crisp.
​Transfer to a paper towel lined plate to drain. Pour off all but 1 Tablespoon of fat from the pan. Season chicken with salt and pepper cook in dutch oven until browned on both sides.
Picture
Picture
​Transfer to a platter to cool. When the chicken cools, remove the skin.
​Pour off all but 1 1/2 Tablespoons of fat from the pan. Arrange potatoes, cut-side down in the pan. Cook over medium heat about 10 minutes or until browned.
Picture
Picture
​Stir in onion and cook until softened. Add garlic and thyme and cook 30 seconds.
​Stir in wine, broth, half of the bacon and hot sauce. Bring to a boil.
Picture
Picture
​Return chicken and any juices to pot. Reduce heat to medium and cook, covered, until potatoes are tender and meat registers 175 degrees. (About 25 minutes)
​Sprinkle with scallions and remaining bacon.
Picture
Picture
​The chicken was super moist and tender and the broth was rich and flavorful.
Picture
On a side note: I was really nervous about using my dutch oven on the stove top because I had heard all sorts of horror stories about people who cracked their expensive le creuset dutch ovens by heating them on the stove. I do not have a le crueset dutch oven but I have another brand and I carefully read over the instructions once again just to make sure that I was not going to experience a kitchen catastrophe in the middle of fixing dinner.  I didn't see anything that warned against putting mine on the stove top so I  went ahead with the recipe as directed.  
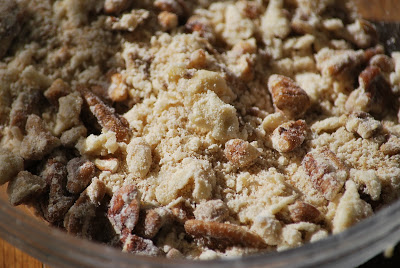
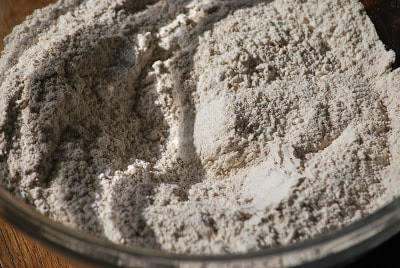
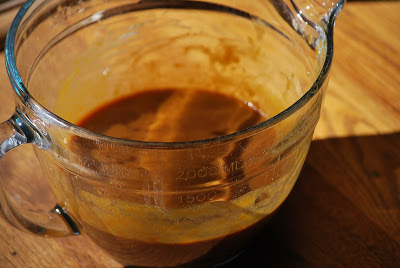
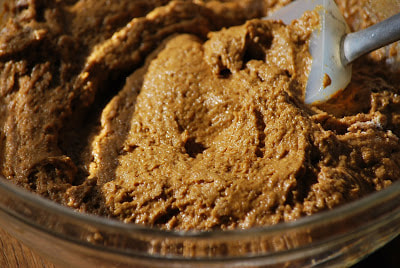
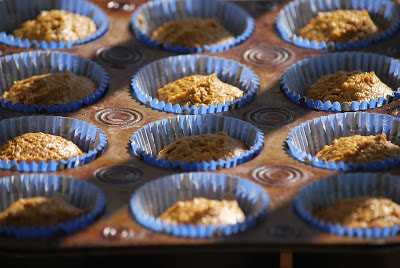
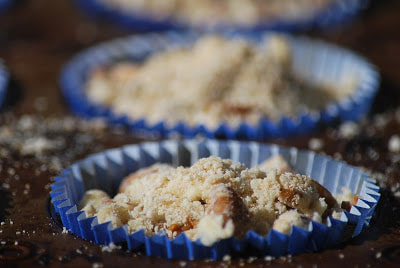
Ciao!
Click here for a printable version of this recipe
0 Comments

Pecan Praline Muffins

1/18/2012

0 Comments

 
Picture
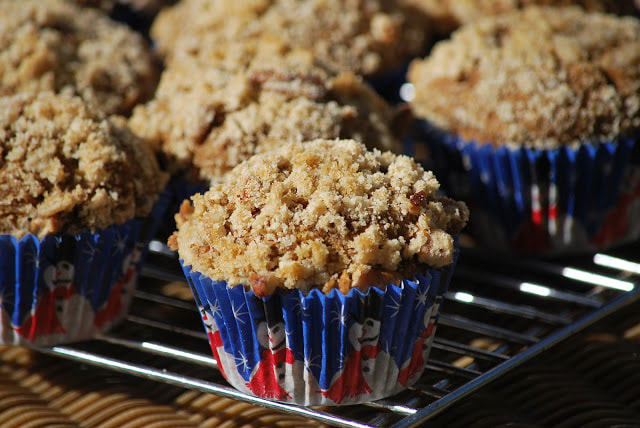
I tend to think of muffins as healthy but the truth is they often hide lots of fat and calories inside their pretty little wrappers.  I found this recipe for pumpkin muffins Family Fun magazine and I was intrigued by the ingredient list.  A muffin with whole wheat flour and the use of molasses to replace some of the sugar - I'm sold.  I admit that I was somewhat skeptical at first but these muffins were absolutely beautiful - and delicious.
Picture
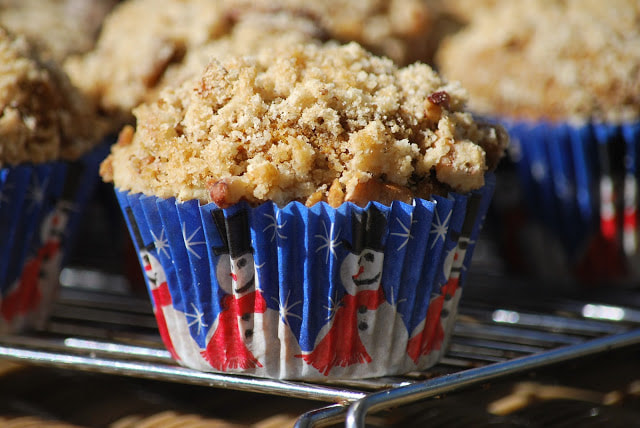
Pumpkin Praline Muffins
Topping
3 Tablespoons cold butter

1/3 cup flour
3 Tablespoons brown sugar
1/3 cup chopped pecans

Batter
1 cup flour
1 cup whole wheat flour
1/3 cup sugar
2 teaspoons baking powder
1 teaspoon baking soda
1 teaspoon pumpkin pie spice
1/4 teaspoon salt
2/3 cup canned pumpkin
1/3 cup molasses
1/3 cup canola oil
2 eggs
1/4 cup milk
1 teaspoon vanilla
Combine topping ingredients in a small bowl and mix with a pastry blender.
​In a large bowl, whisk together flours, sugar, baking powder, baking soda, pumpkin pie spice and salt.
Picture
Picture
In another bowl whisk together pumpkin, molasses, eggs, milk and vanilla.
Stir pumpkin mixture into the dry ingredients.
Picture
​Divide the batter among 13 muffin cups.
Picture
Sprinkle with praline topping.
Picture
Picture
Bake 15 minutes at 400.
Picture
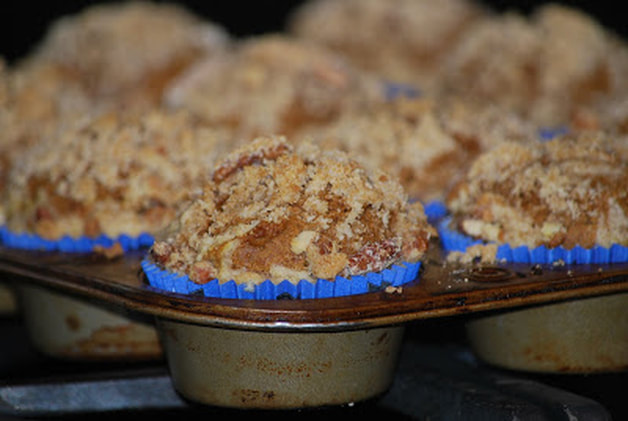
Let the muffins cool in the pan for 10 minutes and then move to a wire rack to cool completely.

The muffins came out of the oven with beautifully rounded tops and they didn't deflate when they cooled!  These muffins were a masterpiece for the eyes - and they tasted just as good as they looked.  I love the bright blue cupcakes papers too - the perfect pop of color to highlight these marvelous muffins.  Thank you Family Fun for the great recipe.

​Ciao!
Click here for a printable version of this recipe
0 Comments
<<Previous
Forward>>
    Like my page on facebook.

    Follow me on Instagram


    Follow Me on Pinterest

    Categories

    All
    30 Minute Meals
    30-minute-meals
    Big Green Egg Recipes
    Chocolate
    Christmas Classics
    Comfort Foods
    Crock Pot Meals
    Fall Favorites
    Healthy-choices
    Healthy-choices
    My Favorites
    Springtime Treats
    St Patrick's Day Goodies
    Summertime Specialties
    Thanksgiving Classics
    Valentine Treats
    Vegetarian
    Winter Warm Ups

    Archives

    June 2025
    May 2025
    April 2025
    March 2025
    February 2025
    January 2025
    December 2024
    November 2024
    October 2024
    September 2024
    June 2024
    May 2024
    April 2024
    March 2024
    February 2024
    January 2024
    September 2023
    August 2023
    July 2023
    June 2023
    May 2023
    April 2023
    March 2023
    February 2023
    January 2023
    December 2022
    November 2022
    October 2022
    September 2022
    August 2022
    July 2022
    June 2022
    May 2022
    April 2022
    March 2022
    February 2022
    January 2022
    December 2021
    November 2021
    October 2021
    September 2021
    August 2021
    July 2021
    June 2021
    May 2021
    April 2021
    March 2021
    February 2021
    January 2021
    December 2020
    November 2020
    October 2020
    September 2020
    August 2020
    July 2020
    June 2020
    May 2020
    April 2020
    March 2020
    February 2020
    January 2020
    December 2019
    November 2019
    October 2019
    September 2019
    August 2019
    July 2019
    June 2019
    May 2019
    April 2019
    March 2019
    February 2019
    January 2019
    December 2018
    November 2018
    October 2018
    September 2018
    August 2018
    July 2018
    June 2018
    May 2018
    April 2018
    March 2018
    February 2018
    January 2018
    December 2017
    November 2017
    October 2017
    September 2017
    August 2017
    July 2017
    June 2017
    May 2017
    April 2017
    March 2017
    February 2017
    January 2017
    December 2016
    November 2016
    October 2016
    September 2016
    August 2016
    July 2016
    June 2016
    May 2016
    April 2016
    March 2016
    February 2016
    January 2016
    December 2015
    November 2015
    October 2015
    September 2015
    August 2015
    July 2015
    June 2015
    May 2015
    April 2015
    March 2015
    February 2015
    January 2015
    December 2014
    November 2014
    October 2014
    September 2014
    August 2014
    July 2014
    June 2014
    May 2014
    April 2014
    March 2014
    February 2014
    January 2014
    December 2013
    November 2013
    October 2013
    September 2013
    August 2013
    July 2013
    June 2013
    May 2013
    April 2013
    March 2013
    February 2013
    January 2013
    December 2012
    November 2012
    October 2012
    September 2012
    August 2012
    July 2012
    June 2012
    May 2012
    April 2012
    March 2012
    February 2012
    January 2012
    December 2011
    November 2011
    October 2011
    September 2011
    August 2011
    July 2011

Photos from Free Public Domain Illustrations by rawpixel, Texas_Custom_Patios
  • Recipe Index
  • Blog Posts
  • My Story
  • Connect